manuals.online logo
Brands
  1. Home
  2. •
  3. Brands
  4. •
  5. Teknion
  6. •
  7. Indoor Furnishing
  8. •
  9. Teknion BM_R User manual

Teknion BM_R User manual

Expansion Casegoods Installation Guide / Guide d'installation
2021-01-19 14:27
BM_R, BH_WB, BH_CB, BH_PT, BH_MT, BH_EP, BH_LB, BH_L, BH_LT, BH_RB, BH_PP & BHK__ -
Height-Adjustable Table & Kneespace - Mid-Height / Table ajustable en hauteur & Module - Mi-Hauteur
1 / 9
L04-64040_R01
2046
For additional information on this installation contact Technical Support. Pour plus d'informations sur cette installation contactez le support technique.
#2
#3.1
Serrer les vis pression
Tighten set screws
BHKHA
or/ou
BKKFH
#1 B02-61026
B02-61027
40BH_
BSMCHP
IF APPLICABLE
Install Wall Panel Brackets (A15-64409)
before continuing. To install Wall Panel
brackets, refer to L04-64041.
SI APPLICABLE
Installer les supports de Panneau Mural
(A15-64409) avant de continuer. Pour
installer les supports à Panneau Mural, se
référer au guide L04-64041.
X
Y
#3.3
E07-0077
#10 x 7/8"
Y X A15-64418
#3.2 Locate studs
Localiser les montants
WALL/MUR
Expansion Casegoods Installation Guide / Guide d'installation
2021-01-19 14:27
BM_R, BH_WB, BH_CB, BH_PT, BH_MT, BH_EP, BH_LB, BH_L, BH_LT, BH_RB, BH_PP & BHK__ -
Height-Adjustable Table & Kneespace - Mid-Height / Table ajustable en hauteur & Module - Mi-Hauteur
2 / 9
L04-64040_R01
2046
For additional information on this installation contact Technical Support. Pour plus d'informations sur cette installation contactez le support technique.
#3.4
Position against
wall and level.
Positionner sur
le mur et niveler. See next page for
anchoring requirements
Voir page suivante pour les
exigences de fixation
#3.5
E07-0077
#10 x 7/8"
2 screws per brackets must
be fixed to the studs
2 vis par support doivent être
fixées aux montants
WARNING
No drywall fixations allowed.•
The purchaser and installer are responsible to ensure appropriate methods for a secure and safe•
installation that meets all the applicable local building codes and laws.
Studs must be attached to ceiling and floor structures as per building code requirements and•
must be load bearing studs.
Wood studs should be minimum 2” x 4”.•
Steel studs should be minimum 20ga x 3-⅝”.•
Studs must be 12’ high or less, for installation on higher studs, please refer to the engineer of•
record.
If the wall on which the product is installed supports vertical weight or lateral winds, refer to•
the engineer of record.
If installed in seismic region, refer to the engineer of record.•
Overdriving may result in torsional failure of the fastener or tearing of the wall.•
ATTENTION
Aucune fixation aux cloisons sèches autorisée.•
L'acheteur et l'installateur sont responsables de s'assurer des méthodes appropriées pour un•
installation conforme aux lois et codes du bâtiment applicables.
Les montants doivent être fixés aux structures de plafond et de plancher conformément aux•
exigences du code du bâtiment et doivent être des montants porteurs.
Les montants de bois doivent mesurer au moins 2 ”x 4”.•
Les montants en acier doivent mesurer au moins 20ga x 3-⅝”.•
Les montants doivent avoir une hauteur de 12 pi ou moins, pour une installation sur des•
montants plus élevés, veuillez vous référer à l'ingénieur en charge.
Si le mur sur lequel le produit est installé supporte un poids vertical ou des vents latéraux,•
reportez-vous à l'ingénieuren charge.
S'il est installé dans une région sismique, consultez l'ingénieur en charge.•
Un usage non recommandé peut entraîner une rupture des fixations un arrachement du mur.•
#3.6
Expansion Casegoods Installation Guide / Guide d'installation
2021-01-19 14:27
BM_R, BH_WB, BH_CB, BH_PT, BH_MT, BH_EP, BH_LB, BH_L, BH_LT, BH_RB, BH_PP & BHK__ -
Height-Adjustable Table & Kneespace - Mid-Height / Table ajustable en hauteur & Module - Mi-Hauteur
3 / 9
L04-64040_R01
2046
For additional information on this installation contact Technical Support. Pour plus d'informations sur cette installation contactez le support technique.
Drywall 1/2" + Wood stud 2" x 4"
Cloison sèche ½" + Montant Bois 2" x 4"
5/16" Lag Screw x 2.5" with 5/32" pilot hole
5/16" Vis Tire-Fond x 2.5" avec pré-trou 5/32"
Drywall 1" + Wood stud 2" x 4"
Cloison sèche 1" + Montant Bois 2" x 4"
5/16" Lag Screw x 3" with 5/32" pilot hole
5/16" Vis Tire-Fond x 3" avec pré-trou 5/32"
#12 Self-drilling screw x 2"
#12 Vis autoperçante x 2"
Wall fixation minimum requirements
Exigences minimales de fixation murale
Drywall ½" + Metal Stud
Cloison sèche ½" + Montant Métal
Drywall 1" + Metal Stud
Cloison sèche 1" + Montant Métal
#12 Self-drilling screw x 1.5"
#12 Vis autoperçante x 1.5"
E04-50100
1/4-20 x 5/8"
E07-0077
#10 x 7/8"
IF APPLICABLE
Install Wall Panel. To install Wall
Panel, refer to L04-64041.
SI APPLICABLE
Installer le Panneau Mural avant de
continuer. Pour installer le Panneau
Mural, se référer au guide L04-64041.
#4
CLICK!
#5.1 #5.2
Expansion Casegoods Installation Guide / Guide d'installation
2021-01-19 14:27
BM_R, BH_WB, BH_CB, BH_PT, BH_MT, BH_EP, BH_LB, BH_L, BH_LT, BH_RB, BH_PP & BHK__ -
Height-Adjustable Table & Kneespace - Mid-Height / Table ajustable en hauteur & Module - Mi-Hauteur
4 / 9
L04-64040_R01
2046
For additional information on this installation contact Technical Support. Pour plus d'informations sur cette installation contactez le support technique.
40BH_
Tighten set
screws
Serrer les
vis pression
#6.2#6.1
41BH_
42BH_
Expansion Casegoods Installation Guide / Guide d'installation
2021-01-19 14:27
BM_R, BH_WB, BH_CB, BH_PT, BH_MT, BH_EP, BH_LB, BH_L, BH_LT, BH_RB, BH_PP & BHK__ -
Height-Adjustable Table & Kneespace - Mid-Height / Table ajustable en hauteur & Module - Mi-Hauteur
5 / 9
L04-64040_R01
2046
For additional information on this installation contact Technical Support. Pour plus d'informations sur cette installation contactez le support technique.
41BH_
E04-50100
1/4-20 x 5/8
Power Bar /
Motor Wire/Fil de moteur
Barre d'alimentation
Remote/Manette
Motor Wire/Fil de moteur
Motor Wire/
Fil de moteur
Expansion Casegoods Installation Guide / Guide d'installation
2021-01-19 14:27
BM_R, BH_WB, BH_CB, BH_PT, BH_MT, BH_EP, BH_LB, BH_L, BH_LT, BH_RB, BH_PP & BHK__ -
Height-Adjustable Table & Kneespace - Mid-Height / Table ajustable en hauteur & Module - Mi-Hauteur
6 / 9
L04-64040_R01
2046
For additional information on this installation contact Technical Support. Pour plus d'informations sur cette installation contactez le support technique.
Remote/Manette
#7
42BH_
N09-8157
Electic Tray/
Boîtier électrique
Alternative assembly
Montage alternatif
Remote/
Manette
Note:
Reinforcement bar is NOT centered.
Le renfort N'EST PAS centré.
Expansion Casegoods Installation Guide / Guide d'installation
2021-01-19 14:27
BM_R, BH_WB, BH_CB, BH_PT, BH_MT, BH_EP, BH_LB, BH_L, BH_LT, BH_RB, BH_PP & BHK__ -
Height-Adjustable Table & Kneespace - Mid-Height / Table ajustable en hauteur & Module - Mi-Hauteur
7 / 9
L04-64040_R01
2046
For additional information on this installation contact Technical Support. Pour plus d'informations sur cette installation contactez le support technique.
#8
- Plug the system
- Initialize the system*
- Check that the wires are correctly placed
- Brancher le système
- Initialiser le système*
- Vérifier que les fils sont bien placés
* To initialize the actuators and the remote,
see the procedure L04-50001.
* Pour initialiser les vérins et la télécommande,
suivre la procédure L04-50001.
T11-50500
Use tie-wraps to attach cords.
Utiliser les attaches-câbles.
B03-50103
E07-0077
#10 x 7/8"
40BH_
E03-50909
Knob 1/4-20
Bouton 1/4-20
#10
#9
E01-50818
1/4-20 x 7/8"
E07-0077
#10 x 7/8"
E07-0077
#10 x 7/8"
BW_
E01-50818
1/4-20 x 7/8"
Expansion Casegoods Installation Guide / Guide d'installation
2021-01-19 14:27
BM_R, BH_WB, BH_CB, BH_PT, BH_MT, BH_EP, BH_LB, BH_L, BH_LT, BH_RB, BH_PP & BHK__ -
Height-Adjustable Table & Kneespace - Mid-Height / Table ajustable en hauteur & Module - Mi-Hauteur
8 / 9
L04-64040_R01
2046
For additional information on this installation contact Technical Support. Pour plus d'informations sur cette installation contactez le support technique.
E07-0077
#10 x 7/8"
402100
#8 x 5/8"
Expansion Casegoods Installation Guide / Guide d'installation
2021-01-19 14:27
BM_R, BH_WB, BH_CB, BH_PT, BH_MT, BH_EP, BH_LB, BH_L, BH_LT, BH_RB, BH_PP & BHK__ -
Height-Adjustable Table & Kneespace - Mid-Height / Table ajustable en hauteur & Module - Mi-Hauteur
9 / 9
L04-64040_R01
2046
For additional information on this installation contact Technical Support. Pour plus d'informations sur cette installation contactez le support technique.
#11 #12
402101
#8 x 1.5"
X80-64022
or/ou X80-64024
D02-50502
X80-64023
#8 x 7/8"
E04-50084
402101
#8 x 1.5"
or/ou
Place the panel back.
Remettre le panneau.
X80-64137
B02-64003
Height-Adjustable Products – Expansion Series / Produits réglables en hauteur - Série Expansion
User Guide / Guide d'utilisation
For additional information on this installation contact Technical Support. Pour plus d'informations sur cette installation contactez le support technique.
2019-02-12 L04-50001_R04.DOCX 1 / 10
IMPORTANT SAFETY INSTRUCTIONS
When using an electrical furnishing, basic precautions should always be followed, including the following:
Read all instructions before using this furnishing.
DANGER – To reduce the risk of electric shock:
1. Always unplug this furnishing from the electrical outlet before cleaning or servicing.
2. This furnishing has a polarized plug (one blade is wider than the other). This plug will fit in a polarized outlet only one way. If the plug
does not fit fully in the outlet, reverse the plug. If it still does not fit, contact a qualified electrician to install the proper outlet. Do not
change the plug in any way.
WARNING – To reduce the risk of burns, fire, electric shock, or injury to persons:
1. Unplug from outlet before putting on or taking off parts.
2. Close supervision is necessary when this furnishing is used by, or near children, invalids, or disabled persons.
3. Use this furnishing only for its intended use as described in these instructions. Do not use attachments not recommended by the
manufacturer.
4. Never operate this furnishing if it has a damaged cord or plug, if it is not working properly, if it has been dropped or damaged, or
dropped into water.
5. Keep the cord away from heated surfaces.
6. Do not use outdoors.
7. Do not operate where aerosol (spray) products are being used or where oxygen is being administered.
8. “WARNING: Risk of Injury – Keep children away from the motorized table in motion”.
9. Maximum intended load for table surface 150 lbs [68 kg]. (100 lbs [45 kg] for Glass and 1-9/16” thick Solid Surfaces)
SAVE THESE INSTRUCTIONS
SERVICING OF DOUBLE-INSULATED PRODUCTS
In a double-insulated product, two systems of insulation are provided instead of grounding. No grounding means is provided on a
double-insulated product, nor is a means for grounding to be added to the product. Servicing a double insulated product requires
extreme care and knowledge of the system, and is to be done only by qualified service personnel. Replacement parts for a double-
insulated product must be identical to the parts they replace. A double insulated product is marked with the words ″DOUBLE
INSULATION″or ″DOUBLE INSULATED.″The symbol (square within a square) is also able to be marked on the product.
Height-Adjustable Products – Expansion Series / Produits réglables en hauteur - Série Expansion
User Guide / Guide d'utilisation
For additional information on this installation contact Technical Support. Pour plus d'informations sur cette installation contactez le support technique.
2019-02-12 L04-50001_R04.DOCX 2 / 10
INSTRUCTIONS DE SECURITÉ IMPORTANTES
Lors de l’utilisation de mobilier électrique, des précautions de base doivent toujours être respectées, incluant les suivantes :
Lire toutes les instructions avant d’utiliser ce mobilier.
DANGER – Pour réduire le risque de choc électrique :
1. Toujours débrancher ce mobilier de la prise électrique avant de nettoyer ou d’entretenir.
2. Ce mobilier est munie d’une fiche polarisée (une lame plus large que l’autre). Cette fiche s’insère dans une prise polarisée dans
une seule orientation. Si la fiche ne s’insère pas complètement, retournez la fiche. Si elle ne s’insère toujours pas, contactez un
électricien qualifié pour installer une prise adéquate. Ne remplacez la fiche d’aucune façon.
AVERTISSEMENT – Pour réduire les risques de brûlures, d’incendies, de chocs électriques ou de blessures corporelles :
1. Débrancher de la prise avant l’installation ou le retrait de composants.
2. Une surveillance étroite est nécessaire lorsque ce mobilier est utilisé par ou à proximité d’enfants, de personnes invalides ou de
personnes handicapées.
3. Utilisez ce meuble uniquement selon l'usage prévu et tel que décrit dans ces instructions. N'utilisez pas de fixations non
recommandées par le fabricant.
4. N'utilisez jamais ce mobilier si le cordon ou la fiche est endommagé, s'il ne fonctionne pas correctement, s'il a été échappé ou
endommagé ou s’il a été échappé dans l'eau.
5. Gardez le cordon loin des surfaces chaudes.
6. Ne pas utiliser à l’extérieur.
7. Ne pas utiliser où des aérosols (vaporisateurs) sont utilisés ni où de l'oxygène est administré.
8. « AVERTISSEMENT: Risque de blessure - Gardez les enfants à l'écart de la table motorisée en mouvement »
9. Charge maximale prévue sur la surface de la table 150 lbs [68 kg]. (100 lbs [45 kg] pour surfaces en verre et placage 1-9/16 po)
CONSERVER CES INSTRUCTIONS
ENTRETIEN DE PRODUITS À DOUBLE ISOLATION
Dans un produit à double isolation, deux systèmes d'isolation sont prévus à la place de la mise à la terre. Aucun moyen de mise à la
terre n'est fourni sur un produit à double isolation et aucun moyen de mise à la terre ne doit être ajouté au produit. L'entretien d'un
produit à double isolation nécessite une attention et une connaissance extrême du système et doit être effectué uniquement par du
personnel qualifié. Les pièces de remplacement pour un produit à double isolation doivent être identiques aux pièces qu'elles
remplacent. Un produit à double isolation est marqué avec les mots « DOUBLE ISOLATION ». Le symbole (carré dans un carré) peut
également être marqué sur le produit.
Height-Adjustable Products – Expansion Series / Produits réglables en hauteur - Série Expansion
User Guide / Guide d'utilisation
For additional information on this installation contact Technical Support. Pour plus d'informations sur cette installation contactez le support technique.
2019-02-12 L04-50001_R04.DOCX 3 / 10
Caution/Information:
Make sure no obstacles are in the desk’s path and all cords are of appropriate length for desk travel.
Failure to comply with or observe all assembly, safety, and operation instructions and warnings
regarding the use of this product may result in serious property damage or bodily injury.
IMPORTANT:
Any user or installer of this Height-Adjustable product must study this user guide carefully. If this desk is sold, please provide the user
guide to the buyer.
PIEZO™ from Linak:
The adjustable desks shall feature the PIEZO™ hardware-based technology from Linak. A sensor integrated in the lifting column reacts
to any obstruction when raising or lowering the desk, then halts and reverses to prevent material damages.
Before using this product, make sure nothing is blocking the travel of the desk
in the space where it will operate. In spite of the PIEZO™ technology being in
place, there may still be a risk of pinching in exceptional cases. Close
supervision is necessary when this furniture is used by individual with limited
physical, sensory or mental abilities, or with a lack of experience. Keep children
away from moving parts and underneath the desk.
Do not expose the control unit or any height adjustable components to water or other liquids including moisture, drips,
splashes or spills. Clean the control unit only with a dry cloth. Before cleaning, you must always unplug the power cord. The
adjustable desk must be operated in a dry, enclosed space, such as an office or similar, never outdoors.
Liability:
The desk height is adjustable so that it can be positioned at the most ergonomically suitable height. Any other use is at user’s risk. Under
no circumstances does the manufacturer accept warranty claims or liability claims for damages caused from improper use.
CAUTION
Height-Adjustable Products – Expansion Series / Produits réglables en hauteur - Série Expansion
User Guide / Guide d'utilisation
For additional information on this installation contact Technical Support. Pour plus d'informations sur cette installation contactez le support technique.
2019-02-12 L04-50001_R04.DOCX 4 / 10
Control Switch Instructions
Display with Up/Down Memory
Toggle Up/Down
Display Toggle with Memory
Initialization
• Adjust the table to the lowest position
• Press and hold the Down (V) button until
movement has been performed.1
• Adjust the table to the lowest position
• Tilt the panel down and hold until movement has
been performed.1
• Adjust the table to the lowest position
• Tilt the panel down and hold until movement has
been performed .1
1 The desk/table should move down and up a small distance to indicate that the command has been received.
Display Units
• Not Applicable • Not Applicable • Change between cm and inch by pressing the
“reminder” (clock) button and the “star” button
for two seconds.
• When the display starts to blink, use the “star”
button to change between cm and inch.
• Press Bluetooth® button to confirm selection.
• Proceed with display height adjustment or press
Bluetooth® button to confirm.
Display Height
• Press and hold the Up (Λ) and Down (V) buttons
for 5 seconds until 3 bars appear ( --- ).
• Press the Up or Down button as required to adjust
the height shown on the display.
• After 5 seconds of inactivity, system returns to
normal operation.
• Not Applicable • Press the “reminder” (clock) button and the
“star” button for two seconds.
• When the unit starts to blink, proceed with unit
change or press Bluetooth® button to confirm
selection.
• Tilt panel up or down to the desired display
height.
• Press Bluetooth® button to confirm.
Height-Adjustable Products – Expansion Series / Produits réglables en hauteur - Série Expansion
User Guide / Guide d'utilisation
For additional information on this installation contact Technical Support. Pour plus d'informations sur cette installation contactez le support technique.
2019-02-12 L04-50001_R04.DOCX 5 / 10
Memory
To store a position:
•Drive to the required desk height
•Press the “S” button.
•Press a memory button (•, •• ou •••).
To drive to a stored height:
• Press and hold a memory button. The surface will
stop at the stored position.
• Not Applicable To store a position:
•Drive to the required desk height
•Press the “star” button until desired memory
number is displayed
•Press the “star” button for two seconds to store
position
To drive to a stored height:
•Tilt and hold the panel. The surface will stop at
the stored position.
•Tap twice in the direction you want to drive to
automatically reach the next stored position in
the chosen direction.
To reset all memory positions:
•Press the “star” button 5 times so the “no
memory” logo is displayed.
• Press the “star” button for two seconds to
confirm.
Others
•For “reminder” function and Bluetooth® pairing
instructions, Press the “reminder” (clock) button
and scan the QR code displayed or refer to
Teknion web site.
Troubleshooting
Reinitialize the system when:
•the system does not operate properly, move slowly &/or only downward.
•the desk has been moved &/or relocated.
•an actuator (leg) looses its connection to the control box or a connecting cable is pulled out during operation.
•the table impacts an obstruction during operation - more than once. Make sure there are no obstructions in either the up or down directions and carry out
a reinitialization
•the display shows error code E##.
If a reinitialization does not address the issue, contact your facilities representative for assistance.
Height-Adjustable Products – Expansion Series / Produits réglables en hauteur - Série Expansion
User Guide / Guide d'utilisation
For additional information on this installation contact Technical Support. Pour plus d'informations sur cette installation contactez le support technique.
2019-02-12 L04-50001_R04.DOCX 6 / 10
Attention/Information:
Assurez-vous qu’aucun obstacle ne nuit au mouvement du bureau et que tous les cordons électriques
soient de longueur appropriée permettant le libre mouvement de celui-ci. Enfreindre les
recommandations d’assemblages, de sécurités et des instructions de mises en garde concernant
l'utilisation de ce produit peut entraîner des dommages matériels graves ou des blessures corporelles.
IMPORTANT:
Tous les utilisateurs ou les installateurs doivent étudier attentivement ce guide d’utilisation pour ce produit réglable en hauteur. Si ce
bureau est vendu, bien vouloir fournir le guide d’utilisation à l'acheteur.
PIEZO™ de Linak:
Les bureaux réglables en hauteur disposent de la technologie PIEZO ™ de Linak. Un capteur intégré dans la colonne ajustable réagit à
toute obstruction, en soulevant ou en abaissant le bureau; dès qu’il y a contact avec un obstacle celui-ci arrête et inverse le
mouvement pour éviter des dommages matériels.
Avant d'utiliser ce produit, assurez-vous que rien ne bloque le mouvement du
bureau dans l'espace où il fonctionne. En dépit de la technologie Piezo ™ en
place, il peut encore y avoir un risque de pincement dans des cas exceptionnels.
Une surveillance étroite est nécessaire lorsque ce mobilier est utilisé par une
personne ayant des capacités physiques, sensorielles ou mentales limitées, ou avec
un manque d'expérience. Gardez les enfants loin des pièces en mouvement et du
dessous du bureau réglable.
Ne pas exposer l'unité de commande ou les composantes réglables à l'eau ou à d'autres liquides, y compris à l'humidité, à
des gouttes, des éclaboussures et des déversements. Nettoyez l'unité de commande uniquement avec un chiffon sec.
Avant le nettoyage, vous devez toujours débrancher le cordon d'alimentation. Le bureau réglable doit être utilisé dans un
endroit sec et fermé, comme à l’intérieur d’un édifice, jamais à l'extérieur.
Responsabilité:
La hauteur du bureau est réglable afin qu'il puisse être placé à la hauteur la plus ergonomiquement appropriée. Toute autre utilisation
est aux risques et périls de l'utilisateur. En aucun cas, le manufacturier accepte les demandes de garantie ou des réclamations de
responsabilité pour les dommages causés par une mauvaise utilisation.
Attention
Height-Adjustable Products – Expansion Series / Produits réglables en hauteur - Série Expansion
User Guide / Guide d'utilisation
For additional information on this installation contact Technical Support. Pour plus d'informations sur cette installation contactez le support technique.
2019-02-12 L04-50001_R04.DOCX 7 / 10
Instructions d’utilisation
Interrupteur à affichage et mémoire des
fonctions monter/descendre
Interrupteur basculant monter/descendre
Interrupteur basculant à affichage, mémoire
des fonctions monter/descendre
Initialisation
• Régler la surface à la hauteur la plus basse
• Appuyer et maintenir le bouton de descente (V)
jusqu’à ce qu’il y ait un léger mouvement.1
•Régler la surface à la hauteur la plus basse
•Basculer et maintenir l’unité de commande vers
le bas jusqu’à ce qu’il y ait un léger mouvement.1
•Régler la surface à la hauteur la plus basse
•Basculer et maintenir l’unité de commande vers
le bas jusqu’à ce qu’il y ait un léger mouvement.1
1 Le bureau/table fera un léger mouvement “descendre-monter” pour indiquer que la commande a été reçue.
Unités d’affichage
• Non applicable. • Non applicable. • Alterner entre cm et pouces en appuyant sur le
bouton « rappel » (horloge) et sur le bouton
« favoris » (étoile) pendant deux secondes.
•Lorsque l’affichage clignote, utiliser le bouton
« favoris » pour alterner entre cm et pouces.
•Appuyer sur le bouton Bluetooth® pour
confirmer la sélection.
•Poursuivre avec l’ajustement de la hauteur
affichée ou appuyer sur le bouton Bluetooth®
pour confirmer.
Hauteur affichée
•Appuyez simultanément sur les boutons de
montée (Λ) et descente (V) durant 5 secondes
jusqu'à ce que 3 barres apparaissent ( --- ).
•Appuyer sur les boutons de montée (Λ) et
descente (V) pour ajuster la hauteur affichée.
•Après 5 secondes d’inactivité, le système
retourne en fonctionnement normal.
• Non applicable. • Appuyer sur le bouton « rappel » (horloge) et sur
le bouton « favoris » (étoile) pendant deux
secondes.
•Lorsque l’unité clignote, procéder au
changement d’unité ou appuyer sur le bouton
Bluetooth® pour confirmer.
•Basculer l’unité de commande jusqu’à ce que
la hauteur désirée soit affichée.
•Appuyer sur le bouton Bluetooth® pour
confirmer.
Height-Adjustable Products – Expansion Series / Produits réglables en hauteur - Série Expansion
User Guide / Guide d'utilisation
For additional information on this installation contact Technical Support. Pour plus d'informations sur cette installation contactez le support technique.
2019-02-12 L04-50001_R04.DOCX 8 / 10
Positions mémorisées
Pour mémoriser une position :
•Régler la hauteur de la surface à la position
désirée.
•Appuyez sur le bouton « S »,
•Appuyez sur l’un des boutons mémoire (•, •• ou
•••).
Rappel des positions mémorisées:
•Appuyez et maintenez la pression sur un bouton
mémoire. La surface arrêtera à la position
mémorisée.
• Non applicable. Pour mémoriser une position :
•Régler la hauteur de la surface à la position
désirée.
•Appuyer sur le bouton « étoile » pour sélectionner
le numéro de mémoire désiré.
•Appuyer sur le bouton « étoile » pendant deux
secondes pour enregistrer la position.
Rappel des positions mémorisées:
•Basculer et maintenir la commande. La surface
arrêtera à la position mémorisée.
•Basculer deux fois dans la direction désirée pour
atteindre automatiquement la prochaine
position mémorisée.
Pour effacer toutes les positions mémorisées :
•Appuyer sur le bouton « étoile » 5 fois pour faire le
logo « aucune mémoire ».
•Appuyer sur le bouton « étoile » pendant deux
secondes pour confirmer.
Autres
• Pour les fonctions de rappels et instructions
d’appareillage Bluetooth®, appuyer sur le
bouton « rappel » (horloge) et balayer le code
QR affiché ou consulter le site web de Teknion.
Dépannage
Réinitialiser le système lorsque :
•Le système ne fonctionne pas correctement, se déplace lentement et/ou uniquement vers le bas.
•Le bureau a été déplacé et/ou relocalisé.
•Un vérin électrique a perdu sa connexion à la boîte de commande ou un câble de connexion a été débranché pendant le fonctionnement.
•La surface entre en contact avec un obstacle pendant son déplacement et ce, plus d'une fois. S'assurer qu'il n'y a aucun obstacle qui entrave le
mouvement de la surface (dans les deux directions soit vers le haut ou vers le bas) et effectuer la réinitialisation.
•L'écran affiche un code d’erreur E##.
Si une réinitialisation ne résout pas le problème, contactez votre représentant pour assistance.
Height-Adjustable Products – Expansion Series / Produits réglables en hauteur - Série Expansion
User Guide / Guide d'utilisation
For additional information on this installation contact Technical Support. Pour plus d'informations sur cette installation contactez le support technique.
2019-02-12 L04-50001_R04.DOCX 9 / 10
Procedure for moving and/or relocating Height Adjustable Run-Off
1. Unplug the system and wires.
2. Unscrew the adjustable column from the Secondary Desk.
3. Move H-A desk with 2 persons, in order to support both ends.
Do not move leaving the base on the ground, you could damage the mechanism.
4. Move Secondary Desk.
5. Plug back the system and reinitialize (see page 4).
Procédure pour déplacer et/ou relocaliser Retour Ajustable en Hauteur
1. Débrancher le système et les fils.
2. Dévisser la colonne ajustable du bureau secondaire.
3. Déplacer le Bureau Ajustable à 2 personnes afin qu'il y ait quelqu'un de chaque côté.
Ne pas déplacer en laissant la base au sol, vous pourriez endommager le mécanisme.
4. Déplacer le Bureau Secondaire.
5. Rebrancher le système et faire la réinitialisation (voir page 7).
Height-Adjustable Products – Expansion Series / Produits réglables en hauteur - Série Expansion
User Guide / Guide d'utilisation
For additional information on this installation contact Technical Support. Pour plus d'informations sur cette installation contactez le
support technique.
2019-02-12 L04-50001_R04.DOCX 10 / 10
WARNING – Risk of fire and shock, Use only SJT type 18
AWG cord.
WARNING – Risk of injury, Do not operate this
equipment unless properly trained.
For Commercial Use Only
"WARNING” Risk of Injury – Max load 150 lbs [68 kg].
(100 lbs [45 kg] for Glass & 1-9/16” Solid Surfaces)
AVERTISSEMENT – Risque de feu et de choc électrique,
utiliser seulement un câble de type SJT jauge 18.
AVERTISSEMENT – Risque de blessure, ne pas opérer
cet équipement sans être correctement formé.
Pour usage commercial seulement
« AVERTISSEMENT » Risque de blessure – Charge Max
150 lbs. [68 kg]. (100 lb [45 kg] verre & placage 1-9/16")

This manual suits for next models

31

Other Teknion Indoor Furnishing manuals
Teknion north 56 User manual

Teknion

Teknion north 56 User manual

Teknion Leverage Operating and maintenance instructions
Teknion

Teknion Leverage Operating and maintenance instructions
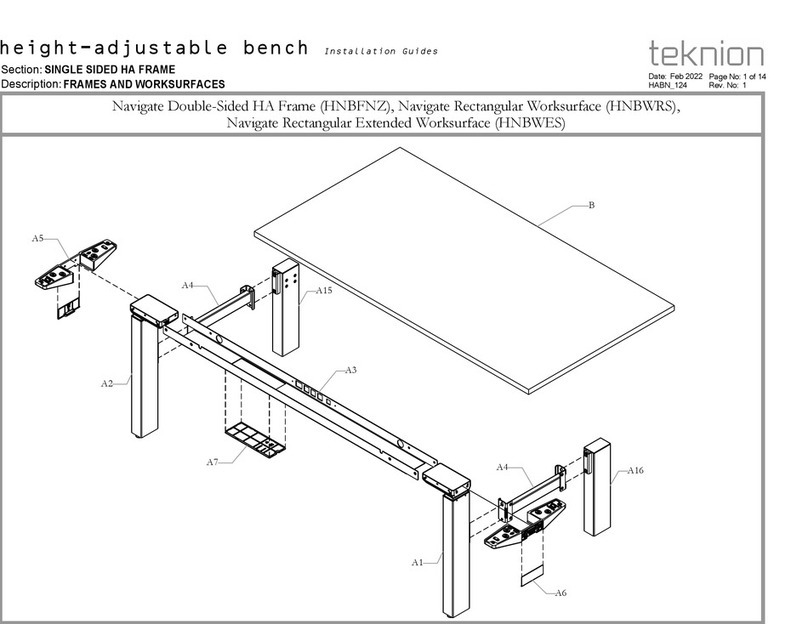
Teknion Navigate Single-Sided Frame HNBFNZ User manual

Teknion

Teknion Navigate Single-Sided Frame HNBFNZ User manual

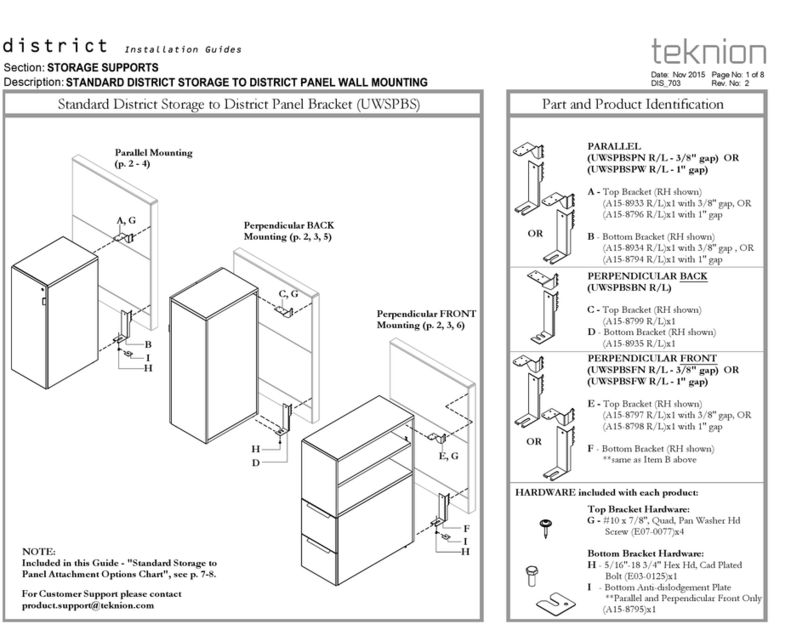
Teknion UWSPBS Operating and maintenance instructions
Teknion

Teknion UWSPBS Operating and maintenance instructions

Teknion B_MDWO Operating and maintenance instructions
Teknion

Teknion B_MDWO Operating and maintenance instructions

Teknion Complements User manual

Teknion

Teknion Complements User manual

Teknion HWBCTF User manual

Teknion

Teknion HWBCTF User manual

Teknion HABCDG Series Operating and maintenance instructions

Teknion

Teknion HABCDG Series Operating and maintenance instructions

Teknion Savera Owner's manual

Teknion

Teknion Savera Owner's manual

Teknion RKXD Operating and maintenance instructions

Teknion

Teknion RKXD Operating and maintenance instructions

Teknion District User manual

Teknion

Teknion District User manual

Teknion interpret WWSDC Operating and maintenance instructions

Teknion

Teknion interpret WWSDC Operating and maintenance instructions

Teknion Upstage User manual

Teknion

Teknion Upstage User manual

Teknion Livello User manual

Teknion

Teknion Livello User manual

Teknion Casegoods BC MHRB User manual

Teknion

Teknion Casegoods BC MHRB User manual
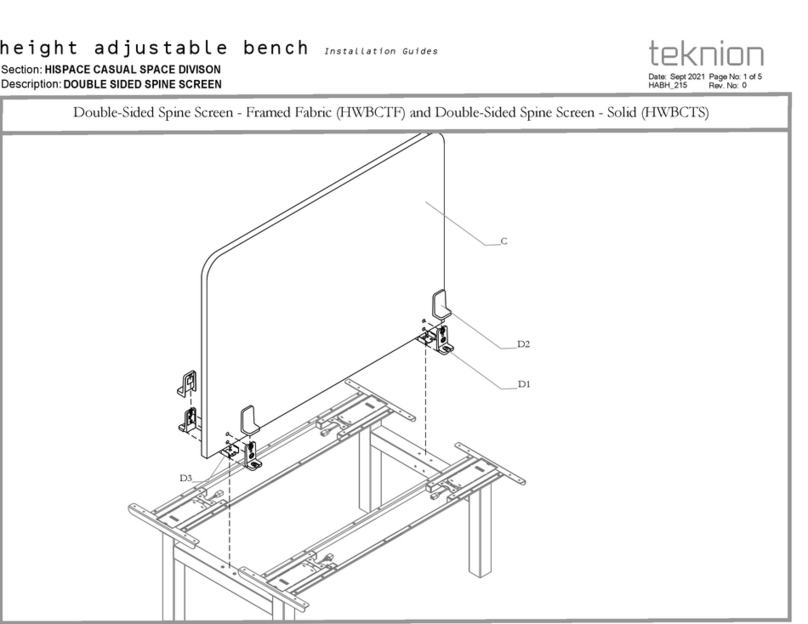
Teknion HTSFT User manual

Teknion

Teknion HTSFT User manual

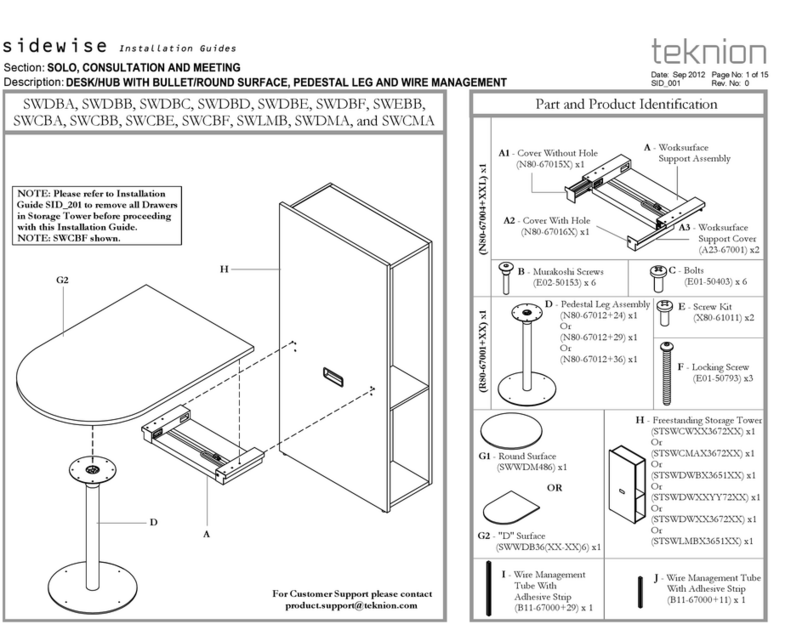
Teknion height-adjustable bench Operating and maintenance instructions
Teknion

Teknion height-adjustable bench Operating and maintenance instructions

Teknion Synapse Wood Guest Chair NSYN Operating and maintenance instructions

Teknion

Teknion Synapse Wood Guest Chair NSYN Operating and maintenance instructions

Teknion Leverage User manual

Teknion

Teknion Leverage User manual

Teknion nuova contessa Owner's manual

Teknion

Teknion nuova contessa Owner's manual

Teknion Interpret User manual

Teknion

Teknion Interpret User manual

Teknion Ledge Surface & Support Kit - Without Cable... Operating and maintenance instructions

Teknion

Teknion Ledge Surface & Support Kit - Without Cable... Operating and maintenance instructions

Teknion interpret WWCBSD Operating and maintenance instructions

Teknion

Teknion interpret WWCBSD Operating and maintenance instructions

Teknion BSMLHR User manual

Teknion

Teknion BSMLHR User manual

Popular Indoor Furnishing manuals by other brands

Kawachi KW 47 Setup manual

Kawachi

Kawachi KW 47 Setup manual

Lifetime Kidsrooms 156 Assembly instructions

Lifetime Kidsrooms

Lifetime Kidsrooms 156 Assembly instructions

Wholesale Interiors 5110 Assembly instructions

Wholesale Interiors

Wholesale Interiors 5110 Assembly instructions

Earthlite Sedona user manual

Earthlite

Earthlite Sedona user manual

Design Within Reach Raleigh Bed manual

Design Within Reach

Design Within Reach Raleigh Bed manual

Safavieh Furniture Keelin FOX4200A quick start guide

Safavieh Furniture

Safavieh Furniture Keelin FOX4200A quick start guide

Tradecraft Specialties BULLDOZ-4 instruction manual

Tradecraft Specialties

Tradecraft Specialties BULLDOZ-4 instruction manual

Oxybul éveil & jeux 331227 Instruction Notice

Oxybul éveil & jeux

Oxybul éveil & jeux 331227 Instruction Notice

Better Homes and Gardens AVERY BH18-021-199-44 Assembly instructions

Better Homes and Gardens

Better Homes and Gardens AVERY BH18-021-199-44 Assembly instructions

BUT PLYMOUTH FT 1RLX ELEC TISSU Assembly instructions

BUT

BUT PLYMOUTH FT 1RLX ELEC TISSU Assembly instructions

Crosley Kiawah CO7118-BR quick start guide

Crosley

Crosley Kiawah CO7118-BR quick start guide

Furinno 18054 Assembly instruction

Furinno

Furinno 18054 Assembly instruction

Whalen 19WTLD-SPCA manual

Whalen

Whalen 19WTLD-SPCA manual

KÖHL SONOMA PRESIDIO Assembly instructions

KÖHL

KÖHL SONOMA PRESIDIO Assembly instructions

NewTechWood OD-SPT-721 Assembly instructions

NewTechWood

NewTechWood OD-SPT-721 Assembly instructions

Ofs Impulse G2 installation instructions

Ofs

Ofs Impulse G2 installation instructions

PHI VILLA E02GF103 Use and care guide

PHI VILLA

PHI VILLA E02GF103 Use and care guide

The Land of Nod Modern Modular Open Cube Assembly instructions

The Land of Nod

The Land of Nod Modern Modular Open Cube Assembly instructions

manuals.online logo
manuals.online logoBrands
  • About & Mission
  • Contact us
  • Privacy Policy
  • Terms and Conditions

Copyright 2025 Manuals.Online. All Rights Reserved.