Teuco Seaside User manual

USER’S MANUAL
MANUEL D’UTILISATION
BEDIENUNGSANLEITUNG
SEASIDE

2SEASIDE
EN
Congratulations!
The Teuco Seaside you have purchased is a bathtub and much more. It is a lifestyle that promotes natural wellness.
Superb design, materials, colours and sophisticated technological features are combined in a product both simple and
revolutionary.
Unconstrained by conventional bathroom design, the Seaside is a thrill to be experienced any time, adding a new
dimension to home living space.
Whether lying in the water, sitting alongside or reclining on the soft fabric-covered cushions, you will always be fully
confident of having acquired a product guaranteed by the long experience of a brand leader like Teuco.
This manual provides a guide for the safe use of your SeaSide bathtub. As such, it should be read through carefully
and in its entirety before using the product.
This manual constitutes an integral part of the product and must be kept for future reference.
Teuco Guzzini SpA reserves the right to make such changes as are deemed appropriate without prior notice and
without any obligation to update.
GENERAL INFORMATION ....................................................................... 3
- TEUCO QUALITY
- TEUCO - TECHNOLOGY AND SAFETY
- WARNINGS
INSTRUCTIONS FOR USE
- PARTSOFTHESEASIDE...................................................................... 4
- PRELIMINARYOPERATIONS................................................................... 6
- DETAILS OF THE CONTROL PANEL (QUICK START - ALARM)
- DETAILSOFTHEREMOTECONTROL........................................................... 8
- BLOWERFUNCTION......................................................................... 10
- WATERLIGHTFUNCTION..................................................................... 13
- WATERLIGHT+BLOWER..................................................................... 15
- ADDITIONAL FUNCTIONS (SUNLIGHT - MOONLIGHT - HEATER) . . . . . . . . . . . . . . . . . . . . . . . . . . . . . . . . . . . . 16
- DISPLAY SETTINGS - INFO (CLOCK - LANGUAGE). . . . . . . . . . . . . . . . . . . . . . . . . . . . . . . . . . . . . . . . . . . . . . . . 18
- DISINFECTION ............................................................................. 20
PERIODIC MAINTENANCE ..................................................................... 22
- REPLACING THE REMOTE CONTROL BATTERIES
- CLEANING THE SUCTION VALVE
- CLEANING OF SURFACES (refer to the accompanying CLEANING INSTRUCTIONS MANUAL)
- CARE OF THE CUSHIONS
REPAIRS .................................................................................... 23
- DIAGNOSTICS MESSAGES
CONTENTS
USE AND MAINTENANCE MANUAL

SEASIDE 3
EN
TEUCO QUALITY
Teuco takes the greatest care over the materials used in its products, making technological improvements continuously both
to the plastics utilized, and to details of construction. All tubs are fashioned from cast acrylic resin: the frame is steel, with
antivibration mounts; pipelines are of high strength material.
Teuco hydrospas have the marking, certifying that they have been designed and built in compliance with the essential
requirements of European Directives.
The safety ofTeuco whirlpool systems is also certified officially by (Italian Quality Mark Institute) as being in compliance
with the application of current European standards.
The LED spot lighting device has certification from the (Italian Quality Mark Institute) pursuant to IEC 62471
and it has been assessed as RISK FREE.
General Information
All Teuco bathtubs are designed to offer unmatched quality, functional advantage, safety and hygiene.
Hydro Clean SyStem
The suction valve guarantees a watertight seal when closed, isolating the whirlpool system from soapsuds or other foreign
matter. The Blower nozzles are dried completely after each use.
drainage SyStem
Eliminates any risk of water being left in the system after using the Seaside, so as to avoid the formation of lime scale and
leave the bathtub perfectly clean.
automatiC diSinfeCtion
Guarantees total hygiene of the system and the bathtub following use, by generating a flow of cleansing fluid that sterilizes
the plumbing and the surface of the tub.
TEUCO - TECHNOLOGY AND SAFETY
To ensure the appliance is correctly installed, follow all the instructions in the accompanying installation manual with due care. Incorrect
installation may result in injury to persons and animals or damage to property. The manufacturer declines any liability for injury or damage
attributable to incorrect installation.
In the interests of correct product use, follow the instructions in this manual. This product may only be used for the purpose for which it was
designed. The manufacturer cannot be held liable for any damage deriving from any use that does not conform to the instructions and
specifically, those concerning safety.
The use of this product is reserved to adults. It is not intended for use by persons with reduced physical, sensory or mental capabilities or
with insufficient experience or familiarity with the product, unless they are supervised or have been instructed in the use of the equipment by
a person responsible for their safety. Children must be supervised to make sure that they do not play with the appliance. In special cases
(elderly persons, people with high blood pressure or heart problems, pregnant women), need to seek medical advice before using the tub.
When using toiletries in the bathtub, it is advisable to utilize only the special essences made by Teuco; these are available at points of sale
and from Teuco authorized service centres. It is important never to use bubble bath or other foamable toiletries when Seaside functions are
in operation; these can be added to a normal soaking bath, when the blower is not in use.
Take care, when using the SeaSide, that the suction valve is never obstructed by any object or part of the body, and in particular, keep hair
well clear.
Do not block the air intake vents of the inspection panel.
When the SeaSide is not in use, isolate the system from the electrical power supply at the thermal-magnetic RCD switch installed up-line of
the appliance.
In the event of breakdown or malfunction occurring during the warranty period, contact a Teuco technician or approved service centre only.
The manufacturer declines any liability for damage or injury caused by appliances that have been tampered with or incorrectly repaired.
WARNINGS

4SEASIDE
EN
PARTS OF THE SEASIDE
Instructions for use
Bath filler
Dispenser cap
Cleansing fluid container.
Hand-held shower
Pop-up waste handle
Opens and closes the pop-up waste
Waterlight
Illuminated (backlit)
waterfall
Moonlight
Rim lighting

SEASIDE 5
EN
Remote control
Waterproof and unsinkable
Sunlight
Chromo experience
Blower jet
Control panel
Incorporates the display
indicating operation of the
system, the Alarm button and
the Quick Start button.
Taps

Blinking LED: Indicates reception of signals from
Remote Control (see Remote Control)
6SEASIDE
EN
DETAILS OF CONTROL PANEL AND DISPLAY
QUICK START
ON/OFF button
Display
Shows messages
LED Infrared receiver
ALARM
ON/OFF button
FILLING THE TUB
Fill the tub until the water covers is at least 10 cm above the suction valve.
POWERING-UP THE SYSTEM
Position the isolating switch (fitted during installation) to “ON”.
The display goes into STAND-BY mode, showing the exact
time. Display in STAND-BY mode
20 : 30
PRELIMINARY OPERATIONS

SEASIDE 7
EN
QUICK START
Once the system has been powered up, the Waterlight (illuminated waterfall), Sunlight and Moonlight functions can be
activated by pressing a single button at the control panel.
Display in STAND-BY mode
20 : 30
To make adjustments, use the remote control
(see REMOTE CONTROL).
To start the functions, press the “QUICK START” button.
The functions start and the display shows:
The exact time.
The temperature of the water in the tub.
The duration of the function (TIMER) in minutes.
Waterlight in progress.
Display indicating Waterlight
in progress
30 36°C 20 : 30
WAT E R L I GHT
Display indicating Waterlight
in progress
30 36°C 20 : 30
WAT E R L I GHT
When theTimer setting elapses, the system shuts off and the display reverts to STAND-BY.
DISINFECTION of the system is not carried out (see DISINFECTION).
To cut the function short press QUICK START a second time or use the remote control (see REMOTE
CONTROL:Preliminary operations); the system shuts off and the display reverts to STAND-BY.
ALARM
The ALARM can be activated directly from the control panel.
The alarm locks up the system, shutting off any functions currently selected, and can also activate a bell or other sounder,
provided that this is already installed (see directions for installing the tub).
Display in STAND-BY mode
20 : 30
Display indicating “ALARM”
status
A L A R M
To activate the alarm, press the “ALARM” button.
To reset the system, press the QUICK START button or the
I/O button on the remote control;
the display reverts to STAND-BY mode and the system
shuts off.

8SEASIDE
EN
DETAILS OF REMOTE CONTROL
O/I - ON/OFF button
Switches the control panel
ON and OFF
Infrared emitter
WATERLIGHT
ON/OFF button
Waterlight function
MOONLIGHT:
ON/OFF button
rim lighting
HEATER:
Heater
ON/OFF button
BLOWER:
ON/OFF button
BLOWER function
ADJUSTMENTS
”” and ””: Buttons used to
select/adjust functions
ENTER: Button used to confirm
selections/settings
SUNLIGHT:
Chromo experience
ON/OFF button
INFO:
Button used to access settings
- Change display CLOCK setting
- Select display LANGUAGE

AUTOMATIC SHUTOFF:
If no control panel or remote control button is pressed within 30 minutes following power-up or since the last function
was active (TIMER setting) the system shuts off and the display reverts to STAND-BY.
DISINFECTION of the system is not carried out (see DISINFECTION).
To switch on, press the “0/I” button;
the welcome message will appear in the control panel display
for a few seconds.
Thereafter,
the display switches to READY;
the system can now be used
(see WATERLIGHT or BLOWER).
To switch off the panel, press “0/I” a second time:
if no cycle has been selected, whether Waterlight or Blower,
the system shuts off and the display reverts to STAND-BY.
if if at least one cycle has been selected, whether Waterlight
or Blower, a message will be displayed prompting
DISINFECTION (see DISINFECTION).
Display showing
Disinfection prompt
ST ART
D I S I N F E CT I ON ?
WE L COME TO
SE A S I D E
Display indicating
READY status
36°C 20 : 30
R E ADY
Display in STAND-BY mode
20 : 30
SWITCHING ON FROM THE REMOTE CONTROL
SEASIDE 9
EN

10 SEASIDE
EN BLOWER function
Special whirlpool essences made by Teuco can be used
when the Blower is in operation.
Do not use soaps, bath oils or other foamable products.
STARTING THE BLOWER
Pressing the “O/I” button to switch on,
the display goes into READY mode.
Display indicating READY
status
36°C 20 : 30
R E ADY
Press the “BLOWER” button to activate the function.
Display indicating READY
status
36°C 20 : 30
R E ADY
When the Blower has finished, the system shuts off and the
display reverts to READY.
To cut the session short, press the BLOWER button a second time; the system shuts off and the display reverts to
READY.
The Blower starts and the display shows:
The exact time.
The temperature of the water in the tub.
The duration of the blower session (TIMER) in minutes (adjustable).
Blower in progress.
Display indicating Blower
in progress
1 5 36°C 20 : 30
BL OWER
DRAINING THE BLOWER SYSTEM
To ensure the blower system drains completely, activate the BLOWER function after the tub has emptied so as to
dry out the pipelines.
Also,
15 minutes after unplugging the waste, the control panel will power up again; the BLOWER function starts up at
maximum speed, then switches off after 10 seconds (control panel reverts to stand-by).

SEASIDE 11
EN
Blower menu
B l owe r
A I R
AUTOCONFIRM:
If no button is pressed for 5 seconds while the Air menu remains active, the current setting AUTOCONFIRMS and the
display reverts to the Blower menu.
AIR adjustment display
1 5 3 6 °C 20 : 3 0
A I R
Select AIR from the Blower menu.
Press “ENTER”
the display will show the Air adjustment scale.
Use the “and ” buttons to increase or reduce
the flow of air.
Confirm by pressing “ENTER”
the display will revert to the Blower menu.
Blower menu
B l owe r
A I R
AUTOCONFIRM:
If no button is pressed for 5 seconds while the Blower menu remains active, the display reverts to the massage
currently selected.
BLOWER SETTINGS
With the BLOWER in operation, the user can:
- Adjust the air flow
- Change the duration of the Blower session Display indicating Blower
in progress
1 5 36°C 20 : 30
BL OWER
Blower
A I R
B l owe r
T I M ER 30m
Blower menu
Press “ENTER”
the display will show the Blower menu.
Select the setting to be changed
using the ”” and ”” buttons.
.

12 SEASIDE
EN
Select TIMER from the Blower menu.
Blower menu
B l owe r
T I M ER 30m
Blower menu
B l owe r
T I M ER 30m
Display showing TIMER
B l owe r
T I M ER 30m
AUTOCONFIRM:
If no button is pressed for 5 seconds while the Timer menu remains active, the current setting AUTOCONFIRMS and
the display reverts to the Blower menu.
CHANGING THE DURATION OF THE BLOWER SESSION
Press “ENTER”
the display will show the Timer.
Use the “and ” buttons to increase or reduce
the duration between 1 and 30 minutes.
Confirm by pressing “ENTER”
the display will revert to the Blower menu.

SEASIDE 13
EN
WATERLIGHT function
STARTING THE WATERLIGHT
Pressing the “O/I” button to switch on,
the display goes into READY mode.
Display indicating
READY status
36°C 20 : 30
R E ADY
Special bath essences made by Teuco can be used
when the waterfall is in operation.
Do not use soaps, bath oils or other foamable products.
Press the “WATERLIGHT” button to activate the function.
The function starts up and the display shows:
The exact time.
The temperature of the water in the tub.
The duration of the session (TIMER) in minutes (adjustable).
Waterlight in progress.
Display indicating
Waterlight in progress
30 36°C 20 : 30
WAT E R L I GHT
Display indicating
READY status
36° C 20 : 30
R E ADY
When theTimer setting elapses, the system shuts off and the
display reverts to STAND-BY.
To cut the session short, press the WATERLIGHT button a second time; the system shuts off and the display reverts
to READY.
If the message “ADD WATER” is displayed, fill the tub to the
level at which the selected massage is able to start.
FUNCTION DOES NOT START!!!
Display in
DIAGNOSTICS mode
AD D
WAT ER

14 SEASIDE
EN
The duration can be changed while the WATERLIGHT is in
operation.
Display indicating
Waterlight in progress
1 5 36°C 20 : 30
WAT E R L I GHT
Display indicating
Waterlight in progress
30 36°C 20 : 30
WAT E R L I GHT
Display showing TIMER
Wa t erl i g ht
T I M ER 30m
AUTOCONFIRM:
If no button is pressed for 5 seconds while the TIMER menu remains active, the current setting AUTOCONFIRMS and
the display reverts to the Waterlight menu.
CHANGING THE DURATION OF THE WATERLIGHT SESSION
Press “ENTER”
the display will show the Timer.
Use the “and ” buttons to increase or reduce
the duration between 1 and 60 minutes.
Confirm by pressing “ENTER”
the display will revert to the Waterlight menu.

SEASIDE 15
EN
ADJUSTING THE BLOWER AIR FLOW (DURING WATERLIGHT)
Display indicating
Waterlight + Blower
in progress
30 36°C 20 : 30
WATER L I GHT B L
With the WATERLIGHT+BLOWER in operation, the user can:
- Change the duration of the Waterlight session
- Adjust the BLOWER air flow
The Waterlight and Blower functions can be used together.
WATERLIGHT + BLOWER
Display indicating
Waterlight + Blower
in progress
30 36°C 20 : 30
WATER L I GHT B L
Press the “BLOWER” button to activate the function.
The letters BL are displayed alongside the selected massage.
The TIMER setting that controls the Blower cannot be altered,
whereas the Waterlight TIMER remains adjustable (see
WATERLIGHT - CHANGING THE DURATION OF THE
WATERLIGHT SESSION)
AIR adjustment display
B l owe r
A I R
AUTOCONFIRM:
If no button is pressed for 5 seconds while the Air menu remains active, the current setting AUTOCONFIRMS and the
display reverts to the massage currently selected.
Press “ENTER”
the display will show the Whirlpool+Blower menu
Select the setting to be changed
using the “” and “” buttons.
Press “ENTER”
the display will show the Air adjustment scale
(see BLOWER: Adjusting the Air Flow).
Display indicating
Waterlight in progress
30 36°C 20 : 30
WAT E R L I GHT
Wa t erl i g ht
T I M ER 30m t
B l owe r
A I R
Waterlight + Blower menu

16 SEASIDE
EN
If the message “ADD WATER” is displayed, fill the tub to the
level at which the underwater lights come on.
CROMOEXPERIENCE FAIL TO SWITCH ON!!!
Display in
DIAGNOSTICS mode
AD D
WAT ER
ADDITIONAL functions
SUNLIGHT - CROMOEXPERIENCE
While enabling a function or while the system is on standby
(Display in READY mode) it is possible to switch on the
chromo experience mode.
Having switched on by pressing the “O/I” button, the user can activate certain additional functions.
Display indicating
Sunlight ON
1 5 36°C 20 : 30
SUNL I GHT ON
Display indicating
Sunlight OFF
1 5 36°C 20 : 30
SUNL I GHT OF F
Switch on the chromo experience with the “SUNLIGHT” button.
The chromo therapy will start to operate, rotating colours at
intervals of approximately 10 seconds.
The colours are: white - pink - red - orange – yellow - green -
cyan - blue - purple.
The display will show that the function is on for a few seconds
and then returns to the previous display.
Block the required colour with the “SUNLIGHT” key.
Press the “SUNLIGHT” button twice in rapid succession (in 2
seconds).
Switch off the chromo experience function with the
“SUNLIGHT” button.
The chromo experience function will switch off, the display will
show that it has switched off for a few seconds before returning
to the previous display.

SEASIDE 17
EN
HEATER
Whenever the WATERLIGHT function is activated, the user
can switch on the heater to keep the water in the bathtub at a
steady temperature.
Display indicating
Heater ON
1 5 36° C#20 : 30
HEA T E R O N
Display indicating
Heater OFF
1 5 36° C 20 : 30
HEA T E R O FF
Press the “HEATER” button to switch on.
As the heater comes on, the display will indicate its “on” status
(#) for a few seconds, then revert to the previous item.
Press the “HEATER” button to switch off.
The heater switches off, and the display indicates the “off”
status for a few seconds before reverting to the previous item.
AUTOMATIC SHUTOFF:
When the function currently selected ceases operating, the heater will also shut off.
MOONLIGHT - RIM LIGHTING
Whenever a function is activated, or the system is ready
(Display showing READY) the user can switch on the rim light.
Display indicating
Moonlight ON
1 5 36°C 20 : 30
MOON L I GHT O N
Display indicating
Moonlight OFF
1 5 36°C 20 : 30
MOON L I GHT O FF
Switch on by pressing the “MOONLIGHT” button.
As the light comes on, the display will indicate its “on” status
for a few seconds, then revert to the previous item.
Switch off by pressing the “MOONLIGHT” button.
When the light goes out, the display will indicate its “off” status
for a few seconds, then revert to the previous item.

18 SEASIDE
EN
CLOCK
Info menu
I N F O 2 0 : 30
C l o ck
Info menu
I N F O 2 0 : 30
C l o ck A
Display showing Clock
I N F O 2 0 : 30
C hang e m i nu t es
AUTOCONFIRM:
If no button is pressed for 5 seconds while the Clock menu remains active, the current setting AUTOCONFIRMS and
the display reverts to the Info menu.
Display showing Clock
I n f o 2 0 : 30
C hang e m i nu t es
Select TIME from the Info menu.
Press “ENTER”
the display will show SET HOURS.
Use the “ and ” buttons to change the Hours displayed.
Confirm by pressing “ENTER”
the display shows SET MINUTES.
Use the “ and ” buttons to change
the Minutes displayed.
Confirm by pressing “ENTER”
the display shows SELECT Clock MODE.
Use the “ and ” buttons to change
the Clock display MODE.
Confirm by pressing “ENTER”.
The display will revert to the Info menu.
Display showing Clock
I N F O 0 8 : 30 P
C h ange mode
Whenever a function is activated, or the system is ready
(Display showing READY) the user can:
- set the CLOCK
- Change the Language of the display
I N F O 2 0 : 30
C l o ck
I N F O 2 0 : 30
L a nguage EN
I N F O 2 0 : 30
¬
Info menu
AUTOCONFIRM:
If no button is pressed for 5 seconds while the Info menu remains active, the display reverts to the previous item.
Display settings - INFO
Press the “INFO” button
the display will show the Info menu.
Select the setting to be changed
using the “” and “” buttons.

SEASIDE 19
EN
LANGUAGE
Info menu
I N F O 2 0 : 30
L a nguag e EN
Massage menu
I N F O 2 0 : 30
L a nguag e EN
AUTOCONFIRM:
If no button is pressed for 5 seconds while the Language menu remains active, the current setting AUTOCONFIRMS
and the display reverts to the Info menu.
Display indicating Language
I N F O 2 0 : 30
L a nguag e EN
Select LANGUAGE from the Info menu.
Press “ENTER”
the display shows the language currently selected.
Use the “and ” buttons to change the display language.
Confirm by pressing “ENTER”
the display will revert to the Info menu.

20 SEASIDE
EN DISINFECTION
RUNNING THE DISINFECTION CYCLE
When the system is switched off using the “O/I” button after at least one Waterlight or Blower cycle has been selected,
a DISINFECTION cycle will follow.
Display showing
Disinfection prompt
ST ART
D I S I N F E CT I ON ?
L EAVE
BA TH TUB
D I S I N F ECT I ON
RUNN I NG
Be sure to VACATE THE BATHTUB before Disinfection
takes place.
Press “ENTER” to start the Disinfection.
The display shows a warning message for a few seconds.
Thereafter,
The display indicates Disinfection in progress;
The disinfection cycle is automatic and includes the following
steps:
- pump operates for 1 minute approximately, with cleansing
fluid supplied from the dispenser;
- pause of 10 minutes allowing disinfectant action;
- suction valve closes.
When the Disinfection cycle has finished, the system shuts off
and the display reverts to STAND-BY.
Turn the handle of the pop-up waste to empty the tub.
Display in STAND-BY mode
20 : 30
To postpone the disinfection cycle, press the “O/I” button
and the display will revert to STAND-BY.
During Disinfection, both the remote control and the control panel are deactivated
except for the “O/I” and “ALARM” buttons, which can be used to
suspend the Disinfection cycle at any given moment.
If the message “ADD WATER” is displayed, fill the tub to the
level at which the Disinfection cycle is able to start.
DISINFECTION DOES NOT START!!!
Display in
DIAGNOSTICS mode
AD D
WAT ER
Table of contents
Languages:
Other Teuco Bathroom Fixture manuals
Teuco
Teuco P551S Series User manual
Teuco
Teuco KO40 User manual
Teuco
Teuco Multifunctional Light User manual

Teuco
Teuco H46M Series User manual
Teuco
Teuco SEASIDE T07 User manual
Teuco
Teuco CROMOEXPERIENCE User manual

Teuco
Teuco 220M User manual
Teuco
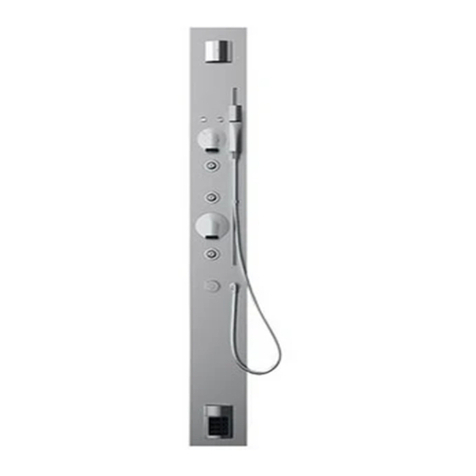
Teuco P546S Series User manual
Teuco
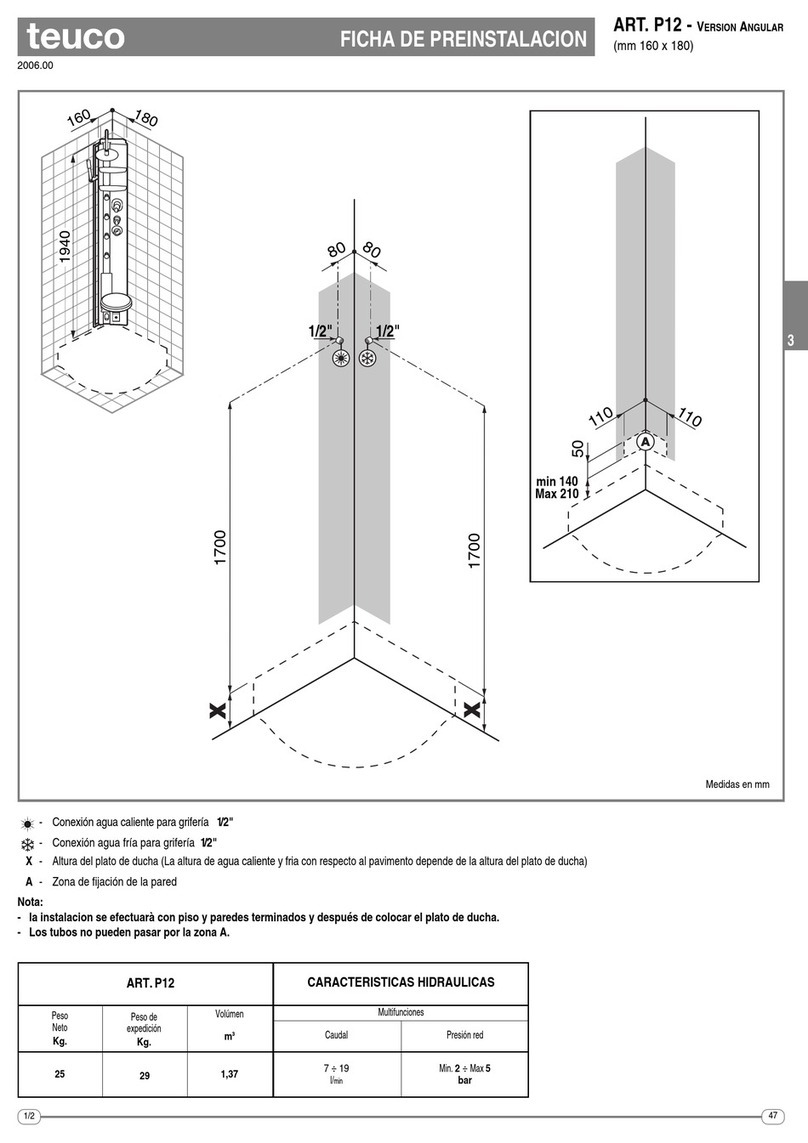
Teuco P12 User manual

Teuco
Teuco 193 User manual
Popular Bathroom Fixture manuals by other brands

Fantini Rubinetti
Fantini Rubinetti ACQUADOLCE 8091B instructions
HAFA
HAFA Fine 1381840 manual

Spectrum
Spectrum Pfister Vie 016-VI installation guide

Sussman
Sussman Mr.Steam 300 Series Installation, operation & maintenance manual

Costway
Costway JH10015BL manual

Crosswater Digital
Crosswater Digital Solo Operation and care guide

