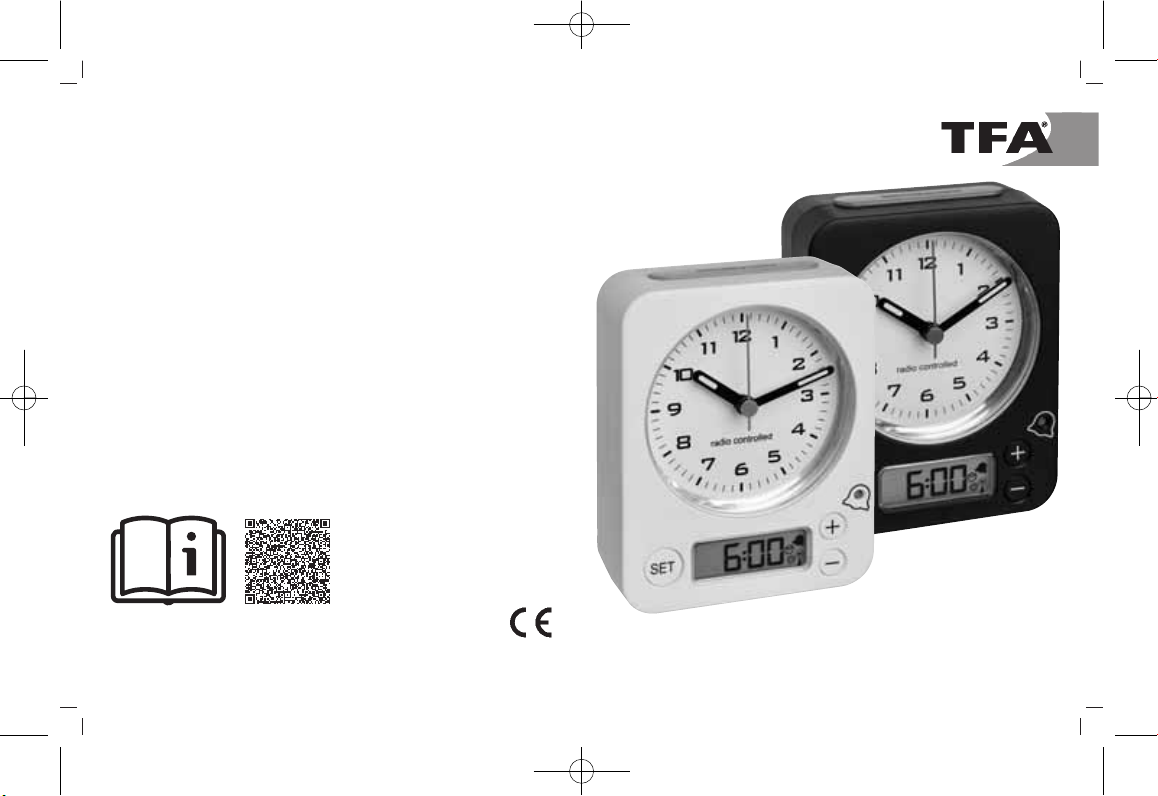
TFA 60.1511 User manual

Bedienungsanleitung
Instruction manual
Mode d’emploi
Istruzioni per l'uso
Gebruiksaanwijzing
Instrucciones de uso
Kat. Nr. 60.1511
Instruction manuals
www.tfa-dostmann.de/en/service/downloads/instruction-manuals
Instruction manuals
www.tfa-dostmann.de/en/service/downloads/instruction-manuals
TFA_No. 60.1511_Anleitung_04_23 06.04.2023 13:42 Uhr Seite 1

32
Fig. 1 Fig. 2
A 1
B 3B 3
B 5
B 2
B 6B 1
B 4 C 1
TFA_No. 60.1511_Anleitung_04_23 06.04.2023 13:42 Uhr Seite 2

Fig. 3
54
Funkwecker
Vielen Dank, dass Sie sich für dieses Gerät aus dem Hause TFA entschieden haben.
1. Bevor Sie mit dem Gerät arbeiten
•Lesen Sie sich bitte die Bedienungsanleitung genau durch.
•Durch die Beachtung der Bedienungsanleitung vermeiden Sie auch Beschädi-
gungen des Geräts und die Gefährdung Ihrer gesetzlichen Mängelrechte
durch Fehlgebrauch.
•Für Schäden, die aus Nichtbeachtung dieser Bedienungsanleitung verursacht
werden, übernehmen wir keine Haftung.
•Beachten Sie besonders die Sicherheitshinweise!
•Bewahren Sie diese Anleitung gut auf!
2. Lieferumfang
• Funk-Wecker
• Bedienungsanleitung
3. Einsatzbereich und alle Vorteile Ihres neuen Gerätes auf einen Blick
• Funkuhr mit höchster Genauigkeit
• Analoge Zeitanzeige mit nachleuchtenden Zeigern
• Digitale Alarmeinstellung (minutengenau)
• Weckalarm mit Snooze-Funktion
• Manuelle Einstellmöglichkeit und Zeitzone
• Rundumlaufende Hintergrundbeleuchtung
4. Zu Ihrer Sicherheit
• Das Produkt ist ausschließlich für den oben beschriebenen Einsatzbereich geeig-
net.
• Verwenden Sie das Produkt nicht anders, als in dieser Bedienungsanleitung darge-
stellt wird.
• Das eigenmächtige Reparieren, Umbauen oder Verändern des Gerätes ist nicht
gestattet.
A 2 A 6
A 8
A 3 A 4 A 5
A 7
TFA_No. 60.1511_Anleitung_04_23 06.04.2023 13:42 Uhr Seite 3

76
Funkwecker
Vorsicht!
Verletzungsgefahr:
• Halten Sie das Gerät und die Batterien außerhalb der Reichweite von Kindern.
• Kleinteile können von Kindern (unter drei Jahren) verschluckt werden.
• Batterien enthalten gesundheitsschädliche Säuren und können bei Verschlucken
lebensgefährlich sein. Wurde eine Batterie verschluckt, kann dies innerhalb von 2
Stunden zu schweren inneren Verätzungen und zum Tode führen. Wenn Sie vermu-
ten, eine Batterie könnte verschluckt oder anderweitig in den Körper gelangt sein,
nehmen Sie sofort medizinische Hilfe in Anspruch.
• Batterien nicht ins Feuer werfen, kurzschließen, auseinandernehmen oder aufla-
den. Explosionsgefahr!
• Um ein Auslaufen der Batterien zu vermeiden, sollten schwache Batterien mög-
lichst schnell ausgetauscht werden. Verwenden Sie nie gleichzeitig alte und neue
Batterien oder Batterien unterschiedlichen Typs.
• Sollte eine Batterie ausgelaufen sein, vermeiden Sie Kontakt mit Haut, Augen und
Schleimhäuten. Spülen Sie ggf. umgehend die betroffenen Stellen mit Wasser und
suchen Sie einen Arzt auf.
Wichtige Hinweise zur Produktsicherheit!
• Setzen Sie das Gerät keinen extremen Temperaturen, Vibrationen und Erschütte-
rungen aus.
• Vor Feuchtigkeit schützen.
5. Bestandteile
Anzeige:
A1: Analoge Uhrzeit
Display:
A2: Alarmzeit A3: Batterie-Symbol
A4: Snooze-Symbol A5: Alarm ON/OFF Symbol
Funkwecker
A6: Alarmzeit-Symbol A7: Sommerzeit-Symbol
A8: DCF-Empfangszeichen
B:Tasten:
B1: SNOOZE/LIGHT Taste B2: SET Taste
B3: + Taste B4: - Taste
B5: Alarm ON/OFF Schiebeschalter mit Farbmarke
B6: RESET Taste
C: Gehäuse:
C 1: Batteriefach
6. Inbetriebnahme
• Öffnen Sie das Batteriefach und legen Sie drei neue Batterien 1,5 V AA polrichtig
ein. Schließen Sie das Batteriefach wieder.
• Das Gerät ist jetzt betriebsbereit.
• Ein kurzer Signalton ertönt.
• Im Display erscheinen die Alarmzeit (Voreinstellung 6:00) und das Alarmzeit-Sym-
bol.
• Die Zeiger stellen sich auf 12.00 Uhr.
• Die Uhr versucht nun das DCF-Funksignal zu empfangen. Das DCF-Empfangszei-
chen blinkt im Display.
• Wenn der Zeitcode nach 3-12 Minuten empfangen wurde, erscheint im Display kurz
die digitale Uhrzeit und die analoge Uhr stellt sich auf die funkgesteuerte Zeit ein.
Das DCF-Empfangszeichen erscheint ständig im Display.
6.1 Funkempfang
• Der DCF-Funkempfang findet dreimal täglich um 1:00, 3:00 und um 5:00 Uhr mor-
gens statt. Ist der DCF-Funkempfang bis 5:00 Uhr morgens nicht erfolgreich, so fin-
det der nächste DCF-Empfangsversuch wieder um 1:00 Uhr morgens statt.
• Sie können die Initialisierung auch manuell starten.
• Halten Sie die + Taste für drei Sekunden gedrückt.
TFA_No. 60.1511_Anleitung_04_23 06.04.2023 13:42 Uhr Seite 4

98
Funkwecker
• Das DCF-Empfangszeichen blinkt.
• Zum Deaktivieren des DCF-Funkempfangs halten Sie die + Taste noch einmal für
drei Sekunden gedrückt.
• Das DCF-Empfangszeichen verschwindet.
• Es gibt drei verschiedene Empfangssymbole:
blinkt - Empfang aktiv
bleibt stehen - Empfang erfolgreich
kein Symbol - Empfang wurde deaktiviert
• Falls die Funkuhr kein DCF-Funksignal empfangen kann (z.B. wegen Störungen,
Übertragungsdistanz, etc.), kann die Zeit manuell eingestellt werden. Die Uhr arbeitet
dann wie eine normale Quarz-Uhr (siehe Manuelle Einstellungen).
Hinweis zum Empfang der Funkzeit
Die Zeitübertragung erfolgt von einer Cäsium Atom-Funkuhr, die von der
Physikalisch Technischen Bundesanstalt in Braunschweig betrieben wird. Die Abwei-
chung beträgt weniger als 1 Sekunde in einer Million Jahren. Die Zeit ist kodiert und
wird von Mainflingen in der Nähe von Frankfurt am Main durch ein DCF-77 (77.5 kHz)
Frequenzsignal übertragen mit einer Reichweite von ca. 1.500 km. Ihre Funkuhr emp-
fängt das Signal, wandelt es um und zeigt immer die exakte Zeit an. Auch die Umstel-
lung von Sommer- und Winterzeit erfolgt automatisch. Während der Sommerzeit
erscheint im Display. Der DCF-Funkempfang hängt hauptsächlich von der geo-
graphischen Lage ab. Im Normalfall sollten innerhalb des Radius von 1.500 km aus-
gehend von Frankfurt bei der Übertragung keine Probleme auftauchen.
Bitte beachten Sie folgende Hinweise:
•
Es wird empfohlen, einen Abstand von mindestens 1,5 – 2 Metern zu eventuell stören-
den Geräten wie Computerbildschirmen und Fernsehgeräten einzuhalten.
• In Stahlbetonbauten (Kellern, Aufbauten) ist das empfangene Signal natürlicherweise
schwächer. In Extremfällen wird empfohlen, das Gerät in Fensternähe zu platzieren
und/oder durch Drehen das Funksignal besser zu empfangen.
Funkwecker
• Nachts sind die atmosphärischen Störungen meist geringer und ein DCF-Funkemp-
fang ist in den meisten Fällen möglich. Ein einziger Empfang pro Tag genügt, um die
Genauigkeit zu gewährleisten und Abweichungen unter einer Sekunde zu halten.
7. Bedienung
• Während des DCF-Funkempfangs ist eine Tastenbedienung nicht möglich.
• Halten Sie die + oder - Taste im Einstellungsmodus einige Sekunden gedrückt, um
in den Schnelldurchlauf zu gelangen.
• Das Gerät verlässt automatisch den Einstellungsmodus, wenn länger Zeit keine
Taste gedrückt wird.
7.1 Manuelle Einstellungen
• Halten Sie die SET Taste für ein paar Sekunden gedrückt, um in den Ein-
stellungsmodus zu gelangen.
7.1.1 Zeitzonenkorrektur
• Die Zeitzonenkorrektur wird benötigt, wenn das DCF-Funksignal empfangen wer-
den kann, die Zeitzone sich aber von der DCF-Funkzeit unterscheidet.
• 0 (Voreinstellung) erscheint im Display.
• Drücken Sie die - oder + Taste, um die Zeitzonenkorrektur (+9/-9) vorzunehmen
(z.B. +1=eine Stunde später).
7.1.2 Manuelle Uhrzeiteinstellung
(falls die Funkuhr kein DCF-Funksignal empfangen kann)
• Drücken Sie die SET Taste noch einmal und Sie können nun nacheinander das
Jahr, den Monat, den Tag, die Stunden und die Minuten ansteuern und mit der -
oder + Taste einstellen.
• Bestätigen Sie die Eingaben mit der SET Taste.
• Die analoge Uhr stellt sich auf die manuell eingegebene Zeit ein.
• Bei erfolgreichem Empfang des DCF-Funksignals wird die manuell eingestellte Zeit
überschrieben.
TFA_No. 60.1511_Anleitung_04_23 06.04.2023 13:42 Uhr Seite 5

1110
Funkwecker
7.2 Einstellung der Alarmzeit
• Drücken Sie die SET Taste.
• Die Stundenanzeige blinkt.
• Stellen Sie mit der - oder + Taste die Stunden ein.
• Bestätigen Sie die Eingabe mit der SET Taste.
• Die Minutenanzeige blinkt und Sie können nun mit der - oder + Taste die Minuten
einstellen.
• Bestätigen Sie die Eingabe mit der SET Taste.
• Auf dem Display erscheint die eingestellte Alarmzeit.
• Schieben Sie den ON/OFF Schiebeschalter nach oben (ON), um die Alarm-Funkti-
on einzuschalten.
• Gleichzeitig wechselt die Farbmarke.
• Das Alarm-Symbol erscheint im Display.
• Die Alarmzeit ist aktiviert.
• Wenn die eingestellte Alarmzeit erreicht ist, beginnt der Wecker zu klingeln.
• Das Alarm-Symbol blinkt.
• Die Hintergrundbeleuchtung blinkt ebenfalls und schaltet sich nach ein paar Sekun-
den aus.
• Drücken Sie auf die SET Taste und der Alarm wird beendet.
• Wird der Alarm nicht beendet, schaltet sich der ansteigende Alarmton automatisch
nach ein paar Minuten aus.
• Das Alarm-Symbol bleibt im Display stehen und der Weckalarm aktiviert sich erneut
zur gleichen Alarmzeit wieder.
• Wenn der Wecker klingelt, drücken Sie die SNOOZE/LIGHT Taste, um die Snooze-
Funktion zu aktivieren.
• Ist die Snooze-Funktion aktiviert, erscheint auf dem Display.
• Der Alarm wird für die Dauer von 5 Minuten unterbrochen.
• Schieben Sie den ON/OFF Schiebeschalter nach unten (OFF), um die Alarm-Funk-
tion auszuschalten.
• Gleichzeitig wechselt wieder die Farbmarke.
• Das Alarm-Symbol verschwindet im Display.
Funkwecker
7.3 Beleuchtung
• Drücken Sie die SNOOZE/LIGHT Taste.
• Die Hintergrundbeleuchtung wird für 5 Sekunden aktiviert.
8. Pflege und Wartung
• Reinigen Sie das Gerät mit einem weichen, leicht feuchten Tuch. Keine Scheuer-
oder Lösungsmittel verwenden!
• Entfernen Sie die Batterien, wenn Sie das Gerät längere Zeit nicht verwenden.
• Bewahren Sie Ihr Gerät an einem trockenen Platz auf.
8.1 Batteriewechsel
• Sobald das Batteriesymbol erscheint, wechseln Sie bitte die Batterien.
• Öffnen Sie das Batteriefach und legen Sie drei neue Batterien 1,5 V AA polrichtig
ein.
• Schließen Sie das Batteriefach wieder.
9. Fehlerbeseitigung
Problem Lösung
Keine Anzeige/ ➜ Batterien polrichtig einlegen
Keine Zeigerbewegung ➜ Batterien wechseln
Kein DCF Empfang ➜ + Taste für drei Sekunden gedrückt
halten, um Empfangsversuch auszulösen
➜Anderen Aufstellort für das Gerät wählen
➜Empfangsversuch in der Nacht abwarten
➜Beseitigen der Störquellen
➜Neuinbetriebnahme des Gerätes gemäß
Bedienungsanleitung
➜Uhrzeit manuell einstellen
Unkorrekte Anzeige ➜Batterien wechseln
TFA_No. 60.1511_Anleitung_04_23 06.04.2023 13:42 Uhr Seite 6

1312
Funkwecker
➜RESET Knopf auf der Rückseite mit
einem spitzen Gegenstand drücken
Wenn Ihr Gerät trotz dieser Maßnahmen immer noch nicht funktioniert, wenden Sie
sich an den Händler, bei dem Sie das Produkt gekauft haben.
10. Entsorgung
Dieses Produkt und die Verpackung wurden unter Verwendung hochwertiger Materia-
lien und Bestandteile hergestellt, die recycelt und wiederverwendet werden können.
Dies verringert den Abfall und schont die Umwelt.
Entsorgen Sie die Verpackung umweltgerecht über die eingerichteten Sammelsysteme.
Entsorgung des Elektrogeräts
Entnehmen Sie nicht festverbaute Batterien und Akkus aus dem Gerät und
entsorgen Sie diese getrennt.
Dieses Gerät ist entsprechend der EU-Richtlinie über die Entsorgung von
Elektro- und Elektronik-Altgeräten (WEEE) gekennzeichnet.
Dieses Produkt darf nicht mit dem Hausmüll entsorgt werden. Der Nutzer ist
verpflichtet, das Altgerät zur umweltgerechten Entsorgung bei einer ausge-
wiesenen Annahmestelle für die Entsorgung von Elektro- und Elektronikge-
räten abzugeben. Die Rückgabe ist unentgeltlich. Beachten Sie die aktuell
geltenden Vorschriften!
Entsorgung der Batterien
Batterien und Akkus dürfen keinesfalls in den Hausmüll. Sie enthalten
Schadstoffe, die bei unsachgemäßer Entsorgung der Umwelt und der
Gesundheit Schaden zufügen können. Als Verbraucher sind Sie gesetzlich
verpflichtet, gebrauchte Batterien und Akkus zur umweltgerechten Entsor-
gung beim Handel oder entsprechenden Sammelstellen gemäß nationalen
oder lokalen Bestimmungen abzugeben. Die Rückgabe ist unentgeltlich.
Die Bezeichnungen für enthaltene Schadstoffe sind:
Cd=Cadmium, Hg=Quecksilber, Pb=Blei.
Funkwecker
11.Technische Daten
Spannungsversorgung: Batterien 3 x 1,5 V AA (nicht inklusive)
Gehäusemaße: 91 x 41 x 115 mm
Gewicht: 172 g (nur das Gerät)
Diese Anleitung oder Auszüge daraus dürfen nur mit Zustimmung von TFA Dostmann
veröffentlicht werden. Die technischen Daten entsprechen dem Stand bei Drucklegung
und können ohne vorherige Benachrichtigung geändert werden.
Die neuesten technischen Daten und Informationen zu Ihrem Produkt finden Sie auf
unserer Homepage unter Eingabe der Artikel-Nummer in das Suchfeld.
EU-Konformitätserklärung
Hiermit erklärt TFA Dostmann, dass der Funkanlagentyp 60.1511 der Richtlinie
2014/53/EU entspricht. Der vollständige Text der EU-Konformitätserklärung ist unter
der folgenden Internetadresse verfügbar:
www.tfa-dostmann.de/service/downloads/ce
www.tfa-dostmann.de
E-Mail: info@tfa-dostmann.de
TFA Dostmann GmbH & Co.KG
Zum Ottersberg 12, 97877 Wertheim, Deutschland 04/23
TFA_No. 60.1511_Anleitung_04_23 06.04.2023 13:42 Uhr Seite 7

1514
Radio-controlled alarm clock
Thank you for choosing this instrument from TFA.
1. Before you use this product
•Please make sure you read the instruction manual carefully.
• Following and respecting the instructions in your manual will prevent damage
to your instrument and loss of your statutory rights arising from defects due
to incorrect use.
• We shall not be liable for any damage occurring as a result of non-following of
these instructions.
• Please pay particular attention to the safety notices!
• Please keep this instruction manual safe for future reference.
2. Delivery contents
• Radio-controlled alarm clock
• Instruction manual
3. Field of operation and all the benefits of your new instrument at a glance
• Highest precision radio-controlled clock
• Analogue display with luminescent clock hands
• Digital alarm time setting (to the minute)
• Alarm with snooze function
• Manual setting option and time zone
• Circular backlight
4. For your safety
• This product is exclusively intended for the field of application described above.
• It should only be used as described within these instructions.
• Unauthorized repairs, modifications or changes to the product are prohibited.
Radio-controlled alarm clock
Caution!
Risk of injury:
• Keep this device and the batteries out of reach of children.
• Small parts can be swallowed by children (under three years old).
• Batteries contain harmful acids and may be hazardous if swallowed. If a battery is
swallowed, this can lead to serious internal burns and death within two hours. If you
suspect a battery could have been swallowed or otherwise caught in the body, seek
medical help immediately.
• Batteries must not be thrown into a fire, short-circuited, taken apart or recharged.
Risk of explosion!
• Low batteries should be changed as soon as possible to prevent damage caused by
leaking.
• Never use a combination of old and new batteries together, nor batteries of different
types.
• Avoid contact with skin, eyes and mucous membranes when handling leaking bat-
teries. In case of contact, immediately rinse the affected areas with water and con-
sult a doctor.
Important information on product safety!
• Do not expose the device to extreme temperatures, vibrations or shocks.
• Protect it from moisture.
5. Elements
Indication:
A1: Analogue time
Display:
A2: Alarm time A3: Battery symbol
A4: Snooze symbol A5: Alarm ON/OFF symbol
TFA_No. 60.1511_Anleitung_04_23 06.04.2023 13:42 Uhr Seite 8

1716
Radio-controlled alarm clock
A6: Alarm time symbol A7: Daylight Saving Time symbol
A8: DCF symbol
B: Buttons:
B1: SNOOZE/LIGHT button B2: SET button
B3: + button B4: - button
B5: Alarm switch ON/OFF with color mark
B6: RESET button
C: Housing:
C 1: Battery compartment
6. Getting started
• Open the battery compartment and insert three new batteries 1,5 V AA, polarity as
illustrated. Close the battery compartment again.
• The device is ready for use.
• The device will alert you with a beep.
• The alarm time (default 6:00) and the alarm time symbol appear in the display.
• The clock's hands move to 12.00 o'clock.
• The clock will now scan the DCF frequency signal.The DCF symbol is flashing on the
display.
• When the time code is received successfully after 3-12 minutes, the digital time
appears briefly on the display and the analogue clock updates to the radio-controlled
time.The DCF symbol appears steadily on the display.
6.1 DCF reception
• The DCF reception always takes place at 1:00, 3:00 and 5:00 o'clock in the morn-
ing. If the reception is not successfully received until 5:00 o'clock, the next receive
operation is again at 1:00 o'clock in the morning.
• You can start the initialization manually.
• Press and hold + button for three seconds.
Radio-controlled alarm clock
• The DCF symbol will be flashing.
• To deactivate the DCF reception, press and hold again the + button for three
seconds.
• The DCF symbol disappears.
• There are three different reception symbols:
flashing - reception is active
stays - reception is very good
no symbol - reception is deactivated
• If the clock cannot detect the DCF-signal (for example due to disturbances, trans-
mitting distance, etc.), the time can be set manually. The DCF symbol disappears
and the clock will then work as a normal quartz clock. (see: Manual settings).
Note for radio-controlled time DCF
The time base for the radio-controlled time is a caesium atomic clock operated by the
Physikalisch Technische Bundesanstalt Braunschweig. It has a time deviation of less
than one second in one million years.The time is coded and transmitted from Mainflin-
gen near Frankfurt via frequency signal DCF-77 (77.5 kHz) and has a transmitting
range of approximately 1,500 km. Your radio-controlled clock receives this signal and
converts it to show the precise time. Changeover from summer time or winter time is
automatic. In Daylight Saving Time is shown on the display. The quality of the
reception depends mainly on the geographic location. Normally there should be no
reception problems within a 1,500 km radius around Frankfurt.
Please take note of the following:
• The recommended distance to any interfering sources like computer monitors or TV
sets is at least 1.5 - 2 meters.
• Inside ferro-concrete rooms (basements, superstructures), the received signal is
naturally weakened. In extreme cases, please place the unit close to a window to
improve the reception.
TFA_No. 60.1511_Anleitung_04_23 06.04.2023 13:42 Uhr Seite 9

1918
Radio-controlled alarm clock
• During night-time, the atmospheric interference is usually less severe and reception
is possible in most cases. A single daily reception is adequate to keep the accuracy
deviation under 1 second.
7. Operation
• During the DCF reception is a button operation not possible.
• Press and hold the + or the - button for a few seconds in the setting mode for a fast
running.
• The device will automatically quit the setting mode if no button is pressed for a long
period of time.
7.1 Manual settings
• Press and hold the SET button for a few seconds to enter the setting mode.
7.1.1 Time zone correction
• The time zone correction is needed for countries where the DCF signal can be
received but the time zone is different from the German time.
• 0 (default) appears on the display.
• Press the - or + button to adjust the time zone correction (-9/+9, e.g.: +1=one hour
later).
7.1.2 Manual setting of the clock
(if the radio-controlled clock cannot receive the DCF reception signal)
• Press the SET button to make the settings in the following sequence: Year, month,
day, hour and minutes. Press the + or - button to adjust it.
• Confirm the setting with the SET button.
• The analogue clock shows automatically the manually set time.
• By a successful reception of the DCF signal, the manually set time will be overwritten.
7.2 Setting of the alarm time
• Press the SET button.
Radio-controlled alarm clock
• The hour digits will be flashing.
• Press the + or - button to adjust hours.
• Confirm the setting with the SET button.
• The minute digit will be flashing. Press the - or + button to adjust the minutes.
• Confirm the setting with the SET button.
• The display shows the adjusted alarm time.
• Slide the ALARM switch ON/OFF upwards (ON) to activate the alarm function.
• At the same time, the color mark for the alarm changes.
• The alarm symbol appears on the display.
• The alarm time is activated.
• When the adjusted alarm time is reached, the alarm will ring.
• The alarm symbol will be flashing.
• The backlight will also be flashing and turns off after a few seconds.
• Press the SET button and the alarm will stop.
• If the alarm is not stopped manually, the increasing alarm will automatically turn off
after certain minutes.
• The alarm symbol rests on the display and the alarm time will be reactivated at the
same time.
• When the alarm rings, press the SNOOZE/LIGHT button and the snooze function
will be activated.
• Once the snooze function is activated, will be flashing on the display.
• The alarm will be interrupted for 5 minutes.
• Slide the ALARM switch ON/OFF downwards (OFF) to deactivate the alarm func-
tion.
• At the same time, the color mark for the alarm changes again.
• The alarm symbol disappears.
7.3 Backlight
• Press the SNOOZE/LIGHT button.
• The backlight turns on for 5 seconds.
TFA_No. 60.1511_Anleitung_04_23 06.04.2023 13:42 Uhr Seite 10

2120
Radio-controlled alarm clock
8. Care and maintenance
• Clean the instrument with a soft damp cloth. Do not use solvents or scouring
agents.
• Remove the batteries if you do not use the device for a long period of time.
• Keep the device in a dry place.
8.1 Battery replacement
• Change the batteries when the battery symbol appears on the display.
• Open the battery compartment and insert three new batteries 1,5 V AA, polarity as
illustrated.
• Close the battery compartment again.
9. Troubleshooting
Problems Solution
No indication / ➜Ensure that the batteries polarities are
clock's hands do not move correct
➜Change the batteries
No DCF reception ➜Press the + button for three seconds and
start the reception manually
➜Choose another place for your device
➜Wait for attempted reception during the night
➜Check if there is any source of interference
➜Restart the device according to the manual
➜Set the clock manually
Incorrect indication ➜Change the batteries
➜Use a pin to press the RESET button
If your device fails to work despite these measures contact the supplier from whom you
purchased it.
Radio-controlled alarm clock
10.Waste disposal
This product and its packaging have been manufactured using high-grade materials
and components which can be recycled and reused. This reduces waste and protects
the environment.
Dispose of the packaging in an environmentally friendly manner using the collection
systems that have been set up.
Disposal of the electrical device
Remove non-permanently installed batteries and rechargeable batteries
from the device and dispose of them separately.
This product is labelled in accordance with the EU Waste Electrical and
Electronic Equipment Directive (WEEE).
This product must not be disposed of in ordinary household waste. As a
consumer, you are required to take end-of-life devices to a designated col-
lection point for the disposal of electrical and electronic equipment, in order
to ensure environmentally-compatible disposal. The return service is free of
charge. Observe the current regulations in place!
Disposal of the batteries
Never dispose of empty batteries and rechargeable batteries with ordinary
household waste. They contain pollutants which, if improperly disposed of,
can harm the environment and human health. As a consumer, you are
required by law to take them to your retail store or to an appropriate collec-
tion site depending on national or local regulations in order to protect the
environment.The return service is free of charge.
The symbols for the contained heavy metals are:
Cd=cadmium, Hg=mercury, Pb=lead.
11. Specifications
Power consumption: Batteries 3 x 1,5 V AA (not included)
TFA_No. 60.1511_Anleitung_04_23 06.04.2023 13:42 Uhr Seite 11

2322
Radio-controlled alarm clock
Housing dimension: 91 x 41 x 115 mm
Weight: 172 g (instrument only)
No part of this manual may be reproduced without written consent of TFA Dostmann.
The technical data are correct at the time of going to print and may change without
prior notice.
The latest technical data and information about this product can be found in our home-
page by simply entering the product number in the search box.
EU declaration of conformity
Hereby, TFA Dostmann declares that the radio equipment type 60.1511 is in compli-
ance with Directive 2014/53/EU.The full text of the EU declaration of conformity is avail-
able at the following Internet address: www.tfa-dostmann.de/service/downloads/ce:
www.tfa-dostmann.de
E-Mail: info@tfa-dostmann.de
TFA Dostmann GmbH & Co.KG
Zum Ottersberg 12, 97877 Wertheim, Germany 04/23
Réveil radio-piloté
Nous vous remercions d'avoir choisi l'appareil de la Société TFA.
1. Avant d'utiliser votre appareil
•Veuillez lire attentivement le mode d'emploi.
• En respectant ce mode d'emploi, vous éviterez d'endommager votre appareil
et de perdre vos droits légaux en cas de défaut si celui-ci résulte d’une utilisa-
tion non-conforme.
• Nous n'assumons aucune responsabilité pour des dommages qui auraient été
causés par le non-respect du présent mode d'emploi.
• Suivez bien toutes les consignes de sécurité !
• Conservez soigneusement le mode d'emploi !
2. Contenu de la livraison
• Réveil radio-piloté
• Mode d'emploi
3. Aperçu du domaine d'utilisation et de tous les avantages de votre nouvel
appareil
• Horloge radio-pilotée de grande précision
• Affichage analogique avec aiguilles luminescentes
• Réglage numérique de l'alarme (à la minute près)
• Réveil avec fonction de répétition « snooze »
• Option de réglage manuel et fuseau horaire
• Éclairage de fond périphérique
4. Pour votre sécurité
• Le produit est destiné uniquement à l'utilisation décrite ci-dessus.
• N'utilisez jamais l’appareil à d'autres fins que celles décrites dans le présent mode
d'emploi.
• Vous ne devez en aucun cas réparer, démonter ou modifier l'appareil par vous-
même.
TFA_No. 60.1511_Anleitung_04_23 06.04.2023 13:42 Uhr Seite 12

2524
Réveil radio-piloté
Attention !
Danger de blessure :
• Placez votre appareil et les piles hors de la portée des enfants.
• Les petites pièces peuvent être avalées par les enfants (de moins de trois ans).
• Les piles contiennent des acides nocifs pour la santé et peuvent être mortelles
dans le cas d’une ingestion. Si une pile a été avalée, elle peut entraîner des brûlu-
res internes graves ainsi que la mort dans l’espace de 2 heures. Si vous craignez
qu’une pile ait pu être avalée ou ingérée d’une autre manière, quelle qu’elle soit,
contactez immédiatement un médecin d’urgence.
• Ne jetez jamais de piles dans le feu, ne les court-circuitez pas, ne les démontez
pas et ne les rechargez pas. Risque d'explosion !
• Une pile faible doit être remplacée le plus rapidement possible afin d'éviter toute
fuite. N'utilisez jamais simultanément de piles anciennes avec des piles neuves ou
des piles de types différents.
• Évitez tout contact de la peau, des yeux et des muqueuses avec le liquide des
piles. En cas de contact, rincez immédiatement les zones concernées à l’eau et
consultez un médecin.
Conseils importants de sécurité du produit !
• Évitez d’exposer l’appareil à des températures extrêmes, à des vibrations ou à des
chocs.
• Protégez-le contre l'humidité.
5. Composants
Indication :
A1 : Horloge analogique
Affichage :
A2 : Heure de réveil A3 : Symbole de pile
Réveil radio-piloté
A4 : Symbole de répétition « snooze » A5 : Symbole de réveil ON/OFF
A6 : Symbole de l'heure de réveil A7 : Symbole de l'heure d'été
A8 : Symbole de réception DCF
B :Touches:
B1 : Touche SNOOZE/LIGHT B2 : Touche SET
B3 : Touche + B4 : Touche -
B5 : Interrupteur de réveil ON/OFF avec marque de couleur
B6 : Touche RESET
C : Boîtier :
C 1 : Compartiment à piles
6. Mise en service
• Ouvrez le compartiment à piles et insérez trois nouvelles piles de type 1,5 V AA en
respectant la polarité +/-. Refermez le compartiment à piles.
• Votre appareil est maintenant prêt à fonctionner.
• Un signal sonore se fait entendre.
• L'heure de réveil (6 :00 par défaut) et le symbole de l'heure de réveil sont affichés
sur l'écran.
• Les aiguilles se déplacent à 12.00 heures.
• L’horloge cherche le signal radio DCF. Le symbole de réception DCF clignote sur
l'écran.
• En cas de réception correcte après 3-12 minutes, l’heure digitale est affichée briè-
vement et l'horloge analogique se déplace à l’heure radio. Le symbole de réception
DCF est affiché en continu sur l'écran.
6.1 Réception du signal DCF
• La réception du signal DCF a lieu à 1:00, 3:00 et 5:00 heures du matin. Si la récep-
tion a échoué à 5:00 h du matin, la prochaine réception sera effectuée à 1:00 h le
jour suivant.
TFA_No. 60.1511_Anleitung_04_23 06.04.2023 13:42 Uhr Seite 13

2726
Réveil radio-piloté
• Vous pouvez également activer manuellement la réception.
• Appuyez sur la touche + pendant trois secondes.
• Le symbole de réception DCF clignote.
• Pour désactiver la réception DCF, appuyez de nouveau sur la touche + pendant
trois secondes.
• Le symbole de réception DCF disparaît.
• Il y a trois symboles de réception différents :
clignote - réception en cours
allumé en continu - la réception a abouti
aucun symbole - réception désactivée
• Si votre horloge radio-pilotée ne peut pas recevoir le signal DCF (par exemple en
cas de perturbations, d'une distance de transmission excessive etc.), vous pouvez
régler l'horaire manuellement. L’horloge fonctionne comme une horloge à quartz
normale (voir Réglages manuels).
Consignes pour la réception de l'heure radio
La transmission de l’heure radio-pilotée s’effectue via une horloge atomique au
césium, exploitée par la Physikalisch Technische Bundesanstalt de Braunschweig (Ins-
titut Fédéral Physico-Technique de Braunschweig). L’écart de précision de cette horlo-
ge est d' 1 seconde pour un million d’années. L’heure est diffusée à partir de Mainflin-
gen, près de Francfort-sur-le-Main, avec un signal DCF-77 (77,5 kHz) d'une portée
d’environ 1500 km. L'horloge radio-pilotée reçoit le signal, le convertit et affiche l'heure
précise. Le passage de l'heure d'hiver à l'heure d'été et vice-versa s'effectue également
en mode automatique. Pendant l’heure d’été, apparaît sur l'écran. La réception
dépend de votre position géographique. En règle générale, dans un rayon de 1500 km
autour de Francfort, aucun problème de transmission ne devrait apparaître.
Nous vous prions de respecter les consignes suivantes :
• Nous vous recommandons de respecter une distance de 1,5 - 2 m entre l'appareil
et d’éventuelles sources de signaux parasites, comme les écrans d'ordinateurs et
les postes de télévision.
Réveil radio-piloté
• Dans les bâtiments en béton armé (caves, greniers aménagés), le signal reçu est
affaibli. Dans les cas extrêmes, nous vous conseillons de placer l’appareil près
d’une fenêtre de manière à améliorer la réception du signal radio.
• La nuit, les perturbations s’affaiblissent en règle générale et la réception DCF est
possible dans la plupart des cas. Une seule réception par jour suffit pour garantir la
précision de l’affichage de l’heure et pour maintenir d’éventuels écarts en dessous
d'1 seconde.
7. Utilisation
• Lors de la réception DCF, l'opération des touches n'est pas possible.
• Appuyez sur la touche + ou la touche - pendant quelques secondes dans le mode
de réglage respectif, pour parvenir à l'affichage rapide.
• L'appareil quitte automatiquement le mode de réglage lorsqu’aucune touche n’est
pressée pendant un certain temps.
7.1 Réglages manuels
• Appuyez sur la touche SET pendant quelques secondes pour passer en mode de
réglage.
7.1.1 Correction de fuseau horaire
• Vous avez la possibilité d'utiliser un autre fuseau horaire si votre réveil radio-piloté
peut recevoir le signal DCF mais l'heure de votre fuseau horaire sera différente de
l’heure DCF.
• 0 (par défaut) apparaît sur l’écran.
• Appuyez sur la touche - ou + pour régler la correction de fuseau horaire
(-9/+9, par exemple : +1 = une heure plus tard).
7.1.2 Réglage manuel de l'heure
(si votre horloge radio-pilotée ne peut pas recevoir le signal DCF)
• En appuyant sur la touche SET, vous pouvez alors ajuster l'année, le mois, le jour,
les heures et les minutes. Vous pouvez régler ces valeurs à l'aide des touches +
ou -.
TFA_No. 60.1511_Anleitung_04_23 06.04.2023 13:42 Uhr Seite 14

2928
Réveil radio-piloté
• Validez au moyen de la touche SET.
• L'horloge analogique affiche l'heure ajustée manuellement.
• Lorsque la réception du signal DCF a abouti, l'heure ajustée manuellement sera
remplacée par l’heure radio.
7.2 Réglage du réveil
• Appuyez sur la touche SET.
• L'affichage des heures clignote.
• Réglez l'heure avec la touche - ou +.
• Validez au moyen de la touche SET.
• L’affichage des minutes clignote et vous pouvez régler les minutes avec la
touche - ou +.
• Validez au moyen de la touche SET.
• L'heure de réveil réglée est affichée sur l’écran.
• Poussez l'interrupteur ON/OFF vers le haut (ON) pour activer le réveil.
• Le marqueur de couleur change alors de couleur.
• Le symbole de réveil apparaît sur l'écran.
• L'alarme est activée.
• Lorsque l'heure de réveil fixée est atteinte, le réveil se met à sonner.
• Le symbole de réveil clignote
• L'éclairage de fond clignote également mais s'éteindra après quelques secondes.
• Appuyez sur la touche SET pour éteindre le réveil.
• Si l'alarme n'est pas arrêtée, elle s'arrêtera automatiquement après quelques minu-
tes.
• Le symbole de réveil reste sur l'écran et elle sera de nouveau active pour l'heure de
réveil suivant.
• Lorsque le réveil sonne, appuyez sur la touche SNOOZE/LIGHT pour activer la
fonction de répétition « snooze ».
• Si la fonction de répétition « snooze » est activée, le symbole apparaît sur
l'écran.
• L'alarme s'interrompt pendant 5 minutes.
• Poussez l'interrupteur ON/OFF vers le bas (OFF) pour désactiver le réveil.
Réveil radio-piloté
• Le marqueur de couleur change alors à nouveau de couleur.
• Le symbole de réveil disparaît de l'écran.
7.3 Éclairage de fond
• Appuyez sur la touche SNOOZE/LIGHT.
• L’éclairage de fond est activé pendant 5 secondes.
8. Entretien et maintenance
• Pour le nettoyage de votre appareil, utilisez un chiffon doux et humide. N'utilisez
pas de solvants ou d´agents abrasifs !
• Enlevez les piles, si vous n'utilisez pas votre appareil pendant une durée prolongée.
• Conservez votre appareil dans un endroit sec.
8.1 Remplacement des piles
• Si le symbole de pile apparaît sur l'écran, changez les piles.
• Ouvrez le compartiment à piles et insérez trois nouvelles piles de type 1,5 V AA en
respectant la polarité +/-.
• Refermez le compartiment à piles.
9. Dépannage
Problème Solution
Aucun affichage/aucun mouve- ➜Contrôlez la bonne polarité des piles
ment des aiguilles ➜Changez les piles
Pas de réception DCF ➜Maintenez la touche + appuyée pendant
trois secondes pour démarrer la tentative
de réception
➜Sélectionnez une autre position pour
votre appareil
➜Attendez la réception du signal de nuit
➜Éliminez les sources de parasitage
TFA_No. 60.1511_Anleitung_04_23 06.04.2023 13:42 Uhr Seite 15

3130
Réveil radio-piloté
➜Remettez l'appareil en service, conformé-
ment aux instructions
➜Réglez l'heure manuellement
Affichage incorrect ➜Changez les piles
➜Appuyez sur la touche RESET à l'aide
d'un objet pointu
Si votre appareil ne fonctionne toujours pas malgré ces mesures, adressez-vous au
vendeur chez qui vous avez acheté votre appareil.
10.Traitement des déchets
Ce produit et son emballage ont été fabriqués avec des matériaux de haute qualité qui
peuvent être recyclés et réutilisés. Cela permet de réduire les déchets et de protéger
l’environnement.
Éliminez les emballages de manière respectueuse de l'environnement par le biais des
systèmes de collecte établis.
Mise au rebut de l'appareil électrique
Retirez de l'appareil les piles et les batteries rechargeables qui ne sont pas
installées de façon permanente et jetez-les séparément.
Cet appareil est conforme aux normes de l'UE relatives au traitement des
déchets électriques et électroniques (WEEE).
Réveil radio-piloté
L'appareil usagé ne doit pas être jeté dans les ordures ménagères. L’utilisa-
teur s’engage, pour le respect de l’environnement, à déposer l’appareil
usagé dans un centre de traitement agréé pour les déchets électriques et
électroniques. La collecte est gratuite. Respectez les réglementations en
vigueur !
Élimination des piles
Les piles et les batteries rechargeables ne doivent pas être jetées dans les
détritus ménagers. Elles contiennent des polluants qui peuvent nuire à l'en-
vironnement et à la santé si elles sont éliminées de manière inappropriée.
En tant qu'utilisateur, vous avez l'obligation légale de rapporter les piles et
les batteries rechargeables usagées à votre revendeur ou de les déposer
dans une déchetterie proche de votre domicile conformément à la régle-
mentation nationale et locale. La collecte est gratuite.
Les métaux lourds sont désignés comme suit :
Cd = cadmium, Hg = mercure, Pb = plomb.
11. Caractéristiques techniques
Alimentation Piles 3 x 1,5 V AA (non incluses)
Dimensions du boîtier 91 x 41 x 115 mm
Poids 172 g (appareil seulement)
TFA_No. 60.1511_Anleitung_04_23 06.04.2023 13:42 Uhr Seite 16

3332
Réveil radio-piloté
La reproduction, même partielle, du présent mode d'emploi est strictement interdite sans
l'accord explicite de TFA Dostmann. Les caractéristiques techniques de ce produit ont été
actualisées au moment de l'impression et peuvent être modifiées sans avis préalable.
Les dernières données techniques et les informations concernant votre produit peuvent
être consultées en entrant le numéro de l'article sur notre site Internet.
Déclaration UE de conformité
Le soussigné, TFA Dostmann, déclare que l'équipement radioélectrique du type
60.1511 est conforme à la directive 2014/53/UE. Le texte complet de la déclaration UE
de conformité est disponible à l'adresse Internet suivante :
www.tfa-dostmann.de/service/downloads/ce
www.tfa-dostmann.de
E-Mail : info@tfa-dostmann.de
TFA Dostmann GmbH & Co.KG
Zum Ottersberg 12, 97877 Wertheim, Allemagne 04/23
Sveglia radiocontrollato
Vi ringraziamo per aver scelto l'apparecchio della TFA.
1. Prima di utilizzare l'apparecchio
•Leggete attentamente le istruzioni per l'uso.
• Seguendo le istruzioni per l'uso, eviterete anche di danneggiare il prodotto e
di pregiudicare, a causa di un utilizzo scorretto, i diritti di consumatore che vi
spettano per legge.
• Decliniamo ogni responsabilità per i danni derivanti dal mancato rispetto
delle presenti istruzioni per l'uso.
• Prestate particolare attenzione alle misure di sicurezza!
• Conservate con cura queste istruzioni per l'uso.
2. La consegna include
• Sveglia radiocontrollato
• Istruzioni per l'uso
3. Utilizzi e vantaggi del vostro nuovo apparecchio
• Orologio radiocontrollato della massima precisione
• Indicazione analogica con lancette luminescenti
• Impostazione dell'allarme digitale (impostabile al minuto)
• Allarme con funzione snooze
• Possibilità di impostazione manuale e fuso orario
• Retroilluminazione circolare
4. Per la vostra sicurezza
• Il prodotto è adatto esclusivamente agli utilizzi di cui sopra.
• Non utilizzate il prodotto in maniera diversa da quanto descritto in queste istruzioni.
• Non sono consentite riparazioni, alterazioni o modifiche non autorizzate del disposi-
tivo.
TFA_No. 60.1511_Anleitung_04_23 06.04.2023 13:42 Uhr Seite 17

3534
Sveglia radiocontrollato
Attenzione!
Pericolo di lesioni:
• Tenere il dispositivo e le batterie lontano dalla portata dei bambini.
• Le piccole parti possono essere ingerite dai bambini (sotto i tre anni)
• Le batterie contengono acidi nocivi per la salute. Se ingerite, le batterie possono
essere mortali. Se una batteria venisse ingerita, potrebbe causare gravi ustioni
interne e portare alla morte nel giro di due ore. Se si sospetta che una batteria sia
stata ingerita o inserita nel corpo in altra maniera, consultare immediatamente un
medico.
• Non gettare le batterie nel fuoco, non polarizzarle in maniera scorretta, non smon-
tarle e non cercare di ricaricarle. Pericolo di esplosione!
• Sostituire quanto prima le batterie esauste, in modo da evitare perdite.
• Non utilizzate mai contemporaneamente batterie usate e batterie nuove né batterie
di tipi diversi.
• Evitare il contatto del liquido delle batterie con la pelle, gli occhi e le mucose. In casi
di contatto, sciacquare subito la zona interessata con acqua e consultare un medico.
Avvertenze sulla sicurezza del prodotto!
• Non esporre l'apparecchio a temperature estreme, vibrazioni e urti.
• Proteggere dall’umidità.
5. Componenti
Indicazione:
A1: Orologio analogico
Display:
A2: Ora della sveglia A3: Simbolo della batteria
A4: Simbolo snooze A5: Simbolo della sveglia ON/OFF
Sveglia radiocontrollato
A6: Simbolo dell'ora della sveglia A7: Simbolo dell'ora legale
A8: Simbolo della ricezione del segnale DCF
B:Tasti:
B1: Tasto SNOOZE/LIGHT B2: Tasto SET
B3: Tasto + B4: Tasto -
B5: Commutatore sveglia ON/OFF con marcatura colorata
B6: Tasto RESET
C: Struttura esterna:
C 1: Vano batteria
6. Messa in funzione
• Aprire il vano batteria e inserire tre batterie nuove tipo AA da 1,5 V, rispettando le
corrette polarità. Richiudere il vano batteria.
• L'apparecchio è pronto per l'uso.
• Viene emesso un breve segnale acustico.
• L’ora della sveglia (predefinito 6:00) e il simbolo dell'ora della sveglia viene visualiz-
zato sul display.
• Le lancette si spostano sulle ore 12.00.
• L'orologio inizia a ricevere il segnale radio DCF. Il simbolo della ricezione del segna-
le DCF lampeggia sul display.
• Se il codice dell'ora è stato ricevuto entro 3-12 minuti, viene visualizzato brevemen-
te sul display l’ora digitale e l'orologio analogico visualizza l'ora radiocontrollata. Il
simbolo della ricezione del segnale DCF viene costantemente visualizzato sul
display.
6.1 Ricezione del segnale DCF
• La ricezione del segnale DCF avverrà tutti i giorni alle ore 01.00, 03.00 e 05.00. Se
la ricezione non è avvenuta con successo alle 05:00, la ricezione successiva è di
nuovo alle 01:00 del mattino.
TFA_No. 60.1511_Anleitung_04_23 06.04.2023 13:42 Uhr Seite 18

3736
Sveglia radiocontrollato
• È possibile avviare l'inizializzazione manualmente.
• Tenere premuto per tre secondi il tasto +.
• Il simbolo della ricezione del segnale DCF lampeggia.
• Per disattivare la ricezione tenere premuto nuovamente per tre secondi il tasto +.
• Il simbolo della ricezione del segnale scompare.
• Ci sono tre differenti simboli di ricezione:
lampeggiante - Ricezione attiva
Simbolo acceso - Ricezione molto buona
Nessun simbolo - Ricezione spenta
• Nel caso in cui l’orologio non riesca a ricevere il segnale DCF (a causa di guasti,
della distanza di trasmissione, ecc.), l'ora può essere impostata manualmente. L'oro-
logio funziona come un normale orologio al quarzo (vedi: Impostazioni manuali).
Indicazione per la ricezione dell'ora radiocontrollata
L'ora viene trasmessa da un orologio atomico al cesio gestito dal Physikalisch Techni-
sche Bundesanstalt di Braunschweig. La deviazione è inferiore a 1 secondo in un milio-
ne di anni. L'ora è codificata e trasmessa da Mainflingen vicino Francoforte con un
segnale a frequenza DCF - 77 (77,5 kHz) entro un raggio di 1.500 km. L'orologio radio-
controllato riceve il segnale e lo converte per visualizzare l'ora precisa. Anche il pas-
saggio tra ora solare e ora legale è automatico. Durante il periodo estivo sul display
appare . La qualità della ricezione dipende molto dalla posizione geografica. In cir-
costanze normali e in assenza di problemi di ricezione dovrebbe avvenire entro il rag-
gio di 1.500 km da Francoforte.
Rispettate le norme elencate qui di seguito:
• La distanza raccomandata da qualsiasi fonte di interferenza come monitor di com-
puter o televisori deve essere di almeno 1.5 - 2m.
• All'interno di strutture in cemento armato (seminterrati, sovrastrutture) la ricezione
del segnale è naturalmente più debole. In casi estremi si consiglia di sistemare
l'unità vicino ad una finestra per ottenere una migliore ricezione del segnale.
Sveglia radiocontrollato
• Durante le ore notturne, le interferenze dovute ad agenti atmosferici sono normal-
mente meno influenti e la ricezione DCF è possibile nella maggior parte dei casi.
Una singola ricezione giornaliera è sufficiente a garantire la precisione e a mante-
nere la deviazione al di sotto di un secondo.
7. Utilizzo
• Durante il ricevimento del segnale DCF non è possibile l'utilizzo dei tasti.
• Tenere premuto il tasto + o - per alcuni secondi in ogni modalità impostazione per
procedere velocemente.
• L'apparecchio esce automaticamente dalla modalità impostazione se non si preme
alcun tasto per un periodo prolungato.
7.1 Impostazioni manuali
• Tenere premuto per alcuni secondi il tasto SET per attivare la modalità impostazione.
7.1.1 Correzione del fuso orario
• La correzione del fuso orario è necessaria dove è possibile ricevere il segnale DCF
ma il fuso orario differisce da quello tedesco.
• Sul display appare 0 (predefinito).
• Premere il tasto - o + per impostare la correzione del fuso orario (+9/-9, ad esem-
pio: +1 = un'ora dopo).
7.1.2 Impostazione manuale dell’ora
(nel caso in cui l’orologio non riesca a ricevere il segnale DCF)
• Premendo il tasto SET è adesso possibile modificare uno dopo l'altro le impostazio-
ni per anno, mese, giorno, ore e minuti e installare con il tasto + o -.
• Confermare con il tasto SET.
• L'orologio analogico si adatta all’ora inserita manualmente.
• In caso di corretta ricezione del segnale DCF, l'ora impostata in modalità manuale
viene sostituita.
TFA_No. 60.1511_Anleitung_04_23 06.04.2023 13:42 Uhr Seite 19

3938
Sveglia radiocontrollato
7.2 Regolazione dell'ora dell'allarme
• Premere il tasto SET.
• L’indicazione dell’ora lampeggia.
• Impostare con il tasto - o + le ore.
• Confermare con il tasto SET.
• L'indicazione dei minuti lampeggia; inserire i minuti procedendo nello stesso modo.
• Confermare con il tasto SET.
• Sul display viene visualizzata l'ora dell'allarme.
• Spingere il commutatore ON/OFF verso l’alto (ON) per attivare la funzione sveglia.
• Contemporaneamente cambia il colore della marcatura.
• Sul display appare il simbolo dell'allarme.
• L’ora dell'allarme è attivata.
• Quando l'orario di allarme inserito viene raggiunto, la sveglia comincia a suonare.
• Sul display lampeggia il simbolo dell’allarme.
• La retroilluminazione lampeggia anche e spegne dopo pochi secondi.
• Premere il tasto SET per arrestare l’allarme.
• Se non viene interrotto, il segnale si disattiva automaticamente dopo pochi minuti.
• Il simbolo della sveglia resta fisso sul display e la sveglia resta impostata sullo stes-
so orario.
• Quando suona la sveglia innestare la funzione snooze con il tasto SNOOZE/
LIGHT.
• Quando la funzione snooze è attivata, sul display compare .
• Il suono della sveglia verrà interrotto per 5 minuti.
• Spingere l'interruttore ON/OFF verso il basso (OFF), per disattivare la funzione sve-
glia.
• Contemporaneamente di nuovo cambia il colore della marcatura.
• Il simbolo dell'allarme scompare sul display.
7.3 Retroilluminazione
• Premere il tasto SNOOZE/LIGHT.
• La retroilluminazione si accende per 5 secondi.
Sveglia radiocontrollato
8. Cura e manutenzione
• Per pulire l'apparecchio utilizzare solo un panno morbido leggermente inumidito.
Non usare solventi o prodotti abrasivi.
•
Rimuovere le batterie, se non si utilizza l'apparecchio per un periodo prolungato.
• Collocare il dispositivo in un luogo asciutto.
8.1 Sostituzione delle batterie
• Cambiare le batterie se il simbolo della batteria appare sul display.
• Aprire il vano batteria e inserire tre batterie nuove tipo AA da 1,5 V, rispettando le
corrette polarità.
• Richiudere il vano batteria.
9. Guasti
Problema Risoluzione del problema
Nessuna indicazione / nessun ➜Inserire le batterie rispettando le corrette
movimento delle lancette polarità
➜Sostituire le batterie
Nessuna ricezione DCF ➜Tenere premuto per tre secondi il tasto +
e avviare l'inizializzazione manualmente
➜Cercare nuove posizioni per il dispositivo
➜Attendere il tentativo notturno di ricezione
➜Eliminare fonti d'interferenza
➜Riavviate il dispositivo secondo le istruzioni
➜Regolare l’ora manualmente
Indicazione nessuna corretta ➜Sostituire le batterie
➜Premere con un oggetto appuntito il tasto
RESET
Qualora il vostro apparecchio continui a non funzionare nonostante queste procedure,
rivolgetevi al rivenditore presso il quale lo avete acquistato.
TFA_No. 60.1511_Anleitung_04_23 06.04.2023 13:42 Uhr Seite 20
Other manuals for 60.1511
1
Table of contents
Languages:
Other TFA Clock manuals