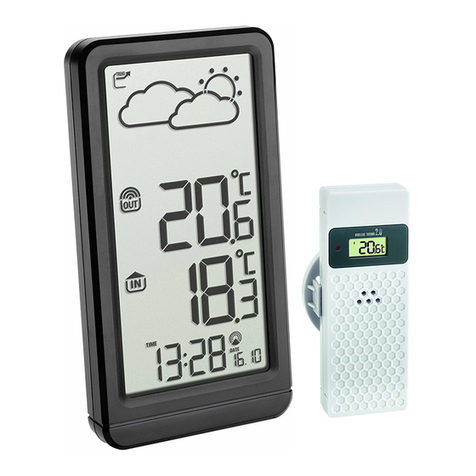
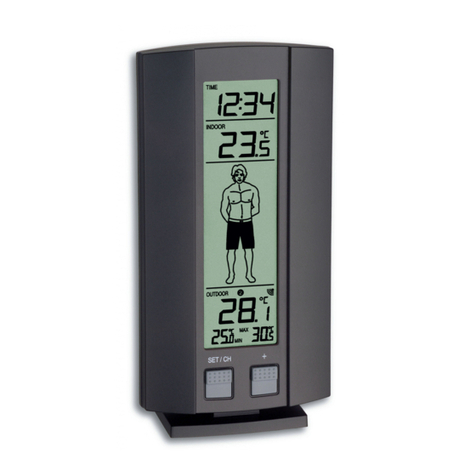
TFA LAGAN User manual

STRATOS
Kat. Nr. 35.1077
Bedienungsanleitung
Instruction manual
Mode d'emploi
Istruzioni per l'uso
Gebruiksaanwijzing
Instrucciones de uso
TFA Dostmann GmbH & Co.KG, Zum Ottersberg 12, D-97877 Wertheim.
Diese Anleitung oder Auszüge daraus dürfen nur mit Zustimmung von TFA Dostmann veröffentlicht wer-
den. Die technischen Daten entsprechen dem Stand bei Drucklegung und können ohne vorherige Benach-
richtigung geändert werden.
EU-KONFORMITÄTSERKLÄRUNG
Wir erklären hiermit, dass diese Funkanlage die wesentlichen Anforderungen der R&TTE Direktive
1999/5/EG erfüllt.
Eine Kopie der unterschriebenen und mit Datum versehenen Konformitätserklärung erhalten Sie auf
No part of this manual may be reproduced without written consent of TFA Dostmann. The technical data
are correct at the time of going to print and may change without prior notice.
DECLARATION OF CONFORMITY
Herewith we declare, that this wireless transmission device does comply with the essentials requirements
of R&TTE Directive 1999/5/EC.
A copy of the signed and dated Declaration of Conformity is available on request via info@tfa-dost-
mann.de.
La reproduction, même partielle du présent mode d'emploi est strictement interdite sans l'accord explicite
de TFA Dostmann. Les spécifications techniques de ce produit ont été actualisées au moment de l'impres-
sion et peuvent être modifiées, sans avis préalable.
EU- DECLARATION DE CONFORMITE
Nous déclaronsque cet appareil émetteur récepteur d'ondes radio répond aux exigences essentielles de la
directive R&TTE 1999/5/CE.
Une copie signée et datée de la déclaration de conformité est disponible sur demande auprès de info@tfa-
dostmann.de.
È vietata la pubblicazione delle presenti istruzioni o di parti di esse senza una precedente autorizzazione
della TFA Dostmann. I dati tecnici corrispondono allo stato del prodotto al momento della stampa e posso-
no cambiare senza preavviso.
DICHIARAZIONE DI CONFORMITÀ ’UE
Con la presente dichiariamo che questo impianto radio adempie alle prescrizioni sostanziali della direttiva
R&TTE 1999/5/CE.
Una copia firmata e datata della Dichiarazione di Conformità è disponibile, su richiesta all'indirizzo
Deze gebruiksaanwijzing of gedeelten eruit mogen alleen met toestemming van TFA Dostmann worden
gepubliceerd. De technische gegevens van dit apparaat zijn actueel bij het ter perse gaan en kunnen zon-
der voorafgaande informatie worden gewijzigd.
EU-CONFORMITEITSVERKLARING
Hiermee verklaren wij, dat deze radiografische installatie voldoet aan de belangrijkste eisen van de R&TTE
richtlijn 1999/5/EG.
Een kopie van de getekende en gedateerde Conformiteitsverklaring is op verzoek beschikbaar via
Estas instrucciones o extractos de las mismas no pueden ser publicados sin la autorización de la TFA Dos-
tmann. Los datos técnicos de este producto corresponden al estado en el momento de la impresión y pue-
den ser modificados sin previo aviso.
UE-DECLARACIÓN DE CONFORMIDAD
Declaramos que esta instalación de radio cumple con los requisitos fundamentales de la directiva R&TTE
1999/5/CE.
Tiene a su disposición una copia firmada y sellada de la Declaración de Conformidad, solicítela al info@tfa-
dostmann.de.
www.tfa-dostmann.de 12/13
TFA_No_35.1077_Anleitung_12/13 18.12.2013 15:21 Uhr Seite 1

Inhaltsverzeichnis
1. Einführung . . . . . . . . . . . . . . . . . . . . . . . . . . . . . . . . . . . . . . . . . . . . . . . . . . . . . . .4
1.1 Funktionen . . . . . . . . . . . . . . . . . . . . . . . . . . . . . . . . . . . . . . . . . . . . . . . . . . .4
2. Bestandteile . . . . . . . . . . . . . . . . . . . . . . . . . . . . . . . . . . . . . . . . . . . . . . . . . . . . . .4
2.1 Basisstation . . . . . . . . . . . . . . . . . . . . . . . . . . . . . . . . . . . . . . . . . . . . . . . . . .5
2.2 Thermo-Hygro-Sensor . . . . . . . . . . . . . . . . . . . . . . . . . . . . . . . . . . . . . . . . . .5
2.3 Windsensor . . . . . . . . . . . . . . . . . . . . . . . . . . . . . . . . . . . . . . . . . . . . . . . . . . .6
2.4 Regensensor . . . . . . . . . . . . . . . . . . . . . . . . . . . . . . . . . . . . . . . . . . . . . . . . . .6
3. Inbetriebnahme . . . . . . . . . . . . . . . . . . . . . . . . . . . . . . . . . . . . . . . . . . . . . . . . . . .6
3.1 Batterie einlegen . . . . . . . . . . . . . . . . . . . . . . . . . . . . . . . . . . . . . . . . . . . . . .6
3.2 Installation . . . . . . . . . . . . . . . . . . . . . . . . . . . . . . . . . . . . . . . . . . . . . . . . . . .8
4. LCD Bildschirm . . . . . . . . . . . . . . . . . . . . . . . . . . . . . . . . . . . . . . . . . . . . . . . . . . .10
4.1 LCD Überblick . . . . . . . . . . . . . . . . . . . . . . . . . . . . . . . . . . . . . . . . . . . . . . . .10
4.2 Wettervorhersage . . . . . . . . . . . . . . . . . . . . . . . . . . . . . . . . . . . . . . . . . . . .11
4.3 Wettertendenzanzeige . . . . . . . . . . . . . . . . . . . . . . . . . . . . . . . . . . . . . . . .11
4.4 Sturmwarnung . . . . . . . . . . . . . . . . . . . . . . . . . . . . . . . . . . . . . . . . . . . . . . .11
5. Programm-Modus . . . . . . . . . . . . . . . . . . . . . . . . . . . . . . . . . . . . . . . . . . . . . . . . .12
5.1 Schnellanzeige-Modus . . . . . . . . . . . . . . . . . . . . . . . . . . . . . . . . . . . . . . . . .12
5.2 Einstellmodus . . . . . . . . . . . . . . . . . . . . . . . . . . . . . . . . . . . . . . . . . . . . . . . .12
5.3 Historiemodus . . . . . . . . . . . . . . . . . . . . . . . . . . . . . . . . . . . . . . . . . . . . . . .13
5.4 Alarmmodus . . . . . . . . . . . . . . . . . . . . . . . . . . . . . . . . . . . . . . . . . . . . . . . . .13
5.5 Min/Max Modus . . . . . . . . . . . . . . . . . . . . . . . . . . . . . . . . . . . . . . . . . . . . . .14
6. Technische Daten . . . . . . . . . . . . . . . . . . . . . . . . . . . . . . . . . . . . . . . . . . . . . . . . .15
7. Batteriewechsel, Hinweise, Entsorgung . . . . . . . . . . . . . . . . . . . . . . . . . . . . . . .16
STRATOS – Funk-Wetterstation
3
TFA_No_35.1077_Anleitung_12/13 18.12.2013 15:21 Uhr Seite 2

1. Einführung
Ihre neue Profi-Funk-Wetterstation besteht aus einer Basisstation mit Innensen-
soren für Raumtemperatur, Luftfeuchtigkeit und Luftdruck und mehreren
Außensensoren zur Messung von Außentemperatur, Luftfeuchtigkeit, Wind-
stärke und Regenmenge.
So erhalten Sie viele Informationen über Klima und Wetter rund um Ihr Haus.
Das macht Spaß und neugierig auf mehr.
Bitte lesen Sie die Gebrauchsanweisung sorgfältig durch und bewahren Sie sie
auf.
1.1 Funktionen
• Kabellose Übertragung der Außentemperatur, Luftfeuchtigkeit, Regenmenge
und Windgeschwindigkeit von den Außensendern zur Basisstation (868 MHz)
• Besonders sichere Datenübertragung durch Verkabelung der einzelnen Sender
untereinander mit hoher Reichweite bis 100 m (Freifeld)
• Innentemperatur und Luftfeuchtigkeit
• Wettervorhersage mit Symbolen und Luftdrucktendenz
• Absoluter und relativer Luftdruck
• Grafische Darstellung des Luftdruckverlaufs der letzten 24 Std.
• Vergangenheitswerte der letzten 24 Std.
• Windchill-Temperatur und Taupunkt
• Programmierbare Alarmzustände, z.B. Temperaturalarm, Sturmwarnung usw.
• Maxima- und Minimawerte unter Angabe von Zeit und Datum der Speicherung
• Funkuhr mit Alarm und Datumsanzeige
• Zeitzone ±12 Std., manuelle Zeiteinstellung möglich
• Hintergrundbeleuchtung (bei Tastenbedienung)
• Zum Aufstellen oder an die Wand hängen
2. Bestandteile
Inhalt
Basisstation:
• Batterien 3 x 1,5 V AA
Sensor:
• Thermo-Hygro-Sensor
• Batterien 2 x 1,5 V AA
• Regenschutzkappe
• Windsensor
• Regensensor
• 2 Verbindungskabel zum Thermo-Hygro-Sensor
• Mast
• Montagematerial
Bedienungsanleitung
STRATOS – Funk-Wetterstation
4
STRATOS – Funk-Wetterstation
5
2.1 Basisstation
Vorderseite
Rückseite
2.2 Thermo-Hygro-Sensor
Der Thermo-Hygro-Sensor misst die Außentemperatur und
Außenluftfeuchtigkeit. Außerdem ist er die wesentliche Daten-
kommunikationseinheit. Wind- und Regensensor sind mit dem
Thermo-Hygrosensor über Kabel verbunden. Die Wetterdaten
werden per Funk zur Basisstation gesendet. Der DCF-Empfän-
ger für die Funkzeit ist im Thermo-Hygro-Sensor integriert.
LCD-Display
Ständer
Tasten
Aufhängeöse
Batteriefach
TFA_No_35.1077_Anleitung_12/13 18.12.2013 15:21 Uhr Seite 3

2.3 Windsensor
Der Windsensor misst die Windgeschwindigkeit und überträgt
die Daten zum Thermo-Hygro-Sensor, der die Außendaten an
die Basisstation sendet. Die Stromversorgung kommt vom Ther-
mo-Hygro-Sensor über eine Kabelverbindung.
2.4 Regensensor
Der Regensensor misst die Regenmenge und überträgt die
Daten zum Thermo-Hygro-Sensor, der die Außendaten an die
Basisstation sendet. Die Stromversorgung kommt vom Thermo-
Hygro-Sensor über eine Kabelverbindung.
3. Inbetriebnahme
• Vor der endgültigen Anbringung am Bestimmungsort nehmen Sie die Wetter-
station bitte zunächst so in Betrieb, dass sich alle Bestandteile in räumlicher
Nähe befinden.
3.1 Batterien einlegen
Thermo-Hygro Sensor
• Entfernen Sie die Schutzhaube vom Thermo-Hygro-Sensor, um die beiden
Anschlüsse für den Wind- und Regensensor freizulegen.
• Stecken Sie die beiden Kabel in die entsprechenden Anschlüsse. Achten Sie dar-
auf, die beiden Stecker nicht zu verwechseln.
• Öffnen Sie das Batteriefach der Basisstation auf der Rückseite und legen Sie 3 x
AA, 1,5V Alkaline Batterien in das Batteriefach und schließen Sie den Batterie-
deckel.
• Öffnen Sie das Batteriefach vom Thermo-Hygro-Sensor unter den beiden An-
schlüssen und legen Sie 2 x AA, 1.5V Alkaline Batterien ein. Schließen Sie den
Batteriedeckel wieder.
STRATOS – Funk-Wetterstation
6
STRATOS – Funk-Wetterstation
7
Empfang der Außenwerte und der Funkzeit
• Wenn die Batterien in die Basisstation eingelegt werden, ertönt ein kurzer Sig-
nalton und alle LCD Segmente werden für 3 sec. angezeigt. Die Station geht nun
in den Lernmodus, um den Sicherheitscode der Sensoren zu erlernen.
• Wenn der Thermo-Hygro-Sensor neu in Betrieb genommen wird (auch nach dem
Batteriewechsel), leuchtet die LED Anzeige für 4 sec. auf. Wenn die LED Anzeige
nicht aufleuchtet, überprüfen Sie die Batterien.
• Der Sensor überträgt für 24 sec. die Wetterdaten, danach wird der Empfang der
Funkzeit (DCF) aktiviert. Während des Empfangs der Funkzeit (ca. 5 min.) wer-
den keine Wetterdaten übertragen. Die LED Anzeige blinkt 5 Mal, bis das DCF
Funksignal empfangen wird.
•Wichtig: Drücken Sie keine Taste während der ersten 10 Minuten, wenn sich die
Station im Lernmodus befindet. Wenn die Außenwerte und die Funkzeit ange-
zeigt werden, können Sie die Außensender im Freien anbringen. Wenn die Funk-
zeit nicht empfangen wird, können Sie die Zeit manuell einstellen. Falls die
Außenwerte nicht angezeigt werden, oder wenn Sie vor dem Empfang der
Außenwerte eine Taste gedrückt haben, wiederholen Sie den Inbetriebnahme-
prozess. Bitte warten Sie 10 sec., bevor Sie die Batterien wieder einlegen.
Hinweis für die Funkzeit DCF
• Die Zeitübertragung erfolgt von einer Cäsium Atom-Funkuhr, die von der Physi-
kalisch Technischen Bundesanstalt in Braunschweig betrieben wird. Die Abwei-
chung beträgt weniger als 1 Sekunde in einer Million Jahren. Die Zeit ist kodiert
und wird von Mainflingen in der Nähe von Frankfurt am Main durch ein DCF-77
(77.5 kHz) Frequenzsignal übertragen mit einer Reichweite von ca. 1.500 km.
Ihre Funkuhr empfängt das Signal, wandelt es um und zeigt immer die exakte
Zeit an. Auch die Umstellung von Sommer- und Winterzeit erfolgt automatisch.
Der Empfang hängt hauptsächlich von der geographischen Lage ab. Im Normal-
fall sollten innerhalb des Radius von 1.500 km ausgehend von Frankfurt bei der
Übertragung keine Probleme auftauchen.
Bitte beachten Sie folgende Hinweise:
• Der DCF-Empfänger für die Funkzeit ist im Thermo-Hygro-Sensor integriert. Es
wird empfohlen, einen Abstand zu eventuellen Störfeldern und Stahlbetonbau-
ten einzuhalten.
• Nachts sind die atmosphärischen Störungen meist geringer und ein Empfang ist
in den meisten Fällen möglich. Ein einziger Empfang pro Tag genügt, um die
Genauigkeit zu gewährleisten und Abweichungen unter 1 Sekunde zu halten.
• Der Außensender versucht täglich, das DCF-Signal zu empfangen. Wenn der
Empfang nicht erfolgreich ist, erscheint das Empfangssymbol nicht mehr im
Display, der Empfang wird aber weiterhin versucht. Bei erfolgreichem Empfang
wird die manuell eingestellte Zeit überschrieben.
3.2 Installation
• Bevor Sie Sender und Basisstation fest installieren, überprüfen Sie bitte, ob die
Datenübertragung dauerhaft von Ihrem gewählten Aufstellort aus möglich ist
(Reichweite Freifeld max. bis zu 100 Meter, bei massiven Wänden, insbesondere
mit Metallteilen kann sich die Sendereichweite erheblich reduzieren). Suchen Sie
sich gegebenenfalls einen neuen Aufstellort für Sender und/oder Empfänger.
Batteriefach
Anschlüsse
Batteriedeckel
LED Anzeige
TFA_No_35.1077_Anleitung_12/13 18.12.2013 15:21 Uhr Seite 4

STRATOS – Funk-Wetterstation
8
STRATOS – Funk-Wetterstation
9
b.) Montage des Regensensors
c.) Montage des Thermo-Hygro-Sensors
d.) Montage der Sender an einem Mast mithilfe der beiden Halter
Wenn Wind- und Regensen-
sor am Mast befestigt sind,
verbinden Sie die Kabel mit
den beiden Anschlüssen auf
dem Thermo-Hygro-Sensor.
Nun ist die Stromversor-
gung gewährleistet und die
Daten können zur Basis-
station übertragen werden.
1) Basisstation
Mit dem ausklappbaren Ständer auf der Rückseite kann die Basisstation aufge-
stellt werden oder mit der Aufhängeöse an der Wand befestigt werden. Vermei-
den Sie die Nähe zu anderen elektrischen Geräten (Fernseher, Computer, Funk-
telefone) und massiven Metallgegenständen.
2) Sender
Bitte stellen Sie den Sendermast fest auf einer ebenen Oberfläche an einem
möglichst freien Platz auf. Vermeiden Sie die Nähe von Bäumen und anderen
Abdeckungen, die die korrekte Regen- oder Windmessung beeinträchtigen
könnten.
a.) Montage des Windsensors
Stecken Sie den Mast zusammen.
Überprüfen Sie zunächst, ob sich das Windrad frei bewegen lässt. Dann befesti-
gen Sie das Windrad mit der Schraube an dem Mast. Der Wind sollte ungehin-
dert von allen Richtungen Zugang haben.
TFA_No_35.1077_Anleitung_12/13 18.12.2013 15:21 Uhr Seite 5

4. LCD Bildschirm
4.1 LCD Überblick
Die folgende Abbildung zeigt sämtliche Displaysegmente. Während der norma-
len Anwendung erscheint diese Darstellung nicht.
4.2 Wettervorhersage
Die Funkwetterstation unterscheidet 4 unterschiedliche Wettersymbole (Sonnig,
teilweise bewölkt, bedeckt, Regen).
Die Wettersymbole zeigen eine Wetterverbesserung oder -verschlechterung aus-
gehend vom aktuellen Wetter an, was aber nicht unbedingt dem auf dem Sym-
bol angegebenen Wetter entsprechen muss.
4.3 Wettertendenzanzeige
Die Wettertendenzpfeile befinden sich zwischen den Wettersymbolen und zei-
gen an, ob der Luftdruck momentan steigt oder fällt. Ein Pfeil nach rechts
bedeutet, dass der Luftdruck ansteigt und besseres Wetter zu erwarten ist; ein
Pfeil nach links bedeutet, dass der Luftdruck sinkt und schlechteres Wetter zu
erwarten ist.
Der Wechsel der Wettersymbole bezieht sich auf den aktuellen relativen Luft-
druck und die Veränderungen der letzten 12 Stunden. Wenn das Wetter sich
ändert, blinken die Tendenzpfeile. Wenn die Wetterbedingungen für 3 Stunden
stabil geworden sind, bleiben die Tendenzpfeile fest auf dem Display stehen.
Beispiele für wechselnde Wettersymbole:
Hinweise zu den Empfindlichkeitswerten der Wettersymbole:
Der Schwellenwert, bei dem eine Wetterveränderung angezeigt wird, kann vom
Anwender selbst auf eine Luftdruckveränderung zwischen 2-4hPa eingestellt
werden (Vorgabe 2hPa). Wird Beispielsweise 4 hPa ausgewählt, muss ein Luft-
druckabfall oder Anstieg von 4 hPa erfolgen, um eine Wetteränderung anzuzei-
gen. Für Gebiete, bei denen es häufig Luftdruckänderungen gibt, sollte ein
höherer Schwellenwert eingestellt werden als für ein Gebiet mit stabiler Luft-
drucksituation.
4.4 Sturmwarnung
Der Schwellenwert für Sturmwarnung kann vom
Anwender selbst auf einen Luftdruckabfall zwischen
4-9hPa eingestellt werden (Vorgabe 4hPa). Wenn der
Luftdruckabfall innerhalb von 3 Stunden den Schwel-
lenwert überschreitet, wird der Sturmwarner aktiviert:
das Regensymbol und die Tendenzpfeile blinken drei
Stunden lang.
STRATOS – Funk-Wetterstation
10
STRATOS – Funk-Wetterstation
11
1. Zeit
2. Weckalarm -Symbol
3. Wochentag/Zeitzone/Historie
4. Datum
5. Innentemperatur
6. Raumluftfeuchtigkeit
7. Hi/Lo Alarm: Grenzwert für Innen
über- oder unterschritten
8. Temperaturanzeige in °C/°F
9. Alarmsymbol für Innenwerte
10. MIN/MAX Information
11. Außentemperatur/Windchill/Tau-
punkt
12. Außenluftfeuchtigkeit
13. Hi/Lo Alarm: Grenzwert für Außen
über- oder unterschritten
14. Temperaturanzeige in °C/°F
15. Alarmsymbol für Außenwerte
16. Wettervorhersage-Symbole
17. Wettertendenzanzeige
18. Luftdruck (relativ oder absolut)
19. Luftdruckdiagramm mit 24 h Historie
20. Hi/Lo Alarm: Grenzwert Luftdruck
über- oder unterschritten
21. Luftdruckanzeige in inHg oder hPa
22. Alarmsymbol für Luftdruck
23. Windgeschwindigkeitsanzeige
in m/s, km/h, Knoten, mph oder
Beaufort
24. Hi Alarm: Grenzwert Windgeschwin-
digkeit überschritten
25. Alarmsymbol für Wind
26. Regenmenge 1h, 24h, Woche, Monat
oder Total
27. Regenmenge-Anzeige in mm/in
28. Hi Alarm: Grenzwert Regenmenge
überschritten + Alarmsymbol für
Regenmenge
29. Funkzeit DCF
30. Empfangsymbol DCF
31. Batteriestandsanzeige (Sender)
32. Batteriestandsanzeige (Basisstation)
sonnig teilweise
bewölkt
bedeckt Regen
3.
1.
30.
29.
2.
7.
13.
16.
19.
18.
23.
24.
25.
12.
6.
32.
4.
9.
10.
8.
5.
27.
28.
26.
22.
21.
20.
15.
14.
11.
17.
31.
TFA_No_35.1077_Anleitung_12/13 18.12.2013 15:21 Uhr Seite 6

5. Programm-Modus
Die Basisstation hat 5 Tasten zur einfachen Bedienung: SET, + , HISTORY, ALARM
und MIN/MAX.
Außerdem verfügt das Gerät über fünf Programm-Modi: Schnellanzeige-Modus,
Einstellmodus, Alarmmodus, Historie-Modus und Min/Max Modus.
Das Gerät verlässt automatisch den Programm-Modus, wenn die HISTORY Taste
betätigt wird oder länger als 10 Sekunden keine Taste gedrückt wird.
5.1 Schnellanzeige-Modus
Im Schnellanzeige-Modus können Sie sich schnell über einzelne Wetterdaten
informieren. Drücken Sie die SET Taste im Normalmodus, um zu der entspre-
chenden Displayanzeige zu gelangen und +oder MIN/MAX, um den gewünsch-
ten Anzeigewert auszuwählen.
1. Außentemperatur / Windchill-Temperatur / Taupunkt
2. Absoluter Luftdruck / relativer Luftdruck
3. Windgeschwindigkeit / Windböengeschwindigkeit
4. Regenmenge 1 h / 24 h / 1 Woche / 1 Monat / Total
Drücken Sie die SET Taste für 2 sec., während die gesamte Regenmenge ange-
zeigt wird, stellt sich der Wert auf 0.0 mm zurück und kumuliert nun die Regen-
mengen bis zur nächsten Rückstellung.
5.2 Einstellmodus
• Drücken Sie die SET Taste im Normalmodus für 3 Sekunden, um in den normalen
Einstellmodus zu gelangen.
• Im Einstellmodus verändern Sie die Werte mit der +oder MIN/MAX Taste. Halten
Sie die Tasten im Einstellmodus gedrückt, gelangen Sie in den Schnelllauf.
• Drücken Sie die SET Taste, um die folgenden Einstellungen auszuwählen:
1. Zeitzone ±12 Std.: Die Zeitzoneneinstellung wird benötigt, wenn das DCF
Signal empfangen werden kann, die Zeitzone sich aber von der DCF-Zeit
unterscheidet (z.B. +1=eine Stunde später).
2. 12/24 Stunden-Zeitformat
3. Manuelle Zeiteinstellung (Stunden/ Minuten)
4. Kalender-Einstellung (Jahr/Monat/Datum, Wochentag wird berechnet)
5. Temperaturanzeige in °C oder °F
6. Luftdruckanzeige in hPa oder inHg
7. Einstellung relativer Luftdruck von 300hPa – 1100hPa (Vorgabe 1013.2hPa).
Der relative Luftdruck ist bezogen auf Meereshöhe und muss auf Ihre Orts-
höhe eingestellt werden. Erfragen Sie den aktuellen Luftdruck Ihrer Umge-
bung (Wert vom Wetteramt, Internet, Optiker, geeichte Wettersäulen an
öffentlichen Gebäuden, Flughafen).
8. Schwellenwert für Luftdruckveränderung (Vorgabe 2hPa, siehe 4.3)
9. Schwellenwert für Sturmwarnung (Vorgabe 4hPa, siehe 4.4)
10. Windgeschwindigkeits- und Windböengeschwindigkeitsanzeige in km/h,
mph, m/s, Knoten oder bft
11. Regenmengenanzeige in mm or inch
Hinweis: Bitte stellen Sie die gewünschten Maßeinheiten zu Beginn Ihrer Messun-
gen ein. Die gespeicherten Werte werden bei einem Wechsel rückwirkend auf die
neue Einheit umgestellt, so dass es durch den internen Rechenalgorithmus Auf-
lösungsverluste geben kann.
STRATOS – Funk-Wetterstation
12
STRATOS – Funk-Wetterstation
13
5.3 Historie-Modus
• Drücken Sie im Normalmodus die HISTORY Taste, um in den Historie-Modus zu
gelangen.
• Im Historie-Modus drücken Sie die +oder MIN/MAX Taste, um die aufgezeichne-
ten Werte der letzten 24 Stunden in 3 Stunden-Schritten abzurufen (3 h, -6 h,
-9 h, -12 h, -15 h, -18 h, -21 h, -24 h)
5.4 Alarm-Modus
• Die Wetterstation kann so eingestellt werden, dass beim Eintritt bestimmter
Wetterbedingungen ein Alarm ausgelöst wird. Zu diesem Zweck können Sie für
viele Parameter einen oberen und unteren Grenzwert eingeben, der nicht über-
bzw. unterschritten werden soll.
• Im Normalmodus drücken Sie die ALARM Taste, um in den Eingabemodus für
den oberen Grenzwert zu gelangen.
• Drücken Sie nun die SET Taste, um die folgenden Parameter anzuwählen. Den
oberen Grenzwert geben Sie mit der +oder MIN/MAX Taste ein. Halten Sie die
Tasten im Einstellmodus gedrückt, gelangen Sie in den Schnelllauf.
• Den jeweiligen Alarm aktivieren und deaktivieren Sie mit der ALARM Taste.
„HI AL“ und ein Alarmsymbol erscheint oder verschwindet neben dem entspre-
chenden Wert im Display.
1. Weckalarm (Stunden/Minuten, gleiche Einstellung für unteren und oberen
Grenzwert)
2. Innenluftfeuchtigkeit
3. Innentemperatur
4. Außenluftfeuchtigkeit
5. Außentemperatur
6. Windchill Temperatur
7. Taupunkt
8. Luftdruck
9. Windgeschwindigkeit
10. Windböengeschwindigkeit
11. Regenmenge 1 h
12. Regenmenge 24 h
• Drücken Sie im Normalmodus zweimal die ALARM Taste, gelangen Sie in den
Eingabemodus für den unteren Grenzwert.
• Drücken Sie nun die SET Taste, um die folgenden Parameter anzuwählen. Die
unteren Grenzwerte geben Sie mit der +oder MIN/MAX Taste ein. Halten Sie die
Tasten im Einstellmodus gedrückt, gelangen Sie in den Schnelllauf. Den jeweili-
gen Alarm aktivieren und deaktivieren Sie mit der ALARM Taste. „LO AL“ und
ein Alarmsymbol erscheint oder verschwindet neben dem entsprechenden Wert
im Display.
1. Weckalarm (Stunden/Minuten, gleiche Einstellung für unteren und oberen
Grenzwert)
2. Innenluftfeuchtigkeit
3. Innentemperatur
4. Außenluftfeuchtigkeit
5. Außentemperatur
6. Windchill Temperatur
7. Taupunkt
8. Luftdruck
TFA_No_35.1077_Anleitung_12/13 18.12.2013 15:21 Uhr Seite 7

Hinweis: Wenn Sie das erste Mal die ALARM Taste drücken, erscheint “---“ auf allen
Displayfeldern. Später erscheinen die eingegebenen Grenzwerte, sofern sie aktiviert sind.
Alarmsignal
Wenn der eingestellte Alarmwert unter- bzw. überschritten wird, ertönt ein
Alarmsignal für 120 sec.. Der entsprechende Wert, “HI AL” oder “LO AL” und das
Alarmsymbol blinken solange, bis die Wetterbedingungen wieder innerhalb des
eingestellten Grenzwertes liegen. Sie können das Alarmsignal mit jeder beliebi-
gen Taste beenden.
Beispiel
Der eingestellte Grenzwert für den Taupunkt wurde überschritten:
5.5 Min/Max Modus
• Drücken Sie im Normalmodus die MIN/MAX Taste, um in den Maximum-Modus
zu kommen.
• Mit der +Taste können Sie sich die Höchstwerte von folgenden Parametern mit
Datum und Uhrzeit der Aufzeichnung anzeigen lassen. Drücken Sie die SET
Taste, während der entsprechende maximale Wert angezeigt wird, wird er auf
den aktuellen Wert zurückgestellt.
1. Innenluftfeuchtigkeit
2. Innentemperatur
3. Außenluftfeuchtigkeit
4. Außentemperatur
5. Windchill Temperatur
6. Taupunkt
7. Luftdruck
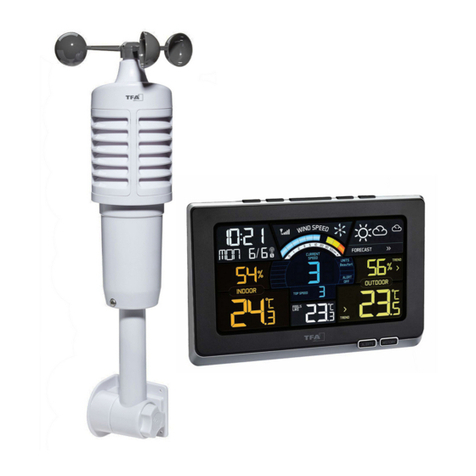
8. Windgeschwindigkeit
9. Windböengeschwindigkeit
10. Regenmenge 1 h
11. Regenmenge 24 h
12. Regenmenge wöchentlich
13. Regenmenge monatlich
• Drücken Sie im Normalmodus zweimal die MIN/MAX Taste, um in den Minimum-
Modus zu kommen.
• Mit der +Taste können Sie sich die Tiefstwerte von folgenden Parametern mit
Datum und Uhrzeit der Aufzeichnung anzeigen lassen. Drücken Sie die SET
Taste, während der entsprechende minimale Wert angezeigt wird, wird er auf
den aktuellen Wert zurückgestellt.
1. Innenluftfeuchtigkeit
2. Innentemperatur
3. Außenluftfeuchtigkeit
4. Außentemperatur
5. Windchill Temperatur
6. Taupunkt
7. Luftdruck
STRATOS – Funk-Wetterstation
14
6. Technische Daten
Übertragungsdistanz Freifeld: 100 Meter max.
Frequenz: 868MHz
Messintervall Thermo-Hygro Sensor: 48 sec
Alarmdauer: 120 sec
Temperatur:
Maßeinheit: °C/°F
Messbereich
Außen: -40°…+65°C
-40°…+149°F
Innen: 0°…+60°C
32°…+140°F
(Anzeige OFL außerhalb des Messbereichs)
Auflösung: 0.1°C
Genauigkeit: ±1°C
Luftfeuchtigkeit
Maßeinheit: %rF
Messbereich: 10%bis 99% rF
Auflösung: 1%
Genauigkeit: ±3% bei 20...80% rF, ansonsten ±5%
Regenmenge
Maßeinheit: mm / inch
Messbereich: 0 - 9999mm
0-393.6 inch
(Anzeige OFL außerhalb des Messbereichs)
Auflösung: 0.3mm (Regenvolumen < 1000mm)
1mm (Regenvolumen > 1000mm)
Windgeschwindigkeit
Maßeinheit: km/h, m/s, mph, Knoten, Beaufort
Messbereich: 0~180km/h / 0-50 m/s, 0-111.8 mph
(Anzeige OFL außerhalb des Messbereichs)
Luftdruck
Maßeinheit: hPa / inHg
Messbereich: 300hPa – 1100hPa
8.85 – 32.5inHg
Auflösung: 0.1hPa
Genauigkeit: ±3hPa
Batterien
Basisstation: 3 x AA 1.5V LR6 Alkaline
Sender: 2 x AA 1.5V LR6 Alkaline
Batterielebensdauer: ca. 12 Monate für Basisstation
ca. 24 Monate für Thermo-Hygro Sensor
STRATOS – Funk-Wetterstation
15
blinkt
blinkt
blinkt
TFA_No_35.1077_Anleitung_12/13 18.12.2013 15:21 Uhr Seite 8

STRATOS – Funk-Wetterstation
16
Index
1. Introduction . . . . . . . . . . . . . . . . . . . . . . . . . . . . . . . . . . . . . . . . . . . . . . . . . . . . .18
1.1 Features . . . . . . . . . . . . . . . . . . . . . . . . . . . . . . . . . . . . . . . . . . . . . . . . . . . .18
2. Inventory of contents . . . . . . . . . . . . . . . . . . . . . . . . . . . . . . . . . . . . . . . . . . . . . .18
2.1 Feature of the base station . . . . . . . . . . . . . . . . . . . . . . . . . . . . . . . . . . . . .19
2.2 Feature of the thermo-hygro sensor . . . . . . . . . . . . . . . . . . . . . . . . . . . . .19
2.3 Feature of wind sensor . . . . . . . . . . . . . . . . . . . . . . . . . . . . . . . . . . . . . . . .20
2.4 Feature of rain sensor . . . . . . . . . . . . . . . . . . . . . . . . . . . . . . . . . . . . . . . . .20
3. Getting started . . . . . . . . . . . . . . . . . . . . . . . . . . . . . . . . . . . . . . . . . . . . . . . . . . .20
3.1 Battery installation . . . . . . . . . . . . . . . . . . . . . . . . . . . . . . . . . . . . . . . . . . . . .20
3.2 Mounting . . . . . . . . . . . . . . . . . . . . . . . . . . . . . . . . . . . . . . . . . . . . . . . . . . .22
4. LCD display . . . . . . . . . . . . . . . . . . . . . . . . . . . . . . . . . . . . . . . . . . . . . . . . . . . . . .24
4.1 LCD overview . . . . . . . . . . . . . . . . . . . . . . . . . . . . . . . . . . . . . . . . . . . . . . . .24
4.2 Weather forecast . . . . . . . . . . . . . . . . . . . . . . . . . . . . . . . . . . . . . . . . . . . . .25
4.3 Weather forecast tendency indicator . . . . . . . . . . . . . . . . . . . . . . . . . . . . .25
4.4 Storm warning indicator . . . . . . . . . . . . . . . . . . . . . . . . . . . . . . . . . . . . . . .25
5. Program modes . . . . . . . . . . . . . . . . . . . . . . . . . . . . . . . . . . . . . . . . . . . . . . . . . . .26
5.1 Quick display mode . . . . . . . . . . . . . . . . . . . . . . . . . . . . . . . . . . . . . . . . . . .26
5.2 Setting mode . . . . . . . . . . . . . . . . . . . . . . . . . . . . . . . . . . . . . . . . . . . . . . . .26
5.3 History mode . . . . . . . . . . . . . . . . . . . . . . . . . . . . . . . . . . . . . . . . . . . . . . . .27
5.4 Alarm mode . . . . . . . . . . . . . . . . . . . . . . . . . . . . . . . . . . . . . . . . . . . . . . . . .27
5.5 Min/Max mode . . . . . . . . . . . . . . . . . . . . . . . . . . . . . . . . . . . . . . . . . . . . . . .28
6. Specification . . . . . . . . . . . . . . . . . . . . . . . . . . . . . . . . . . . . . . . . . . . . . . . . . . . . .29
7. Battery replacement, Notes, Waste disposal . . . . . . . . . . . . . . . . . . . . . . . . . . .30
STRATOS – Wireless weather station
17
7. Batteriewechsel
• Wenn die Batterien der Basisstation ersetzt werden müssen, erscheint die Batte-
rieanzeige (RX) auf dem Display.
• Wenn die Batterien des Außensenders ersetzt werden müssen, erscheint die Bat-
terieanzeige (TX) auf dem Display.
Hinweis: Wenn die Batterien des Thermo-Hygro-Sensors ausgetauscht werden,
wird die Basisstation erst innerhalb von ca. 3 Stunden neue Wetterdaten erhal-
ten. Sie können die Zeit verkürzen, indem Sie die Batterien aus der Basisstation
herausnehmen und wieder einlegen. Dann gehen allerdings die gespeicherten
Daten verloren.
• Batterien nicht ins Feuer werfen, kurzschließen, auseinander nehmen oder auf-
laden. Explosionsgefahr!
• Batterien enthalten gesundheitsschädliche Säuren. Um ein Auslaufen der Batte-
rien zu vermeiden, sollten schwache Batterien möglichst schnell ausgetauscht
werden. Verwenden Sie nie gleichzeitig alte und neue Batterien oder Batterien
unterschiedlichen Typs. Beim Hantieren mit ausgelaufenen Batterien chemika-
lienbeständige Schutzhandschuhe und Schutzbrille tragen!
8. Hinweise
• Bewahren Sie Ihre Funkwetterstation an einem trockenen Platz auf.
• Setzen Sie das Gerät keinen extremen Temperaturen, Vibrationen und Erschütte-
rungen aus.
• Reinigen Sie das Gerät mit einem weichen, leicht feuchten Tuch. Keine Scheuer-
oder Lösungsmittel verwenden!
• Halten Sie das Gerät von anderen elektronischen Geräten und großen Metalltei-
len fern.
• Bitte führen Sie eine Neuinbetriebnahme durch, wenn die Station nicht ein-
wandfrei funktioniert. Tauschen Sie die Batterien aus.
• Bewahren Sie die Geräte und die Batterien außerhalb der Reichweite von Kin-
dern auf.
• Verwenden Sie das Produkt nicht anders, als in dieser Anleitung dargestellt wird.
• Das eigenmächtige Reparieren, Umbauen oder Verändern des Gerätes ist nicht
gestattet.
• Dieses Gerät ist nicht zur öffentlichen Information geeignet und nur für den pri-
vaten Gebrauch bestimmt.
9. Entsorgung
Dieses Produkt wurde unter Verwendung hochwertiger Materialien und Bestand-
teile hergestellt, die recycelt und wiederverwendet werden können.
Batterien und Akkus dürfen keinesfalls in den Hausmüll!
Als Verbraucher sind Sie gesetzlich verpflichtet, gebrauchte Batterien
und Akkus zur umweltgerechten Entsorgung beim Handel oder entspre-
chenden Sammelstellen gemäß nationaler oder lokaler Bestimmungen
abzugeben.
Die Bezeichnungen für enthaltene Schwermetalle sind:
Cd=Cadmium, Hg=Quecksilber, Pb=Blei
Dieses Gerät ist entsprechend der EU-Richtlinie über die Entsorgung von
Elektro- und Elektronik-Altgeräten (WEEE) gekennzeichnet.
Dieses Produkt darf nicht mit dem Hausmüll entsorgt werden. Der Nutzer
ist verpflichtet, das Altgerät zur umweltgerechten Entsorgung bei einer
ausgewiesenen Annahmestelle für die Entsorgung von Elektro- und
Elektronikgeräten abzugeben.
TFA_No_35.1077_Anleitung_12/13 18.12.2013 15:21 Uhr Seite 9

1. Introduction
This new wireless weather station consists on a base station with indoor sensors
for room temperature, humidity and atmospheric pressure and several outdoor
sensors for measuring outdoor temperature, humidity, wind velocity and quantity
of rainfall.
So you get useful information about climate and weather in and around your
house. This is fun and makes you curious to know more.
Please read this instruction manual thoroughly to fully understand the correct
operation of your weather station and benefit from its unique features.
1.1 Features
• Wireless transmission of outdoor temperature, humidity, quantity of rainfall and
wind velocity from the exterior sensors to the weather station (868 MHz)
• Particularly secure data transmission by connecting each transmitter with cable,
long-distance range up to 100 m (free field)
• Indoor temperature and humidity
• Weather forecast with symbols and tendency of atmospheric pressure
• Absolute and relative atmospheric pressure
• Bar graph indication of atmospheric pressure for the last 24 hours
• 24 hours history
• Windchill factor and dewpoint
• Programmable alarm functions for certain weather conditions, like temperature
alarm, storm warning
• Maximum and minimum values with time and date of recording
• Radio controlled clock with alarm and date
• Time zone ±12 hours, manual time setting possible
• Backlight (when using buttons)
• For wall mounting or table standing
2. Inventory of contents
Content
Weather station:
• Batteries 3 x 1,5 V AA
Sensor:
• Thermo-Hygro-Sensor
• Batteries 2 x 1,5 V AA
• Rain protection cover
• Wind sensor
• Rain sensor
• 2 connecting cables to Thermo-Hygro-Sensor
• Mast
• Mounting material
Manual
STRATOS – Wireless weather station
18
2.1 Base station
Front view
Back view
2.2 Thermo-hygro sensor
The thermo-hygro-sensor measures the outdoor temperature
and humidity. In addition it is the main data communication
unit: The wind and rain sensors are connected to the thermo-
hygro-sensor for operating power and to communicate to the
base station. Weather data sent from the thermo-hygro-sensor
is transmitted through wireless link. The radio controlled time
receiver is built inside the sensor.
STRATOS – Wireless weather station
19
LCD
Stand
Buttons
Wall Mount Hole
Battery
Compartment
TFA_No_35.1077_Anleitung_12/13 18.12.2013 15:21 Uhr Seite 10

2.3 Wind sensor
The wind sensor measures wind speed and sends the data to
thermo-hygro-sensor, which transmits the data to the base sta-
tion. Operating power is taken from the thermo-hygro-sensor
by a cable connection.
2.4 Rain sensor
The rain sensor measures the rainfall and sends the data to
thermo-hygro-sensor, which transmits the data to the base sta-
tion. Operating power is taken from the thermo-hygro-sensor
by a cable connection.
3. Getting started
• Before placing and installing all components of the weather station at their final
destination, please set up the weather station with all parts being nearby for
testing the correct function.
3.1 Battery installation
Thermo-hygro-sensor
• Remove the protective cover of the thermo-hygro-sensor to reveal the two
sockets (for the wind sensor and rain sensor)
• Connect the attached cables of wind and rain sensors to the corresponding
sockets at the thermo-hygro-sensor by clicking them into place. Make sure not to
swap the sockets.
• Open the base station’s battery cover located at the back of the unit and insert
3 x AA, 1.5V Alkaline batteries into the battery compartment and close the bat-
tery cover
• Open the battery cover of the thermo-hygro-sensor located below the two sockets
and insert 2 x AA, 1.5V Alkaline batteries and close the cover.
STRATOS – Wireless weather station
20
Transmission of outdoor values and DCF time
• When the base station is powered up, a short beep will sound and all LCD seg-
ments will light up for about 3 seconds before it enters into learning mode to
learn the sensors security code.
• When the thermo-hygro-sensor is powered up (also after a change of batteries),
the LED indicator will light up for 4 seconds. If the LED does not light up, make
sure the batteries are inserted the correct way.
• After the thermo-hygro-sensor is powered up, the sensor will transmit weather
data for 24s, and then the sensor will start the radio controlled time reception.
During the DCF time reception period (maximum 5 minutes), no weather data
will be transmitted. The LED indicator will be flashing 5 times once DCF signal
was synchronized.
Note: DO NOT PRESS ANY BUTTONS during the first 10 minutes learning period
or before radio controlled time is displayed on the receiver. After both outdoor
weather data and radio controlled time are displayed you can place your remote
sensor outdoors at the final destination. In case the clock cannot detect the DCF-
signal (for example due to disturbances, transmitting distance, etc.), the time
can be set manually. If the outdoor weather data is not displayed or if any but-
ton is pressed before the weather station receives the signal, you will need to
follow the battery installation procedure again. Please wait minimum 10 sec-
onds before re-inserting the batteries to make a proper reset for both transmit-
ter and receiver.
Note for Radio Controlled Time DCF
• The time base for the radio controlled time is a Caesium Atomic Clock operated
by the Physikalisch Technische Bundesanstalt Braunschweig which has a time
deviation of less than one second in one million years. The time is coded and
transmitted from Mainflingen near Frankfurt via frequency signal DCF-77 (77.5
kHz) and has a transmitting range of approximately 1,500 km. Your radio-
controlled clock receives this signal and converts it to show the precise time in
summer or wintertime. The quality of the reception depends greatly on the
geographic location. In normal cases, there should be no reception problems
within a 1,500 km radius around Frankfurt.
Please take note of the following:
• The radio-controlled time receiver is built inside the thermo-hygro-sensor. It is
recommended to keep distance to any interfering sources and ferro-concrete
buildings.
• During night-time, the atmospheric disturbances are usually less severe and
reception is possible in most cases. A single daily reception is adequate to keep
the accuracy deviation under 1 second.
• If the reception is not successful, the DCF reception symbol disappears, but the
DCF time reception will be repeated again. The manually set time will be over-
written by the DCF time when the signal is received successfully.
3.2 Mounting
• Before installing the sensors and the base station at their final destination
please check if the data transmission is continuously possible (transmission
range max. 100 m free field, within ferro-concrete rooms the received signal is
naturally weakened). If necessary chose another position for transmitter and /
or base station.
STRATOS – Wireless weather station
21
Battery
Compartment
Sensor Sockets
Battery cover
LED Indicator
TFA_No_35.1077_Anleitung_12/13 18.12.2013 15:21 Uhr Seite 11

1) Base station
With the foldable leg at the back of the unit, the base station can be placed
onto any flat surface or wall mounted at the desired location by the hanging
hole at the back of the unit.
2) Remote sensor
For accurate results, the remote sensor mast should be securely mounted onto a
horizontal surface and in an open area away from trees or other coverings
where rainfall or wind speed may be reduced causing inaccurate reading.
a.) Mounting the wind sensor
Assemble the mast. Firstly, check that the wind-fan can rotate freely before fix-
ing the unit. The wind sensor should now be mounted using the screw onto a
mast provided to allow the wind to travel around the sensor unhindered from
all directions.
STRATOS – Wireless weather station
22
b.) Mounting the rain sensor
c.) Mounting the thermo-hygro-sensor same as rain sensor
d.) Fix the whole set to a pole with the two adjustable hoops.
Once the wind sensor and
rain sensor are fixed onto
the mast, connect the cable
to the corresponding ther-
mo-hygro-sensor socket.
STRATOS – Wireless weather station
23
TFA_No_35.1077_Anleitung_12/13 18.12.2013 15:21 Uhr Seite 12

4. LCD display
4.1 LCD overview
The following illustration shows the full segments of the LCD for description
purposes only and will not appear like this during normal operation and use.
STRATOS – Wireless weather station
24
4.2 Weather forecast
The four weather symbols (sunny, partly cloudy, cloudy and rainy) represent the
weather forecast.
The weather forecast symbols indicate an improvement or worsening of the
future weather conditions based on the current weather, which does not have to
correspond exactly with the weather indicated on the symbol.
4.3 Weather forecast tendency indicator
The weather tendency indicators arrow is located between the weather icons to
show the air pressure tendency and provide a forecast of the weather to be
expected by the decreasing or increasing air pressure. The rightward arrow
means that the air pressure is increasing and the weather is expected to become
better. The leftward arrow means that the air pressure is decreasing and the
weather is expected to become worse.
The change of weather forecast icon is in accord to the relationship between
current relative pressure and the pressure change since last twelve hours. If the
weather is changing, weather tendency indicator (animated arrows) will be
flashing. And after the next three hours if weather conditions have become sta-
ble, the arrows will fix indicating a stable condition happened.
Examples of changing weather icons:
Notes to pressure sensitivity setting for weather forecasting:
The pressure threshold can be set to suit the user’s requirement for weather
forecasting from 2-4hPa (default 2hPa). For areas that experience frequent
changes in air pressure requires a higher setting compared to an area where the
air pressure is stagnant. For example if 4hPa is selected, then there must be a fall
or rise in air pressure of at least 4hPa before the weather station will register
this as a change in weather.
4.4 Storm warning indicator
The storm threshold can be set to suit the user’s
requirement for storm forecasting from 4-9hPa (default
4hPa). When there is a fall over pressure threshold
within 3 hours, the storm forecasting will be activated,
the clouds with rain icon and tendency arrows will flash
for 3 hours indicating the storm warning feature has
been activated.
STRATOS – Wireless weather station
25
1. Time
2. Alarm on indicator
3. Day of week/ time zone / history
4. Date
5. Indoor temperature display
6. Indoor humidity display
7. Indoor temperature and humidity
low alarm and high alarm
8. Temperature display unit
9. General indoor alarm icon
10. MIN/MAX information
11. Wind chill and dew point tempera-
ture display
12. Outdoor temperature and humidity
display
13. Outdoor temperature and humidity
low alarm and high alarm
14. Temperature display unit
15. General outdoor alarm icon
16. Weather forecast icon
17. Weather tendency indicator
18. Pressure unit (relative or absolute)
19. Pressure with 24 hour history graph
20. Pressure low alarm and high alarm
21. Pressure display unit (inHg or hPa)
22. Pressure alarm on indicator
23. Wind speed display unit (m/s, km/h,
knots, chill mph, bft)
24. Wind speed high alarm
25. Wind alarm on indicator
26. Rainfall 1h, 24h, week, month or
total hour display
27. Rainfall display unit (mm/in)
28. Rainfall alarm on indicator
29. Radio controlled time version DCF
30. Radio controlled time icon
31. Low battery indicator (transmitter)
32. Low battery indicator (base station)
Sunny Partly
cloudy
Cloudy Rainy
3.
1.
30.
29.
2.
7.
13.
16.
19.
18.
23.
24.
25.
12.
6.
32.
4.
9.
10.
8.
5.
27.
28.
26.
22.
21.
20.
15.
14.
11.
17.
31.
TFA_No_35.1077_Anleitung_12/13 18.12.2013 15:21 Uhr Seite 13

STRATOS – Wireless weather station
26
5.3 History Mode
• While in Normal Mode, press the HISTORY button to enter the History Mode.
• In the History Mode, press the + button to select the record over the past 24hours
at increments of -3 hours, -6 hours, -9 hours, -12 hours, -15 hours, -18 hours,
-21 hours, -24 hours
5.4 Alarm Mode
• The weather station can be programmed in that way that in certain weather
conditions an alarm is activated. For this purpose an upper (High Alarm) and
lower limit (Low Alarm) can be set for many parameters.
• While in Normal Mode press the ALARM button to enter the High Alarm Mode.
• Press the SET button to select the following alarm modes. Press +button or
MIN/MAX button to set the high alarm value. Press and hold the buttons to
change the number in great step.
• Press the ALARM button to choose the alarm on or off. “HI AL” and an alarm sym-
bol appears or disappears next to the corresponding parameter in the display.
1. Time alarm (hours/minutes, at low alarm setting mode, the same time
alarm setting sequence will repeat)
2. Indoor humidity high alarm
3. Indoor temperature high alarm
4. Outdoor humidity high alarm
5. Outdoor temperature high alarm
6. Wind chill high alarm
7. Dew point high alarm
8. Pressure high alarm
9. Wind speed high alarm
10. Gust speed high alarm
11. 1Hour rain high alarm
12. 24 hour rain high alarm
• While in Normal Mode press twice the ALARM button to enter the Low Alarm
Mode.
• Press the SET button to select the following alarm modes. Press +button or
MIN/MAX button to set the low alarm value. Press and hold the buttons to
change the number in great step.
• Press the ALARM button to choose the alarm on or off. “LO AL” and an alarm sym-
bol appears or disappears next to the corresponding parameter in the display.
1. Time alarm (hours/minutes, at high alarm setting mode, the same time
alarm setting sequence will repeat)
2. Indoor humidity low alarm
3. Indoor temperature low alarm
4. Outdoor humidity low alarm
5. Outdoor temperature low alarm
6. Wind chill low alarm
7. Dew point low alarm
8. Pressure low alarm
Remark: after the initial pressing of ALARM button, “- - -“ will be displayed for all seg-
ments. Later the high and low alarm values appear if they are activated.
STRATOS – Wireless weather station
27
5. Program Modes
The base station has five buttons for easy operation: SET button, +button,
ALARM button, HISTORY buttonand MIN/MAX button. And there are five pro-
gram modes available: Quick Display Mode, Setting Mode, Alarm Mode, History
Mode and Min/Max Mode.
The program mode can be exited at any time by either pressing the HISTORY
button, or waiting for the 10-second time-out to take effect.
5.1 Quick Display Mode
In Quick Display Mode you get a quick information about several weather data.
While in normal mode, press the SET button to enter the Quick Display Mode
and to toggle through the display mode. Press +button or MIN/MAX button to
select the desired information:
1. Outdoor Temperature / Wind chill / Dew point
2. Absolute pressure / Relative pressure
3. Wind speed / Gust speed
4. 1 hour/ 24 hour / week/ month / total rainfall quantity
Press the SET button for two seconds while the rainfall total quantity is dis-
played to reset the rainfall total value to zero and to cumulate the rainfall quan-
tities until the next reset.
5.2 Setting Mode
• Press the SET button for 3 second while in normal mode to enter the normal set-
ting mode.
• In the setting modes, press +button or MIN/MAX button to select the units or
scrolls the value. Holding the +button or MIN/MAX button for 3 second will
increase/decrease digits in great steps.
• Press the SET button to select the following setting in sequence:
1. Time Zone Setting ±12 hrs.: The time zone is used for countries where the
DCF signal can be received but the time zone is different from the German
time (e.g. + 1=one hour later).
2. 12/24 hour format
3. Manual time setting (hours/minutes)
4. Calendar setting (year/month/date, weekday will be calculated thus no
need to set weekday)
5. Temperature display unit degree Celsius or Fahrenheit
6. Air pressure display units in hPa or inHg
7. Relative pressure setting from 300hPa – 1100hPa (default 1013.2hPa). Rela-
tive pressure is referred to sea level’s pressure and has to be adjusted first
to your local altitude. Ask for the present atmospheric pressure of your
home area (Local weather service, www, optician, calibrated instruments in
public buildings, airport).
8. Pressure threshold setting (default 2hPa, see 4.3)
9. Storm threshold setting (default 4hPa, see 4.4)
10. Wind speed and gust display units in km/h, mph, m/s, knots, bft
11. Rainfall display units in mm or inch
Note: Please set the units firstly before change units’ value. During change of units
setting, the previous set value will be changed according to the new units. However
it might cause resolution loss due to its internal calculation algorithm.
TFA_No_35.1077_Anleitung_12/13 18.12.2013 15:21 Uhr Seite 14

Alarm signal
When a set weather alarm condition has been triggered, that particular alarm
will sound for 120 seconds. The corresponding value, “HI AL” or “LO AL” and
the alarm symbol are flashing until the weather condition doesn’t meet the user
set level. Press any button to mute the alarm.
Example
Dew point high alarm was triggered:
5.5 Min/Max Mode
• While in Normal Mode, press the MIN/MAX button to enter the maximum mode.
• In the maximum reading Mode, press the + button to display the following max-
imum values together with the time and date stamp when these values were
recorded. Press SET button while the corresponding maximum value is displayed
to reset to the current reading together with the current time and date.
1. Indoor humidity maximum
2. Indoor temperature maximum
3. Outdoor humidity maximum
4. Outdoor temperature maximum
5. Wind chill temperature maximum
6. Dew point temperature maximum
7. Pressure maximum
8. Wind speed maximum
9. Gust speed maximum
10. 1Hour rain maximum
11. 24 hour rain maximum
12. Week rainfall maximum
13. Month rainfall maximum
• While in Normal Mode, press twice the MIN/MAX button to enter the minimum
mode.
• In the minimum reading Mode, press the +button to display the following maxi-
mum values together with the time and date stamp when these values were
recorded. Press SET button while the corresponding minimum value is displayed
to reset to the current reading together with the current time and date.
1. Indoor humidity minimum
2. Indoor temperature minimum
3. Outdoor humidity minimum
4. Outdoor temperature minimum
5. Wind chill temperature minimum
6. Dew point temperature minimum
7. Pressure minimum
STRATOS – Wireless weather station
28
6. Specifications
Transmission distance in open field: 100 meter max.
Frequency: 868MHz
Measuring interval
thermo-hygro-sensor: 48 sec
Alarm duration: 120 sec
Temperature:
Measuring unit: °C/°F
Measuring range:
outdoor: -40°…+65°C
-40°…+149°F
indoor: 0°…+60°C
32°…+140°F
(show OFL if outside range)
Resolution: 0.1°C
Accuracy: ±1°C
Humidity
Measuring unit: %RH
Measuring range: 10%...99% RH
Resolution: 1%
Accuracy: ±3% for 20...80% RH, otherwise ±5%
Rain volume
Measuring unit: mm/inch
Rain volume display: 0 - 9999mm
0-393.6 inch
(show OFL if outside range)
Resolution: 0.3mm (if rain volume < 1000mm)
1mm (if rain volume > 1000mm)
Wind speed
Measuring unit: km/h, m/s, mph, knots, Beaufort
Wind speed : 0~180km/h / 0-50 m/s, 0-111.8 mph
(show OFL if outside range)
Atmospheric pressure
Measuring unit: hPa / inHg
Measuring range: 300hPa – 1100hPa
8.85 – 32.5inHg
Resolution: 0.1hPa
Accuracy: ±3hPa
Power consumption
Base station: 3 x AA 1.5V LR6 Alkaline batteries
Remote sensor: 2 x AA 1.5V LR6 Alkaline batteries
Battery life: About 12 months for base station
About 24 months for thermo-hygro-sensor
STRATOS – Wireless weather station
29
digit flashing
digit flashing
digit flashing
TFA_No_35.1077_Anleitung_12/13 18.12.2013 15:21 Uhr Seite 15

7. Battery replacement
• When batteries require replacement for the base station, the low battery indica-
tor (RX) will light up on the LCD.
• When batteries require replacement for the transmitter, the low battery indica-
tor (TX) will light up on the LCD.
Note: If a battery change for the transmitter happened, the base station will be
resynchronized to the transmitter again within the next 3 hours. If you want to
shorten the receiving data time, you have to re-install the batteries of the base
station as well. But in this case the previous weather data and alarm value
settings of the base station will be lost.
• Batteries must not be thrown into a fire, short-circuited, taken apart or
recharged. Risk of explosion!
• Batteries contain harmful acids. Low batteries should be changed as soon as pos-
sible to prevent damage caused by leaking. Never use a combination of old and
new batteries together, nor batteries of different types. Wear chemical-resistant
protective gloves and safety glasses when handling leaking batteries.
8. Notes
• Keep your weather station in a dry place.
• Do not place your device near extreme temperatures, vibrations or shocks.
• Clean your device with a soft damp cloth. Do not use solvents or scouring
agents.
• Avoid placing the device near interference sources/metal frames such as com-
puter or TV sets.
• Please reset the device and follow the battery installation procedure if the unit
does not work properly. Change the batteries.
• Keep the devices and the batteries out of the reach of children.
• The products should only be used as described within these instructions.
• Unauthorized repairs, modifications or changes to the product are prohibited.
• This product is not be used for public information, it is only intended for home
use.
9. Waste disposal
This product has been manufactured using high-grade materials and components
which can be recycled and reused.
Never dispose of empty batteries and rechargeable batteries in house-
hold waste.
As a consumer, you are legally required to take them to your retail store
or to an appropriate collection site depending on national or local regu-
lations in order to protect the environment.
The symbols for the heavy metals contained are: Cd=cadmium, Hg=mer-
cury, Pb=lead
This instrument is labelled in accordance with the EU Waste Electrical and
Electronic Equipment Directive (WEEE).
Please do not dispose of this instrument in household waste. The user is
obligated to take end-of-life devices to a designated collection point for
the disposal of electrical and electronic equipment, in order to ensure
environmentally-compatible disposal.
STRATOS – Wireless weather station
30
Sommaire
1. Introduction . . . . . . . . . . . . . . . . . . . . . . . . . . . . . . . . . . . . . . . . . . . . . . . . . . . . .32
1.1 Fonctions . . . . . . . . . . . . . . . . . . . . . . . . . . . . . . . . . . . . . . . . . . . . . . . . . . .32
2. Composants . . . . . . . . . . . . . . . . . . . . . . . . . . . . . . . . . . . . . . . . . . . . . . . . . . . . .33
2.1 Station de base . . . . . . . . . . . . . . . . . . . . . . . . . . . . . . . . . . . . . . . . . . . . . .33
2.2 Sonde thermo-hygrométrique . . . . . . . . . . . . . . . . . . . . . . . . . . . . . . . . . .34
2.3 Sonde anémométrique . . . . . . . . . . . . . . . . . . . . . . . . . . . . . . . . . . . . . . . .34
2.4 Capteur pluviométrique . . . . . . . . . . . . . . . . . . . . . . . . . . . . . . . . . . . . . . .34
3. Mise en service . . . . . . . . . . . . . . . . . . . . . . . . . . . . . . . . . . . . . . . . . . . . . . . . . . .34
3.1 Insertion de la batterie . . . . . . . . . . . . . . . . . . . . . . . . . . . . . . . . . . . . . . . .34
3.2 Installation . . . . . . . . . . . . . . . . . . . . . . . . . . . . . . . . . . . . . . . . . . . . . . . . . .36
4. Écran LCD . . . . . . . . . . . . . . . . . . . . . . . . . . . . . . . . . . . . . . . . . . . . . . . . . . . . . . .38
4.1 Aperçu LCD . . . . . . . . . . . . . . . . . . . . . . . . . . . . . . . . . . . . . . . . . . . . . . . . . .38
4.2 Prévision météorologique . . . . . . . . . . . . . . . . . . . . . . . . . . . . . . . . . . . . . .39
4.3 Affichage de la tendance météorologique . . . . . . . . . . . . . . . . . . . . . . . . .39
4.4 Alerte de tempête . . . . . . . . . . . . . . . . . . . . . . . . . . . . . . . . . . . . . . . . . . . .39
5. Mode programmation . . . . . . . . . . . . . . . . . . . . . . . . . . . . . . . . . . . . . . . . . . . . .40
5.1 Mode affichage rapide . . . . . . . . . . . . . . . . . . . . . . . . . . . . . . . . . . . . . . . .40
5.2 Mode réglage . . . . . . . . . . . . . . . . . . . . . . . . . . . . . . . . . . . . . . . . . . . . . . . .40
5.3 Mode historique . . . . . . . . . . . . . . . . . . . . . . . . . . . . . . . . . . . . . . . . . . . . . .41
5.4 Mode alarme . . . . . . . . . . . . . . . . . . . . . . . . . . . . . . . . . . . . . . . . . . . . . . . .41
5.5 Mode Mini/Maxi . . . . . . . . . . . . . . . . . . . . . . . . . . . . . . . . . . . . . . . . . . . . . .42
6. Caractéristiques techniques . . . . . . . . . . . . . . . . . . . . . . . . . . . . . . . . . . . . . . . . .43
7. Remplacement des batteries, Remarques, Traitement des déchets . . . . . . . . . .44
STRATOS – Station météorologique radio-pilotée
31
TFA_No_35.1077_Anleitung_12/13 18.12.2013 15:21 Uhr Seite 16

1. Introduction
Votre nouvelle station météorologique professionnelle se compose d'une station
de base avec des sondes intérieures pour température, humidité et pression
atmosphérique et de plusieurs sondes extérieures destinées à mesurer la tempé-
rature extérieure, l'humidité de l'air, la vitesse du vent et la pluviométrie.
Vous disposez donc de multiples informations sur les conditions météorolo-
giques autour de votre domicile. Ceci vous donnera envie d'en savoir plus.
Veuillez lire attentivement le mode d'emploi et conservez-le en lieu sûr.
1.1 Fonctions
• Transmission de température extérieure, humidité, quantité de pluie et vitesse
du vent sans câble (868 MHz) des émetteurs à la station de base
• Transmission de données particulièrement sure des émetteurs réciproquement
reliés par câble, avec long rayon d’action de max. 100 m (champ libre)
• Température et humidité intérieure
• Prévisions météo par symboles et tendance de la pression atmosphérique
• Pression atmosphérique relative et absolue
• Indication graphique de la pression atmosphérique des dernières 24 heures
• Histoire des dernières 24 heures
• Température de Windchill et point de rosée
• Alarme programmable, comme alarme de température, de tempête
• Valeurs maximales et minimales indiquant l’heure et date de la mémorisation
• Horloge radio pilotée avec alarme et date
• Fuseau horaire ±12 heures, réglage de l’heure manuel possible
• Eclairage de fond (en appuyant une touche)
• A poser ou à fixer au mur
2. Composants
Contenu
Station de base:
• Batteries 3 x 1,5 V AA
Capteur:
• Capteur Thermo-Hygro
• Batteries 2 x 1,5 V AA
• Chapeau de protection contre la pluie
• Anémomètre
• Pluviomètre
• 2 câbles de connexion au capteur Thermo-Hygro
• Mât
• Matériel pour l’assemblage
Mode d’emploi
STRATOS – Station météorologique radio-pilotée
32
2.1 Station de base
Face avant
Face arrière
2.2 Sonde thermo-hygrométrique
La sonde thermo-hygrométrique mesure la température et
l'humidité extérieures de l'air. Il constitue aussi l'unité princi-
pale de communication des données. La sonde anémométrique
et la sonde pluviométrique sont reliées par câble à la sonde
thermo-hygrométrique. Les données météorologiques sont
retransmises à la station de base par signal radio. Le récepteur
DCF pour l'heure radio-pilotée est intégré dans la sonde
thermo-hygrométrique.
STRATOS – Station météorologique radio-pilotée
33
LCD
Support
Touches
Suspension
murale
Logement de
batterie
TFA_No_35.1077_Anleitung_12/13 18.12.2013 15:21 Uhr Seite 17

2.3 Sonde anémométrique
La sonde anémométrique mesure la vitesse du vent et retrans-
met les données à la sonde thermo-hygrométrique qui envoie
alternativement les données extérieures à la station de base.
L'alimentation électrique est fournie par la sonde thermo-
hygrométrique au moyen d'un câble de liaison.
2.4 Sonde pluviométrique
La sonde pluviométrique mesure la quantité d'eau de pluie et
retransmet les données à la sonde thermo-hygrométrique, qui
envoie alternativement les données extérieures à la station de
base. L'alimentation électrique est fournie par la sonde
thermo-hygrométrique au moyen d'un câble de liaison.
3. Mise en service
• Avant le montage définitif à l'emplacement choisi, veuillez mettre la station
météorologique en service en positionnant tous les composants dans son
voisinage immédiat.
3.1 Insertion de la batterie
Sonde thermo-hygrométrique
• Déposez la capot de protection de la sonde thermo-hygrométrique.
• Enfichez les deux câbles dans les raccordements correspondants. Veillez à ne pas
confondre les deux fiches de raccordement.
• Ouvrez le compartiment des piles situé au dos de la station de base et intro-
duisez 3 piles alcalines AA, 1,5V puis refermez le couvercle.
• Ouvrez le compartiment des piles de la sonde thermo-hygrométrique situé
au-dessous des deux raccordements et introduisez 2 piles alcalines AA, 1,5V.
Refermer le couvercle.
STRATOS – Station météorologique radio-pilotée
34
Réception des mesures extérieures et du signal radio DCF
• Lorsque les piles sont introduites dans la station de base, un signal sonore se fait
entendre et tous les segments DEL s'allument pour 3 s. La station passe alors en
mode apprentissage pour apprendre le code de sécurité des sondes.
• Lorsque la sonde thermo-hygrométrique est mise en service pour la première fois
(de même qu'après un remplacement des piles), la DEL témoin s'allume pour 4 s.
Si la DEL témoin ne s'allume pas, vérifiez les piles.
• La sonde retransmet les données météorologiques pendant 24 s, puis la récep-
tion horaire (DCF) est activée. Durant la réception horaire (env. 5 min), aucune
donnée météorologique n'est retransmise. La DEL témoin clignote 5 fois jusqu'à
ce que le signal radio DCF soit réceptionné.
•Important: lorsque la station se trouve en mode apprentissage, n'appuyez sur
aucune touche pendant les 10 premières minutes. Lorsque les données extérieures
et l'heure radio-pilotée s'affichent, vous pouvez installer les émetteurs exté-
rieurs au dehors. Si la réception de l'heure radio-pilotée ne fonctionne pas, vous
pouvez régler l'heure manuellement. Si les mesures extérieures ne sont pas
affichées ou si vous avez appuyé sur une touche avant la réception des mesures
extérieures, recommencez la procédure de mise en service. Veuillez attendre 10 s
avant de réintroduire les piles.
Remarque pour la réception de l’heure radio
• La transmission de l’heure radio s’effectue selon une horloge atomique au
césium, exploitée par la Physikalisch Technische Bundesanstalt de Braunschweig
(Institut Fédéral Physico-Technique de Braunschweig). L’écart de précision de
cette horloge est de 1 seconde pour un million d’années seulement. L’heure est
distribuée à partir de Mainfingen, près de Francfort sur le Main, par un signal
DCF-77 (77,5 kHz), avec une portée d’environ 1.500 km. Votre horloge radio pilo-
té reçoit ce signal, le convertit et affichera ainsi toujours l’heure exacte. Le pas-
sage de l’heure d’hiver à l’heure d’été et vice-versa s’effectue également en
mode automatique. La réception est essentiellement fonction de votre position
géographique. En règle générale, dans un rayon de 1.500 km autour de Franc-
fort, aucun problème de transmission ne devrait apparaître.
Nous vous prions de respecter les consignes ci-après:
• Le récepteur DCF pour l'heure radio-pilotée est intégré dans la sonde thermo-
hygrométrique. Nous vous recommandons de ménager une distance d’éventuel-
les sources de signaux parasites et des bâtiments en béton armé.
• La nuit, les perturbations s’affaiblissent en règle générale, et la réception est
possible en plupart des cas. Un seul créneau de réception par jour suffit, pour
garantir la précision de l’affichage de l’heure, et pour maintenir d’éventuels
écart en dessous de 1 seconde.
• L’horloge tente de capter le signal DCF journellement. Si la réception du signal
radio de l'heure est impossible, le symbole DCF disparaît, mais la tentative de
réception recommence. L’heure ajustée manuellement sera transcrite en cas
réussit.
3.2 Installation
• Avant l'installation définitive des émetteurs et de la station de base, vérifiez si la
retransmission des données est en permanence assurée à partir de l'emplace-
ment que vous avez choisi (la portée en terrain libre s'élève à 100 mètres;
STRATOS – Station météorologique radio-pilotée
35
Raccordements
des sondes
Couvercle
DEL témoin
Compartiment
des piles
TFA_No_35.1077_Anleitung_12/13 18.12.2013 15:21 Uhr Seite 18

les murs massifs, particulièrement ceux comportant des parties métalliques, peu-
vent sensiblement réduire la portée des émetteurs). Le cas échéant, cherchez un
autre emplacement pour l'émetteur et/ou le récepteur.
1) Station de base
À l'aide du pied escamotable situé au dos, la station de base peut être mise en
place sur un meuble ou encore être accrochée au mur à l'aide de l'œillet de
suspension. Évitez une mise en place à proximité d'autres appareils électriques
(téléviseur, ordinateur, téléphone sans fil) et d'objets métalliques.
2) Émetteur
Installez solidement le mât d'émission sur une surface plane à un emplacement
sans obstacles. Évitez une installation à proximité d'arbres et d'autres endroits
abrités, ceux-ci peuvent influencer la mesure correcte de la pluviométrie ou de la
vitesse du vent.
a.) Montage de la sonde anémométrique
Montez le mât. Vérifiez en premier lieu si la roue éolienne tourne librement.
Fixer ensuite la roue éolienne sur le mât à l'aide de la vis. Le vent doit pouvoir
accéder librement de toutes les directions.
STRATOS – Station météorologique radio-pilotée
36
b.) Montage de la sonde pluviométrique
c.) Montage de la sonde thermo-hygrométrique
d.) Montage de l'émetteur sur un mât à l'aide des deux supports
Une fois que la sonde ané-
mométrique et la sonde plu-
viométrique sont fixées au
mât, connectez les câbles
aux deux raccordements
prévus sur la sonde thermo-
hygrométrique. L'alimenta-
tion électrique est mainte-
nant assurée et les données
peuvent être retransmises à
la station de base.
STRATOS – Station météorologique radio-pilotée
37
TFA_No_35.1077_Anleitung_12/13 18.12.2013 15:21 Uhr Seite 19

4. Écran LCD
4.1 Aperçu de l'écran LCD
L'illustration suivante montre tous les segments de l'afficheur. Cette illustration
n’apparaît pas lors de l'utilisation normale.
STRATOS – Station météorologique radio-pilotée
38
4.2 Prévision météorologique
La station météorologique radioélectrique affiche 4 symboles météorologiques
différents (ensoleillé, peu nuageux, nuageux, pluie).
Les symboles météorologiques signalent une amélioration ou une dégradation
météorologique sur la base de la météo actuelle, laquelle ne correspond pas
obligatoirement à celle signalée par le symbole.
4.3 Affichage de la tendance météorologique
Les flèches de tendance météorologique sont situées entre les symboles météo-
rologiques et indiquent si la pression atmosphérique est momentanément en
hausse ou en baisse. Une flèche vers la droite signifie que la pression atmosphé-
rique augmente et qu'une amélioration météorologique est à prévoir, une flè-
che vers la gauche signifie que la pression atmosphérique diminue et qu'une
dégradation météorologique est à prévoir.
La modification des symboles météorologiques se réfère à la pression atmosphé-
rique relative actuelle et aux changements intervenus au cours des 12 dernières
heures. Lorsque la météo change, les flèches de tendance clignotent. Lorsque les
conditions météorologiques se sont stabilisées pendant 3 heures, les flèches de
tendance restent fixes sur l'afficheur.
Exemples de changement des symboles météorologiques
Remarques à propos des valeurs de sensibilité des symboles météorologiques:
La valeur seuil à laquelle un changement météorologique est affiché peut être
réglée par l'utilisateur sur un changement de la pression atmosphérique entre
2-4hPa (valeur consigne 2hPa) Exemple: si on sélectionne 4hPa, une baisse ou
une hausse de la pression atmosphérique de 4hPa doit intervenir pour qu'un
changement météorologique soit affiché. Pour les zones dans lesquelles les
changements de pression atmosphérique sont fréquents, il convient de para-
métrer une valeur seuil plus grande que pour une zone dans laquelle la pression
atmosphérique est plus stable.
4.4 Alerte de tempête
La valeur seuil pour l'alerte de tempête peut être
réglée par l'utilisateur sur une baisse de pression
atmosphérique entre 4-9hPa (valeur consigne 4hPa) Si
la baisse de pression atmosphérique dépasse la valeur
seuil dans un intervalle de 3 heures, l'alerte de tempête
est activée. Le symbole de pluie et les flèches de ten-
dance clignotent pendant 3 heures.
STRATOS – Station météorologique radio-pilotée
39
1. Heure
2. Symbole alarme réveil
3. Jour/Zone horaire/Historique
4. Date
5. Température intérieure
6. Humidité relative intérieure
7. Alarme Hi/Lo : valeur limite de dépassement
supérieur ou inférieur à l'intérieur
8. Affichage de la température en °C/°F
9. Symbole d'alarme pour les valeurs inté-
rieures
10. Information MIN/MAX
11. Température extérieure/Wind-Chill/Point de
rosée
12. Humidité relative extérieure
13. Alarme Hi/Lo: valeur limite de dépassement
supérieur ou inférieur à l'extérieur
14. Affichage de la température en °C/°F
15. Symbole d'alarme pour les valeurs
extérieures
16. Symbole prévision météorologique
17. Affichage de la tendance météorologique
18. Pression atmosphérique (relative ou absolue)
19. Diagramme pression atmosphérique avec
historique 24 h
20. Alarme Hi/Lo : valeur limite de dépassement
supérieur ou inférieur de la pression atmos-
phérique
21. Affichage de la pression atmosphérique en
inHG ou hPa
22. Symbole d'alarme pour pression atmosphé-
rique
23. Affichage de la vitesse du vent en m/s, km/h,
nœuds, mph ou Beaufort
24. Alarme Hi/Lo : Valeur limite de dépassement
de la vitesse du vent
25. Symbole d'alarme pour vent
26. Pluviométrie 1h, 24h, semaine, mois ou
totale
27. Affichage de la pluviométrie en mm/in
28. Alarme Hi/Lo: valeur limite de dépassement
de la pluviométrie + symbole d'alarme plu-
viométrie
29. Heure radio-pilotée DCF
30. Symbole de réception DCF
31. Affichage état de charge des piles
(sonde thermo-hygrométrique)
32. Affichage état de charge des piles
(station de base)
Ensoleillé Peu
nuageux Nuageux Pluie
3.
1.
30.
29.
2.
7.
13.
16.
19.
18.
23.
24.
25.
12.
6.
32.
4.
9.
10.
8.
5.
27.
28.
26.
22.
21.
20.
15.
14.
11.
17.
31.
TFA_No_35.1077_Anleitung_12/13 18.12.2013 15:21 Uhr Seite 20
Table of contents
Languages:
Other TFA Weather Station manuals
Popular Weather Station manuals by other brands

Oregon Scientific
Oregon Scientific WMR112A user manual

Ambient Weather
Ambient Weather WS-110 user manual

Ambient
Ambient 7-Day user guide

Oregon Scientific
Oregon Scientific BAR638HGA user manual

ZHANGZHOU JIMEI ELECTRONIC CO.
ZHANGZHOU JIMEI ELECTRONIC CO. H997 manual

Ambient Weather
Ambient Weather WS-0900-IP user manual