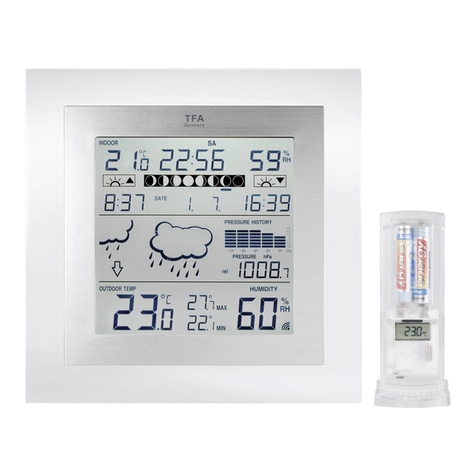
TFA TWIN PLUS User manual

RoHS
Bedienungsanleitung
Operating Instructions
Mode d’emploi
Istruzioni
Instrucciones para el manejo
Gebruiksaanwijzing
Kat. Nr. 30.3049
TFA_No_30.3049_Anleitung_05_17 17.05.2017 10:16 Uhr Seite 1

32
Fig. 1
A 3 B 1A 2
C 2 C 3
A 1
B 2B 3 C 1B 4 B 5
Fig. 2
D 1
D 2
D 5
D 6
D 3
D 4
D 7
TFA_No_30.3049_Anleitung_05_17 17.05.2017 10:16 Uhr Seite 2

54
TWIN – Funk-Wetterstation
Vielen Dank, dass Sie sich für dieses Gerät aus dem Hause TFA
entschieden haben.
1. Bevor Sie mit dem Gerät arbeiten
•Lesen Sie sich bitte die Bedienungsanleitung genau durch. So
werden Sie mit Ihrem neuen Gerät vertraut, lernen alle Funktio-
nen und Bestandteile kennen, erfahren wichtige Details für die
Inbetriebnahme und den Umgang mit dem Gerät und erhalten
Tipps für den Störungsfall.
•Durch die Beachtung der Bedienungsanleitung vermeiden Sie
auch Beschädigungen des Gerätes und die Gefährdung Ihrer
gesetzlichen Mängelrechte durch Fehlgebrauch.
•Für Schäden, die aus Nichtbeachtung dieser Bedienungsan-
leitung verursacht werden, übernehmen wir keine Haftung.
Ebenso haften wir nicht für inkorrekte Messwerte und Folgen,
die sich aus solchen ergeben können.
•Beachten Sie besonders die Sicherheitshinweise!
•Bewahren Sie diese Anleitung gut auf!
2. Lieferumfang
• Funk-Thermo-Hygrometer (Basisstation)
• Sender (Kat.-Nr. 30.3195)
• Bedienungsanleitung
3. Einsatzbereich und alle Vorteile Ihres neuen Gerätes
• Außentemperatur und Luftfeuchtigkeit kabellos (max. 30 m)
• Innentemperatur und Luftfeuchtigkeit
• Komfortzone (Smiley)
• Alarm für Temperatur und Luftfeuchtigkeit
• Frostsymbol
• Max.-Min.-Funktion mit Speicherung der letzten 24 Stunden
4. Zu Ihrer Sicherheit
• Das Produkt ist ausschließlich für den oben beschriebenen Ein-
satzbereich geeignet. Verwenden Sie das Produkt nicht anders,
als in dieser Anleitung dargestellt wird.
• Das eigenmächtige Reparieren, Umbauen oder Verändern des
Gerätes ist nicht gestattet.
Vorsicht!
Verletzungsgefahr:
• Bewahren Sie die Geräte und die Batterien außerhalb der Reich-
weite von Kindern auf.
• Batterien nicht ins Feuer werfen, kurzschließen, auseinander
nehmen oder aufladen. Explosionsgefahr!
• Batterien enthalten gesundheitsschädliche Säuren. Um ein Aus-
laufen der Batterien zu vermeiden, sollten schwache Batterien
möglichst schnell ausgetauscht werden. Verwenden Sie nie
gleichzeitig alte und neue Batterien oder Batterien unterschiedli-
chen Typs. Beim Hantieren mit ausgelaufenen Batterien chemi-
kalienbeständige Schutzhandschuhe und Schutzbrille tragen!
Wichtige Hinweise zur Produktsicherheit!
• Setzen Sie das Gerät keinen extremen Temperaturen, Vibratio-
nen und Erschütterungen aus.
• Vor Feuchtigkeit schützen.
• Der Außensender ist spritzwassergeschützt, aber nicht wasser-
dicht. Suchen Sie einen niederschlagsgeschützten Platz für den
Sender aus.
5. Bestandteile
5.1 Basisstation (Fig. 1):
A: Display für Innen und Außen
A 1: Temperatur und Luftfeuchtigkeit für Innen oder Außen
A 2: Komfortzone (Smiley)
A 3: MAX/MIN Werte
B: Tasten:
Taste vorne:
B 1: SEARCH IN/OUT Taste
Tasten hinten:
B 2: ▲Taste
B 3: RESET Knopf
TFA_No_30.3049_Anleitung_05_17 17.05.2017 10:16 Uhr Seite 3

76
TWIN – Funk-Wetterstation
B 4: ▼/°C/°F Taste
B 5: ALERT Taste
C: Gehäuse:
C 1: Wandaufhängung
C 2: Batteriefach
C 3: Ständer (ausklappbar)
5.2 Außensender (Fig. 2):
D 1: Sendesignallampe
D 2: Display Temperatur und Luftfeuchtigkeit
Tasten im Batteriefach
D 3: RESET Taste
D 4: °C/°F Taste
Gehäuse:
D 5: Wandaufhängung
D 6: Batteriefach
D 7: Ständer (ausklappbar)
6. Inbetriebnahme
Batterien einlegen:
• Legen Sie die Geräte in einem Abstand von ca. 1,5 Metern von-
einander auf einen Tisch. Vermeiden Sie die Nähe zu möglichen
Störquellen (elektronische Geräte und Funkanlagen).
• Öffnen Sie das Batteriefach des Außensenders, indem Sie den
Batteriefachdeckel nach unten schieben (siehe Markierung) und
den Deckel abheben.
• Legen Sie zwei neue Batterien 1,5 V AAA polrichtig ein.
• Schließen Sie das Batteriefach wieder.
• Öffnen Sie das Batteriefach der Basisstation und legen Sie zwei
neue Batterien 1,5 V AAA polrichtig ein.
• Ein kurzer Signalton ertönt und alle Segmente werden kurz
angezeigt.
• Schließen Sie das Batteriefach wieder.
• Die Innentemperatur und die -luftfeuchtigkeit erscheinen auf
dem Display.
Empfang der Außenwerte
• Nach dem Einlegen der Batterien wird die Außentemperatur und
–luftfeuchtigkeit an die Basisstation übertragen.
• Das Funksignal-Symbol blinkt. Die Basisstation versucht 3
Minuten lang, die Außenwerte zu empfangen.
• Zum Umschalten auf das Display der Außentemperatur und
-luftfeuchtigkeit drücken Sie die SEARCH/IN/OUT Taste im Nor-
malmodus
• Wird die Außentemperatur und –luftfeuchtigkeit nicht empfan-
gen, erscheint „- -.-” auf dem Display. Prüfen Sie die Batterien
und starten Sie einen weiteren Versuch. Beseitigen Sie eventuel-
le Störquellen.
• Sie können die Initialisierung auch manuell starten. Halten Sie
die SEARCH/IN/OUT Taste auf der Basisstation im Außenmodus
für drei Sekunden gedrückt.
• Ein kurzer Signalton ertönt, „- -.-” und das Funksignal-Symbol
blinken auf dem Display. Die Basisstation versucht nun, die
Außenwerte zu empfangen.
7. Bedienung
• Das Gerät verlässt automatisch den Einstellmodus, wenn länger
als 15 Sekunden keine Taste gedrückt wird.
• Jeder Tastendruck wird mit einem kurzen Signalton bestätigt.
7.1 Speichern und Löschen der maximalen und minimalen Werte
• Sobald die Basisstation und der Außensender aktiv sind, werden
die maximalen und minimalen Werte für Innen und Außen
gespeichert und nach 24 Stunden automatisch zurückgestellt.
• Zum manuellen Löschen der maximalen und minimalen Außen-
werte halten Sie die SEARCH/IN/OUT Taste für 3 Sekunden
gedrückt. Gleichzeitig aktivieren Sie den Empfang des Außen-
senders.
• Zum manuellen Löschen aller gespeicherten Werte drücken Sie
die RESET Taste mit einem spitzen Gegenstand oder entnehmen
Sie die Batterien.
7.2 Temperaturanzeige
• Drücken Sie die ▼/°C/°F Taste auf der Rückseite der Basissta-
tion im Normalmodus und Sie können zwischen Celsius (°C)
oder Fahrenheit (°F) als Temperaturanzeige auswählen.
TFA_No_30.3049_Anleitung_05_17 17.05.2017 10:16 Uhr Seite 4

98
TWIN – Funk-Wetterstation
7.3 Temperatur und Luftfeuchtigkeit
• Das Display zeigt die aktuelle Temperatur und Luftfeuchtig-
keit für Innen, die Komfortstufe sowie die Höchst- und Tiefst-
werte der letzten 24 Stunden an.
• Drücken Sie die SEARCH/IN/OUT Taste.
• Das Display zeigt die aktuelle Temperatur und Luftfeuch-
tigkeit für Außen, die Komfortstufe sowie die Höchst- und Tiefst-
werte der letzten 24 Stunden an.
• Drücken Sie noch einmal die SEARCH/IN/OUT Taste.
• und das Kreissymbol erscheinen im Display.
• Im Display erscheinen nun abwechselnd die Werte für Außen
und Innen für 6 Sekunden.
• Zur Rückkehr in den Normalmodus drücken Sie noch einmal die
SEARCH/IN/OUT Taste.
7.4 Komfortstufe
• Auf dem Display erscheinen vier verschiedene Gesichter zur
Anzeige der Komfortstufe für Temperatur und Luftfeuchtigkeit.
Kalt… Komfort! Heiß… Sehr heiß!
7.5 Alarm für Temperatur und Luftfeuchtigkeit
7.5.1 Einstellung der Alarme
• Halten Sie im Normalmodus die ALERT Taste auf der Rückseite
der Basisstation gedrückt.
• und blinken im Display.
• Drücken Sie die ▲Taste oder die ▼/°C/°F Taste, um zwischen
dem Innen- oder Außenbereich auszuwählen.
• Drücken Sie die ALERT Taste noch einmal.
• und Voreinstellung oder die zuletzt eingestellte Temperatur-
Obergrenze wird auf dem Display angezeigt.
• Stellen Sie mit der ▲Taste oder der ▼/°C/°F Taste die
gewünschte obere Temperaturgrenze ein.
• Bestätigen Sie mit der ALERT Taste.
• und Voreinstellung oder die zuletzt eingestellte Temperatur-
Untergrenze wird auf dem Display angezeigt.
• Stellen Sie mit der ▲Taste oder der ▼/°C/°F Taste die
gewünschte untere Temperaturgrenze ein.
• Bestätigen Sie mit der ALERT Taste.
• und Voreinstellung oder die zuletzt eingestellte Luftfeuchtig-
keits-Obergrenze wird auf dem Display angezeigt.
• Stellen Sie mit ▲Taste oder der ▼/°C/°F Taste die gewünschte
obere Luftfeuchtigkeitsgrenze ein.
• Bestätigen Sie mit der ALERT Taste.
• und Voreinstellung oder die zuletzt eingestellte Luftfeuchtig-
keits-Untergrenze wird auf dem Display angezeigt.
• Stellen Sie mit ▲Taste oder der ▼/°C/°F Taste die gewünschte
untere Luftfeuchtigkeitsgrenze ein.
• Bestätigen Sie mit der ALERT Taste.
7.5.2 Aktivieren eines Alarms
• Drücken Sie die SEARCH/IN/OUT Taste im Normalmodus, um
zwischen dem Innen- oder Außenbereich auszuwählen.
• Drücken Sie die ALERT Taste.
• erscheint im linken Display. Die Temperaturalarm-Funktion
ist nun aktiviert.
• Drücken Sie die ALERT Taste noch einmal, um nur den Luft-
feuchtigkeitsalarm zu aktivieren. erscheint im rechten Dis-
play.
• Drücken Sie die ALERT Taste noch einmal, um beide Alarme zu
aktivieren. erscheint in beiden Displays.
• Drücken Sie die ALERT Taste noch einmal, schalten Sie die
Alarmfunktionen aus. verschwindet in beiden Displays.
7.6 Alarmfall
• Im Alarmfall blinkt das entsprechende Symbol und ein
Alarmton ertönt. Beenden Sie den Alarmton mit einer beliebigen
Taste. Wird der Alarmton nicht beendet, ist er für
2 Minuten aktiv und schaltet sich dann automatisch ab.
7.7 Frostanzeige
• Liegt die Außentemperatur zwischen -2 °C und + 3°C, erscheint
das Schneeflocken-Symbol auf dem Display.
TFA_No_30.3049_Anleitung_05_17 17.05.2017 10:16 Uhr Seite 5

1110
TWIN – Funk-Wetterstation
7.8 Außensender
7.8.1 Temperaturanzeige
• Drücken Sie die °C/°F Taste im Batteriefach des Außensenders
und Sie können zwischen Celsius (°C) oder Fahrenheit (°F) als
Temperaturanzeige auswählen.
7.9 Aufstellen und Befestigen der Basisstation und des Senders
• Mit dem ausklappbaren Ständer auf der Rückseite kann die
Basisstation aufgestellt werden oder mit der Aufhängeöse an der
Wand im Wohnraum befestigt werden. Vermeiden Sie die Nähe
zu anderen elektrischen Geräten (Fernseher, Computer, Funktele-
fone) und massiven Metallgegenständen.
• Mit dem ausklappbaren Ständer auf der Rückseite kann der
Außensender aufgestellt werden oder mit der Aufhängeöse an
der Wand befestigt werden. Suchen Sie sich einen schattigen,
niederschlagsgeschützten Platz für den Sender aus. (Direkte
Sonneneinstrahlung verfälscht die Messwerte und ständige
Nässe belastet die elektronischen Bauteile unnötig).
• Prüfen Sie, ob eine Übertragung der Messwerte vom Sender am
gewünschten Aufstellort zur Basisstation stattfindet (Reichweite
Freifeld ca. 30 Meter), bei massiven Wänden, insbesondere mit
Metallteilen kann sich die Sendereichweite erheblich reduzieren.
• Suchen Sie sich gegebenenfalls einen neuen Aufstellort für Sen-
der und/oder Empfänger.
8. Pflege und Wartung
• Reinigen Sie das Gerät mit einem weichen, leicht feuchten Tuch.
Keine Scheuer- oder Lösungsmittel verwenden!
• Entfernen Sie die Batterien, wenn Sie das Gerät längere Zeit
nicht verwenden.
• Bewahren Sie Ihr Gerät an einem trockenen Platz auf.
8.1 Batteriewechsel
• Sobald das Batteriesymbol erscheint, wechseln Sie bitte die Bat-
terien im Außensender.
•Achtung: Bei einem Batteriewechsel muss der Kontakt zwischen
Sender und Basisstation wieder hergestellt werden – also Batte-
rien immer in beide Geräte neu einlegen oder manuelle Sender-
suche starten.
9. Fehlerbeseitigung
Problem Lösung
Keine Anzeige ➜ Batterien polrichtig einlegen
➜ Batterien wechseln
Kein Senderempfang ➜Batterien des Außensenders
Anzeige „---“ prüfen (keine Akkus verwenden!)
➜Neuinbetriebnahme von Sender
und Basisstation gemäß Anlei-
tung
➜Manuelle Sendersuche starten:
RESET Knopf in dem Batteriefach
des Außensenders mit einem
spitzen Gegenstand drücken und
die SEARCH/IN/OUT Taste auf
der Basisstation gedrückt halten
➜Anderen Aufstellort für Sender
und/oder Basisstation wählen
➜Abstand zwischen Sender und
Basisstation verringern
➜Beseitigen der Störquellen
Unkorrekte Anzeige ➜Batterien wechseln
➜RESET Knopf mit einem spitzen
Gegenstand auf der Basisstation
drücken
10. Entsorgung
Dieses Produkt wurde unter Verwendung hochwertiger Materialen
und Bestandteile hergestellt, die recycelt und wiederverwendet
werden können.
Batterien und Akkus dürfen keinesfalls in den Haus-
müll!
TFA_No_30.3049_Anleitung_05_17 17.05.2017 10:16 Uhr Seite 6

1312
TWIN – Funk-Wetterstation
Als Verbraucher sind Sie gesetzlich verpflichtet,
gebrauchte Batterien und Akkus zur umweltgerechten
Entsorgung beim Handel oder entsprechenden Sam-
melstellen gemäß nationaler oder lokaler Bestimmun-
gen abzugeben.
Die Bezeichnungen für enthaltene Schwermetalle
sind: Cd=Cadmium, Hg=Quecksilber, Pb=Blei
Dieses Gerät ist entsprechend der EU-Richtlinie über
die Entsorgung von Elektro- und Elektronik-Altgerä-
ten (WEEE) gekennzeichnet.
Dieses Produkt darf nicht mit dem Hausmüll entsorgt
werden. Der Nutzer ist verpflichtet, das Altgerät zur
umweltgerechten Entsorgung bei einer ausgewiese-
nen Annahmestelle für die Entsorgung von Elektro-
und Elektronikgeräten abzugeben.
11. Technische Daten
Basisstation:
Messbereich Innen:
Temperatur: -10 °C… +50 °C (+14 °F…+122 °F)
Luftfeuchtigkeit: 20%...95%
Anzeige LL.L /HH.H Wert außerhalb
des Messbereichs
Spannungsversorgung: 2 x 1,5 V AAA
(Batterien nicht inklusive)
Größe: 137 x 17 (38) x 83 mm
Gewicht: 105 g (nur das Gerät)
Sender:
Messbereich Außen:
Temperatur: -20 °C… +50 °C (-4 °F …+122 °F)
Luftfeuchtigkeit: 20%...99%
Reichweite Freifeld: 30 m
Übertragungsfrequenz: 433 MHz
Maximale Sendeleistung: < 10mW
Übertragungszeit: 30 Sekunden
Spannungsversorgung: 2 x 1,5 V AAA
(Batterien nicht inklusive)
Größe: 62 x 24 (35) x 101 mm
Gewicht: 62 g (nur das Gerät)
Diese Anleitung oder Auszüge daraus dürfen nur mit Zustimmung von TFA
Dostmann veröffentlicht werden. Die technischen Daten entsprechen dem
Stand bei Drucklegung und können ohne vorherige Benachrichtigung geän-
dert werden.
Die neuesten technischen Daten und Informationen zu Ihrem Produkt finden
Sie unter Eingabe der Artikel-Nummer auf unserer Homepage.
EU-KONFORMITÄTSERKLÄRUNG
Hiermit erklärt TFA Dostmann, dass der Funkanlagentyp 30.3049 der Richt-
linie 2014/53/EU entspricht. Der vollständige Text der EU-Konformitätserklä-
rung ist unter der folgenden Internetadresse verfügbar:
www.tfa-dostmann.de
E-Mail: [email protected]
TFA Dostmann GmbH & Co.KG
Zum Ottersberg 12, D-97877 Wertheim, Deutschland 05/17
TFA_No_30.3049_Anleitung_05_17 17.05.2017 10:16 Uhr Seite 7

1514
TWIN PLUS – Wireless Thermo-Hygrometer
Thank you for choosing this instrument from TFA.
1. Before you use this product
•Please make sure you read the instruction manual carefully.
This information will help you to familiarize yourself with your
new device, to learn all of its functions and parts, to find out
important details about its first use and how to operate it and to
get advice in the event of a malfunction.
•Following and respecting the instructions in your manual will
prevent damage to your instrument and loss of your statutory
rights arising from defects due to incorrect use.
•We shall not be liable for any damage occurring as a result of
non following of these instructions.
•Likewise, we take no responsibility for any incorrect readings
or for any consequences resulting from them.
•Please take particular note of the safety advice!
•Please keep this instruction manual safe for future reference.
2. Delivery contents
• Wireless Thermo-Hygrometer (basic unit)
• Transmitter (Cat.-Nr. 30.3195)
• Instruction manual
3. Field of operation and all of the benefits of your new instru-
ment at a glance
• Outdoor temperature and humidity wireless (up to 30 m)
• Indoor temperature and humidity
• Comfort level (smiley)
• Alarm for temperature and humidity
• Frost symbol
• Max.-min.-function with storage of the last 24 hours
4. For your safety
• The product is exclusively intended for the field of application
described above. The product should only be used as described
within this instruction.
• Unauthorised repairs, modifications or changes to the product
are prohibited.
Caution!
Risk of injury:
• Keep these instruments and the batteries out of the reach of
children.
• Batteries must not be thrown into a fire, short-circuited, taken
apart or recharged. Risk of explosion!
• Batteries contain harmful acids. Low batteries should be
changed as soon as possible to prevent damage caused by leak-
ing. Never use a combination of old and new batteries together,
nor batteries of different types. Wear chemical-resistant protec-
tive gloves and safety glasses when handling leaking batteries.
Important information on product safety!
• Do not place the unit near extreme temperatures, vibrations or
shocks.
• Protect from moisture.
• The transmitter is splashproof, but not watertight. Should you
decide to use the transmitter in the outdoor area, choose a
shady and dry place.
5. Elements
5.1 Basic unit (Fig. 1):
A: Display for indoor and outdoor
A 1: Indoor or outdoor temperature and humidity
A 2: Comfort level (smiley)
A 3: MAX/MIN values
B: Buttons:
Button front:
B 1: SEARCH/IN/OUT button
Buttons backside:
B 2: ▲button
B 3: RESET button
B 4: ▼/°C/°F button
B 5: ALERT button
TFA_No_30.3049_Anleitung_05_17 17.05.2017 10:16 Uhr Seite 8

1716
TWIN PLUS – Wireless Thermo-Hygrometer
C: Housing:
C 1: Wall mount hole
C 2: Battery compartment
C 3: Stand (fold out)
5.2 Outdoor transmitter (Fig. 2):
D 1: Transmission signal lamp
D 2: Display of temperature and humidity
Buttons inside the battery compartment
D 3: RESET button
D 4: °C/°F button
Housing:
D 5: Wall mount hole
D 6: Battery compartment
D 7: Stand (fold out)
6. Getting started
Insert batteries:
• Place both instruments on a desk with a distance of approxi-
mately 1.5 meter. Check that no other electronic devices are
close.
• Open the battery compartment of the transmitter by pulling the
battery compartment cover downwards (see marking) and lift up
the cover.
• Insert two new batteries 1,5 V AAA, ensure battery polarities are
correct.
• Close the battery compartment again.
• Open the battery compartment of the basic unit and insert two
new batteries 1,5 V AAA, ensure battery polarities are correct.
• A brief beep tone will sound and all LCD segments will light up
for a short moment.
• Close the battery compartment again.
• The indoor temperature and humidity appear in the display.
Reception of the outdoor values
• After the batteries are inserted the outdoor temperature and
humidity will automatically be transmitted to the basic unit.
• The reception signal-symbol flashes. The basic unit will scan for
3 minutes the outdoor values.
• To toggle to the display of the outdoor temperature and humidi-
ty press the SEARCH/IN/OUT button in normal mode.
• If the reception of outdoor temperature and humidity fails, “- -.-
” appears on the display. Check the batteries and try it again.
Check if there is any source of interference.
• Manual initialization can be helpful. Press and hold SEARCH/
IN/OUT button of the basic unit for 3 seconds in outdoor mode.
• A brief beep tone will sound, “- -.-” and the reception symbol
flash on the display. The basic unit will scan the outdoor values.
7. Operation
• The instrument will automatically quit the setting mode if no
button is pressed within 15 seconds.
• Every press of a button is confirmed with a short beep.
7.1 Store and reset of the maximum and minimum values
• As soon as the basic unit and the outdoor transmitter are active
the maximum and minimum values for indoor and outdoor will
be stored and reset automatically after 24 hours.
• Press and hold SEARCH/IN/OUT button for 3 seconds in the
outdoor mode to clear the maximum and minimum outdoor val-
ues manually. At the same time the reception for the outdoor
transmitter will be activated.
• Press the RESET button with a pointed pin or remove the batter-
ies to clear all recorded values.
7.2 Temperature indication
• Press the ▼/°C/°F button at the backside of the basic unit in
normal mode to change between °C (Celsius) or °F (Fahrenheit)
as temperature unit.
7.3 Temperature and humidity
• The display shows the current indoor temperature and the
humidity, the comfort level and the maximum and minimum val-
ues for the past 24 hours.
• Press the SEARCH/IN/OUT button.
TFA_No_30.3049_Anleitung_05_17 17.05.2017 10:16 Uhr Seite 9

1918
TWIN PLUS – Wireless Thermo-Hygrometer
• The display shows the current outdoor temperature and
the humidity, the comfort level and the maximum and minimum
values for the past 24 hours.
• Press the SEARCH/IN/OUT button again.
• and the circle symbol appear on the display.
• All outdoor and indoor values will appear alternating for 6 sec-
onds.
• Press the SEARCH/IN/OUT button again to return to normal
mode.
7.4 Comfort level
• On the display appear four different faces to indicate the comfort
level for temperature and humidity.
Cold Comfort Hot Very hot
7.5 Alarm for temperature and humidity
7.5.1 Adjust the alarms
• Press and hold the ALERT button at the backside of the basic
unit in normal mode.
• and flash on the display.
• Press ▼/°C/°F or ▲button to toggle between indoor or outdoor
area.
• Press the ALERT button again.
• and the default or the last adjusted upper temperature limit
appear on the display.
• Press the ▼/°C/°F or ▲button to adjust the desired upper tem-
perature limit.
• Confirm with the ALERT button.
• and the default or the last adjusted lower temperature limit
appear on the display.
• Press ▼/°C/°F or ▲button to adjust the desired lower tempera-
ture limit.
• Confirm with the ALERT button.
• and the default or the last adjusted upper humidity limit
appear on the display.
• Press ▼/°C/°F or ▲button to adjust the desired upper humidity
limit.
• Confirm with the ALERT button.
• and the default or the last adjusted lower humidity limit
appear on the display.
• Press ▼/°C/°F or ▲button to adjust the desired lower humidity
limit.
• Confirm with the ALERT button.
7.5.2 Activate the alarms
• Press SEARCH/IN/OUT button in normal mode to toggle
between indoor or outdoor area.
• Confirm with the ALERT button.
• appears on the left display. The temperature alarm function
is actived.
• Press the ALERT button again to activate only the humidity
alarm. appears on the right display.
• Press the ALERT button again to activate both alarms.
appears on both displays.
• Press the ALERT button again to deactivate the alarm functions.
disappears on both displays.
7.6 Case of alarm
• In the case of an alarm the corresponding symbol flashes
and an alarm sound is acitivated. You can stop the alarm by
pressing any button. If the alarm will not turned off, it will auto-
matically turn off after approximately 2 minutes.
7.7 Indication of frost
• If the outside temperature is between -2 ° C and +3 ° C the
snowflake symbol appears on the display.
7.8 Outdoor transmitter
7.8.1 Temperature indication
• Press °C/°F button to change between °C (Celsius) or °F
(Fahrenheit) as temperature unit.
TFA_No_30.3049_Anleitung_05_17 17.05.2017 10:16 Uhr Seite 10

2120
TWIN PLUS – Wireless Thermo-Hygrometer
7.9 Positioning and fixing of the basic unit and the transmitter
• With the foldable leg at the back of the basic unit it can be
placed onto any flat surface or wall mounted at the respective
location by the hanging hole at the back of the unit. Avoid the
vicinity of any interfering field like computer monitors or TV sets
and solid metal objects.
• With the foldable leg at the back of the transmitter it can be
placed onto any flat surface or wall mounted at the respective
location by the hanging hole at the back of the unit. Choose a
shady and dry position for the transmitter. (Direct sunshine fal-
sifies the measurement and continuous humidity strains the
electronic components needlessly).
• Check the transmission of 433 MHz signal from the transmitter
to the basic unit (transmission range 30 m free field). Within
ferro-concrete rooms (basements, superstructures), the
received signal is naturally weakened.
• If necessary choose another position for transmitter and/or
basic unit.
8. Care and maintenance
• Clean the instruments with a soft damp cloth. Do not use sol-
vents or scouring agents.
• Remove the batteries if you do not use the product for a long
period of time.
• Store the devices in a dry place.
8.1 Battery replacement
• When the battery symbol appears, replace the batteries in the
transmitter.
•
Please note: When the batteries are changed, the contact between
transmitter and receiver must be restored – so always insert new
batteries into both units or start a manual transmitter search.
9. Troubleshooting
Problems Solution
No indication ➜ Ensure batteries’ polarities
are correct
➜ Change the batteries
No transmitter reception ➜Check batteries of external trans-
Display “---“ mitter (do not use rechargeable
batteries!)
➜Restart the transmitter and the
basic unit as per the manual
➜Start manual search for the trans-
mitter: Press RESET button in the
battery compartment of the
transmitter by using a pointed
object and press and hold the
SEARCH/IN/OUT button on the
basic unit
➜Choose another place for the
transmitter and/or the basic unit
➜Reduce the distance between the
transmitter and the basic unit
➜Check if there is any source of
interference.
Incorrect indication ➜Change the batteries
➜Press the RESET button by using a
pointed object on the basic unit
10. Waste disposal
This product has been manufactured using high-grade materials
and components which can be recycled and reused.
Never dispose empty batteries and rechargeable bat-
teries in household waste.
As a consumer, you are legally required to take them
to your retail store or to appropriate collection sites
depending on national or local regulations in order to
protect the environment.
The symbols for the heavy metals contained are:
Cd=cadmium, Hg=mercury, Pb=lead
TFA_No_30.3049_Anleitung_05_17 17.05.2017 10:16 Uhr Seite 11

2322
TWIN PLUS – Wireless Thermo-Hygrometer
This product is labelled in accordance with the EU
Waste Electrical and Electronic Equipment Directive
(WEEE).
Please do not dispose of this product in ordinary
household waste. As a consumer, you are required to
take end-of-life devices to a designated collection
point for the disposal of electrical and electronic
equipment, in order to ensure environmentally-com-
patible disposal.
11. Specifications
Basic station:
Measuring range indoor
Temperature: -10 °C… +50 °C (+14 °F…+122 °F)
Humidity: 20%...95%
Indication LL.L /HH.H Value is outside
measuring range
Power consumption: 2 x 1,5 V AAA
(batteries not included)
Dimensions: 137 x 17 (38) x 83 mm
Weight: 105 g (only instrument)
Outdoor transmitter:
Measuring range outdoor
Temperature: -20 °C… +50 °C (-4 °F …+122 °F)
Humidity: 20%...99%
Range: max. 30 m (free field)
Transmission frequency: 433 MHz
Maximum
radio-frequency power: < 10mW
Transmission time: 30 seconds
Power consumption: 2 x 1,5 V AAA
(batteries not included)
Dimensions: 62 x 24 (35) x 101 mm
Weight: 62 g (instrument only)
No part of this manual may be reproduced without written consent of TFA
Dostmann. The technical data are correct at the time of going to print and
may change without prior notice.
The latest technical data and information about your product can be found
by entering your product number on our homepage.
EU declaration of conformity
Hereby, TFA Dostmann declares that the radio equipment type 30.3049 is in
compliance with Directive 2014/53/EU.
The full text of the EU declaration of conformity is available at the following
internet address:
www.tfa-dostmann.de
E-Mail: [email protected]
TFA Dostmann GmbH & Co.KG
Zum Ottersberg 12, D-97877 Wertheim, Germany 05/17
TFA_No_30.3049_Anleitung_05_17 17.05.2017 10:16 Uhr Seite 12

2524
TWIN PLUS – Thermo-hygromètre radio piloté
Nous vous remercions d'avoir choisi l'appareil de la société TFA.
1. Avant d'utiliser votre appareil
•Veuillez lire attentivement le mode d'emploi.
Vous vous familiariserez ainsi avec votre nouvel appareil, vous
découvrirez toutes les fonctions et tous les éléments qui le com-
posent, vous noterez les détails importants relatifs à sa mise en
service et vous lirez quelques conseils en cas de dysfonctionne-
ment.
•En respectant ce mode d'emploi, vous éviterez d'endommager
votre appareil et de perdre vos droits légaux en cas de défaut
si celui-ci résulte d’une utilisation non-conforme.
•Nous n'assumons aucune responsabilité pour des dommages
qui auraient été causés par le non-respect du présent mode
d'emploi.
•De même, nous n’assumons aucune responsabilité pour des
relevés incorrects et les conséquences qu’ils pourraient
engendrer.
•Suivez bien toutes les consignes de sécurité!
•Conservez soigneusement le mode d'emploi!
2. Contenu de la livraison
• Thermo-hygromètre radio piloté (station de base)
• Émetteur (Kat. No. 30.3195)
• Mode d'emploi
3. Aperçu du domaine d'utilisation et de tous les avantages de
votre nouvel appareil
• Température et humidité extérieure sans câble (env. 30 m)
• Température et humidité intérieure
• Confort du climat (smiley)
• Alarme de température et d’humidité
• Symbole de gel
• Fonction max.-min. avec mémorisation des dernières 24 heures
4. Pour votre sécurité
• L'appareil est destiné uniquement à l'utilisation décrite ci-des-
sus. Ne l'utilisez jamais à d'autres fins que celles décrites dans
le présent mode d'emploi.
• Vous ne devez en aucun cas démonter ou modifier l'appareil par
vous-même.
Attention!
Danger de blessure:
• Gardez vos appareils et les piles hors de la portée des enfants.
• Ne jetez jamais les piles dans le feu, ne les court-circuitez pas,
ne les démontez pas et ne les rechargez pas. Risques d'explo-
sion!
• Les piles contiennent des acides nocifs pour la santé. Une pile
faible doit être remplacée le plus rapidement possible, afin
d'éviter une fuite.
• N'utilisez jamais simultanément de piles anciennes avec des
piles neuves ou des piles de types différents. Pour manipuler
des piles qui ont coulé, utilisez des gants de protection chimique
spécialement adaptés et portez des lunettes de protection !
Conseils importants de sécurité du produit!
• Évitez d’exposer l’appareil à des températures extrêmes, à des
vibrations ou à des chocs.
• Protégez-le contre l'humidité.
• L'émetteur résiste aux éclaboussures d'eau mais il n'est pas
étanche. Si vous installez l'émetteur à l’extérieur, choisissez un
emplacement à l’ombre et protégé de la pluie.
5. Composants
5.1 Station de base (Fig. 1):
A: Affichage pour l’intérieur et l’extérieur
A 1: Température et humidité intérieur ou extérieur
A 2: Niveau de confort du climat (smiley)
A 3: Valeurs MAX/MIN
B: Touches:
Touche avant:
B 1: Touche SEARCH/IN/OUT
TFA_No_30.3049_Anleitung_05_17 17.05.2017 10:16 Uhr Seite 13

2726
TWIN PLUS – Thermo-hygromètre radio piloté
Touches arrière:
B 2: Touche ▲Taste
B 3: Bouton RESET
B 4: Touche ▼/°C/°F
B 5: Touche ALERT
C: Boîtier:
C 1: Suspension murale
C 2: Compartiment à pile
C 3: Support (dépliable)
5.2 Émetteur extérieur (Fig. 2):
D 1: Lampe signal de transmission
D 2: Écran température et humidité
Touches dans le compartiment à piles
D 3: Touche RESET
D 4: Touche °C/°F
Boîtier:
D 5: Suspension murale
D 6: Compartiment à pile
D 7: Support (dépliable)
6. Mise en service
Insertion des piles:
• Déposez l'appareil et l'émetteur sur une table à une distance
d'environ 1,5 mètre l'un de l'autre. Évitez la proximité de sour-
ces de parasitage (appareils électroniques ou appareils radio).
• Ouvrez le compartiment à piles de l'émetteur, en tirant le cou-
vercle du compartiment de la pile (voir marquage). Soulevez le
couvercle.
• Insérez deux piles neuves 1,5 V AAA, contrôlez la bonne polarité
des piles.
• Refermez le compartiment à piles.
• Ouvrez le compartiment à piles de la station de base et insérez
deux nouvelle piles 1,5 V AAA, contrôlez la bonne polarité des
piles.
• Un signal sonore se fait entendre et tous les segments LCD s'al-
lument.
• Refermez le compartiment à piles.
• La température et l’humidité intérieure apparaissent sur l'af-
fichage.
Réception des valeurs extérieures
• Après l'insertion des piles, la température et l'humidité extérieu-
re seront transférées de l'émetteur à la station de base.
• Le symbole de réception commence à clignoter. La station de
base cherche les valeurs extérieures pendant 3 minutes.
• Pour changer l'affichage en la température et l'humidité exté-
rieure, appuyez sur la touche SEARCH/IN/OUT en mode normal.
• Si la température et l’humidité extérieure ne sont pas reçues,
«- -.- » apparaît sur l'écran. Contrôlez les piles et effectuez une
nouvelle tentative. Éliminez les éventuelles sources de parasitage.
• Vous pouvez activer manuellement la réception de l’heure radio.
Maintenez la touche SEARCH/IN/OUT de la station de base
appuyée pendant 3 secondes.
• Un signal sonore se fait entendre, «- -.- » et le symbole de
réception commence à clignoter sur l'écran. La station de base
cherche les valeurs extérieures.
7. Utilisation
• L'appareil quitte automatiquement le mode de paramétrage si
aucune entrée n'a été effectuée pendant 15 secondes.
• Chaque pression sur la touche est confirmée par un signal sonore.
7.1 Mémoriser et effacer les valeurs maximales et minimales
• Une fois que la station de base et l'émetteur sont actifs, les
valeurs maximales et minimales intérieures et extérieures sont
mises en mémoire et après 24 heures sont automatiquement
remises à zéro.
• Pour effacer les valeurs maximales et minimales extérieures
mises en mémoire, il faut maintenir la touche SEARCH/IN/OUT
pendant 3 secondes dans le mode extérieur. Simultanément,
activez la réception de l'émetteur.
• Pour effacer toutes les valeurs, appuyez sur la touche RESET à
l'aide d’un objet pointu ou retirez les piles.
TFA_No_30.3049_Anleitung_05_17 17.05.2017 10:16 Uhr Seite 14

2928
TWIN PLUS – Thermo-hygromètre radio piloté
7.2 Affichage de la température
• Appuyez sur la touche ▼/°C/°F au verso de la station de base en
mode normal, vous pouvez alors sélectionner la température en
Celsius (°C) ou Fahrenheit (°F).
7.3 Température et humidité
• L'écran affiche la température actuelle et l’humidité ambian-
te, le niveau du confort et les valeurs maximales et minimales
des 24 dernières heures.
• Appuyez sur la touche SEARCH/IN/OUT.
• L'écran affiche la température actuelle et l’humidité exté-
rieure, le niveau du confort et les valeurs maximales et minima-
les des 24 dernières heures.
• Appuyez de nouveau sur la touche SEARCH/IN/OUT.
• et le symbole circulaire apparaissent sur l'écran.
• L'écran affiche maintenant tour à tour les valeurs pour l’exté-
rieur et l’intérieur pendant 6 secondes.
• Appuyez de nouveau sur la touche SEARCH/IN/OUT pour le
retour au mode normal.
7.4 Niveau de confort
• Sur l’écran apparaissent quatre visages différents pour
indiquer le niveau de confort de la température et de l'humidité.
Froid Confort! Chaud Très chaud!
7.5 Alarme pour la température et l’humidité
7.5.1 Réglage des alarmes
• Maintenez appuyée la touche ALERT au verso de la station de
base en mode normal.
• et commencent à clignoter.
• Appuyez sur la touche ▼/°C/°F ou ▲pour choisir entre les
valeurs extérieures ou ambiantes.
• Appuyez de nouveau sur la touche ALERT
• et la valeur par défaut ou la limite supérieure de température
reglée apparaissent sur l’affichage.
• Réglez la limite supérieure de température désirée avec la tou-
che ▼/°C/°F ou ▲.
• Validez via la touche ALERT.
• et la valeur par défaut ou la limite inférieure de température
reglée apparaissent sur l’affichage.
• Réglez la limite inférieure de température désirée avec la touche
▼/°C/°F ou ▲.
• Validez via la touche ALERT.
• et la valeur par défaut ou la limite supérieure de l’humidité
reglée apparaissent sur l’affichage
• Réglez la limite supérieure de l'humidité désirée avec la touche
▼/°C/°F ou ▲.
• Validez via la touche ALERT.
• et la valeur par défaut ou la limite inférieure de l’humidité
reglée apparaissent sur l’affichage.
• Réglez la limite inférieure de l'humidité désirée avec la touche
▼/°C/°F ou ▲.
• Validez via la touche ALERT.
7.5.2 Activer des alarmes
• Appuyez sur la touche SEARCH /IN /OUT en mode normal, pour
choisir entre les valeurs extérieures ou ambiantes.
• Appuyez sur la touche ALERT.
• apparaît dans l'écran de gauche. L'alarme de la température
est activée.
• Appuyez de nouveau sur la touche ALERT, pour activer seule-
ment l'alarme d'humidité. apparaît dans l'écran de droite.
• Appuyez de nouveau sur la touche ALERT, pour activer toutes
les alarmes. apparaît dans les deux écrans.
• Appuyez de nouveau sur la touche ALERT, éteignez les fonctions
de l'alarme. disparaît dans les deux écrans.
7.6 Alarme
• Dans le cas d'une alarme la valeur appropriée clignote. et
un signal sonore se fait entendre. Pour arrêter l’alarme, appuyez
sur n’importe quelle touche. Si le ton sonore ne s’arrête pas,
l’alarme restera active pendant 2 minutes et s’arrêtera automati-
quement.
TFA_No_30.3049_Anleitung_05_17 17.05.2017 10:16 Uhr Seite 15

3130
TWIN PLUS – Thermo-hygromètre radio piloté
7.7 Indicateur de gel
• Si la température extérieure se trouve entre -2 °C et +3 °C, le
symbole flocon de neige apparaît sur l'écran.
7.8 Émetteur extérieur
7.8.1 Affichage de la température
• Appuyez sur la touche °C/°F dans le compartiment à piles de
l'émetteur, il vous est alors possible de sélectionner la tempéra-
ture en Celsius (°C) ou Fahrenheit (°F).
7.9 Mise en place et fixation de la station de base et de
l’émetteur
• À l'aide du pied au dos de votre appareil, la station de base peut
être mise en place sur un meuble ou encore être accrochée au
mur à l'aide de l'œillet de suspension. Évitez une mise en place à
proximité d'autres appareils électriques (téléviseur, ordinateur,
téléphone sans fil) ou d'objets métalliques.
• À l'aide du pied au dos de l'émetteur, celui-ci peut être mis en
place sur un meuble ou encore être accrochée au mur à l'aide de
l'œillet de suspension. Choisissez un emplacement à l'ombre et
protégé de la pluie pour votre émetteur. L’exposition directe au
soleil falsifie la mesure de l'humidité et une humidité continue
endommage les composants électroniques inutilement.
• Vérifiez que les valeurs de mesure entre l'émetteur et la station
de base principale (portée avec champ libre d’environ 30
mètres) sont bien transmises de l’endroit choisi. En cas de murs
massifs, en particulier comportant des parties métalliques, la
portée d'émission peut se trouver réduite considérablement.
• Si nécessaire, cherchez de nouveaux emplacements pour
l'émetteur et/ou le récepteur.
8. Entretien et maintenance
• Pour le nettoyage de votre appareil, utilisez un chiffon doux et
humide. N’utilisez aucun agent solvant abrasif!
• Enlevez les piles, si vous n'utilisez pas votre appareil pendant
une période prolongée.
• Conservez-le dans un endroit sec.
8.1 Remplacement des piles
• Lorsque le symbole de pile apparaît sur l’écran, changez les
piles de l'émetteur.
•Attention:
Il faut rétablir le contact entre l'émetteur et le récepteur après le
remplacement des piles - Il faut donc toujours remplacer les
piles dans les deux appareils ou bien lancer la recherche
manuellement.
9. Dépannage
Problème Solution
Aucun affichage ➜ Contrôlez la bonne polarité des
piles
➜ Changez les piles
Pas de réception ➜Vérifiez les piles de l'émetteur
de l'émetteur externe (n'utilisez pas d'accus)
Affichage «---» ➜Remettez en service l 'émetteur
et la station de base, conformé-
ment aux instructions
➜Vous pouvez activer manuelle-
ment la réception: Appuyez sur la
touche RESET du compartiment à
piles de l'émetteur avec un objet
pointu et maintenez la touche
SEARCH/IN/OUT de la station de
base appuyée
➜Sélectionnez une autre position
pour l'émetteur et / ou la station
de base
➜Réduisez la distance entre
l'émetteur et la station de base.
➜Éliminez les éventuelles sources
de parasitage
Affichage incorrecte ➜Changez les piles
TFA_No_30.3049_Anleitung_05_17 17.05.2017 10:16 Uhr Seite 16

3332
TWIN PLUS – Thermo-hygromètre radio piloté
➜Appuyez sur la touche RESET
avec un objet pointu de la station
de base
10. Traitement des déchets
Ce produit a été fabriqué avec des matériaux de construction de
haute qualité qui peuvent être recyclés et réutilisés.
Les piles et accus usagés ne peuvent en aucun cas
être jetés dans les ordures ménagères !
En tant qu'utilisateur, vous avez l'obligation légale de
rapporter les piles et accus usagés à votre revendeur
ou de les déposez dans une déchetterie proche de
votre domicile conformément à la réglementation
nationale et locale.
Les métaux lourds sont désignés comme suit:
Cd=cadmium, Hg=mercure, Pb=plomb
Cet appareil est conforme aux normes de l'UE relati-
ves au traitement des déchets électriques et électro-
niques (WEEE).
L'appareil usagé ne doit pas être jeté dans les ordures
ménagères. L’utilisateur s’engage, pour le respect de
l’environnement, à déposer l’appareil usagé dans un
centre de traitement agréé pour les déchets électri-
ques et électroniques.
11. Caractéristiques techniques
Station de base:
Plage de mesure ambiante
Température: -10 °C… +50 °C (+14 °F…+122 °F)
Humidité: 20%...95%
Affichage LL.L / HH.H Valeurs au dehors de la gamme
de mesure
Alimentation: 2 x 1,5 V AAA
(non incluses)
Mesure de boîtier: 137 x 17 (38) x 83 mm
Poids: 105 g (appareil seulement)
Émetteur:
Plage de mesure extérieure
Température: -20 °C… +50 °C (-4 °F …+122 °F)
Humidité: 20%...99%
Rayon d’action: env. 30 mètres
Fréquence de réception: 433 MHz
Puissance de radiofré-
quence maximale transmise: < 10mW
Temps de transmission: 30 secondes
Alimentation: 2 x 1,5 V AAA
(non incluses)
Mesure de boîtier: 62 x 24 (35) x 101 mm
Poids: 62 g (appareil seulement)
La reproduction, même partielle du présent mode d'emploi est strictement interdite
sans l'accord explicite de TFA Dostmann. Les spécifications techniques de ce produit
ont été actualisées au moment de l'impression et peuvent être modifiées, sans avis
préalable. Les dernières données techniques et des informations concernant votre
produit peuvent être trouvées en entrant le numéro de l'article sur notre site.
Déclaration UE de conformité
Le soussigné, TFA Dostmann, déclare que l'équipement radioélectrique du type
30.3049 est conforme à la directive 2014/53/UE. Le texte complet de la déclaration
UE de conformité est disponible à l'adresse internet suivante:
www.tfa-dostmann.de
E-Mail: [email protected]
TFA Dostmann GmbH & Co.KG
Zum Ottersberg 12, D-97877 Wertheim, Allemagne 05/17
TFA_No_30.3049_Anleitung_05_17 17.05.2017 10:16 Uhr Seite 17

3534
TWIN PLUS – Termo-igrometro radio controllato
Vi ringraziamo per aver scelto l'apparecchio della TFA.
1. Prima di utilizzare l'apparecchio
•Leggete attentamente le istruzioni per l'uso.
Avrete così modo di familiarizzare con il vostro nuovo apparec-
chio, di scoprirne tutte le funzioni e le componenti, di apprende-
re importanti dettagli sulla sua messa in funzione, di acquisire
dimestichezza nel suo utilizzo e di usufruire di alcuni validi con-
sigli da seguire in caso di guasti.
•Seguendo le istruzioni per l'uso, eviterete anche di danneg-
giare il dispositivo e di pregiudicare, a causa di un utilizzo
scorretto, i diritti del consumatore che vi spettano per legge.
•Decliniamo ogni responsabilità per i danni derivanti dal man-
cato rispetto delle presenti istruzioni per l'uso. Allo stesso
modo, non siamo responsabili per eventuali letture errate e
per le conseguenze che ne possono derivare.
•Prestate particolare attenzione alle misure di sicurezza!
•Conservate con cura queste istruzioni per l'uso!
2. La consegna include
• Termo-igrometro radio controllato (stazione base)
• Trasmettitore (No. Cat. 30.3195)
• Istruzioni per l'uso
3. Tutte le applicazioni e tutti i vantaggi del vostro nuovo appa-
recchio
• Temperatura ed umidità esterna senza fili (30 metri al mass.)
• Temperatura e umidità interna
• Livello di comfort (smiley)
• Allarme per la temperatura e umidità
• Simbolo del gelo
• Funzione MIN/MAX con memorizzazione delle ultime 24 ore
4. Per la vostra sicurezza
• Il prodotto è adatto esclusivamente agli utilizzi di cui sopra. Non
utilizzate il prodotto in maniera diversa da quanto descritto in
queste istruzioni.
• Non sono consentite riparazioni, alterazioni o modifiche non
autorizzate del dispositivo.
Avvertenza!
Pericolo di lesioni:
• Tenere i dispositivi e le batterie lontano dalla portata dei bambini.
• Non gettare le batterie nel fuoco, non polarizzarle in maniera
scorretta, non smontarle e non cercare di ricaricarle. Pericolo di
esplosione!
• Le batterie contengono acidi nocivi per la salute. Sostituire
quanto prima le batterie quasi scariche, in modo da evitare che
si scarichino completamente. Non utilizzate mai contempora-
neamente batterie usate e batterie nuove né batterie di tipi diver-
si. Quando si maneggiano batterie esaurite indossare sempre
guanti resistenti alle sostanze chimiche e occhiali di protezione.
Avvertenze sulla sicurezza del prodotto!
•
Non esporre l'apparecchio a temperature estreme, vibrazioni e urti.
• Proteggere dall’umidità.
• Il trasmettitore è resistente agli spruzzi d'acqua, ma non imper-
meabile. Se volete utilizzare il trasmettitore all'aperto, cercate un
luogo ombreggiato e al riparo dalla pioggia.
5. Componenti
5.1 Stazione base (Fig. 1):
A: Indicazione per esterno e interno
A 1: Temperatura e umidità esterno o interno
A 2: Livello di comfort (smiley)
A 3: Valori massimi e minimi
B: Tasti:
Tasto anteriore:
B 1: Tasto SEARCH IN/OUT
Tasti posteriori:
B 2: Tasto ▲
B 3: Bottone RESET
B 4: Tasto ▼/°C/°F
B 5: Tasto ALERT
TFA_No_30.3049_Anleitung_05_17 17.05.2017 10:16 Uhr Seite 18

3736
TWIN PLUS – Termo-igrometro radio controllato
C: Struttura esterna:
C 1: Montaggio a parete
C 2: Vano batterie
C 3: Supporto (pieghevole)
5.2 Trasmettitore esterno (Fig. 2):
D 1: Lampada segnale della trasmissione
D 2: Display temperatura e umidità
Tasti nel vano batterie
D 3: Tasto RESET
D 4: Tasto °C/°F
Struttura esterna:
D 5: Montaggio a parete
D 6: Vano batterie
D 7: Supporto (pieghevole)
6. Messa in funzione
Inserire le batterie:
• Posizionare gli apparecchi su un tavolo ad una distanza di circa
1,5 metri l'uno dall'altro. Tenerli lontano da eventuali fonti di
interferenza (dispositivi elettronici e impianti radio).
• Aprire il vano batterie del trasmettitore, tirando il coperchio del
vano batterie verso il basso (vedi simbolo) e sollevare il coper-
chio.
• Inserire due batterie nuove AAA da 1,5 V, osservando la corretta
polarità.
• Richiudete il vano batteria.
• Aprire il vano batterie della stazione base e inserire due batterie
nuove AAA da 1,5 V, osservando la corretta polarità.
• Si sente un breve segnale acustico e tutti i segmenti dell'LCD
appaiono contemporaneamente.
• Richiudete il vano batteria.
• Sul display appare la temperatura e l'umiditià interna.
Informazioni per valori esterni
• Dopo aver inserito le batterie, la temperatura esterna e l'umidità
vengono trasmesse alla stazione base.
• Il simbolo della ricezione del segnale lampeggia sul display. La
stazione base inizia a ricevere i valori esterni per 3 minuti.
• Per passare alla visualizzazione della temperatura e dell'umidità
esterna, premete il tasto SEARCH / IN / OUT in modalità norma-
le.
• Se non si ricevono i valori della temperatura e dell'umidità ester-
na, sul display viene visualizzato “- -.-”. Controllare le batterie e
riprovare di nuovo. Eliminare eventuali fonti di interferenza.
• È possibile avviare l'inizializzazione anche in modo manuale.
Tenere premuto il tasto SEARCH/IN/OUT per tre secondi sul
retro della stazione base.
• Si sente un breve segnale acustico. Sul display lampeggiano “--
.-” e il simbolo della ricezione del segnale. La stazione base ini-
zia a ricevere i valori esterni.
7. Uso
• L'apparecchio esce automaticamente dalla modalità impostazio-
ne se non si preme alcun tasto per più di 15 minuti.
• Ogni pressione sui tasti viene confermata con un breve segnale
acustico.
7.1 Memorizzare e cancellare i valori massimi e minimi
• Una volta che la stazione base e il trasmettitore sono attivi, i
valori massimi e minimi per interni ed esterni verranno memo-
rizzati e dopo 24 ore si resettano automaticamente.
• Per cancellare manualmente i valori massimi e minimi esterni
visualizzati tenere premuto il tasto SEARCH/IN/OUT per 3 secon-
di. Al tempo stesso attivare la ricezione del trasmettitore.
• Per cancellare manualmente tutti i valori memorizzati tenere pre-
muto il tasto RESET con un oggetto appuntito o rimuovere le
batterie.
7.2 Visualizzazione della temperatura
• Premere il tasto ▼/°C/°F sul retro della stazione base in modali-
tà normale ed è possibile scegliere fra la visualizzazione della
temperatura in gradi °C (gradi Celsius) o °F (gradi Fahrenheit).
TFA_No_30.3049_Anleitung_05_17 17.05.2017 10:16 Uhr Seite 19

3938
TWIN PLUS – Termo-igrometro radio controllato
7.3 Temperatura e umidità
• Sul display vengono visualizzati la temperatura attuale e
l'umidità interna, il livello di comfort e i valori massimi e minimi
con cronologia di 24 h.
• Premere il tasto SEARCH /IN/OUT.
• Sul display vengono visualizzati la temperatura attuale e
l'umidità esterna, il livello di comfort e i valori massimi e minimi
con cronologia di 24 h.
• Premere il tasto SEARCH /IN/OUT di nuovo.
• Sul display vengono visualizzati e il simbolo del cerchio .
• Sul display si alterneranno i valori per interni ed esterni per 6
secondi.
• Premere il tasto SEARCH/IN/OUT per ritornare alla modalità nor-
male.
7.4 Livello di comfort
• Il display visualizza quattro facce diverse per indicare il livello di
comfort per la temperatura e l'umidità.
Freddo Comfort! Caldo Molto caldo!
7.5 Allarme per temperatura e umidità
7.5.1 Impostazione degli allarmi
• Tenere premuto il tasto ALERT sul retro della stazione base in
modalità normale.
• Sul display lampeggiano e .
• Premere il tasto ▲o ▼/°C/°F per scegliere tra l'area esterna e
interna.
• Premere il tasto ALERT di nuovo.
• e il predefinito o il limite più alto di temperatura impostato
viene visualizzato sul display.
• Impostare il limite più alto di temperatura desiderata con il tasto
▲o ▼/°C/°F.
• Confermare con il tasto ALERT.
• e il predefinito o il limite più basso di temperatura impostato
viene visualizzato sul display.
• Impostare il limite più basso di temperatura desiderata con il
tasto ▲o ▼/°C/°F.
• Confermare con il tasto ALERT.
• e il predefinito o il limite più alto di umidità impostato viene
visualizzato sul display.
• Impostare il limite più alto di umidità desiderata con il tasto ▲o
▼/°C/°F.
• Confermare con il tasto ALERT.
• e il predefinito o il limite più basso di umidità impostato
viene visualizzato sul display.
• Impostare il limite più basso di umidità desiderata con il tasto ▲
o ▼/°C/°F.
7.5.2 Attivare gli allarmi
• Premere il tasto SEARCH/IN/OUT in modalità normale per sce-
gliere tra l'area esterna e interna.
• Premere il tasto ALERT.
• Sul display di sinistra appare . La funzione di allarme di tem-
peratura è attivata.
• Per attivare solo l'allarme dell’umidità premere il tasto ALERT di
nuovo. Sul display di destra appare .
• Per attivare tutte le due funzioni premere il tasto ALERT di
nuovo. Su entrambi i display appare .
• Premere il tasto ALERT di nuovo, disattivare le funzioni di allar-
me. Su entrambi i display scompare .
7.6 Caso di allarme
• In caso di allarme il simbolo corrispondente lampeggia e
un segnale acustico suona. Spegnere il segnale acustico con un
tasto qualsiasi. Se l'allarme non viene arrestato, si spegne auto-
maticamente dopo 2 minuti.
7.7 Indicazione de gelo
• Se la temperatura esterna è tra -2 ° C e +3 ° C compare il simbo-
lo del fiocco di neve sul display.
TFA_No_30.3049_Anleitung_05_17 17.05.2017 10:16 Uhr Seite 20
This manual suits for next models
1
Table of contents
Languages:
Other TFA Weather Station manuals

TFA
TFA 35.1124 User manual

TFA
TFA WS-9135N User manual

TFA
TFA Dostmann Linea Plus 35.1144.01.IT User manual

TFA
TFA ERGO 30.3014 User manual

TFA
TFA WEATHERHUB User manual

TFA
TFA 35.1022 User manual

TFA
TFA 35.1126 User manual

TFA
TFA CONNECT 35.1143.IT User manual

TFA
TFA 35.1087 User manual

TFA
TFA Klima@Home 30.3060.01.IT User manual