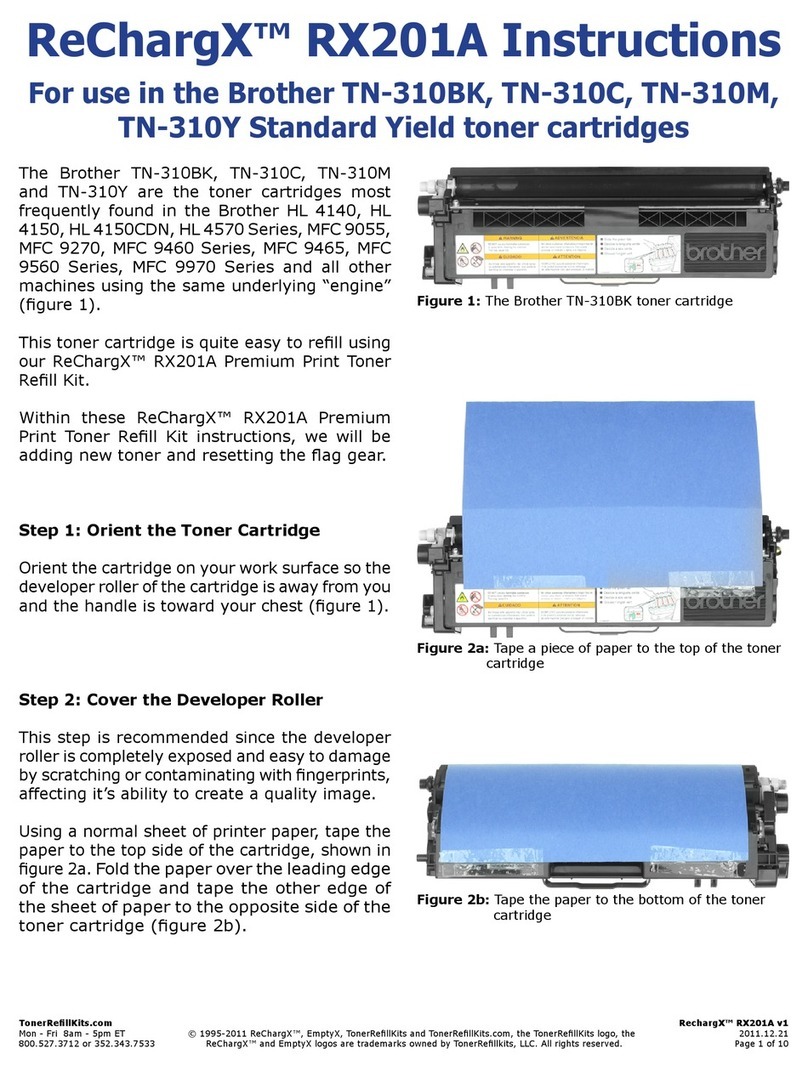
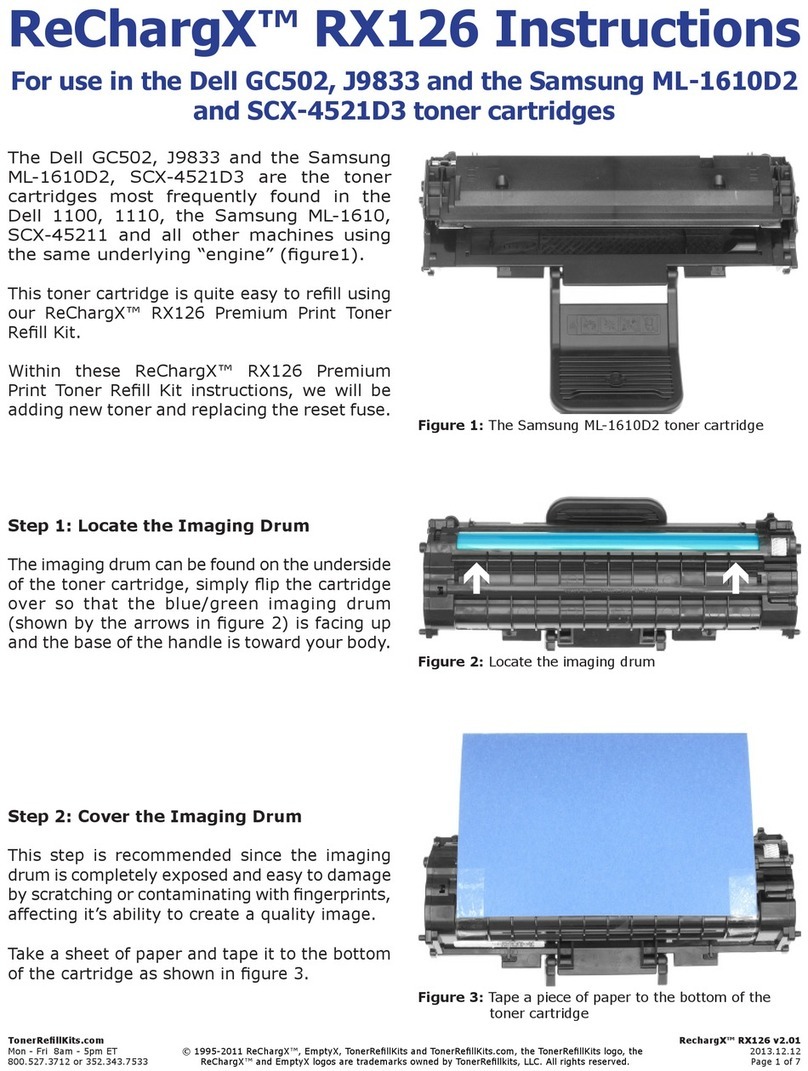
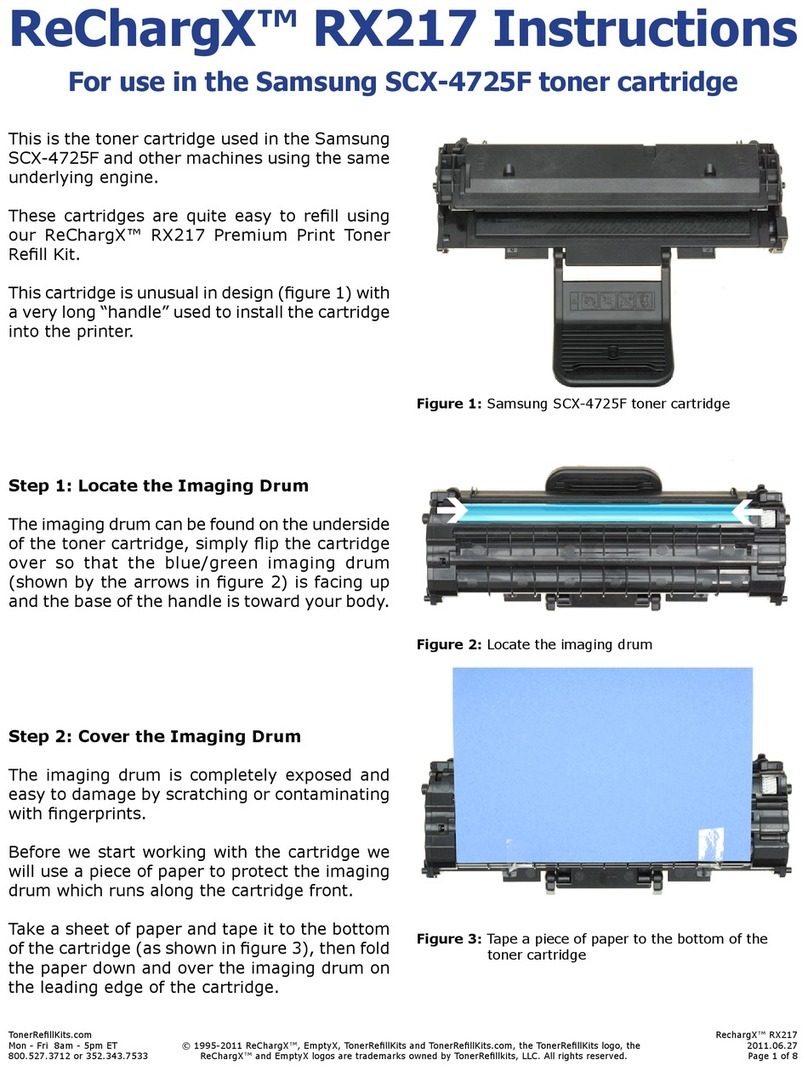
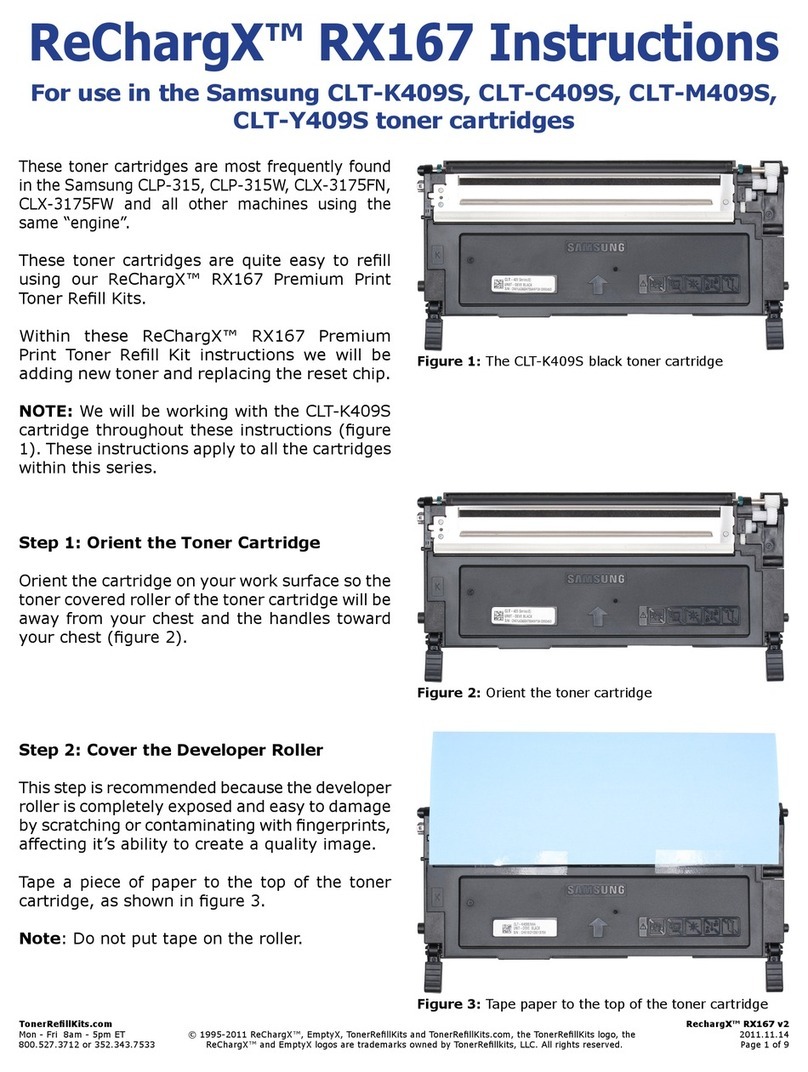
TonerRefillKits ReChargX RX077 User manual

TonerRellKits.com RechargX™RX077v2
Mon-Fri8am-5pmET©1995-2011ReChargX™,EmptyX,TonerRellKitsandTonerRellKits.com,theTonerRellKitslogo,the 2012.01.10
800.527.3712or352.343.7533ReChargX™andEmptyXlogosaretrademarksownedbyTonerRellkits,LLC.Allrightsreserved. Page1of7
The Canon L50 (6812A001AA) is the toner
cartridge most frequently found in the Canon
imageCLASSD660,D661,D680,D760,D761,
D780,D860,D861,D880,PC-1060,PC-1060,
PC-1080F, SmartBase PC-1210D, SmartBase
PC-1230D,SmartBasePC-1270Dandallother
machines using the same underlying “engine”
(gure1).
Thistonercartridgeisquiteeasytorellusing
our ReChargX™ RX077 Premium Print Toner
RellKit.
Within these ReChargX™ RX077 Premium
Print Toner Rell Kit instructions, we will be
addingnewtoner,removingthe wastetoner
andreplacingtheresetchip.
Step 1: Plug in the Hole-Making Tool
Pluginthehole-makingtoolincludedwiththe
ReChargX™ToolKit.
Turnthesandtimeroverandwaitthefullthree
minutes before using the tool so it reaches
properoperatingtemperature;thisensuresthe
toolwilleasilypenetratethecartridgehousing
(gure2).
Step 2: Locating the Toner Hopper Hole
Place the cartridge down on a table with the
handleclosesttoyourbodylikeifyouwere
loadingitbackintotheprinter.
Thetonerhopperholewillbelocatedinthelower
rightcornerwheretheembossedimageofa
thermometerisfoundasshownbythecirclein
gures3aand3b.
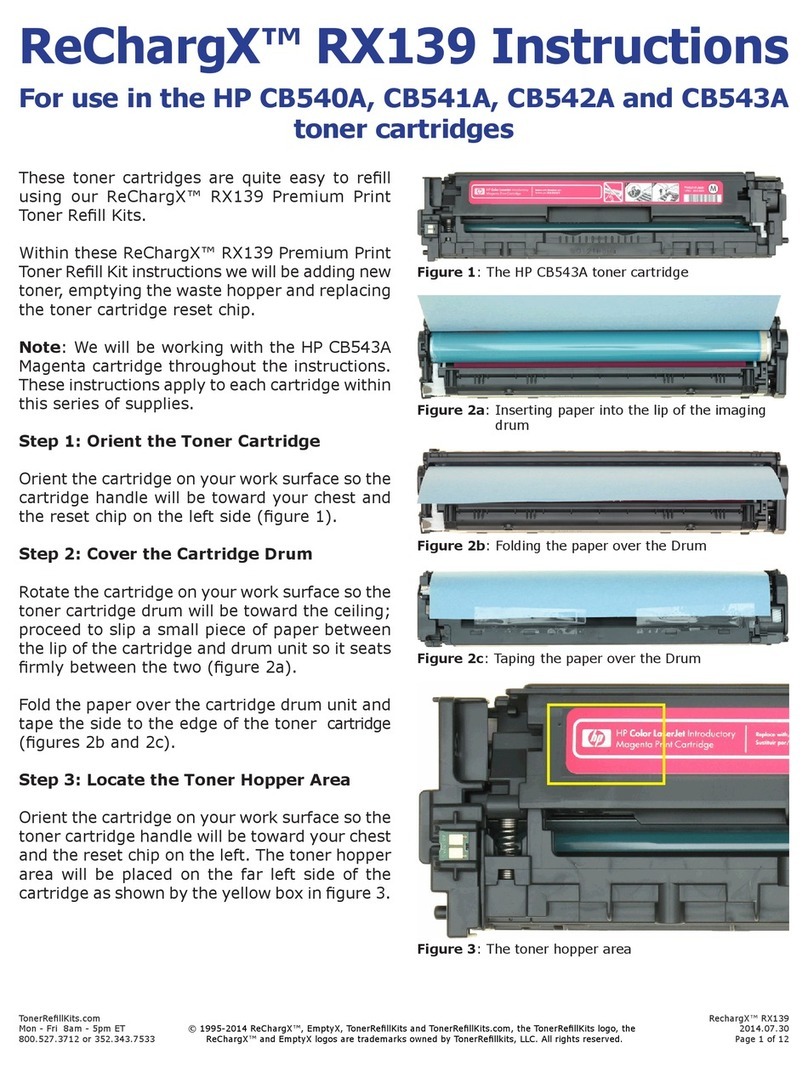
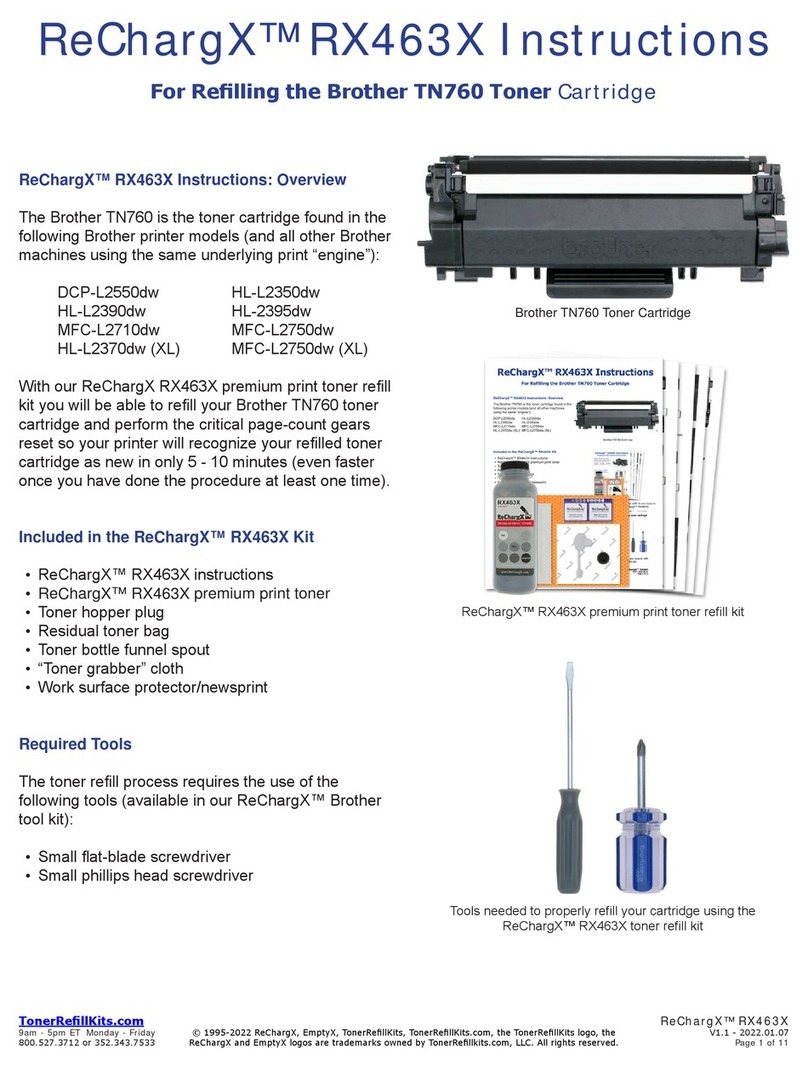
ReChargX™ RX077 Instructions
For use in the Canon L50 (6812A001AA) toner cartridge
Figure 1: The Canon L50 toner cartridge
Figure 2:Waitingforthehole-makingtooltoheatup
Figure 3a: Locate the toner hopper hole in the lower right
Figure 3b: Close up of the toner hopper hole location
TonerRellKits.com RechargX™RX077v2
Mon-Fri8am-5pmET©1995-2011ReChargX™,EmptyX,TonerRellKitsandTonerRellKits.com,theTonerRellKitslogo,the 2012.01.10
800.527.3712or352.343.7533ReChargX™andEmptyXlogosaretrademarksownedbyTonerRellkits,LLC.Allrightsreserved. Page2of7
Step 3: Creating the Toner Hopper Hole
HoldtheReChargX™hole-makingtooldirectly
overthelocationfortheholeandpressthe
copper hole-making bit against the cartridge
allowingtheheatofthetooltocreatethehole
(thereisnoneedtouseexcessiveforce,letthe
tooldotheworkwithaminimalamountof
pressure)(gure4).
Note:Oncethecoppertipofthehole-making
toolslowlypenetratesthetopofthetoner
cartridge, immediately withdraw the tool and
unplugitfromthewall.
Step 4: Remove the Excess Plastic From
the Hole-Making Tool
U
se the metal tip of the small at-blade
screwdriver,includedintheReChargX™Tool
Kit, to remove the small, circular piece of
plastic that will normally remain inside the
copperhole-makingbit(gure5).
NOTE:Thisstepneedstobecompletedbefore
the hole-making tool cools off. If the plastic
doeshardeninsidethecopperbit,pluginthe
toolandremovetheplasticdebrisassoonasit
startstoloosenfromthebit.
Figure 4:Createthetonerhopperhole
Figure 5:Removetheexcessplasticpiece

TonerRellKits.com RechargX™RX077v2
Mon-Fri8am-5pmET©1995-2011ReChargX™,EmptyX,TonerRellKitsandTonerRellKits.com,theTonerRellKitslogo,the 2012.01.10
800.527.3712or352.343.7533ReChargX™andEmptyXlogosaretrademarksownedbyTonerRellkits,LLC.Allrightsreserved. Page3of7
Step 5: Add ReChargX™ RX077 Premium
Print Toner to the Toner Hopper
Now we will ll the toner hopper with the
ReChargX™RX077PremiumPrinttoner.
Toensurethetonerowsfreelyfromthebottle
duringlling,makecertainthecapisscrewed
tightly on the bottle, then gently rock/shake
thebottletofreeup thetonerthatmayhave
settledduringshipping.
Next,removethe original cap from thebottle
andreplaceitwiththeplasticdispenserspout
fromtheReChargX™RX077TonerRellKit.
Tomaketheaddingofthetonertothetoner
hopperaseasyanddust-freeaspossible,tilt
theendofthecartridgewiththeholeinitup
at a 45 degree angle and slowly angle the
dispenserspoutonthebottleoftonertomeet
upwiththehole,asshowningure6.
Tiltingthebottleupalittlemorewillstartthe
tonerowingintothetonerhopper.
NOTE:Ifatanypointthetonerstopsowing,
simply stand the bottle upright to loosen the
tonerandstartthepouringprocessoveragain
(resist temptation to squeeze the bottle as it
willmakeaspillormessmorelikely).
Fillthehopperuntilitappearstobefulloruntil
itappearstonernolongerowseasilyintothe
hopper(anytonerleftinthebottlecan easily
beadded in the future afteryouhavedone a
considerableamountofprinting).
Figure 6:Fillthecartridge

TonerRellKits.com RechargX™RX077v2
Mon-Fri8am-5pmET©1995-2011ReChargX™,EmptyX,TonerRellKitsandTonerRellKits.com,theTonerRellKitslogo,the 2012.01.10
800.527.3712or352.343.7533ReChargX™andEmptyXlogosaretrademarksownedbyTonerRellkits,LLC.Allrightsreserved. Page4of7
Step 6: Clean the Area Around the Toner
Hopper Hole Before Sealing
Unfold the yellow/orange “toner grabber” cloth
fromtheReChargX™RX077PremiumPrintToner
RellKitandstretchitalongbothdimensions(it
will stretch considerably in one dimension and
not the other). Stretching the yellow/orange
tonergrabberclothactivatesthetonerretaining
substancethatisembeddedwithinthecloth.
Youwillbeusingthisclothtocleantheoutside
ofthetonerhopperholetoensuretheleak-proof
seal will be applied rmly and securely to the
cartridge,asshowningure7.
NOTE:Onlyusethetonergrabberclothonthe
exteriorofthetonercartridgearoundthetoner
hopperholearea.Donotusetheclothtoclean
anyoftheinternalcomponentsorthecartridge
imagingdrum.
Step 7: Remove the ReChargX™ Seal
from the Protective Backing
Remove the protective backing from the
ReChargX™leak-proofseal(gure8a)and
lower the seal around the toner hopper
hole.
Press rmly around the entire seal to
ensurethesealsecurelystickstothetoner
cartridge,asshowningure8b.
Figure 7: Clean the area around the toner hopper hole
Figure 8a:RemovetheReChargX™leak-proofseal
fromtheprotectivebacking
Figure 8b:Sealappliedaroundhopperhole

TonerRellKits.com RechargX™RX077v2
Mon-Fri8am-5pmET©1995-2011ReChargX™,EmptyX,TonerRellKitsandTonerRellKits.com,theTonerRellKitslogo,the 2012.01.10
800.527.3712or352.343.7533ReChargX™andEmptyXlogosaretrademarksownedbyTonerRellkits,LLC.Allrightsreserved. Page5of7
Step 8: Plug in the Hole-Making Tool
Pluginthehole-makingtoolincludedwiththe
ReChargX™ToolKit.
Turnthesandtimeroverandwaitthefullthree
minutes before using the tool so it reaches
properoperatingtemperature;thisensuresthe
toolwilleasilypenetratethecartridgehousing
(gure9).
Step 9: Locating the Waste Toner Hopper
Turnthecartridgeupsidedown,withtheridged
undersideofthetonerhopperawayfromyou.
Thewastetonerhopperwillbefoundinthelower
leftcornerasshownbythecircleingures10a
and10b.
Step 10: Creating the Waste Hopper Hole
HoldtheReChargX™hole-makingtooldirectly
overthelocationfortheholeandpressthe
copper hole-making bit against the cartridge
allowingtheheatofthetooltocreatethehole
(thereisnoneedtouseexcessiveforce,letthe
tooldotheworkwithaminimalamountof
pressure)(gure11).
Note:Oncethecoppertipofthehole-making
toolslowlypenetratesthetopofthetoner
cartridge, immediately withdraw the tool and
unplugitfromthewall.
Figure 9:Waitforthehole-makingtooltoheatup
Figure 10a:Locatethewastetonerhopper
Figure 10b:Closeupoftonerhopperlocation
Figure 11:Createthewastetonerhopperhole

TonerRellKits.com RechargX™RX077v2
Mon-Fri8am-5pmET©1995-2011ReChargX™,EmptyX,TonerRellKitsandTonerRellKits.com,theTonerRellKitslogo,the 2012.01.10
800.527.3712or352.343.7533ReChargX™andEmptyXlogosaretrademarksownedbyTonerRellkits,LLC.Allrightsreserved. Page6of7
Step 11: Empty the Waste Toner Hopper
Nowwewillremovethewastetonerfromthe
tonercartridge.
NOTE:Thistonercannotbeusedagainas
paper dust, hair, staples and other small
itemscanaccumulateinthewastehopper.
Holding the cartridge over the newsprint,
includedin therellkit, carefullypour out
anywastetoner,asshowningure12.
If the waste toner stops owing, stand the
cartridgeupagainandthenre-lowerthehole
overthepaper(gentlytappingalongtheside
ofthetonercartridgehelpstokeepthetoner
owingaswell).
NOTE:Thereisnoneedtoattempttoremove
everylastbitofwastetonerfromthehopper,
justthatwhichcomesouteasily.
Step 12: Remove the Excess Plastic From
the Hole-Making Tool
Usingthetipoftheat-bladescrewdriver,
includedintheReChargX™ToolKit,removethe
smallpieceofplasticfromthecoppertipofthe
hole-makingtool,asshowningure13.
Thissmallpieceofplasticbecomesimpossible
toremoveonceitbecomescoldandhardensto
thecoppertipofthehole-makingtool.
Figure 12:Emptythewastetonerhopper
Figure 13:Removetheexcessplasticpiece

TonerRellKits.com RechargX™RX077v2
Mon-Fri8am-5pmET©1995-2011ReChargX™,EmptyX,TonerRellKitsandTonerRellKits.com,theTonerRellKitslogo,the 2012.01.10
800.527.3712or352.343.7533ReChargX™andEmptyXlogosaretrademarksownedbyTonerRellkits,LLC.Allrightsreserved. Page7of7
Step 13: Clean the Area Around the Waste
Toner Hopper Hole Before
Sealing
Afterthewastetonerhasbeenremovedfrom
thewastehopper,usetheyellow/orangetoner
grabberclothtocleanaroundthewastehopper
hole,asshowningure14,sotheReChargX™
leak-proofsealwilladheretothecartridgebody
ascompletelyaspossible.
Step 14: Remove the ReChargX™ Seal
from the Protective Backing
Remove the protective backing from the
ReChargX™ leak-proof seal (gure 15a)
andlowerthesealaroundthetonerhopper
hole.
Press rmly around the entire seal to
ensurethesealsecurelystickstothetoner
cartridge,asshowningure15b.
Congratulations – You’re Finished!
Congratulations!Youhavesuccessfully relled
yourCanonL50(6812A001AA)tonercartridge
andemptiedthewastehopper.
Enjoyyoursavings.You’vejustsaved$100.00
byrellingyourtonercartridge!
-EndofReChargX™RX077Instructions-
Customer Service / Technical Support
Tofurther help yourReChargX™RX077 Toner
Rell procedure, we are always ready, willing
andhappytoansweranyofyourquestionsor
commentsviatechnicalsupport.
Please contact us at 352.343.7533 or
800.527.3712M-F8am-5pmET.
Additionally, you may also chat with us using
LiveHelponourwebsite(M-F8am-5pmET)
orsubmitatechnicalsupportticketat:
www.TonerRellKits.com/Tech_Support.php
Figure 14:Cleanthewastetonerhopperhole
Figure 15a:Cleanthewastetonerhopperhole
Figure 15b:Cleanthewastetonerhopperhole
Table of contents
Other TonerRefillKits Printer Accessories manuals

TonerRefillKits
TonerRefillKits brother ReChargX RX350 User manual

TonerRefillKits
TonerRefillKits ReChargX RX463X User manual

TonerRefillKits
TonerRefillKits ReChargX RX139 User manual

TonerRefillKits
TonerRefillKits ReChargX RX076 User manual

TonerRefillKits
TonerRefillKits ReChargX RX217 User manual

TonerRefillKits
TonerRefillKits ReChargX RX201A User manual

TonerRefillKits
TonerRefillKits ReChargX RX180 User manual

TonerRefillKits
TonerRefillKits ReChargX RX161 User manual

TonerRefillKits
TonerRefillKits ReChargX RX167 User manual

TonerRefillKits
TonerRefillKits ReChargX RX126 User manual