manuals.online logo
Brands
  1. Home
  2. •
  3. Brands
  4. •
  5. TonerRefillKits
  6. •
  7. Printer Accessories
  8. •
  9. TonerRefillKits ReChargX RX201A User manual

TonerRefillKits ReChargX RX201A User manual

TonerRellKits.com RechargX™ RX201A v1
Mon - Fri 8am - 5pm ET © 1995-2011 ReChargX™, EmptyX, TonerRellKits and TonerRellKits.com, the TonerRellKits logo, the 2011.12.21
800.527.3712 or 352.343.7533 ReChargX™ and EmptyX logos are trademarks owned by TonerRellkits, LLC. All rights reserved. Page 1 of 10
ReChargX™ RX201A Instructions
For use in the Brother TN-310BK, TN-310C, TN-310M,
TN-310Y Standard Yield toner cartridges
The Brother TN-310BK, TN-310C, TN-310M
and TN-310Y are the toner cartridges most
frequently found in the Brother HL 4140, HL
4150, HL 4150CDN, HL 4570 Series, MFC 9055,
MFC 9270, MFC 9460 Series, MFC 9465, MFC
9560 Series, MFC 9970 Series and all other
machines using the same underlying “engine”
(gure 1).
This toner cartridge is quite easy to rell using
our ReChargX™ RX201A Premium Print Toner
Rell Kit.
Within these ReChargX™ RX201A Premium
Print Toner Rell Kit instructions, we will be
adding new toner and resetting the ag gear.
Step 1: Orient the Toner Cartridge
Orient the cartridge on your work surface so the
developer roller of the cartridge is away from you
and the handle is toward your chest (gure 1).
Step 2: Cover the Developer Roller
This step is recommended since the developer
roller is completely exposed and easy to damage
by scratching or contaminating with ngerprints,
affecting it’s ability to create a quality image.
Using a normal sheet of printer paper, tape the
paper to the top side of the cartridge, shown in
gure 2a.
Fold the paper over the leading edge
of the cartridge and tape the other edge of
the sheet of paper to the opposite side of the
toner cartridge (gure 2b).
Figure 1: The Brother TN-310BK toner cartridge
Figure 2a: Tape a piece of paper to the top of the toner
cartridge
Figure 2b: Tape the paper to the bottom of the toner
cartridge
TonerRellKits.com RechargX™ RX201A v1
Mon - Fri 8am - 5pm ET © 1995-2011 ReChargX™, EmptyX, TonerRellKits and TonerRellKits.com, the TonerRellKits logo, the 2011.12.21
800.527.3712 or 352.343.7533 ReChargX™ and EmptyX logos are trademarks owned by TonerRellkits, LLC. All rights reserved. Page 2 of 10
Step 3: Orient the Toner Cartridge
Orient the cartridge on your work surface so
the end of the cartridge with the white label
and toner hopper plug is facing upward, shown
in gure 3.
The toner hopper plug will be located underneath
the white label of the cartridge.
Step 4: Score the Cartridge Label
Using the edge of a at-blade screwdriver, slice
through the label at the top and side (gure 4).
Step 5: Remove the Toner Hopper Plug
Wedge the edge of a at-blade screwdriver
down between the lip of the cartridge and the
toner hopper plug then pry the plug up and
out, gure 5.
Do not worry about damaging the plug, we include
a replacement plug with the ReChargX™ RX201A
Toner Rell Kit. However, be careful not to damage
the toner cartridge itself.
Figure 3: Orient the toner cartridge
Figure 4: Remove the cartridge label
Figure 5: Remove the toner hopper plug
TonerRellKits.com RechargX™ RX201A v1
Mon - Fri 8am - 5pm ET © 1995-2011 ReChargX™, EmptyX, TonerRellKits and TonerRellKits.com, the TonerRellKits logo, the 2011.12.21
800.527.3712 or 352.343.7533 ReChargX™ and EmptyX logos are trademarks owned by TonerRellkits, LLC. All rights reserved. Page 3 of 10
Step 6: Empty the Toner Hopper
You must remove any toner that is still in the
toner hopper before relling.
NOTE: This step does not need to be repeated
the next time you rell.
NOTE: This toner cannot be used again, the new
toner being added cannot mix with the residual
OEM toner. Failing to remove the toner before
relling will result in signicant hazing on some
or all of the printed page that will not go away
with further printing.
Open the plastic bag, included in the ReChargX™
RX201A Toner Rell Kit, and lower the toner
cartridge so the toner hopper hole is in the bag.
Carefully pour out as much of the remaining
toner as possible (gure 6).
Shaking the toner cartridge up-and-down is
not recommended as it normally creates an
unnecessary toner mess.
If the toner stops owing, stand the cartridge
up and then lower the toner hopper hole into
the bag (gently tapping along the side of the
cartridge helps to keep the toner owing).
With the majority of the toner removed, seal
the bag and toss it in the garbage.
Figure 6: Empty the OEM toner
TonerRellKits.com RechargX™ RX201A v1
Mon - Fri 8am - 5pm ET © 1995-2011 ReChargX™, EmptyX, TonerRellKits and TonerRellKits.com, the TonerRellKits logo, the 2011.12.21
800.527.3712 or 352.343.7533 ReChargX™ and EmptyX logos are trademarks owned by TonerRellkits, LLC. All rights reserved. Page 4 of 10
Step 7: Add ReChargX™ RX201A Premium
Print Toner to the Toner Hopper
Now we will ll the toner hopper with the
ReChargX™ RX201A Premium Print toner.
To ensure the toner ows freely from the bottle
during lling, make certain the cap is screwed
tightly on the bottle, then gently rock/shake
the bottle to free up the toner that may have
settled during shipping.
Next, remove the original cap from the bottle
and replace it with the plastic dispenser spout
from the ReChargX™ RX201A Toner Rell Kit.
To make the adding of the toner to the toner
hopper as easy and dust-free as possible, tilt
the end of the cartridge with the hole in it up
at a 45 degree angle and slowly angle the
dispenser spout on the bottle of toner to meet
up with the hole, as shown in gure 7.
Tilting the bottle up a little more will start the
toner owing into the toner hopper.
NOTE: If at any point the toner stops owing,
simply stand the bottle upright to loosen the
toner and start the pouring process over again
(resist temptation to squeeze the bottle as it
will make a spill or mess more likely).
Fill the hopper until it appears to be full or until
it appears toner no longer ows easily into the
hopper (any toner left in the bottle can easily
be added in the future after you have done a
considerable amount of printing).
Figure 7: Fill the toner hopper
TonerRellKits.com RechargX™ RX201A v1
Mon - Fri 8am - 5pm ET © 1995-2011 ReChargX™, EmptyX, TonerRellKits and TonerRellKits.com, the TonerRellKits logo, the 2011.12.21
800.527.3712 or 352.343.7533 ReChargX™ and EmptyX logos are trademarks owned by TonerRellkits, LLC. All rights reserved. Page 5 of 10
Step 8: Clean the Area Around the Toner
Hopper Hole Before Sealing
Unfold the yellow/orange “toner grabber” cloth
from the ReChargX™ RX201A Premium Print Toner
Rell Kit and stretch it along both dimensions (it will
stretch considerably in one dimension and not the
other). Stretching the yellow/orange toner grabber
cloth activates the toner retaining substance that is
embedded within the cloth.
You will be using this cloth to clean the outside
of the toner hopper hole to ensure the new
hopper plug will be applied rmly and securely
to the cartridge, as shown in gure 8.
NOTE: Only use the toner grabber cloth on the
exterior of the toner cartridge around the toner
hopper hole area. Do not use the cloth to clean
any of the internal components or the cartridge
developer roller.
Step 9: Plug the Toner Hopper Hole
Remove the new plug from your ReChargX™
RX201A Premium Toner Rell Kit and place the
plug over the hopper hole, press rmly around
the entire perimeter of the plug to make certain
the plug sits securely inside the toner hopper
hole (gure 9).
NOTE: Do not press hard enough for the plug
to go through the hole and into the cartridge.
Step 10: Locating the Cartridge Gear
End-cap
The nal set of steps consist of resetting the
toner cartridge ag gear. Resetting the gear
is essential to ensure that the cartridge is
recognized by the printer as being full. Also,
it resets the voltage bias (this eliminates
light print).
To begin, turn the toner cartridge on its end, so
that the cartridge gear end-cap is facing toward
you, as shown in gure 10. (The opposite side
from the ll cap).
Figure 8: Clean the area around the toner hopper hole
Figure 9: Reinsert the toner hopper plug
Figure 10: Orient the toner cartridge
TonerRellKits.com RechargX™ RX201A v1
Mon - Fri 8am - 5pm ET © 1995-2011 ReChargX™, EmptyX, TonerRellKits and TonerRellKits.com, the TonerRellKits logo, the 2011.12.21
800.527.3712 or 352.343.7533 ReChargX™ and EmptyX logos are trademarks owned by TonerRellkits, LLC. All rights reserved. Page 6 of 10
Step 11: Locate and Remove the Screws
Holding the Gear End-Cap in
Place
The cartridge gear end-cap is held in place by
three screws, shown by the arrows in gure 11.
Using a phillips-head screwdriver remove the
screws holding the end-cap in place.
Step 12: Remove the Gear End-cap
With the screws removed lift the gear end-cap
up and off of the toner cartridge and set it aside
for future use (gure 12).
Step 13: Locate the Flag gear
In the cartridges current orientation the ag
gear is the large gear on the right side of the
toner cartridge, shown by the arrow in gure 13.
ë
ë
ë
Figure 11: Locate and remove the screws holding the gear
end-cap in place
Figure 12: Remove the end-cap
ì
Figure 13: Locate the ag gear
TonerRellKits.com RechargX™ RX201A v1
Mon - Fri 8am - 5pm ET © 1995-2011 ReChargX™, EmptyX, TonerRellKits and TonerRellKits.com, the TonerRellKits logo, the 2011.12.21
800.527.3712 or 352.343.7533 ReChargX™ and EmptyX logos are trademarks owned by TonerRellkits, LLC. All rights reserved. Page 7 of 10
Step 14: Locate Both Tabs on the
Flag gear
To reset the ag gear you must rst locate
two tabs on the ag gear itself. The rst tab
is located on the top of the ag gear near the
center post, as shown by the black circle in
gure 14a. This rst tab is the one you will
be using to rotate the ag gear.
The second tab will be found in the lower left
section of the ag gear, shown by the black circle
in gure 14b.
Step 15: Resetting the Flag gear
Rotate the ag gear counter clockwise just far
enough so the tab in the seven o’clock position
is now in the ve o’clock position. The path from
the seven o’clock to the ve o’clock is shown by
the red arrow in gure 15.
NOTE: This step is continued in more detail on
the following page.
Figure 14a: Locate the rst tab on the ag gear.
Figure 14b: Locate the second tab on the ag gear
Figure 15: The path of the tab on the lower left of the gear
TonerRellKits.com RechargX™ RX201A v1
Mon - Fri 8am - 5pm ET © 1995-2011 ReChargX™, EmptyX, TonerRellKits and TonerRellKits.com, the TonerRellKits logo, the 2011.12.21
800.527.3712 or 352.343.7533 ReChargX™ and EmptyX logos are trademarks owned by TonerRellkits, LLC. All rights reserved. Page 8 of 10
Step 15: Resetting the Flag gear
Continued
Using the thumb of your left hand, hold the metal
spring in place so it doesn’t pop off during the
next step. With the other hand grab the rst tab
and lift up slightly on the ag gear making sure
not to remove the ag gear from the cartridge
(gure 16a).
With the gear lifted up, rotate it counter clockwise
so the tab in the seven o’clock position of the gear
is in its new location in the ve o’clock position, as
shown in gure 16b.
Figure 16a: Hold the metal spring in place and lift up
slightly on the ag gear
Figure 16b: Tab in it’s new location
TonerRellKits.com RechargX™ RX201A v1
Mon - Fri 8am - 5pm ET © 1995-2011 ReChargX™, EmptyX, TonerRellKits and TonerRellKits.com, the TonerRellKits logo, the 2011.12.21
800.527.3712 or 352.343.7533 ReChargX™ and EmptyX logos are trademarks owned by TonerRellkits, LLC. All rights reserved. Page 9 of 10
Step 16: Reinstall the Cartridge End-cap
Place the end-cap back onto the cartridge in the
same orientation as it had been prior to being
removed, then use a philips-head screwdriver
to replace each of the screws back into the end
cap (gures 17a and 17b).
Step 17: Removing the Piece of Paper
With the cartridge relled and the ag gear
reset, remove the paper from both sides of the
developer roller, as shown in gure 18.
This piece of paper can now be discarded.
Figure 17a: Replace the cartridge end-cap
Figure 17b: Reinstall the screws that held the end-cap
in place
Figure 18: Remove the piece of paper from the toner
cartridge
TonerRellKits.com RechargX™ RX201A v1
Mon - Fri 8am - 5pm ET © 1995-2011 ReChargX™, EmptyX, TonerRellKits and TonerRellKits.com, the TonerRellKits logo, the 2011.12.21
800.527.3712 or 352.343.7533 ReChargX™ and EmptyX logos are trademarks owned by TonerRellkits, LLC. All rights reserved. Page 10 of 10
Congratulations – You’re Finished!
Congratulations! You have successfully relled
your Brother TN310 toner cartridge.
Enjoy your savings. You’ve just saved $47.00 by
relling your black toner cartridge and/or $51.00
by relling each of your color toner cartridges!
-End of ReChargX™ RX201A Instructions-
Customer Service / Technical Support
To further help your ReChargX™ RX201A Toner
Rell procedure, we are always ready, willing
and happy to answer any of your questions or
comments via technical support.
Please contact us at 352.343.7533 or
800.527.3712 M - F 8am - 5pm ET.
Additionally, you may also chat with us using
Live Help on our website (M - F 8am - 5pm ET)
or submit a technical support ticket at:
www.TonerRellKits.com/Tech_Support.php

Other TonerRefillKits Printer Accessories manuals

TonerRefillKits brother ReChargX RX350 User manual

TonerRefillKits

TonerRefillKits brother ReChargX RX350 User manual

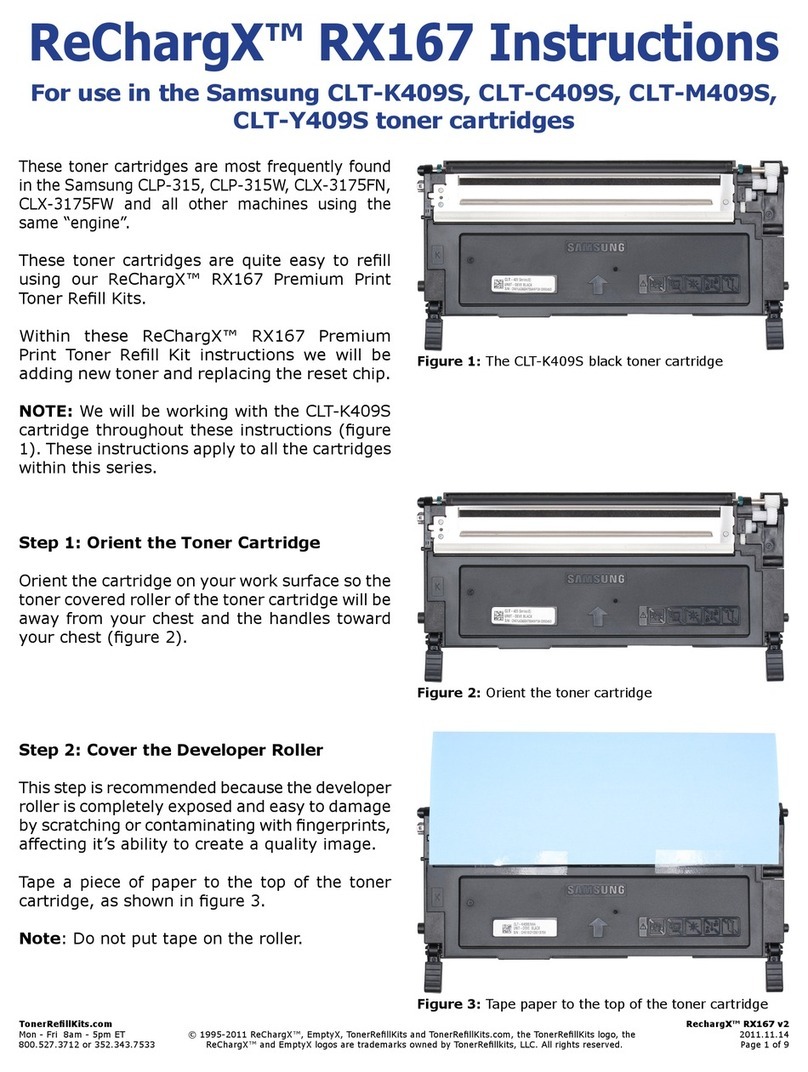
TonerRefillKits ReChargX RX167 User manual

TonerRefillKits

TonerRefillKits ReChargX RX167 User manual

TonerRefillKits ReChargX RX161 User manual

TonerRefillKits

TonerRefillKits ReChargX RX161 User manual

TonerRefillKits ReChargX RX180 User manual

TonerRefillKits

TonerRefillKits ReChargX RX180 User manual

TonerRefillKits ReChargX RX077 User manual

TonerRefillKits

TonerRefillKits ReChargX RX077 User manual

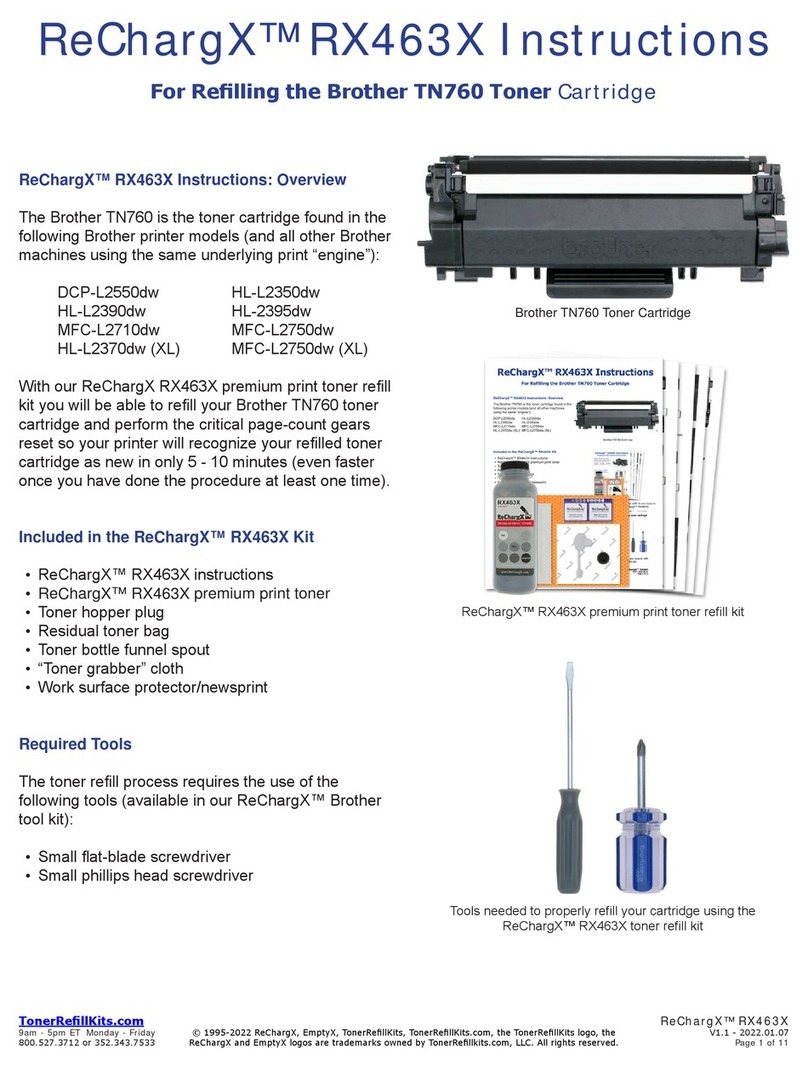
TonerRefillKits ReChargX RX463X User manual

TonerRefillKits

TonerRefillKits ReChargX RX463X User manual

TonerRefillKits ReChargX RX139 User manual

TonerRefillKits

TonerRefillKits ReChargX RX139 User manual

TonerRefillKits ReChargX RX076 User manual

TonerRefillKits

TonerRefillKits ReChargX RX076 User manual

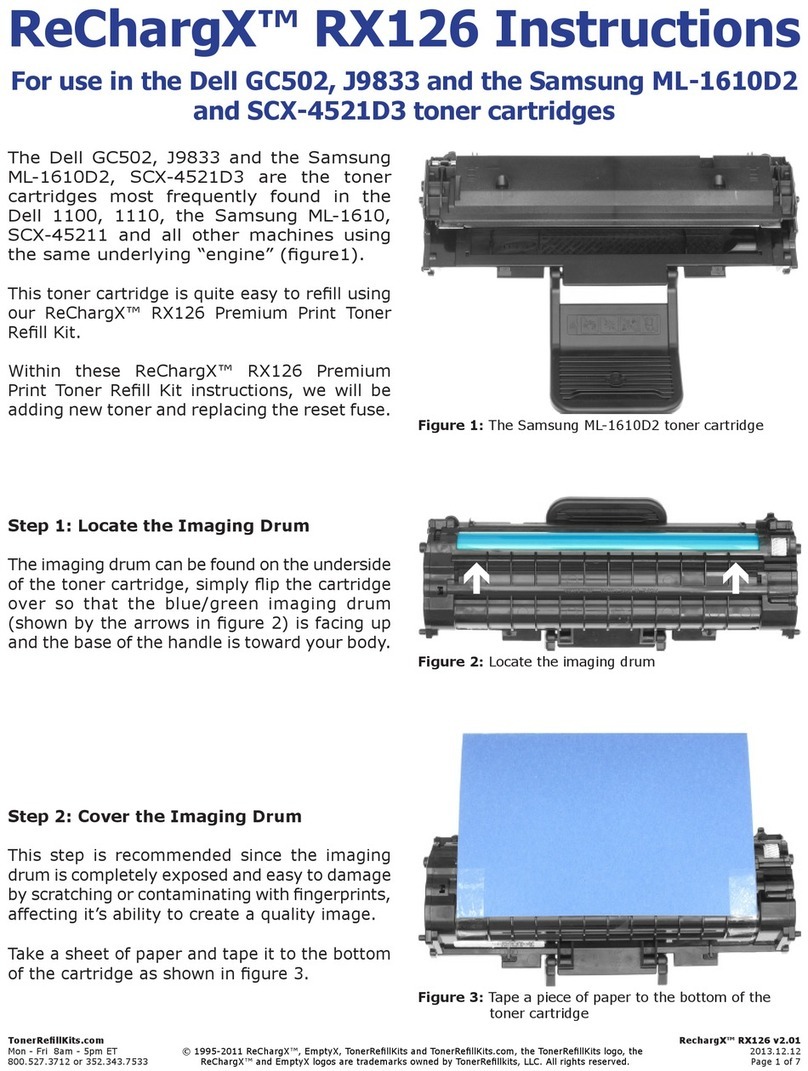
TonerRefillKits ReChargX RX126 User manual

TonerRefillKits

TonerRefillKits ReChargX RX126 User manual

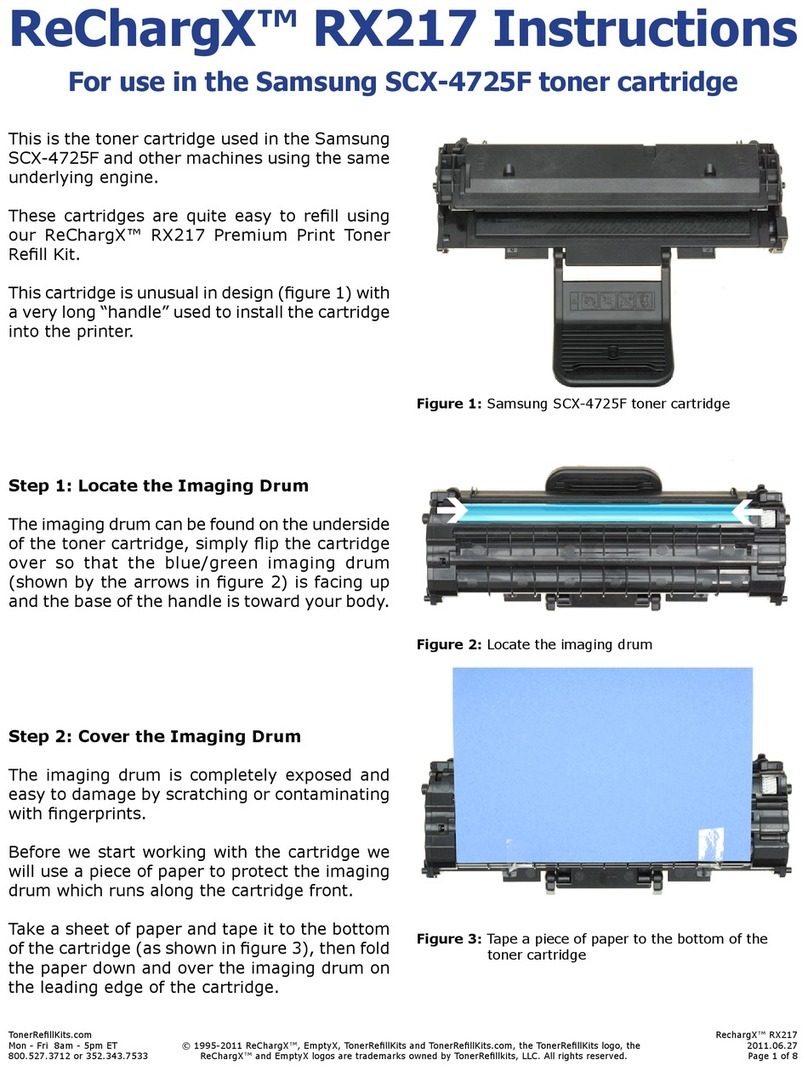
TonerRefillKits ReChargX RX217 User manual

TonerRefillKits

TonerRefillKits ReChargX RX217 User manual

Popular Printer Accessories manuals by other brands

Oki B6200 Series user manual

Oki

Oki B6200 Series user manual

Oki CX 1145 MFP installation instructions

Oki

Oki CX 1145 MFP installation instructions

Oki C5150n installation instructions

Oki

Oki C5150n installation instructions

Oki MPS3537mc Series Setup guide

Oki

Oki MPS3537mc Series Setup guide

SPROCKET X Quickstart assembly manual

SPROCKET

SPROCKET X Quickstart assembly manual

Canon Inner Finisher-D1 Installation procedures

Canon

Canon Inner Finisher-D1 Installation procedures

Canon PIXMA Pro9500 Mark II supplementary guide

Canon

Canon PIXMA Pro9500 Mark II supplementary guide

Sharp MX-FR26U Operation guide

Sharp

Sharp MX-FR26U Operation guide

Konica Minolta bizhub 223 user guide

Konica Minolta

Konica Minolta bizhub 223 user guide

Epson T549100 Material safety data sheet

Epson

Epson T549100 Material safety data sheet

Epson Stylus Photo R210 Instructional manual

Epson

Epson Stylus Photo R210 Instructional manual

Creo Color Controller C-80 Technical manual

Creo

Creo Color Controller C-80 Technical manual

Epson T501201 Material safety data sheet

Epson

Epson T501201 Material safety data sheet

Rega Elys 2 owner's manual

Rega

Rega Elys 2 owner's manual

Labelmate MC-10 user manual

Labelmate

Labelmate MC-10 user manual

Epson EASY FLOW IV R1900 installation instructions

Epson

Epson EASY FLOW IV R1900 installation instructions

Kyocera TASKalfa 400ci Operation guide

Kyocera

Kyocera TASKalfa 400ci Operation guide

Sawgrass C88 installation instructions

Sawgrass

Sawgrass C88 installation instructions

manuals.online logo
manuals.online logoBrands
  • About & Mission
  • Contact us
  • Privacy Policy
  • Terms and Conditions

Copyright 2025 Manuals.Online. All Rights Reserved.