Toro 60in Bagger Kit User manual

FormNo.3413-338RevB
60inBaggerKit
TimeCutter®MX6050RidingMower
ModelNo.79396—SerialNo.400000000andUp
Operator'sManual
WARNING
CALIFORNIA
Proposition65Warning
ThisproductcontainsachemicalorchemicalsknowntotheStateofCalifornia
tocausecancer,birthdefects,orreproductiveharm.
Introduction
Readthisinformationcarefullytolearnhowtooperate
andmaintainyourproductproperlyandtoavoid
injuryandproductdamage.Youareresponsiblefor
operatingtheproductproperlyandsafely.
Wheneveryouneedservice,genuineparts,or
additionalinformation,contactanAuthorizedService
DealerorCustomerServiceandhavethemodel
andserialnumbersofyourproductready.Figure1
identiesthelocationofthemodelandserialnumbers
ontheproduct.Writethenumbersinthespace
provided.
g005673
Figure1
1.Modelandserialnumberlocation
ModelNo.
SerialNo.
Thismanualidentiespotentialhazardsandhas
safetymessagesidentiedbythesafety-alertsymbol
(Figure2),whichsignalsahazardthatmaycause
seriousinjuryordeathifyoudonotfollowthe
recommendedprecautions.
g000502
Figure2
1.Safety-alertsymbol
Thismanualuses2wordstohighlightinformation.
Importantcallsattentiontospecialmechanical
informationandNoteemphasizesgeneralinformation
worthyofspecialattention.
©2017—TheToro®Company
8111LyndaleAvenueSouth
Bloomington,MN55420
Registeratwww.T oro.com.OriginalInstructions(EN)
PrintedintheUSA.
AllRightsReserved*3413-338*B

Contents
Introduction...............................................................1
Safety.......................................................................3
TowingSafety.....................................................3
SafetyandInstructionalDecals..........................4
Setup........................................................................5
1PreparingtheMachine.....................................6
2InstallingtheWeight.........................................6
3InstallingtheAttachmentMount.......................8
4InstallingtheLatchRod....................................9
5AssemblingtheBaggerTop.............................9
6InstallingtheBaggerTop................................10
7InstallingtheHigh-LiftBlades..........................11
8InstallingtheChute.........................................11
9ConnectingwiththeDischargeTube..............13
Operation................................................................14
EmptyingtheGrassBags.................................14
ClearingObstructionsfromtheBagger.............14
RemovingtheBagger.......................................15
UsingtheDrawBar...........................................15
OperatingTips.................................................16
Maintenance...........................................................17
RecommendedMaintenanceSchedule(s)...........17
InspectingtheBaggerAttachment....................17
InspectingtheMowerBlades............................18
CleaningtheBaggerAttachment......................18
Storage...................................................................18
StoringtheBaggerAttachment.........................18
2

Safety
WARNING
Leaves,grass,orbrushcancatchre.Are
intheengineareacancausepersonalinjury
andpropertydamage.
•Keeptheengineandmuferareafreeof
debrisaccumulation.
•Takecarewhenopeningthebaggercover
tokeepdebrisfromfallingontotheengine
andmuferarea.
•Allowthemachinetocoolbeforestoringit.
Thefollowinglistcontainssafetyinformationspecic
toT oroproductsandothersafetyinformationyou
mustknow.
•Becomefamiliarwiththesafeoperationofthe
equipment,withtheoperatorcontrols,andsafety
signs.
•Useextracarewithgrasscatchersorother
attachments.Thesecanchangetheoperating
characteristicsandthestabilityofthemachine.
•Followtherecommendationsforaddingor
removingweightsasdescribedintheOperator’s
Manualforthemachine.
•Donotuseagrasscatcheronsteepslopes.A
heavygrasscatchercouldcauselossofcontrol
oroverturnthemachine.
•Slowdownanduseextracareonhillsides.Mow
slopessidetoside.Turfconditionscanaffectthe
stabilityofthemachine.Useextremecaution
whileoperatingneardrop-offs.
•Keepallmovementonslopesslowandgradual.
Donotmakesuddenchangesinspeed,directions,
orturning.
•Thegrasscatchercanobstructtheviewtothe
rear.Useextracarewhenoperatingthemachine
inreverse.
•Usecarewhenloadingorunloadingthemachine
intoatruckortrailer.
•Parkthemachineonalevelsurface,disengage
thedrives,engagetheparkingbrake,andshutoff
theenginebeforeleavingtheoperatingposition
foranyreason,includinguncloggingoremptying
thegrasscatcher.
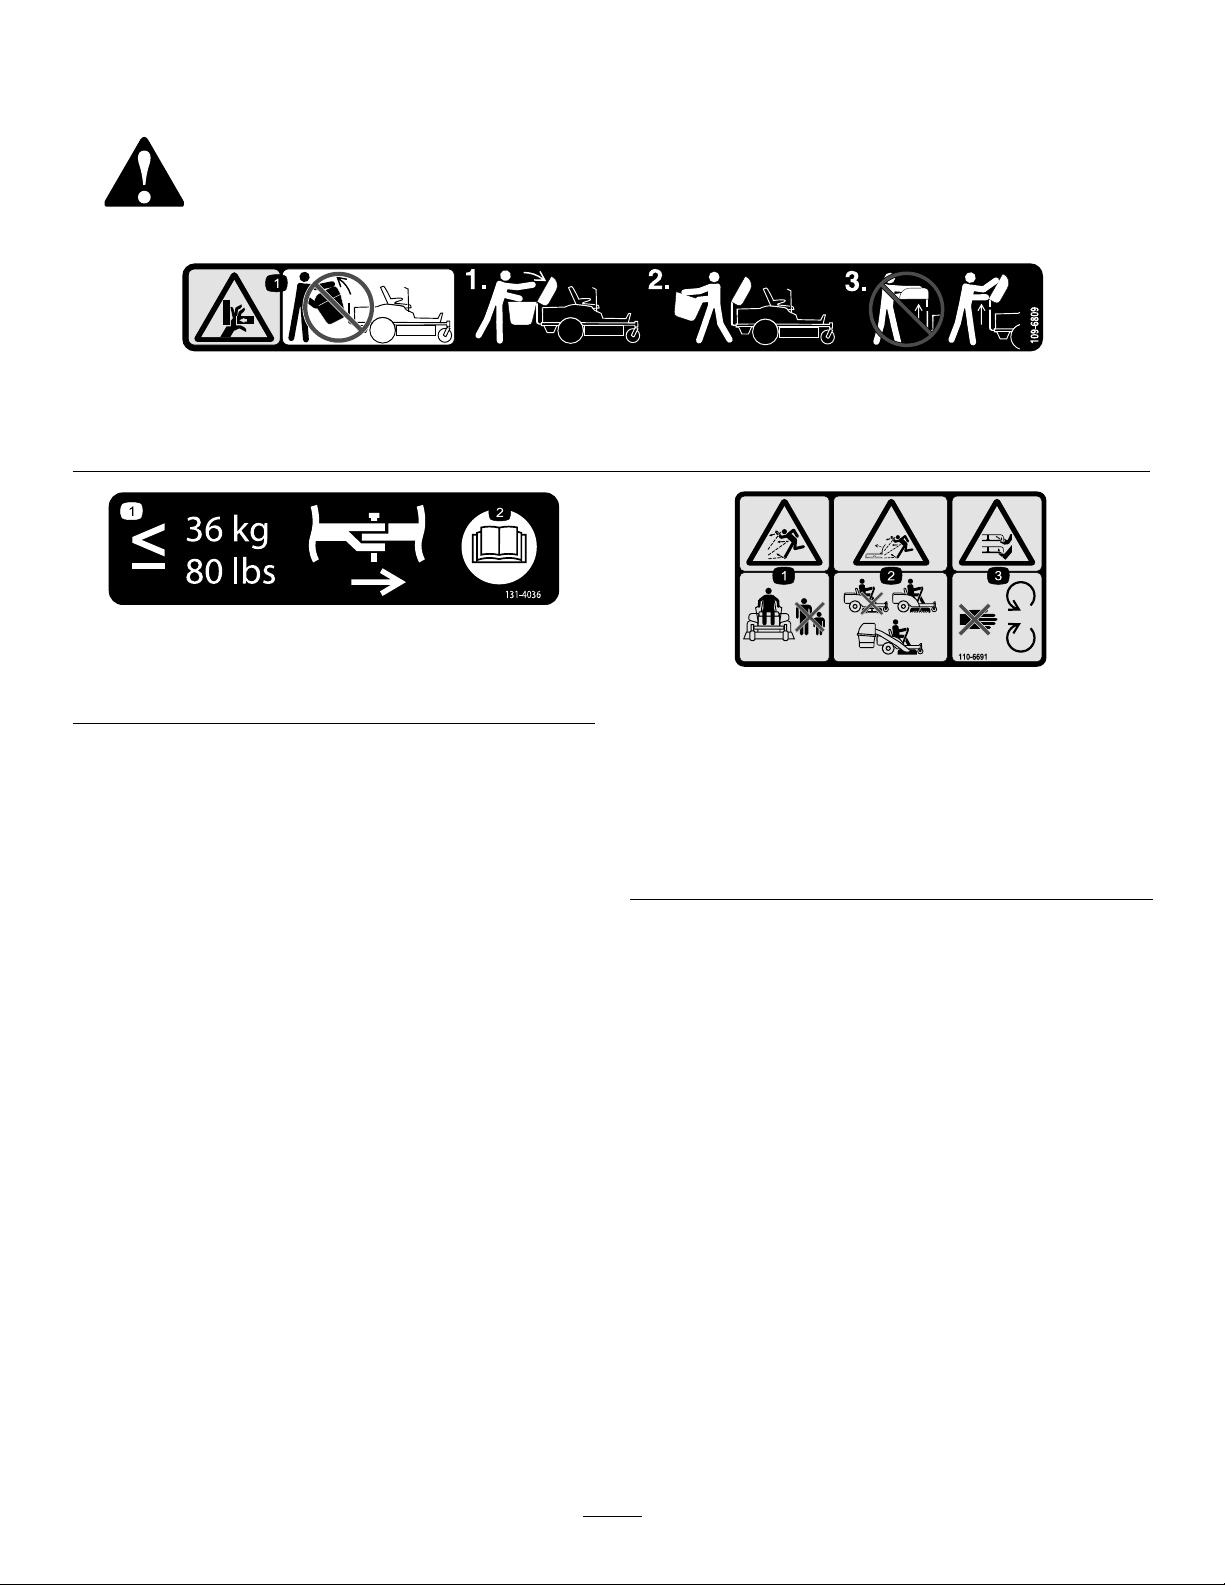
•Ifyouremovethegrasscatcher,installany
dischargedeectororguardthatwasremoved
toinstallthegrasscatcher.Donotoperatethe
machinewithouteithertheentiregrasscatcheror
thegrassdeectorinplace.
•Donotleavegrassingrasscatcherforextended
periodsoftime.
•Grasscatchercomponentsaresubjecttowear,
damage,anddeterioration,whichcouldexpose
movingpartsorallowobjectstobethrown.
Frequentlycheckcomponentsandreplacethem
withmanufacturer'srecommendedpartswhen
necessary.
TowingSafety
•Donotattachtowedequipmentexceptatthehitch
point.
•Followtheattachmentmanufacturer's
recommendationforweightlimitsfortowed
equipmentandtowingonslopes.
•Neverallowchildrenorothersinorontowed
equipment.
•Onslopes,theweightofthetowedequipmentmay
causelossoftractionandlossofcontrol.Reduce
towedweightandslowdown.
•Stoppingdistanceincreaseswiththeweightofthe
towedload.Travelslowlyandallowextradistance
tostop.
•Makewideturnstokeeptheattachmentclearof
themachine.
•Donottowaloadthatweighsmorethanthe
towingmachine.
3

SafetyandInstructionalDecals
Safetydecalsandinstructionsareeasilyvisibletotheoperatorandarelocatednearanyarea
ofpotentialdanger.Replaceanydecalthatisdamagedormissing.
decal109-6809
109-6809
1.Crushinghazardofhand—donotremovethewholebaggerfromthemachine;openthebaggertopandthenremovethebag(s)
fromthebagger.Donotremovethebaggertopwhenitisclosed;openthebaggertopandthenremoveit.
decal131-4036
131-4036
1.Themaximumdrawbar
pullis36kg(80lb).
2.ReadtheOperator's
Manual.
decal110-6691
110-6691
1.Thrownobjecthazard—keepbystandersasafedistance
awayfromthemachine.
2.Thrownobjecthazard,mower—donotoperatewithoutthe
deector,dischargecover,orgrasscollectionsystemin
place.
3.Cutting/dismembermentofhandorfoot—stayawayfrom
movingparts.
4

Setup
LooseParts
Usethechartbelowtoverifythatallpartshavebeenshipped.
ProcedureDescriptionQty.Use
1Nopartsrequired–Preparethemachine.
Weighttray1
Leftweight-traymount1
Rightweight-traymount1
Suitcaseweight—16kg(35lb)1
Retainingrod1
Bolt(3/8x1-1/4inches)2
Flangenut(3/8inch)4
Carriagebolt(3/8x1inch)2
2
Self-tappingbolt(5/16x3/4inch)2
Installtheweight.
Stabilizerbracket1
Carriagebolt(5/16x3/4inch)2
Locknut(5/16inch)4
Self-tappingscrew(5/16x3/4inch)2
Bolt(5/16x1inch)2
Pivotframe1
Hairpincotter2
Rod2
Washer2
3
Draw-bardecal1
Installtheattachmentmount.
Latchrod1
4Hairpincotter1Installthelatchrod.
Baggertop1
5Baggerscreen1Assemblethebaggertop.
GrassBag2
6Upperbaggertube1Installthebaggertop.
7High-liftblade3Installthehigh-liftblades.
Curvedbafe1
Locknut(5/16inch)1
Handknob1
Washer1
8
Chute1
Installthechute.
9Dischargetube1Connectwiththedischargetube.
5

Note:Determinetheleftandrightsidesofthe
machinefromthenormaloperatingposition.
1
PreparingtheMachine
NoPartsRequired
Procedure
1.Parkthemachineonalevelsurfaceand
disengagethedrives.
2.Engagetheparkingbrake.
3.Shutofftheengineandremovethekey.
4.Waitforallmovingpartstostopbeforeleaving
theoperatingposition.
5.Ensurethatthemachineissecurefrom
movementandallowsurfacestocoolbeforeyou
begintoworkonit.
6.Cleanthemachineofanydebrisonthemachine
deckorrearpartofthemachinetoease
installation.
2
InstallingtheWeight
Partsneededforthisprocedure:
1Weighttray
1Leftweight-traymount
1Rightweight-traymount
1Suitcaseweight—16kg(35lb)
1Retainingrod
2Bolt(3/8x1-1/4inches)
4Flangenut(3/8inch)
2Carriagebolt(3/8x1inch)
2Self-tappingbolt(5/16x3/4inch)
Procedure
CAUTION
Thebaggerchangestheweightdistributionof
themachine.Operatingthemachinewithout
thefrontweightsmaycauseanunstable
condition,whichcouldresultinalossof
control.
Ensurethefrontweightsareproperlyinstalled
beforeoperatingthemachinewiththebagger
attachment.
1.Removetheexistingboltandnutfromtheleft
andrightsideoftheplatformwhereyouwill
installtheweight-traymounts.
2.Usethe2self-tappingbolts(5/16x3/4inch),2
bolts(3/8x1-1/4inches),andangenuts(3/8
inch)tosecuretheleftandrightweight-tray
mountstothemachine(Figure3).
6

g196533
Figure3
Cutawayview
1.Weight-traymounts3.Flangenut(3/8inch)
2.Bolt(3/8x1-1/4inches)4.Self-tappingbolt(5/16x
3/4inch)
3.Usethe2carriagebolts(3/8x1inch)andange
nutstosecuretheweighttraytothemounts
(Figure4).
g196549
Figure4
1.Carriagebolt(3/8x1inch)3.Weighttray
2.Weight-traymount4.Flangenut(3/8inch)
4.Insertthesuitcaseweightintotheweighttray
withthegroovesidefacingtowardthefrontof
themachine(Figure5).
g196560
Figure5
1.Retainingrod3.Suitcaseweight
2.Weighttray
5.Inserttheretainingrodintothetrayandrotateit
intothelockedposition(Figure5).
Important:Removethesuitcaseweightwhenever
youremovethebaggerattachment.
7

3
InstallingtheAttachment
Mount
Partsneededforthisprocedure:
1Stabilizerbracket
2Carriagebolt(5/16x3/4inch)
4Locknut(5/16inch)
2Self-tappingscrew(5/16x3/4inch)
2Bolt(5/16x1inch)
1Pivotframe
2Hairpincotter
2Rod
2Washer
1Draw-bardecal
Procedure
1.Installthestabilizerbrackettotheengineguard
using2carriagebolts(5/16x3/4inch)and2
locknuts(5/16inch)asshowninFigure6.
g203564
Figure6
1.Stabilizerbracket3.Locknut(5/16inch)
2.Carriagebolt(5/16x3/4
inch)
2.Installthepivotframetothemachineframeas
showninFigure7.Ensurethatyoupushthe
pivotframeupuntilitistightagainstthebottom
oftheengineguard.Looselysecurethepivot
frametothemachineframeusing2bolts(5/16x
1inch)and2locknuts(5/16inch).
g203563
Figure7
1.Machineframe4.Bolt(5/16x1inch)
2.Locknut(5/16inch)5.Pivotframe
3.Hole
3.Securethepivotframetothebottomofthe
machineframeusing2self-tappingscrews(5/16
x3/4inch)asshowninFigure8.
g203566
Figure8
1.Self-tappingscrew(5/16x
3/4inch)
2.Pivotframe
4.Tightthe2bolts(5/16x1inch)and2locknuts
(5/16inch)fromstep2.
5.Attachthedrawbardecal1.3cm(1/2inch)to
theleftoftheattachmentmount(Figure9).
8

g203562
Figure9
1.Drawbardecal
6.Installthebent,aredendofarodintothekeyed
slotintheleftsideofthemachineframe,and
movetherodrearwardtoseatitintheframe
(Figure10).
Note:Repeatthisstepfortherightsideofthe
machine.
g203565
Figure10
Leftsideshown
1.Pivotframehole4.Supportrod
2.Washer5.Keyedslot(existing)
3.Hairpincotter6.Bent,aredendofrod
7.Insertthebentendsoftherodsintothe
attachmentmountasshowninFigure10and
securetheendofeachrodwithawasherand
hairpincotter.
4
InstallingtheLatchRod
Partsneededforthisprocedure:
1Latchrod
1Hairpincotter
Procedure
Installthelatchrodwithahairpincotter(Figure11).
g202360
Figure11
1.Hairpincotter2.Latchrod
5
AssemblingtheBaggerTop
Partsneededforthisprocedure:
1Baggertop
1Baggerscreen
Procedure
1.Turnthebaggertopover.
2.InstallthescreenasshowninFigure12andthat
itslopesdowntowardthecollectionbags.
9

Note:Makesurethatthescreenssnapinto
placeandthetabsengagethebaggertop.
G005666
1
2
3
4
g005666
Figure12
1.Baggertop3.Screentab
2.Screen4.Slotinbaggertop
6
InstallingtheBaggerTop
Partsneededforthisprocedure:
2GrassBag
1Upperbaggertube
Procedure
1.Installthebaggertoptothebaggerframe.
2.Slidethebracketsoverthepostsinthebagger
frameandinstallthecircularcotterpinintothe
holeintherighthandpost(Figure13).
3.Rotatethebaggerhooddowntotheoperating
position.
Note:T oremovethecircularcotterpin,
continuetorotateitinthesamedirectionas
installed.
G016265
g016265
Figure13
1.Baggerhood4.Circularcotterpin
2.Baggerframe5.Post
3.Baggerhoodbracket
10

4.Liftthebaggertopandinstallthebagsbysliding
thebagframehooksontotheretainingbrackets
(Figure14).
1
2
3
4
g033032
Figure14
1.Bag3.Retainingbracket
2.Baggerframe4.Bagframehook
5.Lowerthebaggertopontothebags(Figure15).
g033030
Figure15
6.Securethehoodwiththelatch(Figure15).
7.Installtheupperbaggertubebyinsertingthe
curvedendintotheopeninginthebaggertop.
Note:Makesurethatthearedendwiththe
retentionpostispointingdownandforwardin
preparationtobematedwiththenishingkit.
7
InstallingtheHigh-Lift
Blades
Partsneededforthisprocedure:
3High-liftblade
Procedure
RefertotheOperator’sManualforthemachineto
removetheexistingbladesandinstallthehigh-lift
blades.
8
InstallingtheChute
Partsneededforthisprocedure:
1Curvedbafe
1Locknut(5/16inch)
1Handknob
1Washer
1Chute
Procedure
WARNING
Anuncovereddischargeopeningcouldallow
thelawnmowertothrowobjectstowardyou
orbystanders,resultinginseriousinjury.
Also,contactwiththebladecouldoccur.
Neveroperatethelawnmowerunlessyou
installacoverplate,amulchplate,oragrass
chuteandcatcher.
Neveroperatethemowerwiththedischargeopening
uncovered.Alwaysuseadischargecover,mulch
cover,orbaggingchutewhenoperatingthemower
deck.
1.Removefastenersthatsecurethedeector
assemblytothemowerdeck(Figure16).
Note:Retainallfasteners.
11

G013095
1
23
4
5
g013095
Figure16
1.Deectorassembly4.Carriagebolt(existing;
reuse)
2.Locknut(existing;retain)5.Carriagebolt(existing;
retain)
3.Locknut(existing;reuse)
2.Removethedeectorassembly.
Note:Retainallpartstoconvertthemower
decktosidedischarge.
3.Locateandinstalltheangledcutoffbafetothe
mowerdeckattherearholesinthemowerdeck
(Figure17).
Note:Usetheexistingfastenersfromthat
locationtosecuretheangledcutoffbafetothe
mowerdeck.
g202281
Figure17
1.Holeinfrontwallofthe
mowerdeck
6.High-liftblade
2.Locknut7.Locknut(existing;reuse)
3.Horizontalpost,curved
bafe
8.Angledcutoffbafe
4.Verticalpost,curvedbafe9.Carriagebolt(existing;
reuse)
5.Curvedbafe10.Center,forwardholein
mowerdeck
4.Installthecurvedbafetothemowerdeck
(Figure17).
A.Aligntheverticalpostinthecurvedbafe
withcenter,forwardholeinthemowerdeck
andthehorizontalpostwiththeholeinthe
frontwallofthemowerdeck.
B.Securehorizontalposttothefrontwallof
themowerdeckusingalocknut.
5.Installthechutetothemowerdeck.
Note:Ensurethattheopeningintopofthe
chutealignswiththeexposedpostonthe
mowerdecktopandtheforwardverticalplate
mateswiththefoldedmetalbracketofthechute
(Figure18).
12

G013097
1
2
3
4
5
6
g013097
Figure18
1.Dischargechute4.Foldedmetalbracket
(chute)
2.Handknob5.Forwardverticalplate
(deck)
3.Washer6.Exposedpostinthemower
deck(curvedbafe)
6.Installawasherandhandknoboverthepost
comingthroughthechutetop(Figure18).
7.Handtightentheknobtosecurethechutetothe
mowerdeck.
8.Hooktheexiblelatchonthechutetothe
retainingclaspweldedtothesidewallofthe
mowerdeck(Figure19).
G013098
1
2
g013098
Figure19
1.Retainingclasp2.Flexiblelatch
9
Connectingwiththe
DischargeTube
Partsneededforthisprocedure:
1Dischargetube
Procedure
1.Slidethecurvedendofthedischargetubeinto
theopeninginthebaggertop(Figure20).
G010641
12
3
4
5
g010641
Figure20
1.Dischargetube4.Peg
2.Openinginbaggertop5.Rubberstrap
3.Flaredendofdischarge
tube
2.Slidethearedendofthedischargetubeover
theendofthechute.Movetherubberretaining
straponthechutesnapsoverthepegonthe
dischargetubetosecureit(Figure20).
3.Installthewireontothesparkplug(s).
13

Operation
Note:Determinetheleftandrightsidesofthe
machinefromthenormaloperatingposition.
WARNING
Toavoidpersonalinjury,followthese
procedures:
•Becomefamiliarwithalloperatingand
safetyinstructionsintheOperator's
Manualforthemowerbeforeusingthis
attachment.
•Neverremovethedischargetube,bags,
baggertop,orthechutewhiletheengine
isrunning.
•Alwaysshuttheengineoffandwaitforall
movingpartstostopbeforeclearingan
obstructionfromthebaggingsystem.
•Neverperformmaintenanceormake
repairswhiletheengineisrunning.
EmptyingtheGrassBags
Becarefulwhenliftingorhandlingagrassbagthat
isfull.
1.Parkthemachineonalevelsurfaceand
disengagetheblade-controlswitch.
2.Movethemotioncontrolleversoutwardtothe
NEUTRAL-LOCKposition,shutofftheengine,
removethekey,engagetheparkingbrakeand
waitforallmovingpartstostopbeforeleaving
theoperatingposition.
3.Open(raise)thebaggertop(Figure21).
G005758
g005758
Figure21
4.Compressdebrisintothebags.Withboth
hands,liftuponthebag,unhookitfromthe
retainingbracket,andemptythebag.Repeat
thisstepfortheotherbag.
5.Installthebagsbyslidingthebagframehooks
ontotheretainingbrackets(Figure22).
G005672
1
2
3
4
g005672
Figure22
1.Bag3.Retainingbracket
2.Baggerframe4.Bag-framehook
6.Lowerthebaggertopontothebags.
ClearingObstructionsfrom
theBagger
1.Parkthemachineonalevelsurfaceand
disengagethedrives.
2.Engagetheparkingbrake.
3.Shutofftheengineandremovethekey.
4.Waitforallmovingpartstostopbeforeleaving
theoperatingposition.
5.Checkthegrassbagsandemptythemifthey
arefull.
6.Separatethedischargetubeandchute.
7.Removethedischargetubeandchutefromthe
baggertopandmowerdeck.Usingastickor
similarobject,carefullyremoveandclearthe
obstructionfromthemower,dischargetube,
chute,andthebaggertop.
14

8.Afteryouremovetheobstruction,installthe
completebaggersystemandresumeoperation.
RemovingtheBagger
CAUTION
Failingtoremovethefrontbaggerweights
andoperatingthemachinewithoutthebagger
attachmentmaycauseanunstablecondition,
whichcouldresultinalossofcontrol.
•Alwaysremovethefrontweightswhen
removingthebaggerattachment.
•Neveroperatethemachinewithoutthe
baggerattachmentandthefrontweights
installed.
YoucanremovethebaggerbyrepeatingtheSetup
sectionsfromallinstalledbaggerrelatedkitsin
reverseorder.Ifweightsareinstalled,alwaysremove
thefrontbaggerweightswhenremovingthebagger
attachments.
Note:Itisnecessaryonlytoremovethecutoffbafe
wheninstallingamulchingkit.
UsingtheDrawBar
Thebaggersupportbrackethasadrawbarfeature
thatyoucanusefortowing.
•Readandunderstandalltheoperatinginstructions
ofthemachine.
•Whenturning,slowdownandobservethe
clearance.
•Makewideturnsandkeeptowedequipmentclear
ofthetowingvehicle.
•Themaximumdrawbarpullis36kg(80lb).
•Excessivedrawbarpullmaycausehydrostatic
transmissionfailure.
g203567
Figure23
1.Baggersupportbracketwithdrawbar
15

OperatingTips
TipsforBagging
RememberingtheSizeofthe
MachinewiththeAttachment
Rememberthatthemachineislongerandwiderwith
thisattachmentinstalled.Byturningtoosharplyin
connedplaces,youmaydamagetheattachment.
Trimming
Alwaystrimwiththeleftsideofthemower.Donottrim
withtherightsideofthemowerbecauseyoucould
damagethebaggerchuteanddischargetube.
CuttingHeight
Donotsetthemowercuttingheighttoolowbecause
longgrasssurroundingthemowercanpreventair
fromgettingunderthemowerandenteringthe
baggingsystem.Ifenoughairdoesnotgetunderthe
mower,thebaggingsystemwillplug.
CuttingFrequency
Cutthegrassoften,especiallywhenitgrowsrapidly.
Youwillhavetocutyourgrasstwiceifitgets
excessivelylong.
CuttingTechnique
Forbestlawnappearance,besuretoslightlyoverlap
themowerintothepreviouslycutarea.Thishelps
reducetheloadontheengineandreducesthechance
ofpluggingthechuteanddischargetube.
BaggingSpeed
Mostoftenyouwillbagwiththemowerthrottleinthe
FASTpositionanddriveatanormalgroundspeed.
However,inextremelydryanddustygrass,youmay
wanttoslightlyreducethethrottlespeedandincrease
thegroundspeedofthemower.Thebaggingsystem
mayplugifyoudrivetoofastandtheenginespeed
getstooslow.Onhills,itmaybenecessarytoslow
themowergroundspeed.Thishelpsmaintainthe
enginespeedandbaggingefciency.Mowdownhill
wheneverpossible.
CAUTION
Asthebaggerlls,extraweightisaddedto
thebackofthemachine.Ifyoustopand
startsuddenlyonhills,youmaylosesteering
controlorthemachinemaytip.
•Donotstartorstopsuddenlywhengoing
uphillordownhill.Avoiduphillstarts.
•Ifyoudostopthemachinewhengoing
uphill,disengagethebladecontrol.Then
backdownthehillusingaslowspeed.
•Avoidsuddenturnsorrapidspeed
changesonslopes.
•Neveroperatethemachinewithoutthe
baggerattachmentandthefrontweights
installed.
BaggingLongGrass
Excessivelylonggrassisheavyandmaynotbe
propelledcompletelyintothegrassbags.Ifthis
happens,thedischargetubeandchutemayplug.To
avoidpluggingthebaggingsystem,mowthegrass
atahighheightofcut,thenlowerthemowertoyour
normalcuttingheightandrepeatthebaggingprocess.
BaggingWetGrass
Alwaystrytocutgrasswhenitisdrybecauseyour
lawnwillhaveaneatappearance.Ifyoumustcutwet
grass,usetheconventionalside-dischargefeatureof
themower.Severalhourslater,whentheclippings
aredry,installthecompletebaggerattachmentand
vacuumupthegrassclippings.
SignsofPlugging
Asyouarebagging,asmallamountofgrassclippings
normallyblowoutthefrontofthemower.Anexcessive
amountofclippingsblowingoutindicatesthatthe
bagsarefullorthesystemisplugged.
16

Maintenance
Note:Determinetheleftandrightsidesofthemachinefromthenormaloperatingposition.
CAUTION
Ifyouleavethekeyintheignitionswitch,
someonecouldaccidentlystarttheengine
andseriouslyinjureyouorotherbystanders.
Removethekeyfromtheignitionand
disconnectthewirefromthesparkplug
beforeyoudoanymaintenance.Setthewire
asidesothatitdoesnotaccidentallycontact
thesparkplug.
DANGER
Enginescanbecomehotwhentheyare
operating.Severeburnscanoccurfrom
contactinghotsurfaces.
Allowengines,especiallythemufer,tocool
beforetouching.
DANGER
Leaves,grass,orbrushcancatchre.Are
intheengineareacancausepersonalinjury
andpropertydamage.
•Keeptheengineandmuferareafreeof
debrisaccumulation.
•Takecarewhenopeningthebaggercover
tokeepdebrisfromfallingontotheengine
andmuferarea.
•Allowthemachinetocoolbeforestoringit.
RecommendedMaintenanceSchedule(s)
MaintenanceService
IntervalMaintenanceProcedure
Aftertherst10hours•Inspectthebagger.
Beforeeachuseordaily•Cleanthebagger.
Beforestorage•Inspectthebagger.
•Cleanthebagger.
InspectingtheBagger
Attachment
ServiceInterval:Aftertherst10hours
Beforestorage
1.Checkthechute,dischargetube,andthebagger
top.Replacethesepartsiftheyarecrackedor
broken.
2.Tightenallnuts,bolts,andscrews.
3.Inspectallfastenersandlatches;replaceany
missingordamaged.
4.Inspectthegrassbagsfordeterioration.
WARNING
Youorbystanderscouldbeseverely
injuredbyyingdebrisorthrownobjects
thatmaypassthroughtorn,worn,or
deterioratedgrassbags.
•Checkthegrassbagsforholes,rips,
wear,andotherdeterioration.
•Donotwashthegrassbags.
•Ifthebaghasdeteriorated,install
newgrassbagssuppliedby
themanufacturerofthisbagger
attachment.
17

InspectingtheMower
Blades
Inspectthemowerbladesregularlyandwhenevera
bladestrikesaforeignobject.
Ifthebladesarebadlywornordamaged,installnew
blades.RefertoyourmowerormowerOperator's
Manualforcompleteblademaintenance.
CleaningtheBagger
Attachment
ServiceInterval:Beforeeachuseordaily
Beforestorage
1.Aftereachuse,removeandwashtheinside
andoutsideofthebaggertop,dischargetube,
chute,andtheundersideofthemower,using
watersprayedfromagardenhose.Useamild
detergenttoremovestubborndirt.
2.Makesurethatyouremovemattedgrassfrom
allparts.
3.Flushthegrassbagswithwaterusinggarden
hosetoremoveanydebris.
4.Afterwashing,letallthepartsdrythoroughly.
Storage
StoringtheBagger
Attachment
Note:Topreventrapiddeteriorationofthebag
material,storethebagswheretheywilldrycompletely
aftereachuse.
1.Cleanthebaggerattachment;refertoCleaning
theBaggerAttachment(page18).
2.Inspectthebaggerattachmentfordamage;refer
toInspectingtheBaggerAttachment(page17).
3.Makesurethatthegrassbagsareemptyand
thoroughlydry.
4.Storethebaggerinaclean,dryplace,out
ofdirectsunlight.Thisprotectstheplastic
partsandextendsthelifeofthebagger.Ifyou
muststorethebaggeroutside,coveritwitha
weatherproofcover.
18

Notes:

TimeCutter
TheToroWarranty
LimitedWarranty(seewarrantyperiodsbelow)
ConditionsandProductsCovered
TheT oroCompanyanditsafliate,ToroWarrantyCompany,pursuanttoan
agreementbetweenthem,jointlypromisetorepairtheToroProductslisted
belowifdefectiveinmaterialsorworkmanship.
Thefollowingtimeperiodsapplyfromtheoriginaldateofpurchase:
ProductsWarrantyPeriod
TimeCutterMowersResidentialUse2–3years
•Engines1—ResidentialuseKawasaki–3years
Kohler–3years
Toro–3years
TimeCutterMowersCommercialuse30days
•Engines1—CommercialuseKawasaki–3years
Kohler–90days
ToroSingleCylinder–90days
ToroTwinCylinder–3years/300
Hours3
TimeCutterHDMowers3yearsor300Hours3
•Engines1—Residentialand
CommercialUse3yearsor300Hours3
AllMowers
•Attachments1year
•Battery90daysPartsandLabor
1yearPartsonly
•BeltsandTires90days
1SomeenginesusedonT oroProductsarewarrantedbytheenginemanufacturer.
2Residentialusemeansuseoftheproductonthesamelotasyourhome.Useatmorethanone
locationisconsideredcommercialuseandthecommercialusewarrantywouldapply.
3Whicheveroccursrst.
Warrantymaybedeniedifthehourmeterisdisconnected,altered,or
showssignsofbeingtamperedwith.
OwnerResponsibilities
YoumustmaintainyourToroProductbyfollowingthemaintenance
proceduresdescribedintheOperator'sManual.Suchroutinemaintenance,
whetherperformedbyadealerorbyyou,isatyourexpense.
InstructionsforObtainingWarrantyService
IfyouthinkthatyourToroProductcontainsadefectinmaterialsor
workmanship,followthisprocedure:
1.ContactanyAuthorizedToroServiceDealertoarrangeserviceat
theirdealership.T olocateadealerconvenienttoyou,accessourweb
siteatwww.Toro.com.Youmayalsocallthenumberslistedinitem#3
tousethe24-hourT oroDealerlocatorsystem.
2.Bringtheproductandyourproofofpurchase(salesreceipt)tothe
ServiceDealer.Thedealerwilldiagnosetheproblemanddetermineif
itiscoveredunderwarranty.
3.IfforanyreasonyouaredissatisedwiththeServiceDealer’s
analysisorwiththeassistanceprovided,contactusat:
ToroWarrantyCompany
CustomerCareDepartment,RLCDivision
8111LyndaleAvenueSouth
Bloomington,MN55420-1196
Tollfreeat866-216-6029(U.S.customers)
Tollfreeat866-216-6030(Canadiancustomers)
ItemsandConditionsNotCovered
Thereisnootherexpresswarrantyexceptforspecialemissionsystem
coverageandenginewarrantycoverageonsomeproducts.Thisexpress
warrantydoesnotcoverthefollowing:
•Costofregularmaintenanceserviceorparts,suchaslters,fuel,
lubricants,oilchanges,sparkplugs,airlters,bladesharpening
orwornblades,cable/linkageadjustments,orbrakeandclutch
adjustments
•Componentsfailingduetonormalwear
•Anyproductorpartwhichhasbeenaltered,misused,neglected,
requiresreplacementorrepairduetoaccidentsorlackofproper
maintenance
•Pickupanddeliverycharges
•RepairsorattemptedrepairsbyanyoneotherthananAuthorizedToro
ServiceDealer
•Repairsnecessaryduetofailuretofollowrecommendedfuel
procedure(consultOperator'sManualformoredetails)
–Removingcontaminantsfromthefuelsystemisnotcovered
–Useofoldfuel(morethanonemonthold)orfuelwhichcontains
morethan10%ethanolormorethat15%MTBE
–Failuretodrainthefuelsystempriortoanyperiodofnon-use
overonemonth
GeneralConditions
AllrepairscoveredbythesewarrantiesmustbeperformedbyanAuthorized
ToroServiceDealerusingT oroapprovedreplacementparts.
NeitherTheToroCompanynorToroWarrantyCompanyisliablefor
indirect,incidentalorconsequentialdamagesinconnectionwiththe
useoftheToroProductscoveredbythiswarranty,includingany
costorexpenseofprovidingsubstituteequipmentorserviceduring
reasonableperiodsofmalfunctionornon-usependingcompletionof
repairsunderthiswarranty.
Allimpliedwarrantiesofmerchantability(thattheproductistfor
ordinaryuse)andtnessforuse(thattheproductistforaparticular
purpose)arelimitedtothedurationoftheexpresswarranty.
Somestatesdonotallowexclusionsofincidentalorconsequential
damages,orlimitationsonhowlonganimpliedwarrantylasts,sothe
aboveexclusionsandlimitationsmaynotapplytoyou.
Thiswarrantygivesyouspeciclegalrights,andyoumayalsohaveother
rightswhichvaryfromstatetostate.
CountriesOtherthantheUnitedStatesorCanada
ThiswarrantyisnotvalidinMexico.CustomerswhohavepurchasedToroproductsoutsidetheUnitedStatesorCanadashouldcontacttheirT oro
Distributor(Dealer)toobtainguaranteepoliciesforyourcountry,province,orstate.IfforanyreasonyouaredissatisedwithyourDistributor'sserviceor
havedifcultyobtainingguaranteeinformation,contacttheToroimporter.Ifallotherremediesfail,youmaycontactusatT oroWarrantyCompany.
AustralianConsumerLaw:AustraliancustomerswillnddetailsrelatingtotheAustralianConsumerLaweitherinsidetheboxoratyourlocalT oro
Dealer.
374-0258RevJ
This manual suits for next models
1
Table of contents
Other Toro Lawn Mower Accessories manuals
Popular Lawn Mower Accessories manuals by other brands

Exmark
Exmark ULTRAVAC BAGGER 126-6954 Setup instructions

Simplicity
Simplicity 30" Mower 1690822 Operator's manual

Snapper
Snapper 6-3317 installation instructions

Bush Hog
Bush Hog RO-840 Operator's manual

Land Pride
Land Pride Accu-Z Z60 Operator's manual

Big League Lawns
Big League Lawns CheckMate 21462 installation guide