manuals.online logo
Brands
  1. Home
  2. •
  3. Brands
  4. •
  5. Toro
  6. •
  7. Paint Sprayer
  8. •
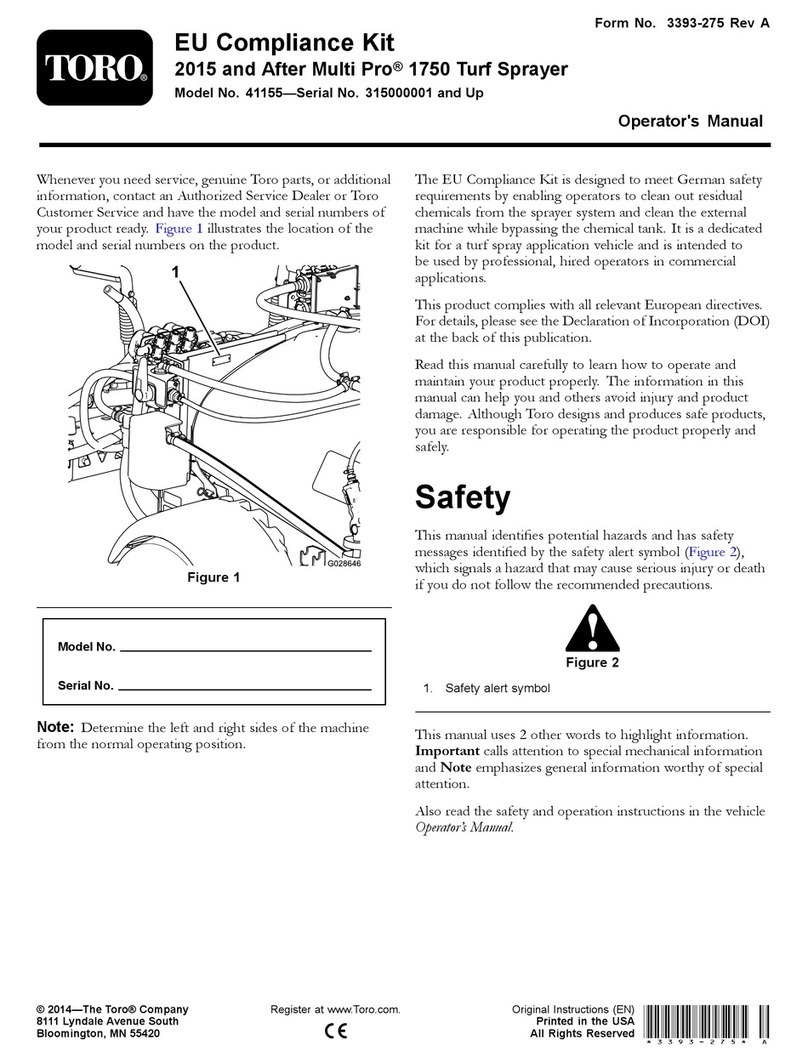
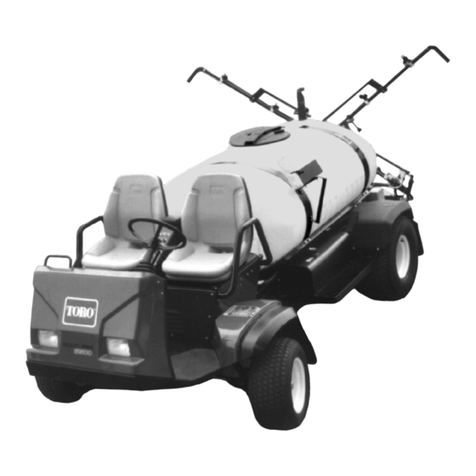
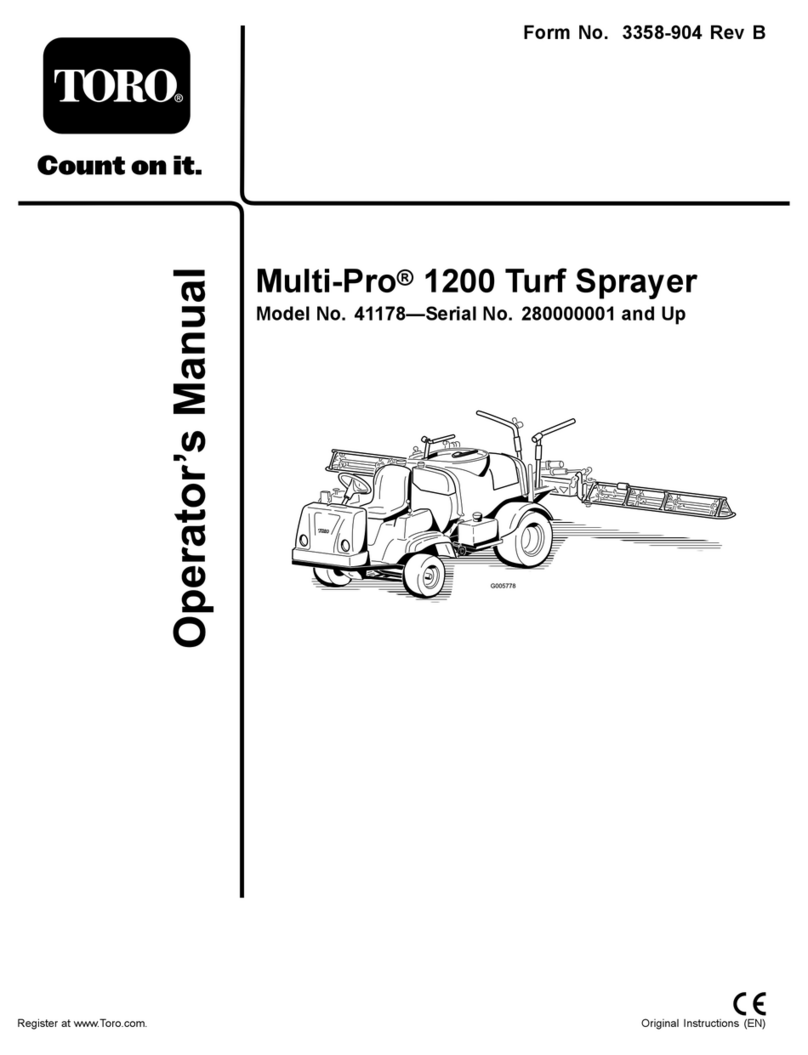
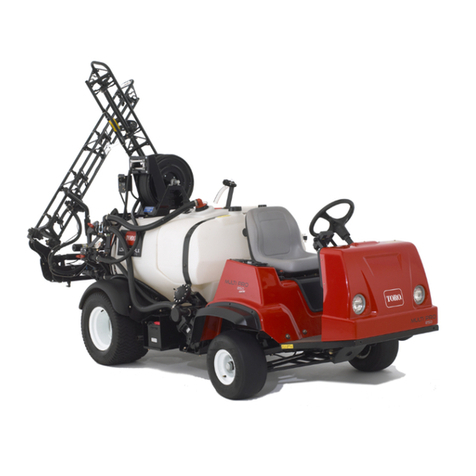
  9. Toro 41107 User manual

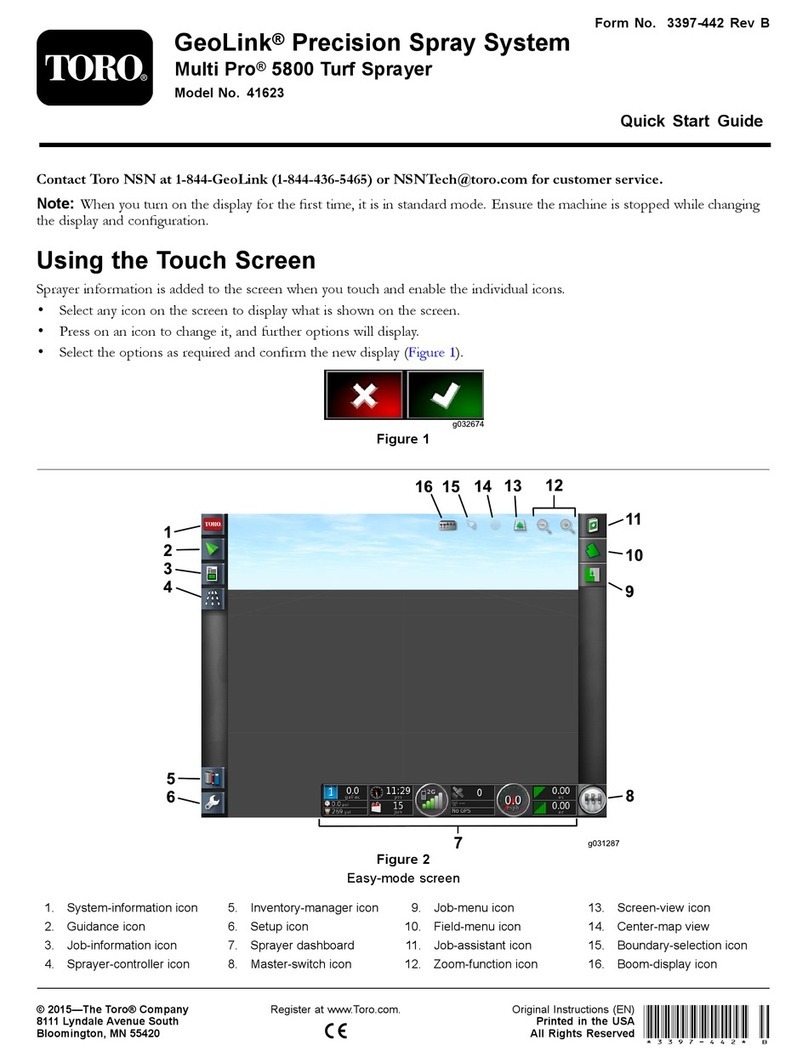
Toro 41107 User manual

1
©The TORO Company - 2001
All Rights Reserved
To assure maximum safety, optimum
performan e, and to gain knowledge of
the produ t, it is essential that you or any
other operator of this vehi le read and
understand the ontents of this manual
before the engine is ever started. Pay
parti ular attention to the SAFETY
INSTRUCTIONS highlighted by the
triangular safety alert symbol.
The safety alert symbol means
CAUTION, WARNING, or DANGER
- personal safety instru tion. Failure to
omply with the instru tion may result in
personal injury.
FORM NO. 104-8942
MODEL NO. 41107-210000235 and UP OPERATOR'S &
SETUP
MANUAL
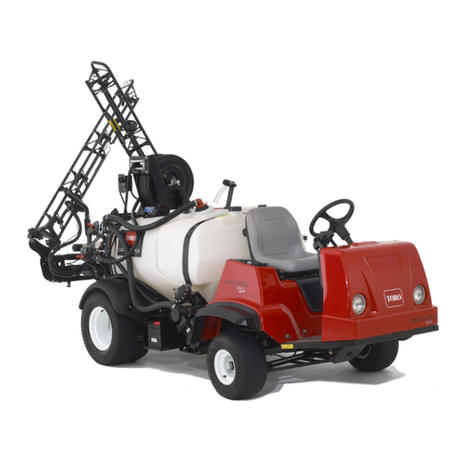
MULTI PRO® 1200
TURF SPRAYER
2
When the ma hine is used or operated on any California forest, brush, or grass overed land, a
properly operating Spark Arrester must be obtained and installed to the Muffler. The operator is
violating state law, Se tion 4442 Publi Resour es Code if a Spark Arrester is not used.
IDENTIFICATION AND ORDERING
VEHICLE: ENGINE:
The MULTI PRO® 1200 has two identification
numbers: a model number and a serial number
These numbers are stamped into a plate located
on floor board of the vehicle In any
correspondence concerning the unit, supply the
model number and serial number to ensure
correct information and replacement parts are
obtained Record your Vehicle Identification
numbers on the illustration below for future
reference
This vehicle is not a motor vehicle as defined by
the National Traffic Motor Vehicle Safety Act It is
not designed or manufa tured for use on roads,
streets, or highways, and is not to be li ensed
as a motor vehi le.
FOREWORD
Safety, mechanical, and some general information in this manual are emphasized DANGER, WARNING,
and CAUTION identify safety messages Whenever the triangle safety symbol appears, it is followed by
a safety message that must be read and understood For more details concerning safety, read the safety
instructions on pages 4 through 6 IMPORTANT identifies special mechanical information and NOTE
identifies general information worthy of special attention
SPARK ARRESTER
In some places a Spark Arrester muffler must be used because of local, state, or federal regulations The
Spark Arrester available from your local TORO Distributor is approved by the United States Department
of Agriculture and the United States Forest Service
All information, illustrations and specifications in this manual are based on the latest product information available at the time of
publication The right is reserved to make any changes at any time without notice
DATE PURCHASED: _______________________
You have purchased a vehicle from the industry leader in maintenance excellence Its future performance
and dependability are of prime importance TORO is also concerned about future use of the vehicle
and safety of the user Therefore, this manual must be read by you and those involved with the MULTI
PRO® 1200 to assure that safety, proper setup, operation, and maintenance procedures are followed at
all times The major sections of the manual are:
MOD.
SER.
THE TORO CO.
MINNEAPOLIS, MN. 55420
1. SAFETY INSTRUCTIONS 2. SETUP INSTRUCTIONS 3. BEFORE OPERATING
4. OPERATING INSTRUCTIONS 5. MAINTENANCE 6. SPRAYING SYSTEM
WARNING
The engine exhaust from this produ t
ontains hemi als known to the State
of California to ause an er, birth
defe ts, or other reprodu tive harm.
The engine has three identification numbers: a
model number, a specification number and a serial
number These numbers appear on a decal affixed
to the engine shrouding When ordering parts or
in any communication involving the engine, it will
be necessary to supply the engine manufacturer
with these numbers, to ensure correct information
and replacement parts are obtained Record the
engine identification numbers on the illustration
below for future reference
3
5-7
5
5-6
6-7
7
7
8-9
10
11-14
11
12-14
15-19
15
16
17
18
18
19
19
19
19
20-21
22-25
22
22
22
23
23
23-24
24
24
24
24
25
25
26
26
27
28
29
29-30
31-32
33
34-37
34
34
35
35
36
37
38
38
TABLE OF CONTENTS
SAFETY INSTRUCTIONS................................................................................................................
SUPERVISOR'S RESPONSIBILITES
BEFORE OPERATING
WHILE OPERATING
SAFETY AND INSTRUCTIONS.................................................................................................
MAINTENANCE
SAFETY AND INSTRUCTION DECALS...................................................................................
SPECIFICATIONS......................................................................................................................
SETUP INSTRUCTIONS..................................................................................................................
ACTIVATE AND CHARGE BATTERY
SPRAY SYSTEM
BEFORE OPERATING....................................................................................................................
CHECK ENGINE CRANKCASE OIL
FILL FUEL TANK
CHECK AIR CLEANER/AIR INTAKE
CHECK TRANSAXLE/HYDRAULIC FLUID
CHECK BRAKE FLUID/MASTER CYLINDER
CHECK TORQUE OF WHEEL NUTS
CHECK TIRE PRESSURE
INSPECT TIRES
NEUTRAL INTERLOCK SWITCH
VEHICLE CONTROLS...............................................................................................................
OPERATING INSTRUCTIONS........................................................................................................
PRE-STARTING CHECKS
STARTING ENGINE
DRIVING VEHICLE
STOPPING VEHICLE
NEW VEHICLE BREAK-IN
OPERATING CHARACTERISTICS
SPEED
TURNING
BRAKING
TIPOVERS
HILLS
TOWING VEHICLE
MAINTENANCE.................................................................................................................................
SERVICE INTERVAL CHART
DAILY MAINTENANCE SCHEDULE
MAINTENANCE SCHEDULE
JACKING VEHICLE
NEUTRAL INTERLOCK SWITCH
LUBRICATION............................................................................................................................
AIR CLEANER MAINTENANCE................................................................................................
ENGINE MAINTENANCE..........................................................................................................
AIR INTAKE/COOLING AREAS
ENGINE CRANKCASE OIL
OIL FILTER
IGNITION SYSTEM
SPARK PLUG
IN-LINE FUEL FILTER
CLUTCH SYSTEM AND CVT BELT
STEERING PUMP BELT TENSION
DESCRIPTION PAGE
4
TABLE OF CONTENTS
39-40
39
39
40
40
40
41
41
42
43-44
43
43
44
45
46
47-48
49
50
51-59
60
61
62
63
63
63
63
64
64
64
64
64
64
65
65
66
66
67-68
69
70-71
72
73
73
74
74
DESCRIPTION PAGE
HYDRAULIC SYSTEM MAINTENANCE..................................................................................
CHANGING TRANSAXLE/HYDRAULIC FLUID
REPLACING TRANSAXLE/HYDRAULIC FILTER
CHECKING HYDRAULIC LINES AND HOSES
CLEANING TRANSAXLE/HYDRAULIC STRAINER
PRESSURE SETTINGS
TRANSAXLE MAINTENANCE..................................................................................................
HYDRAULIC SYSTEM DIAGRAM...........................................................................................
TIRE & BRAKE MAINTENANCE.............................................................................................
ELECTRICAL MAINTENANCE................................................................................................
JUMP STARTING PROCEDURE
FUSES
BATTERY CARE & STORAGE
VEHICLE ELECTRICAL DIAGRAM.........................................................................................
SPRAYING SYSTEM.......................................................................................................................
SPRAY CONTROLS AND OPERATION..................................................................................
SPRAY PRO  MONITOR MAIN FUNCTIONS......................................................................
QUICK START SPRAY GUIDE.................................................................................................
BEFORE SPRAYING.................................................................................................................
SPRAY PRO  MONITOR FUNCTION...................................................................................
SPRAY PRO FINE TUNING..................................................................................................
SPRAY PRO  OPERATION AND SPRAYER OPERATION.................................................
PREVENTIVE MAINTENANCE................................................................................................
SUCTION STRAINER
AFTER SPRAYING
FLUSH PUMP AFTER USE
PUMP MAINTENANCE.............................................................................................................
CHANGING OF VALVES AND DIAPHRAGMS
VALVES
DIAPHRAGM
PUMP LUBRICATION
SUCTION AND PRESSURE DAMPENER MAINTENANCE
MAINTENANCE.........................................................................................................................
BOOM BYPASS VALVE
FLOWMETER
BOOM CONTROL VALVE
SPRAY SYSTEM FLOW & ELECTRICAL DIAGRAM.............................................................
MAINTENANCE TROUBLESHOOTING.................................................................................
SPRAY PRO  TROUBLESHOOTING...................................................................................
STORAGE..................................................................................................................................
PERFORMANCE VERIFICATION............................................................................................
OPTIONAL RATE CHECK........................................................................................................
NOZZLE CHECK.......................................................................................................................
CALCULATE RANGE................................................................................................................
TORO® WARRANTY...................................................................................................... BACK COVER
5
SAFETY INSTRUCTIONS
BEFORE OPERATING:
1. Operate the vehicle only after reading and
understanding the contents of this manual A
replacement manual is available by sending
complete model and serial number to: Hahn
Equipment Co., A subsidiary of The TORO
Company, 1625 N Garvin, Evansville, Indiana
47711-4596
Read and understand the Engine Manufacturer's
Operator's Manual Follow the safety alert
messages
1. Make sure operators are thoroughly trained
and familiar with the Operator's Manual and all
labels on the vehicle
2. Be sure to establish your own special
procedures and work rules for unusual operating
conditions (e g slopes too steep for vehicle
operation)
The MULTI PRO® 1200 Turf Sprayer was
designed and tested to offer safe servi e when
operated and maintained properly. Although
hazard ontrol and a ident prevention
partially are dependent upon the design and
onfiguration of the vehi le, these fa tors are
also dependent upon the awareness, on ern,
and proper training of the personnel involved
in the operation, maintenan e, and storage of
the vehi le. Improper use or maintenan e of
the vehi le an result in injury or death.
This is a spe ialized Turf Sprayer designed for
off road use. Its ride and handling will have a
different feel than what drivers experien e with
passenger ars or tru ks. So take time to
be ome familiar with your MULTI PRO® 1200.
The atta hments that adapt to the MULTI PRO®
1200 are not overed in this manual. See the
spe ifi Operator's Manual provided with the
atta hment for additional safety instru tions.
READ THESE MANUALS.
TO REDUCE THE POTENTIAL FOR INJURY
OR DEATH, COMPLY WITH THE FOLLOWING
SAFETY INSTRUCTIONS:
3. This vehicle is designed to carry Only You,
the Operator. Never carry passengers on the
vehicle
4. Never operate the vehicle when under the
influence of drugs or alcohol
5. Become familiar with the controls and know
how to stop the engine quickly
6. Keep all shields, safety devices, and decals
in place If a shield, safety device, or decal is
malfunctioning, illegible, or damaged, repair or
replace it before operating the vehicle
7. Always wear substantial shoes Do not
operate vehicle while wearing sandals, tennis
shoes, or sneakers Do not wear loose fitting
clothing or jewelry which could get caught in
moving parts and cause personal injury
8. Wearing safety glasses, safety shoes, long
pants, and a helmet is advisable and required by
some local safety and insurance regulations
9. Keep everyone, especially children and pets,
away from the areas of operation
10. Before operating the vehicle, always check
all parts of the vehicle and any attachments If
something is wrong, stop using the vehi le
Make sure the problem is corrected before vehicle
or attachment is operated again
11. Since gasoline is highly flammable, handle
it carefully
A. Use an approved gasoline container
B. Do not remove cap from fuel tank when
engine is hot or running
C. Do not smoke while handling gasoline
D. Fill fuel tank outdoors and to
approximately one inch below top of tank,
(bottom of filler neck) Do not overfill
E. Wipe up any spilled gasoline
12 Entering tank is prohibited Some spray
chemicals could be hazardous Entering tank
could increase exposure to hazardous chemicals
SUPERVISOR'S RESPONSIBILITIES:
2. Never allow children to operate the vehicle
or adults to operate it without proper instructions
Only trained and authorized persons should
operate this vehicle Anyone who operates the
vehicle should have a motor vehicle license
6
SAFETY INSTRUCTIONS
5. The vehicle is designed with safety in mind
This vehicle is not a passenger car It is a Turf
Sprayer and is not designed for use on roadways
Above all, use good judgement when operating
this vehicle Failure to operate vehicle safely may
result in an accident, tip over of vehicle and
serious injury or death Drive carefully To
prevent tipping or loss of control:
A. Use extreme caution, reduce speed and
maintain a safe distance around sand traps,
ditches, creeks, ramps, and any unfamiliar
areas, or other hazards
B. Watch for holes or other hidden
hazards
C. Always reduce speed before starting up
or down a hill Do not start or stop suddenly when
traveling uphill or downhill Do not operate
vehicle on a steep slope Travel straight up and
down normal slopes Avoid turning on hillsides
whenever possible Reduce speed when making
sharp turns or when turning on hillsides
D. If engine stalls or loses power and cannot
make it to the top of a slope, apply brakes and
do not turn vehicle around Always back slowly
straight down the slope
E. Use extra caution when operating vehicle
on wet surfaces, at higher speeds or with a full
load Stopping time will increase with a full load
F. Operate vehicle with extra caution when
handling off-center loads that cannot be
centered
G. Avoid sudden starts and stops Do not
go from reverse to forward or forward to reverse
without first coming to a complete stop
H. Do not attempt sharp turns or abrupt
maneuvers or other unsafe driving actions that
may cause a loss of vehicle control
I. Before backing up, be sure no one is
behind the vehicle Back up slowly
J. Watch out for traffic when near or crossing
roads Always yield the right of way to
pedestrians and other vehicles This vehicle is
not designed for use on streets or highways
Always signal your turns and stops early enough
to let other people know what you plan to do
Obey all traffic rules and regulations
K. Never operate vehicle in or near an area
where dust or fumes, which are explosive, are in
the air The electrical and exhaust systems of the
vehicle can produce sparks capable of igniting
explosive materials
13. The MULTI PRO® 1200 is equipped with a
Neutral Interlock Switch The purpose of this
switch is to insure that the vehicle will not start
unless the Range Selector is in the NEUTRAL
position and/or the Neutral Engine Speed Control
will not engage unless the Range Selector is in
the neutral position Should any of the following
occur:
A Vehicle will not start with Range Selector
in neutral
B Vehicle will start with Range Selector in
gear
C Neutral Engine Speed Control will engage
with Range Selector in gear
D Neutral Engine Speed Control will not
engage with Range Selector in neutral
See the Maintenance section for the Neutral
Interlock Switch, page 29
WHILE OPERATING:
WARNING: Do not run engine in a onfined
area without adequate ventilation. Exhaust
fumes are hazardous, and ould possibly be
deadly.
1. Operator should remain seated whenever the
vehicle is in motion Operator should keep both
hands on steering wheel whenever possible
Keep arms and legs within the vehicle body at all
times
2. Sit on seat when starting and operating the
vehicle
3. When starting the engine:
A. Engage the Parking Brake
B. Turn Key Switch to the "ON" position
C. Apply Service Brake
D. Put the Range Selector in the Neutral
Position and start the engine
E. After engine is started, select the
appropriate range
F. Release the Parking Brake
4. Operator must be skilled and trained in how
to drive on hillsides Failure to use caution on
slopes or hills may cause loss of control and
vehicle to tip or roll, possibly resulting in personal
injury or death
7
6. Do not touch Engine, Muffler, or Muffler
Shield while engine is running or soon after it has
stopped because these areas may be hot
enough to cause burns
7. If the vehicle ever vibrates abnormally, stop
immediately, turn off engine, wait for all motion
to stop, and inspect for damage Repair all
damage before commencing operation
8. Before getting off the seat:
A. Stop movement of the vehicle
B. While braking, set Parking Brake and
place Range Selector in the Neutral position
C. Shut engine off and wait for all movement
to stop
D. Remove Key from Ignition Switch
E. Do not park on slopes unless wheels are
chocked or blocked
SAFETY AND INSTRUCTIONS
6. Before disconnecting or performing any
work on the hydraulic system, all pressure in the
system must be relieved by stopping the engine
7. If major repairs are ever needed or assistance
is required, contact an Authorized TORO
Distributor
8. Disconnect battery before servicing the
vehicle If battery voltage is required for
troubleshooting, temporarily connect the battery
9. If the engine must be running to perform
maintenance, or an adjustment, keep hands, feet,
clothing, and any parts of the body away from
the engine and any moving parts Keep everyone
away
10. Do not over-speed engine by changing
Governor settings Maximum engine speed is
3350 no-load rpm To assure safety and
accuracy, have an Authorized TORO Distributor
check maximum engine speed with a tachometer
11. Shut engine off before checking or adding
oil to the crankcase
12. To assure optimum performance and
continued safety of the vehicle, always use
genuine TORO replacement parts and
accessories Replacement parts and accessories
made by other manufacturers could be
dangerous Altering this vehicle in any manner
may affect the vehicle's operation, performance,
durability, or its use may result in injury or death
Such use could also void the product warranty
of the TORO Company
13. This vehicle should not be modified without
The TORO Company's authorization Direct any
inquiries to:
Hahn Equipment Co.
A subsidiary of The TORO Company
1625 N Garvin Street
Evansville, IN 47711-4596
MAINTENANCE:
1. Before servicing, lubricating or making
adjustments to the vehicle, stop engine, set
Parking Brake and remove Key from Ignition
Switch to prevent someone from accidentally
starting the engine
2. Make sure the vehicle is in safe operating
condition, keeping all nuts, bolts, and screws
tight
3. To reduce potential fire hazard, keep the
engine area free of excessive grease, grass,
leaves, and accumulation of dirt Do not wash a
warm engine or electrical components
4. Make sure all hydraulic line connectors are
tight, and all hydraulic hoses and lines are in
good condition before applying pressure to the
system
5. Keep body and hands away from any pin
hole leaks in hydraulic lines that may eject high
pressure transaxle fluid Use cardboard or paper
to find hydraulic leaks Transaxle fluid escaping
under pressure can penetrate skin and cause
injury Fluid accidentally injected into the skin
must be surgically removed within a few hours
by a doctor familiar with this form of injury, or
gangrene may result
L. Watch out for and avoid low overhangs
such as tree limbs, door jambs, overhead
walkways, etc Make sure there is enough room
overhead to easily clear the vehicle and your
head
M. If ever unsure about safe operation,
STOP WORK and ask your supervisor
8
Part No 87-0570: Located on Rear
Tank Band
SAFETY AND INSTRUCTION DECALS
The following safety and instru tion de als are installed on the vehi le. If any be ome damaged
or illegible, repla e them. De al part numbers are listed below and in the parts atalog. Order
repla ements from your Authorized TORO Distributor.
Part No 93-0688: Located on
Spray Tank Lid
Part No 100-6775: Located on
Top of Fuel Tank
Part No 104-8750: Located on Lower
Front of Front Console
Part No 104-8882: Located On
Spray Valve Console Top
Part No 104-8749: Located On
Spray Valve Console Panel
Part No 100-8470: Located on
Upper Left Console
Part No 104-7628: Located on Left
Side of Dash Panel
THE TORO CO., 8111 LYNDALE AVE. S.
BLOOMINGTON, MN 55420-1196
104-7628
87-0570
93-0688
100-8470
9
SAFETY AND INSTRUCTION DECALS
The following safety and instru tion de als are installed on the vehi le. If any be ome damaged
or illegible, repla e them. De al part numbers are listed below and in the parts atalog. Order
repla ements from your Authorized TORO Distributor.
Part No 62-5550: Located on Front of
Front Console
Part No 100-8621:
Located on Dash Panel
Part No 100-8620: Located On Seat Mount Box Part No 100-8454: Located on
Lower Left Console
Part No 100-8577: Located on
Agitation Valve
Part No 100-6836: Located on
Tank by Tank Drain Handle
100-6836
N
100-8454
1. 3.
6. 7.
2.
4. 5.
1. 3.
2. 4.
2
31
R
N
N
2
31
R
N
100-8577
4
1
2
3
5
6
N
1260 lb
572 kg <1290 lb
<585 kg
350 lb
158 kg
<3500 lb
<1589 kg
100-8621
104-8902
Part No 104-8902: Located on Right Fender
10
SPECIFICATIONS
Operator Ear Sound Level Measurement:
85 dBA
Noise: This unit has a continuous A weighted
sound pressure level at the operator ear of 85
dBA based on measurements of identical
machines per Directive 98/37/EC
Vibration: This unit does not exceed a vibration
level of 2 5 m/s2 at the hands based on
measurements of identical machines per ISO
5349 procedures
This unit does not exceed a vibration level of 0 5
m/s2 at the posterior based on measurements of
identical machines per ISO 2631 procedures
Vehi le: 4 Wheel, rear wheel drive, front steer,
single operator turf sprayer
Engine: 20HP Kohler V Twin horizontal shaft
governed to 3350 rpm, w/30 amp alternator,
accel pump carburetor
Battery: 12 volt with 360 cold cranking amps
@ 0° F
Fuel Capa ity: 5 gallon
Front Suspension: Full independent rubber
torsion swingarm
Rear Suspension: Rigid
Steering: Hydraulic power, center pivot
linkage
Tires:
Front: 18 x 9 5-8 slick
Rear: 24 x 13-12 Multi Trac
Brakes: 4 wheel hydraulic with dual chamber
master cylinder
ROPS: 2 Post Rollover Protection Structure
with Lap Safety Belt (optional)
Lights: Twin halogen headlights
Transmission: Integrated transaxle with 3
forward speed ranges and reverse
Ground Speed:
1st range: 0-3 1 mph
2nd range: 0-5 0 mph
3rd range: 0-11 0 mph
Sprayer Tank: 160 gallon tank, Inductive
Agitation, polyethylene material, large sump,
top controlled drain valve
Spray Pump: Diaphragm pump, proportional
ground speed control system 30 GPM @ 0 psi,
dry crankcase Can operate dry Self priming
Polyurethane diaphragms
Pressure Relief: Poppet style, 220 psi max
Su tion Filter: Top mounted for easy access,
50 mesh stainless steel
Control Valve: Manual rate adjustment, volu-
metric control for constant application rate
Boom Control Valves: Manual ON/OFF,
constant application rate with individual sec-
tions off
Agitation Control: Active agitation or return to
pump suction
Spray Appli ations Rate: Fast and accurate
response to ground speed changes
General Spe ifi ations (approx.):
Base Weight: Base unit 1260lbs
With standard spray sys
Without operator: dry 1610lbs
full 2900lbs
Maximum Gross Vehicle Weight: 3,500lbs
Measurements with Spray System:
Overall Width: 56
Overall Length: 120 with spray system
Height: Top of Tank 43"
Top of Boom "X" Pattern 74"
Ground Clearance: 4 5"
Wheel Base: 62
Inside Rear Tire Turning Diameter: 96"
Center of Gravity: 35" rear of the front axles
with unit empty and without booms or operator
Clut h: Centrifugally engaged variable belt
drive (CVT)
11
SETUP INSTRUCTIONS
Battery will be preactivated prior to shipment If
battery is not activated or filled with electrolyte, it
must be removed from vehicle, filled with
electrolyte and charged Bulk electrolyte with
1 260 specific gravity can be purchased from a
local battery supply outlet
1. Loosen knobs securing battery cover to battery
base and slide cover off (See FIG 1)
2. Remove capscrew, washers and locknut
securing battery hold down to battery base
Remove hold down and slide battery out of battery
base
3. Remove filler caps from battery and slowly fill
each cell until electrolyte is just above the plates
4. Replace filler caps and connect a 3 to 4 amp
battery charger to the battery posts Charge the
battery at a rate of 3 to 4 amperes for 4 to 8 hours
5. When battery is charged, disconnect charger
from electrical outlet and battery posts
6. Remove filler caps Slowly add electrolyte to
each cell unit up to fill ring Install filler caps
IMPORTANT: Do not overfill battery.
Ele trolyte will overflow onto other parts of the
vehi le and severe orrosion and deterioration
will result.
WARNING
Conne ting ables to the wrong
terminal ould ause the battery to
explode, resulting in personal injury
and damage to the ele tri al system.
Make sure Battery Cables do not
interfere or rub on any moving or hot
parts.
ACTIVATE AND CHARGE BATTERY:
CAUTION
Ele trolyte gases are explosive and an
ause serious injury to eyes, lungs and
skin. Nausea may result if the gases are
inhaled.
Wear safety goggles and rubber gloves
when working with ele trolyte or
battery.
Charge the Battery in a well ventilated
pla e so gases produ ed while harging
an dissipate.
Unplug harger from ele tri al outlet
before onne ting to or dis onne ting
harger leads from battery posts.
Sin e the gases are explosive, keep
open flames and ele tri al sparks away
from the battery; DO NOT SMOKE!
8. Install the positive cable (red) to the positive
(+) terminal and the negative cable (black) to the
negative (-) terminal of the battery and secure with
capscrews and nuts Slide the rubber boot over
the positive terminal to prevent possible short-out
from occurring
9. Install battery hold down and secure to base
with capscrew, washers and locknut
10. Reinstall battery cover to battery base and
tighten knobs
Note: For Battery Maintenance, see Electrical
Maintenance, page 44
FIG. 1
1. Knob 3. Battery Base
2. Hold Down 4. Positive (+) Cable
1
1786
2
4
1
3
7. Slide battery into battery base so battery
terminals are toward the front of the vehicle
12
4. Position a Spacer Tube between the lugs on
each side of the Main Frame tube Insert a 1/2" x
2-3/4" Grade 8 cap screw through the Boom
Support Straps, lugs, and spacers Secure the
Main Frame to the Boom Mounting Brackets with
flange nuts Torque to 105 ft lbs (142 N-m) (See
FIG 3)
2. Main Frame Tube 4. Boom Support Strap
FIG. 3
5. Using a torque wrench, tighten the 1/2" x 18"
screw that joins the Wedges to the Boom Mounts
Tighten to 50 ft lbs (68 N-m)
6. Position the two (2) Center Boom angles on
the Main Frame and secure them to the Main
Frame Tube with two (2) square U-bolts, four (4)
flat washers and hex nuts (See FIG 4, page 13)
1801
CAUTION
Chemi als are hazardous and an
ause personal injury!
Se urely tighten all sprayer hose
lamp onne tions during intial set-up
to prevent leaks and hose blow-offs
while spraying system is in operation.
SPRAY SYSTEM:
NOTE: In the following instru tions, "sealer",
refers to the Teflon Thread Tape.
NOTE: If optional Hose Reel is to be installed
on unit; install Hose Reel before installing
Boom. See Set-Up and Parts Manual supplied
with Hose Reel.
1. Remove Stop Pins in Boom Mount Assemblies
Apply a heavy coating of grease to the tubes of
the two (2) Boom Mount Assemblies and insert
them into the Vehicle Frame until Angled Gusset
bottoms out against Vehicle Frame (See FIG 1)
1. Stop Pin 3. 1/2" x 18" s rews
2. Boom Mount ASM
FIG. 1
NOTE: If installing the "En losed Boom" option
in pla e of the Standard Boom, skip steps 2-
20. See En losed Boom Instru tions.
2. Install the two (2) Boom Hold-In Assemblies
to the top of the Boom Mount uprights as shown
in FIG 2, using four (4) 1/2" x 1-1/4" cap screws,
and flange nuts
SETUP INSTRUCTIONS
3. Attach the two (2) "U"-shaped Boom Mounting
Brackets to the third and fourth holes from the
top of the Boom Mount uprights with four (4)
1/2" x 1-1/4" cap screws, and flange nuts Torque
to 75 ft-lbs (102 N-m)
1802
FIG. 2
1. Boom Hold-In ASM 2. Boom Mount Uprights
1. Spa er Tube 3. Boom Mounting Bra kets
2
1813-1200
1
13
SETUP INSTRUCTIONS
10. Place two (2) Hose Clamps on two (2) 3/4" x
19" Jumper Hoses and connect the two (2) "end"
Turret Bodies to the Double Barb Turret Body
Space nozzles 20" apart and tighten fasteners
securely Apply thread sealer and install 90° 3/4"
Hose Barb on the Threaded Turret Body (See
FIG 4)
11. Attach the two (2) Strut Assemblies to the
two (2) Adjustable Clevises found on each side
of the Main Frame tube with (2) 1/2" x 2" Clevis
Pins and two (2) 1/8" x 1" Cotter Pins (See FIG
4)
7. Center and attach the Center Boom Pipe to
the two (2) Center Boom Angle with two (2)
clamps, two (2) 3/8" x 1" cap screws, flat washers
and lock nuts Once mounted the Center Boom
Pipe should be approx 20" from ground
8. Loosely attach the Double Barb Turret Body
with the Turret Body Clamp in the approximate
center of the Center Boom Pipe For the most
uniform spray coverage, position all Nozzles level
as shown in FIG 4
9. Loosely attach a Single Barb Turret Body with
the Turret Body Clamp to LH end of the Center
Boom Pipe Loosely attach a threaded Turret
Body with the Turret Body Clamp to RH end of
the Center Boom Pipe
FIG. 4
8. Jumper Hose
9. Strut ASM
10. Adjustable Clevis
11. Turret Body Clamp
12. Threaded Barb Turret
13. 90° Hose Barb
1800
1. Center Boom Angle
2. Main Frame
3. U-bolt
4. Center Boom Pipe
5. Boom Clamp
6. Double Barb Turret
7. Single Barb Turret
1. Extension Boom Pipe
2. Pivot ASM
FIG. 5
3. Boom Support ASM
4. Height Adjustment
1. Boom Support ASM
2. Extension Boom Pipe
3. U-bolt
4. Double Barb Turret
FIG. 6
5. Single Barb Turret
6. Jumper Hose 3/4" x 19"
7. Boom Cap
8. Jumper Hose 3/4" x 21"
12. Insert the plugged end of an Extension Boom
Pipe into the Pivot Assembly and secure with four
(4) 1/4" x 1-1/4" cap screws and lock nuts (See
FIG 5) Repeat on the opposite side to assemble
the other Extension Boom
NOTE: If the optional "Foam Marker Kit" is to
be installed, refer to the instru tions furnished
with that kit before pro eeding to Step 12.
IMPORTANT! DO NOT over-tighten the nuts
in Steps 12 and 14. The lamping a tion ould
rush the Boom Pipe.
1078
14
SETUP INSTRUCTIONS
15. Assemble the RH Boom Support Assembly
to the other Extension Boom Pipe
16. Adjust the Booms to a level position by
adjusting the jam nuts on the adustable clevis
assemblies (See FIG 4, page 13) to the desired
position, then tighten the nuts against the Main
Frame plate
17. Attach three (3) Double Barb Turret Bodies
and one (1) Single Barb Turret Body with Clamp
Assemblies on each Extension Boom Pipe as
shown in FIG 6, page 13
18. Level Nozzles and space 20" apart Connect
the Turret Body Assemblies with 3/4" x 19" Jumper
Hoses and a 3/4" x 21" Jumper Hose Secure
with hose clamps (See FIG 6, page 13)
13. Attach the LH Boom Support Assembly to
the Pivot Assembly, using a 5/16" x 1-1/2" cap
screw and lock nut (See FIG 5 & 6, page 13 )
14. Secure the two (2) plates of the Boom
Support Assembly to the Extension Boom Pipe,
using two (2) 1/4" U-bolts, four (4) lock nuts and
flat washers (See FIG 6, page 13)
1. Pressure Tee
2. Pressure Supply Hose
3. U-Shaped Fork
FIG. 7
4. Agitation Hose
5. Agitation Valve
3
1
4
2
1898
5
19. Place a hose clamp on the center Boom
Feeder HOse and attach it to the 90° Hose Barb
at the RH end of Center Boom Pipe
20. Place a hose clamp on the right and left
Boom Feeder Hose and attach them to the
Double Barb Nozzles on the right and left Boom
Pipes
NOTES:
15
BEFORE OPERATING
CHECK ENGINE CRANKCASE OIL:
The engine is shipped with approximately 2
quarts, 1 89 liters, (w/ filter) of oil in the crankcase;
however, level of oil must be he ked before
and after the engine is first started.
1. Position vehicle on a level surface Set Parking
Brake Tilt seat forward to gain access to the
engine compartment (See FIG 1)
2. Remove dipstick and wipe oil off with a clean
cloth Insert dipstick into tube making sure
dipstick is seated fully, remove dipstick and check
level of oil If oil level is low, remove filler cap and
add enough oil to raise level up to, but not over,
the F mark on the dipstick Never operate with
the oil level below the L mark or over the F
mark on the dipstick Add the oil slowly and
check the level often during this process (See
FIG 2)
3. The engine uses any high-quality detergent
oil having the American Petroleum Institute - API
- service classification SF or SG See viscosity
chart for recommended weight to use
RECOMMENDED SAE VISCOSITY GRADES
IMPORTANT! Che k level of oil BEFORE
EACH USE, while engine is ool so the oil has
had some time to drain into the sump.
FIG. 1
Change oil and filter after the first 5 hours of
operation, thereafter, change oil and filter after
every 100 hours of operation However, change
oil more frequently when engine is operated in
extremely dusty or dirty conditions
NOTE: To change the Engine Crankcase Oil and
the Oil Filter, see Engine Maintenance, page 34
1
2
1781
1516
FIG. 2
CAUTION
Servi ing the vehi le while the engine
is running or vehi le is not properly
se ured ould result in personal injury
or death.
Before servi ing or making adjustments
to the vehi le, stop engine, set parking
brake, and remove key from the swit h.
4. Install the dipstick firmly in place and install
the oil fill cap
1. Dipsti k 2. Oil Filler Cap
16
BEFORE OPERATING
FILL FUEL TANK:
Fuel tank capacity is 5 gallons (19 liters)
THE TORO COMPANY STRONGLY
RECOMMENDS THE USE OF FRESH, CLEAN
UNLEADED REGULAR GRADE GASOLINE IN
TORO GASOLINE POWERED PRODUCTS
UNLEADED GASOLINE BURNS CLEANER,
EXTENDS ENGINE LIFE, AND PROMOTES
GOOD STARTING BY REDUCING THE BUILDUP
OF COMBUSTION CHAMBER DEPOSITS
MINIMUM OCTANE RATING OF 87
IMPORTANT! California Emissions
Regulations REQUIRE the use of UNLEADED
GASOLINE ONLY!
1. Clean area around fuel tank cap (See FIG 3)
1. Fuel Tank Cap
FIG. 4
1. Fuel Tank
FIG. 3
1773
1
1772
1
DANGER
Be ause gasoline is flammable, au-
tion must be used when storing or
handling it.
2. Remove fuel tank cap
3. Fill tank to about one inch below top of tank
(bottom of filler neck) DO NOT OVERFILL.
Then install cap
4. Wipe up any fuel that may have spilled to
prevent a fire hazard
FUEL GAUGE: The Fuel Tank Cap shows
amount of fuel in Tank (See FIG 4)
Do not fill fuel tank while engine
is running, hot, or when vehi le
is in an en losed area. Vapors
may build up and be ignited by a
spark or flame sour e many feet
away.
DO NOT SMOKE while filling the
fuel tank to prevent the possibil-
ity of an explosion. Always fill
fuel tank outside and wipe up
any spilled gasoline before start-
ing the engine. Use a funnel or
spout to prevent spilling gaso-
line, and fill tank no higher than
one in h below top of tank, (bot-
tom of filler ne k). DO NOT
OVER FILL.
Store gasoline in a lean safety
approved ontainer and keep the
ap on the ontainer. Keep gaso-
line in a ool, well ventilated
pla e; never in an en losed area
su h as a hot storage shed.
To assure volatility, do not buy
more than a 30 day supply of
gasoline.
Gasoline is a fuel for internal om-
bustion engines; therefore, do
not use it for any other purpose.
Sin e many hildren like the
smell of gas, keep gas out of their
rea h; the fumes are explosive
and dangerous to inhale.
17
BEFORE OPERATING
CHECK AIR CLEANER/AIR INTAKE:
1. Check the Air Cleaner for any loose or
damaged components (See FIG 5)
NOTE: Operating the engine with loose or
damaged Air Cleaner components could allow
unfiltered air into the engine causing premature
wear and failure
1. Air Cleaner 3. Cover
2. Air Filter 4. Air Intake
FIG. 5
2. Check cooling air intake areas and external
surfaces of engine (See FIG 5) Operating the
engine with a blocked screen, dirty or plugged
cooling fins, and/or cooling shrouds removed,
will cause engine damage due to overheating
Note: For Air Cleaner & Air Intake Maintenance,
see page 33
1774
3
21
4
To avoid the possibility of a stati
harge igniting gasoline vapors, the
National Highway Traffi Safety
Administration re ommends the
following:
Pur hase and store gasoline only
in an approved ontainer.
Always pla e gasoline ontainers
on the ground away from your
vehi le before filling.
Do not fill gasoline ontainers
inside a vehi le or on a tru k or
trailer bed be ause interior
arpets or plasti tru k bed liners
may insulate the ontainer and
slow the loss of any stati harge.
When pra ti al, remove gas-
powered equipment from the
tru k or trailer and refuel the
equipment with its wheels on the
ground.
If this is not possible, then refuel
su h equipment on a tru k or
trailer from a portable ontainer,
rather than from a gasoline
dispenser nozzle.
If a gasoline dispenser nozzle
must be used, keep the nozzle in
onta t with the rim of the fuel
tank or ontainer opening at all
times until fueling is omplete.
DANGER
18
BEFORE OPERATING
2. Fluid level should be up to MAX line on
reservoir (See FIG 8)
3. If fluid level is low, clean area around cap,
remove reservoir cap and fill to proper level DO
NOT OVERFILL.
1. Brake Fluid Reservoir
2. Max. Line
FIG. 8
DANGER
Operating the vehi le with worn brakes
an result in serious injury or death.
CHECK BRAKE FLUID/MASTER
CYLINDER:
The brake fluid reservoir is shipped from the
factory filled with DOT 3 brake fluid Check level
before engine is first started and every 8 hours or
daily thereafter
1. Park machine on a level surface Set Parking
Brake Tilt seat forward to gain access to the
master cylinder and the brake fluid reservoir (See
FIG 7)
1875-1
1
2
3
CHECK TRANSAXLE/HYDRAULIC
FLUID:
The transaxle reservoir is filled with Dexron III ATF
Check level before engine is first started and every
8 hours or daily, thereafter Capacity of system is
7 5 qt (7 1 liters)
1. Position the vehicle on a level surface Set
Parking Brake
2. Clean area around dipstick (See FIG 6)
3. Unscrew dipstick from top of transaxle and
wipe with a clean cloth
4. Screw dipstick into transaxle making sure it is
seated fully, unscrew dipstick and check fluid
level Fluid should be up to top of flat portion of
dipstick If level is low, add enough fluid to
achieve the proper level
IMPORTANT! ALWAYS USE CAUTION
WHEN FILLING THE RESERVOIR OR
CHECKING THE LEVEL OF THE
HYDRAULIC FLUID. KEEP THE SYSTEM
FREE OF CONTAMINANTS.
Note: For Transaxle/Hydraulic Maintenance, see
page 39-41
1. Dipsti k 2. Drain Plug
FIG. 6
1775
1
2
4
3. Min. Line
4. Master Cylinder
FIG. 7
1. Oil Dipsti k 4. Fuel Pump
2. Fuse Blo k 5. In-Line Filter
3. Oil Fill 6. Brake Reservoir
6
5
34
12
1886
19
NEUTRAL INTERLOCK SWITCH:
The Multi Pro® 1200 is equipped with a Neutral
Interlock Switch The purpose of this switch is to
ensure that the vehicle will not start and the Neutral
Engine Speed Control will not engage unless the
Range Selector is in the NEUTRAL position
The Neutral Interlock Switch is located
underneath the Left Control Panel and is
accessed by removing the Air Cleaner Cover (See
FIG 9)
Check and maintain the Neutral Interlock Switch
in a position that prevents the engine from starting
unless the range selector is in the Neutral Position
BEFORE OPERATING
Note: For Neutral Interlock Switch Maintenance,
see Maintenance, page 29
WARNING
If the engine an be started or the
Neutral Engine Speed Control an be set
without the Range Sele tor in the Neutral
Position, the Neutral Interlo k Swit h
ir uit is faulty. DO NOT OPERATE THE
VEHICLE!
FIG. 9
1. Neutral Interlo k Swit h
2. Air Filter
1884
CHECK TORQUE OF WHEEL NUTS:
Failure to maintain proper torque ould
result in failure or loss of wheel and may
result in personal injury.
Torque front wheel nuts to 55-65 ft-lb (75-
88N-m) and rear wheel nuts or bolts to 45-
65 ft-lb (61 TO 88 N-m) after 1-4 hours
of operation and again after 10 hours
of operation and every 200 hours
thereafter.
WARNING
WARNING
Brake failure an ause loss of
ontrol and result in serious injury or
death.
Test Brake fun tion and orre t before
operation.
IMPORTANT! After the "initial run-in"
(approximately one to two hours), he k all the
MULTI PRO® 1200 wheel fasteners for
tightness.
CHECK TIRE PRESSURE:
Check tire pressure every 8 hours or daily to
assure proper levels Maximum air pressure in
both front and rear tires is 18 psi
The air pressure needed is determined by the
payload carried Once the desired pressure has
been ascertained, it is to be used and maintained
as a factor in the computer programming to
insure the accuracy of the spraying system
INSPECT TIRES:
Check tire condition for wear or damage
Operating accidents, such as hitting curbs, can
damage a tire or rim and also disrupt wheel
alignment; so inspect tire condition after any
accident
Note: Your MULTI PRO® 1200 is supplied with
self-adjusting brakes Replace brakes when worn
See MULTI PRO® 1200 Parts Manual for
replacement For Emergency/Parking Brake
Maintenance, see page 42
1
2
3
3. Shield Panel L.H.
20
1. ACCELERATOR PEDAL:
The accelerator pedal gives the operator the ability
to vary engine and ground speed of the vehicle
when the transmission is in gear Depressing the
accelerator pedal increases engine RPM, then
clutch is engaged, and ground speed is
increased Releasing pedal will decrease engine
RPM, clutch is disengaged, and ground speed
decreases (See FIG 3) For Driving Vehicle, see
Operating Instructions, page 22
2. MANUAL CHOKE:
Pull "OUT" Choke when starting cold engine After
successfully starting engine, gradually push
Choke "IN" to adjust engine to best running speed
Once engine warms to normal operating
temperature, Choke should not be needed (See
FIG 4, page 21) For Starting Engine, see
Operating Instructions, page 22
3. IGNITION SWITCH:
The ignition switch, used to start and stop the
engine, has three positions; OFF, RUN and
START Rotate key clockwise - START position -
to engage starter motor Release key when
engine starts The key will move automatically to
the ON position To shut engine off, rotate key
counterclockwise to "OFF" position (See FIG 3)
For Electrical Diagram, see Electrical Maintenance,
page 45 For Starting Engine, see Operating
Instructions, page 22
4. HOUR METER:
Indicates the total hours of machine operation
The hour meter starts to function whenever the
key switch is rotated to "ON" position (See FIG
3) For Electrical Diagram, see page 45
5. VOLTMETER:
Indicates the amount of current flow at the Battery
The indicator will register near the center of the
dial when the Battery is fully charged When the
engine is running, the indicator should register
on the right hand (charge) side of the dial When
the indicator is on the left side, Battery is
discharging (See FIG 3) For Electrical Diagram,
see Electrical Maintenance, page 45
VEHICLE CONTROLS
6. BRAKE PEDAL:
The brake pedal is used to apply service brake to
stop or slow vehicle (See FIG 3) For Stopping
Vehicle, see Operating Instructions, page 23
DANGER
Operating the vehi le with worn brakes
an result in serious injury or death.
FIG. 3
1. Steering Wheel
2. A elerator Pedal
3. Brake Pedal
4. Master On/Off Foot Swit h
5. Voltmeter
7
1800
4
3
1
5
10
89
7. EMERGENCY/PARKING BRAKE:
Whenever the engine is shut off, the parking
brake must be engaged to prevent accidental
movement of the vehicle To engage the
Emergency/Parking Brake, pull back on lever To
disengage, push lever forward Make sure
Emergency/Parking Brake is released before
moving vehicle If vehicle is parked on a steep
grade, make sure parking brake is applied Place
chocks at the down hill side of wheels, (see page
25) For Emergency/Parking Brake adjustment,
see Emergency/Parking Brake Maintenance, See
page 42
2
6. Hour Meter
7. Ignition Swit h
8. Headlamp Swit h
9. Neu. Engine Speed Cntrl.
10. Range Sele tor
6
Familiarize yourself with the ontrols and
re ommended operating pro edures before
operating the MULTI PRO® 1200.

This manual suits for next models

1

Other Toro Paint Sprayer manuals

Toro 41235 User manual

Toro

Toro 41235 User manual

Toro Multi Pro 1750 User manual

Toro

Toro Multi Pro 1750 User manual

Toro 41179 User manual

Toro

Toro 41179 User manual

Toro Ultra Sonic Boom 133-2808 User manual

Toro

Toro Ultra Sonic Boom 133-2808 User manual

Toro Multi Pro 5800 User manual

Toro

Toro Multi Pro 5800 User manual

Toro 41249 User manual

Toro

Toro 41249 User manual

Toro 41394 User manual

Toro

Toro 41394 User manual

Toro 136-0457 User manual

Toro

Toro 136-0457 User manual

Toro 41564 User manual

Toro

Toro 41564 User manual

Toro 41393TE Quick start guide

Toro

Toro 41393TE Quick start guide

Toro Multi Pro 1750 User manual

Toro

Toro Multi Pro 1750 User manual

Toro 41086 User manual

Toro

Toro 41086 User manual

Toro SprayMaster 34246 User manual

Toro

Toro SprayMaster 34246 User manual

Toro Multi Pro 1200 User manual

Toro

Toro Multi Pro 1200 User manual

Toro 34230 User manual

Toro

Toro 34230 User manual

Toro Multi Pro 5800-D User manual

Toro

Toro Multi Pro 5800-D User manual

Toro 41582 User manual

Toro

Toro 41582 User manual

Toro Spray Master 34235 Manual

Toro

Toro Spray Master 34235 Manual

Toro 41642 User manual

Toro

Toro 41642 User manual

Toro Multi Pro 41118 User manual

Toro

Toro Multi Pro 41118 User manual

Toro 34225 User manual

Toro

Toro 34225 User manual

Toro Spray Master Series User manual

Toro

Toro Spray Master Series User manual

Toro Multi Pro 1200 User manual

Toro

Toro Multi Pro 1200 User manual

Toro Multi Pro ExcelaRate 5800-G User manual

Toro

Toro Multi Pro ExcelaRate 5800-G User manual

Popular Paint Sprayer manuals by other brands

Sumake SS-1240RGA manual

Sumake

Sumake SS-1240RGA manual

Graco MP455 Operation - repair - parts

Graco

Graco MP455 Operation - repair - parts

impact 7512 instructions

impact

impact 7512 instructions

DeVilbiss JJ-K Series Operation manual

DeVilbiss

DeVilbiss JJ-K Series Operation manual

Parkside 380862-2110 Translation of the original instructions

Parkside

Parkside 380862-2110 Translation of the original instructions

Avanti 57568 Owner's manual & safety instructions

Avanti

Avanti 57568 Owner's manual & safety instructions

Graco Triton 308 Instructions-parts list

Graco

Graco Triton 308 Instructions-parts list

WALTHER PILOT WA XV operating instructions

WALTHER PILOT

WALTHER PILOT WA XV operating instructions

Graco FinishPro II 295 Operation - repair - parts

Graco

Graco FinishPro II 295 Operation - repair - parts

Alemlube 6603A Owner technical manual

Alemlube

Alemlube 6603A Owner technical manual

WALTHER PILOT PILOT XIII-N operating instructions

WALTHER PILOT

WALTHER PILOT PILOT XIII-N operating instructions

WALTHER PILOT PILOT WA XV operating instructions

WALTHER PILOT

WALTHER PILOT PILOT WA XV operating instructions

Solo 416 Li instruction manual

Solo

Solo 416 Li instruction manual

Morrison S201 Operator's manual

Morrison

Morrison S201 Operator's manual

Berner 198583 instruction manual

Berner

Berner 198583 instruction manual

DeVilbiss SRI PRO series Technical bulletin

DeVilbiss

DeVilbiss SRI PRO series Technical bulletin

Graco Reactor A-20 repair parts

Graco

Graco Reactor A-20 repair parts

Dynalabs DYN-IS-5 product manual

Dynalabs

Dynalabs DYN-IS-5 product manual

manuals.online logo
manuals.online logoBrands
  • About & Mission
  • Contact us
  • Privacy Policy
  • Terms and Conditions

Copyright 2025 Manuals.Online. All Rights Reserved.