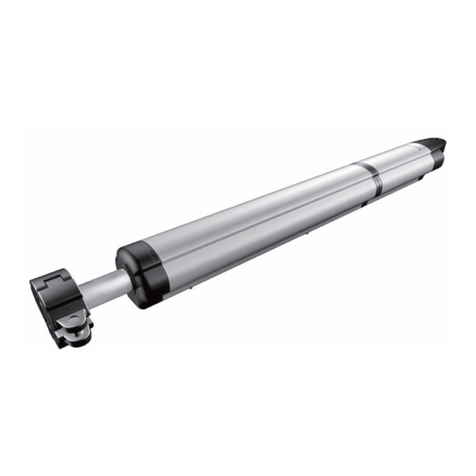
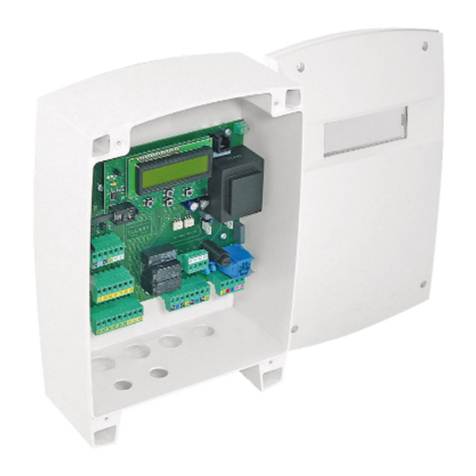
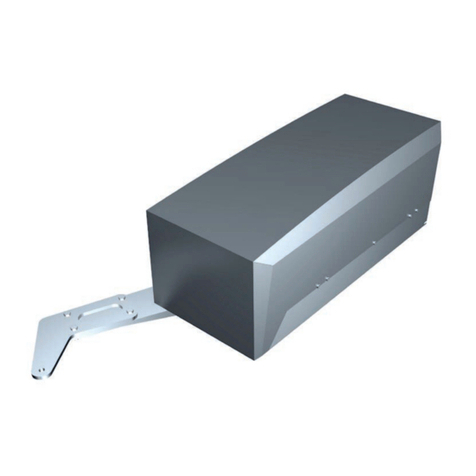
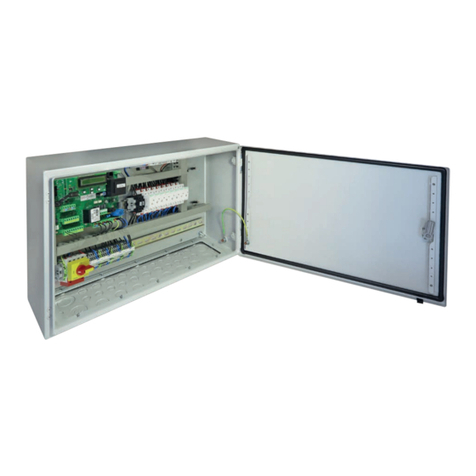
tousek ST 63 User manual

Connection and installation manual
ST 63 control unit
for folding and swing gates
Safety Sensor

- 2 - tousek / EN_ST-63_02 / 25. 03. 2020
Index
General warning and safety notes.............................................................................................................................. 3
1. Notes, general characteristics, function, technical data ............................................................................... 4
2. Control, Danger notes, Warnings - connection works ................................................................................. 5
2.1 Control box .................................................................................................................................... 6
2.2 Control board ................................................................................................................................. 8
2.3 Terminal assignment....................................................................................................................... 9
2.4 Connection notes for the operator SWING X-TP ......................................................................... 10
2.5 Programming, Menu structure ....................................................................................................... 12, 13–14
2.6 Connections and adjustments ................................................................................................................... 15
Buttons / switches......................................................................................................................... 15
Photocells..................................................................................................................................... 17
Safety edges................................................................................................................................. 20
Left leaf......................................................................................................................................... 21
Right leaf ...................................................................................................................................... 21
Operating mode............................................................................................................................ 22
Light / lamps ................................................................................................................................. 23
Peripherals ................................................................................................................................... 24
Diagnosis...................................................................................................................................... 28
3. Connecting the receiver.............................................................................................................................. 29
4. Putting into operation ................................................................................................................................. 30
5. Optional Trac light control unit STA 11.................................................................................................... 33
6. troubleshooting guide ................................................................................................................................. 39
This manual is the sole property of the TOUSEK Ges.m.b.H. and may not be made available to competitors. All rights reserved. No part of it may be reproduced without our prior
written permission. We will not accept liability for any claims resulting from misprints or errors. This edition of the manual replaces all earlier publications of the same.

tousek / EN_ST-63_02 / 25. 03. 2020 - 3 -
EU - Manufacturer´s Declaration:
The company TOUSEK Ges.m.b.H., based in Zetschegasse 1, A-1230 Vienna/Austria, hereby declares that the
control unit ST 63 complies with the folloleaf directives:
- Low Voltage Directive 2014/35/EU, incl. changes
- Electromagnetic Compatibility Directive 2014/30/EU, incl. changes
Oktober 2018
General warning and safety notes
• These installation and operating instructions form an integral part of the product “control unit”. They have been speci-
cally written for professional installers trained and skilled in the trade and should be carefully read in their full length before
carrying out the installation. It concerns the control only, not of the overall device “automatic gate”. After the installation
this manual has to be handed over to the user.
• Installation, connection, adjustments, putting into operation, and servicing may only be carried out by trained
professionals in full accordance with these installation and operating instructions.
• Before carrying out works on the gate system, the power supply has to be turned o.
• Before taking o the housing cover, always turn o the mains switch!
• The EU Machine Directive, laws and rules concerning the prevention of accidents, and laws and standards which are in
force in the EU and in the individual countries have to be strictly followed.
• The TOUSEK Ges.m.b.H. can not be held liable for any claims resulting from disregards of the laws and standards in
force during the installation and operation.
• The packaging materials (cardboard, plastic, EPS foam parts and lling material etc.) have to be properly disposed of
in accordance with the applying recycling and environmental protection laws. They may be hazardous to children and
therefore have to be stored out of children´s reach.
• The product is not suitable for installation in explosion-hazardous areas.
• The product may only be used in accordance with its original purpose, for which it has been exclusively designed, and
which is described in these installation and operating instructions. The TOUSEK Ges.m.b.H. rejects any liability if the
product is used in any way not fully conforming to its original purpose as stated herein.
• Children have to be instructed that the gate facility as well as the belonging parts may not be used improperly, e.g. for
playing. Furthermore handheld transmitters have to be kept in safe places and other impulse emitters as buttons and
switches have to be installed out of children‘s reach..
• Before beginning with the installation the installer has to make sure that all mechanical components of the gate facil-
ity, like carrier prole/rail, gate frame and panels, guiding elements etc. are suciently supportive and resistant for the
purpose of gate automation.
• All electrical installations have to be made in full conformity with the applying rules and laws (e.g. using a fault current
circuit breaker, proper grounding etc.).
• An all-pole disconnecting main switch with a contact opening-gap of minimum 3 mm has to be foreseen.
• After installation the proper function of the gate facility and the safety devices has to be checked!
• The TOUSEK Ges.m.b.H. rejects any liability for claims resulting from usage of the product in combination with compo-
nents or devices which do not fully conform to the applying safety laws and rules.
• Only original spare and replacement parts may be used for repair of the product.
• The installer has to inform the user about all aspects of the automatic operation of the complete gate facility, as well as
about emergency operation. The installer further has to supply to the user all instructions relating to the safe operation
of the gate facility. The installation and operating instructions also have to be handed over to the user.
Maintenance
• Maintenance works may only be carried out by qualied personnel.
• Maintenance and servicing of the complete gate facility has to be carried out according to the gate builder´s/
installer´s instructions.
• Check the proper sensitivity setting of the ARS safety reverse system once a month.
- 4 - tousek / EN_ST-63_02 / 25. 03. 2020
1. General ST 63 control unit for folding and swing gates
Product features
•
Suitable for folding/swing gates with the electromechanic
operators SWING X3 TPspeed and SWING X4 LHTP with
integrated speed sensor (1 leaf or 2 leaves operation possible).
• opening and closing delay for one leaf separately adjustable
• automatic closing time adjustable
• runtime for the both operators detected automatically
•
swing gate: separate adjustable soft stop time of both operators
folding gate: adjustable ramp time (no loss of fore even
with reduced speed)
• safety system ARS (autom. reversal system)
•
operating mode: impulse, automatic, dead man or emergency mode
• integrated evaluation of safety sensing edges
• self-monitoring of photocells
• self-diagnosis display
•
optional module: “electric lock /magnetic clamp” or “drop bolt”
• slots for optional modul and radio receiver
• easy programming via menu navigation
Function ST 63 control unit for folding and swing gates
The following operating modes can be selected:
• impulse: opening and closing via command given by an impulse button
• automatic: automatic closing if pause time is over
• deadman mode: The motor opens as long as the impulse button is pressed (hold)
• Emergency mode: deadman mode without safety devices (in case of malfunction)
1K ST63 for 1 leaf,
in plastic housing 295 x 340 x 130mm
1 / 2 ST63 for 1 or 2 leaves,
in steel housing 600 x 380 x 210mm
Technical data
Folding/swing gate control unit ST63 Types
power supply 230V a.c., +/-10% 50Hz ST 63K 1-leaf Art.Nr. 12112240
motor output
(via FU-frequency converter)
1-leaf: 1 x 370W, 3 x 230Va.c.
2-leaves: 2 x 370W, 3 x 230Va.c. housing plastic
295 x 340 x 130mm
ashing light output 24Va.c., max. 5W
courtyard light output 230V a.c., max. 60W ohmic
frequency converter
1 (for 1 leaf)
E-Schlossausgang optional 12Vd.c. or 24V d.c. (via module) ST63 1-leaf Art.Nr 12112210
magnetic clamp output optional 24Vd.c. (via module) housing steel
600 x 380 x 210mm
power supply output 24Va.c.
photocell output 24Va.c.
frequency converter
1 (for 1 leaf)
ambient temperature -20°C to +70°C ST63 2-leaves Art.Nr. 12112220
protection class IP66 housing steel
600 x 380 x 210mm
speed sensor
frequency converter
2 (for 2 leaves)
Additional modules
for the steel cabinet optional dropbolt control unit (1- or 2-leaves)
• optionale traffic light control unit STA 11
other optional
components
pluggable radio receiver • Additional module for gate status evaluation, • E-lock/magnet module or drop bolt
module
To ensure a perfect operation an all-current-sensitive residual current circuit breaker
type B must be used!

tousek / EN_ST-63_02 / 25. 03. 2020 - 5 -
2. Control unit ST 63 control unit for folding and swing gates
• To ensure a perfect operation, an all-current-sensitive residual current circuit breaker
type B must be used!
Warning
• Before connection works or taking o
the control cover, the mains switch
must be turned o!
• If the control is power supplied, its inner part is under
tension.
• In order to avoid electrical strokes, the safety regula-
tions have to be kept.
• The device may only be connected by trained profes-
sionals.
• The product is not suitable for installation in
explosion-hazardous areas.
• An all-pole disconnecting mains switch with a contact
opening gap of min. 3 mm has to be foreseen. The
gate facility has to be secured according to the valid
safety regulations!
• IMPORTANT: The control lines (sensor, buttons, ra-
dio, photocells, etc.) have to be laid separately from
the 230V lines (supply line, motors, signal lamp).
DANGER NOTES - Use of frequency converter
• Read this manual carefully before installing and using the converter. Installation, ajdustment, repair and
maintenance have to be made by professional sta.
> The non-compliance of the following instructions
leads to death or perilous injuries !!!
LOOK UP TO CONTINUOUS EARTHING
• An oxidated cooling element can form a confining layer to the mounting plate. Take implicitly the
suggested earthing connections into account!
ACCIDENTAL USE OF DEVICE
• Read this manual carefully before installing and using the converter.
• Adjustment of parameter settings have to be done by trained professionals.
DANGER OF ELECTRIC SHOCK OR ELECTRIC ARC AND EXPLOSION
• Read this manual carefully before installing and using the converter. Installation, ajdustment, repair and
maintenance have to be made by professinal sta.
• The user is responsible for the compliance of all relevant international and national electrotechnical rules/requirements
regarding the protection earthing of all devices.
• Numerous components of the frequency converter, including the printed circuits boards, are being supplied through the
mains voltage. DO NOT TOUCH ! Only use electrically isolated tools.
• Do NOT touch non shielded elements or bolt connections at terminals with mains voltage on
• DO NOT short-out the clamps PA/+ and PC/- or the DC-Bus-condensers.
• Before maintenance of converter:
- Cut o any power supply (also external of control device).
- Put a warning signboard with „DO NOT TURN ON“ onto the power switch or circuit breaker.
- Lock the power switch or circuit breaker in open position.
- WAIT 15 MINUTES so that the PC-Bus-condensers can discharge.
- Measure the voltage supply of DC-Busses between clamps PA/+ and PCI-, to make sure that the voltage is under 42 Vd.c.
The LED´s of converter can not show whether there is no DC-bus supply.
- Should the DC-Bus-condensers not fully discharge please contact manufacturer. Do not try to repair yourself.
• Mount all covers and before switching on the supply or before starting and stopping the converter.

- 6 - tousek / EN_ST-63_02 / 25. 03. 2020
FU-1 FU-2
ST
KL1
E
A
KL2
for 1-leaf operation:
FU and speed sensor already pre-
wired in the factory for right leaf.
HS
2.1 overview of the control box ST 63 control unit for folding and swing gates
1K
Control unit in plastic housing für 1 leaf operation
components of the control box
FU-1 frequency converter 1
FU-2 frequency converter 2 (only in steel housing)
ST control board with display and four
programming buttons +, -, ENTER and ESC
HS main switch (only in steel housing)
KL1 control board terminals (ST)
on DIN rail:
KL2 terminal block for 230Va.c. power supply,
speed sensor and grounding connection.
In the steel housing version, the supply voltage
is connected to the main switch (HS).
Expandability with the optional components listed
below is only possible in the steel cabinet
Optionale components in steel housing:
page 7
A trac light control board STA 11
E drop bolt modul
MST drop bolt control unit (on housing door)
with 1 or 2 motor control boards to control
1 or 2 drop bolts SAFELOCK
IMPORTANT
The factory setting of the frequency converter
(FU) must not be changed!
In case of changes the warranty becomes au-
tomatically void!
FU-1
ST
KL1
KL2
FU and speed sensor already pre-
wired in the factory for right leaf.
1/2 control unit in steel housing for 1 or 2 leaf operation

tousek / EN_ST-63_02 / 25. 03. 2020 - 7 -
dropbolt control unit for one dropbolt dropbolt control unit for two dropbolts
Optional components for steel housing:
trac light control unit (A), dropbolt module (E), dropbolt control unit (MST)
E
A
MST
ST 63 including additional components:
A trac light control unit STA 11 page 33
E dropbolt module page 26, 27
MST dropbolt control unit page 26, 27
For wiring the optional components, please follow the
descriptions on the pages listed.
connections
• The wiring to the standard components (frequency converter, main switch and the connection to the terminals (KL2) on
the DIN rail are carried out at the factory.
• The connection works of the operator must be carried out according to the installation manual (page 10).
• All other neccesary connection works must be carried out on the connection terminals (KL1) of the control unit.
Except the connection of speed sensor wires and power supply wires which must be connected to the terminal block
(KL2) on the DIN rail or main switch (HS) (in steel cabinet version) see page 9.
For wiring optional components, please follow the descriptions on the pages listed.
• connection of the dropbolt or the electric lock page 26–27
• connection of the trac light control unit STA 11 page 33–38

- 8 - tousek / EN_ST-63_02 / 25. 03. 2020
T
FE
–
ESC ENTER
+
display
F1
ZM
E
VE
TA
FU-L FU-R
B
KL1
D
2.2 control board (ST) ST 63 control unit for folding and swing gates
Attention
During connection, adjustment and maintenance works please take care, that the electronic circuit board won t be
damaged by moisture (rain).
components of the control board
(KL1) connection terminals
(B)
term. 88/89: for trac light control connection (optional)
(D) Display connection or TC-/TSI-connection
(optional „tousek-connect“ / „tousek-service-interface“)
(TA)
additional pulse button (corresponding to: term. 30/32)
(FU-L)
MODBUS (FU-connection for LEFT leaf)
(FU-R)
MODBUS (FU-connection for RIGHT leaf)
(E) System plug for optional module drop bolt or electric
lock / magnet
(
page
26–27)
(VE) 230V a.c. for electric lock/magnet module
(FE)
slot for optional radio receiver (
page 29)
(ZM) slot for optional module „status display“ (page 25)
(T) transformer
(F1) fuse T 1A
Important
The optional „tousek-connect“ or
the „tousek-service interface“ must
be connected with socket (D)!
Not with (E) !
Overview

tousek / EN_ST-63_02 / 25. 03. 2020 - 9 -
2.3 Terminal assignment ST 63 control unit for folding and swing gates
78 79 50 52 50 53 50 55 50 56
signal contacts
attendence ILD
MSE 1 (LL1) (8,2kOhm)
MSE 2 (LL2) (8,2kOhm)
MSE 3 (RL1) (8,2kOhm)
MSE 4 (RL2) (8,2kOhm)
12 13
courtyard lamp 230Va.c.,
max. 60W ohmic
Erdung
Versorgungsspannung
230V a.c.
0 12
L N
30 31 30 32 30 33 30 34 30
common
STOP switch
common
IMPULSE switch
common
CLOSE switch
common
PEDESTRIAN switch
common
30 36 30 39 30 S3S4
common
OPEN switch
common
incudtion loop detector
common
emergeny mod
page 16
ashing light 24Va.c.,
max. 5W
24Va.c. OUT
for accessories, max. 10W
10 11 76 77
The impulse inputs (impulse, I loop, pedestrian, CLOSE, OPEN) are
not active in trac light mode!
trafc light control page
33
STOP-button
If no STOP button is connected,
bridge the terminals 30/31!
(jumper as factory settings)
The stop input has no emergency
stop function! - In order to ensure
the emergency stop function, provide the
supply line with an all-pole disconnecting
emergency stop switch, that locks after
actuation!
Drehzalsensor +
Sensorsignal 1 (links)
Drehzahlsensor –
Drehzalsensor +
Sensorsignal 2 (rechts)
Drehzahlsensor –
1
2
3
1
2
3
power supply
PHC-transmitter
power supply PHC-receiver
or accessories, max. 0,3A
common PHC
PHC-contact inside
PHC-contact outside
PHC-contact back area
41 42 43 44 45 46 48 49
88 89
connection terminals
traic light control STA 11
88 89
S4
S3
emergency
mode
S4
S3
normal-
terminal blocks (KL1) of the control board
terminal block (KL2) on DIN rail
power supply connection:
to terminal block (KL2)
(on DIN rail)
sensor connection:
to terminal block (KL2)
(on DIN rail)
sensor connection:
to terminal block (KL2)
(on DIN rail)
Danger
• Before connection works or taking o the housing cover the power supply has to be turned o !
• Follow safety instructions! (page 5)
signal contact „attendence ILD“ (78/79):
potential free contact, max. switching voltage
60Vd.c., 30W ohmic load
1K
ST63K for 1 leaf operation:
LN
L N
1
2
3
rotational speed sensor +
sensor signal 2 (right)
rotational speed sensor –
power supply
230V a.c.
grounding
KL2
prewired in the
factory for right leaf
1/2 ST63 in steel housing for one/double
leaf operation:
rotational speed sensor +
sensor signal 1 (left)
rotational speed sensor –
rotational speed sensor +
sensor signal 2 (right)
rotational speed sensor –
grounding
1
2
3
1
2
3
KL2
Connection of the 230Va.c. supply
to the main switch
KL2

- 10 - tousek / EN_ST-63_02 / 25. 03. 2020
2.4 Connection notes for the operator SWING X-TP ST 63
CONNECTION OF OPERATORS to control unit
left operator right operator
INSIDE
Connection wire with
the color / number
left operator right operator
MODBUS → FU-L MODBUS → FU-R
(M)
motor wire
1 →
frequency converter
U/T1
frequency converter
U/T1
2 →V/T2 V/T2
3 →W/T3 W/T3
green/yellow →
grounding screw grounding screw
shield →
grounding plate grounding plate
(S)
sensor wire
1 →terminal KL2: 65 terminal KL2: 65
2 →terminal KL2: 66 terminal KL2: 67
3 →
terminal KL2: 68 terminal KL2: 68
if shield used →
Important: motor and sensor wires
• Attention: Before carrying out any connection works, the power supply of the gate facility has to be turned o!
• It is possible to connect 2 SWING X-TP motors to the control unit ST63. The operator SWING X-TP has a connection
cable for the power supply and for the integrated torque sensor. The sensor signal is sent to the control unit and denes
the performance/response when hitting an obstacle or when reaching a gate end position.
• The motor and sensor wires must be supplied to the control unit in 2 separate tubes
or a cable channel with partition.
• 1
1K
The ST63 control unit for 1 leaf operation is prewired in the factory for right leaf. For left leaf operation the
MODBUS must be connected to the FU-L slot. The sensor wires must be connected for the left operator according to
the chart below.
sensor wires connection to the terminal block (KL2)
• The sensor wire must not exceed the max. length of 50m ! - For lengths of more than 20m shielded con-
trol lines must always be used. The shield must be clamped together with the cable number 3 (terminal 68).
• If sensor wires with more than 3 cables are used the remaining cables must be clamped together with the cable num-
ber 3 (terminal 68) - do not clamp to a ground wire (earth lead)!
•
When connecting the sensors to the control unit please note the labeling/marking of the cables (number 1–3).
Bad connection leads to destruction !
motor wires
• The motor wire (3 wires marked with 1, 2, 3 and the ground wire) must be connected to the frequency converter. If 2 ope-
rators going to be connected each operator must be connected to one frequency converter (FU-1, FU-2). The frequency
converter (FU) of the left operator must be connected to the FU-L MODBUS slot of the control board. The frequency
converter (FU) of the right operator must be connected to the FU-R MODBUS slot of the control board.
• IMPORTANT: After switching on the power supply and giving an impulse (command) the gate leaves must open!
If it is not the case, 2 of the 3 phases (1, 2, 3) connected to the frequency converter must be interchanged.
2
3
1
green/yellow
1
2
3
1
2
3
2
3
1
operators SWING X TP
M
IMPORTENT!
separate tubes or a
cable channel with partition!
shield
S
3
2
1
grounding screw
1 2 3
M
MODBUS
(FU-connection → FU-L or FU-R)
shield
grounding plate

tousek / EN_ST-63_02 / 25. 03. 2020 - 11 -
SWING X-TP: cable extension with connection box
motor wire:
(M) motor wire
(S) sensor wire
M
SWING X TP bottom
shield
110mm
15mm 30mm 65mm
S
For EMC conform cable extension is necessary to use a connection box with the suitable
screws.
• Metal tongues in the holes serve as contact to the shield.
Remove the cable sheath at these points!
• Take care of the right connection between the metal tongues in
the holes and the shield of the motor wire (M).
cable bolting M16
1
2
3
1
2
3S
M
S
M
shieldshield
shield
M
S
M
S
shield
Article no.
motor wire for
SWING X TP *)
10m extension 14120430
20m extension 14120440
*) or equivalent cable of the type YSLC/PUR-JZ 4G0,75mm2
Article no.
connection box
SWING X TP
to extend the motor
wire and the sensor
wire
14120420
cable extension:
connection to the
frequency converter
connection to the speed sensor
slots of the terminal block (KL2)
on DIN rail
ST63
max. 20m

- 12 - tousek / EN_ST-63_02 / 25. 03. 2020
–
ESC ENTER
+
text display
• The program menu is divided into „POSITIONING“ „BASIC SETTINGS” and „ MENU CONTROL”
BASIC SETTINGS
•
When entering the programming of the control unit for the rst time you will see the BASIC SETTINGS
.
• Here the necessary adjustments for the use of the operator/gate can be set quickly.
• For advanced settings/programming please choose the menu point „menu control”.
MENU CONTROL
• For futher programming you will reach immediatly the MENU (CONTROL) (Basic settings are skipped)
• The menu control includes all kinds of settings.
The dierent menu points are indicated as follows:
= selectable settings = factory settings = status display
G shows the menu points which are in the “ BASIC SETTINGS”
Programming menu Adjustments - overview
2.5 Programming ST 63 control unit for folding and swing gates
Programming buttons Adjustments - overview
• The adjustment (programming) of the operating parameters is carried out with four programming buttons and
the display.
• Before starting the programming, please choose the language. Use the buttons +or -to choose menu langua-
ge and conrm with ENTER.
•
Note: Language selection can also be chosen by pressing the ESC button for 5s, from any position in menu.
•
Before the programming can be started, you have to select the door type (swing gate or folding gate)
• The text display informs about behaviour, chosen menus
and adjustment of dierent settings.
• The programming of the control is carried out with the help
of four buttons (+, -, ENTER and ESC).
• Scrolling through the available menu points (up/
down) or the adjustment of a parameter (value in-
crease/decrease) is carried out with buttons +and –..
AUTO-COUNT: when holding one of the buttons the value
changes automatically.
• When pressing the ENTER-button a conrmation for
entering the shown menu point, resp. for accepting the
shown value of a parameter is given.
• When pressing the ESC-button you return to the superior
menu point. Possibly changed adjustments of a parameter
are rejected with this button (the former values will remain).
• AUTO-EXIT: if no button is pressed during 1 min. then the
menu switches automatically to the “ready” menu (wihtout
saving changed parameters)

tousek / EN_ST-63_02 / 25. 03. 2020 - 13 -
main layer sub layer settings/adjustments
buttons/switches
page 15
impulse button OPEN/STOP/CLOSE
OPEN/CLOSE/OPEN
OPEN
DEADMAN *) if impulse button is set on
DEADMAN, then all other buttons
also in DEADMAN mode-.
pedestr. opening OPEN/STOP/CLOSE
OPEN/CLOSE/OPEN
OPEN
DEADMAN *)
ILD channel
(ILD = Induction loop detector)
impulse OPEN
security
attendence
(also in DEADMAN mode)
security
attendence
photocells
page 17
Ginner photocell not active
during closing reverse
stop, opens after release
during opening stop-then open
Gouter photocell not active
during closing reverse
stop, opens after release
Gback area photoc. active
not active
ILD/PHC pause time
ILD/PHC = induction loop detektor / photocell
no inuence of photocell/ ILD
cancel pause time (close immediately)
re-start pause time
immediate closing after opening
PHC-self test
(PHC = photocell)
active
not active
safety edge
page 20
Gsafety edge LL1
LL = left leaf
not active
opening active
closing active
opening / closing
Gsafety edge LL2 not active
opening active
closing active
opening / closing
Gsafety edge RL1
RF = right leaf
not active
opening active
closing active
opening / closing
Gsafety edge RL2 not active
opening active
closing active
opening / closing
SE- status display
Display: status safety edges (= SE)
left leaf
page 21
delay left leaf opening delay
closing delay
delay time left leaf OFF, 1...25s = 2s
force 60...100% = 70%
speed 60...100% (SWING X3 TPspeed) = 100%
75...100% (SWING X4 LHTP)
only with
swing gates
soft speed 25...50% = 50%
soft stop time OPEN OFF, 0,1...9,0s = 5s
soft stop time CLOSE OFF, 0,1...9,0s = 5s
right leaf
page 21
delay right leaf opening delay
closing delay
delay time right leaf OFF, 1...25s = 2s
force 60...100% = 70%
speed 60...100% (SWING X3 TPspeed) = 100%
75...100% (SWING X4 LHTP)
only with
swing gates
soft speed 25...50% = 50%
soft stop time OPEN OFF, 0,1...9,0s = 5s
soft stop time CLOSE OFF, 0,1...9,0s = 5s
operating mode
page 22
impulse logic stop, start of pause time
impulse suppressioning when opening
pause time extension
Goperating mode impulse mode
1...255s automatic close [ increment 1 ]
pedestr. opening 25...100% = 100%
automatic mode complete / pedestrian opening
only complete opening
only pedestrian opening
pause time logic no inuence
permanent ON
only with
folding gates
ramp time open 1,0...6,0s = 3s
ramp time close 1,0...6,0s = 3s
menu item showed:
with trac mode, without trac mode, with swing gates, with folding gates
swing / folding gate control ST63
+
–
Menu structure Adjustments - overview
ESC ENTER
Note: Some changes in the functionality or operating logic are not accepted until the gate is closed and the word „Ready“ appears on the display.

- 14 - tousek / EN_ST-63_02 / 25. 03. 2020
main layer sub layer settings/adjustments
light/ lamps
page 23
prewarning OPEN OFF, 1...30s = OFF
prewarning CLOSE
OFF, 1...30s = OFF
court yard light 1 OFF, 5...950 = OFF
10s afterglow
green phase
5...120s [ increment 1 ] = 20s
clearance time
1...60s [ increment 1 ] = 5s
trac light gate CLOSED
red light OFF
permanent RED
trac light logic
green on both sides
green on one side
peripherals
page 24
trac light not active
active
locking electric lock/magnetic clamp
drop bolt
reverse stroke
Reverse stroke only with activated
locking!
with E-lock/magnetic clamp: with drop bolt:
not active
0,5...8s
not active
active
delay magnetic clamp OFF
0,1...1s /
electric lock not active
1...10s /
drop bolt /
OPEN and CLOSE
OPEN only
CLOSE only
additional module gate status display 1
gate status display 2
diagnosis
page 28
status display state display of all inputs
delete positions NO
YES
factory settings NO
YES
software version show software version
serial number show serial number
protocol show protocol notes
menu item showed: with trac mode, without trac mode
swing / folding gate control ST63
+
–
ESC ENTER
Note: Some changes in the functionality or operating logic are not accepted until the gate is
closed and the word „Ready“ appears on the display.
Menu structure Adjustments - overview
Note: deactivate locking (Electric lock or drop bolt)
To deactivate locking, the menu item „locking“ has to be set to „Electric lock/magnetic clamp“ and the menu item „Electric
lock“ to „not active“ afterwards.

tousek / EN_ST-63_02 / 25. 03. 2020 - 15 -
As impulse-, pedestrian-, close- and impulse-OPEN buttons pushbuttons or key switches as well as external
radio receivers with potential free make contacts can be used. As stop switch a break contact has to be used!!
In trac light mode the impulse-, pedestrian-, close- and impulse-OPEN buttons are without any
function.
Impulse button (terminals KL1 30/32) Buttons/switches
OPEN/STOP/CLOSE successive impulses (factory setting): an impulse of the impulse switch makes the motor start
opening/closing. If the impulse switch is actuated again during this opening-/closing movement, the motor stops.
With the next command of the impulse switch the motor moves in the opposite direction of the last gate movement
OPEN/CLOSE/OPEN successive impulses:
an impulse of the impulse switch makes the motor start opening/closing.
If the impulse switch is actuated again during this opening/closing movement, the travel direction is reversed.
•In this operation mode it is not possible to stop the motor with the impulse switch – it always
moves until reaching an end position. (Opened or closed position).
• for the function OPEN/CLOSE/OPEN we strongly suggest the installation of a photocell!
OPEN: Only opening commands are accepted by the impulse switch – closing the gate with the impulse switch is
not possible.
DEAD MAN: The motor opens as long as the impulse switch is pressed (hold) – closing the gate with the impulse
switch is not possible. As soon as the switch is released, the motor stops. If hold to run operating mode is selected,
the radio receiver slot (FE) is set out of order for reasons of safety.
• If the impulse switch is set to DEAD MAN operation, then also all other buttons are in DEAD MAN mode.
With the impulse-, open- or the pedestrian button the gate is opened, with the CLOSE-button it is closed.
• IMPORTANT: Do not put into operation in dead man mode.
Select only after putting into operation (page 30), if desired.
buttons/switches Anschlüsse und Einstellungen
• A general status display of all inputs is available in menu DIAGNOSIS / STATUS DISPLAY.
2.6 Connections and adjustments ST 63 control unit for folding and swing gates
Pedestrian button (terminals KL1 30/34) Buttons/switches
OPEN/STOP/CLOSE successive impulses:
An impulse of the pedestrian button makes the according gate leaf open/close. If the pedestrian button is actuated
again during this movement, the motor stops. With the next impulse the motor moves in opposite direction of the last
gate movement.
OPEN/CLOSE/OPEN successive impulses:
A command of the pedestrian button makes the according gate wing open/close. If the button is actuated again during
this movement, the travel direction is reversed.
•In this operation mode it is not possible to stop the motor with the pedestrian button – it always
moves until reaching an end position. (Opened or closed position).
• for the function OPEN/CLOSE/OPEN we strongly suggest the installation of a photocell!
OPEN: Only opening commands are accepted by the pedestrian button – closing the gate with the pedestrian button
is not possible.
DEADMAN: The motor opens as long as the pedestrian button is pressed (hold) – closing the
gate with the pedestrian button is not possible. As soon as the button is released, the motor stops.
If hold to run operating mode is selected, the radio receiver slot (FE) is set out of order for reasons of safety.
The DEADMAN function can not be chosen actively but is set automatically as soon as the impulse
button is set to DEADMAN mode.
The single menu points are marked as shown below:
= possible adjustment (or value assignment) = factory setting = status display
G marks the menu points which are contained in the BASIC SETTINGS
Danger
• Before connection works or taking o the housing cover the power supply has to be turned o !
• Follow safety instructions! (page 5)

- 16 - tousek / EN_ST-63_02 / 25. 03. 2020
In emergency mode are the photocells and the safety edges deactivated, but the STOP-switch is still active.
Right after deleting the end positions (menu diagnosis→delete positions→yes) emergency mode is NOT possible.
ILD channel (N.O. contact, terminals 30/39) Buttons / switches
no traffic light and
no deadman mode
traffic light or
deadman mode
impulse OPEN /When driving on the induction loop, the gate opens.
security security When driving on the induction loop, the setting selected under
„photocell“ is effective (page 17).
attendence attendence Via a potential free closing contact (terminals 78/79) the approach
to the induction loop can be evaluated.
An optionally available induction loop detector forwards the signals of an induction loop
via a potential-free switching contact to the terminals KL1 30/39.
Further information corresponding ISD manual.
CLOSE-button (N.O. contact, terminals KL1 30/33) Buttons / switches
• A command with the CLOSE-switch engages closing of gate. In deadman mode the gate closes as long as
the CLOSE-switch is pressed/switched. As soon as switch is released the gate movement stops.
STOPP-switch (N.C. contact, terminals KL1 30/31) Buttons / switches
• when pressing the stop switch the gate stops in any desired position.
As stop switch a break contact has to be used.
If no stop switch is connected, terminals 30/31 have to be wire-bridged. KL1 31
30
The stop input has no emergency stop function! - In order to ensure the emergency stop function, provide
the supply line with an all-pole disconnecting emergency stop switch, that locks after actuation!
OPEN-button (N.O. contact, terminals KL1 30/36) Buttons / switches
• A command with the OPEN-switch engages opening of gate. In deadman mode the gate opens as long as
the CLOSE-switch is pressed/switched. As soon as switch is released the gate movement stops.
EMERGENCY MODE switch (terminals KL1 S3/S4) Buttons / switches
•to activate the emergency mode a button with maintained contact must be
connected to the terminals S3/S4.
•safety device malfunction: in emergency mode the gate can be opened and closed
with reduced speed. The gate travels like in dead-man mode. With OPEN-switch
the gate can be opened and withc CLOSE-switch it can be closed.
KL1
36
30
with OPEN switch: open the gate
33
30
KL1
with CLOSE switch: close the gate
39
30
ISD
KL1
S4
S3
emergency
mode
S4
S3
normal
operation
KL1 KL1

tousek / EN_ST-63_02 / 25. 03. 2020 - 17 -
Ginner photocell (PHC-contact: terminals KL1 45/46) Photocells
not active: to be selected, if the inner photocell should not be triggered.
during closing reverse: if the safety device is triggered during closing the gate reverses (opens). If automatic mode
is selected the gate closes after the pause time is over. If impluse mode is selected a new CLOSE impulse must be
given.
stop, opens after release: if the safety device is triggered during opening or closing the motor stops until the device
is released. Then the gate opens. If automatic mode is selected the gate closes after the pause time is over. If impluse
mode is selected a new CLOSE impulse must be given.
during opening stop-then open: if the safety device is triggered during opening the motor stops until the device
is released. Then the gate opens. (back area monitoring). If automatic mode is selected the gate closes after the
pause time is over. If impluse mode is selected a new CLOSE impulse must be given.
Photocells Connections and adjustments
Gouter photocell (PHC-contact: terminals KL1 45/48) Photocells
not active: to be selected, if the outer photocell should not be triggered.
during closing reverse: if the safety device is triggered during closing the gate reverses (opens). If automatic mode
is selected the gate closes after the pause time is over. If impluse mode is selected a new CLOSE impulse must be
given.
stop, opens after release: if the safety device is triggered during opening or closing the motor stops until the device
is released. Then the gate opens. If automatic mode is selected the gate closes after the pause time is over. If impluse
mode is selected a new CLOSE impulse must be given.
Important: Photocells notes
Photocell connection:
• the control unit has a power supply connection for
a 24V a.c. photocell (PHC)
power supply: PHC-transmitter: terminals KL1 41/42
PHC-receiver: terminals KL1 43/44
Note: in „gate closed“ position the terminals 41/42 and 43/44 are being
switched into energy saving mode (no current).
• The PHC contacts have to be closed when using powered and posi-
tioned photocells (opening contact)
PHC-contacts:
inside = term. KL1 45/46, outside = term. KL1 45/48,
back area = term. KL1 45/49
Mounting note (SYNC function):
IMPORTANT: When using two pairs of photocells please do not
install both photocell transmitters/receivers on the same side (to
eleminate interference between both) !
Exception: photocells with SYNC function allow the installation of
both photocell transmitters/receivers on the same side without causing
interference to each other.
Self-monitoring of photocells:
The control unit has a monitoring function for the connected photocells. A test will be triggered by each impulse
and will be checked if the receiver of the photocell responds to the signal from the photocell transmitter. If the-
re is no communication between the photocell receiver and transmitter the control unit responds with an error.
The deactivation of the self-test function is only permitted if the safety installations correspond to the
category 3 !
you will nd detailed information in the corresponding photocell manual.
1
2
3 3
left right
INSIDE
(1) inner photocell
(2) outer photocell
(3) back area photocell
standard
transmitter1 receiver1
receiver2 transmitter2
with SYNC
transmitter1 receiver1
transmitter2 receiver2
All the photocells are activated by default (inside/outside/back area) in the menu. But it can be deactivated while
basic settings are carried out.

- 18 - tousek / EN_ST-63_02 / 25. 03. 2020
Gback area photocell (contact: terminals KL1 45/49) Photocells
active: to be selected, if the back area of the gate has to be protected by photocells.
not active: no monitoring by PHC-back area.
ILD/PHC pause time Photocells
no inuence of photocell/ ISD: the safety device has no inuence on pause time in automatic mode.
cancel pause time: if the safety device is triggered during the pause time the pause time will be reduced, it means
the door closes after release of the safety device.
re-start pause time: if the safety device is triggered during the pause time (automatic mode), the pause time will
be restarted (as set). After the elapsed pause time the door closes.
immediate closing after opening: if the safety device is triggered during opening or in open position, the door
immediate closes after the open position has been reached and the safety device has been released.
In trac light mode only the adjustments „no inluence“ and „immediate clos
ing
after opening“ are available.
PHC- self test Photocells
active: photocell self-test is executed with an opening impulse (switch, button) in gate position „closed“.
not active: photocell self-test is not executed.
Attention
• The photocell self-test can only be deactivated by selecting „not active“.
• The deactivation of the self-test function is only permitted if the safety installations correspond to the
category 3 !
Important
• To activate the SYNC-function, the
plug-in bridges (J) in both photocell
transmitters have to be removed.
(see manual LS 41/180).
SYNC
J
Outer photocell
Tousek LS 41/180 as safety device
Outer and inner photocell
Tousek LS 41/180 as safety device
with active SYNC-function
Photocells - connection examples
transmitter receiver
N.O.
COM
N.C.
49
48
46
45
44
43
42
41
KL1
transmitter receiver
OUTSIDE:
INSIDE:
N.O.
COM
N.C.
N.O.
COM
N.C.
49
48
46
45
44
43
42
41
KL1

tousek / EN_ST-63_02 / 25. 03. 2020 - 19 -
Back area reective photocell
Tousek RLS 620 as safety device
24Va.c.
12–240V
a.c./d.c.
NO
NC
COM
COM
49
48
46
45
44
43
42
41
KL1
Important
• Jumper J of transmitter and receiver has to be
adjusted in the same way.
Outer photocell
Tousek LS 26 as safety device
+
~
-
~
12/24V
J
+
~
-
~
12/24V
NC C NO J
transmitter receiver
49
48
46
45
44
43
42
41
KL1

- 20 - tousek / EN_ST-63_02 / 25. 03. 2020
Safety edges connections and adjustments
Gsafety edge LL1 (8,2kΩ safety edge 1, left leaf: terminals KL1 50/52) Safety edges
not active: should not be evaluated.
opening active: should be evaluated at opening.
closing active: should be evaluated at closing.
opening / closing: should be evaluated at opening and closing.
Gsafety edge LL2 (8,2kΩ safety edge 2, left leaf: terminals KL1 50/53) Safety edges
not active: should not be evaluated.
opening active: should be evaluated at opening.
closing active: should be evaluated at closing.
opening / closing: should be evaluated at opening and closing.
Gsafety edge RL1 (8,2kΩ safety edge 1, right leaf: terminals KL1 50/54) Safety edges
not active: should not be evaluated.
opening active: should be evaluated at opening.
closing active: should be evaluated at closing.
opening / closing: should be evaluated at opening and closing.
Gsafety edge RL2 (8,2kΩ safety edge 2, right leaf: terminals KL1 50/55) Safety edges
not active: should not be evaluated.
opening active: should be evaluated at opening.
closing active: should be evaluated at closing.
opening / closing: should be evaluated at opening and closing.
status: not triggered
status: triggered
status: contact strip not connected
or defect
status: contact strip deactivated in menu
$o
$x
$
$-
e.g.
$$$$$$$$$$$$$$$$
$$$$$$$$$$$$$$$$
LL1 LL2 RL1 RL2
SE-status display Safety edges
Status dsplay of safety sensing edges LL1 left leaf (1) RL1 right leaf (1)
LL2 left leaf (2) RL2 right leaf (2)
Safety sensing edges
• OBSTACLE DETECTION: When a contact strip is triggered/activated then a change of
direction is eected for 1s. After that the gate stops.
• The safety sensing edges are activated and have the function OPEN/CLOSE by default. Tha
safety sensing edges can be deactivated or the function can be changed while the basic
settings are carried out (see below)
• Safety sensing edges on the same gate leaf and with the same function (i.e. active when
opening, closing or opening / closing) can be connected in series as shown below.
Example: W 8,2kΩ nal resistance
E nal edge
D passage edge
S to control When connecting one safety edge a nal edge (E) has to be used.
Important
• After giving the impulse to automatically program the end positions, no other impulse must be given. Also the
safety devices mustn´t be triggered. This would lead to an interruption of the programming process.
• Therefore, the mechanical stops must be set so that the existing contact strips cannot be triggered.
safety edge LL1
safety edge LL2
E
W
D D S
50
52
50
53
safety edge RL1
safety edge RL2
50
55
50
56
Table of contents
Other tousek Gate Opener manuals

tousek
tousek ST 64 User manual

tousek
tousek TPS 60 PRO m6 User manual

tousek
tousek ST 61A User manual

tousek
tousek Rollco LWA 115/1A User manual

tousek
tousek ST 80A Guide

tousek
tousek PULL T8 User manual

tousek
tousek Swing-X User manual

tousek
tousek PULL T8 User manual

tousek
tousek FOLD 330/L User manual

tousek
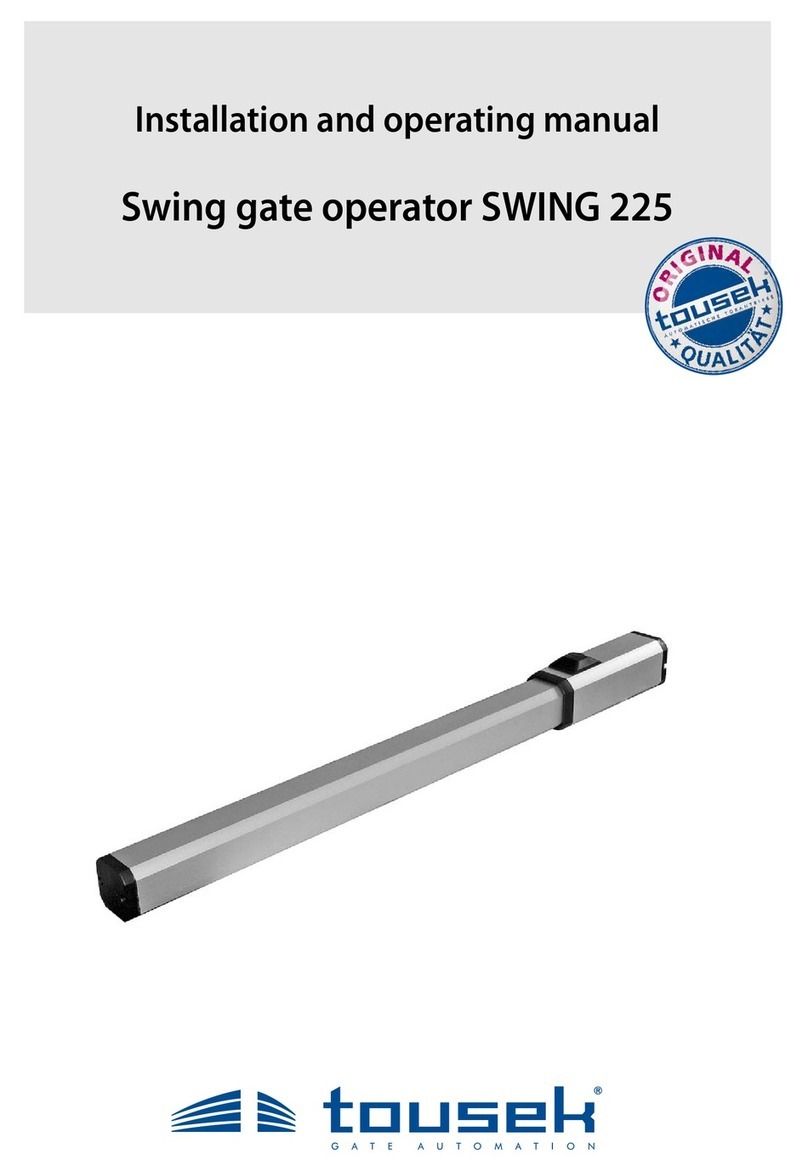
tousek SWING 225 AEB/29 N User manual