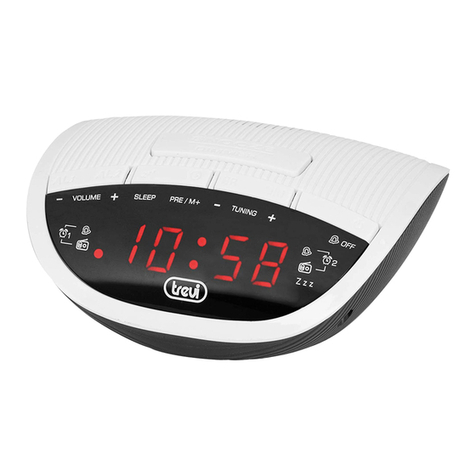
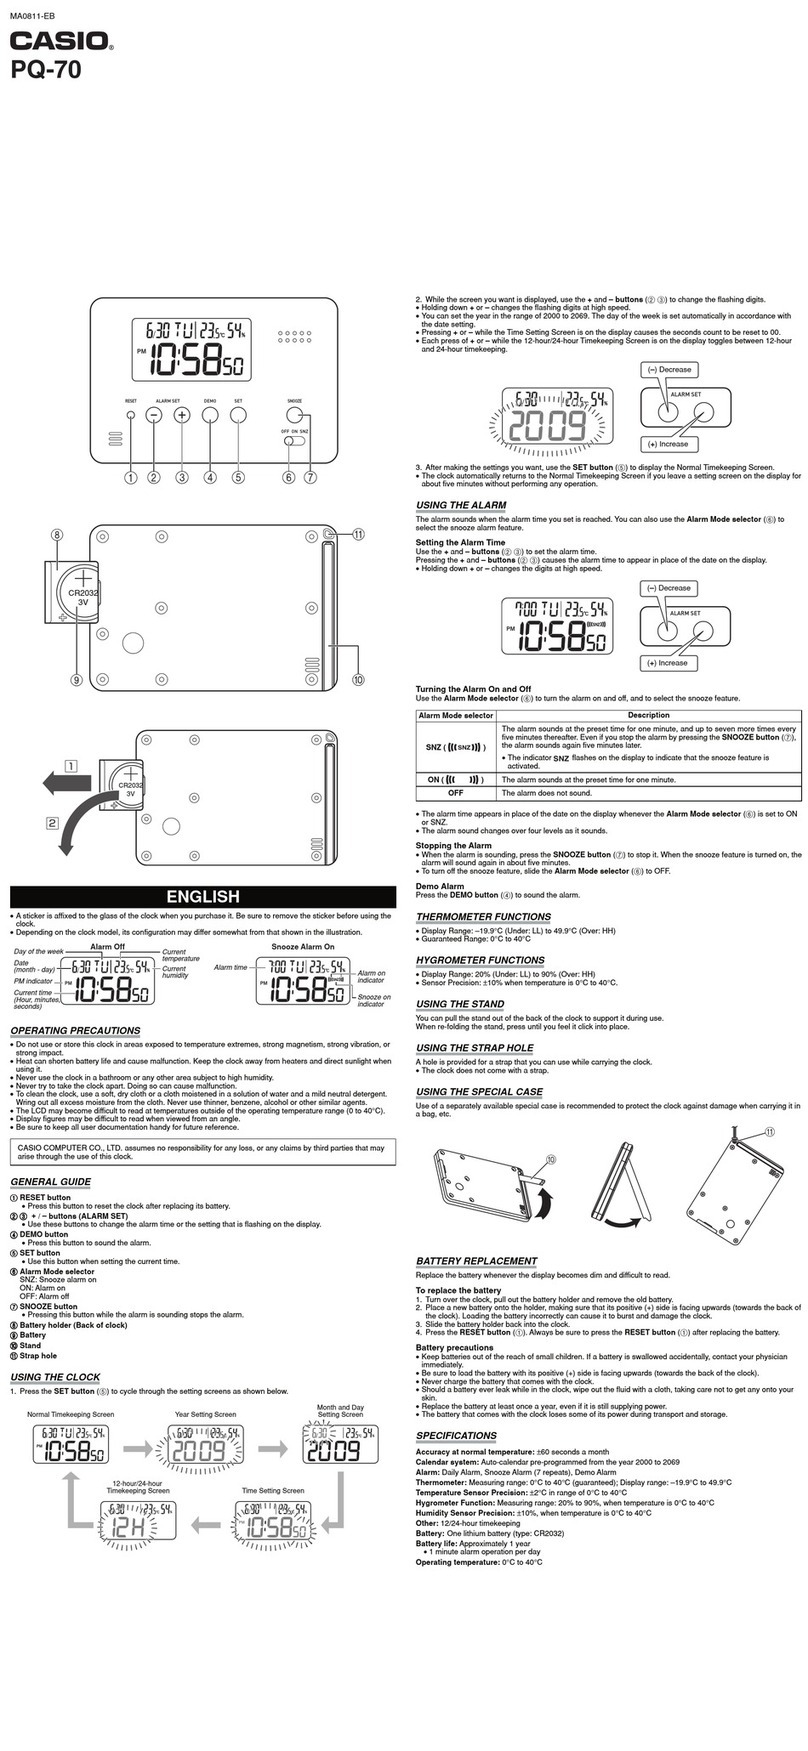
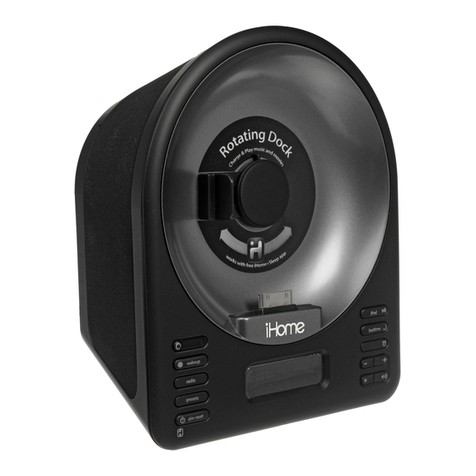
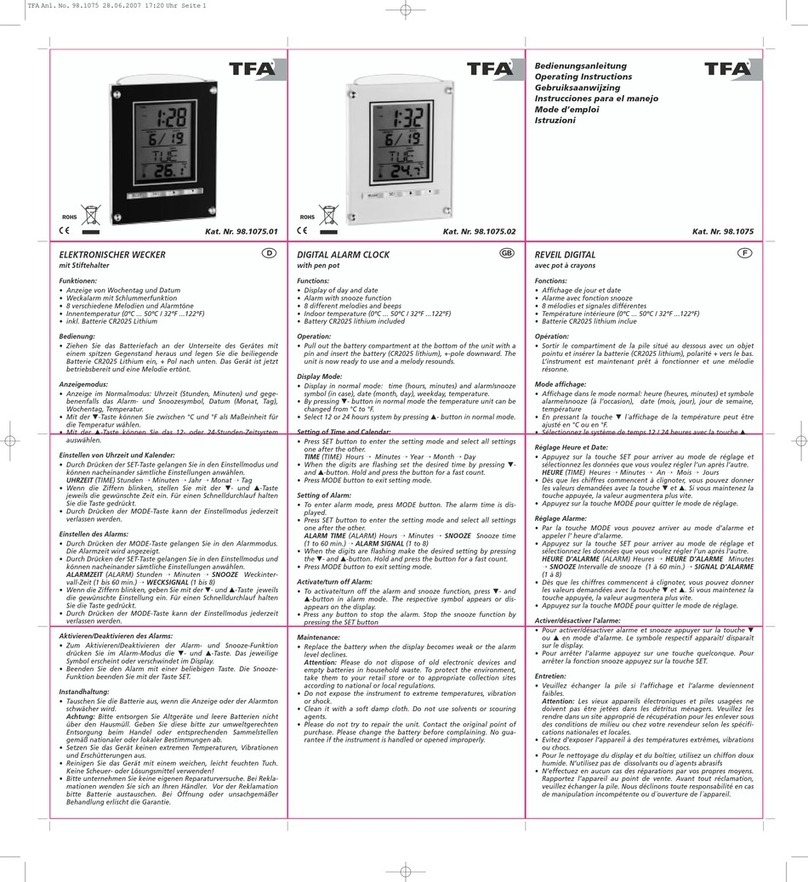
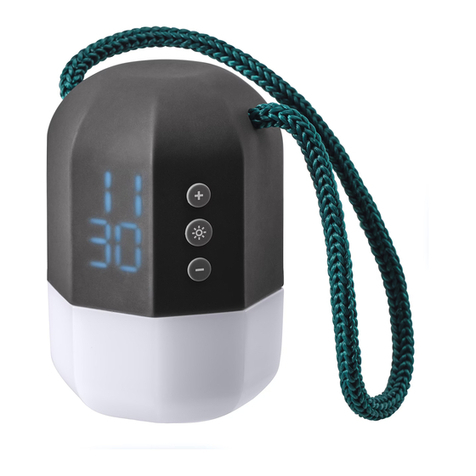
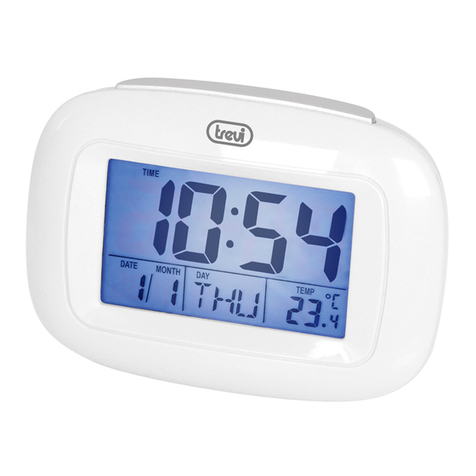
Trevi EC 885 User manual

EC 885
Guida d’uso
User guide
OROLOGIO DIGITALE
CON DISPLAY LED
ALARM CLOCK
WITH LED DISPLAY

EC 885
2_
ATTENZIONE
RISCHIO DI SCOSSE
ELETTRICHE
NON ESPORRE
A PIOGGIA E UMIDITÀ
ATTENZIONE: NON APRIRE L’APPARECCHIO. ALL’INTERNO NON VI
SONO COMANDI MANIPOLABILI DALL’UTENTE NE PARTI DI RICAMBIO.
PER TUTTE LE OPERAZIONI DI SERVIZIO RIVOLGERSI AD UN CENTRO DI
ASSISTENZA AUTORIZZATO TREVI
CAUTION
DANGER OF ELECTRIC SHOCK!
DO NOT EXPOSE TO
RAIN OR HUMIDITY
CAUTION: TO REDUCE THE RISK OF ELECTRIC SHOCK, DO NOT REMOVE
COVER OR BACK.NO USER SERVICEABLE PERTS INSIDE. REFER SERVICING
TO QUALIFIED PERSONNEL ONLY.
ATTENTION
DANGER DE DECHARGES ELEC
-
TRIQUES
NE PAS EXPOSER A LA PLUIE
NI A L’HUMIDITE
ATTENTION: NE PAS OUVRIR L’APPAREIL. SON INTERIEUR NE CONTIENT
AUCUNE COMMANDE DESTINEE A L’UTILISATEUR NI DE PIECES DE
RECHANGE. POUR TOUTE OPERATION D’ASSISTANCE CONTACTER UN
CENTRE D’ASSISTANCE AGREE TREVI.
ACHTUNG
GEFAHR ELEKTRISCHER SCHLÄGE
NICHT DER FEUCHTIGKEIT
UND DEM REGEN AUSSETZEN
ACHTUNG: DAS GERÄT NICHT ÖFFNEN. IM INNERN BEFINDEN SICH KEINE
VOM BENUTZER SELBST INSTANDSETZBAREN TEILE UND AUCH KEINE
ERSATZTEILE. FÜR JEGLICHE SERVICEARBEITEN,WENDEN SIE SICH BITTE
AN EINE TREVI AUTORISIERTEN KUNDENDIENSTSTELLE.
ATENCION
PELIGRO DE CHOQUES ELECTRICOS
NO EXPONER A LLUVIA Y HU-
MEDAD
ATENCION: NO ABRIR EL APARATO,EN SU INTERIOR NO HAY MANDOS
QUE PUEDAN SER MANIPULADOS POR EL USUARIO NI PARTES DE
REPUESTO. PARA TODAS LAS OPERACIONES DE SERVICIO DIRIGIRSE A UN
CENTRO DE ASISTENCIA AUTORIZADO TREVI.
WARNING!

_3
EC 885
NOTE D'USO
Questo apparecchio è uno strumento elettronico di alta precisione, evitate
quindi di utilizzarlo nei seguenti casi:
• Vicino a campi magnetici.
• Vicino a fonti di calore come caloriferi e stufe.
• In luoghi molto umidi come stanze da bagno, piscine, ecc...
• In luoghi molto polverosi.
• In luoghi soggetti a forti vibrazioni.
• Posizionare l’apparecchio in modo che ai suoi lati ci sia sempre abbastanza
spazio per la libera circolazione di aria (almeno 5 cm).
• Se dei liquidi penetrano all’interno dell’apparecchio scollegare immedia-
tamente la spina dalla presa e portare l’apparecchio al più vicino centro
assistenza autorizato TREVI.
• Controllare sempre che i cavi di alimentazione siano installati correttamen-
te.
• Nessunasorgentediammanuda,qualicandeleaccese,dovrebbeessere
posta sull’apparecchio.
• L’apparecchio non deve essere esposto a stillicidio o a spruzzi d’acqua e
nessun oggetto pieno di liquido, quali vasi, deve essere posto sull’apparec-
chio.
• Primadiaccenderel’apparecchio,vericaresemprecheilcavodialimenta-
zione e il cavo di collegamento siano installati correttamente.
• L’adattatore di corrente deve essere collegato a una presa vicina al dispositi-
vo e deve essere facilmente accessibile.
• Se si nota un calore eccessivo sul dispositivo o sull’adattatore di corrente,
scollegare immediatamente la spina dalla presa di corrente principale.
• Non tirare il cavo di alimentazione
• Conservare il presente manuale per futuri riferimenti.
CURA E MANUTENZIONE
Per la pulizia si consiglia l’uso di un panno morbido,leggermente inumidito.
Evitate solventi o sostanze abrasive.
IMPORTANTE
Questo dispositivo e' progettato per uso domestico. La buona costruzione di
questo apparecchio ne garantisce per lungo tempo il perfetto funzionamento.
Se tuttavia dovesse presentarsi qualche inconveniente, sarà opportuno con-
sultare il più vicino Centro Assistenza autorizzato TREVI.
TREVI persegue una politica di continua ricerca e sviluppo. Pertanto i pro-
dotti possono presentare caratteristiche diverse da quelle descritte.

EC 885
4_
NOTES OF USE
This appliance is a high precision electronic instrument,so avoid using it in the
following cases:
• Nearmagneticelds.
• Near heat sources such as heaters and stoves.
• In very humid places such as bathrooms, swimming pools, etc ...
• In very dusty places.
• In places subject to strong vibrations.
• Position the appliance so that there is always enough space on its sides for
free circulation of air (at least 5 cm).
• If liquids penetrate inside the appliance,immediately disconnect the plug
from the socket and take the appliance to the nearest TREVI authorized
service center.
• Always check that the power cables are installed correctly.
• Nonakedamesources,suchaslightedcandles,shouldbeplacedonthe
appliance.
• The appliance must not be exposed to dripping or splashing water and no
objectslledwithliquid,suchasvases,mustbeplacedontheappliance.
• Before turning on the appliance, always check that the power cable and
connection cable are installed correctly.
• The power adapter must be connected to a socket close to the device and
must be easily accessible.
• If you notice excessive heat on the device or on the power adapter, imme-
diately disconnect the plug from the main power outlet.
• Do not pull the power cord
• Keep this manual for future reference.
CARE AND MAINTENANCE
For cleaning, we recommend using a soft,slightly damp cloth.Avoid solvents
or abrasive substances.
IMPORTANT
This device is designed for home use.The good construction of this devi-
ce guarantees its perfect functioning for a long time. However, should any
problems arise,it is advisable to consult the nearest TREVI authorized service
center.
TREVI pursues a policy of continuous research and development.Therefore
the products may have characteristics different from those described.

_5
EC 885
NOTES D’UTILISATION
Cet appareil est un instrument électronique de haute précision,évitez donc de
l’utiliser dans les cas suivants:
• Près de champs magnétiques.
• À proximité de sources de chaleur telles que radiateurs et poêles.
• Dans des endroits très humides comme les salles de bain, les piscines, etc.
• Dans des endroits très poussiéreux.
• Dans des endroits soumis à de fortes vibrations.
• Positionnezl’appareildemanièreàcequ’ilyaittoujourssufsamment
d’espace sur ses côtés pour une libre circulation de l’air (au moins 5 cm).
• Si des liquides pénètrent à l’intérieur de l’appareil, débranchez immédiate-
mentlachedelapriseetapportezl’appareilaucentredeserviceagréé
TREVI le plus proche.
• Vérieztoujoursquelescâblesd’alimentationsontcorrectementinstallés.
• Aucunesourcedeammenue,tellequedesbougiesallumées,nedoitêtre
placée sur l’appareil.
• L’appareil ne doit pas être exposé à des gouttes d’eau ou des éclaboussures
et aucun objet rempli de liquide,comme des vases, ne doit être placé sur
l’appareil.
• Avantd’allumerl’appareil,vérieztoujoursquelecâbled’alimentationetle
câbledeconnexionsontcorrectementinstallés.
• L’adaptateur secteur doit être connecté à une prise à proximité de l’appareil
et doit être facilement accessible.
• Si vous remarquez une chaleur excessive sur l’appareil ou sur l’adaptateur
secteur,débranchezimmédiatementlachedelaprisesecteur.
• Ne tirez pas sur le cordon d’alimentation
• Conservez ce manuel pour référence future.
SOIN ET MAINTENANCE
Pour le nettoyage, nous vous recommandons d’utiliser un chiffon doux légère-
ment humide.Évitez les solvants ou les substances abrasives.
IMPORTANT
Cet appareil est conçu pour un usage domestique. La bonne construction
de cet appareil garantit son parfait fonctionnement pendant longtemps. Ce-
pendant, en cas de problème, il est conseillé de consulter le centre de service
agréé TREVI le plus proche.
TREVI poursuit une politique de recherche et développement continue. Par
conséquent, les produits peuvent avoir des caractéristiques différentes de
celles décrites.

EC 885
6_
NUTZUNGSHINWEISE
Dieses Gerät ist ein hochpräzises elektronisches Instrument.Verwenden Sie es
daher in den folgenden Fällen nicht:
• In der Nähe von Magnetfeldern.
• In der Nähe von Wärmequellen wie Heizungen und Öfen.
• An sehr feuchten Orten wie Badezimmern, Schwimmbädern usw.
• An sehr staubigen Orten.
• An Orten, die starken Vibrationen ausgesetzt sind.
• Stellen Sie das Gerät so auf, dass an den Seiten immer genügend Platz für
eine freie Luftzirkulation vorhanden ist (mindestens 5 cm).
• Wenn Flüssigkeiten in das Gerät eindringen, ziehen Sie sofort den Stecker
aus der Steckdose und bringen Sie das Gerät zum nächstgelegenen von
TREVI autorisierten Servicecenter.
• Überprüfen Sie immer, ob die Stromkabel richtig installiert sind.
• Auf das Gerät dürfen keine offenen Flammenquellen wie brennende Kerzen
gestellt werden.
• Das Gerät darf keinem tropfenden oder spritzenden Wasser ausgesetzt wer-
den, und es dürfen keine mit Flüssigkeit gefüllten Gegenstände wie Vasen
auf das Gerät gestellt werden.
• Überprüfen Sie vor dem Einschalten des Geräts immer, ob das Netzkabel
und das Verbindungskabel richtig installiert sind.
• Das Netzteil muss an eine Steckdose in der Nähe des Geräts angeschlossen
und leicht zugänglich sein.
• Wenn Sie am Gerät oder am Netzteil übermäßige Hitze bemerken, ziehen
Sie sofort den Stecker aus der Steckdose.
• Ziehen Sie nicht am Netzkabel
• Bewahren Sie dieses Handbuch zum späteren Nachschlagen auf.
PFLEGE UND WARTUNG
Zur Reinigung empfehlen wir die Verwendung eines weichen, leicht feuchten
Tuchs.Vermeiden Sie Lösungsmittel oder abrasive Substanzen.
WICHTIG
Dieses Gerät ist für den Heimgebrauch konzipiert. Die gute Konstruktion die-
ses Gerätes garantiert lange Zeit seine einwandfreie Funktion.Sollten jedoch
Probleme auftreten,wenden Sie sich an das nächstgelegene autorisierte
TREVI-Servicecenter.
TREVI verfolgt eine Politik der kontinuierlichen Forschung und Entwicklung.
Daher können die Produkte andere als die beschriebenen Eigenschaften
aufweisen.

_7
EC 885
NOTAS DE USO
Este aparato es un instrumento electrónico de alta precisión,así que evite
usarlo en los siguientes casos:
• Cerca de campos magnéticos.
• Cerca de fuentes de calor como calentadores y estufas.
• En lugares muy húmedos como baños,piscinas, etc ...
• En lugares muy polvorientos.
• En lugares sujetos a fuertes vibraciones.
• Coloqueelaparatodemodoquesiemprehayasucienteespacioalos
lados para la libre circulación del aire (al menos 5 cm).
• Si penetran líquidos en el interior del aparato, desconecte inmediatamente
el enchufe de la toma y lleve el aparato al centro de servicio autorizado
TREVI más cercano.
• Compruebe siempre que los cables de alimentación estén instalados cor-
rectamente.
• No deben colocarse sobre el aparato fuentes de llamas vivas, como velas
encendidas.
• El aparato no debe exponerse a goteos o salpicaduras de agua y no se
deben colocar objetos llenos de líquido, como jarrones, sobre el aparato.
• Antes de encender el aparato, compruebe siempre que el cable de alimen-
tación y el cable de conexión estén instalados correctamente.
• El adaptador de corriente debe estar conectado a una toma cercana al
dispositivo y debe ser fácilmente accesible.
• Si nota un calor excesivo en el dispositivo o en el adaptador de corriente,
desconecte inmediatamente el enchufe de la toma de corriente principal.
• No tire del cable de alimentación
• Conserve este manual para futuras consultas.
CUIDADO Y MANTENIMIENTO
Para la limpieza,recomendamos utilizar un paño suave ligeramente húmedo.
Evite disolventes o sustancias abrasivas.
IMPORTANTE
Este dispositivo está diseñado para uso doméstico. La buena construcción de
este dispositivo garantiza su perfecto funcionamiento durante mucho tiempo.
Sin embargo, si surgiera algún problema, se recomienda consultar al centro de
servicio autorizado TREVI más cercano.
TREVI sigue una política de investigación y desarrollo continuos. Por tanto, los
productos pueden tener características distintas a las descritas.

EC 885
8_
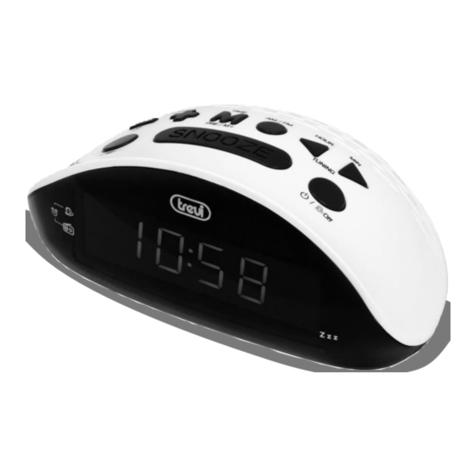
DESCRIZIONE COMANDI
1. Tasto Alarm 1
2. Tasto -
3. Tasto +
4. Tasto TIME regolazione orario
5. Tasto ALARM OFF spegnimento
allarme
6. Tasto HOUR regolazione ora
7. Tasto MIN regolazione minuti
8. Tasto Alarm 2
9. Non utilizzato
10.Tasto Snooze/Dimmer
11.Vano batterie (sul retro)
12. Led indicatori allarme 1/2 attivi
13. Display LED
INSTALLAZIONE
Inserire due batterie“AAA”nell’apposito vano (11) sul retro dell’apparecchio
rispettando le polarità indicate.
Inserire la spina del cavo di alimentazione in una presa di corrente 230V
50Hz;ildisplaylampeggerànoaquandol’orariononsaràregolato.
REGOLAZIONE ORARIO
1. Tenerepremutoalungoiltasto(4)noaquandoipuntini“:”dell’orario
iniziano a lampeggiare.
2. Premere il tasto HOUR(6) per attivare la regolazione dell’ora.
Tramite i tasti +(3) e -(2) impostare l’ora corrente.
3. Premere il tasto MIN(7) e tramite i tasti +(3) e -(2) impostare i minuti correnti.
Confermare premendo una volta il tasto (4).
REGOLAZIONE E ATTIVAZIONE ALLARMI
1. Premere a lungo il tasto ALARM1 (1), il led indicatore allarme 1 sul display
comincerà a lampeggiare.
2. Premere il tasto HOUR(6) per attivare la regolazione dell’ora della sveglia
tramite i tasti +(3) e -(2).
3. Premere il tasto MIN(7) per attivare la regolazione dei minuti della sveglia
tramite i tasti +(3) e -(2).
4. Premere il tasto ALARM1 (1), per confermare l’impostazione.
Sul display si accenderà l’indicatore dell’allarme (12).
5. Per impostare ALARM2 seguire i passi da 1 a 4 premendo il tasto ALARM2
invece di ALARM1.
Per visualizzare l’ora della sveglia impostata premere a lungo il tasto Alarm1(1)
o Alarm2(8), attendere alcuni secondi per il ritorno alla normale visualizzazio-
ne dell’orario.
Per attivare o disattivare un allarme premere i tasti Alarm1 o Alarm2, l’indicato-
re (12) mostrerà se l’allarme e’ attivo.
ITALIANO

_9
EC 885
FUNZIONE SNOOZE E DISATTIVAZIONE ALLARME
1. Durante il suono dell’allarme,premere il tasto SNOOZE (10) per arrestare
momentaneamente l’allarme,l’indicatore dell’allarme (12) comincerà a
lampeggiare. Dopo 9 minuti l’allarme riprenderà a suonare.
2. Durante il suono dell’allarme,premere il tasto ALARM OFF (5) per arrestare
denitivamentel’allarme.L’allarmerimarràattivoesuonerà24oredopo.
3. Premere due volte il tasto ALARM1 (5) o ALARM2 (6) per disattivare il
corrispondente allarme.Sul display si spegnerà il corrispondente indicatore
d’allarme (12).
REGOLAZIONE LUMINOSITA’ DISPLAY
1. Premere il tasto SNOOZE/DIMMER (10) per abbassare la luminosità del
display.
2. Premerlo nuovamente per aumentare la luminosità del display.
BATTERIA TAMPONE ANTI BLACK-OUT
Per mantenere in funzione l’orologio e la memorizzazione dell’allarme anche
durante una momentanea mancanza di energia elettrica,inserire due batterie
“AAA” nell’apposito vano (11) sul retro dell’apparecchio rispettando le polarità
indicate.
Durante la mancanza di alimentazione elettrica, e’ possibile visualizzare l’ora
corrente per alcuni secondi premendo un tasto qualsiasi.
Nota: durante il funzionamento a batterie, l’allarme sveglia non funziona.
CARATTERISTICHE TECNICHE
Alimentazione:.................................................. 230V 50Hz - DC3V 2x batterie
................................................................................. AAA (non fornite)
Consumo:............................................................ 3 W
Dimensioni:......................................................... 155 x 73 x 84 mm
Peso:...................................................................... 310 gr.
INFORMAZIONI AGLI UTENTI
ai sensi del Decreto Legislativo N° 49 del 14 Marzo 2014
“Attuazione della Direttiva 2012/19/UE sui rifiuti di apparecchiature elettriche ed elettroniche
(RAEE)”
Il simbolo del cassonetto barrato riportato sull’apparecchiatura indica che il prodotto alla fine della
propria vita utile deve essere raccolto separatamente dagli altri rifiuti. L’utente dovrà, pertanto, confe-
rire l’apparecchiatura integra dei componenti essenziali giunta a fine vita agli idonei centri di raccolta
differenziata dei rifiuti elettronici ed elettrotecnici, oppure riconsegnarla al rivenditore al momento
dell’acquisto di nuova apparecchiatura di tipo equivalente, in ragione di uno a uno, oppure 1 a zero
per le apparecchiature aventi lato maggiore inferiore a 25 cm. L’adeguata raccolta differenziata per
l’avvio successivo dell’apparecchiatura dimessa al riciclaggio, al trattamento e allo smaltimento
ambientale compatibile contribuisce ad evitare possibili effetti negativi sull’ambiente e sulla salute
e favorisce il riciclo dei materiali di cui è composta l’apparecchiatura. Lo smaltimento abusivo del
prodotto da parte dell’utente comporta l’applicazione delle sanzioni amministrative di cui al D.Lgs n.
Decreto Legislativo N° 49 del 14 Marzo 2014.
EC 885
10_
ENGLISH
COMMANDS DESCRIPTION
1. Button Alarm 1
2. Button -
3. Button +
4. Button TIME for time adjustment
5. Button ALARM OFF to switch off
the alarm
6. Button HOUR for hour adjustment
7. Button MIN for minutes adjustment
8. Button Alarm 2
9. Not used
10. Button Snooze / Dimmer
11. Battery compartment (on the
back)
12. Led Alarm 1/2 indicator
13. Display
INSTALLATION
Insert two“AAA”batteries in the compartment (11) on the back of the device,
respecting the indicated polarity.
Insert the plug of the power cable into a 230V 50Hz socket; the display will
ashuntilthetimeisset.
TIME ADJUSTMENT
1. Hold down the button (4) for a long time until the dots“:”of the time begin
toash.
2. Press the HOUR button (6) to activate the hour adjustment.
Using the + (3) and - (2) keys, set the current time.
3. Press the MIN key (7) and use the + (3) and - (2) keys to set the current minu-
tes.Conrmbypressingthekey(4)once.
ALARM ADJUSTMENT AND ACTIVATION
1. Long press the ALARM1 key (1), the alarm 1 indicator LED on the display will
startashing.
2. Press the HOUR button (6) to activate the alarm time adjustment using the
+ (3) and - (2) buttons.
3. Press the MIN key (7) to activate the adjustment of the minutes of the alarm
using the + (3) and - (2) keys.
4.PresstheALARM1button(1)toconrmthesetting.Thealarmindicator(12)
will light up on the display.
5. To set ALARM2 follow steps 1 to 4 by pressing the ALARM2 key instead of
ALARM1.
To view the set alarm time,long press the Alarm1 (1) or Alarm2 (8) button, wait
a few seconds for the return to normal time display.
To activate or deactivate an alarm,press the Alarm1 or Alarm2 buttons, the
indicator (12) will show if the alarm is active.

_ 11
EC 885
SNOOZE FUNCTION AND ALARM DEACTIVATION
1. During the alarm sound,press the SNOOZE button (10) to temporarily stop
thealarm,thealarmindicator(12)willbegintoash.After9minutesthe
alarm will resume sounding.
2. During the alarm sound,press the ALARM OFF button (5) to permanently
stop the alarm.The alarm will remain active and will sound 24 hours later.
3. Press the ALARM1 (5) or ALARM2 (6) key twice to deactivate the correspon-
ding alarm.The corresponding alarm indicator (12) will go off on the display.
DISPLAY BRIGHTNESS ADJUSTMENT
1. Press the SNOOZE / DIMMER button (10) to dim the display.
2. Press it again to increase the brightness of the display.
ANTI BLACK-OUT BATTERY
To keep the clock running and the alarm memorization even during a momen-
tary power failure,insert two“AAA”batteries in the compartment (11) on the
back of the device,respecting the indicated polarity.
During a power failure, it is possible to view the current time for a few seconds
by pressing any button.
Note: during battery operation,the wake-up alarm does not work.
TECHNICAL FEATURES
Power supply: ................................................... 230V 50Hz - DC3V 2x AAA
................................................................................. batteries (not supplied)
Consumption: ................................................... 3 W
Dimensions: ....................................................... 155 x 73 x 84 mm
Weight: ................................................................ 310 gr.
Precautions for correct disposal of the product.
The symbol shown on the equipment indicates that waste must be disposed of in“sepa-
rate collection” and so the product must not be disposed of together with urban waste.
The user must take the product to special“separate waste collection centres”provided by
local government,or deliver it to the retailer against the purchase of a new product.
Separate collection of waste and subsequent treatment,recycling and disposal opera-
tions promotes the production of equipment with recycled materials and limits negative
effects on the environment and on health caused by improper handling of waste.
Illegal disposal of the product leads to the enforcement of administrative penalties.

EC 885
12 _
FRANÇAIS
DESCRIPTION DES COMMANDES
1. Bouton Alarme 1
2. Bouton -
3. Bouton +
4. Bouton TIME pour le réglage de
l’heure
5. Touche ALARM OFF pour désactiver
l’alarme
6. Bouton HOUR pour le réglage de
l’heure
7. Bouton MIN pour le réglage des
minutes
8. Bouton Alarme 2
9. Non utilisé
10. Bouton Snooze / Dimmer
11. Compartiment à piles (à l’arrière)
12. Indicateur LED d’alarme 1/2
13.Afchage
INSTALLATION
Insérez deux piles «AAA» dans le compartiment (11) à l’arrière de l’appareil en
respectant la polarité indiquée.
Insérezlacheducâbled’alimentationdansuneprise230V 50Hz;l’af-
chage clignotera jusqu’à ce que l’heure soit réglée.
RÉGLAGE DE L’HEURE
1. Maintenez le bouton (4) enfoncé pendant un long moment jusqu’à ce que
les points «:» de l’heure se mettent à clignoter.
2. Appuyez sur le bouton HOUR (6) pour activer le réglage de l’heure.
À l’aide des touches + (3) et - (2), réglez l’heure actuelle.
3. Appuyez sur la touche MIN (7) et utilisez les touches + (3) et - (2) pour régler
lesminutesactuelles.Conrmezenappuyantunefoissurlatouche(4).
RÉGLAGE ET ACTIVATION DE L’ALARME
1. Appuyez longuement sur la touche ALARM1 (1),le voyant LED d’alarme 1
sur l’écran commencera à clignoter.
2. Appuyez sur le bouton HOUR (6) pour activer le réglage de l’heure de l’alar-
me à l’aide des boutons + (3) et - (2).
3. Appuyez sur la touche MIN (7) pour activer le réglage des minutes de l’alar-
me à l’aide des touches + (3) et - (2).
4.AppuyezsurleboutonALARM1(1)pourconrmerleréglage.L’indicateur
d’alarme (12) s’allumera sur l’écran.
5. Pour régler ALARM2,suivez les étapes 1 à 4 en appuyant sur la touche
ALARM2 au lieu de ALARM1.
Pourafcherl’heuredel’alarmeréglée,appuyezlonguementsurlebouton
Alarm1(1)ouAlarm2(8),attendezquelquessecondesleretouràl’afchage
normal de l’heure.
Pour activer ou désactiver une alarme, appuyez sur les boutons Alarm1 ou
Alarm2, l’indicateur (12) indiquera si l’alarme est active.

_ 13
EC 885
FONCTION SNOOZE ET DÉSACTIVATION D’ALARME
1. Pendant le son de l’alarme, appuyez sur le bouton SNOOZE (10) pour arrêter
temporairement l’alarme, l’indicateur d’alarme (12) commencera à clignoter.
Après 9 minutes,l’alarme recommencera à sonner.
2. Pendant le son de l’alarme, appuyez sur le bouton ALARM OFF (5) pour
arrêterdénitivementl’alarme.L’alarmeresteraactiveetretentira24heures
plus tard.
3. Appuyez deux fois sur la touche ALARM1 (5) ou ALARM2 (6) pour désactiver
l’alarme correspondante.L’indicateur d’alarme correspondant (12) s’éteint
surl’afchage.
RÉGLAGE DE LA LUMINOSITÉ DE L’AFFICHAGE
1.AppuyezsurleboutonSNOOZE/DIMMER(10)pourassombrirl’afchage.
2. Appuyez à nouveau pour augmenter la luminosité de l’écran.
BATTERIE ANTI BLACK-OUT
Pour maintenir l’horloge en marche et la mémorisation de l’alarme même
lors d’une coupure de courant momentanée, insérez deux piles «AAA» dans le
compartiment (11) à l’arrière de l’appareil en respectant la polarité indiquée.
Lors d’une panne de courant,il est possible de visualiser l’heure actuelle pen-
dant quelques secondes en appuyant sur n’importe quel bouton.
Remarque: pendant le fonctionnement de la batterie, l’alarme de réveil ne fon-
ctionne pas.
CARACTÉRISTIQUES TECHNIQUES
Alimentation: .................................................... 230V 50Hz - DC3V 2x piles AAA
(non ...................................................................... fournies)
Consommation: ............................................... 3 W
Dimensions: ....................................................... 155 x 73 x 84 mm
Poids: .................................................................... 310 gr.
Recommandations pour l’élimination correcte du produit.
Lesymbolegurantsurl’appareilindiquequeleproduitfaitl’objetd’une“collecte
séparée“. C’est pourquoi,le produit ne doit pas être éliminé avec les déchets urbains.
L’utilisateur doit remettre le produit auprès de“ décharges spécialisées de collecte
séparée“ prévues par les autorités locales, ou bien le rendre au revendeur quand il
achètera un nouvel appareil équivalent.
La collecte séparée du produit et les opérations successives de traitement, recyclage et
élimination favorisent la production d’appareils composés par des matériaux recyclés
ainsi que permettent d’éviter des effets négatifs sur l’environnement et sur la santé des
personnes suite à une gestion impropre du déchet.
Toute élimination abusive du produit entraîne l’application de sanctions administratives.

EC 885
14 _
DEUTCH
BEFEHLSBESCHREIBUNG
1. Tastenalarm 1
2. Taste -
3. Taste +
4. Taste ZEIT zur Zeiteinstellung
5. Taste ALARM AUS, um den Alarm
auszuschalten
6. Taste STUNDE zur Stundeneinstel-
lung
7. Taste MIN zur Minuteneinstellung
8. Tastenalarm 2
9. Nicht verwendet
10. Button Snooze / Dimmer
11. Batteriefach (auf der Rückseite)
12. LED Alarm 1/2 Anzeige
13. Anzeige
INSTALLATION
Legen Sie zwei AAA-Batterien in das Fach (11) auf der Rückseite des Geräts ein
und achten Sie dabei auf die angegebene Polarität.
Stecken Sie den Stecker des Netzkabels in eine 230V 50Hz-Buchse. Die
Anzeige blinkt, bis die Uhrzeit eingestellt ist.
ZEITEINSTELLUNG
1. Halten Sie die Taste (4) lange gedrückt, bis die Punkte„:“ der Zeit zu blinken
beginnen.
2. Drücken Sie die HOUR-Taste (6), um die Stundeneinstellung zu aktivieren.
Stellen Sie mit den Tasten + (3) und - (2) die aktuelle Uhrzeit ein.
3. Drücken Sie die MIN-Taste (7) und stellen Sie mit den Tasten + (3) und - (2)
die aktuellen Minuten ein. Bestätigen Sie durch einmaliges Drücken der
Taste (4).
ALARMEINSTELLUNG UND AKTIVIERUNG
1. Drücken Sie lange die Taste ALARM1 (1). Die Alarm-1-Anzeige-LED im
Display beginnt zu blinken.
2. Drücken Sie die HOUR-Taste (6), um die Alarmzeiteinstellung mit den Tasten
+ (3) und - (2) zu aktivieren.
3. Drücken Sie die MIN-Taste (7), um die Einstellung der Alarmminuten mit
den Tasten + (3) und - (2) zu aktivieren.
4. Drücken Sie die Taste ALARM1 (1), um die Einstellung zu bestätigen. Die
Alarmanzeige (12) leuchtet im Display auf.
5. Um ALARM2 einzustellen, führen Sie die Schritte 1 bis 4 aus, indem Sie
anstelle von ALARM1 die Taste ALARM2 drücken.
Um die eingestellte Alarmzeit anzuzeigen,drücken Sie lange die Taste Alarm1
(1) oder Alarm2 (8) und warten Sie einige Sekunden, bis zur normalen Zeitan-
zeige zurückgekehrt ist.
Um einen Alarm zu aktivieren oder zu deaktivieren, drücken Sie die Tasten

_ 15
EC 885
Alarm1 oder Alarm2. Die Anzeige (12) zeigt an,ob der Alarm aktiv ist.
SNOOZE-FUNKTION UND ALARM-DEAKTIVIERUNG
1. Drücken Sie während des Alarmtons die SNOOZE-Taste (10), um den Alarm
vorübergehend zu stoppen.Die Alarmanzeige (12) beginnt zu blinken. Nach
9 Minuten ertönt der Alarm weiter.
2. Drücken Sie während des Alarmtons die Taste ALARM OFF (5), um den
Alarm dauerhaft zu stoppen. Der Alarm bleibt aktiv und ertönt 24 Stunden
später.
3. Drücken Sie zweimal die Taste ALARM1 (5) oder ALARM2 (6), um den
entsprechenden Alarm zu deaktivieren. Die entsprechende Alarmanzeige
(12) erlischt im Display.
EINSTELLUNG DER HELLIGKEIT ANZEIGEN
1. Drücken Sie die SNOOZE / DIMMER-Taste (10), um die Anzeige zu dimmen.
2. Drücken Sie erneut, um die Helligkeit des Displays zu erhöhen.
ANTI BLACK-OUT BATTERIE
Legen Sie zwei AAA-Batterien in das Fach (11) auf der Rückseite des Geräts ein,
um die Uhr und die Alarmspeicherung auch bei einem kurzzeitigen Stro-
mausfall unter Einhaltung der angegebenen Polarität aufrechtzuerhalten.
Während eines Stromausfalls kann die aktuelle Zeit einige Sekunden lang
durch Drücken einer beliebigen Taste angezeigt werden.
Hinweis: Während des Batteriebetriebs funktioniert der Weckalarm nicht.
TECHNISCHE EIGENSCHAFTEN
Stromversorgung: ........................................... 230V 50Hz - DC3V 2x AAA
................................................................................. Batterien (nicht im Lieferumfang
................................................................................. enthalten)
Verbrauch: .......................................................... 3 W
Abmessungen: ................................................. 155 x 73 x 84 mm
Gewicht: .............................................................. 310 gr.
Hinweise zur ordnungsgemäßen Entsorgung des Produkts.
Das auf dem Gerät angebrachte Symbol weist darauf hin,dass das Altgerät“getrennt zu
sammeln”ist und das Produkt daher nicht zusammen mit dem Gemeindeabfall entsorgt
werden darf.
Der Benutzer muss das Produkt zu den entsprechenden,von der Gemeindeverwaltung
eingerichteten“Wertstoffsammelstellen” bringen oder dem Händler beim Kauf eines
neuen Produkts übergeben.
Die getrennte Müllsammlung und anschließende Aufbereitung,Wiederverwertung und
Entsorgung fördern die Herstellung von Geräten unter Verwendung wiederverwerteter
Materialien und vermindern die negativen Auswirkungen auf die Umwelt und Gesun-
dheit in Folge einer falschen Müllverwaltung.
Die widerrechtliche Entsorgung des Produkts führt zur Auferlegung von Verwaltungsstra-
fen.

EC 885
16 _
DESCRIPCIÓN DE LOS COMANDOS
1. Botón Alarm 1
2. Botón -
3. Botón +
4. Botón TIME para ajustar la hora
5. Botón ALARM OFF para apagar la
alarma
6. Botón HOUR para ajustar la hora
7. Botón MIN para ajuste de minutos
8. Botón Alarm 2
9. No utilizado
10. Botón Snooze / Dimmer
11. Compartimento de la batería (en la
parte posterior)
12. Indicador LED de alarma 1/2
13. Pantalla
INSTALACIÓN
Inserte dos pilas “AAA”en el compartimento (11) de la parte trasera del dispo-
sitivo, respetando la polaridad indicada.
Inserte el enchufe del cable de alimentación en una toma de 230V 50Hz; la
pantalla parpadeará hasta que se establezca la hora.
AJUSTE DE TIEMPO
1. Mantenga pulsado el botón (4) durante mucho tiempo hasta que los pun-
tos“:” del tiempo comiencen a parpadear.
2. Presione el botón HOUR (6) para activar el ajuste de la hora.
Usandolasteclas+(3)y-(2),congurelahoraactual.
3.PresionelateclaMIN(7)yuselasteclas+(3)y-(2)paracongurarlosminu-
tosactuales.Conrmarpresionandolatecla(4)unavez.
AJUSTE Y ACTIVACIÓN DE ALARMA
1. Mantenga presionada la tecla ALARM1 (1), el LED indicador de alarma 1 en
la pantalla comenzará a parpadear.
2. Presione el botón HORA (6) para activar el ajuste de la hora de la alarma
usando los botones + (3) y - (2).
3. Pulsar la tecla MIN (7) para activar el ajuste de los minutos de la alarma
mediante las teclas + (3) y - (2).
4.PresioneelbotónALARM1(1)paraconrmarlaconguración.Elindicador
de alarma (12) se iluminará en la pantalla.
5.ParacongurarALARM2,sigalospasos1a4presionandolateclaALARM2
en lugar de ALARM1.
Paraverlahoradealarmacongurada,mantengapresionadoelbotónAlarm1
(1) o Alarm2 (8), espere unos segundos para volver a la pantalla de hora
normal.
Para activar o desactivar una alarma, presione los botones Alarm1 o Alarm2, el
indicador (12) mostrará si la alarma está activa.
ESPAÑOLESPAÑOL

_ 17
EC 885
FUNCIÓN SNOOZE Y DESACTIVACIÓN DE ALARMA
1. Durante el sonido de la alarma, presione el botón SNOOZE (10) para
detener temporalmente la alarma,el indicador de alarma (12) comenzará a
parpadear. Después de 9 minutos,la alarma volverá a sonar.
2. Durante el sonido de la alarma, presione el botón ALARM OFF (5) para dete-
ner permanentemente la alarma.La alarma permanecerá activa y sonará 24
horas después.
3. Presione la tecla ALARM1 (5) o ALARM2 (6) dos veces para desactivar la
alarma correspondiente.El indicador de alarma correspondiente (12) se
apagará en la pantalla.
AJUSTE DEL BRILLO DE LA PANTALLA
1. Presione el botón SNOOZE / DIMMER (10) para atenuar la pantalla.
2. Presiónelo nuevamente para aumentar el brillo de la pantalla.
BATERÍA ANTI BLACK-OUT
Para mantener el reloj en marcha y la memorización de la alarma incluso
durante un corte momentáneo de energía, inserte dos pilas“AAA” en el com-
partimiento (11) en la parte posterior del dispositivo, respetando la polaridad
indicada.
Durante un corte de energía, es posible ver la hora actual durante unos segun-
dos presionando cualquier botón.
Nota: durante el funcionamiento con pilas,la alarma de despertador no funciona.
CARACTERÍSTICAS TÉCNICAS
Fuente de alimentación: ............................... 230V 50Hz - DC3V 2x pilas AAA
................................................................................. (no incluidas)
Consumo: ........................................................... 3 W
Dimensiones: .................................................... 155 x 73 x 84 mm
Peso: ..................................................................... 310 gr.
Advertencias para la correcta eliminación del producto.
El símbolo que aparece en el aparato indica que el residuo debe ser objeto
de“recogida selectiva” por tanto el producto no se debe eliminar junto con
residuos urbanos.
El usuario deberá entregar el producto a los“centros de recogida selectiva”
creados por las administraciones municipales o bien al distribuidor cuando
adquiera un nuevo producto.
La recogida selectiva del residuo y las sucesivas operaciones de tratamiento,
recuperación y eliminación favorecen la fabricación de aparatos con materia-
les reciclados y limitan los efectos negativos en el medio ambiente y la salud
causados por una gestión incorrecta del residuo.
La eliminación abusiva del producto da lugar a la aplicación de sanciones
administrativas.

EC 885
18 _
NOTE

_ 19
EC 885

TREVI S.p.A. Strada Consolare Rimini-San Marino,62 47924 Rimini (RN) - Italy
MADE IN CHINA
This manual suits for next models
1
Table of contents
Languages:
Other Trevi Alarm Clock manuals

Trevi
Trevi ME 3140 User manual

Trevi
Trevi SLD 3068 S User manual

Trevi
Trevi RC 858 PJ User manual

Trevi
Trevi ME 3106 User manual

Trevi
Trevi RC 853 D User manual

Trevi
Trevi RC 830D User manual

Trevi
Trevi SLD 3101 User manual

Trevi
Trevi RC 850 BL User manual

Trevi
Trevi SLD 3860 User manual

Trevi
Trevi EC 880 User manual

Trevi
Trevi RC 853 D User manual

Trevi
Trevi SLD 3875 User manual

Trevi
Trevi SL 3840 User manual

Trevi
Trevi PJ 3027 User manual

Trevi
Trevi RC 825 D User manual

Trevi
Trevi RC 860BL User manual

Trevi
Trevi EC 878 User manual

Trevi
Trevi SLD 3019 User manual

Trevi
Trevi SLD 3870 User manual

Trevi
Trevi ME 3106 User manual