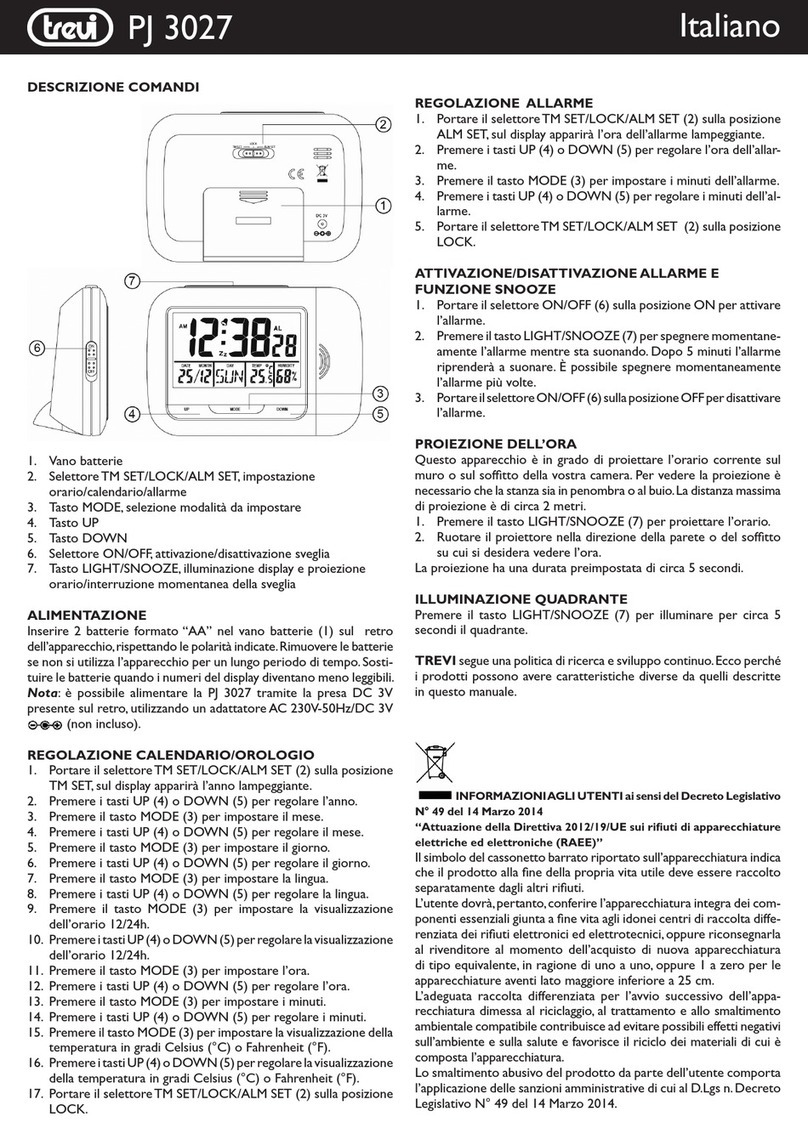
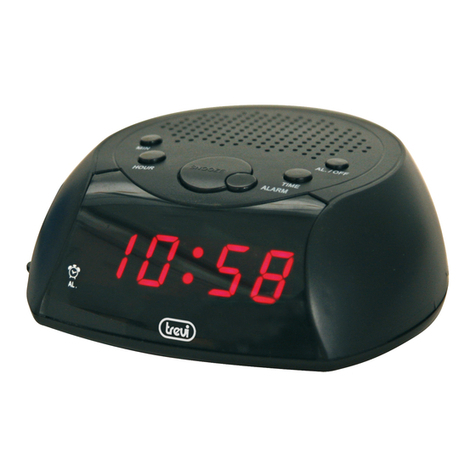
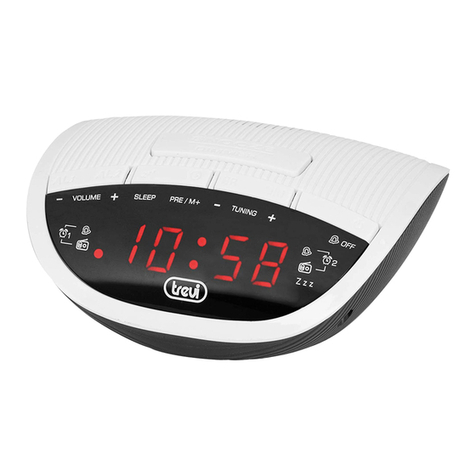
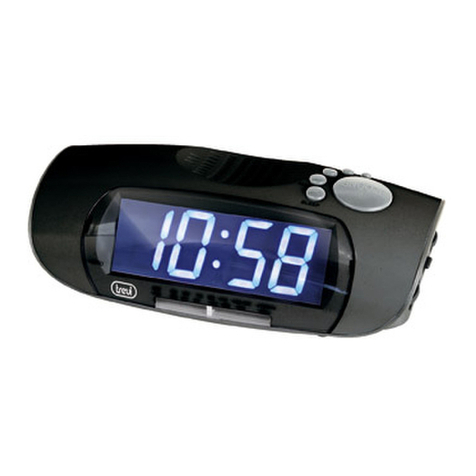
Trevi RC 832 User manual

Per informazioni integrative eaggiornamenti di questo prodottovedi: www.trevi.it
For additional informationand updates of this product see: www.trevi.it
RC 832
RADIO SVEGLIA ELETTRONICA
MANUALE D’USO
MULTILANGUAGE USER GUIDE
ENG FRADEU ESP GRE

R C 832A M / F M A L A R M C L O C K
2
ITA L I A N O
COMANDI
1. Bottone Sleep
2. Volume -/Allarme
3. Volume +
4. Preset/Memoria/Reg. Ora
5. AM/FM
6. Tun -/Ore
7. Tun+/Minuti
8. Accensione/Standby/Allarme Off
9. Speaker
10. Snooze
11. Comparto Batteria
12. Indicatori Allarme -Buzzer -Radio
13. Display
14. Indicatore Sleep
INSTALLAZIONE
Inserire la spina delcavetto di alimentazione in unapresa di corrente
230V-50Hz.
Per mantenere in funzione l’orologio ela memorizzazione dell’orarioanche
durante unamomentanea mancanza di energia elettrica, inserire duebatterie
AAA(nonfornite) nell’appositovano(11)sulfondodell’apparecchioseguendo
le indicazioni di polarità stampate sul mobile.
REGOLAZIONE OROLOGIO
1. InmodalitàStandby, premere alungo il tasto Preset/Memoria/Reg.Ora(4),
si attiverà la funzione di regolazione ora (il display lampeggerà).
2. Tramite itasti Ore(6) eMinuti (7) regolare rispettivamente l’ora eiminuti
correnti.
3. Confermare premendo il tasto Preset/Memoria/Reg.Ora(4).
Nota: se durante la fase di regolazione (display lampeggiante) nonviene
premuto nessun tasto per un certo tempo, la radiosveglia si riporta auto-
maticamente in standby (display fisso).
RADIO
1. Per accendere la radio premenere il tasto Accensione/Standby(8). Per
spegnerla premerlo nuovamente.
2. Selezionate la bandadi frequenza desiderata tramite il tasto AM/FM(5).
3. Sintonizzatevi sulla vostra stazione preferita selezionando la giusta fre-
quenza con itasti TUN+(7) eTUN-(6). Durante l’operazione sul display
viene visualizzatala frequenza sintonizzata.
4. Premendo itasti TUN+ eTUN- alungo si attiva la ricerca automatica,
la radioeffettuaunascansione dellafrequenzafino afermarsi allaprima
stazione radioricevuta.
Ascolto di stazioni radio memorizzate ememorizzazione di una stazione
radio
È possibile memorizzarefino a10 stazioni radioin bandaAM e10 stazioni
radio in bandaFM:
1. Selezionate la bandadi frequenza desiderata tramite il tasto AM/FM(5).
2. Per salvare unastazione radio,sintonizzare la stazione radio desiderata
premere alungo il tasto Preset/Memoria/Reg. Ora(4)., fino aquando il
displaylampeggerà. Premeredi nuovoil tastoPreset/Memoria/Reg.Ora(4)
perconfermare la memorizzazione. La stazione radio èora salvata.
3. Per ascoltare unastazione radio salvata in memoria premere il tasto
Preset/Memoria/Reg. Ora(4) epremere i tasti VOL+(3) eVOL-(2) fino
avisualizzare il numero di memoria desiderato.
REGOLAZIONE VOLUME
Durante l’ascoltodellaradiopremere itasti VOL+(3) eVOL-(2)perregolare
il volume di ascolto.
SVEGLIA
In modalità Standby, premere il tasto VOL-(2)perscegliere la modalità di
sveglia:
Modalità Buzzer: La sveglia emetterà il classico BEEP.
Modalità Radio: La sveglia si accenderà su unastazione Radio.
1. In modalita Standby, premere alungo il tasto VOL- (2), si attiverà la
funzione di regolazione ora (il display lampeggerà).
2. Tramite itasti (6) e(7) regolare rispettivamente l’ora eiminuti in cui
attivare l’allarme sveglia.
3. Confermare con il tasto VOL-(2), il display smetterà di lampeggiare e
tornerà amostrare l’ora corrente.
SPEGNIMENTO DELLA SVEGLIA
Se desiderate spegnere momentaneamente la sveglia, premere il pulsante
SNOOZE (10); l’interruzione dura 9minuti, trascorsi iquali la sveglia si
riaccende.L’operazionepuòessere ripetutadiverse volteentroun’oraditempo.
Perspegneredefinitivamentel’allarme-svegliapremereil tastoSPEGNIMENTO
ALLARME(8).
L’allarme rimane comunque attivo perripetersi 24 ore dopo.
Per disattivarlo agiresultastoVOL-(2)finoallospegnimentodellaindicazione
di allarme(12).
FUNZIONE SLEEP
IlpulsanteSLEEP (1) vi permettediprogrammarelospegnimentoautomatico
dellaradiofino ad un massimo di 90 minuti.
Regolare il tempo di spegnimento premendo il tasto SLEEP (1) piùvolte;
inizialmente verrà mostrato il tempo massimo di 90 minuti, premendo più
volteil tastoSLEEP questotemposi abbasseràapassi di 10 minuti fino alla
comparsa della scritta OFF(funzione SLEEP disattivata).
Quando la funzione SLEEP viene attivata, sul display si attiva l’indicazione
ZZZ(14).
SPECIFICHE TECNICHE
Alimentazione: ...................................................................AC 230V-50Hz
Batterie tampone(non fornite):..................................2batterie “AAA”1.5V
GammafrequenzaFM:........................................................87.5-108MHz
Gammadi frequenzaAM:....................................................522-1620KHz
Dimensioni:......................................................................151*71*99mm
Peso:.............................................................................................310gr.
GARANZIA
1. L’apparecchioègarantitoper24 mesi dalladatadifabbricazione indicata
sull’etichetta applicata sul prodotto.
2. La garanzia si applica solo ad apparecchi, nonmanomessi, riparati da
centri assistenza TREVI, essa comprende la riparazione deicomponenti
perdifetti di fabbricazione con l’esclusione di etichette, manopole eparti
asportabili.
3. TREVInonrisponde didanni diretti oindiretti acose o/e persone causati
dall’usoosospensione d’usodell’apparecchio.
1. 2. 3. 4. 5. 6. 7. 8.
9.
13. 10. 11. 14.12.

R C 832A M / F M A L A R M C L O C K
3
ENG L I S H
CONNECTING THE UNIT
Insert the wired plug correctly into a power outlet. The clock displaywillshow"00 : 0 0"and you
need to set the correct time.It will also return to show "00 : 0 0" if there has been a power out and
no back-upbatteryisfitted.
TO SET THE TIME
Set the unit to Standby mode. You can only set the timewhen unit is inStandbymode.
1. Press and hold the Time Set Buttonfor about 2 seconds. Then the current timewill be
flashing.Releasethebutton.
2. Press the Hour Button onceand repeatlyto adjust the hour digit.
3. Press the MinuteButtononce and repeatly to adjust the minutedigit.
Note: Press and hold the Hour/MinuteButton will change the digit at a fast speed.
4. Press once again the TimeSet Button when it reaches the right time.Then the
current timewill stop flashing.
CONFIGURATION ANDFUNCTIONS :
1. SleepButton
2. TuningDown/Hour Button
3. TuningUp/MinuteButton
4. Preset/MemoryUp/
TimeSetButton
5. Built-InSpeaker
6. AM/FM Button
7. VolumeDown/AlarmButton
8. VolumeUp Button
9. On/Standby/AlarmOffButton
10. SnoozeButton
11. Alarm Indicator -
Buzzer / Radio
12. LED Display
13. Battery Compartment
(Bottomside-
Backupbatteries)
14. SleepIndicator
5
1 7 8 4 6 2 3 9
11 12 10 13 14
BATTERY BACK-UP
This clock radio has a back-up power system to ensure continuousoperation of the clock in the
event of a power failure.The switch from AC to battery power is automatic. However, under
batterypower, the clock displaywillnot illuminate even though the clockmaintainsthecorrect
timeand storesthealarm timein the memory. The system operateson 2x1.5V "AAA" size
batteries(notincluded).We recommend the use of a long life battery to ensure maximum
performance.
CHECKING THE TIME DURING NO SUPPLY OF AC POWER (WITH BACKUP
BATTERIES)
When there is no supply of AC power but the unit is fitted with 2x1.5V "AAA" size batteries(for
backup), the displaywill not show any information. However, you can still check the currenttime
by pressingany button and the current tme will be displaying for a few seconds. But, It will not
alarm when it reaches the preset alarm time.
ANTENNA
The unit has a flexible wire on the back of the unit and it should be extended to its full length for
best reception white receiving FM radio. For AM, the radio is supplied with a built-in directional
aerial, rotatethe unit for the best AM reception.
SPECIFICATIONS
Power Source : AC230V ~ 50Hz
DC3V , 2x1.5V "AAA" size batteries type (for clock
back-up)(battery notincluded)
Frequency Range : FM 87.5-108 MHz
AM522-1620 kHz
Dimensions
Weight
: 150(L) x 98(D) x 70(H) MM
: 310g
Weight anddimensionsare approximatebecause we continuallystrive to improveour products,
specificationsmay change without prior notice.
USE THE ALARM
1. Set theAlarm timeand select alarm typeas described in previoussection. Make sure the
Alarm indicator is on.
2. W hen it reach the alarm time, you can hear the radioor buzzer sound depending on
which alarm typeyou have selected before.
3. Press once the Alarm Off Button to turn off the alarm sound then theradio or buzzer
sound will be off.
Note : If you selectAM or FM Radio as alarm type,make sure you have turned a desired
station and a suitablevolumelevel before using this alarm type.
SNOOZE OPERATION
To obtain approximatively further 9 minutes sleep, press the Snooze Button after the radio or the
buzzer switch on at the preset wake-up time. The Alarm Indicator will be flashing.This will
silence the radio or the buzzer for 9 minutes. You can repeat this operationforup to about 1
hour.
GOING TO SLEEP WITH THE SOUND OF THE RADIO
1.
2. Press once and repeatly the Sleep Button to select the sleeping time(minutes) as
90-80-70-60-50-40-30-20-10-OFF (OFF meaning that Sleep function is cancelled).
Press once the Sleep Button to activate theSleep function. The Sleep Indicatorwill on.
After setting thesleeping time,the radio will on and off and return to standbymode when it
reached thesleep set time.
If you want to cancel the sleep funciton,simplypress once the On/Standby Button then the
sleep function will be disable. The Sleep Indicatorwilloffand the unit will return to Standby
mode.
GOING TO SLEEP AND WAKENING TO THE SOUND OF THE UNIT
1. Repeat steps described in "TO SET THE ALARM TIME AND THE ALARM MODE"
and "USE THE ALARM".
2. Press the Sleep Button and set the period of timeyou want to listen to the radio
before it switches offautomatically.
3. The radio is now programmed to turn itself off after you go to sleep and the alarm will
on automaticallyat thepreset wake-up time.
RADIO OPERATION
1. Press the On/Standby Button to set the unit to Radio mode.
2. Select the AM or FM band by pressing the AM/FM Button. Then the AM or FM
frequencywill show on the LED display.
3. Tune a stationby pressing the Tuning Up/Down Button.
Pressingeither Tuning Up/Down Button for more than 1 second to activatethe automatic
tuning mode. The automatic tuner will scan up or down and lockonto the next station.Ifthe
automatic tuning does not precisely tune into a radio station, pressthe Tuning Up/Down
Button to adjustthe tuning.
4. Adjust the volume by pressing Volume Up/Down Button.
5. To turn off the radio,press the On/Standby Button to set the unit to Standby mode.
6. After tuned into a radio station, the unit will return to show the current time instead of
the radio frequency after a few seconds.
7. If you want to check the radio frequency, press either once the Tuning Up or Tuning Down
button then the unit will show the radio frequency for a few seconds.
STORES PRESET STATIONS
Up to 10 stations(10 AM and 10 FM) can be stored in memory:
1. Under RADIO mode, select the waveband by pressing theAM/FMButton.
2. Tune to a desired station as described in previoussection.
3. Press and hold the Preset/Memory Up Button for about 2 secondsthen the Preset Station
Number will flash. Release the button.
4. Press once or moretimes the Volume Up/Down Button to select your desired Preset
StationNumberfrom P1 to P10.
5. Press once the Preset/MemoryUp Button then the Preset StationNumber will stop flashing.
Now the station is stored in your desired Preset Station Number.
To replace a station stored in the memory,repeat all the stages described above.The new
station will replacethe previously stored one.
To receive Preset Stations :
1. Under RADIO mode, select the waveband by pressing theAM/FMButton.
2. Press once or more times the Preset/MemoryUp Button to select the desired Preset
StationNumber.
TO SET THE ALARM TIME AND THE ALARM MODE
Set the unit to Standby mode. You can only set the alarmtime when unit is in Standbymode.
1. Press and hold the theAlarm Button for 2 seconds Then the alarm time will be flashing.
Releasethebutton.
2. Press the Hour Button once and repeatly to adjust the hour digit.
3. Press the MinuteButton once and repeatly to adjustthe minutedigit.
Note: Press and hold the Hour/Minute Button will change the digit at a fast speed.
4. Press once again the Alarm Button when it reaches the right time.Then the alarm time
will stop flashing. The alarm time is set.
5. Press once or more times theAlarm button to select which type of alarm you like as below
:-
a) Alarm -
b) Alarm -
c) Alarm -
Indicator light on : Buzzer selected as alarm type.
Indicator light on : Radio selected as alarm type.
& Indicators both light off : No alarm selected, meaning
that the unit will not alarm when it reachesthe Alarm set time.
WARRANTY
1. This unitis guaranteed for aperiod of 24 months from the date of
productionprinted on the product itself or on label on product.
2. The warranty is valid only if the unithasnotbeen tampered with. The
warranty is valid only at authorized TREVI assistance centres, that
will repair manufacturing defects, excluded replacement of labels and
removable parts.
3. TREVI is notliable for damage to people or things caused by the useof
this unitor by the interruption inthe useof this unit.

R C 832A M / F M A L A R M C L O C K
4
Ε Η Α
Η Η ΑΑ
οοθήσ σσά ο αώιο σ ία. οθό ο οοιού θα φαισί έι
": " αι θα έι α θίσ σσή ώα. Είσς, θα ισέι σ έι ":
" ά άι έοος ύαος αι άι φιή ααία.
Η Η ΩΑ
θίσ οάα σ αάσασ ααοής. οί α οίσ όο ώα ο
οάα βίσαι σ αάσασ ααοής.
. αήσ αι αήσ αέο ο ήο Tie Set ια ίο όα. ό θα
ίαι έοσα ώα ααβοσβήι. Αφήσ ο οί.
. αήσ ο οί ώας ία φοά αι αιέα ια α θίσ ο φίο ώας.
.αήσ ο ήο ώ ία φοά αι αιέα ια α θίσ ο ό φίο.
ίσ: αήσ αι αήσ αέο ο οί Hour / Miute ια α αά ο φίο
ήο αύα.
. αήσ αά ο ήο ύθισς ώας όα φάσι σο σσό όο. σέια,
έοσα ώα θα σααήσι α ααβοσβήι.
Α Α
.αήσ ο οί Εοοίσ / Ααοή ια α θίσ οάα σ ιοία
αιόφο.
. Ειέ ώ AM ή FM ιέοας ο ήο AM / FM. σέια, σόα AM ή
FM θα φαίσι οθό LED.
.θίσ έα σαθό ιέοας ο ήο Tuig Up / Dow. αώας ο ήο Tuig
Up / Dow ια ισσόο αό όο ια α οοιήσ ιοία
αόαο σοισού. Ο αόαος ές θα σαώσι ος α ά ή ος α ά αι
θα ιώσι σο όο σαθό. Α ο αόαος σοισός σοισί αίβια
σ αιοφιό σαθό, αήσ ο οί ύθισ ος α ά / ά ια α
οσαόσ ύθισ.
. θίσ έασ αώας ο ήο Volue Up / Dow.
. ια α αοοιήσ ο αιόφο, αήσ ο οί O / Stadb ια α θέσ
οάα σ αάσασ ααοής.
. Αφού σοισί σ αιοφιό σαθό, οάα θα ισέι ια α φαίσι
έοσα ώα αί ια αιοφιή σόα ά αό ιά όα.
. Εά θέ α έ αιοφιή σόα, αήσ ί ία φοά ο οί Tuig
Up ή Tuig Dow, σ σέια οάα θα φαίσι αιοσόα ια ιά
όα.
ΑΗ ΩΩ ΑΩ
έι σαθοί AM αι FM οού α αοθού σ ή:
. ιοία RADIO, ιέ ώ σοή ιέοας ο ήο AM / FM.
.οισί σ έα ιθό σαθό ός ιάφαι σ οού όα.
.αήσ αι αήσ αέο ο ήο Preset / Meor Up ια ίο όα
αι σ σέια ο Preset Statio Nuber θα ααβοσβήσι. Αφήσ ο οί.
.αήσ ία ή ισσός φοές ο ήο Volue Up / Dow ια α ιέ ο
ιθό αιθό σαθού αό ο P σο P.
.αήσ ία φοά ο ήο Preset / Meor Up αι σ σέια ο αιθός
οιέο σαθού θα σααήσι α ααβοσβήι. ώα ο σαθός αοθύαι σο
ιθό αιθό σαθού. ια α αιαασήσ έα σαθό ο ίαι αοθέος σ
ή, ααάβ όα α σάια ο ιάφοαι ααά. Ο έος σαθός
αιαθισά ο οοές αοθέο.
ια α άβεε οαθοισέος σαθούς:
. ιοία RADIO, ιέ ώ σοή ιέοας ο ήο AM / FM.
.αήσ ία ή ισσός φοές ο ήο Preset / Meor Up ια α ιέ ο
ιθό αιθό σαθού.
Η Η ΩΑ Α Η Α ΗΗ
θίσ οάα σ αάσασ ααοής. οί α θίσ όο ώα
αφύισς όα οάα βίσαι σ αάσασ ααοής.
. αήσ αι αήσ αέο ο οί σαού ια όα. σέια
ααβοσβήι ώα αφύισς. Ειέ ο ήο.
.αήσ ο οί ώας ία φοά αι αιέα ια α θίσ ο φίο ώας.
.αήσ ο ήο ώ ία φοά αι αιέα ια α θίσ ο ό φίο.
ίσ: αήσ αι αήσ αέο ο οί Hour / Miute ια α αά ο φίο
ήο αύα.
.αήσ αά ο οί σαού όα φάσι σο σσό όο. σέια, ώα
αφύισς σααά α ααβοσβήι. Η ώα σαού έι θισί.
.αήσ ία ή ισσός φοές ο οί αός ια α ιέ ο ύο
σαού ο σας αέσι, ός ααά : -
ΙΑΜΟΡΦΩΗ & ΛΙΣΟΤΡΓΙ:
1. Sleep Button
2. ο Down/Hour
3. ο Up/Minute
4. ήο οιοής / ής
ά / ώας
5. ωαωο χο
6. ο AM/FM
7. ο α Down/Alarm
8. ο αUp
9. ο On/Standby/Alarm Off
10. ο Snooze
11. Έι σαού - Buzzer / αιόφο
12. LED
13. Χο πααα (ω πυ -Backup
batteries)
14. SleepIndicator
5
1 7 8 4 6 2 3 9
11 12 10 13 14
BATTERY BACK-UP
Αό ο αιόφο οόι ιαθέι έα φιό σύσα οφοοσίας ια α ιασφαισί
σής ιοία ο οοιού σ ίσ ιαοής ύαος. Η ααή αό AC
σ ισύ ααίας ίαι αόα. Ωσόσο, ό ισύ ς ααίας, οθό ο
οοιού αάβι, αόο ο ο οόι ιαί σσή ώα αι αοθύι ο όο
αφύισς σ ή. ο σύσα ιοί ααίς έθος .V "AAA"
ιαβάοαι. ισού ήσ ααίας άς ιάιας ής ια α
ασφαίσ έισ αόοσ.
ΑΑ Η ΑΗ Α ΑΑ
Η Όα άι οφοοσία αασσόο ύαος αά
οάα ίαι φοιασέ ααίς έθος .V "AAA" ια φία,
οθό θα φαίι αία οφοία. Ωσόσο, οί α έ
έοσα ώα αώας οοιοήο οί αι ο έο οιό ιάσα θα
φαισί ια ιά όα. Αά, θα ιοοιθί όα φάσι σο
οαθοισέο όο σαού.
ΑΑ
Η οάα ιαθέι έα ύαο αώιο σο ίσ έος ς οάας αι θα έι α
αθί σ όο ο ήος ς ια αύ ή ού αιοφώο FM. ια ο AM, ο
αιόφο αέαι ια σαέ αθιή αία, ισέ
οάα ια αύ ή AM.
ΠΡΟΙΑΓΡΑΦ
Τοφοοα : AC230V ~ 50Hz
DC3V , 2x1.5V "AAA" size batteries type (for clock
back-up)(battery notincluded)
ο υχα : FM 87.5-108 MHz
AM522-1620 kHz
α
Βο
: 150(L) x 98(D) x 70(H) MM
: 310g
ο βάος αι οι ιασάσις ίαι αά οσέισ ιή οσαθού σώς α
βιώο α οϊόα ας, οι οιααφές οού α αάο ίς
οού ιοοίσ.
ΧΡΗΗ ΞΤΠΝΗΣΗΡΙ
1. θίσ ώα αφύισς αι ιέ ο ύο ήι ός ιάφαι σ
οού όα. βαιθί όι έι ήι ίαι ααέ.
.Όα φάσι ο όος ια ο ήι, οί α αούσ ο ήο ο αιοφώο
ή ο βοβή αάοα ο ύο ιοοίσς ο έ ιέι ι.
.αήσ ία φοά ο οί αοοιήσ ο ήι αι σ σέια ο ήος
ο αιοφώο ή ο βοβή θα σβήσι.
ίσ: Εά ιέ AM ή αιόφο FM ς ύο ήι, ββαιθί όι έ
οοιήσι έα ιθό σαθό αι έα αάο ίο έασς ι
σιοοιήσ αό ο ύο ια ο ήι.
Α SNOOZE
ια α ααί ίο 9 ά ο ύο σας, αήσ ο οί ααβοής ά
αό ο αιόφο ή ο ιαό ο βοβή σο οαθοισέο όο αφύισς. Ο
ίς ήι θα ααβοσβήι. Αό θα σιά ο αιόφο ή ο βοβή ια 9
ά. οί α ααάβ αή ιοία ια ίο ώα.
ΚΟΙΜΗΘΙΣ Μ ΣΟΝ ΗΧΟ ΣΟΤ ΡΑΙΟΦΩΝΟΤ
1.αήσ ία φοά ο οί Sleep ια α οοιήσ ιοία Sleep. Ο
ίς ύο θα οοιθί.
.αήσ ία φοά αι αιέα ο οί Sleep ια α ιέ ο όο
ύο ά ς 9-80-70-60-50-40-30-20-10 -OFF OFF ο σαίι όι ιοία
Sleep αώαι.
Αφού θίσ ο όο ύο, ο αιόφο θα οοιθί αι θα
αοοιθί αι θα ισέι σ αάσασ ααοής όα φάσι σ
αθοισέ ώα ο ύο. Α θέ α αώσ ιοία ύο, αήσ
αά ο οί Εοοίσ / Ααοή, ό ιοία αοοίσς θα
αοοιθί. Ο ίς άς θα σβήσι αι οάα θα ισέι σ
αάσασ ααοής.
ΚΟΙΜΗΘΙΣ ΚΑΙ ΞΤΠΝΗΣ Μ ΣΟΝ ΗΧΟ ΣΟΤ ΡΑΙΟΦΩΝΟΤ
.Εααάβ α βήαα ο ιάφοαι σ όα "Η Ο ΧΟΟ
ΑΕΟ Α Η ΕΟΑ ΑΕΟ" αι "ΧΗΟΟΗΕ Ο
ΑΕΟ«
.αήσ ο οί Αασοής ιοίας αι θίσ ώα ο θέ α
αούσ ο αιόφο ι αοάς θί ός ιοίας.
.ο αιόφο ίαι ώα οααισέο α αοοιίαι αφού ά ια ύο
αι ο σαός θα οοιθί αόαα αά οαθοισέ ώα
αφύισς.
a) Alarm -
b) Alarm -
c) Alarm -
Indicator light on : Buzzer selected as alarm type.
Indicator light on : Radio selected as alarm type.
& Indicators both light off : No alarm selected, meaning
that the unit will not alarm when it reachesthe Alarm set time.
ΗΗ
.Αή οάα ίαι έ ια οιό ιάσα ώ
αό οία ααής ο ώαι σο ίιο ο οϊό
ή σ ιέα ο οϊόος.
.Η ύσ ισύι όο ά έι ααβιασί οάα. Η
ύσ ισύι όο σ οσιοοέα έα οσήις ς
TREVI, α οοία θα ιιοθώσο αασασιά αώαα,
αιώας αιαάσασ ιώ αι αφαιού
αά.
. Η TREVI θύαι ια ιές σ άοα ή άαα ο
οαούαι αό ήσ αής ς οάας ή αό ιαοή
ς ήσς αής ς οάας.
R C 832A M / F M A L A R M C L O C K
4
4
5
Branchez le cordon d’alimentationàuneprise 230Vprise decourant -50Hz.
Pour garder l’horloge en marche et temps de stockage en cas de panne
de courant momentanée, insérez deux piles AAA (non fournies) dans le
compartiment de la batterie (11)sur le fond dessignes de polarité suivants
imprimé sur le Mobile.
RÉGLAGE DE L’HORLOGE
1. En mode veille, appuyez et maintenez le bouton Preset/Mémoire/Reg.
Maintenant (4), activera «fonction de réglage maintenant » (l’affichage
clignote).
2. Utilisationdestouches duHeures (6) et minutes (7) régler respectivement
les heures et les minutes
3. Reconnaître appuyez sur le Preset /Mémoire /Reg. Maintenant(4).
Remarque:Si pendant la phase de réglage (affichage clignotant) ne pas
appuyer surn’importequelletouchependantuncertaintemps, leradio-réveil
revient automatiquement au mode (affichage fixe) veille.
RADIO
1. Activerla radioen appuyantsurle Marche/Veille(8);appuyezdenouveau
pour l’éteindre.
2. Sélectionnez la bande de fréquence désirée en appuyant sur la FM/AM
(5).
3. Branchez votre station préférée en sélectionnant la bonne fréquence et
le réglageTUN + (7) et TUN -(6). Pendantl’opération, l’écran affichela
fréquence d’accord.
4. Appuyez sur les boutons TUN+ et TUN- recherche longue est automa-
tiquement activé, la radio scanne couvre la fréquence às’arrêter àla
première station trouvée.
Écoute de stations de radio et de mémoriser unestation de radio
Et possible de mémoriser jusqùà 10 stations de radio dans la bande AM et
10 stations de radio sur la bande FM:
1. Sélectionnez la bande de fréquence désirée en appuyant sur la FM/AM
(5).
2. Pourenregistrer unestationderadio, syntonisez laradiodésiré et appuyez
sur le boutonPreset/Mémoire/Reg.Maintenant(4). Ce quel’affichage
clignote. Maintenant, déplacez les boutons (6) ou (7) pour sélectionner
la cellule de mémoire Appuyez sur le bouton Preset /Mémoire /Reg.
Maintenant(4) pour confirmer la memorization.
3. Pour écouter unestation de radio enregistrée en mémoire, appuyer sur
le Preset /Mémoire /Reg.Maintenant(4) appuyez sur le bouton VOL+
(3) et VOL-(2)jusqùà ce quele numéro de mémoire désiré.
F R A N C AISE
RÉGLAGE DU VOLUME
Touten écoutant la radio, appuyez sur le bouton VOL+(3) et VOL-(2)pour
régler le volume d’écoute.
ALARME
En mode veille, appuyez sur la touche VOL (2) pour sélectionner le mode
alarme :
ModeBuzzer: L’alarme émettra le BIP classique.
Moderadio: L’alarme se meten marche unestation de radio.
1. En mode veille, appuyez et maintenez le bouton VOL- (2), va activer “la
fonction de réglagemaintenant(l’affichageclignote).
2. Utilisez les boutons (6) et (7) respectivement ajuster l’heure et minute
pour activer le réveil.
3. ValidezenappuyantsurlatoucheVOL-(2), l’affichages’arrête» clignotant
et sera de retour”pour afficher l’heure actuelle.
ARRET DE L’ALARME
Si vous voulez désactiver temporairement l’alarme,appuyez sur le bouton
SNOOZE (10); l’interruption dure 9minutes, après quoi l’alarme s’allume à
nouveau. L’opérationpeut ‘êtrerépété plusieurs fois en uneheure.
Pour désactiver la presse réveil ALARMOFF(8).
L’alarme reste active pour répétée 24 heures plus tard.
Pour désactiver acte sur la touche VOL-(2)jusqùà ce quevous éteignez
l’indication d’alarme (12).
SLEEP
Le bouton SLEEP (1) vous permetde programmer l’arrêt automatique de la
radio jusqùà un maximum de 90 minutes.
Réglez le temps de sommeil en appuyant sur SLEEP (1) plus de «temps; va
d’abordêtre «montré le temps maximum de 90 minutes, en appuyant plus”
bouton SLEEP àplusieurs reprises réduira ce temps “enincréments de 10
minutes jusqùà ce quel’écranaffiche OFF (fonction SLEEP désactivée).
Lorsque la fonction SLEEP est activée, l’écran s’allume indiquant ZZZ (14).
CARACTERISTIQUES TECHNIQUES
Alimentation:.............................................................AC 230V-50Hz
Les piles de sauvegarde (non inclus):....................... 2piles “AAA”1.5V
Gammede fréquenceFM:.........................................87.5-108MHz
Plage de fréquences AM:..........................................522-1620KHz
Taille:.......................................................................151*71*99mm
Poids:.......................................................................310gr.
GARANTIE
1. L’appareilest garanti pendant unepériode de 24 mois de la date de
fabrication indiquée sur l’étiquette se trouvant sur le produit.
2. La garantie n’estappliquée quesur les appareils nonaltérés, ayant été
réparés chez un Service Après-Vente TREVI. Elle comprend la réparation
descomposantes àla suite de défauts de fabrication, àl’exclusion
d’étiquettes,boutons de réglage et parties amovibles.
3. TREVI ne répond pasdesdommages directs ou indirects aux choses et/
ou aux personnes entraînés pendant l’usage ou la suspension d’usage
de l’appareil.
COMMANDES
1.
Sleep
1.
2
.
9
.
3.
4. 5. 6. 7.
8.
2.
Vol -/ Alarme
3.
Vol+
4.
Preset /Mémoire /Reg.
Maintenant
5.
AM /FM
6.
Tun -/Heures
7.
Tun +/Minutes
8.
Marche /Arrêt /Veille alarme
9.
Haut-parleurs
10.
Snooze
11.
Compartiment de la pile
12.
Indicateurs d’alarme-Buzzer-
R
adio
13.
Affiche
12.
13.
10. 11.
14.
14.
ZZZ
INS
TALLATION

R C 832A M / F M A L A R M C L O C K
6
D E U T S C H
m
12. Alarm Anzeige -Buzzer -Radio
13. Display
14. ZZZ
INSTALLATION
Schließen SiedasNetzkabel ineine Steckdose 230V -50Hz.
Umdie Uhrläuft undLagerzeit bei Stromunterbrechung zu halten, legen Sie
zwei AAA-Batterien (nicht enthalten) indasBatteriefach(11)an derUnterseite
derfolgenden Symptome derPolarität am Mobile gedruckt.
UHREINSTELLEN
1. Standby, drücken undhalten Siedie Preset /Speicher /Reg-Taste. Jetzt
(4) aktivieren “Anpassungsfunktion jetzt” (Display blinkt).
2. Mitden Tasten Ore(6) undMinuten (7) die StundenundMinuten.
3. Erkennen, drückenSie die Preset /Speicher/Reg.Profil (4).
Hinweis: Wenn während der Anpassungsphase (blinkende Anzeige) nicht
drücken eine beliebige Taste für eine Weile, kehrt die Uhrautomatisch in
den Radio-Modus (feste Anzeige) vor.
RADIO
1. Aktivieren SiedasRadio durch Drücken derSchlaf- Ein-/Ausschalten/
Alarm(8). Drücken Sieerneut, um sie auszuschalten.
2. Wählen Siedasgewünschte Frequenzband durch Drücken derAM /FM
(5).
3. SchließenSieIhreLieblings indemSiedierichtigeFrequenzund Einstellung
TUN +(7) undTUN- (6). Im Betrieb zeigt dasDisplay die eingestellte
Frequenz.
4. Presse TUN+au TUN-lange Suchtaste aktiviert wird, scannt automa-
tisch die Radiofrequenz umfasst, um an derersten Station gefunden zu
stoppen.
Hören von Radiosendern undspeichern Sie einen Radiosender
Undkann bis zu 10 Radiostationen und10 AM-Radiosender speichern im
UKW-Band:
1. Wählen Siedasgewünschte Frequenzband durch Drücken derAM/FM
(5).
2. Um einen Radiosender, tune den gewünschten Radio speichern und
drückenSiediePreset/Speicher/Reg-Taste.Profil (4). DieAnzeigeblinkt.
Nunbewegen Siedie Tasten (6) oder (7) um die Speicherzelle Drücken
Siedie Preset /Speicher /Reg-Taste. Jetzt (4), umdasAuswendiglernen
zu bestätigen.
3. Um einen Radiosender im Speicher gespeichert zu hören, drücken Sie
die Preset /Speicher /Reg.Jetzt (4), drücken Siedie Taste VOL-(2) und
VOL+(3) bis die gewünschte Sendernummer.
LAUTSTÄRKEREGELUNG
Während SieRadio hören, drücken Siedie Taste VOL-(2) undVOL +(3),
um die Lautstärke einzustellen.
WECKDIENST
Drücken Sieim Standby-Modus dieVOL-Taste(2) denAlarmmodus
auszuwählen:
Buzzer-Modus: Der Alarm wirddasklassische BEEP emittieren.
Radio-Modus: Der Alarmwird auf einem Radiosender einzuschalten.
1. Standby, drücken undhalten Siedie VOL -(2), ermöglicht Einstellung
Funktionjetzt (Display blinkt).
2. Verwenden Siedie Tasten (6) und(7) bzw. die Stunde undMinute, um
den Alarmzu aktivieren.
3. Überprüfen. Durch Drücken derVOL- (2) wird die Anzeige zu stoppen
“zublinken undwird zurückkehren”,um die aktuelle Zeit anzuzeigen.
DIE ALARM
Wenn Sieden Alarm vorübergehend deaktivieren möchten, drücken Siedie
Taste SNOOZE(10); die Unterbrechungdauert9Minuten, nach demderAlarm
wiederzu aktivieren. Der Vorgangkann mehrmals ineiner Stunde wiederholt.
Umden Wecker zu deaktivieren drücken SieALARMOFF(8).
Der Alarmbleibt 24 Stunden später wiederholt.
Umwirkenaufdie VOL- (2) drehen,bisSiedie AlarmAnzeige(12)zudrehen.
SLEEP
SLEEP-Taste (1) können Siedie automatische Abschaltung desFunkauf
maximal 90 Minuten zu programmieren.
Stellen Siedie Schlafzeit durch Drücken von SLEEP (1) mehr “Zeit;zuerst
werden “gezeigt,die maximale Zeit von 90 Minuten Drücken härter”SLEEP-
Taste wiederholt, dieses Mal zu reduzieren “,in Schritten von 10 Minuten,
bis die Anzeige OFF(Sleep-Funktion deaktiviert) Bildschirm.
Wenn die Sleep-Funktionaktiviert ist, leuchtet dasDisplay anzeigt,ZZZ(14).
TECHNISCHE DATEN
Spannungsversorgung:......................................... AC 230V-50 Hz
Backup-Batterien (nicht enthalten):....................... 2“AAA”-Batterien 1,5V
FM-Frequenzbereich:............................................ 87.5-108MHz
Frequenzbereich AM:.............................................522-1620KHz
Größe:..................................................................151*71*99mm
Gewicht:...............................................................310gr.
GARANTIEBESTIMMUNGEN
1. DasGeräthateineGarantievon24 Monatenab dem Herstellungsdatum.
Das Herstellungsdatum istauf deram Produkt angebrachten Etikette
angegeben.
2. Die Garantie gilt nur für Geräte, an denen nicht selbst ausgeführte
Reparaturen erfolgt sind, sondern die von TREVI-Kundendienststellen
durchgeführt wurden. Die Garantie umfaßt die Reparatur von Bauteilen,
wenndiese aufHerstellungsfehler zurückzuführen sind. Die Garantie gilt
hingegen nichtfür Etiketten, Drucktasten, Knöpfe undentfernbare Teile.
3. TREVI haftetnichtfür direkte oder indirekte Sach- und/oder Personen
schäden,dievomGebrauchdes Gerätes verursacht wordensind.
13. 10. 11. 14.12.
BEFEHLE
1. Sleep Taste
1.
2
.
9
.
3.
4. 5. 6. 7.
8.
2. Vol -/Alarm
3. Vol +
4. Preset/ Memory /Reg. jetzt
5. AM /FM
6. Tun -/Stunden
7. Tun +/Minuten
8. Schlaf- Ein-/ Ausschalten /
Alar
9. Lautsprecher
10. Snooze
11. Batteriefach

R C 832A M / F M A L A R M C L O C K
7
ESP A N O L
COMANDOS
1.Botón Sleep
2. Vol -/Allarme
3. Vol+
4. Preset /Memoria /Reg. Ahora
5. AM /FM
6. Tun -/Horas
7. Tun +/Minutos
8. Encendido /Reloj Standby /Off
9. Altavoces
10. Snooze
11. Compartimiento de la batería
12.Indicadores de alarma -Buzzer -R
13.Display
14. ZZZ
INSTALACIÓN
adio
Conecte el cable de alimentación aunatoma de corriente de 230V -50Hz.
Para mantener en funcionamiento el reloj yel tiempo de almacenamiento
durante un corte momentáneo de alimentación, inserte dospilas AAA (no
incluidas) en el compartimiento de la batería (11)en la parte inferior de los
siguientes signos de polaridad‘impresa en la Mobile.
AJUSTE DE RELOJ
1. En el modo de espera, presione ymantenga presionado el botón de
memorización /Memoria/Reg.Ahora(4), se activará “funciónde ajuste
actual (la pantalla parpadeará”).
2. Uso de los botones de horas (6) yminutos (7) ajustar respectivamente
la hora ylos minutos.
3. Reconocer pulse el Preset /Memoria /Reg. Ahora(4).
Nota: Si durante la fase de ajuste (pantalla parpadea) no presione ningún
botón durante un cierto tiempo, el radio reloj vuelve automáticamente al
modo(pantallafija) de espera.
RADIO
1. Activación de la radio pulsando el botón Encendido/Reloj Standby/Off
(8); presiónelo de nuevo para apagarlo.
2. Seleccione la banda de frecuencia deseada pulsando el AM/FM(5).
3. Sintonicesuemisorafavoritaal seleccionarla frecuenciacorrecta TUN+
(7) yTUN -(6). Durante la operación, la pantalla muestra la frecuencia
sintonizada.
4. Al pulsar los botones TUN+ yTUN- larga búsqueda se activa de forma
automática, la radio explora el rango de frecuencia hasta quepare en la
primera estación encontrada.
Escucha de emisoras preestablecidas yalmacenar unaemisora de radioEs
posible almacenar hasta 10 emisoras de radio en la banda de AM y10
estaciones de radio en la banda FM:
1. Seleccione la banda de frecuencia deseada pulsando el AM/FM(5).
2. Para guardar unaestación de radio, sintonice la radio quedesee y
mantenga pulsado el botón Preset /Memoria /Reg.Ahora (4). Hasta
quela pantalla parpadeará. Ahora mueve los botones (6) o(7) para
seleccionar la celda de memoria Presione el botón de memorización/
Memoria/Reg. Ahora (4) paraconfirmar la radiomemorizzazione.
3. Para escuchar unaemisora de radio guardada en la memoria, presione
el preset /Memoria /Reg.Ahora (4) ypulse el botón VOL-(2) yVOL+(3)
hasta queel número de memoria deseado.
AJUSTE DEL VOLUMEN
Mientras escucha la radio, pulse el botón VOL-(2)yVOL+(3) para ajustar
el volumen de escucha.
ALARMA
En modo de espera, presione la tecla VOL (2) para seleccionar el modo
de alarma:
ModoBuzzer: La alarma se emite el tonoclásico.
ModoRadio: La alarma se encenderá unaestación de radio.
1. Enel mododeespera,presioneymantenga presionadoel botónVOL- (2),
se activará “funciónde ajuste actual (la pantalla parpadeará).
2. Utilicelosbotones(6)y(7) respectivamenteajustar la horaylos minutos
en la quese activa la alarma delreloj.
3. Confirme pulsando el botón VOL-(2) la pantalla dejará de parpadeoy
volveremos para mostrar la hora actual.
APAGAR LA ALARMA
Si desea desactivar temporalmente la alarma,pulse el botón SNOOZE (10);
la interrupción dura 9minutos, después de lo cual la alarma se enciende de
nuevo. La operación puede “repetirvarias veces en unahora.
Para apagar la prensa despertador ALARMOFF(8).
La alarma permanece activa durante repite 24 horas después.
Para desactivar actuar sobre el botón VOL -(2)hasta quese apague la
indicación de alarma (12).
SLEEP
El botónSLEEP (1) le permite programarel apagado automático dela radio,
hasta un máximo de 90 minutos.
Ajuste el tiempodesuspensión pulsandoSLEEP (1) más“veces;inicialmente
se ‘muestrael tiempo máximo de 90 minutos, presionando más“botón
SLEEP varias veces bajará este tiempò en pasos de 10 minutos hasta que
la pantalla muestre OFF(función SLEEP desactivado).
Cuandose activalafunciónSLEEP,lapantallase enciendaindicandoZZZ(14).
ESPECIFICACIONES TÉCNICAS
Fuente de alimentación:..........................................AC 230V-50Hz
Baterías de respaldo (no incluido):..........................2pilas “AAA”de 1,5V
Rango de frecuencia FM:........................................87.5-108MHz
Rango de frecuencia AM:.......................................522-1620KHz
Dimensiones:.........................................................151*71*99mm
Peso:.....................................................................310gr.
GARANTIA
1. El aparato tiene unagarantía de 24 meses apartirde la fecha de fabri-
cación indicadaen la tarjeta sobre el producto.
2. La garantía está aplicada solamente alos productos no desarreglados y
reparadosporloscentrosdeasistenciaTREVI.Además, lagarantíaincluye
la reparación de los componentes acausa de defectos de fabricación,
con la exclusión de etiquetas, botones ypartesremovibles.
3. TREVI no es responsable pordaños directos oindirectos acosas y/o
personas causados porel uso osuspensión deluso delaparato.
1. 2. 3. 4. 5. 6. 7. 8.
9.
13. 10. 11. 14.12.

8
Avvertenze per il corretto smaltimento del prodotto.
Il simbolo riportato sull’apparecchiatura indica che il rifiuto deve
essere oggetto di “raccolta separata” pertanto il prodottonondeve
essere smaltito insiemeai rifiuti urbani.
L’utentedovrà consegnare il prodotto presso gliappositi “centridi
raccolta differenziata”predisposti dalle amministrazioni comunali,
oppure consegnarlo al rivenditore contro acquisto di un nuovo
prodotto.
La raccolta differenziata del rifiuto e le successive operazioni di
trattamento, recupero esmaltimento favoriscono la produzione di
apparecchiature con materiali riciclati elimitano glieffetti negativi
sull’ambiente esulla salute causati da unagestione impropria
delrifiuto.
Lo smaltimento abusivo delprodotto comporta l’applicazione di
sanzioni amministrative.
Precautions for correct disposal of the product.
The symbol shown on the equipment indicates that waste must be
disposed of in “separate collection” and so the product must not
be disposed of together with urbanwaste.
Theuser must taketheproduct tospecial “separate waste collection
centres” provided by local government, or deliver it to the retailer
against thepurchase of anewproduct.
Separate collection of waste and subsequent treatment, recycling
and disposal operations promotes the production of equipment
withrecycledmaterials andlimits negativeeffects ontheenvironment
and on health caused by improper handlingof waste.
Illegal disposal of the product leads to the enforcement of admi-
nistrative penalties.
Recommandations pour l’éliiationcorrecte du produit.
Le symbole figurantsur l’appareil indiqueque le produitfaitl’objet
d’une“collecte séparée “.C’estpourquoi, le produit ne doit pas
être éliminé avec les déchets urbains.
L’utilisateurdoit remettre le produit auprès de “décharges spécia-
lisées de collecte séparée “prévues parles autorités locales, ou
bien le rendre au revendeur quand il achètera un nouvel appareil
équivalent.
La collecte séparée du produit et les opérations successives de
traitement, recyclage et élimination favorisent la production d’ap-
pareils composés pardesmatériaux recyclés ainsi quepermettent
d’éviterdeseffets négatifs sur l’environnement et sur la santé des
personnes suite àunegestion impropredu déchet.
Toute élimination abusive du produit entraîne l’application de
sanctions administratives.
C O R R E C T D I S P O S AL OF P R O D U C T
Hinweise zur ordnungsgemäßen Entsorgung des Produkts.
Das auf dem Gerät angebrachte Symbol weist darauf hin, dass
dasAltgerät “getrenntzu sammeln” ist unddasProdukt daher
nichtzusammenmitdemGemeindeabfallentsorgt werdendarf.
Der Benutzer muss dasProduktzu den entsprechenden, von der
Gemeindeverwaltungeingerichteten“Wertstoffsammelstellen”brin-
genoderdemHändlerbeimKaufeinesneuenProduktsübergeben.
DiegetrennteMüllsammlungundanschließendeAufbereitung,Wie-
derverwertungundEntsorgungförderndieHerstellungvonGeräten
unter Verwendung wiederverwerteter Materialienundvermindern
die negativen Auswirkungen auf die Umwelt und Gesundheit in
Folge einer falschen Müllverwaltung.
DiewiderrechtlicheEntsorgungdesProduktsführtzurAuferlegung
vonVerwaltungsstrafen.
Advertencias para la correcta eliminación del producto.
El símbolo queaparece en el aparato indica queel residuo debe
ser objetode “recogida selectiva” portantoel productono se debe
eliminar juntocon residuos urbanos.
El usuario deberá entregar el producto alos “centrosde recogida
selectiva” creados porlas administraciones municipales obien al
distribuidorcuando adquiera un nuevoproducto.
La recogida selectiva delresiduo ylas sucesivas operaciones de
tratamiento, recuperación yeliminación favorecen la fabricación
de aparatos con materiales reciclados ylimitan los efectos nega-
tivos en el medio ambiente yla salud causados porunagestión
incorrecta delresiduo.
La eliminación abusiva delproducto da lugar ala aplicación de
sanciones administrativas.

MADEINCHINA
Trevi S.p.A. -Strada Consolare Rimini-San Marino, 62 47924
Rimini (Rn) Italy
Tel. 0541/756420 -Fax 0541/756430
www.trevi.it -E-mail: info@trevi.it
DICHIARAZIONE DI CONFORMITÀ
SI DICHIARA CHE:
L’apparecchioRadiosveglia marca
TREVI modello RC 832
risponde alle prescrizioni dell’art. 2comma 1
delD.M. 28 agosto 1995, n°548
Rimini, 05/05/2015 TREVI S.p.A.
Strada Consolare Rimini-San Marino, 62
47924 Rimini (Rn) Italy
CAUTION
DANGER OF ELECTRIC SHOCK!
DO NOTEXPOSE TO
RAINOR HUMIDITY
CAUTION: TO REDUCE THE RISK OF ELECTRIC SHOCK, DO NOT REMOVE
COVEROR BACK. NO USER SERVICEABLE PERTS INSIDE. REFER SERVICING
TO QUALIFIED PERSONNEL ONLY.
ATENCION
PELIGRO DE CHOQUESELECTRICOS
NO EXPONER ALLUVIAY
ATENCION: NO ABRIR EL APARATO, EN SU INTERIOR NO HAY MANDOS QUE
PUEDAN SERMANIPULADOS POR EL USUARIO NI PARTES DE REPUESTO.
PARATODAS LAS OPERACIONES DE SERVICIODIRIGIRSE AUN CENTRO DE
ASISTENCIA AUTORIZADO TREVI.
ATTENZIONE
RISCHIODI SCOSSE
ELETTRICHENONESPORRE
APIOGGIAE UMIDITÀ
ATTENZIONE: NONAPRIRE L’APPARECCHIO. ALL’INTERNONONVI SONO
COMANDI MANIPOLABILI DALL’UTENTENE PARTI DI RICAMBIO. PER TUTTE
LE OPERAZIONI DI SERVIZIO RIVOLGERSI AD UN CENTRO DI ASSISTENZA
AUTORIZZATO TREVI
ATTENTION
DANGER DE DECHARGES ELECTRIQUES
NE PAS EXPOSER ALAPLUIE
NI AL’HUMIDITE
ATTENTION: NE PAS OUVRIR L’APPAREIL. SONINTERIEUR NE CONTIENTAUCUNE
COMMANDEDESTINEE AL’UTILISATEUR NI DEPIECESDERECHANGE.POURTOUTE
OPERATIOND’AS SISTANCECONTACTERUNCENTRED’ASSISTANCEAGREETREVI.
ACHTUNG
GEFAHR ELEKTRISCHER SCHLÄGE
NICHTDER FEUCHTIGKEIT
UNDDEMREGENAUSSETZEN
ACHTUNG: DAS GERÄT NICHT ÖFFNEN. IM INNERN BEFINDEN SICH KEINE
VOM BENUTZER SELBST INSTANDSETZBAREN TEILE UNDAUCHKEINE
ERSATZTEILE. FÜR JEGLICHE SERVICEARBEITEN, WENDEN SIE SICH BITTE
AN EINE TREVI AUTORISIERTEN KUNDENDIENSTSTELLE.
UKPLUG ONLY
WIRES CONNECTIONS TO ATHREE-PIN
PLUG
The wires in this mains leadare coloured in accordance
withthe followingwiring codes:
Blue:...........................................................Neutral
Brown:.......................................................Live
The wires in this mains leadmust be connected to the
terminals in the plug as follows:
Blue wire: .................................................N or Black
Brown wire:.............................................L or Red
Neither wire is to be connected to the earth (E or W)
terminal of three-pin plug.
Should the fuse fail in the plug remove the plug form
the wall socket and replace the fuse witha3Amp.ASTA
approved BS 1362 fuse.
Other manuals for RC 832
1
Table of contents
Languages:
Other Trevi Alarm Clock manuals

Trevi
Trevi RC 829 User manual

Trevi
Trevi RC 853 D User manual

Trevi
Trevi SLD 3019 User manual

Trevi
Trevi ME 3105 User manual

Trevi
Trevi EC 886 User manual

Trevi
Trevi RC 858 PJ User manual

Trevi
Trevi ME 3106 User manual

Trevi
Trevi RC 850 BL User manual

Trevi
Trevi RC 820 User manual

Trevi
Trevi ME 3106 User manual

Trevi
Trevi EC 875 User manual

Trevi
Trevi PJ 3026 User manual

Trevi
Trevi RC 80D2 DAB User manual

Trevi
Trevi EC 889 User manual

Trevi
Trevi SLD 3875 User manual

Trevi
Trevi HY 870 BT User manual

Trevi
Trevi RC 821 D User manual

Trevi
Trevi RC 853 D User manual

Trevi
Trevi EC 880 User manual

Trevi
Trevi SLD 3865 Blu User manual