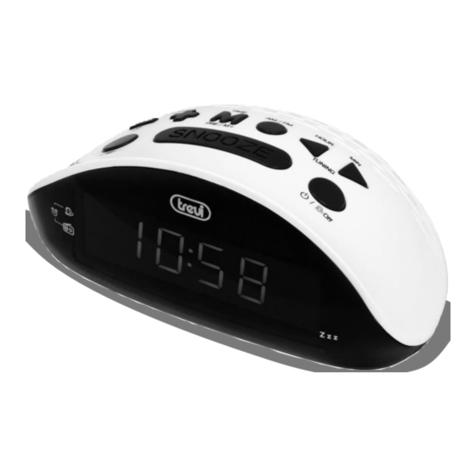
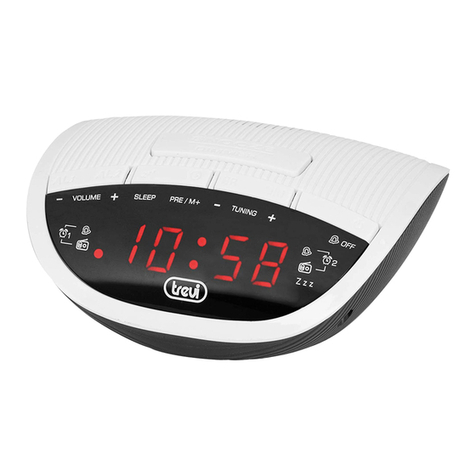
Trevi RC 853 D User manual


3
RC 853 D
FM ALARM CLOCK
GEFAHR ELEKTRISCHER SCHLÄGE
NICHT DER FEUCHTIGKEIT
UND DEM REGEN AUSSETZEN
PELIGRO DE CHOQUES ELECTRICOS
NO EXPONER ALLUVIA Y
ATENCION: NO ABRIR EL APARATO, EN SU INTERIOR NO HAY MANDOS QUE
PUEDAN SER MANIPULADOS POR EL USUARIO NI PARTES DE REPUESTO.
PARA TODAS LAS OPERACIONES DE SERVICIO DIRIGIRSE A UN CENTRO DE
ASISTENCIA AUTORIZADO TREVI.
ACHTUNG: DAS GERÄT NICHT ÖFFNEN. IMINNERN BEFINDEN SICH KEINE
VOM BENUTZER SELBST INSTANDSETZBAREN TEILE UND AUCH KEINE
ERSATZTEILE. FÜR JEGLICHE SERVICEARBEITEN, WENDEN SIE SICH BITTE
AN EINE TREVI AUTORISIERTEN KUNDENDIENSTSTELLE.
CAUTION: TO REDUCE THE RISK OF ELECTRIC SHOCK, DO NOT REMOVE
COVER OR BACK. NO USER SERVICEABLE PERTS INSIDE. REFER SERVICING
TO QUALIFIED PERSONNEL ONLY.
ATTENZIONE: NON APRIRE L’APPARECCHIO. ALL’INTERNO NON VI SONO
COMANDI MANIPOLABILI DALL’UTENTENEPARTIDIRICAMBIO. PERTUTTE
LE OPERAZIONI DI SERVIZIO RIVOLGERSI AD UN CENTRO DI ASSISTENZA
AUTORIZZATO TREVI
DANGER OF ELECTRIC SHOCK!
DO NOT EXPOSE TO
RAIN OR HUMIDITY
RISCHIO DI SCOSSE
ELETTRICHE
NON ESPORRE
A PIOGGIA E UMIDITÀ
UKPLUG ONLY
WIRES CONNECTIONS TO A THREE-PIN
PLUG
The wires in this mains lead are coloured in accordance
with the following wiring codes:
Blue: ............................................................ Neutral
Brown: ....................................................... Live
The wires in this mains lead must be connected to the
terminals in the plug as follows:
Blue wire: .................................................. N or Black
Brown wire:.............................................. L or Red
Neither wire is to be connected to the earth (E or W)
terminal of three-pin plug.
Should the fuse fail in the plug remove the plug form
the wall socket and replace the fuse with a 3 Amp.ASTA
approved BS 1362 fuse.
ATTENTION: NE PASOUVRIR L’APPAREIL.SON INTERIEUR NE CONTIENT AUCUNE
COMMANDE DESTINEE A L’UTILISATEUR NI DE PIECES DE RECHANGE. POUR TOUTE
OPERATION D’ASSISTANCE CONTACTER UN CENTRE D’ASSISTANCE AGREE TREVI.
DANGER DE DECHARGES ELECTRIQUES
NE PAS EXPOSER A LA PLUIE
NI A L’HUMIDITE
ATTENTION
ATENCION
ACHTUNG
CAUTION
ATTENZIONE

4
RC 853 D
FM ALARMCLOCK
NAPOMENE ZA UPORABU
Dugotrajno slušanje pri visokoj glasnoći može oštetiti vaš sluh.
Ovaj uređaj je elektronički instrument visoke preciznosti, stoga ga izbjegavajte u sljedećim slučajevima:
•
U blizini magnetskih polja.
•
U blizini izvora topline kao što su radijatori i peći.
•
Na vrlo vlažnim mjestima kao što su kupaonice, bazeni itd.
•
Na vrlo prašnjavim mjestima.
•
Na mjestima s jakim vibracijama.
•
Uređaj držite izvan dohvata djece.
•
Postavite aparat tako da uvijek ima dovoljno mjesta za slobodnu cirkulaciju zraka (najmanje 5 cm).
•
Ako tekućina prodre u uređaj, odmah isključite utikač iz utičnice i odnesite aparat u najbliži ovlašteni TREVI servisni centar.
•
Prije punjenja uvijek provjerite jesu li kabeli za napajanje i priključni kabeli ispravno instalirani.
•
Na uređaj nemojte stavljati izvore otvorenog plamena, kao što su upaljene svijeće.
•
Uređaj ne smije biti izložen kapanju ili prskanju vode, a na uređaj ne smiju biti postavljeni predmeti napunjeni tekućinom,
kao što su vaze.
•
Čuvajte ovaj priručnik za buduću uporabu.
NJEGA I ODRŽAVANJE
Za čišćenje preporučujemo meku, vlažnu krpu. Izbjegavajte otapala ili abrazivne tvari.
važno
Ovaj je uređaj namijenjen neprofesionalnoj kućnoj uporabi. Dobra konstrukcija ovog uređaja jamči savršeno funkcioniranje duže
vrijeme. Međutim, ako se pojave bilo kakve neugodnosti, savjetujemo da se obratite najbližem ovlaštenom TREVI servisnom
centru.
TREVI provodi politiku kontinuiranog istraživanja i razvoja. Stoga proizvodi mogu imati različita svojstva od opisanih.
NOTES ON USE
This is a precision electronic appliance; avoid using it in the following cases:
•
Near strong heat sources, such as central heating plants or stoves.
•
Listening to high volume for a long time could damage yourhearing.
•
In very humid places such as bathrooms, swimming pools, etc.
•
In very dusty places.
•
In places subject to strong vibrations.
•
Position the appliance in such a way that there is always enough room for free air circulation (at least 5 cm).
•
Do not block the air inlets.
•
Keep the appliance out of the reach of children.
•
If any liquid enters the appliance, unplug it immediately from the socket and take it to the nearest TREVI authorised service centre.
•
Beforeswitchingontheappliance,alwayscheckthatthepowercable andtheconnectioncableareproperlyinstalled.
•
The apparatus shall not be exposed to dripping or splashing water. No objects filled with liquid, such as vases, should be placed on
the unit.
•
No naked flame sources, such as lighted candles, should be placedon.
•
Keep this manual.
CARE AND MAINTENANCE
Use a slightly damp soft cloth for cleaning. Do not use solvents and abrasive substances.
IMPORTANT
This device isdesigned for home use (not professional use). This appliance has been carefully built to ensurelong-lasting perfect
performance. However, should any inconvenience occur, please contact your local authorised TREVI Service Centre.
TREVI follows a policy of ongoing research and development. Therefore products may have different features from those described.

5
RC 853 D
FM ALARM CLOCK
HRVATSKI
KOMANDE
RADIO
Srotolare il cavo d’antenna (13) sul retro della radiosveglia. Estendere
1
2
10
11
1.
Tipka MEM/TIMESET
2.
Tipka TUN-/HOURAL1
3.
TipkaSNOOZE DIM/SLEEP
4.
Tipka AL2 TUN+/MIN
5.
Tipka
AL.OFF
6.
Indikator stanja Sleep
7.
Indikator Alarm 2 BUZZER
INSTALACIJA
3
4
5
6
7
8
14
8.
Alarm2 RADIO indikator
9.
Glasnoća
10.
Indikator Alarma 1 BUZZER
11.
Indikator Alarma 1RADIO
12.
Kabel za napajanje
13.
FM radio antena
14.
Odjeljak za bateriju
e posizionare l’antenna per ottenere la migliore ricezione radio.
1.
Pritisnite tipku “
AL.OFF” (5) za uključivanje radia. Na
zaslonu će se pojaviti frekvencija radio postaje. Pritisnite i
držite tipku “
AL.OFF” (5) nekoliko sekundi da biste
isključili radio
;
2.
Podesite omiljenu stanicu odabirom odgovarajuće
frekvencije pomoću tipki "TUN- / HOUR AL1" (2) ili "AL2 TUN + /
MIN" (4). Tijekom rada na zaslonu se prikazuje podešena
frekvencija.
3.
Pritiskom tipki “TUN- / HOUR AL1” (2) ili “AL2 TUN + / MIN”
(4) na 3 sekunde, radio će skenirati frekvenciju dok se ne
zaustavi na prvoj primljenoj radio postaji.
4.
Nakon prikazivanja frekvencije na nekoliko sekundi, uređaj
će se vratiti na prikaz vremena. Pritisnite tipku "TUN- / HOUR
AL.1" (2) ili "AL.2 TUN + / MIN" (4) za prikaz radio frekvencije.
Slušanje pohranjenih radijskih postaja i pohranjivanje radijske
postaje
Može se pohraniti do 10 FM radijskih postaja:
Da biste spremili radiopostaju, ugodite željenu radio stanicu
dugim pritiskom na tipku "MEM / TIME SET" (1), dok na zaslonu
ne počne treptati prikaz "P01". Sada pomaknite tipke "TUN- /
HOUR AL.1" (2) ili "AL2 TUN + / MIN" (4) za odabir memorijske
ćelije. Za potvrdu pritisnite tipku "MEM / TIME SET" (1), a radio
postaja je spremljena.
1.
Za slušanje radiopostaje spremljene u memoriji, nekoliko puta
pritisnite tipku "MEM / TIME SET" (1) dok se ne prikaže željeni broj
memorije.
PODEŠAVANJE GLASNOĆE
Umetnite utikač kabela za napajanje (12) u utičnicu od 230V 50Hz.
Da bi sat radio i da pohrani vrijeme čak i tijekom privremenog
prekida napajanja, umetnite dvije AAA baterije (nisu isporučene) u
odjeljak (14) na poleđini uređaja slijedeći oznake polariteta otisnute
na kućištu ,
PODEŠAVANJE SATA
1.
Nakon spajanja napajanja, znamenke na zaslonu će zatreperiti
ili pritisnite i držite tipku "MEM / TIME SET" (1) oko 3 sekunde;
2.
Pritisnite tipku "TUN- / HOUR AL1" (2) nekoliko puta kako
biste promijenili postavku vremena;
3.
Pritisnite tipku "AL2 TUN + / MIN" (4) nekoliko puta za
promjenu postavke minute.
4.
Pritisnite tipku "MEM / TIME SET" (1) kako biste potvrdili
postavke.
Napomena:
Ako se tijekom faze pode
š
avanja (prikaz trep
ć
e) NO
tipka pritisne neko vrijeme, ALARM radio se automatski vra
ć
a u
stanje pripravnosti (fiksni prikaz).
Okrenite gumb VOLUME (9) za podešavanje glasnoće slušanja.
NAČIN RADA SLEEP
Pritisnite gumb SNOOZE DIM / SLEEP (3) za programiranje
automatskog isključivanja radija do najviše 90 minuta.
Namjestite vrijeme isključivanja pritiskom na gumb SNOOZE DIM
/ SLEEP (3) nekoliko puta; u početku će se prikazati maksimalno
vrijeme od 90 minuta, pritiskanjem tipke nekoliko puta ovo
vrijeme će se spustiti u koracima od 10 minuta dok se ne pojavi
riječ OFF (SLEEP funkcija je isključena).
Kada je funkcija SLEEP aktivirana, zasvijetlit će indikator stanja
mirovanja (6).
ALARM
Pomoću ovog uređaja možete samostalno postaviti do dva alarma.
Prije podešavanja vremena alarma, provjerite je li vrijeme ispravno
postavljeno. Postupak za postavljanje oba alarma je isti.
9
12
13

6
RC 853 D
FM ALARM CLOCK
HRVATSKI
Za oba alarma možete odabrati način rada alarma: Buzzer
mod: Alarm će se oglasiti klasičnim BEEP.
Način rada radija: Alarm će se uključiti na radijskoj postaji.
POSTAVLJANJE ALARMA 1
1.
Pritisnite i držite tipku "TUN- / HOUR AL1" (2) oko 2 sekunde
za prikaz vremena alarma;
2.
Brojke će treptati;
3.
Pritisnite tipku “
AL.OFF” (5) jednom za podešavanje
vremena alarma
;
4.
Pritisnite tipku "TUN- / HOUR AL1" (2) nekoliko puta kako
biste promijenili postavku vremena;
5.
Pritisnitetipku"AL2TUN+/MIN"(4)nekolikoputazapromjenu
postavkeminute;
6.
Pritisnite jednom tipku “AL.OFF” (5) za potvrdu;
zaslon će prestati treptati i vraća se na prikaz trenutnog
vremena.
Napomena:
ovo će aktivirati zvuk alarma.
POSTAVLJANJE ALARMA 2
Za podešavanje vremena alarma 2, zamijenite tipku "TUN- /
HOUR AL1" (2) tipkom "AL2 TUN + / MIN" (4).
AKTIVACIJA ALARMA
1.
Postavite vrijeme alarma kao što je gore opisano;;
ALARM 1
2.
Pritisnite i držite tipku "TUN- / HOUR AL1" (2) 3 sekunde dok se
ne pojave znamenke;
3.
Pritisnite tipku "TUN- / HOUR AL1" (2) za prebacivanje s
alarma na zujalicu (svijetli indikator alarma 1 BUZZER (10)),
alarm s radijem (indikator Alarm 1 RADIO (11) svijetli) ili
alarm je deaktiviran (ne svijetli indikator).
ALARM 2
2.
Pritisnite i držite tipku "AL2 TUN + / MIN" (4) 3 sekunde sve dok
znamenke ne počnu treptati;
3.
Pritisnite tipku "AL2 TUN + / MIN" (4) za prebacivanje s
alarma na zujalicu (svijetli indikator alarma 2 BUZZER (7),
alarm s radiom (indikator Alarm 2 RADIO (8) svijetli) ili
'Alarm je isključen (ne svijetli indikator).
ISKLJUČIVANJE ALARMA
Ako želite privremeno isključiti alarm, pritisnite tipku "SNOOZE DIM /
SLEEP" (3); prekid traje 9 minuta, nakon čega se alarm uključuje.
Postupak se može ponoviti nekoliko puta u roku od sat vremena.
Za konačno isključivanje alarma pritisnite tipku AL.OFF (5).
Alarm je još uvijek aktivan i ponavlja se 24 sata kasnije.
FUNKCIJA DIMMER
Funkcija DIMMER omogućuje vam podešavanje svjetline..
- pritisnite i držite tipku "SNOOZE DIM / SLEEP" (3) 2 sekunde kako
biste promijenili svjetlinu zaslona
NAPOMENA:
svjetlina zaslona se NE mijenja tijekom podešavanja
RADIOSAVILACIJE i kada je ALARM aktiviran.
TEHNIČKE SPECIFIKACIJA
Napajanje: ….
..........................................................
230V
50Hz
Baterije(nisu uključene): ....................................batterie“AAA”1.5V
Raspon frekvencije FM: ............................................
.
87.5-108MHz
Dimenzije:...........................................................
190*83*65 mm
Potrošnja: ...............................................................................
2W
Težina: ........................................................................343g
INFORMACIJE KORISNICIMA sukladno zakonskoj uredbi br.
49 od 14. ožujka 2014. godine
"Provedba Direktive 2012/19 / EU o otpadnoj električnoj i
elektroničkoj opremi (WEEE)"
Simbol precrtane kante za smeće označen na opremi
označava da se proizvod na kraju vijeka trajanja mora
prikupljati odvojeno od ostalog otpada. Stoga, korisnik mora
osigurati opremu koja integrira bitne komponente na kraju svog
vijeka trajanja u odgovarajućim centrima za odvojeno
prikupljanje elektroničkog i elektro-tehničkog otpada, ili ga
vratiti trgovcu na malo u trenutku kupnje nove ekvivalentne
opreme, na temelju jedan na jedan, ili 1 na nulu za opremu s
dužom stranom manjom od 25 cm. Adekvatno odvojeno
prikupljanje za naknadno puštanje u rad ispuštene opreme za
recikliranje, obradu i kompatibilno zbrinjavanje okoliša pomaže
u izbjegavanju mogućih negativnih učinaka na okoliš i zdravlje
te promiče recikliranje materijala od kojih je oprema
sastavljena. Neovlašteno odlaganje proizvoda od strane
korisnika podrazumijeva primjenu administrativnih sankcija u
skladu sa Zakonodavnim dekretom br. Zakonski dekret br. 49 od
14. ožujka 2014. godine.

7
RC 853 D
FM ALARM CLOCK
ENGLISH
7
CONFIGURATION AND FUNCTIONS
1
2
10
11
and hold down “MEM/TIME SET” button (1) for approximately
3 seconds until the display flashes;
2. Press “TUN-/HOUR AL1” button (2) repeatedly to change the
3
hour setting;
4
3. Press “AL2 TUN+/MIN” button (4) repeatedly to change the
5
minute setting;
4. Press “MEM/TIME SET” button (1) to confirm the time.
SETTING THE ALARM TIME
6
This clock radio has dual alarms that can be set and used concur-
8
rently. The procedure to set both alarms are the same. Both alarms
can either sound the buzzer or wake up to radio.
Follow the instructions below to set alarm time 1.
For alarm time 2, substitute “TUN-/HOUR AL1” button (2) with
“AL2 TUN+/MIN” button (4).
1.
Pressandholddown “TUN-/HOURAL1”button (2) for appro-
ximately 2 seconds to view alarm time;
2.
The digits will flash;
3.
Press “
AL.OFF” button (5) once to set alarm time;
4.
Press “TUN-/HOUR AL.1” button (2) repeatedly to change the
hour setting;
5.
Press “AL2 TUN+/MIN” button (4) repeatedly to change the
1.
MEM/TIME SET button
2.
TUN-/HOURAL1button
3.
SNOOZE DIM/SLEEP button
4.
AL2 TUN+/MIN button
5.
AL.OFF button
6.
Sleep indicator
7.
Alarm 2 BUZZER indicator
PREPARATIONFORUSE
8.
Alarm 2 RADIO indicator
9.
Volume dial
10.
Alarm 1 BUZZER indicator
11.
Alarm 1 RADIO indicator
12.
Power cable
13.
Radio Antenna
14.
Battery compartment
minute setting;
6. Press “
AL.OFF” button (5) once to confirm and digitswill
stop flashing.
Note: This will turn on the alarm buzzer.
ACTIVATING THE ALARM 1
1.
Set alarm time as above. Once the alarm time is set, press
“TUN-/HOUR AL.1” button (2) once toview alarm time;
2.
Press and hold down “TUN-/HOUR AL.1” button (2) until the
This clock radio is AC powered 230V 50Hz.
Use two ‘AAA’ size batteries to keep accurate time during temporary
power interruption. Insert batteries by matching the polarity (+/-)
markings in the battery compartment (14). Please replace all batte-
ries at the same time with only new batteries. Remove all batteries
whentheclockradioisnotinuseforextendedperiodsoftime.
Place the clock radio only on protected furniture. Avoid direct sunlight
and any area that is exposed to water or moisture.
Plug power cable (12) into electrical outlet with correct voltage.
Checkratinglabelsontheradio.DONOTPLUGTHERADIOINTO
ANELECTRICAL OUTLETIFYOUAREUNSUREOFTHEVOLTAGE.
Unwind the radio antenna (13) on the back of the clock radio. Extend
and reposition the antenna for best radio reception.
CLOCK and ALARM CLOCK OPERATION
Note: The time and alarm times can only be set when the radio
is turned off.
SETTING THE TIME
1. The digits will flash after connecting power to the radio, or press
digit flash, approximately 3 seconds;
3. Press “TUN-/HOUR AL.1” button (2) to change between alarm
withbuzzer(BUZZERIndicator(10)willbeon),alarmwithradio
(RADIOIndicator(11)willbeon),oralarmoff(noindicators).
ACTIVATING THE ALARM 2
1.
Set alarm time as above. Once the alarm time is set, press “AL2
TUN+/MIN” button (4) once to view alarm time;
2.
Pressandholddown“AL2TUN+/MIN” button(4)untilthedigit
flash, approximately 3 seconds;
3.
Press “AL2 TUN+/MIN” button (4) to change between alarm
with buzzer (BUZZER Indicator (7) will be on), alarmwith radio
(RADIO Indicator (8) will be on), oralarm off (no indicators).
WHEN THE ALARM SOUNDS
1.
Whenthealarmsounds,press“
AL.OFF” button (5) toturn
offalarmorpress“SNOOZEDIM/SLEEP”button(3)forsnooze;
2.
Once in snooze, alarm will sound again after 9 minutes.
9
12
13
14

8
RC 853 D
FM ALARM CLOCK
ENGLISH
DISPLAY BRIGHTNESS
When the radio is off and the current time showing, press and hold
down“SNOOZEDIM/SLEEP”button (3)for2secondsto change
the brightness of the display between high and low.
Note:
Do not change the display brightness while setting the clock
radio and when the alarm is on.
RADIO OPERATIONS
General Operations
1.
Pressandholddown“
AL.OFF”button (5)toturnradioon
and off. The radio station frequency will appear on the display;
2.
Press “TUN-/HOUR AL1” button (2) or “AL2 TUN+/MIN”
button (4) to change radio frequency, or press and hold down
“TUN-/HOUR AL1” button (2) or “AL2 TUN+/MIN” button (4)
for approximately 3 seconds to auto scan for the next available
station;
3.
Turn “VOLUME” dial (9) to adjust volume level;
4.
Radiowillshowthetimein afewsecondsafterchangingfre-
quency. Press “TUN-/HOUR AL.1” button (2) or “AL2TUN+/
MIN” button (4) to view radio frequency.
Pre-set Station Memory
1.
The radio can store up to 10 FM stations.
2.
To store a station in memory, tune to the desired radio station.
Press and hold down “MEM/TIME SET” button (1) and a number
starting with “P” on the display will flash. This “P” number
representoneofthe tenmemorystations.Press“TUN-/HOUR
AL1” button (2) or “AL2TUN+/MIN” button (4) to change the
station number. Press “MEM/TIME SET” button (1) to confirm.
3.
To recall a pre-set station, turn the radio on. Press “MEM/TIME
SET” button (1) repeatedly until station number is found. The
station frequency will be display momentarily.
SLEEP MODE
PresstheSNOOZEDIM/SLEEP button(3)to programtheradio to
turn off automatically for up to 90minutes.
Set the switch-off time by pressing the SNOOZE DIM/SLEEP but-
ton (3) repeatedly; initially the maximum time of90minutes will
be shown, by pressing the button several times the time will be
loweredinstepsof10minutesuntilthewordOFFappears(SLEEP
function deactivated).
When the SLEEP function is activated, the Sleep indicator (6)
will light up.
SPECIFICATIONS
PowerSource:
..........................................................
230V
50Hz
Back-upBatteries:........................................
batteries “AAA”1.5V
Frequency Range: ...................................................
.
87.5-108MHz
Dimensions:....................................................190*83*65 mm
Power Consumption:..................................................................
2W
Weight:................................................................................
343g
PRECAUTIONS FOR CORRECT DISPOSAL OF THE
PRODUCT.
The symbol shown on the equipment indicates that waste must be
disposed of in “separate collection” and so the product must not
be disposed of together with urban waste.
The user must take the product to special “separate waste collection
centres” provided by local government, or deliver it to the retailer
against the purchase of a new product.
Separate collection of waste and subsequent treatment, recycling
and disposal operations promotes the production of equipment
with recycled materials and limits negative effects on the environment
and on health caused by improper handling ofwaste.
Illegal disposal of the product leads to the enforcement of admi-
nistrative penalties.

9
RC 853 D
FM ALARM CLOCK
FRANÇAISE
8
CONFIGURATION ET FONCTIONS
1
2
10
11
RADIO
Déroulez le câble d’antenne (13) à l’arrière du radio-réveil. Étendez
etpositionnez l’antenne pour obtenir la meilleure réception radio.
3
1.Appuyezsurlebouton“
AL.OFF” (5) pour allumer la radio.
4
La fréquence de la station de radio apparaîtra sur l’affichage.
5
Maintenezlatouche“AL.OFF”(5)enfoncéependantquelques
secondes pouréteindrelaradio;
2.
Syntonisez votre station favorite en sélectionnant la bonne
fréquence avec les touches “TUN-/HOUR AL1” (2) ou “AL2
6
TUN+/MIN” (4). Pendant l’opération, la fréquence accordée
7
est affichée sur l’affichage.
3.
Enappuyantsurlestouches“TUN-/HOURAL1”(2)ou“AL2TUN
+/MIN” (4) pendant 3 secondes, la radio balaie la fréquence
jusqu’à ce qu’elle s’arrête à la première station de radio reçue.
4.
Après avoir affiché la fréquence pendant quelques secondes,
l’appareil revient pour afficher l’heure. Appuyez sur la touche
“TUN-/HOUR AL1” (2) ou “AL2TUN+/MIN” (4) pour afficher
la fréquence radio.
Écoute destations deradioet de mémoriser unestationde radio
Etpossibledemémoriserjusqùà10stationsderadiosurlabandeFM:
1. Pour enregistrer une station de radio, syntonisez la station de
radio désirée en appuyant longuement sur le bouton “MEM/TIME
1.
BoutonMEM/TIMESET
2.
BoutonTUN-/HOURAL1
3.
BoutonSNOOZEDIM/SLEEP
4.
BoutonAL2TUN+/MIN
5.
Bouton
AL.OFF
6.
Indicateur Sleep
7.
Indicateur Alarm 2 BUZZER
INSTALLATION
8.
IndicateurAlarm2RADIO
9.
Volume
10.
Indicateur Alarm 1 BUZZER
11.
Indicateur Alarm 1RADIO
12.
Câble d’alimentation
13.
Antenne radio
14.
Compartiment delabatterie
SET” (1), jusqu’à ce que l’affichage clignote indiquant “P01”.
Maintenant, déplacez avec les touches “TUN-/HOUR AL.1” (2) ou
“AL2TUN+/MIN” (4)pourchoisirlacellulemémoire.Appuyez
sur la touche “MEM/TIME SET” (1) pour confirmer, la station
de radio est maintenant sauvegardée.
2. Pour écouter une station de radio sauvegardée en mémoire,
appuyez plusieurs fois sur la touche “MEM/TIME SET” (1) jusqu’à
ce que le numéro de mémoire souhaité s’affiche.
RÉGLAGE DU VOLUME
Branchez le câble d’alimentation (12) à une prise 230V 50Hz.
Pour garder l’horloge en marche et temps de stockage en cas
de panne de courant momentanée, insérez deux piles AAA (non
fournies) dans le compartiment de la batterie (14) sur le fond des
signes de polarité suivants imprimé sur le Mobile.
RÉGLAGE DE L’HORLOGE
1.
Après avoir connecté l’alimentation, les chiffres de l’affichage
clignotent ou appuyez sur le bouton “MEM/TIME SET” (1) pendant
environ 3 secondes;
2.
Appuyerplusieursfoissurlatouche“TUN-/HOURAL1”(2)pour
changer le réglage del’heure;
3.
Appuyez plusieurs fois sur le bouton “AL2TUN+/MIN” (4) pour
modifier le réglage des minutes.
4.
Appuyez sur le bouton “MEM/TIME SET” (1) pour confirmer
les réglages.
Remarque:
Si
pendant
la
phase
de
réglage
(affichage
clignotant)
ne
pas
appuyer
sur
n’impor
te
quelle
touche
pendant
un
cer
tain
temps,
le
RADIO
-
RÉVEIL
REVIENT
automatiquement
au
mode
(affichage
fixe)
VEILLE
.
TournezleboutonVOLUME(9)pourréglerlevolumed’écoute.
SLEEP
Appuyez sur le bouton SNOOZE DIM/SLEEP (3) pour programmer
la radio pour qu’elle s’éteigne automatiquement pendant 90
minutes maximum.
Réglez l’heure d’arrêt en appuyant plusieurs fois sur le bouton
SNOOZE DIM/SLEEP (3); Au départ, le temps maximum de 90
minutes sera affiché, en appuyant plusieurs fois sur le bouton, ce
temps sera abaissé par pas de 10 minutes jusqu’à ce que le mot
OFF apparaisse (fonction SLEEP désactivée).
Lorsque la fonction SLEEP est activée, l’indicateur de veille (6)
s’allume.
ALARME
Avec cette unité, jusqu’à deux alarmes peuvent être réglées
9
12
13
14

10
RC 853 D
FM ALARM CLOCK
FRANÇAISE
indépendamment. Avant de régler l’heure de l’alarme, assurez-vous
que l’heure est réglée correctement. La procédure de réglage des
deux alarmes est la même.
Pour les deux alarmes, il est possible de choisir le mode d’alarme:
Mode Buzzer: L’alarme retentira sur le BEEP classique.
Mode radio: L’alarme s’allume sur une station de radio.
RÉGLAGE DE L’ALARME 1
1.
Appuyezsurlebouton“TUN-/HOUR AL1” (2) et maintenez-le
enfoncé pendant environ 2 secondes pour afficher l’heure de
l’alarme;
2.
Les chiffres clignotent;
3.
Appuyez une fois sur la touche “
AL.OFF” (5) pour régler
l’heure de l’alarme;
4.
Appuyez plusieurs fois sur la touche “TUN-/HOUR AL1” (2) pour
changer le réglage del’heure;
5.
Appuyez plusieurs fois sur la touche “AL2 TUN+/MIN” (4) pour
modifier le réglage des minutes;
6.
Appuyez une fois sur la touche “
AL.OFF” (5) pour confirmer;
l’affichage cessera de clignoter et retournera pour afficher
l’heure actuelle.
Note:
ceci activera le signal acoustique d’alarme.
RÉGLAGE DE L’ALARME 2
Pour régler l’heure d’alarme 2, remplacer le bouton “TUN-/HOUR
AL1” (2) par le bouton “AL2 TUN+/MIN” (4).
ACTIVATION DE L’ALARME
1.
Réglez l’heure de l’alarme comme décrit ci-dessus;
ALARME 1
2.
Appuyezsurlebouton“TUN-/HOURAL1”(2)etmaintenez-le
enfoncé pendant3secondesjusqu’à ceque les chiffres clignotent;
3.
Appuyer sur la touche “TUN-/HOUR AL1” (2) pour passer de
l’alarme à l’avertisseur sonore (témoin d’alarme 1 BUZZER (10)
allumé), alarme avec radio (indicateur RADIO alarme 1 (11)
allumé) ou l’alarme est désactivée (aucun indicateur allumé).
ALARME 2
2.
Appuyez sur le bouton “AL2 TUN+/MIN” (4) et maintenez-le
enfoncé pendant3secondesjusqu’à ceque les chiffresclignotent;
3.
Appuyer sur la touche “AL2 TUN+/MIN” (4) pour passer de
l’alarme à l’avertisseur sonore (voyant d’alarme 2 BUZZER
allumé), alarme avec radio (l’indicateur RADIO alarme 2 (8)
allumé)oualarmedésactivée(aucunindicateurallumé).
ARRET DE L’ALARME
Si vous souhaitez désactiver temporairement l’alarme, appuyez sur
le bouton “SNOOZE DIM/SLEEP” (3); l’interruption dure 9 minutes,
après quoi l’alarme est à nouveau activée. L’opération peut être
répétée plusieurs fois en une heure.
Pouréteindre l’alarme en permanence,appuyez sur le bouton
AL.OFF (5).
L’alarmeesttoujoursactivepourserépéter24heuresplustard.
FONCTION DIMMER
La fonction DIMMER vous permet de régler la luminosité.
- appuyeretmaintenirlebouton“SNOOZEDIM/SLEEP”(3)pendant
2secondes pourchanger la luminosité del’affichage
Remarque:
La
luminosité
de
l’affichage
n’est
pas
modifiée
lors
du
réglage
du
RADIO
-
RÉVEIL
et
lorsque
l’alarme
est
ACTIVÉE
.
CARACTERISTIQUES TECHNIQUES
Alimentation:
.........................................................
230V
50Hz
Lespilesdesauvegarde(noninclus):..............
piles “AAA” 1.5V
Gamme de fréquence FM:......................................
.
87.5-108MHz
Taille: ............................................................. 190*83*65mm
Consommation: ..........................................................................
2W
Poids:........................................................................ 343g
RECOMMANDATIONS POUR L’ELIMINATION CORRECTE
DU PRODUIT.
Le symbole figurant sur l’appareil indique que le produit fait l’objet
d’une “collecte séparée“. C’est pourquoi, le produit ne doit pas être
éliminé avec les déchets urbains.
L’utilisateur doit remettre le produit auprès de “décharges spécia-
lisées de collecte séparée“ prévues par les autorités locales, ou
bien le rendre au revendeur quand il achètera un nouvel appareil
équivalent.
La collecte séparée du produit et les opérations successives de
traitement, recyclage et élimination favorisent la production d’ap-
pareilscomposés pardesmatériauxrecyclésainsi que permettent
d’éviter des effets négatifs sur l’environnement et sur la santé des
personnes suite à une gestion impropre du déchet.
Toute élimination abusive du produit entraîne l’application de
sanctions administratives.
11
RC 853 D
FM ALARM CLOCK
DEUTSCH
8
KONFIGURATION UND FUNKTIONEN
1
2
10
11
RADIO
Wickeln Sie das Antennenkabel (13) auf der Rückseite des Radio-
weckersab.Verlängernundpositionieren SiedieAntenne,umden
3
besten Radioempfang zu erhalten.
4
1. Drücken Sie die Taste “AL.OFF” (5), um das Radio einzu-
5
schalten. Die Frequenz des Radiosenders wird auf dem Display
angezeigt.HaltenSiedieTaste“
AL.OFF” (5) einige Sekunden
lang gedrückt, um das Radio auszuschalten.
2.
Wählen Sie mit den Tasten“TUN-/HOUR AL1” (2) oder “AL2
6
TUN+/MIN” (4) die gewünschte Frequenz aus. Während des
7
Vorgangswird die eingestellteFrequenzaufdemDisplayange-
zeigt.
3.
Durch Drücken der Tasten “TUN-/HOUR AL1” (2) oder “AL2
TUN+/MIN”(4)für3SekundenscanntdasRadiodieFrequenz
bis zum ersten empfangenen Radiosender.
4.
Nach der Anzeige der Frequenz für einige Sekunden kehrt das
Gerät zur Anzeige der Uhrzeit zurück. Drücken Sie die Taste
“TUN-/HOUR AL.1” (2) oder “AL.2 TUN+/MIN” (4), um die
Radiofrequenz anzuzeigen.
Hören VON Radiosender
n
und
speicher
n
Sie
einen Radiosender
Sie können bis zu 10 FM-Radiosender speichern:
1. Um einen Radiosender zu speichern, stellen Sie durch langes
1.
MEM/TIME SETtaste
2.
TUN-/HOUR AL1 taste
3.
SNOOZE DIM/SLEEPtaste
4.
AL2 TUN+/MINtaste
5.
AL.OFF taste
6.
Sleep Indikator
7.
Alarm 2 BUZZERIndikator
INSTALLATION
8.
Alarm 2RADIO Indikator
9.
Lautstärkeregler
10.
Alarm 1 BUZZER Indikator
11.
Alarm 1 RADIOIndikator
12.
Netzkabel
13.
Radioantenne
14.
Batteriefach
Drücken der Taste “MEM/TIME SET” (1) den gewünschten
Radiosender ein, bis das Display mit “P01” blinkt. Bewegen
Sie sich nun mit den Tasten “TUN-/HOUR AL.1” (2) oder “AL2
TUN+/MIN” (4) um die Speicherzelle auszuwählen. Drücken Sie
die Taste “MEM/TIME SET” (1) zur Bestätigung, der Radiosender
ist jetzt gespeichert.
2. Um einen gespeicherten Radiosender anzuhören, drücken Sie
mehrmals die Taste “MEM/TIME SET” (1), bis die gewünschte
Speichernummer angezeigt wird.
SchließenSie dasNetzkabel (12) ineine Steckdose 230V 50Hz.
Um die Uhr läuft und Lagerzeit bei Stromunterbrechung zu halten,
legen Sie zwei AAA-Batterien (nicht enthalten) in das Batteriefach
(14) an der Unterseite der folgenden Symptome der Polarität am
Mobile gedruckt.
UHR EINSTELLEN
1.
Nach dem Anschließen der Stromversorgung blinken die Ziffern
aufdemDisplay,oderhaltenSiedieTaste“MEM/TIMESET”(1)
etwa 3 Sekunden langgedrückt.
2.
DrückenSiemehrmalsdieTaste“TUN-/HOURAL1”(2),umdie
Zeiteinstellung zu ändern.
3.
Drücken Sie mehrmals die Taste “AL2 TUN+/MIN” (4), um die
Minuteneinstellung zu ändern.
4.
Drücken Sie die Taste “MEM/TIME SET” (1), um die Einstellungen
zu bestätigen.
Hinweis
:
W
enn
wä
hr
end
der
Anp
a
ss
ungsp
ha
s
e
(
b
link
end
e
Anzeige)
nicht
drücken
eine
beliebige
T
aste
für
eine
Weile,
kehr
t
die
Uhr
automatisch
in
den
R
adio-Modus
(feste
Anzeige)
VOR
.
LAUTSTÄRKEREGELUNG
Drehen Sie den VOLUME-Knopf (9), um die Lautstärke einzustellen
SLEEP
Drücken Sie die Taste SNOOZE DIM/SLEEP (3), um das Radio
so einzustellen, dass es sich automatisch für bis zu 90 Minuten
ausschaltet.
Stellen Sie die Ausschaltzeit durch wiederholtes Drücken der
SNOOZE DIM/SLEEP-Taste (3) ein; Zunächst wird die maximale
Zeit von 90 Minuten angezeigt, durch mehrmaliges Drücken der
Taste wird diese Zeit in 10-Minuten-Schritten verringert, bis das
Wort OFF erscheint (SLEEP-Funktion deaktiviert).
Wenn die SLEEP-Funktion aktiviert ist, leuchtet die Sleep-Anzeige
(6) auf.
9
12
13
14

12
RC 853 D
FMALARMCLOCK
DEUTSCH
WECKDIENST
MitdieserEinheitkönnenbiszuzweiAlarmeunabhängigvoneinan-
der eingestellt werden. Stellen Sie vor dem Einstellen der Weckzeit
sicher, dass die Uhrzeit richtig eingestellt ist. Die Vorgehensweise
zum Einstellen beider Alarme ist identisch.
Für beide Alarme kann der Alarmmodus gewählt werden:
Buzzer Mode: Der Alarm ertönt als klassischer BEEP.
Radiomodus: DerAlarm wird auf einem Radiosender aufleuchten.
ALARMEINSTELLUNG 1
1.
Halten Sie die Taste “TUN-/HOUR AL1” (2) etwa 2 Sekunden
lang gedrückt, um die Weckzeit anzuzeigen.
2.
Die Figuren werden blinken;
3.
Drücken Sie einmal die Taste “
AL.OFF” (5), um die Weckzeit
einzustellen;
4.
DrückenSiemehrmalsdieTaste“TUN-/HOURAL1”(2),umdie
Zeiteinstellung zu ändern.
5.
Drücken Sie mehrmals die Taste “AL2 TUN+/MIN” (4), um die
Minuteneinstellung zu ändern.
6.
Drücken Sie einmal die “
AL.OFF”Taste(5) zur Bestätigung;
DasDisplayhörtaufzublinkenundkehrtzurAnzeigederaktuellen
Uhrzeit zurück.
Hinweis:
Dadurch
wird
das
akustische
Alarmsignal
AKTIVIER
t.
ALARMEINSTELLUNG 2
Um die Weckzeit 2 einzustellen, ersetzen Sie die Taste “TUN-/HOUR
AL1” (2) durch die Taste “AL2 TUN+/MIN” (4).
AKTIVIERUNG DES ALARMS
1.
Stellen Sie die Weckzeit wie oben beschrieben ein;
ALARM 1
2.
Halten Sie die Taste “TUN-/HOUR AL1” (2) 3 Sekunden lang
gedrückt, bis die Ziffern blinken.
3.
DrückenSiedieTaste“TUN-/HOURAL1”(2),umvonAlarmmit
Summer(Alarm1SUMMERAnzeige(10)an),AlarmmitRadio
(Alarm 1 Anzeige RADIO (11)an) oderzu schalten derAlarm
ist deaktiviert (keine Anzeige leuchtet).
ALARM 2
2.
Halten Sie die Taste “AL2 TUN+/MIN” (4) 3 Sekunden lang
gedrückt, bis die Ziffern blinken.
3.
Drücken Sie die Taste “AL2TUN+/MIN” (4), um von Alarm mit
Summer (die Anzeige für Alarm 2 BUZZER (7) an), Alarm mit
Radio (die Anzeige für Alarm 2 RADIO (8) leuchtet) oder Alarm
deaktiviert (keine Anzeige leuchtet).
ALARM AUSSCHALTEN
Wenn Sie den Alarm vorübergehend ausschalten möchten, drücken
Sie die Taste “SNOOZE DIM/SLEEP” (3). Die Unterbrechung dauert
9 Minuten. Danach wird der Alarm wieder eingeschaltet. Die Ope-
ration kann mehrmals innerhalb einer Stunde wiederholt werden.
Um den Alarm dauerhaft zu löschen, drücken Sie die
AL.OFF-
Taste (5).
Der Alarm ist immer noch aktiv, um sich 24 Stunden später zu
wiederholen.
DIMMER FUNKTION
Mit der DIMMER-Funktion können Sie die Helligkeit einstellen.
- HaltenSiedieTaste“SNOOZEDIM/SLEEP”(3)2Sekundenlang
gedrückt, um die Helligkeit des Displays zu ändern
Hinweis:
Die
Helligkeit
des
Displays
wird
beim
Einstellen
des
R
adioweckers
und
bei
AKTIVIER
tem
Alarm
nicht
geänder
t.
TECHNISCHE DATEN
Spannungsversorgung:
.......................................
230V
50Hz
Backup-Batterien (nicht enthalten):.............“AAA”-Batterien 1,5V
FM-Frequenzbereich: ...............................................
.87.5-108MHz
Größe: ................................................................
190*83*65mm
Verbrauch: ..................................................................................
2W
Gewicht:...................................................................................
343g
HINWEISE ZUR ORDNUNGSGEMÄßEN ENTSORGUNG
DES PRODUKTS.
Das auf dem Gerät angebrachte Symbol weist darauf hin, dass
das Altgerät “getrennt zu sammeln” ist und das Produkt daher
nicht zusammen mit dem Gemeindeabfall entsorgt werden darf.
Der Benutzer muss das Produkt zu den entsprechenden, von der
Gemeindeverwaltung eingerichteten “Wertstoffsammelstellen” brin-
gen oder dem Händler beim Kauf eines neuen Produkts übergeben.
Die getrennte Müllsammlung und anschließende Aufbereitung, Wie-
derverwertung und Entsorgung fördern die Herstellung von Geräten
unter Verwendung wiederverwerteter Materialien und vermindern
die negativen Auswirkungen auf die Umwelt und Gesundheit in
Folge einer falschen Müllverwaltung.
Die widerrechtlicheEntsorgungdes Produktsführt zur Auferlegung
von Verwaltungsstrafen.

13
RC 853 D
FM ALARM CLOCK
ESPAÑOL
5
6
CONFIGURACIÓN Y FUNCIONES
1
2
10
11
Nota:
Si
durante
la
fase
de
ajuste
(pantalla
parpadea)
no
presione
ningún
bot
ón
durante
un
cier
to
tiempo,
el
radio
reloj
VUELVE
au
-
tomáticamente
al
modo
(pantalla
fija)
de
espera.
3
4
RADIO
Desenrolle el cable de la antena (13) en la parte posterior de la
radio reloj. Extienda y coloque la antena para obtener la mejor
recepción de radio.
1.
Presione el botón “
AL.OFF” (5) para encender la radio.La
7
frecuencia de la estación de radio aparecerá en la pantalla.
8
Mantenga presionada la tecla “ AL.OFF” (5) durante unos
segundos para apagar la radio;
2.
Sintonice su estación favorita seleccionando la frecuencia
correcta con los botones “TUN-/HOUR AL1” (2) o “AL2TUN+/
MIN” (4). Durante la operación, la frecuencia ajustada se muestra
en la pantalla.
14
3. Al presionar las teclas “TUN-/HOUR AL1” (2) o “AL2 TUN+/
MIN” (4) durante 3 segundos, la radio escanea la frecuencia
hasta que se detiene en la primera estación de radio recibida.
4. Después de mostrar la frecuencia durante unos segundos, el
dispositivo volverá a mostrar la hora. Presione el botón “TUN-/
HOUR AL.1” (2) o “AL.2 TUN+/MIN” (4) para visualizar la
frecuencia de radio.
1.
BotónMEM/TIMESET
2.
Botón TUN-/HOUR AL1
3.
Botón SNOOZE DIM/SLEEP
4.
Botón AL2 TUN+/MIN
5.
Botón
AL.OFF
6.
Indicadores Sleep
7.
IndicadoresAlarm2BUZZER
8.
Indicadores Alarm 2 RADIO
INSTALACIÓN
9.
Volumen
10.
Indicadores Alarm 1 BUZ-
ZER
11.
IndicadoresAlarm1RADIO
12.
Cable dealimentación
13.
Antena de radio
14.
Compartimiento de la
batería
Escucha de emisoras preestablecidas y almacenar una emisora
de radio
Esposiblealmacenarhasta10 estaciones deradioenlabanda FM:
1.
Para guardar una estación de radio, sintonice la estación de radio
deseada presionando prolongadamente el botón “MEM/TIME
SET”(1), hasta que la pantalla muestre “P01”. Ahora mueva con
las teclas “TUN-/HOUR AL.1” (2) o “AL2 TUN+/MIN” (4) para
elegir la celda de memoria. Presione el botón “MEM/TIME SET”
(1)
para confirmar, la estación de radio ahora está guardada.
2.
Para escuchar una estación de radio guardada en la memoria,
Conecte el cable de alimentación (12) a una toma de corriente de
230V 50Hz.
Para mantener en funcionamiento el reloj y el tiempo de almace-
namiento durante un corte momentáneo de alimentación, inserte
dos pilas AAA (no incluidas) en el compartimiento de la batería
(14) en la parte inferior de los siguientes signos de polaridad
‘impresa en la Mobile.
AJUSTE DE RELOJ
1.
Después de conectar la fuente de alimentación, los dígitos de la
pantallaparpadearán, opresioneymantengapresionadoelbotón
“MEM/TIME SET” (1) durante aproximadamente 3 segundos;
2.
Presionelatecla“TUN-/HOURAL1”(2)variasvecesparacambiar
la configuración de la hora;
3.
Presioneelbotón“AL2TUN+/MIN”(4)variasvecesparacambiar
la configuración de los minutos;
4.
Presione el botón “MEM/TIME SET” (1) para confirmar la
configuración.
presioneelbotón“MEM/TIMESET”(1)variasveceshastaque
aparezca el número de memoria deseado.
AJUSTE DEL VOLUMEN
Gireel mandoVOLUME(9)paraajustarelvolumendeescucha.
SLEEP
Presione el botón SNOOZE DIM / SLEEP (3) para programar que la
radio se apague automáticamente por hasta 90minutos.
Configure el tiempo de apagado presionando el botón SNOOZE
DIM/SLEEP (3) repetidamente; inicialmente se mostrará el tiempo
máximo de 90 minutos, al presionar el botón varias veces se
reducirá el tiempo en pasos de 10 minutos hasta que aparezca la
palabra OFF (función SLEEP desactivada).
Cuando la función SLEEP está activada, el indicador Sleep (6)
se ilumina.
9
12
13

14
RC 853 D
FM ALARM CLOCK
ESPAÑOL
ALARMA
Con esta unidad, se pueden configurar hasta dos alarmas de forma
independiente. Antes de configurar la hora de la alarma, asegúrese
de que la hora esté configurada correctamente. El procedimiento
para configurar ambas alarmas es el mismo.
Para ambas alarmas, es posible elegir el modo de alarma:
Modo zumbador: laalarmasonaráelBEEPclásico.
Modo deradio: laalarma seencenderáenunaestación de radio.
CONFIGURACIÓN DE ALARMA 1
1.
Mantenga presionado el botón “TUN-/HOUR AL1” (2) durante
aproximadamente 2 segundos para mostrar la hora de la alarma;
2.
Las figuras parpadearán;
3.
Presione la tecla “
AL.OFF” (5) una vez para configurar la
hora de la alarma;
4.
Presionelatecla“TUN-/HOURAL1”(2)variasvecesparacambiar
la configuración de la hora;
5.
Presionelatecla“AL2TUN+/MIN”(4)variasveces paracambiar
la configuración de los minutos;
6.
Presione la tecla “
AL.OFF” (5) una vez para confirmar; la
pantalla dejará de parpadear y volverá a mostrar la hora actual.
Nota:
esto
ACTIVARÁ
la
señal
acústica
de
alarma.
CONFIGURACIÓN DE ALARMA 2
Para configurar la hora de alarma 2, reemplace el botón “TUN-/
HOUR AL1” (2) con el botón “AL2 TUN+/MIN” (4).
ACTIVACIÓN DE LA ALARMA
1.
Configurelahora dela alarma como se describe arriba;
ALARMA 1
2.
Mantenga presionado el botón “TUN-/HOUR AL1” (2) durante
3 segundos hasta que los dígitos parpadeen;
3.
Presione la tecla “TUN-/HOUR AL1” (2) para pasar de la alarma
conelzumbador(elindicadordealarma1BUZZER(10)encendi-
do), laalarmacon la radio(elindicadordealarma 1 RADIO (11)
encendido) o la alarma desactivada (sin indicador encendido).
ALARMA 2
2.
Mantenga presionado el botón “AL2 TUN+/MIN” (4) durante 3
segundos hasta que los dígitos parpadeen;
3.
Presione la tecla “AL2 TUN+/MIN” (4) para pasar de la alarma
con el zumbador (el indicador de alarma 2 BUZZER (7) encen-
dido), la alarma con la radio (el indicador de alarma 2 RADIO
(8) encendido) o alarma desactivada (sin indicador encendido)
APAGANDO LA ALARMA
Si desea apagar la alarma temporalmente, presione el botón
“SNOOZE DIM/SLEEP” (3); lainterrupción dura 9 minutos, luego
de lo cual se vuelve a activar la alarma. La operación se puede
repetir varias veces en una hora.
Para apagar la alarma-alarma permanentemente, presione el botón
AL.OFF (5).
La alarma todavía está activa para repetirse 24 horas después.
FUNCIÓN DIMMER
La función DIMMER le permite configurar el brillo.
- Mantengapresionadoelbotón“SNOOZEDIM/SLEEP”(3)durante
2 segundos para cambiar el brillo de la pantalla
Nota:
Elbrillodelapantallanocambiaalconfigurarlaradioreloj
y cuando la alarma está activada.
ESPECIFICACIONES TÉCNICAS
Fuente dealimentación:
......................................
230V
50Hz
Baterías de respaldo(no incluido): ............... pilas “AAA” de 1,5V
Rango defrecuencia FM:.......................................
.
87.5-108MHz
Dimensiones:.....................................................
190*83*65mm
Consumo de energía:.................................................................
2W
Peso: ........................................................................ 343g
ADVERTENCIAS PARA LA CORRECTA ELIMINACIÓN
DEL PRODUCTO.
El símbolo que aparece en el aparato indica que el residuo debe
ser objeto de “recogida selectiva” por tanto el producto no se debe
eliminar junto con residuos urbanos.
El usuario deberá entregar el producto a los “centros de recogida
selectiva” creados por las administraciones municipales o bien al
distribuidor cuando adquiera unnuevo producto.
La recogida selectiva del residuo y las sucesivas operaciones de
tratamiento, recuperación y eliminación favorecen la fabricación
de aparatos con materiales reciclados y limitan los efectos nega-
tivos en el medio ambiente y la salud causados por una gestión
incorrecta del residuo.
La eliminación abusiva del producto da lugar a la aplicación de
sanciones administrativas.

15
RC 853 D
FM ALARM CLOCK
WARRANTY
JAMSTVO
1.
Uređaj je zajamčen 24 mjeseca od datuma proizvodnje navedenog na naljepnici na proizvodu.
2.
Jamstvo se primjenjuje samo na uređaje koji nisu neovlašteno mijenjani, a popravljaju ih TREVI servisni centri, uključujući
popravak komponenti za proizvodne nedostatke, isključujući naljepnice, gumbe i dijelove koji se mogu ukloniti.
3.
TREVI nije odgovoran za izravnu ili neizravnu štetu na imovini i / ili osobama uzrokovanu uporabom ili obustavom uporabe
uređaja.
WARRANTY
1.
Thisunitisguaranteedforaperiodof24monthsfromthedateofproductionprintedontheproductitselforonlabelonproduct.
2.
The warranty is valid only if the unit has not been tampered with. The warranty is valid only at authorized TREVI assistance centres,
that will repair manufacturing defects, excluded replacement of labels and removable parts.
3.
TREVIisnot liablefordamage topeopleorthingscaused bytheuseofthisunitorbytheinterruptioninthe useofthisunit.
GARANTIE
1.
L’appareil est garanti pendant une période de 24 mois de la date de fabrication indiquée sur l’étiquette se trouvant sur le produit.
2.
Lagarantie n’estappliquée que sur les appareils non altérés, ayant été réparés chez unService Après-Vente TREVI. Ellecomprend la
réparationdescomposantesàlasuitededéfautsdefabrication,àl’exclusiond’étiquettes,boutonsderéglageetpartiesamovibles.
3.
TREVInerépondpasdesdommagesdirects ou indirectsauxchoses et/ouauxpersonnesentraînés pendantl’usageoulasuspension
d’usage de l’appareil.
GARANTIEBESTIMMUNGEN
1.
Das Gerät hat eine Garantie von 24 Monaten ab dem Herstellungsdatum. Das Herstellungsdatum ist auf der am Produkt angebrachte n
Etikette angegeben.
2.
Die Garantie gilt nur für Geräte, an denen nicht selbst ausgeführte Reparaturen erfolgt sind, sondern die von TREVI-Kundendienststellen
durchgeführt wurden. Die Garantie umfaßt die Reparatur von Bauteilen, wenn diese auf Herstellungsfehler zurückzuführen sind. Die
Garantie gilt hingegen nicht für Etiketten, Drucktasten, Knöpfe und entfernbare Teile.
3.
TREVI haftet nicht für direkte oder indirekte Sach- und/oder Personen schäden, die vom Gebrauch des Gerätes verursacht worden
sind.
GARANTIA
1.
Elaparato tiene una garantía de24meses a partir delafecha de fabricación indicada enlatarjeta sobre elproducto.
2.
La garantía está aplicada solamente a los productos no desarreglados y reparados por los centros de asistencia TREVI. Además,
la garantía incluye la reparación de loscomponentes a causa dedefectos defabricación, con laexclusión de etiquetas,botones y
partes removibles.
3.
TREVI no es responsable por daños directos o indirectos a cosas y/o personas causados por el uso o suspensión del uso del
aparato.

DICHIARAZIONE DI CONFORMITÀ UE
SEMPLIFICATA
Il fabbricante TREVI dichiara che l’apparecchio
RC 853 D è conforme alla direttiva 2014/53/UE.
Il testo completo della dichiarazione di conformità EU
è disponibile al seguente indirizzo Internet www.trevi.it
SIMPLIFIED EU DECLARATION OF
CONFORMITY
Hereby TREVI Spa declares that the equipment type
RC 853 D is in compliance with directive 2014/53 /EU.
The full text of the EU declaration of conformity is
available at the following internet address www.trevi.it
Trevi S.p.a.
Strada Consolare Rimini-San Marino, 62
47924 Rimini (RN) Italy
Tel. 0541/756420 - Fax 0541/756430
www.trevi.it - E-mail: info@trevi.it
Made inCHINA
Other manuals for RC 853 D
1
Table of contents
Languages:
Other Trevi Alarm Clock manuals

Trevi
Trevi ME 3140 User manual

Trevi
Trevi SL 3050 S User manual

Trevi
Trevi RC 850 BL User manual

Trevi
Trevi SL 3098RC User manual

Trevi
Trevi ME 3105 User manual

Trevi
Trevi EC 883 BL User manual

Trevi
Trevi RC 821 D User manual

Trevi
Trevi EC 885 User manual

Trevi
Trevi RC 829 User manual

Trevi
Trevi EC 880 User manual

Trevi
Trevi SLD 3860 User manual

Trevi
Trevi RC 830D User manual

Trevi
Trevi RC 853 D User manual

Trevi
Trevi RC 832 User manual

Trevi
Trevi PJ 3026 User manual

Trevi
Trevi ME 3106 User manual

Trevi
Trevi SL 3840 User manual

Trevi
Trevi RC 820 User manual

Trevi
Trevi ME 3106 User manual

Trevi
Trevi RC 860BL User manual