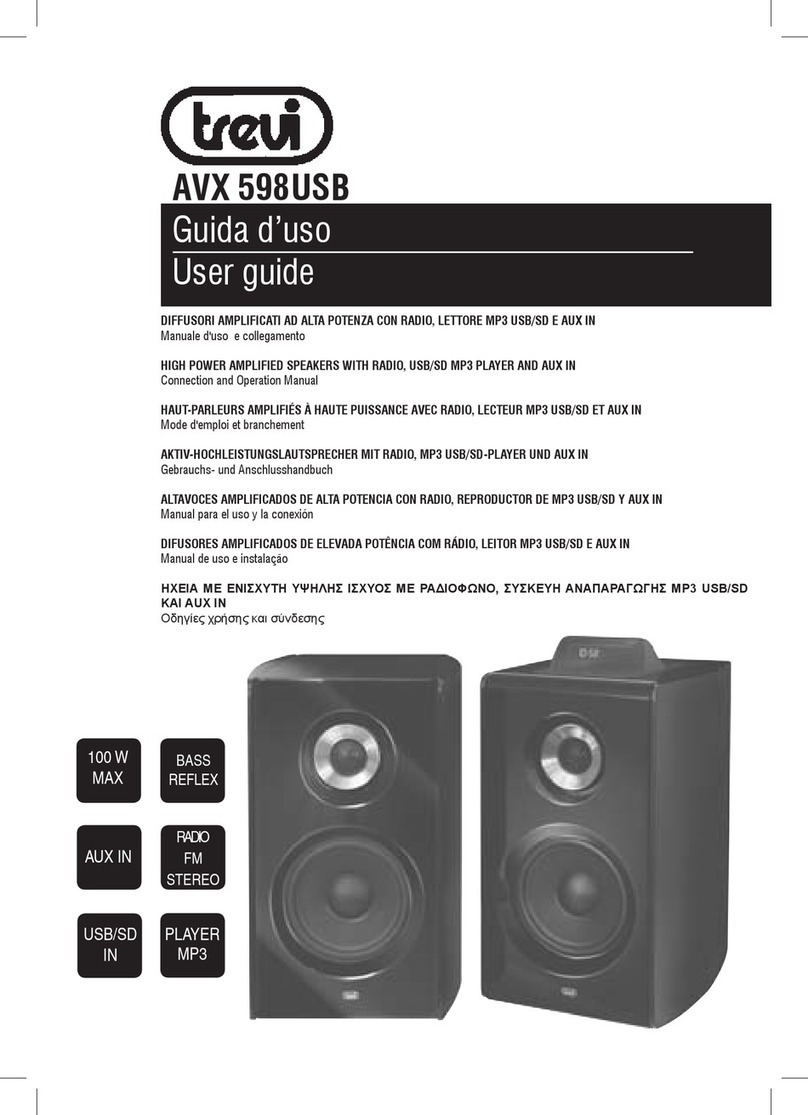
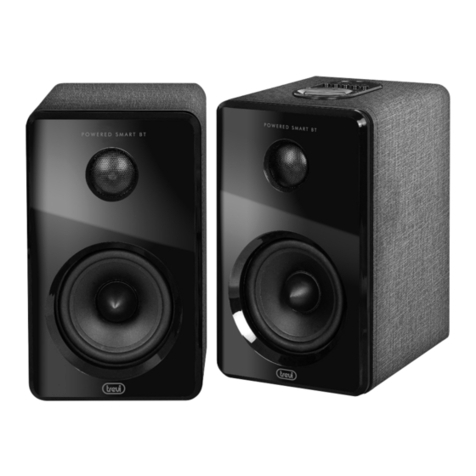
Trevi AVX 565 BT User manual

DIFFUSORI AMPLIFICATI CON
LETTORE MP3/USB/microSD/AUX IN E
BLUETOOTH®
Manuale d'uso e collegamento
AMPLIFIED SPEAKERS WITH
MP3/USB/microSD/AUX PLAYER AND
BLUETOOTH®
Connection and Operation Manual
HAUT-PARLERURS AMPLIFIEE DANS
MP3/USB/microSD/AUX ET
BLUETOOTH®
Mode d'emploi et branchement
AKTIVLAUTSPRECHER MIT
MP3/USB/microSD/AUX UND
BLUETOOTH®
Gebrauchs- und Anschlusshandbuch
ALTAVOZ AMPLIFICADO CON
LECTOR DE MP3/USB/microSD/AUX IN E
BLUETOOTH®
Manual para el uso y la conexión
AVX 565 BT
MANUALE ISTRUZIONI
INSTRUCTION'S MANUAL
50W
MAX
BASS
REFLEX
BLUETOOTH
CONNECTION
USB
MicroSD
AUX IN
Per informazioni integrative ed aggiornamenti su questo prodotto visita www.trevi.it
For additional information and updates of this product see www.trevi.it

WARNING!
WARNING: DO NOT OPEN THE SET. NEITHER CONTROLS OR SPARE
PARTSTO BE USED BYTHE USER ARETO BE FOUND INSIDE IT.APPLYTO
AUTHORISEDTREVI CENTERS FOR SERVICE OPERATIONS.
ATTENZIONE
RISCHIO DI SCOSSEELETTRICHE!
NON ESPORRE A PIOGGIA E
UMIDITÀ
ATTENZIONE: NON APRITE L'APPARECCHIO. ALL'INTERNO NON VI
SONO COMANDI MANIPOLABILI DALL'UTENTE NE PARTI DI RICAMBIO.
PER TUTTE LE OPERAZIONI DI SERVIZIO RIVOLGERSI AD UN CENTRO
DI ASSISTENZA AUTORIZZATO TREVI
DANGER OF ELECTRIC SHOCK!
DO NOT EXPOSE TO
RAIN OR HUMIDITY
ATTENTION
ATTENTION: NE PAS OUVRIR L’APPAREIL, A L’INTERIEUR IL N’Y A PAS
DE COMMANDES A MANIPULER PAR L’UTILISATEUR OU DE PIECES
DE RECHANGE. POUR TOUTES LES OPERATIONS DE SERVICE IL FAUT
S’ADRESSER A UN SERVICE D’ASSISTANCE AUTORISE TREVI.
RISQUE DE DECHARGES
ELECTRIQUES
NE PAS EXPOSER A LA PLUIE ET A
L’HUMIDITE
ACHTUNG
ACHTUNG: DAS GERÄT NICHT ÖFFNEN. IM INNERN BEFINDEN SICH
KEINEVOM BENUTZER SELBST INSTANDSETZBARENTEILE UND AUCH
KEINE ERSATZTEILE.FÜR JEGLICHE SERVICEARBEITEN,WENDEN SIE SICH
BITTE AN EINETREVI AUTORISIERTEN KUNDENDIENSTSTELLE.
GEFAHR ELEKTRISCHER SCHLÄGE
NICHT DER FEUCHTIGKEIT UND
DEM REGEN AUSSETZEN
ATENCION
ATENCION:NOABRIR ELAPARATO,EN SU INTERIOR NO HAY MANDOS
QUE PUEDAN SER MANIPULADOS POR EL USUARIO NI PARTES DE
REPUESTO. PARA TODAS LAS OPERACIONES DE SERVICIO DIRIGIRSE A
UN CENTRO DE ASISTENCIA AUTORIZADO TREVI.
PELIGRO DE CHOQUES
ELECTRICOS
NO EXPONER A LLUVIAY
HUMEDAD
UK PLUG ONLY
WIRES CONNECTIONS TO A UK
THREE-PIN PLUG
The wires in this mains lead are coloured in accordance with the following
wiring codes:
Blue: Neutral
Brown: Live
Thewires inthis mainslead mustbe connectedto theterminals inthe plugas follows:
Blue wire: N or Black
Brown wire: L or Red
Neither wire is to be connected
to the earth (E or W) terminal of
three-pin plug.
Should the fuse fail in the plug remove
the plug form the wall socket and
replace the fuse with a 3Amp.ASTA
approved BS 1362 fuse.
Per evitare possibili danni all’udito, limitare il
tempo di ascolto a volumi elevati.
Para evitar posibles daños a la audición, limitar
el tiempo de escuchar a un volumen alto.
Um Hörschäden zu vermeiden, begrenzen Sie
die Zeit bei hoher Lautstärke zu hören.
Pour éviter d’éventuels dommages auditifs,
limiter le temps d’écoute à volume élevé.
To avoid possible hearing damage, limit the
time listening at high volumes
2
AVX 565 BT WARNING!

COLLEGAMENTO A DISPOSITIVI ESTERNI
CONNECTINGTO EXTERNAL DEVICES
CONNEXION À DES PÉRIPHÉRIQUES EXTERNES
VERBINDUNG MIT EXTERNEN GERÄTEN
CONEXIÓN A DISPOSITIVOS EXTERNOS
Telefoni cellulari/
Smartphone
DVD/Mpeg4 Player
TV/Monitor
*All'uscita audio RCA (Cavo Jack 3.5mm/RCA non incluso)
To RCA audio output (3.5mm Jack cable/RCA cable not included)
À la sortie audio RCA (câble Jack 3.5mm/RCA non fourni)
RCA Audioausgang (Jack 3.5mm/RCA-Kabel nicht im Lieferumfang enthalten)
A la salida de audio RCA (Jack 3.5mm/RCA cable no incluido)
** AllapresacufaoLine-outdeldispositivo
To headphones socket or Line-out of device
Prise d’écouteurs ou de Line-out appareil
Kopfhörerbuchse oder Line-out des Geräts
Toma de auriculares o Line-out de dispositivo
Personal Computer/
Notebook
MP3 Player
**
** **
**
*
- TREVI persegue una politica di continua ricerca e sviluppo. Pertanto i prodotti possono presentare caratteristiche
diverse da quelle descritte.
- TREVI pursues a policy of continuous research and development.Therefore,the products may have different features
from those described.
- TREVI poursuit une politique de recherche et développement continue. Par conséquent, les produits peuvent avoir
des caractéristiques différentes de celles décrites.
- TREVI verfolgt eine Politik der kontinuierlichen Forschung und Entwicklung. Daher können die Produkte andere
Merkmale als die beschriebenen aufweisen.
- TREVI sigue una política de investigación y desarrollo continuos.Por tanto,los productos pueden tener características
diferentes a las descritas.
3
AVX 565 BT

COMANDI / CONTROLS / COMMANDES / KONTROLLE / CONTROLES
REMOTE
REMOTE
REMOTE
3
4
1
6
2
5
7
8
10
9
11
13
14
15
13
12
18
17
16
14
19
+/:
-/9
4
AVX 565 BT

AVVERTENZE E NOTE D'USO
Questo apparecchio è uno strumento elettronico di alta precisione, evitate quindi di utilizzarlo nei seguenti casi:
• Vicino a campi magnetici.
• Vicino a fonti di calore come caloriferi e stufe.
• In luoghi molto umidi come stanze da bagno, piscine, ecc...
• In luoghi molto polverosi o soggetti a forti vibrazioni.
• Non avvicinare l’orecchio all’altoparlante durante le fasi di messa punto e regolazioni del volume e, in particolare, tenere il volume al
minimo nella fase di accensione.Ascoltare a volume alto per lungo tempo, potrebbe danneggiare il vostro udito.
• Posizionare l’apparecchio in modo che ai suoi lati ci sia sempre abbastanza spazio per la libera circolazione di aria (almeno 5cm).
• Se dei liquidi penetrano all’interno dell’apparecchio scollegare immediatamente la spina dalla presa e portare l’apparecchio al più vicino
centro assistenza autorizatoTREVI.
• Controllare sempre prima di ricaricare l’apparecchio, che i cavi di alimentazione e di collegamento siano installati correttamente.
• Nessunasorgentediammanuda,qualicandeleaccese,dovrebbeesserepostasull’apparecchio.
• L’apparecchio non deve essere esposto a stillicidio o a spruzzi d’acqua e nessun oggetto pieno di liquido, quali vasi, deve essere posto
sull’apparecchio.
• Conservare il presente manuale per futuri riferimenti.
CURA E MANUTENZIONE
Per la pulizia si consiglia l’uso di un panno morbido, leggermente inumidito. Evitate solventi o sostanze abrasive.
IMPORTANTE
Questo dispositivo e' progettato per uso domestico non professionale. La buona costruzione di questo apparecchio ne garantisce per lungo
tempo il perfetto funzionamento. Se tuttavia dovesse presentarsi qualche inconveniente, sarà opportuno consultare il più vicino Centro
Assistenza autorizzato TREVI.
DESCRIZIONE COMANDI
1. Presa di alimetazione 100-240V~50/60Hz
2. Interruttore di accensione ON/OFF
3. Uscita per collegamento altoparlante satellite
4. Ingresso AUX jack Ø3,5mm
5. Ingresso micro-SD Card
6. Ingresso USB
7. Tasto MODE,se premuto una volta ha la stessa funzione del tasto
PLAY/PAUSA. Se premuto a lungo seleziona l'ingresso attivo
8. Tasto VOL +/ NEXT, premuto piu' volte aumenta il volume, se
premuto a lungo seleziona la traccia successiva
9. Tasto VOL -/ PREV, premuto piu' volte diminuisce il volume, se
premuto a lungo seleziona la traccia precedente
10. Presacufe
11. Tasto accensione/standby
12. Tasto MUTE, per silenziare gli altoparlanti
13. Tasti controllo volume
14. Tasti PREV/NEXT, traccia precedente/successiva
15. Tasto PLAY/PAUSA, avvia/sospende la riproduzione
16. Tasto BT, selezione funzione BT e selezione ingresso attivo
17. Tasti TRE -/+, controllo toni alti
18. Tasti BASS -/+, controllo toni bassi
19. Tasto RESET, riporta i controlli toni al valore di fabbrica
COLLEGAMENTO DEGLI ALTOPARLANTI
Collegare l'altoparlante satellite all'altoparlante amplicato tramite la
presa (3).
ACCENSIONE E REGOLAZIONI
1. Portare l’interruttore di accensione ON/OFF (2) sulla posizione
ON per accendere l’apparecchio;
2. Regolare il volume generale premendo piu' volte i tasti (8) e (9)
sullatastieracomandidell'altoparlanteamplicatooppuretramitei
tasti (13) del telecomando.Tramite il tasto MUTE(12) e' possibile
silenziare immediatamente l'apparecchio,ripremerlo per ripren-
dere l'ascolto;
3. Portare l’interruttore di accensione ON/OFF (2) sulla posizione
OFF per spegnere l’apparecchio;
4. Premere il tasto (11) per portare l'apparecchio in modo standby,
premere di nuovo per accendere.
Nota:dopo un certo tempo in assenza di riproduzione sonora l'apparecchio
si porta in standby in maniera automatica.Tenere premuto il tasto MODE
per riattivare le casse.
UTILIZZO DEL LETTORE MP3
1. Inserire una memoria micro-SD nell’ingresso micro-SD Card (5)
tenendo i contatti elettrici verso il basso o un dispositivo USB
nell’ingresso USB (6).La riproduzione si avvierà automaticamante;
2. Premere il tasto PLAY/PAUSE (15) per arrestare momentanea-
mente la riproduzione. Ripremerlo per riavviarla;
3. Premere il tasto NEXT o PREV(14) per portarsi sulla traccia
successiva o precedente;
4. Premere a lungo piu' volte il tasto MODE (7) per commutare tra
gli ingressi USB, micro-SD (TF card) e Bluetooth. Il led acceso
vicino al tasto MODE sulla tastiera dell'altoparlante indica la
sorgente selezionata.
UTILIZZO DELL'INGRESSO LINE IN
1. Collegare un cavo audio con presa Jack 3.5mm (non fornito)
all'ingressoAUX(4)postosulretrodell'altoparlanteamplicato
el'altrapresadelcavoaudioallapresacufaoall’uscitaline-out
di una sorgente audio;
Nota: si consiglia di non impostare un volume troppo alto della sorgente
audio per non saturare l’ingresso dei diffusori.
2. Premerealungopiu'volteiltastoMODE(7)noacommutare
sull'ingresso AUX.
UTILIZZO DELLA SORGENTE BLUETOOTH
1. Premere il tasto BT (16) per selezionare la funzione Bluetooth
(led BT/AUX acceso lampeggiante);
2. Si attiverà la modalità di accoppiamento, avviare la funzione
Bluetooth sul dispositivo da accoppiare e ricercare lo speaker
nominato "AVX 565 BT";
3. Adaccoppiamentoavvenutol'indicatoreledrimarràblusso;
4. Avviare la riproduzione musicale dal proprio dispositivo ed
utilizzare i tasti PLAY/PAUSE (15), NEXT e PREV (14) per la
gestione del riproduttore;
5. Premere a lungo il tasto PLAY/PAUSE (15) per disaccoppiare il
dispositivo ed effettuare una nuova operazione di accoppiamento.
CONTROLLOTONI
1. Tramite i tasti (17) è possibile regolare i toni alti;
2. Tramite i tasti (18) è possibile regolare i toni bassi.
PRESA CUFFIE
1. Inserirelecufenellapresacufe(10);
2. Accendere l'apparecchio e regolare il volume.
CARATTERISTICHE TECNICHE
Potenza Audio massima:.......................................50W
Risposta in frequenza ...........................................60Hz-20KHz
Potenza di trasmissione Bluetooth:...................2,5mW
Frequenza di trasmissione Bluetooth:...............2,4GHz
Batteria telecomando:..........................................CR2032
Alimentazione:........................................................100-240V~50/60Hz
Dimensioni unità:...................................................115x185x159mm
5
AVX 565 BTITALIANO
NOTES OF USE
Listen at high volume for long periods of time, may damage your hearing.
Avoid using it in the following cases:
• Near strong heat sources, such as central heating plants or stoves.
• In very humid places such as bathrooms, swimming pools, etc...
• In very dusty places or in places subject to strong vibrations.
• Position the appliance in such a way that there is always enough room for free air circulation (at least 5cm).
• Do not block the air inlets.
• If any liquid enters the appliance, unplug it immediately from the socket and take it to the nearest TREVI authorised
service centre.
• Before switching on the appliance, always check that the power cable and the connection cable are properly installed.
• Nonakedamesources,suchaslightedcandles,shouldbeplacedonthis.
• Theapparatusshallnotbeexposedtodrippingorsplashingwaterandnoobjectlledwithwater,suchasvases,should
be placed on the unit.
• Keep this manual for future reference.
CARE AND MAINTENANCE
For cleaning we recommend the use of a soft, slightly damp cloth.Avoid solvents or abrasives.
IMPORTANT
The good construction of this machine guarantees the perfect functioning for a long time. However, should any problem
arise, you should consult your nearest authorized service center.
COMMANDS DESCRIPTION
1. 100-240V ~ 50/60Hz supply socket
2. ON/OFF switch
3. Output connection for satellite speaker
4. AUX IN Ø3.5mm jack
5. Micro-SD Card input
6. USB input
7. MODE key, if pressed once it has the same function as
the PLAY/PAUSE key. If pressed for a long time it selects
the active input
8. VOL +/NEXT key, pressed several times increases the
volume, if pressed for a long time selects the next track
9. VOL -/PREV key, pressed several times decreases the
volume, if pressed for a long time it selects the previous
track
10. Headphone 3.5mm jack
11. Power/ Standby button
12. MUTE button
13. Volume control keys
14. PREV/NEXT keys
15. PLAY/ PAUSE button
16. BT button
17. TRE -/ + keys, high tone control
18. BASS -/ + keys, bass tone control
19. RESET key, default tone value
CONNECTINGTHE SPEAKERS
Connectthesatellitespeakertotheampliedspeakervia
the socket (3).
POWER ON/OFF AND ADJUSTMENTS
1. Turn the ON/OFF switch (2) to the ON position to
switch on the appliance;
2. Adjust the general volume by pressing the buttons (8)
and(9)onthecontrolpaneloftheampliedspeakeror
using the buttons (13) on the remote control. Using the
MUTE button (12) it is possible to silence the device
immediately, press it again to resume listening;
3. Turn the ON/OFF switch (2) to the OFF position to
switch off the appliance;
4. Press the button (11) to switch the device to standby
mode, press it again to switch it on.
Note: after a certain time, in the absence of sound reproduction,
the device automatically switches to standby.
USB/SD MP3 PLAYER
1. Insert a micro-SD memory in the micro-SD card input
(5) or a USB device in the USB input (6);
Playback will start automatically;
2. Press the PLAY/PAUSE button (15) to stop playback
temporarily. Press it again to restart it;
3. Press the NEXT or PREV (14) button to move to the
next or previous track;
4. Press the MODE button to switch between the USB/
micro-SD (TF card)/Bluetooth inputs. The led next to
the MODE key on the loudspeaker keypad indicates the
selected source.
AUX IN
1. Connect an audio cable with a 3.5mm Jack socket (not
supplied) to the AUX input (4) located on the rear of
theampliedspeakerandtheotheraudiocablesocket
to the line-out output of a audio source;
2. Press the MODE button (7) to switch to theAUX input.
BLUETOOTH
1. Press the BT button to switch to the Bluetooth function
(BT/AUXLEDonashing);
2. The pairing mode will be activated, start the Bluetooth
function on the device to be paired and search for the
speaker named "AVX 565 BT";
3. Once the coupling has been completed,the LED indicator
will remain blue;
4. Use the PLAY/PAUSE (15),NEXT and PREV (14) keys to
control BT device.
TONE CONTROL
1. Using the keys (17) it is possible to adjust the high tones.
2. Using the keys (18) it is possible to adjust the bass tones.
HEADPHONE
1. Insert the headphones into the headphone jack (10);
2. Turn on the unit and adjust the volume.
TECHNICAL FEATURES
Maximum Audio power: .......................... 50W
Frequency response:.................................. 60Hz-20KHz
Bluetooth transmission power: .............. 2,5mW
Bluetooth transmission frequency: ........ 2,4GHz
Remote control battery: .......................... CR2032
Power supply: ............................................. 100-240V~50/60Hz
Unit dimensions: ........................................ 115x185x159mm
6
AVX 565 BT ENGLISH

FRANÇAIS
NOTES D’EMPLOI
Cet appareil est un instrument électronique de haute précision; évitez donc de l’employer dans les cas suivants:
• A proximité de fortes sources de chaleur telles que des radiateurs ou tout appareil de chauffage.
• Dans des lieux très humides tels que des salles de bains, des piscines, etc...
• Dans des lieux très poussiéreux.
• Dans des lieux sujets à des fortes vibrations.
• Positionner l’appareil de façon à laisser toujours de l’espace pour la libre circulation de l’air à ses côtés (au moins 5cm).
• N’obstruez pas les fentes d’aération.
• Sidessubstancesliquidespénètrentàl’intérieurdel’appareil,débranchezimmédiatementlacheetapportezl’appareil
au centre d’assistance agrééTREVI le plus proche.
• Avantdemettrel’appareilenfonction,vérieztoujoursquelescâblesd’alimentationetdeconnexionsoientcorrecte-
ment installés.
• L'appareil ne doit pas être exposé à des gouttes d'eau ou des éclaboussures et aucun objet rempli d'eau, comme des
vases, ne doit être placé sur l'appareil.
• Conservez ce manuel pour référence future.
SOIN ET ENTRETIEN
Pour le nettoyage on conseille l’emploi d’un chiffon doux,légèrement imbibé.Evitez les solvants ou les substances abrasives.
IMPORTANT
La bonne construction de cette machine garantit un fonctionnement parfait pendant longtemps. Cependant, en cas de
problème, vous devez consulter votre centre de service agréé le plus proche.
DESCRIPTION DES COMMANDES
1. Prise d'alimentation 100-240V ~ 50/60Hz
2. Interrupteur Marche/Arrêt
3. Connexion de sortie pour haut-parleur satellite
4. Jack AUX IN Ø3.5mm
5. Entrée de carte Micro-SD
6. Entrée USB
7. La touche MODE, si elle est pressée une fois,a la même
fonction que la touche PLAY/PAUSE. Si vous appuyez
longtemps dessus, il sélectionne l'entrée active
8. Touche VOL +/NEXT, enfoncée plusieurs fois pour
augmenter le volume. Si elle est enfoncée pendant une
longue période, sélectionne la piste suivante.
9. Touche VOL -/PREV, enfoncée plusieurs fois pour dimi-
nuer le volume. Si elle est enfoncée longtemps, la piste
précédente est sélectionnée.
10. Prise casque jack 3,5 mm
11. Bouton d'alimentation/Veille
12. Bouton MUTE
13. Touches de contrôle du volume
14. Touches PREV/NEXT
15. Touche PLAY/PAUSE
16. Bouton BT
17. Touches TRE -/ +, commande de tonalité élevée
18. Touches BASS -/ +, contrôle de la tonalité des basses
CONNECTER LES HAUT-PARLEURS
Connectez l'enceinte satellite à l'enceinte ampliée via la
prise (3).
MARCHE/ARRÊT ET RÉGLAGES
1. Mettez l'interrupteur ON/OFF (2) sur ON pour allumer
l'appareil;
2. Réglez le volume général en appuyant sur les touches (8)
et (9) du panneau de commande ou enutilisant les touches
(13) de la télécommande.À l’aide du bouton MUTE (12),
il est possible de mettre immédiatement l’appareil en
sourdine.Appuyez à nouveau pour reprendre la lecture;
3. Mettez l'interrupteur ON/OFF (2) en position OFF pour
éteindre l'appareil;
4. Appuyez sur le bouton (11) pour mettre l'appareil en
mode veille, appuyez à nouveau pour l'allumer.
Remarques:après un certain temps,en l'absence de reproduction
du son, l'appareil se met automatiquement en veille.
LECTEUR MP3 USB/SD
1. Insérez une carte mémoire micro-SD dans l'entrée de la
carte micro-SD (5) ou un périphérique USB dans l'entrée
USB (6). La lecture commencera automatiquement;
2. Appuyez sur le bouton PLAY/PAUSE (15) pour arrêter
la lecture temporairement.Appuyez à nouveau pour le
redémarrer;
3. Appuyez sur le bouton NEXT ou PREV (14) pour passer
à la piste suivante ou précédente;
4. Appuyez sur le bouton MODE (7) pour basculer entre
les entrées USB/micro-SD (carte TF)/ Bluetooth. Le
voyant situé à côté de la touche MODE sur le clavier du
haut-parleur indique la source sélectionnée.
AUX IN
1. Connectezuncâbleaudioavecuneprisejack3,5mm
(non fournie) à l’entrée AUX (4);
2. Appuyez sur le bouton MODE pour passer à l'entrée
AUX.
BLUETOOTH
1. Appuyez sur le bouton BT (16) pour passer à l’entrée
Bluetooth (les voyants BT/AUX clignotent);
2. Le mode de couplage sera activé, démarrez la fonction
Bluetooth sur le périphérique à coupler et recherchez
le nom "AVX 565 BT";
3. Le voyant reste bleu;
4. Utilisez les touches PLAY/PAUSE (15), NEXT et PREV
(14) pour contrôler le périphérique BT.
CONTRÔLE DETONALITÉ
1. En utilisant les touches (17), il est possible de régler les
tonalités aiguës.
2. Les touches (18) permettent de régler les graves.
HEADPHONE
1. Insérez le casque dans la prise casque (10);
2. Allumez l'appareil et réglez le volume.
CARACTERISTIQUESTECHNIQUES
Puissance totale maximale: ...................... 50W
Réponse en fréquence: ............................ 60Hz-20KHz
Puissance de transmission Bluetooth: .. 2,5mW
Fréquence de transmission Bluetooth: . 2,4GHz
Pile de télécommande: ............................. CR2032
Source de courant: .................................... 100-240V~50/60Hz
Dimensions de l'unité: .............................. 115x185x159mm
7
AVX 565 BTFRANCAIS

DEUTSCH ESPAÑOL
ANWEISUNGEN ZUM GEBRAUCH
Dieses Gerät ist ein elektronisches Instrument höchster Präzision;Vermeiden Sie es in den folgenden Fällen:
• In der Nähe von Wärmequellen, wie z.B. Heizkörpern oder Öfen.
• In sehr feuchten Räumen, wie z.B. Badezimmern, Schwimmbädern, usw.
• In sehr staubigen Räumen, oder an Plätzen, die starkenVibrationen ausgesetzt sind.
• Das Gerät muß so aufgestellt werden,daß an den Seiten genügend Raum für den freien Luftumlauf vorhanden ist (mindestens
5cm).
• DieVentilationsöffnungen nicht abdecken.
• Sollten Flüssigkeiten im Innern des Geräts eindringen, ziehen Sie den Stecker sofort aus der Steckdose und bringen Sie
das Gerät in die nächstgelegene TREVI-autorisierte Kundendienststelle.
• Vor Inbetriebnahme des Gerätes überprüfen Sie stets, daß die Netzkabel und die Verbindungskabel ordnungsgemäß
installiert sind.
• Das Gerät darf keinem tropfenden oder spritzendenWasser ausgesetzt werden,und es dürfen keine mitWasser gefüllten
Gegenstände wieVasen auf das Gerät gestellt werden.
• Bewahren Sie dieses Handbuch zum späteren Nachschlagen auf.
PFLEGE UND WARTUNG
ZumReinigenbenutzenSieeinenleichtangefeuchteten,weichenLappen.Verwenden Sie keineLösungsmitteloderScheuermittel.
WICHTIG
Die gute Konstruktion dieser Maschine garantiert lange Zeit die einwandfreie Funktion.Sollten jedoch Probleme auftreten,
wenden Sie sich an das nächstgelegene autorisierte Servicecenter.
BEFEHLSBESCHREIBUNG
1. 100-240V ~ 50/60Hz Versorgungsbuchse
2. ON/OFF, EIN/AUS-Schalter
3. Ausgangsverbindung für Satellitenlautsprecher
4. Buchse AUX IN Ø3.5mm
5. Micro-SD-Karteingang
6. USB-Eingang
7. MODE-Taste, wenn sie einmal gedrückt wird, hat sie
dieselbe Funktion wie die PLAY/PAUSE-Taste. Durch
langes Drücken wird der aktive Eingang ausgewählt
8. VOL +/NEXT -Taste, mehrmals gedrückt, erhöht die
Lautstärke,bei längerem Drücken wird der nächsteTitel
ausgewählt
9. Taste VOL -/PREV, mehrmals gedrückt, verringert die
Lautstärke, bei längerem Drücken wird der vorherige
Titel ausgewählt
10. Kopfhöreranschluss
11. Power/Standby-Taste
12. MUTE-Taste
13. Lautstärkeregler
14. PREV/NEXT-Tasten
15. PLAY/PAUSE-Taste
16. BT-Taste
17. TRE - /+ - Tasten, hohe Klangregelung
18. BASS - /+ - Tasten, Bassregler
VERBINDEN DER LAUTSPRECHER
Verbinden Sie den Satellitenlautsprecher über die Buchse
(3) mit dem verstärkten Lautsprecher.
POWER ON/OFF UND EINSTELLUNGEN
1. Stellen Sie den ON/OFF-Schalter (2) auf ON, um das
Gerät einzuschalten;
2. Stellen Sie die allgemeine Lautstärke ein, indem Sie die
Tasten (8) und (9) auf dem Bedienfeld oder die Tasten
(13) auf der Fernbedienung drücken.Mit der MUTE-Taste
(12) können Sie das Gerät sofort stummschalten.Drücken
Sie es erneut, um das Hören fortzusetzen;
3. Stellen Sie den ON/OFF-Schalter (2) auf AUS, um das
Gerät auszuschalten;
4. Drücken Sie dieTaste (11),um das Gerät in den Standby-
Modus zu schalten. Drücken Sie es erneut, um es einzu-
schalten.
Hinweise:Nach einer gewissen Zeit schaltet das Gerät bei Fehlen
der Tonwiedergabe automatisch in den Standby-Modus.
USB/SD-MP3-PLAYER
1. Setzen Sie eine Micro-SD-Speicherkarte in denMicro-SD-
Karteneingang (5) oder ein USB-Gerätin denUSB-Eingang
(6) ein. Die Wiedergabe startet automatisch;
2. Drücken Sie dieTaste PLAY/PAUSE (15),um dieWieder-
gabe vorübergehend zu stoppen.Drücken Sie erneut,um
es erneut zu starten;
3. Drücken Sie die NEXT- oder PREV-Taste (14), um zum
nächsten oder vorherigenTitel zu wechseln;
4. Drücken Sie die MODE-Taste (7),um zwischen den USB/
Micro-SD (TF-Karte)/ Bluetooth-Eingängen zu wechseln.
Die LED neben der MODE-Taste auf der Lautsprecher-
tastatur zeigt die ausgewählte Quelle an.
AUX IN
1. Schließen Sie einAudiokabel mit einer3,5-mm-Klinkenbu-
chse (nicht mitgeliefert) an dieAUX-Eingangskabel (4) des
Audio-Kabelsan den Line-Out-Ausgang einerAudioquelle an;
2. Drücken Sie die MODE-Taste (7), um zumAUX-Eingang
zu wechseln.
BLUETOOTH
1. Drücken Sie die BT-Taste (16),um zum Bluetooth-Eingang
zu wechseln (BT/AUX-LED blinkt);
2. Der Pairing-Modus wird aktiviert. Starten Sie die Blue-
tooth-Funktion des zu koppelnden Geräts und suchen
Sie nach dem genannten Lautsprecher "AVX 565 BT";
3. Die LED-Anzeige bleibt blau;
4. Verwenden Sie dieTasten PLAY/PAUSE (15), NEXT und
PREV (14), um das BT-Gerät zu steuern.
TONE CONTROL
1. Mit denTasten (17) können Sie die hohenTöne einstellen.
2. Mit den Tasten (18) können Sie die Basstöne einstellen.
KOPFHÖRER
1. Stecken Sie den Kopfhörer in die Kopfhörerbuchse (10);
2. Schalten Sie das Gerät ein und stellen Sie die Lautstärke ein.
TECHNISCHE EIGENSCHAFTEN
Maximale Gesamtleistung: ....................... 50W
Frequenzgang: ............................................. 60Hz-20KHz
Bluetooth-Sendeleistung: ......................... 2,5mW
Bluetooth-Übertragungsfrequenz: ......... 2,4GHz
Batterie der Fernbedienung: ................... CR2032
Stromversorgung: ...................................... 100-240V~50/60Hz
Geräteabmessungen: ................................ 115x185x159mm
8
AVX 565 BT DEUTSCH

NOTAS DE UTILIZACION
Este aparato es un instrumento electrónico de alta precisión, evite utilizarlo en los siguientes casos:
• En proximidad de fuentes de calor como caloríferos y estufas.
• En lugares donde exista alto grado de humedad como por ejemplo cuartos de baño, piscinas, etc...
• En lugares muy polvorientos es sujetos a fuertes vibraciones.
• Coloqueelaparatodemodoqueporsusladosexistaelespaciosucienteparaqueelairepuedacircularsiempre
libremente (por lo menos 5cm).
• Noobstruyalosoriciosdeventilación.
• Si entra líquido en el aparato, desconecte inmediatamente el enchufe de la corriente y lleve el aparato al centro de
asistencia TREVI más cercano.
• Controle siempre, antes de poner en funcionamiento el aparato, que los cables de alimentación y de conexión estén
instalados correctamente.
• El aparato no debe exponerse a goteos o salpicaduras de agua y no debe colocarse ningún objeto lleno de agua, como
jarrones, sobre la unidad.
• Conserve este manual para consultarlo en el futuro.
CUIDADOSY MANTENIMIENTO
Para la limpieza se aconseja utilizar un paño suave, ligeramente humedecido. Evitar disolventes y sustancias abrasivas.
IMPORTANTE
La buena construcción de esta máquina garantiza el perfecto funcionamiento durante mucho tiempo. Sin embargo,si surge
algún problema, debe consultar con el centro de servicio autorizado más cercano.
DESCRIPCION DE LOS COMANDOS
1. 100-240V ~ 50/60Hz fuente de alimentación
2. Interruptor ON/OFF
3. Conexión de salida para altavoz satélite.
4. Jack AUX IN Ø3.5mm
5. Entrada de tarjeta micro-SD
6. Entrada USB
7. La tecla MODE, si se presiona una vez, tiene la misma
función que la tecla PLAY/PAUSE. Si se presiona durante
mucho tiempo, selecciona la entrada activa.
8. La teclaVOL +/NEXT,presionada varias veces aumenta el
volumen,si se presiona durante mucho tiempo selecciona
la siguiente pista
9. La tecla VOL -/PREV, presionada varias veces disminuye
el volumen, si se presiona por un tiempo prolongado,
selecciona la pista anterior
10. Toma de auriculares
11. Botón de Encendido/En espera
12. Botón MUTE
13. Teclas de control de volumen
14. Teclas PREV/NEXT
15. Botón PLAY/PAUSE
16. Botón BT
17. TRE -/ + teclas, control de tono alto
18. BASS -/ + teclas, control de tono de bajos
CONECTANDO LOS ALTAVOCES
Conecteelaltavozsatélitealaltavozamplicadoatravés
de la toma (3).
ENCENDIDO/APAGADOY AJUSTES
1. Ponga ON/OFF (2) en la posición ON para encender el
aparato;
2. Ajuste el volumen general presionando los botones (8)
y (9) en el panel de control o usando los botones (13)
en el control remoto. Usando el botón MUTE (12) es
posible silenciar eldispositivo inmediatamente,presionarlo
nuevamente para continuar escuchando;
3. Ponga ON/OFF (2) en la posición de OFF para apagar el
aparato;
4. Presione el botón (11) para cambiar el dispositivo al modo
de espera, presiónelo nuevamente para encenderlo.
Notas:después de un cierto tiempo,en ausencia de reproducción de
sonido,el dispositivo cambia automáticamente al modo de espera.
REPRODUCTOR MP3 USB/SD
1. Inserte una tarjeta de memoria micro-SD en la entrada de
la tarjeta micro-SD (5) o un dispositivo USB en la entrada
USB (6). La reproducción comenzará automáticamente;
2. Presione el botón PLAY/PAUSE (15) para detener la
reproducción temporalmente. Presiónelo nuevamente
para reiniciarlo;
3. Presione el botón NEXT y PREV (14) para moverse a la
pista siguiente o anterior;
4. Presione el botón MODE (7) para cambiar entre las
entradas USB/micro-SD (tarjeta TF)/ Bluetooth. El led
junto a la tecla MODE en el teclado del altavoz indica la
fuente seleccionada.
AUX EN
1. Conecte un cable de audio con un conector Jack de 3,5
mm (no suministrado) al conector de cable de audio de
la entrada AUX (4) a la salida de salida de línea de una
fuente de audio;
2. Presione el botón MODE (7) para cambiar a la entrada
AUX.
BLUETOOTH
1. Presione el botón BT (16) para cambiar a la entrada de
Bluetooth (BT/AUX LED parpadea);
2. Se activará el modo de emparejamiento,inicie la función
Bluetooth en el dispositivo que seva a emparejar y busque
el altavoz nombrado "AVX 565 BT";
3. El indicador LED permanecerá en azul;
4. Utilice las teclas PLAY/PAUSE (15), NEXT y PREV (14)
para controlar el dispositivo BT.
CONTROL DETONO
1. Usando las teclas (17) es posible ajustar los tonos altos.
2. Usando las teclas (18) es posible ajustar los tonos bajos.
AURICULARES
1. Inserte los auriculares en la toma de auriculares (10);
2. Encienda la unidad y ajuste el volumen.
CARACTERISTICASTECNICAS
Potencia total máxima: ............................. 50W
Respuesta de frecuencia: ......................... 60Hz-20KHz
Potencia de transmisión Bluetooth: ...... 2,5mW
Frecuencia de transmisión Bluetooth: .. 2,4GHz
Batería de control remoto: ..................... CR2032
Fuente de alimentación: ........................... 100-240V~50/60Hz
Dimensiones de la unidad: ...................... 115x185x159mm
9
AVX 565 BTESPANOL

INFORMAZIONI AGLI UTENTI ai sensi del Decreto Legislativo N°49 del 14 Marzo 2014
“Attuazione della Direttiva 2012/19/UE sui riuti di apparecchiature elettriche ed elettroniche (RAEE)”
Ilsimbolodelcassonettobarratoriportatosull’apparecchiaturaindicacheilprodottoallanedellapropriavitautiledeve
essereraccoltoseparatamentedaglialtririuti.L’utentedovrà,pertanto,conferirel’apparecchiaturaintegradeicomponenti
essenzialigiuntaanevitaagliidoneicentridiraccoltadifferenziatadeiriutielettroniciedelettrotecnici,oppurericonse-
gnarla al rivenditore al momento dell’acquisto di nuova apparecchiatura di tipo equivalente, in ragione di uno a uno,oppure
1 a zero per le apparecchiature aventi lato maggiore inferiore a 25cm.L’adeguata raccolta differenziata per l’avvio successivo
dell’apparecchiatura dimessa al riciclaggio, al trattamento e allo smaltimento ambientale compatibile contribuisce ad evitare
possibili effetti negativi sull’ambiente e sulla salute e favorisce il riciclo dei materiali di cui è composta l’apparecchiatura.Lo
smaltimento abusivo del prodotto da parte dell’utente comporta l’applicazione delle sanzioni amministrative di cui al D.Lgs
n. Decreto Legislativo N°49 del 14 Marzo 2014.
Precautions for correct disposal of the product.
The symbol shown on the equipment indicates that waste must be disposed of in“separate collection” and so the product
must not be disposed of together with urban waste.
The user must take the product to special “separate waste collection centres” provided by local government, or deliver it
to the retailer against the purchase of a new product.
Separate collection of waste and subsequent treatment, recycling and disposal operations promotes the production of
equipment with recycled materials and limits negative effects on the environment and on health caused by improper
handling of waste.
Illegal disposal of the product leads to the enforcement of administrative penalties.
Recommandations pour l’élimination correcte du produit.
Lesymbolegurantsurl’appareilindiquequeleproduitfaitl’objetd’une“collecteséparée“.C’estpourquoi,leproduitne
doit pas être éliminé avec les déchets urbains.
L’utilisateur doit remettre le produit auprès de“décharges spécialisées de collecte séparée“ prévues par les autorités locales,
ou bien le rendre au revendeur quand il achètera un nouvel appareil équivalent.
La collecte séparée du produit et les opérations successives de traitement,recyclage et élimination favorisent la production
d’appareils composés par des matériaux recyclés ainsi que permettent d’éviter des effets négatifs sur l’environnement et
sur la santé des personnes suite à une gestion impropre du déchet.
Toute élimination abusive du produit entraîne l’application de sanctions administratives.
Hinweise zur ordnungsgemäßen Entsorgung des Produkts.
Das auf dem Gerät angebrachte Symbol weist darauf hin,dass dasAltgerät“getrennt zu sammeln” ist und das Produkt daher
nicht zusammen mit dem Gemeindeabfall entsorgt werden darf.
Der Benutzer muss das Produkt zu den entsprechenden,von der Gemeindeverwaltung eingerichteten “Wertstoffsammel-
stellen” bringen oder dem Händler beim Kauf eines neuen Produkts übergeben.
Die getrennte Müllsammlung und anschließendeAufbereitung,Wiederverwertung und Entsorgung fördern die Herstellung
von Geräten unterVerwendung wiederverwerteter Materialien und vermindern die negativenAuswirkungen auf die Umwelt
und Gesundheit in Folge einer falschen Müllverwaltung.
Die widerrechtliche Entsorgung des Produkts führt zur Auferlegung vonVerwaltungsstrafen.
Advertencias para la correcta eliminación del producto.
El símbolo que aparece en el aparato indica que el residuo debe ser objeto de “recogida selectiva” por tanto el producto
no se debe eliminar junto con residuos urbanos.
El usuario deberá entregar el producto a los “centros de recogida selectiva” creados por las administraciones municipales
o bien al distribuidor cuando adquiera un nuevo producto.
La recogida selectiva del residuo y las sucesivas operaciones de tratamiento, recuperación y eliminación favorecen la fabri-
cación de aparatos con materiales reciclados y limitan los efectos negativos en el medio ambiente y la salud causados por
una gestión incorrecta del residuo.
La eliminación abusiva del producto da lugar a la aplicación de sanciones administrativas.
10
AVX 565 BT CORRECT DISPOSAL OF PRODUCT

EN Ifyouwillnotndyourlanguageontheinstructionmanual,pleasegoonourwebsitewww.trevi.ittondit
FR Si vous ne trouverez pas votre langue sur le mode d’emploi, veuillez vous visiter sur notre site Web www.trevi.it de le
trouver
DE WennSieIhreSpracheaufdieBedienungsanleitungnichtnden,gehenSiebitteaufunsereWebseitewww.trevi.itzunden
ES Si no encuentras tu idioma en el manual de instrucciones, por favor vaya a nuestra página web www.trevi.it se encuentra
PT Se você não vai encontrar sua língua sobre o manual de instruções,por favor, vá em nosso site www.trevi.it para encontrá-lo
DICHIARAZIONE DI CONFORMITÀ UE SEMPLIFICATA
Il fabbricante TREVI dichiara che il tipo di apparecchiatura AVX 565 BT è conforme alla direttiva
2014/53/UE.
Il testo completo della dichiarazione di conformità EU è disponibile al seguente indirizzo Internet:
https://www.trevi.it/dms/zidi/TREVI/DOCAVX565BT.pdf
SIMPLIFIED EU DECLARATION OF CONFORMITY
Hereby TREVI Spa declares that the equipment type AVX 565 BT is in compliance with directive
2014/53/EU.
The full text of the EU declaration of conformity is available at the following internet address:
https://www.trevi.it/dms/zidi/TREVI/DOCAVX565BT.pdf
11
AVX 565 BTDECLARATION OF CONFORMITY

Trevi S.p.A.
Strada Consolare Rimini-San Marino, 62
47924 RIMINI (RN) Italy
Tel. 0541/756420 - Fax 0541/756430
www.trevi.it - E-mail: info@trevi.it
Made In China
Table of contents
Other Trevi Speakers System manuals

Trevi
Trevi AVX 582USB User manual

Trevi
Trevi SB 8315 TV User manual

Trevi
Trevi XF 700 User manual

Trevi
Trevi XR 120 BT User manual

Trevi
Trevi SB 5010TV User manual

Trevi
Trevi SB 8380 SW User manual

Trevi
Trevi SH 8400 BT User manual

Trevi
Trevi AVX 570 BT User manual

Trevi
Trevi XF 4800 RAVE User manual

Trevi
Trevi AVX 582USB User manual
Popular Speakers System manuals by other brands

Martin Audio
Martin Audio EM120 - SCHEMATICS Dimensional drawing

Soundstream
Soundstream Class-D & A/B Bi-Amped Pro audio Speaker... user manual

Altec Lansing
Altec Lansing 251 user guide

LG
LG SL10Y Simple manual

Hamlet
Hamlet STEREO SCOPE 503 EM Operator's handbook

Monitor Audio
Monitor Audio Gold 50 owner's manual