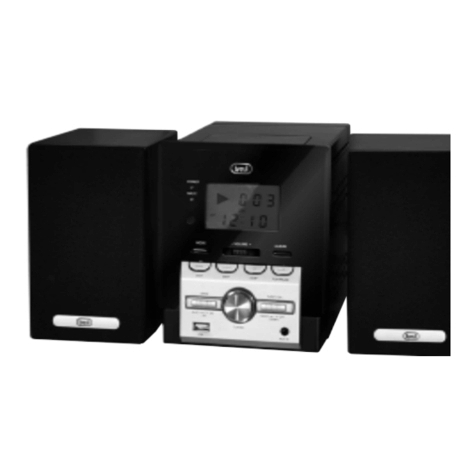
Trevi CMP 574 USB User manual

USB
INPUT
CMP 574 USB
Guida d’uso / User guide
RADIOREGISTRATORE STEREO
CON CD/MP3 / USB
Manuale d'uso e installazione
STEREO RADIO RECORDER
WITH CD/MP3 / USB
Instruction manual
RADIO-MEGNETOPHONE
STEREO
AVEC LECTEUR CD/MP3 / USB
Mode d’emploi et installation
STEREO-RADIO
KASSETTENRECORDER
MIT CD/MP3 / USB
Gebrauchs- und Installationshandbuch
RADIO GRABADORA STEREO
CON UNIDAD LECTORA DE CD/MP3
USB
Manual de uso e instalación
CASSETTE
PLAYBACK
RECORDER

2
CMP 574USB
1
2
3
4
5
6
7 8
9
10
11
12
13
14
17
24
15
21
19
18
16
20
22
23
302928272625
ITALIANO

3
CMP 574USB
NOTE D'USO
Questo apparecchio è uno strumento elettronico di alta precisione, evitate quindi di utilizzarlo nei seguenti casi:
• Vicinoafortifontidicalorecomecaloriferiestufe.
• Inluoghimoltoumidicomestanzedabagno,piscine,ecc.
• Inluoghimoltopolverosi.
• Inluoghisoggettiafortivibrazioni.
Posizionatel'apparecchioinmodocheaisuoilaticisiasempreabbastanzaspazioperlaliberacircolazionediaria(almeno5cm).
Nonostruiteleferitoiediventilazione.
Se dei liquidi penetrano all'interno dell'apparecchio scollegate immediatamente la spina dalla presa e portate l'apparecchio al più
vicinocentroassistenzaautorizzatoTREVI.
Controllatesempreprimadiaccenderel'apparecchiocheicavidialimentazioneedicollegamentosianoinstallaticorrettamente.
CURA E MANUTENZIONE
Perlapuliziasiconsiglial’usodiunpannomorbido,leggermenteinumidito.Evitatesolventiosostanzeabrasive.
IMPORTANTE
Labuonacostruzionediquestoapparecchionegarantisceperlungotempoilperfettofunzionamento.Setuttaviadovessepresentarsi
qualcheinconveniente,saràopportunoconsultareilpiùvicinoCentroAssistenzaautorizzato.
TREVIpersegueunapoliticadicontinuaricercaesviluppo.Pertantoiprodottipossonopresentarecaratteristichediversedaquelle
descritte.
DESCRIZIONE COMANDI
1. ControlloVOLUME
2. SelettorefunzioniCD-MP3-USB/TAPE/RADIO
3. TastoSTANDBY
4. IngressoUSB
5. IndicatoreSTANDBY
6. AntennaFM
7. DisplayLCD
8. IndicatoreFMSTEREO
9. VanoCD
10. Manigliaperiltrasporto
11. IngressoalimentazioneAC
12. SelettoreFMSTEREO/AM
13. TastoBASSenfatizzazionebassi
14. Vanobatterie
15. Controllosintonia
16. Ingressocuffie
17. TastoSTOP,arrestoCD
18. TastoPROG/P-MODE,programmazioneripetizionedelCD
19. TastoSKIP-,saltobranoprecedente
20. Vanocassetta
21. TastoSKIP+,saltobranosuccessivo
22. TastoFOLD-/-10
23. TastoFOLD+/+10
24. TastoPLAY/PAUSE/USB,riproduzione/pausaCD
25. TastoPAUSE,pausacassetta
26. TastoSTOP/EJECT,arresto/espulsionecassetta
27. TastoF.FWD,avanzamentorapidocassetta
28. TastoRWD,riavvolgimentorapidocassetta
29. TastoPLAY,riproduzionecassetta
30. TastoREC,registrazionecassetta
ALIMENTAZIONE
BATTERIE
Aprireilvanobatterie(14)edinserire8batterieformato"D"(UM-1)avendocuradirispettareattentamentelepolaritàindicate.Sostituire
immediatamentelebatteriescaricheetoglierleseprevedetedinonutilizzarel'apparecchioperlungotempo.
RETE
CollegareilcavodialimentazioneallapresaAC(11).InserirelaspinainunapresadicorrenteC.A.230V-50Hz.Noncollegare
l'apparecchioapresecontensionediversadaquellaindicata.
VOLTAGGIO PERICOLOSO ATTENZIONE AVVERTENZE SUL LASER
Questo simbolo riportato sul retro dell'ap-
parecchio ed in questo manuale segnala la
presenzaall'internodiquestoapparecchio
di componenti operanti ad alta tensione,
non apritelo per evitare il rischio di scosse
elettriche.
Questo simbolo riportato sul retro dell'ap-
parecchio ed in questo manuale indicano
la presenza sugli stessi di importanti
istruzioni per la sicurezza d'uso. Leg-
getele attentamente prima di utilizzare
l'apparecchio.
Questo apparecchio è dotato di un sistema
diletturaconraggiolaser.Benchéillaser
sia di bassa potenza e con dispositivo di
sicurezzacheneimpedisceilfunziona-
mento a sportello aperto attenetevi scru-
polosamente alle seguenti avvertenze:
Non avvicinate l'occhio alla lente del
laser con l'apparecchio aperto, pericolo
dilesionedellaretina.
Non tentate di smontare o manomettere
l'unità laser, pericolo di assorbimento di
radiazioni.
ITALIANO
4
CMP 574USB
ACCENSIONE/SPEGNIMENTO
1. PremereiltastodiaccensionegeneraleSTANDBY(3).
2. Posizionareilselettorefunzioni(2)suCD-MP3-USB,TAPEoRADIOperattivarel'apparecchio.
3. Posizionandoilselettorefunzioni(2)suCD-MP3-USB,seentro15minnonverràeffettuataalcunaoperazioneillettoreentrerà
inmodalitàSTANDBY.
NOTA
A causa di evetuali scariche elettromagnetiche l'apparecchio potrebbe andare in reset. Per ripristinarlo è sufficiente spegnerlo
e riaccenderlo.
4. RipremereilpulsanteSTANDBY(3)perspegnerel'unità.
FUNZIONAMENTO
FUNZIONAMENTO RADIO
1. Posizionareilselettorefunzioni(2)suRADIO,ildisplayLCD(7)dellaradiodigitales'illumina.
2. Selezionarelabandachedesiderateascoltare(AM/FMstereo)conilselettore(12).
3. Sintonizzatevisull’emittentedesiderataconilcontrolloTUNING(15).
4. Selastazionechestateascoltandoèstereol'indicatoreFMSTEREO(8)siilluminerà.
5. RegolareilvolumecomedesiderateconilcontrolloVOLUME(1).
6. Sedurantel’ascoltodiunaemittenteFMstereoavvertitefortirumoridifondoefrusciiportareilselettore(12)sullaposizione
FM.
NOTE
Per ottenere la migliore ricezione in FM estendete e orientate l’antenna (6). Se la ricezione non è buona provate a regolare
diversamente la lunghezza e l’orientamento dell’antenna, comunque la qualità della ricezione in FM dipende molto dal luogo
dove è posto l’apparecchio.
L’antenna AM è interna all’apparecchio per cui orientate l’apparecchio per ottenere la migliore ricezione.
La vicinanza di apparecchi TV, lampade al neon o altri elettrodomestici può provocare disturbi nella ricezione di programmi
radio, in questo caso allontanate il radioregistratore dall’apparecchio che disturba.
FUNZIONAMENTO LETTORE CD-MP3
RIPRODUZIONE
1. Posizionareilselettorefunzioni(2)sullaposizioneCD-MP3-USB,ildisplayLCD(7)s'illumina.
2. AprireilvanoCD(9)einserireildiscoconillatoscrittorivoltoversol'alto.Richiuderelosportelloconcura.
3. DopoqualchesecondoildisplayLCD(7)mostrailnumerodelletracce(brani)presentisuldisco.
4. PremeteiltastoPLAY/PAUSE/USB(24)periniziarelariproduzione.
5. PremereiltastoPLAY/PAUSE/USB(24)perattivarelapausa;ilsimbolodiriproduzioneiniziaalampeggiare.
6. PerdisinserirelapausapremereancoraunavoltailtastoPLAY/PAUSE/USB(24).
7. PremereiltastoSTOP(17)perfermaredefinitivamentelariproduzione,ildisplayLCDmostreràletraccepresentisulCD.
SALTO TRACCIA
1. PremendoiltastoSKIP+(21)durantel’ascoltosipassaallatracciasuccessiva,mentreconiltastoSKIP-(19)sipassaalla
tracciaprecedente.
2. TenendopremutoiltastoSKIP+(21)oSKIP-(19)durantel'ascoltosiricercavelocementeunparticolarepassaggiomusicale.
3. Rilasciareiltastopertornareallanormaleriproduzione.
4. IldisplayLCD(7)mostrasemprequaletracciasistaascoltando.
RIPRODUZIONE ININTERROTTA DI UNA SINGOLA TRACCIA
- Inmodalitàdiriproduzione.
1. PremereiltastoPROG./P-MODE(18).
2. Ilsimbolo“ ”lampeggieràsuldisplay.
3. IllettoreCDriprodurràininterrottamentelatracciavisualizzatasuldisplay.
4. Percancellarelariproduzionecontinuadellasingolatraccia,premereiltastoPROG./P-MODE(18)finoallascomparsadel
simbolo.
RIPETIZIONE ININTERROTTA DELL’INTERO DISCO
- Inmodalitàdiriproduzione.
1. PremereduevolteiltastoPROG./P-MODE(18).
2. Ilsimbolo“ ”appariràsuldisplay.
3. IllettoreCDriprodurràininterrottamentel’interodisco.
4. Percancellarelariproduzionecontinuadell'interodisco,premereiltastoPROG./P-MODE(18)finoallascomparsadelsimbolo.
RIPRODUZIONE ININTERROTTA DELL'INTERA CARTELLA (FOLDER)
NB: funzione valida solo per cd MP3.
- Inmodalitàdiriproduzione.
1. PremeretrevolteiltastoPROG./P-MODE(18).
2. Ilsimbolo“ FOLDER”appariràsuldisplay.
3. IllettoreCDriprodurràininterrottamenteilnumerodellacartellavisualizzatasuldisplay.
4. Percancellarelariproduzionecontinuadelsingoloalbum,premereiltastoPROG./P-MODE(18)finoallascomparsadelsimbolo.
RIPRODUZIONE CASUALE DEI BRANI
- Inmodalitàdiriproduzione.
1. PremerequattrovolteiltastoPROG./P-MODE(18).
ITALIANO

5
CMP 574USB
2. SuldisplaycomparelascrittaRAND.
3. IllettoreCDriproduceibranisecondounasequenzacasuale.
4. PerinterromperelariproduzionecasualedeibranipremeteunavoltailtastoPROG./P-MODE(18).
PROGRAMMAZIONE
Èpossibileselezionarel'ordineconcuivengonoriprodottiibrani.
1. PremereiltastoSTOP(17)perfermarelariproduzione.
2. PremereiltastoPROG./P-MODE(18),suldisplayapparelascritta"P01"lampeggiante.
3. SelezionareilbranochedesiderateriprodurreperprimoconitastiSKIP+(21)oSKIP-(19).
4. PremereiltastoPROG./P-MODE(18)perconfermare.
5. Ripetereipunti3e4permemorizzareeriprodurreibranichedesiderate;pericdaudiosipossonomemorizzareunmassimo
di20brani,mentrepericdMP3sipossonomemorizzareunmassimodi99brani.
6. PremereiltastoPLAY/PAUSE/USB(24)periniziarelariproduzione.
7. PremereduevolteiltastoSTOP(17)perannullarelaprogrammazione.
FUNZIONE ALBUM
NB: funzione valida solo per cd MP3 contenenti directory o cartelle.
1. QuandoascoltateunbranoMp3evoletecambiaredirectory,tenerepremutoiltastoFOLD+/+10(23)FOLD.-/-10(22).per
posizionarsisullecartellesuccessive/precedenti.
2. PremereiltastoFOLD.+/+10(23)perascoltarelediecitraccesuccessive.PremereiltastoFOLD-/-10(23)perascoltarele
diecitracceprecedenti.
FUNZIONAMENTO INGRESSO USB
RIPRODUZIONE
1. Peruncorrettofunzionamentodellettoremp3,assicuratevichenonsiapresentealcunCDnelvanocd.
2. CollegareunlettoreMP3dotatodipresaUSBall'ingressoUSB(4).
3. Posizionareilselettorefunzioni(2)sullaposizioneCD-MP3-USB.
4. PremereetenerepremutoiltastoPLAY/PAUSE/USB(24)percommutaresull'ingressoUSB.
5. SuldisplayLCD(7)comparelascrittaUSB,attenderequalchesecondocheillettorecarichituttiifileMP3.
6. PremeteiltastoPLAY/PAUSE/USB(24)periniziarelariproduzione.
7. PerinserirelapausapremereunavoltailtastoPLAY/PAUSE/USB(23).
8. PerdisinserirelapausapremereunasecondavoltailtastoPLAY/PAUSE/USB(23).
9. PremereiltastoSTOP(17)perfermaredefinitivamentelariproduzione.
- Fareriferimentoalparagrafo"funzionamentolettorecd-mp3"perilrestodellefunzioni.
FUNZIONAMENTO RIPRODUTTORE CASSETTE
RIPRODUZIONE CASSETTE
1. Posizionareilselettore(2)sullaposizioneTAPE.
2. Inserireuncassettanelvano(20)conillatochedesiderateascoltarerivoltoversol'esterno.
3. Regolareavostropiacimentoilvolume(1).
4. PremereiltastoPLAY(29)periniziarelariproduzione.
5. PremereiltastoPAUSE(25)perfermaremomentaneamentelariproduzione,premerlonuovamenteperriprenderla.
6. PerfaravanzarevelocementeilnastropremeteiltastoF.FWD(27).
7. PerriavvolgerevelocementeilnastropremeteiltastoR.REW(28).
8. PremereiltastoSTOP/EJECT(26)perfermaredefinitivamentelariproduzione,premerlonuovamenteperestrarrelacassetta.
REGISTRAZIONE DA ALTRE SORGENTI
1. Posizionareilselettore(2)suCD-MP3-USBeavviarelatracciadesiderata,osuRADIOesintonizzatevisullastazionedesiderata.
2. Inserirelacassettanelvano(20).
3. PremereiltastoREC(30)periniziarelaregistrazione.
4. UtilizzareiltastoPAUSE(25)perfermaremomentaneamentelaregistrazione,premerlonuovamenteperriprenderla.
5. PremereiltastoSTOP/EJECT(17)perfermaredefinitivamentelaregistrazione.
CARATTERISTICHE TECNICHE
GENERALI
Alimentazione:................................................................................................. AC230V-50Hz
Batterie8"D"(UM1)nonincluse
Potenza: .......................................................................................................... 1.8Wx2(18Wpmpo)
ConsumoinStand-by:..................................................................................... <0,5W
Dimensioni:...................................................................................................... 358x155x240mm
ITALIANO

6
CMP 574USB
ENGLISH
1
IMPORTANT: Please read before using and keep for future
reference.
IMPORTANT SAFETY INSTRUCTIONS
WARNING:
TO PREVENT FIRE OR SHOCK HAZARD DO NOT USE THIS PLUG WITH AN
EXTENSION CORD, RECEPTACLE OR OTHER OUTLET UNLESS THE BLADES CAN BE
FULLY INSERTED TO PREVENT BLADE EXPOSURE. TO PREVENT FIRE OR SHOCK
HAZARD. DO NOT EXPOSE THIS APPLIANCE TO RAIN OR MOISTURE.
This lightning flash with
arrowhead symbol, within
an equilateral triangle, is
intended to alert the user
to the presence of
insulated dangerous
voltage within the
products enclosure that
may be of sufficient
magnitude to constitute a
risk of electric shock
presents.
Warning: to reduce the
risk of electric shock, do
not remove
cover (or back ) no user -
serviceable part inside.
Refer servicing to
qualified service
personnel.
The exclamation point
within an equilateral
triangle is intended to
alert the user to the
presence of important
operating and
maintenance
(servicing) instructions
in the literature
accompanying the
appliance.
1. Read these instructions.
2. Keep these instructions.
3. Heed all warnings.
4. Follow all instructions.
5. Do not use this apparatus near water.
6. Clean only with dry cloth.
7. Do not block any ventilation openings. Install in accordance with the
manufactures instructions.
8. Do not install near any heat sources such as radiators, heat registers, stoves,
or other apparatus (including amplifiers) that produce heat.
9. Do not defeat the safety purpose of the polarized or grounding type plug. A
polarized plug has two blades with one wider than the other. A grounding
type plug has two blades and a third grounding prong. The wide blade or the
third prong are provided for your safety. If the provided plug does not fit into
your outlet, consult an electrician for replacement of the obsolete outlet.
10. Protect the power cord from being walked on or pinched particularly at the
plugs, convenience receptacles, and at the point where it exits from the
apparatus.
11. Only use attachments/accessories specified by the manufacturer.

7
CMP 574USB ENGLISH
2
12. Unplug the apparatus during lightening sorts or when unused for long
periods of time.
13. Refer all servicing to qualified personnel. Servicing is required when the
apparatus has been damaged in any way, such as power supply cord or plug
is damaged, liquid has been spilled or objects have fallen into the apparatus,
the apparatus has been exposed to rain or moisture, does not operate
normally, or has been dropped.
14. This appliance should not be exposed to dripping or splashing water and no
objects filled with liquids such as vases should be placed on apparatus.
Dripping warning: The product shall not be exposed to dripping or splashing and
that no objects filled with liquids, such as vases, shall be placed on the product.
Ventilation warning: The normal ventilation of the product shall not be impeded
for intended use
Disconnect device warning: Main plug is used as the connection, so it should
always remain ready operate.
LOCATION OF CONTROLS

8
CMP 574USB
ENGLISH
2
FEATURES AND CONTROLS
1. FM ANTENNA
2. HANDLE
3. TUNING KNOB
4. CD DOOR OPEN/CLOSE
5. CASSETTE FUNCTION KEYS
6. FM STEREO INDICATOR
7. VOLUME CONTROL
8. STANDBY BUTTON
9. CD PROG./P-MODE BUTTON
10. BASS BUTTON
11. STANDBY INDICATOR
12. LCD DISPLAY
13. FOLD-/ -10 BUTTON
14. FOLD+/+10 BUTTON
15. CD PLAY/PAUSE/USB BUTTON
16. CD STOP BUTTON
17. CD SKIP/SEARCH BACKWARD
BUTTON
18. CD SKIP/SEARCH FORWARD
BUTTON
19. PHONES JACK
20. BATTERY DOOR
21. AC SOCKET
22. FUNCTION SWITCH
23. BAND SELECTOR
24. USB PORT
INTRODUCTION
Thank you for purchasing this product.
Please read through these operating instructions, so you will know how to
operate your equipment properly. After you finished reading the instructions
manual, put it away in a safe place for future reference.
CAUTION:
Do not block the ventilation openings or holes.
Do not place any naked flame sources, such as lighted candles, on the
apparatus.

9
CMP 574USB ENGLISH
4
When discarding batteries, environmental problems must be considered and
local rules or laws governing the disposal of these batteries must be followed
strictly.
Invisible laser radiation when open and interlock failed or defeated. Avoid
direct exposure to beam.
To prevent fire or shock hazard, do not expose this appliance to rain or
moisture.
NOTE:
The manufacturer is not responsible for any radio or TV interference caused by
unauthorized modifications could void the user's authority to operate the
equipment.
IMPORTANT FOR LASER PRODUCTS
REPRODUCTION OF LABELS
1. CLASSIFICATION LABEL, PLACED ON REAR ENCLOSURE.
2. WARNING LABEL, PLACED INSIDE THE UNIT.
CAUTION: Do not open the unit. There are no user serviceable parts inside the
unit; consult all servicing to qualified service personnel.
Discs for Playback
This system can playback all digital audio CD, MP3, WMA finalized digital audio
CD-Recordable (CD-R) discs, finalized digital audio CD-Rewritable (CD-RW) discs
and CD-DA format digital audio CD/CD-R/CD-RW discs.
POWER SOURCE
This unit is designed to be operated on AC/DC.
AC OPERATION
Plug the smaller end of AC power cord into AC jack on unit and the other bigger
end into AC wall outlet. The batteries will be automatically disconnected.
DC OPERATION
Open the BATTERY COMPARTMENT DOOR. Install 8 pcs UM-1/D size batteries
(not included) into compartment. Please follow correct polarities as indicated.
CAUTION
Remove batteries if they are flat or not being used for a long period of time.
Batteries contain chemical substances, so they should be disposed of properly.
BASIC FUNCTION
SWITCHING ON THE UNIT
Press the standby button and set the FUNCTION SWITCH to CD/MP3/USB or
RADIO position to turn on the unit.
NOTE: In CD/MP3/USB mode, when the unit is not providing the main function

10
CMP 574USB
ENGLISH
5
for 15 minutes, the unit will automatically switch into standby mode. To turn on
the unit again, press "STANDBY" button or replug the unit.
ESD hints – The product maybe reset or not reset to operation of control due to
electrostatic discharge, just switch off and reconnect again.
TO ADJUST VOLUME
Rotate the VOLUME CONTROL back and forth to increase and decrease volume.
TO ENJOY MORE BASS
Depress BASS button to have more extra bass, press again to switch off bass.
HEADPHONES
For private listening, plug the headphones/earphones (not included) into
PHONES jack (3.5 mm diameter).
CAUTION: To prevent possible hearing damage, do not listen at high volume
levels of long periods.
USING THE RADIO
TUNING IN RADIO STATIONS
1. Slide the FUNCTION switch to "RADIO" position.
2. Slide the BAND switch to select the desired wave band: AM/FM ST.
3. Tune to required station by rotating the TUNING KNOB.
4. Rotate the VOLUME CONTROL to comfortable volume level.
5. Extend the TELESCOPIC ANTENNA to its full length if you are listening to FM
broadcasting. Gently rock the unit back and forth to get the best reception
when you are listening to AM program, or place the unit in an open place.
Note: The FM STEREO indicator will be on if you are receiving FM stereo
program.
6. Turn off the radio, Set the FUNCTION switch to CD/MP3/USB or TAPE
operation, or switch off the unit by pressing the STANDBY button.
CASSETTE OPERATION
PLAYBACK OF CASSETTE
Be sure to tighten any slack tape in the cassette before use, using either a pencil or
a ball-point pen, simply insert the pen or pencil into the centre of spool and rotate
to remove slackness. Depress the STOP/EJECT button to open the cassette door.
Insert the cassette into the compartment with the open end facing upwards and
the full reel on the left hand side, push the cassette well down and close the door,
be sure not to touch the tape surface, Set the Function switch to “TAPE” position
and press the cassette play button. To stop playback, press the STOP/EJECT
button once. To release the cassette, press the STOP/EJECT button again.
AUTO STOP
When the tape reaches the end during playback or recording, the built-in auto
stop system will release the depressed play, record keys. The auto stop system
operates while recording from the built-in radio or CD player, only the cassette
function is brought automatically to stop mode and the radio or CD Player will
continue to play.

11
CMP 574USB ENGLISH
6
RADIO RECORDING
A. Install blank cassette tape.
B. Set FUNCTION SWITCH to “RADIO” position. After selecting the desired band
and tune the TUNING KNOB to desired broadcast station. Then push down
RECORD BUTTON and PLAY BUTTON simultaneously.
C. After recording the desired broadcast, depress the STOP/EJECT BUTTON lightly,
and then set FUNCTION SWITCH to “TAPE” position in order to listen to the
recorded broadcast.
D. Press REW button then play button to playback your recording.
ERASURE: When you record over previously recorded tape, the original recording
is automatically erased and replaced by the new recording.
CD/MP3 RECORDING
A. Install a blank tape into cassette compartment.
B. Set the FUNCTION switch to “CD/MP3/USB” position. Load a disc into the disc
compartment, start playback by pressing the PLAY/PAUSE/USB button after
the unit finished reading the disc.
C. Depress the RECORD BUTTON and PLAY BUTTON simultaneously. Recording
starts. Press the STOP/EJECT BUTTON lightly to end recording, or the unit will
stop recording automatically while the tape reaches its end.
D. To listen to the recording, set the FUNCTION switch to select “TAPE” playing
mode, then start tape playback.
TYPES OF CASSETTE
Use only good quality cassettes (IEC TYPE 1) for making recordings. May be used
to replay other types of cassette but is unable to make proper recording on these
more specialized tapes.
The use of C120 cassettes is NOT recommended in this machine.
PROTECTING RECORDING
Normally, anything recorded on the tape is automatically erased when new
recording is made. It is possible to protect your recording from accidental erasure
by removing the tabs found on the rear of the cassette.
When the cassette is held with the recorded side upper-most and exposed tape
facing the front, the protective tab will be found on the left rear of the cassette.
All pre-recorded cassette are protected in this way to prevent accidental erasure
of the commercial recording. “Protected” cassette will prevent the record button
from being operated. If at any time you attempt to record and find that this
button will not depress, never force the mechanism or it may be damaged. Check
that a cassette has been loaded and that tab has not been removed. Recording on
a cassette from which the tabs have been removed can be done by covering the
tab openings with a piece of adhesive tape.
ERASE TAB
FOR SIDE “A”

12
CMP 574USB
ENGLISH
7
CARE OF CASSETTE MECHANISM
Gently clean the tape head and pinch wheel/capstan assemblies after every 10
hours of using the unit. A range of cassette care products are available.
The erase head and record/play head and the surface of the pinch roller are
delicate and must not be touched with metal objects such as screwdrivers. You
may find it easier to clean the assembly by pressing the PLAY button to bright
head and pinch roller into view. Be sure to press the STOP button after cleaning
the mechanism.
Damage to the pinch wheel can occur if the unit is left in PLAY mode with the
power switch off. Under no circumstances should you attempt to lubricate any part of the machine.
USING THE CD/MP3
LOADING A DISC
1. Set the FUNCTION switch to CD/MP3/USB position.
2. Open the CD door. “ OP ” will be shown on the display.
3. Place an audio CD into the tray with the label side facing up.
4. Close the CD door.
The total number of tracks will appear on the display after several seconds.
5. To remove the CD, press to open CD compartment lid, grasp the CD by its edges,
and carefully take it out.
Note:
To ensure good system performance; wait until the disc tray completely reads
the disc before proceeding.
If no disc is loaded into the compartment, or the disc is placed upside down,
the display will show N0d.
PLAYING A DISC
1. Press the PLAY/PAUSE/USB button to start playback.
The playback starts from track 1, the “” indicator is shown on the display.
To interrupt playback, press the PLAY/PAUSE/USB button. The “” indicator
and the current track will flash on the display.
To resume playback, press the PLAY/PAUSE/USB button again.
2. To stop playback, press the STOP button, the total number of tracks appears on
the display.
SELECTING A DESIRED TRACK/PASSAGE
To select a desired track

13
CMP 574USB ENGLISH
8
Press the CD SKIP/SEARCH FORWARD/BACKWARD button repeatedly in stop
mode or during play until the desired track appears on the display.
Press the PLAY/PAUSE/USB button to start play.
To search for a particular passage during playback (track scanning at high speed)
Press and hold the CD SKIP/SEARCH FORWARD/BACKWARD button to scan the
current playing track at high speed until desired point passage, and then release
the button.
Playback will start again from this point.
To select a song which track number exceeds 10 (for MP3 disc only)
To select a song/track which number exceeds 10, Press the FOLD+/+10 or
FOLD-/-10 button each time to skip forward/backward 10 tracks, then press the
CD SKIP/SEARCH FORWARD/BACKWARD button to select desired track. For
example: to select the 17th track, press FOLD+/+10 button, and then press the CD
SKIP/SEARCH FORWARD button six times immediately.
To Select A Desired Folder (for MP3 disc only)
(if the MP3 disc contains more than one folder)
Press and hold the FOLD+/+10 or FOLD-/-10 button more than 2 second to skip
next/previous folder. Until the desired folder number appears on the LCD display,
then release the button.
PROGRAM TRACKS
Programming tracks of disc are possible when playback is stopped. Up to CD 20
tracks /MP3 99 tracks can be stored in the memory in any order.
1. In stop mode, press the PROG./P-MODE button, the “PROGRAM”will flash and
the P01 indicator will be on.
2. Press the CD SKIP/SEARCH FORWARD button to select the first desired track to
be programmed.
3. Press the PROG./P-MODE button to enter. The display changes to show P02.
4. Repeat steps 2 & 3 to store other desired tracks until all tracks are
programmed.
5. Press the PLAY/PAUSE/USB button to start playback from the first
programmed track.
6. Press the STOP button to stop program playback.
To Erase the Memory (Program)
To clear the program, you have two options:
1. Press the STOP button when the disc is stopped, or
2. Open the CD compartment lid, program will be erased.
REPEAT
To Repeat a Single Track
1. Press the PROG./P-MODE button once in play mode, “ ” will flash on the
display. The current track will be played repeatedly until the STOP button is
pressed
2. To cancel Repeat function, press the PROG./P-MODE button, until the “”
disappear on the LCD display.

14
CMP 574USB
ENGLISH
9
To repeat all the Tracks
1. Press PROG./P-MODE button twice in play mode, “ ” shows steady on the
display, all tracks on the disc will be played repeatedly until the STOP button is
pressed.
2. To cancel Repeat function, press the PROG./P-MODE button, until the “ ”
disappear on the LCD display.
To repeat current Directory (for MP3 only)
1. Press PROG./P-MODE button twice in play mode, “ FOLDER” shows
steady on the display, the current directory will be played repeatedly until the
STOP button is pressed.
2. To cancel Repeat function, press the PROG./P-MODE button, until the
“FOLDER” disappear on the LCD display.
RANDOM PLAY
Press the PROG./P-MODE button in play mode till the “RAND ” shows steady on
the display, the random play will start from next track automatically(or press CD
skip forward button), until all tracks are played over and then stop. Press the
PROG./P-MODE button once to cancel.
LISTENING TO USB FLASH DISK DEVICE
1. Set the FUNCTION switch to CD/MP3/USB position.
2. Connect the USB Flash Disk Device into the USB PORT.
3. If the audio CD in the tray, please press and hold the PLAY/PAUSE/USB button
to select the USB function.
4. If the USB is readable, the display will show USB and The total number of tracks
after several seconds.
5. Press the PLAY/PAUSE/USB button to start playback.
6. Press the STOP button to stop playing. The display will show total number of
tracks.
7. You may proceed repeat play
(repeat-1/repeat-folder/repeat-all)/program/program play/random
play/skip up and down operation as the same described in above “USING THE
CD/MP3”.
Note To exit USB operation, press and hold PLAY/PAUSE/USB button to return the
CD mode.
CAUTION:
Do not use any USB extension cable for connecting the USB stick which may
cause harmful interference
In case of malfunction due to electrostatic discharge, just reset the product
(reconnect of power source may be required) to resume normal operation.

15
CMP 574USB ENGLISH
10
SPECIFICATIONS
GENERAL
Power Requirement AC 230V~50Hz
DC 12V UM-1 x 8 PCS
Power consumption 18 Watts
Standby consumption <0.5 Watts
Weight Approx. 2.3 kg
Dimension Approx. 385mm (L) x 240mm (W) x 160mm (H)
Operation Temperature +5 °C - + 35 °C
RECEIVER SECTION
Receiving Bands AM / FM
Tuning Range AM 540 -1600 KHz
FM 87.5 -108 MHz
COMPACT DISC SECTION
Optical Pickup 3-Beam Laser
Frequency Response 100Hz – 16 KHz
CASSETTE SECTION
Recording System 2 Tracks 2 channel (Stereo)
Biasing System DC Bias
Frequency Response 125 – 6.3 KHz
Wow and Flutter 0.35 % WRMS (JIS)
AUDIO SECTION
Power Output 1.8 W x 2
Headphone Impedance 32 Ohms
ACCESSORIES
Instruction Booklet 1
AC Cord 1
CAUTION:
To avoid electric shock, this unit must not be exposed to dripping water or
water splash.
Ventilation warning-The normal ventilation of the product shall not be
impeded for intended use.

16
CMP 574USB
1
2
3
4
5
6
7 8
9
10
11
12
13
14
17
24
15
21
19
18
16
20
22
23
302928272625
FRANÇAIS

17
CMP 574USB
AVERTISSEMENT
NOTES D’EMPLOI
Cetappareilestuninstrumentélectroniquedehauteprécision;évitezdoncdel’employerdanslescassuivants:
• Aproximitédefortessourcesdechaleurtellesquedesradiateursoutoutappareildechauffage.
• Dansdeslieuxtrèshumidestelsquedessallesdebains,despiscines,etc.
• Dansdeslieuxtrèspoussiéreux.
• Dansdeslieuxsujetsàdesfortesvibrations.
• Positionnerl’appareildefaçonàlaissertoujoursdel’espacepourlalibrecirculationdel’airàsescôtés(aumoins5cm).
• N’obstruezpaslesfentesd’aération.
• Sidessubstancesliquidespénètrentàl’intérieurdel’appareil,débranchezimmédiatementlaficheetapportezl’appareilau
centred’assistanceagrééTREVIleplusproche.
• Avantde mettrel’appareilenfonction,vérifiez toujoursquelescâblesd’alimentationetdeconnexion soientcorrectement
installés.
SOIN ET ENTRETIEN
Pourlenettoyageonconseillel’emploid’unchiffondoux,légèrementimbibé.Evitezlessolvantsoulessubstancesabrasives.
IMPORTANT
Labonneconstructiondecetappareilgarantitpourlongtempssonparfaitfonctionnement.Sitoutefoisdesinconvénientsdevaient
seprésenter,contactezleCentred’Assistanceagrééleplusproche.
TREVI poursuitunepolitiquederechercheetdedéveloppementcontinus.Parconséquent,lesproduitspeuventprésenterdes
caractéristiquesdifférentesparrapportauxdonnéesmentionnées.
DESCRIPTION DES COMMANDES
1. RéglageduVOLUME
2. SélecteurfonctionsCD-MP3-USB/TAPE/RADIO
3. ToucheSTANDBY
4. PortUSB
5. IndicateurSTANDBY
6. AntenneFM
7. AfficheurLCD
8. IndicateurFMSTEREO
9. LogementCD
10. Poignéepourletransport
11. Prised’alimentationAC
12. SélecteurbandeFMSTEREO/AM
13. ToucheBASS
14. Logementdespiles
15. RéglageTUNING,accord
16. Entrèeècoteurs
17. ToucheSTOP,arrêtduCD
18. TouchePROG/P-MODE,répétitionaléatoireduCD
19. ToucheSKIP-,passageaumorceauprécédent
20. Logementcassette
21. ToucheSKIP+,passageaumorceausuivant
22. ToucheFOLD-/-10
23. ToucheFOLD+/+10
24. TouchePLAY/PAUSE/USB
25. TouchePAUSEII,pausecassette
26. ToucheSTOP/EJECT,arrêt/éjectioncassetteaudio.
27. ToucheF.FWD,avancerapide
28. ToucheRWD,rembobinagerapide
29. TouchePLAY,lecturecassette
30. ToucheREC,enregistrement
ALIMENTATION
PILES
Ouvrezlelogementdespiles(14)etintroduisez8pilesformat«D»(UM-1)enrespectantattentivementlespolaritésindiquées.
Remplacezimmédiatementlespilesdéchargéesetenlevez-lessil’appareiln’estpasutilisépendantunelonguepériode.
CONNEXION AU RÉSEAU ÉLECTRIQUE
Connectezlecâbled’alimentationsurlapriseAC(11).Branchezlafiched’alimentationsuruneprisedecourantC.A.230V-50Hz.
Nebranchezpascetappareilsurdesprisesayantunetensionautrequecelleindiquée.
VOLTAGE DANGEREUX ATTENTION AVERTISSEMENT SUR
LE LASER
Cesymboleapposésurledosdel’appa-
reil et reproduit dans ce manuel indique
la présence d’éléments fonctionnant à
hautetensionàl’intérieurdecetappareil;
nel’ouvrezpas,afind’éviterlerisquede
déchargesélectriques.
Cesymboleapposésurledosdel’appa-
reil et reproduit dans ce manuel indique
la présence d’instructions importantes
pourlasécuritéd’emploi.Lisez-lesavec
attentionavantd’utiliserl’appareil.
Cet appareil est pourvu d’un système
de lecture à rayon laser. Bien que le
laser soit de faible puissance et muni
d’un dispositif de sécurité empêchant
son fonctionnement lorsque le volet
est ouvert, suivez scrupuleusement les
précautions suivantes:n’approchez pas
les yeux de la lentille du laser lorsque
l’appareilestouvert;dangerdelesionde
laretine.n’essayezpasdedemonterou
d’altererl’unitelaser;dangerd’absorption
deradiations.
FRANÇAIS

18
CMP 574USB
MARCHE/ARRÊT
1. AppuyezsurlatoucheSTANDBYpouractiverl’appareil.
2. Positionnezlesélecteurfonctions(2)surCD-MP3-USB,TAPEouRADIO.
3. Réglezlesélecteurfonctions(2)enpositionCD-MP3-USB,lorsquel'appareilnefournitpaslafonctionprincipalependant15
minutes,l'appareilsemetautomtiquementenmodeSTANDBY.
REMARQUES
En raison des rejets électromagnétiques l'appareil pouvait aller sur reset. Pour restaurer, il suffit de l'éteindre et tourner à
nouveau sur.
4. AppuyezdenoveausurlatoucheSTANDBYpourarrêterl’appareil.
FONCTIONNEMENT
FONCTIONNEMENT RADIO
1. Positionnezlesélecteurfonctions(2)surRADIO,l’afficheurLCD(7)delaradioàaffichagenumériques’allume.
2. Sélectionnezlabandequevousdésirezécouter(AM/FMStéréo)àl’aidedusélecteur(12).
3. Syntonisezl’émetteursouhaitéàl’aidedelacommandeTUNING(15).
4. Silastationécoutéeestenstéréo,l’indicateurFMSTEREO(8)s’allume.
5. Réglezlevolumeàvotregré,àl’aideduréglageVOLUME(1).
6. Sipendantl’écouted’unestationFMstéréo,vousentendezdesbruitsdefondtropforts,positionnezlesélecteur(12)surFM.
REMARQUES
Déployez et orientez l’antenne (6), afin d’obtenir la meilleure réception FM possible. Si la réception n’est pas bonne, essayez de
régler de manière différente la longueur et l’orientation de l’antenne, la qualité de réception FM dépend toutefois beaucoup de
l’endroit où est placé l’appareil.
Puisque l’antenne AM se trouve à l’intérieur de l’appareil, orientez ce dernier de façon à obtenir la meilleure réception possible.
La proximité d’appareils télé, de lampes au néon ou d’autres électroménagers peut provoquer des brouillages dans la
réception de programmes radio ; si c’est le cas, éloignez la radiocassette de l’appareil en question.
FONCTIONNEMENT DU LECTEUR CD-MP3
LECTURE
1. Positionnezlesélecteurdefonction(2)surlapositionCD-MP3-USB,l’afficheurLCD(7)s’allume.
2. OuvrezlelogementCD(9)etintroduisezledisqueaveclafaceétiquetéetournéeverslehaut.Refermezlevoletenappuyant
délicatement.
3. Aprèsquelquessecondesl’afficheurLCD(7)affichelenombredepistes(morceaux)présentessurledisque.
4. AppuyezsurlatouchePLAY/PAUSE/USB(24)pourcommencerlalecture.
5. AppuyezsurlatouchePLAY/PAUSE/USB(24)pouractiverlapause.Lesymboledelecturecommenceàclignoter.
6. Pourdésactiverlapause,appuyezencoreunefoissurlatouchePLAY/PAUSE/USB(24).
7. AppuyezsurlatoucheSTOP(17)pourarrêtercomplètementlalecture.L’afficheurLCDmontrelespistesprésentesdansleCD.
SAUT DE PISTE
1. EnappuyantsurlatoucheSKIP+(21)pendantl’écouteonpasseàlapistesuivante;enappuyantsurSKIP-(19)onpasseàla
pisteprécédente.
2. GardezlatoucheSKIP+(21)ouSKIP-(19)appuyéependantl’écoutepourchercherrapidementunpassageparticulierd’un
morceau.
3. Relâchezlatouchepourreveniràlalecturenormale.
4. L’afficheurLCD(7)indiquetoujourslemorceauenexécution.
LECTURE ININTERROMPUE D’UNE SEULE PISTE
- Enmodedelecture.
1. AppuyezsurlatouchePROG./P-MODE(18).
2. Lesymbole“ ”clognotementsurl’afficheur.
3. LelecteurCDliradefaçoncontinuelapisteindiquéesurl’afficheur.
4. Pourdésactiverlarépétitioncontinuedumorceau,appuyezsurlatouchePROG./P-MODE(18)jusqu'àladisparitiondusymbole.
RÉPÉTITION ININTERROMPUE DU DISQUE ENTIER
- Enmodedelecture.
1. AppuyezdeuxfoissurlatouchePROG./P-MODE(18).
2. Lesymbole“ ”apparaîtsurl’afficheur.
3. LelecteurdeCDliradefaçoncontinueledisqueentier.
4. Pourdésactiverlarépétitioncontinuedudisqueentier,appuyezsurlatouchePROG./P-MODE(18)jusqu'àladisparitiondu
symbole.
RÉPÉTITION ININTERROMPUE DU DOSSIER ENTIER (ALBUM)
REMARQUE : Fonction valable seulement pour les cd MP3.
- Enmodedelecture.
1. AppuyeztroisfoissurlatouchePROG./P-MODE(18).
2. Lesymbole“ FOLDER”apparaîtsurl’afficheur.
3. LelecteurCDliradefaçoncontinuelenumérodudossierindiquésurl’afficheur.
4. Pourdésactiverlarépétitioncontinuedumorceau,appuyezsurlatouchePROG./P-MODE(18)jusqu'àladisparitiondusymbole.
FRANÇAIS

19
CMP 574USB
LECTURE DES MORCEAUX DANS UN ORDRE ALÉATOIRE
- Enmodedelecture.
1. AppuyezquatrefoissurlatouchePROG./P-MODE(18).
2. L’afficheurindique“RAND”.
3. LelecteurdeCDlitlesmorceauxselonuneséquencealéatoire.
4. PourarrêterlalectureepisteAppuyezsurlatouchePROG./P-MODE(18).
PROGRAMMATION
Ilestpossibledesélectionnerl’ordredelecturedesmorceaux.
1. AppuyezsurlatoucheSTOP(17)pourarrêterlalecture.
2. AppuyezsurlatouchePROG./P-MODE(18);l’afficheurmontrelemessage«P01»clignotant.
3. Sélectionnezlemorceauquevoussouhaitezécouterenpremieràl’aidedestouchesSKIP+(21)ouSKIP-(19).
4. AppuyezsurlatouchePROG./P-MODE(18)pourconfirmer.
5. Répétezlespoints3et4pourmémoriseretlirelesmorceauxquevoussouhaitezécouter,jusqu’àunmaximumde20morceaux
pourlesCDaudioetde99morceauxpourlesCDMP3.
6. AppuyezsurlatouchePLAY/PAUSE/USB(24)pourcommencerlalecture.
7. AppuyezdeuxfoissurlatoucheSTOP(17)pourannulerlaprogrammation.
FONCTION ALBUM
REMARQUE : fonction valable seulement pour les CD MP3 contenants des répertoires et des dossiers.
1. LorsquevousécoutezunmorceauMp3etvoussouhaitezchangerderépertoire,gardezlatoucheFOLD+/+10(23),FOLD-/-10
(22)pourpasserauxdossierssuivants.
2. Pendantl'écouted'unmorceaump3,appuyezsurlatoucheFOLD+/+10(23),FOLD-/-10(22)surl'unitépouravancerdedix
morceaux.
FONCTIONNEMENT DU PORT USB
LECTURE
1. Pourlefonctionnementcorrectdulecteurmp3,enleveztoujoursleCDdulogementCD.
2. BranchezunlecteurMP3avecinterfaceUSBsurleportUSB(4).
3. Positionnezlesélecteurdefonction(2)surlapositionCD-MP3-USB-SD,l’afficheurLCD(7)s’allume.
4. AppuyezetmaintenezlatouchePLAY/PAUSE/USB(24)pourbasculerl'entréeUSB.
5. LemessageUSBapparaîtsurl’afficheurLCDdevotreappareil;attendezquelquessecondespourquelelecteurchargetous
lesfichiersMP3.
6. AppuyezsurlatouchePLAY/PAUSE/USB(24)pourcommencerlalecture.
7. Pouractiverlapause,appuyezunefoissurlatouchePLAY/PAUSE/USB(23).
8. Pourdésactiverlapause,appuyezunedeuxièmefoissurlatouchePLAY/PAUSE/USB(23).
9. AppuyezsurlatoucheSTOP(17)pourarrêterdéfinitivementlalecture.
- Consultezlasection“fonctionnementdulecteurcd-mp3”pourl’utilisationdesautresfonctions.
FONCTIONNEMENT MAGNÉTOPHONE À CASSETTES
LECTURE DE CASSETTES
1. Positionnezlesélecteur(2)surTAPE.
2. Insérezunecassettedanslelogement(20)aveclecôtéquevousdésirezécoutertournéversl’extérieur.
3. Réglezlevolume(1)àvotregré.
4. AppuyezsurlatouchePLAY(29)pourcommencerlalecture
5. AppuyezsurlatouchePAUSE(25)pourarrêtermomentanémentlalectureetappuyez-ladenouveaupourrecommencerla
lecture.
6. Pourfaireavancerrapidementlabande,appuyezsurlatoucheF.FWD(27).
7. Pourrembobinerrapidementlabande,appuyezsurlatoucheRWD(28).
8. AppuyezsurlatoucheSTOP/EJECT(26)pourarrêtercomplètementlalecture,etappuyez-ladenouveaupourextrairelacassette.
ENREGISTREMENT D'AUTRES SOURCES
1. Placezlesélecteur(2)surCD-MP3-USBetdémarrerlapistesouhaitéeouàlaRADIOetderégleràlastationsouhaitée.
2. Insérezdanslelogement(20)lacassetteàutiliserpourl’enregistrement.
3. Pourlancerl’enregistrement,appuyezsurlatoucheREC(30).
4. AppuyezsurlatouchePAUSE(25)pourarrêtermomentanémentl’enregistrementetappuyez-ladenouveaupourrecommencer
l’enregistrement.
5. AppuyezsurlatoucheSTOP/EJECT(17)pourarrêtercomplètementl’enregistrement.
CARACTÉRISTIQUES TECHNIQUES
GÉNÉRALITÉS
Alimentation :................................................................................................... C.A.230V-50Hz
8Piles«D»(UM1)pasfournies
Puissance:........................................................................................................ 1.8Wx2(18Wpmpo)
ConsommationélectriqueenmodeStand-by:................................................ <0,5W
Dimensions:..................................................................................................... 358x155x240mm
FRANÇAIS

20
CMP 574USB
1
2
3
4
5
6
7 8
9
10
11
12
13
14
17
24
15
21
19
18
16
20
22
23
302928272625
DEUTSCH
Table of contents
Other Trevi Stereo System manuals

Trevi
Trevi DS 1976 V User manual

Trevi
Trevi AV 610 USB User manual

Trevi
Trevi HFX 1058 User manual

Trevi
Trevi HF 1900 BT User manual

Trevi
Trevi HCX 1200 BT User manual

Trevi
Trevi HCX 1030 S User manual

Trevi
Trevi MCX 1045IPD User manual

Trevi
Trevi SB 8340 SW User manual

Trevi
Trevi HCV 1035 BT User manual

Trevi
Trevi MCX 1021 USB User manual

Trevi
Trevi MCX 1025 USB User manual

Trevi
Trevi TT 1060CD User manual

Trevi
Trevi HCX 1080 BT User manual

Trevi
Trevi HCX 10D8 DAB User manual

Trevi
Trevi MCX 1021 USB User manual

Trevi
Trevi TT 1068 E User manual

Trevi
Trevi TT 1070 E User manual

Trevi
Trevi SB 8370 SW User manual

Trevi
Trevi HCX 10D6 DAB User manual

Trevi
Trevi MCX 1024 USB User manual