3
MCX 1025 USB
AVVERTENZE SUL LASER
Questo apparecchio è dotato di un sistema di lettura con raggio laser. Benché il laser sia di bassa potenza e
con dispositivo di sicurezza che ne impedisce il funzionamento a sportello aperto attenetevi scrupolosamente
alle seguenti avvertenze:
Non avvicinate l'occhio alla lente del laser con l'apparecchio aperto, pericolo di lesione della retina.
Non tentate di smontare o manomettere l'unità laser, pericolo di assorbimento di radiazioni.
NOTE D'USO
Questo apparecchio è uno strumento elettronico di alta precisione; evitate quindi di utilizzarlo nei seguenti casi:
• Vicinoafortifontidicalorecomecaloriferiestufe.
• Inluoghimoltoumidicomestanzedabagno,piscine,ecc.
• Inluoghimoltopolverosi.
• Inluoghisoggettiafortivibrazioni.
• Posizionatel'apparecchioinmodocheaisuoilaticisiasempreabbastanzaspazioperlaliberacircolazionediaria(almeno5
cm).
• Nonostruiteleferitoiediventilazione.
• Sedeiliquidipenetranoall'internodell'apparecchioscollegateimmediatamentelaspinadallapresaeportatel'apparecchioal
più vicino centro assistenza autorizzato TREVI.
• Controllatesempreprimadiaccenderel'apparecchiocheicavidialimentazioneedicollegamentosianoinstallaticorrettamente.
CURA E MANUTENZIONE
Per la pulizia si consiglia l’ uso di un panno morbido, leggermente inumidito. Evitate solventi o sostanze abrasive.
IMPORTANTE
La buona costruzione di questo apparecchio ne garantisce per lungo tempo il perfetto funzionamento. Se tuttavia dovesse presentarsi
qualche inconveniente, sarà opportuno consultare il più vicino Centro Assistenza autorizzato.
TREVI persegue una politica di continua ricerca e sviluppo. Pertanto i prodotti possono presentare caratteristiche diverse da
quelle descritte.
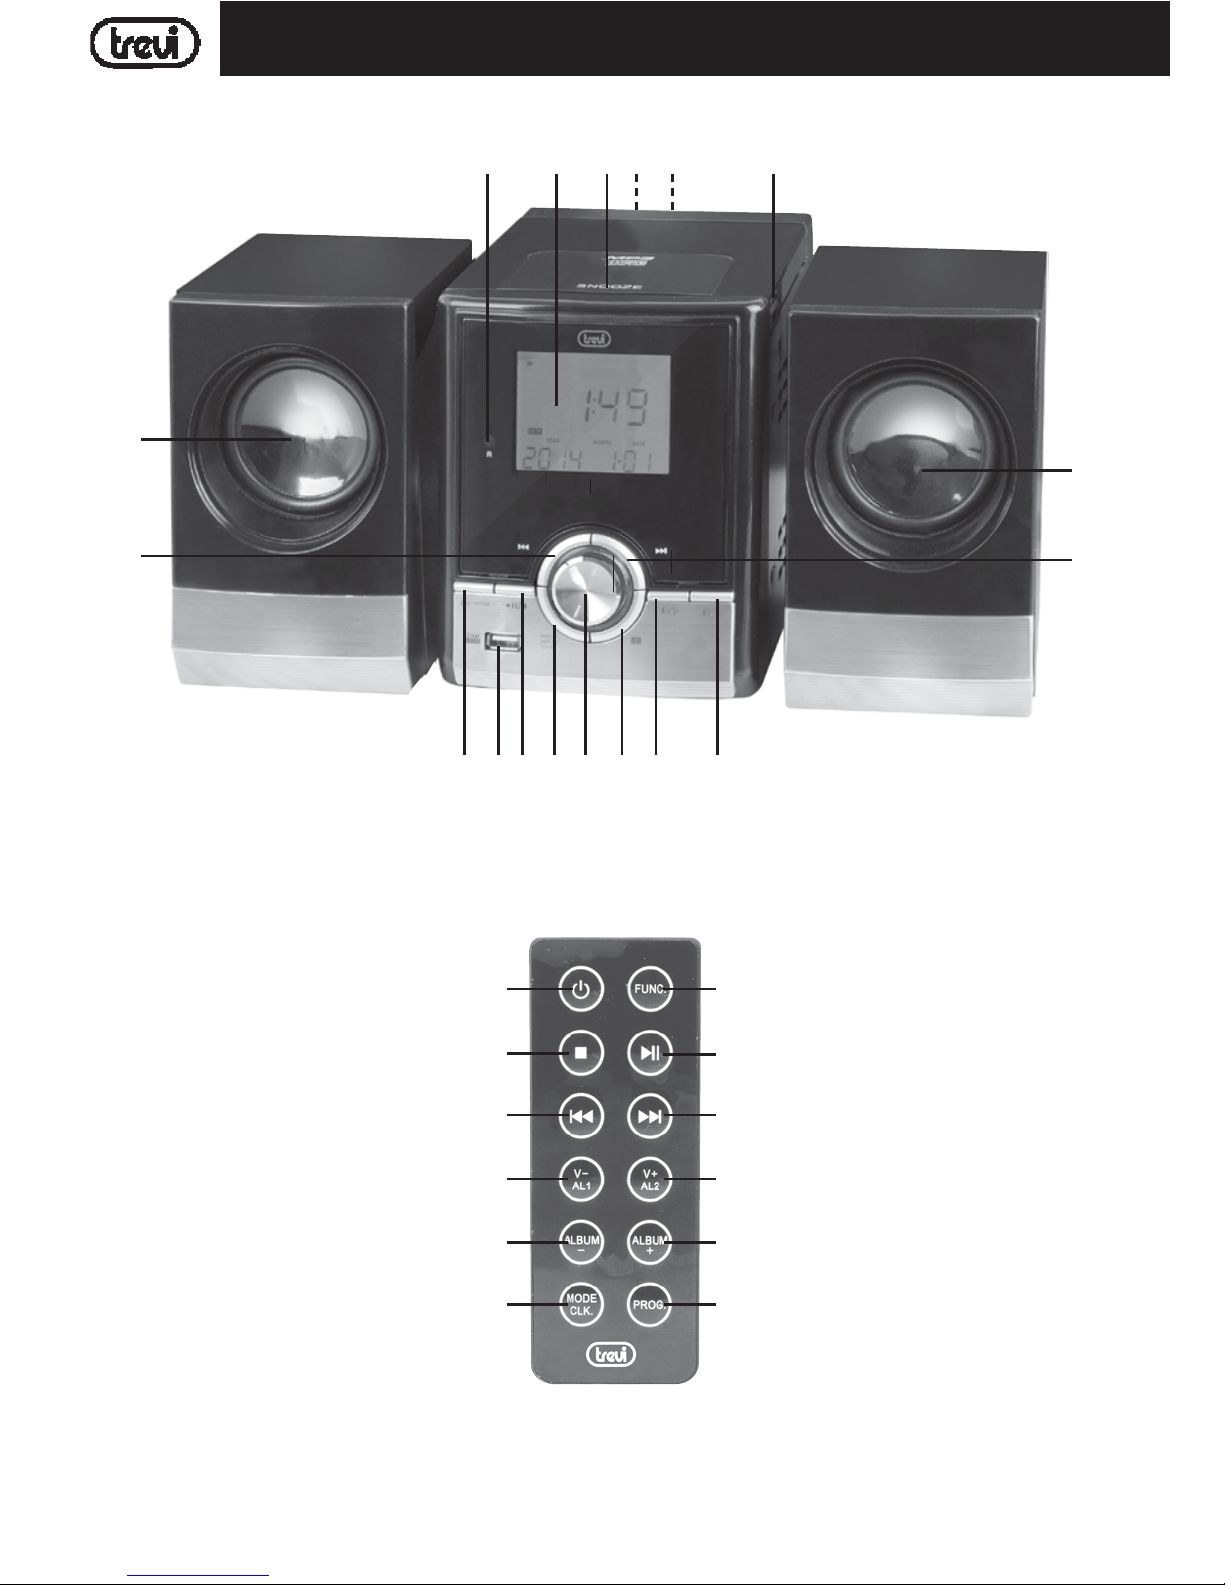
DESCRIZIONE COMANDI
1. Sensore IR telecomando
2. Display
3. Tasto SNOOZE
4. Presacufa
5. Ingresso AUX-IN
6. Apertura vano CD
7. Altoparlanti
8. Tasto PREV I<<, salto brano precedente
9. Tasto NEXT >>I, salto brano successivo
10. Tasto STANDBY/FUNCTION, selettore funzioni RADIO/CD/
USB/AUX
11. Ingresso USB
12. TastoPLAY/PAUSE/STOP>II/ ,riproduzione/pausa/arresto
riproduzione
13. Tasto MODE/DISPLAY/CLK.SET, modalità di riproduzione /
visualizzazione display / regolazione orologio
14. Controllo TUNING, sintonia
15. Tasto ALBUM, selezione cartella in cd/usb mp3
16. Tasto V-/AL1, diminuzione volume / Allarme1
17. Tasto V+/AL2, aumento volume / Allarme2
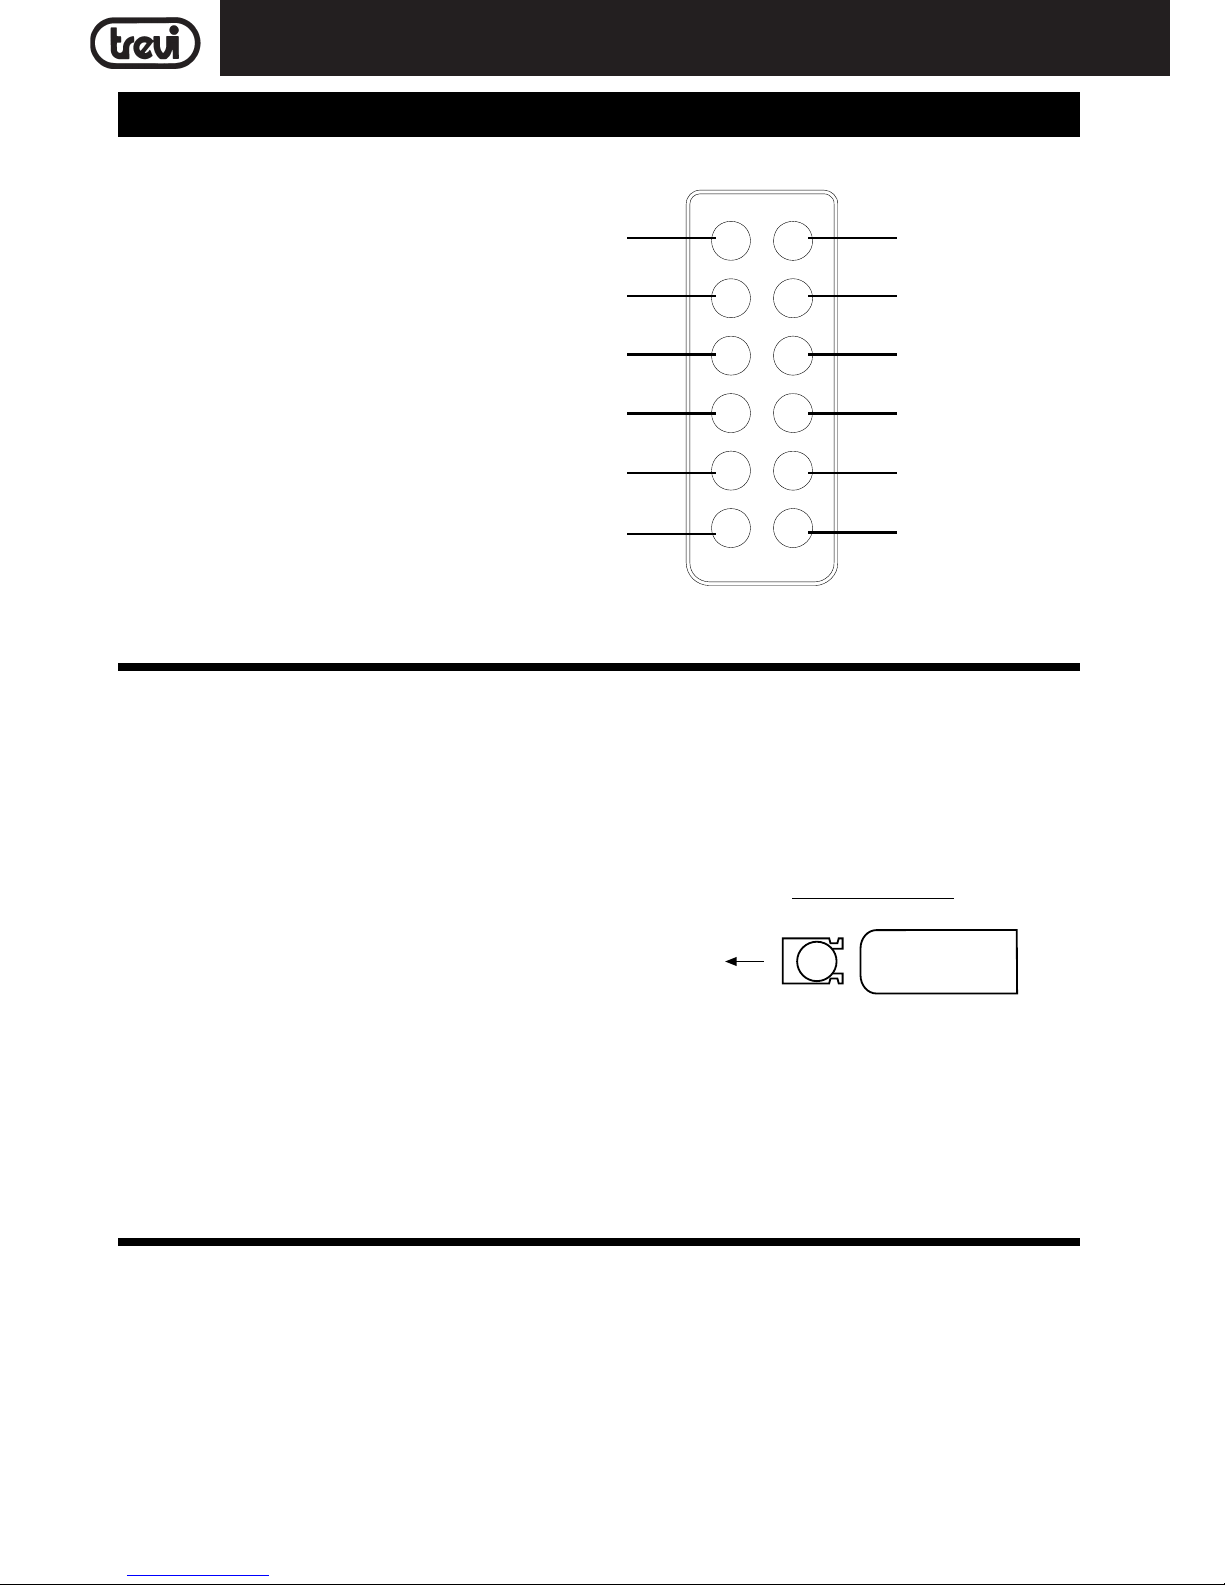
18. Tasto STANDBY
19. Tasto STOP , arresto riproduzione
20. Tasto PREV I<<, salto brano precedente
21. Tasto V-/AL1, diminuzione volume / Allarme1
22. Tasto ALBUM-, selezione cartella precedente in cd/usb mp3
23. Tasto MODE/CLK.SET,modalitàdiriproduzione /regolazione
orologio
24. Tasto FUNCTION, selettore funzioni RADIO/CD/USB/AUX
25. Tasto PLAY/PAUSE >II, riproduzione/pausa
26. Tasto NEXT >>I, salto brano successivo
27. Tasto V+/AL2, aumento volume / Allarme2
28. Tasto ALBUM+, selezione cartella successiva in cd/usb
mp3
29. Tasto PROG., programmazione riproduzione tracce
ITALIANO
SOSTITUZIONE BATTERIA TELECOMANDO
Il telecomando monta una batteria tipo CR2025
1. Spingere la linguetta verso sinistra
2. Estrarre l’alloggiamento porta batteria