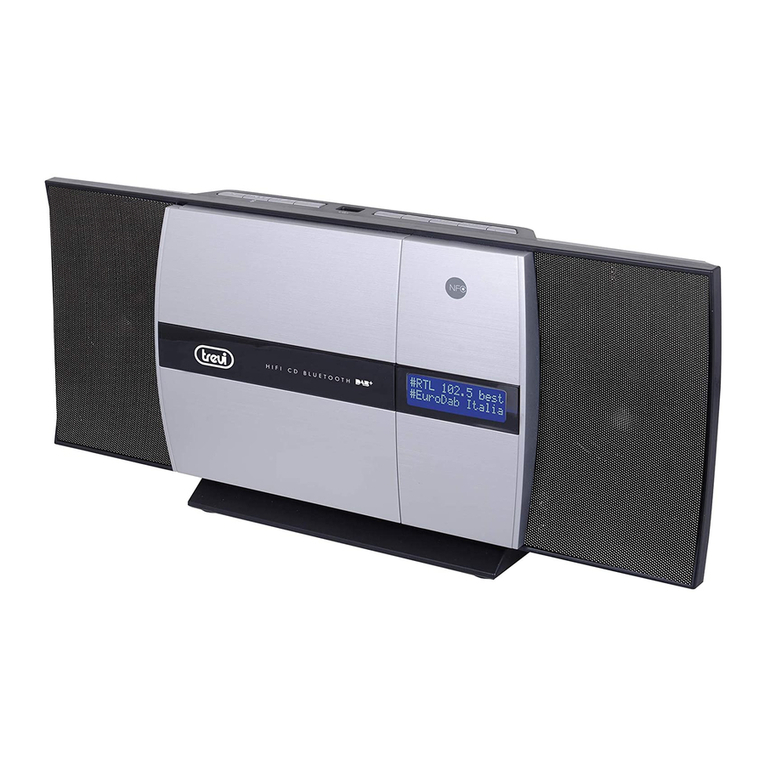
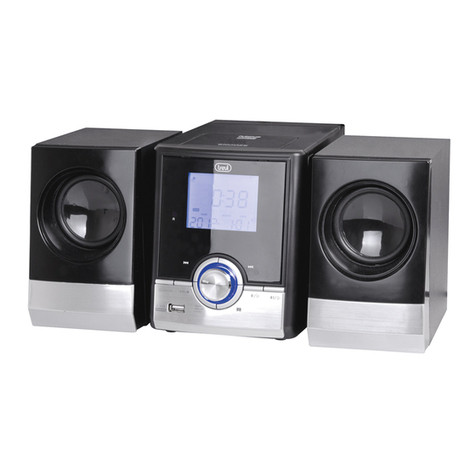
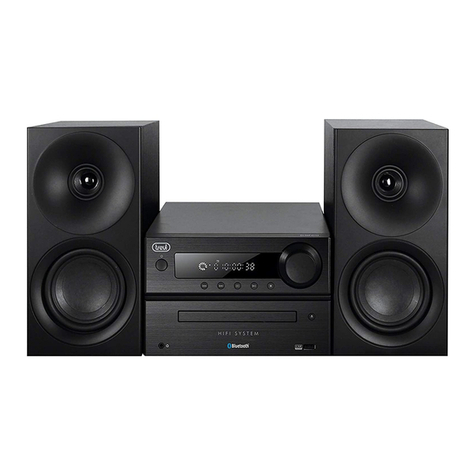
Trevi HCX 1200 BT User manual

JUMBO HIFI SYSTEM CD/MP3/USB/AUX CON
RADIO E CONNESSIONE BLUETOOTH
Manuale d'uso e collegamento
JUMBO HIFI SYSTEM CD/MP3 PLAYER/USB/AUX
WITH RADIO AND BLUETOOTH CONNECTION
Instruction manual
CHAINE STEREO CD/MP3/USB/AUX AVEC
RADIO ET BLUETOOTH
Manuel d’emploi et de connexion
STEREOANLAGE MIT CD/MP3 SPIELER/USB/
AUX RADIO UND BLUETOOTH VERBINDUNG
Betriebs- und Anschlußanleitung
EQUIPOESTEREOCD/MP3/AUX/USBCONRADIO
Y CONEXIÓN BLUETOOTH
Manual de uso y conexiones
AUX IN
HCX 1200 BT
Guida d’uso
User guide
CD MP3
USB IN
BT
HIGH
POWER
RADIO
PLL FM

2
HCX 1200 BT
23 24

3
HCX 1200 BT
AVVERTENZE SUL LASER
Questo apparecchio è dotato di un sistema di lettura con raggio laser. Benché il laser sia di bassa potenza e
con dispositivo di sicurezza che ne impedisce il funzionamento a sportello aperto attenetevi scrupolosamente
alle seguenti avvertenze:
Non avvicinate l'occhio alla lente del laser con l'apparecchio aperto, pericolo di lesione della retina.
Non tentate di smontare o manomettere l'unità laser, pericolo di assorbimento di radiazioni.
NOTE D'USO
Questo apparecchio è uno strumento elettronico di alta precisione; evitate quindi di utilizzarlo nei seguenti casi:
• Vicinoafortifontidicalorecomecaloriferiestufe.
• Inluoghimoltoumidicomestanzedabagno,piscine,ecc.
• Inluoghimoltopolverosi.
• Inluoghisoggettiafortivibrazioni.
■Posizionate l'apparecchio in modo che ai suoi lati ci sia sempre abbastanza spazio per la libera circolazione di aria (almeno
5 cm).
■Non ostruite le feritoie di ventilazione.
■Se dei liquidi penetrano all'interno dell'apparecchio scollegate immediatamente la spina dalla presa e portate l'apparecchio
al più vicino centro assistenza autorizzato TREVI.
■Controllatesempreprimadiaccenderel'apparecchiocheicavidialimentazioneedicollegamentosianoinstallaticorrettamente.
CURA E MANUTENZIONE
Per la pulizia si consiglia l’ uso di un panno morbido, leggermente inumidito. Evitate solventi o sostanze abrasive.
IMPORTANTE
La buona costruzione di questo apparecchio ne garantisce per lungo tempo il perfetto funzionamento. Se tuttavia dovesse presentarsi
qualche inconveniente, sarà opportuno consultare il più vicino Centro Assistenza autorizzato.
TREVI persegue una politica di continua ricerca e sviluppo. Pertanto i prodotti possono presentare caratteristiche diverse da
quelle descritte.
DESCRIZIONE COMANDI UNITA'
1. Display
2. Tasto SKIP -, salto brano precedente
3. TastoPLAY/PAUSE,riproduzione/pausa,memorizzazione
automatica canali radio.
4. Tasto SKIP +, salto brano successivo
5. Tasto STOP
6. Tasto DISCO LIGHT, illuminazione Led
7. Tasto PROGRAM/P-MODE, programmazione, memoriz-
zazione canali Radio
8. Tasto FUNCTION, funzioni RADIO/CD-MP3/USB/BT/AUX
9. Controllo VOLUME
10. Tasto FOLD+/+10/M.+, salto alla cartella sucessiva/
salto di 10 brani successivi in CD/USB MP3
11. Tasto FOLD-/-10/M.-, salto alla cartella precedente/salto
di 10 brani precedenti CD/USB MP3
12. Tasto POWER/STANDBY, , accensione, Standby
13. Ingresso AUX In
14. Ingresso USB
15. Protezioni per Tweeter e woofer
16. Bassreex
17. Tweeter/Woofer
18. Cassa in legno
19. Presa Audio Altoparlante Destro/presa illuminazione Led
altoparlante Destro
20. Presa Audio Altoparlante Sinistro/presa illuminazione Led
altoparlante Sinistro
21. Presa antenna FM
22. Presa cavo di rete 230V/50Hz
23. Sportello lettore CD
24. Tasto apertura sportello CD
ITALIANO

4
HCX 1200 BT
ITALIANO
ALIMENTAZIONE
RETE
Inserire la presa del cavo di rete in dotazione alla presa (22) dell'unità, inserire l'altra estremità in una presa di corrente C.A.230V-
50Hz. Non collegare l'apparecchio a prese con tensione diversa da quella indicata.
COLLEGAMENTI
Collegare i cavi audio degli altoparlanti Destro e Sinistro e i cavi alimentazione Led alle prese (19 e 20).
Collegareilloindotazionedell'antennaRadioFMallapresa(21)
Se non diversamente specicato, le descrizioni dei comandi valgono sia per l'apparecchio che per il telecomando
ACCENSIONE/SPEGNIMENTO
1. Premere il tasto di accensione/standby (12) sull'apparecchio.
- L'apparecchio si avvierà a seconda della funzione scelta.
2. Agire nuovamente sul tasto di accensione/standby (12) per spegnere l'apparecchio.
NOTE
In modalità CD/USB/Bluetooth/AUX, se l'apparecchio non riceve nessun comando per 15 minuti, l'unità si porterà automatica-
menteinmodalitàstandby.Saràsufcientepremerenuovamenteiltastoaccensione/standby(12)perriaccenderel'apparecchio.
FUNZIONAMENTO RADIO
RICERCA STAZIONI RADIO
1. Accendere l'apparecchio e premere il tasto FUNCTION (1) sul telecomando per selezionare la funzione RADIO
2. Sintonizzarsi sulla stazione desiderata utilizzando i tasti TUN- (2) o TUN+ (15), tenerli premuti per qualche secondo per
effettuare una ricerca manuale delle frequenze (la ricerca si fermerà nel momento in cui verrà ricevuta una emittente radio
stereo) o premerli più volte per effettuare una ricerca Fine (passo- passo). La frequenza della stazione apparirà sul Display
(1) dell'unità. Se la frequenza che state ascoltando trasmette in stereofonia apparirà anche la scritta "STEREO" sul display.
3. Regolate il volume agendo sulla manopola (9) dell'unità o utilizzando i tasti (8 e 9) sul telecomando portandolo ad un livello
a voi più confortevole.
NOTE
Per ottenere la migliore ricezione in FM estendete e orientate l’antenna. Se la ricezione non è buona provate a regolare diver-
samente la lunghezza e l’orientamento dell’antenna, comunque la qualità della ricezione in FM dipende molto dal luogo dove
DESCRIZIONE TELECOMANDO
1. Tasto FUNCTION, funzioni RADIO/CD-MP3/USB/BT/AUX
2. Tasto TUN -, ritorno alla stazione Radio precedente.
3. Tasto STOP
4. Tasto B-SKIP/DOWN, salto brano precedente
5. Tasto FOLD.-/-10/Memory-, spostamento alla cartella precedente/ salto di
10 brani precedenti, memorizzazione
6. Tasto MUTE
7. Tasto PROG/MEMORY/P-MODE, programmazione, memorizzazione canali
Radio
8. Tasto VOL-
9. Tasto VOL+
10. Tasto DISCO-LIGHT, illuminazione Led
11. Tasto EQ/ID3, equalizzazione/display info con brani MP3
12. TastoFOLD.+/+10/Memory+,spostamento alla cartellasuccessiva/salto
di 10 brani successivi, spostamento canali Radio memorizzati
13. Tasto F-SKIP/UP, salto brano successivo
14. Tasto//PAIR, PLAY/PAUSA, accoppiamento
15. Tasto TUN +, salto alla stazione Radio successiva.
16. Tasto POWER/STANDBY, accensione/spegnimento e Standby
17. Vano Batterie
3
NAMES OF CONTROLS
1. Display
2. PREVIOUS/REVERSE BUTTON
3. Pause/Play Button
4. NEXT/FORWARD Button
5. POWER/STANDBY Button
6. Disco Light Button
7. Program/P-Mode Button
8. Function Button
9. VOLUME Dial
10. NEXT/FORWARD+10 Button
11. PREVIOUS/REVERSE-10 Button
12. Power/Standby Button
13. Aux In Port
14. USB Port
15. Passive Speaker Guard
16. Through the sound hole
17. Speaker Guard
18. Wooden Box
19. Right Speaker / Disco Light
20. Left Speaker /Disco Light
21. FM ANT. Port
22. AC Power Input
23. Pair Button
24. EQ/ID3 Button
25. Tun+ Button
26. Tun- Button
REMOTE HANDSET
LOADING THE BATTERIES INTO THE REMOTE HANDSET
Open the battery compartment cover.
Insert two “AAA” batteries (not included) as indicated inside the battery compartment.
Close the cover.
Key Functions:
1. FUNCTION BUTTON
2. TUN.-
3. STOP BUTTON
4. SKIP BACKWARD BUTTON
5. FOLD.+/+10/MEMORY+ BUTTON
6. MUTE BUTTON
7. PROG./MEMORY/P-MODE BUTTON
8. VOL- BUTTON
9. VOL+ BUTTON
10. DISCO LIGHT BUTTON
11. EQ/ID3
12. FOLD.-/-10/MEMORY- BUTTON
13. SKIP FORWARD BUTTON
14. PLAY/PAUSE/PAIR BUTTON
15. TUN.+
16. POWER/STANDBY BUTTON
17. BATTERY COMPARTMENT

5
HCX 1200 BTITALIANO
è posto l’apparecchio.
AUTO MEMORIZZAZIONE/SCANSIONE CANALI RADIO
E'possibilesalvareautomaticamenteleprime30stazioniconsegnalesufcientementeforte:
1. In modalità RADIO, premere il tasto //PAIR (14) sul telecomando, l'apparecchio salverà le prime 30 stazioni Radio
ricevute assegnandoli un numero successivo.
2. Dopo aver terminato la scansione, l'unità si sintonizzerà automaticamente al numero di preselezione 1 (P01).
3. Premere il tasto FOLD.+/+10/Memory+ (12) sul telecomando per sintonizzarsi sulla stazione successiva, oppure premere
il tasto FOLD.-/-10/Memory- (5) sul telecomando per sintonizzarsi sulla stazione precedente.
MEMORIZZAZIONE MANUALE DEI CANALI RADIO
E' possibile memorizzare manualmente le stazioni preferite così che possano essere richiamate velocemente:
1. In modalità RADIO, sintonizzarsi sulla stazione desiderata utilizzando i tasti TUN- (2) o TUN+ (15) sul telecomando.
2. Premere il tasto PROG/MEMORY/P-MODE (7), la scritta "P01" lampeggerà sul Display.
3. Premere il tasto FOLD.-/-10/Memory- (5) o il tasto FOLD.+/+10/Memory+ (12) e selezionare il numero dove si vuole
memorizzare la stazione Radio.
4. Premere il tasto PROG/MEMORY/P-MODE (7) per confermare.
5. Ripetere i punti dal 2 al 4 per memorizzare altre stazioni Radio.
6. Premere i tasti FOLD.-/-10/Memory- (5) o il tasto FOLD.+/+10/Memory+ (12) per richiamare il numero della stazione
memorizzata.
NOTE
E'possibilememorizzarenoa30stazioniRadio.
FUNZIONAMENTO LETTORE CD-MP3
RIPRODUZIONE
1. Accendere l'apparecchio e premere il tasto FUNCTION (1) sul telecomando per selezionare la funzione CD.
2. Aprire il vano CD premendo il tasto (24) e inserire il disco con il lato scritto rivolto verso l'alto. Richiudere lo sportello premendo
dolcemente.
3. Dopo qualche secondo il display mostra il numero delle tracce (brani) presenti sul disco e si avviera' la riproduzione.
4. Premere il tasto//PAIR (14) per attivare la pausa, il display incomincia a lampeggiare.
5. Per disinserire la pausa premere ancora una volta il tasto//PAIR (14).
6. PremereiltastoSTOP(3)perfermaredenitivamentelariproduzione.
NOTE
- Assicurarsi che il disco sia completamente fermo prima di aprire lo sportello del CD.
- Se il disco è illeggibile o se non vi è alcun disco all'interno del lettore, il display visualizzerà "NO DISC".
SALTO TRACCIA
1. Premendo il tasto F-SKIP/UP (13), durante l’ascolto si passa alla traccia successiva, mentre con il tasto B-SKIP/DOWN (4),
si passa all'inizio del brano (premendolo una volta) al brano precedente (premendolo più volte).
2. Premere e tenere premuto il tasto F-SKIP/UP (13) o B-SKIP/DOWN (4),durante l'ascolto per ricercare velocemente un parti-
colare passaggio musicale.
3. Rilasciare il tasto per tornare alla normale riproduzione.
Per selezionare un brano/traccia il cui numero è superiore a 10 (CD Mp3), premere il tasto FOLD.+/+10/Memory+ (12) ogni volta
per andare avanti di 10 brani, quindi premere il tasto F-SKIP/UP (13) per selezionare il brano desiderato.
Per selezionare un brano/traccia il cui numero è inferiore a 10 (CD Mp3), premere il tasto FOLD.-/-10/Memory- (5) ogni volta per
andare indietro di 10 brani, quindi premere il tasto B-SKIP/DOWN (4) per selezionare il brano desiderato.
RIPETIZIONE DI UN SINGOLO BRANO
1. Premere una volta il tasto PROG/MEMORY/P-MODE (7) sul telecomando, la scritta REPEAT lampeggiate compare sul display
e l’apparecchio riproduce continuamente la stessa traccia.
2. PremereiltastoSTOP(3)perfermaredenitivamentelaripetizione.
RIPETIZIONE DELL'INTERO DISCO
1. PremeretrevolteiltastoPROG/MEMORY/P-MODE(7)sultelecomando,lascrittaREPEATrimarràssasuldisplayel’ap-
parecchio riproduce continuamente l'intero disco.

6
HCX 1200 BT
2. Perripristinareilfunzionamentonormalediriproduzionedell’apparecchio,premereiltastoSTOP(3)perfermaredenitivamente
la ripetizione.
RIPETIZIONE ALBUM (CD-MP3)
Questa funzione è attiva solamente se il cd Mp3 contiene directory o cartelle
1. PremereduevolteiltastoPROG/MEMORY/P-MODE(7)sultelecomando,compariràlascrittaREPEATFOLDssasuldisplay
e l’apparecchio riproduce continuamente l'intero disco.
2. Premere i tasti F-SKIP/UP (13) o B-SKIP/DOWN, (4) per cercare una directory differente.
3. Per ripristinare il funzionamento normale di riproduzione dell’apparecchio, premere il tasto PROG/MEMORY/P-MODE (7) sul
telecomando,noaquandolescritteREPeRANDscompaionodaldisplay.
FUNZIONE RANDOM
Riproduzione secondo una sequenza casuale del CD.
1. Su riproduzione da CD Audio, premere tre volte il tasto PROG/MEMORY/P-MODE (7) sul telecomando, sul display compare
la scritta RAN.
- Su riproduzione da CD-Mp3, premere quattro volte il tasto PROG/MEMORY/P-MODE (7) sul telecomando, sul display compare
la scritta RAND.
2. Per disattivare la funzione premere il tasto PROG/MEMORY/P-MODE (7) sul telecomando, la scritta RAND scompare dal
display.
FUNZIONE PROGRAM
Riproduzione secondo una programmazione impostata dall'utente.
1. Se il CD è in riproduzione, fermare la lettura premendo il tasto STOP (3).
2. Premere il tasto PROG/MEMORY/P-MODE (7) sul telecomando, sul display compare la scritta P01.
3. Premere i tasti F-SKIP/UP (13) o B-SKIP/DOWN (4) per selezionare la traccia da riprodurre per prima.
4. Premere il tasto PROG/MEMORY/P-MODE (7) sul telecomando per confermare la scelta.
5. Procedereseguendoipunti3-4perimpostareilrestodelletraccenoadunmassimodi20tracceaudioo99tracceMP3.
6. Premere il tasto //PAIR (14) per iniziare la riproduzione programmata.
7. Premere due volte il tasto STOP (3) per disattivare la programmazione.
SELEZIONE DI UNA CARTELLA DESIDERATA (solo per dischi MP3)
1. Per selezionare una cartella desiderata, premere e tenere premuto il tasto FOLD.+/+10/Memory+ (12), premere ogni volta
per andare avanti in una cartella.
2. Premere il tasto F-SKIP/UP (13) per selezionare il brano desiderato.
FUNZIONAMENTO INGRESSO USB
RIPRODUZIONE
1. Accendere l'apparecchio e premere il tasto FUNCTION (1) sul telecomando per selezionare la funzione USB.
2. Collegare una memoria USB alla presa (14) sull'unità, il display mostrerà il numero totale dei brani riproducibili dal dispositivo
USB.
3. Dopo qualche secondo la riproduzione si avvierà automaticamente.
4. Premere il tasto//PAIR (14) per attivare la pausa, il display incomincia a lampeggiare.
5. Per disinserire la pausa premere ancora una volta il tasto//PAIR (14).
6. PremereiltastoSTOP(3)perfermaredenitivamentelariproduzione.
7. Fare riferimento al paragrafo "funzionamento lettore cd-mp3" per il resto delle funzioni.
NOTE
- Il lettore potrebbe non supportare alcuni dispositivi dotati di presa USB, questo è dovuto all'incompatibilità di alcuni processori.
-Per evitare interferenze dannose, collegare sempre le periferiche USB direttamente all'unità. Non utilizzare cavi di prolunga
per collegare i dispositivi USB all'unità.
INGRESSO AUX IN
1. Accendere l'apparecchio e premere il tasto FUNCTION (1) sul telecomando per selezionare la funzione AUX IN.
2. Collegare una qualsiasi unità provvista di uscita audio tramite apposito cavo Jack da 3,5mm (non incluso) all'ingresso AUX
IN (13).

7
HCX 1200 BT
3. Comandare l'unità esterna dai propri comandi.
FUNZIONAMENTO BLUETOOTH
1. Accendere l'apparecchio e premere il tasto FUNCTION (1) sul telecomando per selezionare la funzione BT.
2. Nella modalità Bluetooth, il Led Blu frontale (PAIR) comincerà a lampeggiare seguito da 2 bip, il sistema entra automaticamente
in ricerca.
3. Attivare la funzionalità Bluetooth sul dispositivo esterno da accoppiare e renderlo visibile.
4. Avviare la ricerca dei dispositivi. Al termine ricercare il dispositivo "HCX 1200BT" o "F-3086".
5. Inserire la password "0000" se necessario, oppure inserire quella proposta dall'apparecchio. Se l'unità non riesce a connettersi
entro 2 minuti, l'indicatore luminoso lampeggia ogni 2 secondi. Quindi premere il pulsante //PAIR (14), sul telecomando
per riconnettersi.
6. Premere il tasto//PAIR (14), per avviare la riproduzione
7. Tenere premuto per qualche secondo il tasto //PAIR (14), per eliminare l'accoppiamento.
FUNZIONE EQUALIZZATORE
Questa unità dispone di un sistema di equalizzazione pre impostato, premere il pulsante EQ/ID3 (11) sul telecomando durante la
riproduzione per selezionare un'impostazione che meglio si adatta allo stile musicale: FLAT, CLASSIC, ROCK, POP e JAZZ.
SISTEMA ID3
L'apparecchiodisponediunsistemaID3.Seillemp3chesivuoleriprodurreèinformato"ID3",l'apparecchiovisualizzeràau-
tomaticamente sul display le informazioni di "NOME TITLE", "NOME ARTISTA" e "NOME ALBUM" . Per disattivare questa funzione
èsufcientepremereetenerepremutoilpulsanteEQ/ID3(11)sultelecomandoepassare,quindi,allavisualizzazionenormale.
FUNZIONE DISCO LIGHT
Per cambiare gli effetti delle luci discoteca, premere il tasto DISCO-LIGHT (10) sul telecomando. È possibile scegliere tra cinque
diverse modalità.
Perdisattivareglieffettidellelucidiscoteca,premereiltastoDISCO-LIGHT(10)sultelecomandonoaquandoildisplayvisualizza"OFF".
CARATTERISTICHE TECNICHE
GENERALI
Alimentazione: ........................................................................................................................C.A. 230V 50Hz
Potenza .........................................................................................................................................60W
PotenzaAudiomassimainuscita:..................................................................................................................................35Wx2
Dimensioniunitàcentrale: .....................................................................................................................210x268x317mm
Dimensionialtoparlanti: .....................................................................................................................220x270x317mm
SEZIONE CD
Sistema di lettura: .................................................................................................Laser a semiconduttori, 3 raggi
Risposta in frequenza: ........................................................................................................................100 - 16.000Hz
SEZIONE RADIO
Bande di frequenza: ..................................................................................................................FM 87,5 - 108 MHz
ITALIANO
5
This unit has a ID3 system, if the mp3 file is“ID3” format, it will automatically search the
information of “TITLE NAME” “ARTIST NAME” and ”ALBUM NAME” to show on the display. To
turn off the show tag system, press and hold the EQ/ID3 button and the unit will back to normal
display.
DISCO LIGHT
To change the disco light effects, press the DISCO-LIGHT button on unit or remote control. You
can choose from five different modes.
To disable the disco light, press the DISCO-LIGHT button on unit or remote control until the
display reads “OFF”.
RADIO OPERATION
TUNING TO A RADIO STATION
1. Press the FUNCTION button on unit or remote control to select the RADIO FUNCTION, this
unit is designed for FM ONLY.
2. Tune to the desired station by pressing the TUN.+/TUN.- button on unit or remote control, the
station frequency will show on the display. Example: FM87.80 MHz. If the radio receive
Stereo signal, ”STEREO” indicator will show on the display.
3. Rotate the VOLUME dial on unit or VOL.+/VOL.- key on remote control to adjust the volume
to a comfortable level.
4. Extend FM ANTENNA to its full length and gently move the unit back and forth to get the best
reception, or place the unit in an open location.
5. To turn off the radio, press the FUNCTION button on unit or remote control to switch to other
functions or press POWER button to turn off the unit.
AUTO PRESET MEMORY / SCAN
To search for and automatically save stations to preset memory, press the PLAY/PAUSE
button on unit or remote control. Any station with a strong enough signal will be saved to preset
memory. After the unit is finished scanning, the unit will automatically tune to preset station
number 1 (P01). To tune to the next preset station, press FOLD.+/+10/M.+ button on unit or
remote control. To tune to the previous station, press FOLD.-/-10/M.- button on unit or remote
control.
MANUAL PRESET MEMORY OPERATION
You may choose stations to save in preset memory so that you can tune directly to these
stations quickly.
1. Press the PROG./P-MODE/M. button on unit or remote control . “P01 ” will flash on the
display. Press the TUN.+ or TUN.- button on unit or remote control to select the desired
station.
2.Press the PROG./P-MODE /M. button on unit or remote control to choose the position you
want to store, then press the PROG./P-MODE/M. button on unit or remote control again to
enter.
3. To save another station, repeat steps (1) & (2). You may save up to 30 FM stations.
To tune to preset stations, press FOLD.+/+10/M.+ or FOLD.-/-10/M.- button on unit or remote
control.

8
HCX 1200 BT
ENGLISH
1
IMPORTANT NOTES
INTRODUCTION
Thank you for buying this product.
Please read through these operating instructions, so you will know how to operate your
equipment properly. After you finished reading the instructions manual, put it in a safe place
for future reference.
CAUTION
Use of controls or adjustment or performance of procedures other than those specified herein
may result in hazardous radiation exposure.
DANGER
This Compact disc player is classified as a Class 1
LASER PRODUCT.
THE CLASS 1 LASER PRODUCT label is located
on the rear exterior.
NOTE: The manufacturer is not responsible for any radio or TV interference caused by
unauthorized modifications.
Avoid installing the unit in locations described below:
Places exposed to direct sunlight or close to heat radiating appliances such as electric
heaters, or other equipment that radiate too much heat.
Places subject to constant vibration.
Unventilated or dusty places.
Humid or moist places.
Operate buttons and switches as instructed in the manual.
Before turning on the power for the first time, make sure that the power cord is properly
installed.
Store the unit in a cool area to avoid damage from heat.
CAUTION: TO REDUCE THE RISK OF ELECTRIC SHOCK, DO DOT REMOVE THE COVER
(OR BACK). DO NOT OPEN THE UNIT. FOR SERVICE, PLEASE REFER TO
QUALIFIED SERVICE PERSONNEL.

9
HCX 1200 BTENGLISH
2
LOCATION OF CONTROLS

10
HCX 1200 BT
ENGLISH
3
NAMES OF CONTROLS
1. Display
2. PREVIOUS/REVERSE BUTTON
3. Pause/Play Button
4. NEXT/FORWARD Button
5. POWER/STANDBY Button
6. Disco Light Button
7. Program/P-Mode Button
8. Function Button
9. VOLUME Dial
10. NEXT/FORWARD+10 Button
11. PREVIOUS/REVERSE-10 Button
12. Power/Standby Button
13. Aux In Port
14. USB Port
15. Passive Speaker Guard
16. Through the sound hole
17. Speaker Guard
18. Wooden Box
19. Right Speaker / Disco Light
20. Left Speaker /Disco Light
21. FM ANT. Port
22. AC Power Input
23. Pair Button
24. EQ/ID3 Button
25. Tun+ Button
26. Tun- Button
REMOTE HANDSET
LOADING THE BATTERIES INTO THE REMOTE HANDSET
Open the battery compartment cover.
Insert two “AAA” batteries (not included) as indicated inside the battery compartment.
Close the cover.
Key Functions:
1. FUNCTION BUTTON
2. TUN.-
3. STOP BUTTON
4. SKIP BACKWARD BUTTON
5. FOLD.+/+10/MEMORY+ BUTTON
6. MUTE BUTTON
7. PROG./MEMORY/P-MODE BUTTON
8. VOL- BUTTON
9. VOL+ BUTTON
10. DISCO LIGHT BUTTON
11. EQ/ID3
12. FOLD.-/-10/MEMORY- BUTTON
13. SKIP FORWARD BUTTON
14. PLAY/PAUSE/PAIR BUTTON
15. TUN.+
16. POWER/STANDBY BUTTON
17. BATTERY COMPARTMENT

11
HCX 1200 BTENGLISH
4
REMOTE CONTROL OPERATION
To operate the unit with the remote control, point the
remote handset at the remote sensor on the front panel
and press the appropriate button on the remote handset.
The remote works best within a range of 6 ~ 7 meters from
the front panel and on an angle of 30 degrees. Bright
sunlight or room light conditions can interfere with the
remote control. If the remote operation is unsatisfactory or
stops working entirely, first try replacing the remote
batteries, then try reducing the room lighting conditions.
POWER SOURCE
This unit is designed to operate on AC electrical systems.
AC OPERATION
Plug one end of the power cord into the AC power input on the unit; plug the other end into a
household AC outlet.
BASIC FUNCTION
TURNING THE UNIT ON/OFF
Connect the Left and Right speaker cable to the L/R socket and connect the FM wire to the FM
ANT. socket on the rear cabinet. Press the STANDBY button on unit or remote control to turn the
unit on or off.
NOTE: In CD/USB/BLUETOOTH or AUX mode, when the unit is not providing the main
function for 15 minutes, the unit will automatically switch into standby mode. Press the
STANDBY button to turn on the unit again.
ESD hints – The product maybe reset or not reset to operation of control due to electrostatic
discharge, just switch off and reconnect again.
SETTING THE FUNCTION MODE
To change the function mode, press the FUNCTION button on the unit (RADIO / CD / USB / BT /
AUX).
ADJUSTING THE VOLUME
Rotate the VOLUME dial on unit or VOL.+/VOL.- keys on remote control to increase or
decrease volume.
EQUALIZER (EQ) FUNCTION
This unit has a built-in equalizer system, Press the EQ/ID3 button on unit or remote control
during playback to select a setting that best matches the music style: FLAT, CLASSIC, ROCK,
POP and JAZZ.
ID3 System

12
HCX 1200 BT
ENGLISH
5
This unit has a ID3 system, if the mp3 file is“ID3” format, it will automatically search the
information of “TITLE NAME” “ARTIST NAME” and ”ALBUM NAME” to show on the display. To
turn off the show tag system, press and hold the EQ/ID3 button and the unit will back to normal
display.
DISCO LIGHT
To change the disco light effects, press the DISCO-LIGHT button on unit or remote control. You
can choose from five different modes.
To disable the disco light, press the DISCO-LIGHT button on unit or remote control until the
display reads “OFF”.
RADIO OPERATION
TUNING TO A RADIO STATION
1. Press the FUNCTION button on unit or remote control to select the RADIO FUNCTION, this
unit is designed for FM ONLY.
2. Tune to the desired station by pressing the TUN.+/TUN.- button on unit or remote control, the
station frequency will show on the display. Example: FM87.80 MHz. If the radio receive
Stereo signal, ”STEREO” indicator will show on the display.
3. Rotate the VOLUME dial on unit or VOL.+/VOL.- key on remote control to adjust the volume
to a comfortable level.
4. Extend FM ANTENNA to its full length and gently move the unit back and forth to get the best
reception, or place the unit in an open location.
5. To turn off the radio, press the FUNCTION button on unit or remote control to switch to other
functions or press POWER button to turn off the unit.
AUTO PRESET MEMORY / SCAN
To search for and automatically save stations to preset memory, press the PLAY/PAUSE
button on unit or remote control. Any station with a strong enough signal will be saved to preset
memory. After the unit is finished scanning, the unit will automatically tune to preset station
number 1 (P01). To tune to the next preset station, press FOLD.+/+10/M.+ button on unit or
remote control. To tune to the previous station, press FOLD.-/-10/M.- button on unit or remote
control.
MANUAL PRESET MEMORY OPERATION
You may choose stations to save in preset memory so that you can tune directly to these
stations quickly.
1. Press the PROG./P-MODE/M. button on unit or remote control . “P01 ” will flash on the
display. Press the TUN.+ or TUN.- button on unit or remote control to select the desired
station.
2.Press the PROG./P-MODE /M. button on unit or remote control to choose the position you
want to store, then press the PROG./P-MODE/M. button on unit or remote control again to
enter.
3. To save another station, repeat steps (1) & (2). You may save up to 30 FM stations.
To tune to preset stations, press FOLD.+/+10/M.+ or FOLD.-/-10/M.- button on unit or remote
control.
13
HCX 1200 BTENGLISH
6
CD/MP3 OPERATION
SUPPORTED DISC FORMATS
This unit can play all digital audio CD/MP3, finalized digital audio CD-Recordable (CD-R) discs,
finalized digital audio CD-Rewritable (CD-RW) discs, and CD-DA formatted digital audio
CD/CD-R/CD-RW discs.
LOADING A DISC
1. Press the FUNCTION button on unit or remote control to select “CD” mode.
2. Press PUSH TO OPEN on the CD door to open it; the display will read “OPEN”.
3. Place an audio CD or MP3 disc into the tray with the label side facing up.
4. Close the CD door; the display will flash “CD READ”, and then show the total number of
playable tracks on the disc. Playback will start automatically.
5. To remove the CD, press the STANDBY button on unit or remote control to turn off the unit,
then press PUSH TO OPEN on the CD door to open it. Hold the CD by its edges, and take it out
carefully.
Note:
1. Make sure the disc is completely stopped before opening the CD door.
2. To ensure good system performance, wait until the unit reads the disc completely before
doing anything else.
3. If the disc is unreadable or if no disc is loaded in the tray, the display will show “NO DISC”.
PLAYING A DISC
1. The playback starts from Track 1 automatically after a compatible disc has been loaded and
read by the unit.
To pause playback, press the PLAY/PAUSE button on unit or remote control. The
current track time will flash on the display.
To resume playback, press the PLAY /PAUSE button on unit or remote control again.
2. To stop playback, press the STOP button on unit or remote control. The display will show the
total number of tracks.
SKIPPING TO A TRACK/TIME POINT
To select a desired track
Press the SKIP UP or SKIP DOWN buttons on unit or remote control to skip to the next or
previous track respectively. Track numbers are shown on the display.
To scan quickly to a point in a track
Press and hold the SKIP UP or SKIP DOWN buttons on unit or remote control to quickly scan
forward or in reverse through a track. The track time is shown on the display.
To select a song which track number exceeds 10(for MP3 disc only)
To select a song/track which number exceeds 10, press the FOLD+/+10/M+ button each time to
skip forward 10 tracks, then press the SKIP UP to select desired track.
To select a desired folder (for MP3 disc only)
To select a desired folder, press and hold the FOLD+/+10/M+ button each time to skip forward a
folder, then press the SKIP UP to select desired track.

14
HCX 1200 BT
ENGLISH
7
PROGRAMING TRACKS
You can create a custom play list from your disc when playback is stopped. You can program up
to 20 tracks for a CD disc and 99 tracks for an MP3 disc
1.While play is stopped, press the PROG./P-MODE/M. button on unit or remote control . The
display will flash PROG and show “P01 001”.
2.Use the SKIP UP or SKIP DOWN buttons on unit or remote control to select the first track to
be saved to the program list, then press PROG./P-MODE/M. on unit or remote control to
save. The display will now show the next program number (e.g., “P02 012”).
3.Repeat step 2 to save more tracks to the program list until all tracks have been
programmed.
4.Press the PLAY/PAUSE button on unit or remote control to start playing the program list
from the beginning. The display will show which track is currently playing.
5.Press the STOP button on unit or remote control to stop program playback.
To clear the program, you may the STOP button on unit or remote control when
the disc stopped and open the CD compartment lid. The program is now
erased.
REPEAT PLAY
You can play one track or all tracks on the disc repeatedly.
To repeat a single track, press the PROG./P-MODE/M. button on unit or remote control
during play until the REPEAT indicator flashes on the display. The current track will be
played over an over again until you press the STOP button on unit or remote control.
To repeat all tracks, press the PROG./P-MODE/M. button on unit or remote control during
play until the REPEAT indicator shows steadily on the display. All tracks on the disc will be
played over and over again till you press the STOP button on unit or remote control.
To repeat a folder, press the PROG./P-MODE/M. button on unit or remote control during play
until the REPEAT FOLD indicator shows on the display. All tracks in the current folder will be
played over and over again till you press the STOP button on unit or remote control. (This
option is only available when playing an MP3 disc that contains more than one folder.)
To cancel repeat play, press the PROG./P-MODE/M. button on unit or remote control until
the display no longer shows any repeat indicators.
RANDOM PLAY
Press the PROG./P-MODE/M. button on unit or remote control during play until the “RAN”
indicator shows on the display. Tracks will play in random order. To resume normal playback,
press the PROG./P-MODE/M. button on unit or remote control until the “RAN” indicator
disappears from the display.
INTRO PLAY
Press the PROG./P-MODE/M. button on unit or remote control during play until the “INTRO”
indicator is shown on the display. The first 10 seconds of each track will play, and then skip to
the next track. To resume normal playback, press the PROG./P-MODE/M. button on unit or
remote control until the “INTRO” indicator disappears from the display.

15
HCX 1200 BTENGLISH
8
LISTENING TO USB
USB OPERATION
1. Press the FUNCTION button on unit or remote control to select “USB” mode.
2. Connect the USB memory stick to the USB port found on the front of the unit. The display will
show the total number of playable tracks on the USB device. Playback will start automatically
from Track 1.
3. To pause playback, press the PLAY/PAUSE button on unit or remote control . The current
track time will flash on the display.
4. To resume playback, press the PLAY /PAUSE button on unit or remote control again.
5. To stop playback, press the STOP button on unit or remote control . The display will show the
total number of tracks.
6. To learn more about custom programs and repeat/random/intro playback, please refer to the
CD/MP3 OPERATION section of this manual.
CAUTION:
To prevent harmful interference, always connect USB devices directly to the unit. Do not use
a USB extension cable to connect USB devices to the unit.
AUX-IN OPERATION
1. Press the FUNCTION button on unit or remote control to select “AUX” mode.
2. Connect your audio device to the 3.5mm AUX IN jack found on the front of the unit with a
3.5mm AUX cable.
3. Adjust the volume level by turning the VOLUME dial on the unit or VOL.+/VOL.- keys on
remote control or on the external audio device.
4. Control playback with your audio device.
BLUETOOTH OPERATION
1. Press the FUNCTION button on unit or remote control to switch to BLUETOOTH function,
the LCD will display“ BT ” and the light will flash at high speed.
2. Turn on the Bluetooth function on the device, scan the unit HCX 1200BT and connect, then
input the password 0000 if required, the light will light up to indicate connection done, and
the display will show “BT”. Press Play to start playback. If the unit can't connect the relative
Bluetooth within 2 minutes, the indicator light will flash each 2'nds. Then press the PAIR
button on unit or on remote control to reconnect.
3. Press the VOLUME UP/DOWN on unit/remote control or the device to your desired level.
4. Press the PAIR button on unit or on remote control to disconnect Bluetooth.
Note: The Bluetooth works best within 10 meters.

16
HCX 1200 BT
SPECIFICATIONS
GENERAL
Power Requirement: ..................................................................................................................AC 100-230V 50Hz
Power consumption .........................................................................................................................................60W
Potenzamassimainuscita: ...................................................................................................................................35Wx2
DimensionMainUnit: .....................................................................................................................210x268x317mm
Dimensionspeaker: .....................................................................................................................220x270x317mm
COMPACT DISC SECTION
Optical pickup: ..........................................................................................................................3-Beam Laser
Frequency Response: .........................................................................................................................100 Hz- 16KHz
RECEIVER SECTION
Receiving Bands: ...................................................................................................................................FM only
Frequency range: ..................................................................................................................FM 87,5 - 108 MHz
AUDIO SECTION
PowerOutput: ...................................................................................................................................35Wx2
ENGLISH

17
HCX 1200 BT
AVERTISSEMENT SUR LE LASER
Cet appareil est pourvu d’un système de lecture à rayon laser. Bien que le laser soit de faible puissance et
muni d’un dispositif de sécurité empêchant son fonctionnement lorsque le volet est ouvert, suivez scrupu-
leusementlesprécautionssuivantes:n’approchezpaslesyeuxdelalentilledulaserlorsque l’appareil est
ouvert; danger de lesion de la retine.
n’essayez pas de demonter ou d’alterer l’unite laser; danger d’absorption de radiations.
AVERTISSEMENT
NOTES D’EMPLOI
Cet appareil est un instrument électronique de haute précision; évitez donc de l’employer dans les cas suivants:
• Aproximitédefortessourcesdechaleurtellesquedesradiateursoutoutappareildechauffage.
• Dansdeslieuxtrèshumidestelsquedessallesdebains,despiscines,etc.
• Dansdeslieuxtrèspoussiéreux.
• Dansdeslieuxsujetsàdesfortesvibrations.
■ Positionnerl’appareildefaçonàlaissertoujoursdel’espacepourlalibrecirculationdel’airàsescôtés(aumoins5cm).
■N’obstruez pas les fentes d’aération.
■ Sidessubstancesliquidespénètrentàl’intérieurdel’appareil,débranchezimmédiatementlacheetapportezl’appareilau
centre d’assistance agréé TREVI le plus proche.
■ Avantdemettrel’appareilenfonction,vérieztoujoursquelescâblesd’alimentationetdeconnexionsoientcorrectement
installés.
SOIN ET ENTRETIEN
Pourlenettoyageonconseillel’emploid’unchiffondoux,légèrementimbibé.Evitezlessolvantsoulessubstancesabrasives.
IMPORTANT
La bonne construction de cet appareil garantit pour longtemps son parfait fonctionnement. Si toutefois des inconvénients devaient
se présenter, contactez le Centre d’Assistance agréé le plus proche.
TREVI poursuit une politique de recherche et de développement continus. Par conséquent, les produits peuvent présenter des
caractéristiquesdifférentesparrapportauxdonnéesmentionnées.
DESCRIPTION DES COMMANDES
1. Afcheur
2. Touche SKIP -, passage au morceau précédent
3. Touche PLAY/PAUSE, lecture/pause, chaînes de radio
Mémorisation automatique
4. Touche SKIP+, passage au morceau suivant
Indicateur FM STÉRÉO
5. Touche STOP, arrêt
6. Touche DISCO LIGHT, éclairage à LED
7. TouchePROGRAM/P-MODE,programmation,leschaînes
de radio de stockage
8. Touche FUNCTION, fonctions RADIO/CD-MP3/USB/BT/
AUX
9. Réglage du VOLUME
10. ToucheFOLD+/+10M.+,sauteraudossiersuivant/Saut
10 titres plus tard dans CD/USB/MP3
11. ToucheFOLD-/-10M.-,sauter audossier précédent/Saut
10titresplustôtdansCD/USB/MP3
12. Touche POWER/STANDBY, allumez l’appareil
13. Entrée AUX-IN
14. Entrée USB
15. Protections pour haut-parleurs
16. BassReex
17. Haut-parleurs
18. Caisse en bois
19. Prises haut-parleurs droit /haut-parleur droit prise d'éclai-
rage LED
20. Prises haut-parleurs gauche/haut-parleur gauche prise
d'éclairage LED
21. Prise d'antenne FM
22. Prise de courant
23. Compartiment CD
24. Touche d’ouverture du logement CD
FRANCAIS

18
HCX 1200 BT
FRANCAIS
ALIMENTATION SECTEUR
Insérezlacheducâbled'alimentationfourniaveclasortie(22)del'appareil,branchezl'autreextrémitédansuneprisedecourant
CA230V-50Hz. Ne pas brancher l'appareil à une prise avec une tension autre que celle indiquée.
CONNECTIONS
Connecter l'audio gauche et droite et les cordons d'alimentation conduit à des sorties (19 et 20).
ConnectezlelfourniradioFMantenneàlaprise(21).
MARCHE/ARRÊT
1. Appuyez sur le Touche POWER/STANDBY, (12) sur l'appareil.
- L'appareil démarre en fonction de la fonction sélectionnée.
2. Agir nouveau sur le Touche POWER/STANDBY, (12) pour éteindre l'appareil.
NOTES
En CD/USB/Bluetooth/AUX, si l'appareil ne reçoit aucune commande pendant 15 minutes, l'appareil se met automatiquement
en mode veille. Vous appuyez simplement sur le Touche POWER/STANDBY,(12) pour revenir sur.
RADIO
RECHERCHE STATIONS DE RADIO
1. Allumez l'appareil et appuyez sur la touche de FONCTION (1) de la télécommande pour sélectionner la radio
2. Réglez la station souhaitée en appuyant sur la (1) unité TUN -(2) ou TUN + (15), Maintenez la position pendant quelques
secondes pour effectuer une recherche manuelle des fréquences (la recherche s'arrête quand ils ont reçu une station de
radioserastéréo),ouappuyerplusieursfoispoureffectueruneBeaux-Search(étapeparétape).Lafréquencedelastation
s'afcheàl'écran.Silafréquencequevousécoutezdanslesémissionsstéréoseraégalementlemot"STEREO"àl'écran.
3. Réglez le volume en tournant le bouton (9) de l'unité ou utiliser les boutons (08) (09) sur la télécommande à un niveau plus
confortable pour vous.
NOTES
Pour obtenir la meilleure réception FM, déployez l'antenne et orientée. Si la réception n'est pas bonne sinon essayez de régler
la longueur et l'orientation de l'antenne, mais la qualité de la réception FM dépend de l'endroit où est placé le dispositif.
AUTO MEMORY/SCAN RADIO CANAL
Ilest'possibled'enregistrerautomatiquementles30premièresstationsavecunsignalsufsammentfort:
1. En mode Radio, appuyez sur le bouton PLAY/PAUSE (14) sur la télécommande, l'appareil enregistre les 30 premières stations
de radio ont reçu, en attribuant le numéro suivant.
2. Ayant balayage terminé, l'appareil régler automatiquement le numéro de présélection 1 (P01).
DESCRIPTION TELECOMMANDE
1. Touche FONCTION RADIO/CD-MP3/USB/BT/AUX
2. Touche TUN - revenir à la station de radio précédente.
3. Touche STOP
4. Touche B-SKIP/DOWN, passez à la piste précédente
5. Touche FOLD-/-10/Memory-, déplacer vers le dossier précédent/Saut 10 titres
précédents, stockage
6. Touche MUTE
7. Touche PROG/MEMORY/P-MODE
8. Touche VOL -
9. Touche VOL+
10. Touche DISK LIGHT, l'éclairage LED
11. ToucheEQ/ID3,infosEQ/d'afchageavecdespistesMP3
12. Touche FOLD.+/10/mémoire+, déplacer vers le dossier suivant/Saut 10 titres
déplacementultérieurcanauxradiomémorisées
13. Touche F-SKIP/UP, Sauter la piste suivante
14. Touche //Pause
15. Touche TUN+, sauter à la station de radio suivante.
16. Touche POWER/STANDBY,
17. Touche Compartiment de la pile
3
NAMES OF CONTROLS
1. Display
2. PREVIOUS/REVERSE BUTTON
3. Pause/Play Button
4. NEXT/FORWARD Button
5. POWER/STANDBY Button
6. Disco Light Button
7. Program/P-Mode Button
8. Function Button
9. VOLUME Dial
10. NEXT/FORWARD+10 Button
11. PREVIOUS/REVERSE-10 Button
12. Power/Standby Button
13. Aux In Port
14. USB Port
15. Passive Speaker Guard
16. Through the sound hole
17. Speaker Guard
18. Wooden Box
19. Right Speaker / Disco Light
20. Left Speaker /Disco Light
21. FM ANT. Port
22. AC Power Input
23. Pair Button
24. EQ/ID3 Button
25. Tun+ Button
26. Tun- Button
REMOTE HANDSET
LOADING THE BATTERIES INTO THE REMOTE HANDSET
Open the battery compartment cover.
Insert two “AAA” batteries (not included) as indicated inside the battery compartment.
Close the cover.
Key Functions:
1. FUNCTION BUTTON
2. TUN.-
3. STOP BUTTON
4. SKIP BACKWARD BUTTON
5. FOLD.+/+10/MEMORY+ BUTTON
6. MUTE BUTTON
7. PROG./MEMORY/P-MODE BUTTON
8. VOL- BUTTON
9. VOL+ BUTTON
10. DISCO LIGHT BUTTON
11. EQ/ID3
12. FOLD.-/-10/MEMORY- BUTTON
13. SKIP FORWARD BUTTON
14. PLAY/PAUSE/PAIR BUTTON
15. TUN.+
16. POWER/STANDBY BUTTON
17. BATTERY COMPARTMENT

19
HCX 1200 BT
FRANÇAIS
3. Appuyez sur FOLD.+/10/mémoire+ (12) sur la télécommande pour syntoniser la station suivante, ou appuyez sur FOLD.-
/-10/Memory- (5) de la télécommande pour syntoniser la station suivante.
MANUEL DE STOCKAGE RADIO CANAL
Et'possibledestockermanuellementvosstationspréféréesanqu'ilspuissentêtreappelésrapidement:
1. En mode Radio, syntonisez la station souhaitée à l'aide du TUN- (2) ou TUN + (15) sur la télécommande.
2. Appuyez sur PROG/MEMORY/P-MODE (7), les "P01" clignote sur l'écran.
3. Appuyez sur FOLD.-/-10/Memory- (5) ou le bouton de FOLD.+/10/Memory+ (12) et sélectionnez le numéro où vous
souhaitez enregistrer la station de radio.
4. AppuyezsurPROG/MEMORY/P-MODE(7)pourconrmer.
5. Répétez les étapes 2-3-4 pour mémoriser d'autres stations de radio.
6. Presse ou le bouton de FOLD.-/-10/Memory- (5) ou le bouton de FOLD.+/10/Memory+ (12) pour porter le nombre de la
station mémorisée.
NOTES
Et'possibledemémoriserjusqu'à30stationsderadio.
FONCTIONNEMENT DU LECTEUR CD/MP3 LECTURE
1. Allumez l'appareil et appuyez sur la touche de fonction (1) de la télécommande pour sélectionner la fonction CD.
2. Ouvrez le compartiment CD en appuyant sur la touche (24) et insérez le disque avec l'étiquette vers le haut. Fermez la porte
en appuyant légèrement.
3. Aprèsquelquessecondes,l'afchageindiquelenombredepistes(chansons)surledisqueetdémarrer'lecture.
4. Appuyez sur //PAIR (14) pour activer la pause, l'écran se met à clignoter.
5. Pourrelâcherlapauseappuyezsurlatouche//PAIR (14).
6. Appuyez sur la touche STOP (3) pour arrêter complètement la lecture.
NOTES
- Assurez-vous que le disque est complètement arrêté avant d'ouvrir la porte de CD.
-Siledisqueestillisibleous'iln'yapasdedisquedanslelecteur,l'écranafche"NODISC".
SAUT DE PISTE
1. Appuyer sur la touche F-SKIP/UP (13), tout en écoutant de passer à la piste suivante, tandis que le touche B-SKIP/DOWN
(4), il saute au début de la chanson (une touche) piste précédente (appuyez plusieurs fois).
2. Appuyez et maintenez le bouton de F-SKIP/UP (13) ou B-SKIP/DOWN (4), tout en écoutant de rechercher rapidement un
passage particulier de la musique.
3. Relâchezleboutonpourreprendrelalecturenormale.
Pour sélectionner une piste dont le numéro est supérieur à 10 (CD MP3), appuyez sur le bouton FOLD.+/10/Memory+ (12) à
chaque fois pour prendre de l'avance de 10 titres, puis appuyez sur la F-SKIP/UP (13) pour sélectionner la piste désirée.
Pour sélectionner une piste dont le numéro est inférieur à 10 (CD MP3), appuyez sur la FOLD.-/-10/Memory- (5) à chaque fois de
revenir 10 titres, puis appuyez sur la B-SKIP/DOWN (4) pour sélectionner la piste désirée.
RÉPÉTITION DU UNE SEULE MORCEAU
1. AppuyezunefoissurlatouchePROG/MEMORY/P-MODE(7)delatélécommandeashéàplusieursrepriseslemessage
apparaîtsurl'écranetl'unitéjouecontinuellementlamêmepiste.
2. AppuyezsurlatoucheSTOP(3)d'arrêterdénitivementlarépétition.
REPETITION DU DISQUE ENTIER
1. AppuyezsurlatouchePROG/MEM/P-MODE(7)surlatélécommande,REPEATseraxésurl'écranetl'unitévajoueren
permanence l'ensemble du disque.
2. Pourrétablirlefonctionnementnormaldelalecturedel'appareil,appuyezsurlatoucheSTOP(3)d'arrêterdénitivementla
répétition.
REPETITION DE L'ALBUM (MP3-CD)
Cette fonction n'est active que si le CD MP3 contient des répertoires ou des dossiers
1. AppuyezdeuxfoissurlatouchePROG/MEM/P-MODE(7)surlatélécommande,vousPLIERREPEATxesurl'écranetl'unité
joueenpermanencelatotalitédudisque.
FRANCAIS

20
HCX 1200 BT
2. F-SKIP/UP presse (13) ou B-SKIP/DOWN, (4) à la recherche d'un répertoire différent.
3. Pour rétablir le fonctionnement normal de la lecture de l'appareil, appuyez sur la touche SET/MEMORY/P-MODE (7) de la
télécommandejusqu'àcequeleREPécriteetRANDdisparaissentdel'écran.
FONCTION RANDOM
Lecture selon une séquence aléatoire de la CD.
1. LorsdelalecturedeCDaudio,appuyeztroisfoissurlatouchePROG/MEM/P-MODE(7)surlatélécommande,l'écranafche
le RAN.
- Lors de la lecture de CD-MP3, appuyez quatre fois sur la touche PROG/MEM/P-MODE (7) sur la télécommande, l'écran
afchelemessageRAND.
2. Pour désactiver la fonction, appuyez sur la touche PROG/MEM/P-MODE (7) de la télécommande, le message disparaît de la
RANDd'afchage.
FONCTION DE PROGRAM
Lireselonuncalendrierdéniparl'utilisateur.
1. Si le CD est en cours de lecture, arrêtez la lecture en appuyant sur la touche STOP (3).
2. AppuyezsurPROG/MEMORY/P-MODE(7)surlatélécommande,l'écranafcheP01.
3. F-SKIP/UP presse (13) ou B-SKIP/DOWN (4) pour sélectionner la plage à lire en premier.
4. AppuyezsurPROG/MEMORY/P-MODE(7)surlatélécommandepourconrmerlasélection.
5. Procéderensuivantlesétapes3-4pourréglerlerestedespistesjusqu'àunmaximumde20pistesaudioou99pistesMP3.
6. Appuyez sur //PAIR (14) pour démarrer la lecture programmée.
7. AppuyezdeuxfoissurlatoucheSTOP(3)pourdésactiverlaprogrammation.
SÉLECTION D'UN DOSSIER DÉSIRÉ (UNIQUEMENT POUR LES DISQUES MP3)
1. Pour sélectionner un dossier, appuyez et maintenez le plier FOLD.+/10/Memory+(12), appuyez à chaque fois pour aller de
l'avant dans un dossier.
2. F-SKIP/UP presse (13) pour sélectionner la piste désirée.
FONCTIONNEMENT DE L’ENTRÉE USB
LECTURE
1. Allumez l'appareil et appuyez sur la touche de FONCTION (1) de la télécommande pour sélectionner la fonction USB.
2. ConnectezunemémoireUSBàlaprise(14)del'appareil,l'écranafchelenombretotaldetitresjouablesdupériphérique
USB.
3. Quelques secondes après la lecture démarre automatiquement.
4. Appuyez sur //PAIR (14) pour activer la pause, l'écran se met à clignoter.
5. Pourrelâcherlapauseappuyezsurlatouche//PAIR (14).
6. Appuyez sur la touche STOP (3) pour arrêter complètement la lecture.
7. Reportez-vousà"exploitationcd-mp3"pourlerestedesfonctions.
NOTES
-LejoueurnepeutpasprendreenchargecertainspériphériquesavecunportUSB,celaestdûàl'incompatibilitédecertains
processeurs.
-Pourévitertouteinterférence,toujoursconnecterdespériphériquesUSBdirectementàl'appareil.Nepasutiliserderallonge
pour brancher le périphérique USB à l'unité.
ENTRÉE AUX IN
1. Allumez l'appareil et appuyez sur la touche de FONCTION (1) de la télécommande pour sélectionner la fonction AUX IN.
2. Connectezn'importequelappareiléquipéd'unesortieaudioviauncâblejack3,5mmspécial(nonfourni)àlapriseAUXIN
(13).
3. Fairefonctionnerl'appareilexterneparsescommandes.
FONCTIONNEMENT DE BLUETOOTH
1. Allumez l'appareil et appuyez sur la touche de fonction (1) de la télécommande pour sélectionner la BT.
2. En mode Bluetooth, le bleu avant LED (PAIR) se met à clignoter suivie par 2 bips, le système passe automatiquement en
recherche.
FRANCAIS
Table of contents
Languages:
Other Trevi Stereo System manuals

Trevi
Trevi DS 1976 V User manual

Trevi
Trevi MCX 1021 USB User manual

Trevi
Trevi AV 610 USB User manual

Trevi
Trevi HFX 1058 User manual

Trevi
Trevi SB 8370 SW User manual

Trevi
Trevi TT 1072 DAB User manual

Trevi
Trevi MCX 1045IPD User manual

Trevi
Trevi SB 8350TV User manual

Trevi
Trevi TT 1068 E User manual

Trevi
Trevi SB 8340 SW User manual

Trevi
Trevi HCV 1035 BT User manual

Trevi
Trevi TT 1070 E User manual

Trevi
Trevi HCX 1080 BT User manual

Trevi
Trevi HCX 1030 S User manual

Trevi
Trevi HCV 10D35 DAB User manual

Trevi
Trevi CMP 574 USB User manual

Trevi
Trevi MCX 1025 USB User manual

Trevi
Trevi HF 1900 BT User manual

Trevi
Trevi HCX 10D6 DAB User manual

Trevi
Trevi TT 1060CD User manual