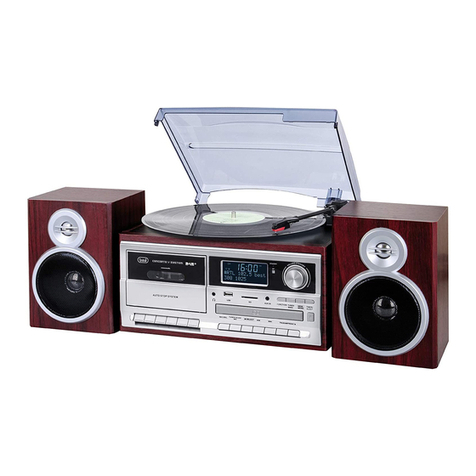
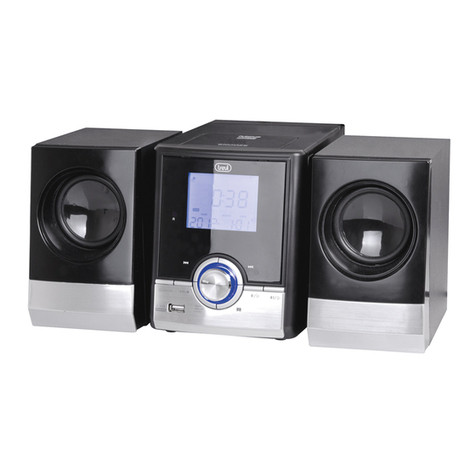
Trevi TT 1070 E User manual

SISTEMA HIFI CON GIRADISCHI/CD/MP3/USB/SD/RADIO/CASSETTA
E CONNESSIONE BLUETOOTH® - Manuale d'uso e collegamento
HIFI STEREO SYSTEM WITH TURNTABLE/CD/MP3/USB/SD/RADIO/CASSETTE
AND BLUETOOTH®CONNECTION - User manual and connection
SYSTÈME HIFI AVEC TOURNE DISQUE/CD/MP3/USB/SD/RADIO/CASSETTE
ET CONNEXION BLUETOOTH® - Mode d'emploi et connexion
HIFI-ANLAGE MIT PLATTENSPIELER/CD/MP3/USB/SD/RADIO/CASSETTE
UND BLUETOOTH®-VERBINDUNG - Bedienungsanleitung und Anschluss
EQUIPO HIFI CON TOCADISCO/CD/MP3/USB/SD/RADIO/CASSETTA
Y CONEXIÓN BLUETOOTH®- Manual de usuario y conexión
TT 1070 E
Guida d’uso
User guide
* Per informazioni integrative e aggiornamenti di questo prodotto vedi: www.trevi.it
* For additional information and updates of this product see: www.trevi.it

2
TT 1070 E
ATENÇÃO
PERIGO DE CHOQUES ELÉTRICOS
NÃO EXPOR A CHUVA E UMIDADE
ATENÇÃO: NÃO ABRIR O APARELHO. NO INTERIOR DO MESMO NÃO EXISTEM
COMANDOS OU PEÇAS DE SUBSTITUIÇÃO QUE POSSAM SER MANIPULADOS
PELO USUÁRIO. EM CASO DE EVENTUAL OPERAÇÃO DE SERVIÇO, DIRIGIR-SE
A UM CENTRO DE ASSISTÊNCIA AUTORIZADO TREVI
PROSOCH
PROSOCH. MHN ANOIGETE THN SUSKEUH. DEN UPARCOUN
STO ESWTERIKO THS ENTOLES POU NA MPOREI NA CEIRISTEI
O KATANALWTHS OUTE ANTALLAKTIKA TMHMATA. GIA OPO-
IADHPOTE EPISKEUH H¢ SUNTHRHSH APEUQUNQEITE SE ENA
APO TA EXOUSIODOTHMENA KENTRA ANTIPROSWPEIAS TREVI.
KINDUNOS HLEKTROPLHXIAS
MHN EKQETETE
SE BROCH KAI UGRASIA
ATTENZIONE
RISCHIO DI SCOSSE ELET-
TRICHE!
NON ESPORRE A PIOGGIA E
UMIDITÀ
ATTENZIONE: NON APRITE L'APPARECCHIO. ALL'INTERNO NON VI SONO
COMANDI MANIPOLABILI DALL'UTENTE NE PARTI DI RICAMBIO. PER TUTTE
LE OPERAZIONI DI SERVIZIO RIVOLGERSI AD UN CENTRO DI ASSISTENZA
AUTORIZZATO TREVI
WARNING!
WARNING: DO NOT OPEN THE SET. NEITHER CONTROLS OR SPARE PARTS TO
BE USED BY THE USER ARE TO BE FOUND INSIDE IT. APPLY TO AUTHORISED
TREVI CENTERS FOR SERVICE OPERATIONS.
DANGER OF ELECTRIC SHOCK!
DO NOT EXPOSE TO
RAIN OR HUMIDITY
ATTENTION
ATTENTION: NE PAS OUVRIR L’APPAREIL, A L’INTERIEUR IL N’Y A PAS DE
COMMANDESAMANIPULERPAR L’UTILISATEUROUDEPIECESDERECHANGE.
POUR TOUTES LES OPERATIONS DE SERVICE IL FAUT S’ADRESSER A UN
SERVICE D’ASSISTANCE AUTORISE TREVI.
RISQUE DE DECHARGES ELEC-
TRIQUES
NE PAS EXPOSER A LA PLUIE ET A
L’HUMIDITE
ACHTUNG
ACHTUNG: DAS GERÄT NICHT ÖFFNEN. IM INNERN BEFINDEN SICH KEINE VOM
BENUTZERSELBSTINSTANDSETZBARENTEILEUND AUCHKEINEERSATZTEILE.
FÜR JEGLICHE SERVICEARBEITEN, WENDEN SIE SICH BITTE AN EINE TREVI
AUTORISIERTEN KUNDENDIENSTSTELLE.
GEFAHR ELEKTRISCHER SCHLÄGE
NICHT DER FEUCHTIGKEIT UND
DEM REGEN AUSSETZEN
ATENCION
ATENCION: NO ABRIR EL APARATO, EN SU INTERIOR NO HAY MANDOS QUE
PUEDAN SER MANIPULADOS POR EL USUARIO NI PARTES DE REPUESTO.
PARA TODAS LAS OPERACIONES DE SERVICIO DIRIGIRSE A UN CENTRO DE
ASISTENCIA AUTORIZADO TREVI.
PELIGRO DE CHOQUES
ELECTRICOS
NO EXPONER A LLUVIA Y
HUMEDAD
WARNING!

3
TT 1070 E
NOTE D'USO
Ascoltare a volume alto per lungo tempo, potrebbe danneggiare il vostro udito.
Questo apparecchio è uno strumento elettronico di alta precisione, evitate quindi di utilizzarlo nei seguenti casi:
• Vicino a campi magnetici.
• Vicino a fonti di calore come caloriferi e stufe.
• In luoghi molto umidi come stanze da bagno, piscine, ecc...
• In luoghi molto polverosi.
• In luoghi soggetti a forti vibrazioni.
• Non avvicinare l’orecchio all’altoparlante durante le fasi di messa punto e regolazioni del volume, e in particolare di tenere il
volume al minimo nella fase di accensione.
• Posizionare l’apparecchio in modo che ai suoi lati ci sia sempre abbastanza spazio per la libera circolazione di aria (almeno 5
cm).
• Se dei liquidi penetrano all’interno dell’apparecchio scollegare immediatamente la spina dalla presa e portare l’apparecchio al
più vicino centro assistenza autorizato TREVI.
• Controllare sempre prima di ricaricare l’apparecchio, che i cavi di alimentazione e di collegamento siano installati correttamente.
• Nessuna sorgente di fiamma nuda, quali candele accese, dovrebbe essere posta sull’apparecchio.
• L’apparecchio non deve essere esposto a stillicidio o a spruzzi d’acqua e nessun oggetto pieno di liquido, quali vasi, deve essere
posto sull’apparecchio.
• Conservare il presente manuale per futuri riferimenti.
CURA E MANUTENZIONE
Per la pulizia si consiglia l’ uso di un panno morbido, leggermente inumidito. Evitate solventi o sostanze abrasive.
IMPORTANTE
Questo dispositivo e' progettato per uso domestico non professionale. La buona costruzione di questo apparecchio ne garantisce
per lungo tempo il perfetto funzionamento. Se tuttavia dovesse presentarsi qualche inconveniente, sarà opportuno consultare il più
vicino Centro Assistenza autorizzato TREVI.
TREVI persegue una politica di continua ricerca e sviluppo. Pertanto i prodotti possono presentare caratteristiche diverse da
quelle descritte.
AVVERTENZE SUL LASER
Questo apparecchio è dotato di un sistema di lettura con raggio laser. Benché il laser sia di bassa potenza e con
dispositivo di sicurezza che ne impedisce il funzionamento a sportello aperto attenetevi scrupolosamente alle
seguenti avvertenze:
- Non avvicinate l'occhio alla lente del laser con l'apparecchio aperto, pericolo di lesione della retina.
- Non tentate di smontare o manomettere l'unità laser, pericolo di assorbimento di radiazioni.
Con utilizzo di auricolari o cuffie:
Per evitare possibili danni all’udito, limitare il tempo di ascolto a volumi elevati.
ITALIANO

4
TT 1070 E
30
ITALIANO
DESCRIZIONE COMANDI
1. Lettore/Registratore cassetta
2. Cristallo di protezione giradischi
3. Presa Cuffie
4. Unità principale
5. Ingresso USB
6. Display LCD
7. Ingresso memoria SD
8. Ingresso AUX IN
9. Ricevitore telecomando
10. Indicatore led Standby/Funzione BT
11. Tasto Function
12. Tasto Tuner/Band
13. Tasto/manopola accensione/standby e regolazione volume
14. Tasto Mode/Clock
15. Tasto Timer/Sleep
16. Tasto Record cassetta
17. Tasto Lettura cassetta
18. Tasto REW Avvolgimento veloce cassetta
19. Tasto FWD Avanzamento veloce cassetta
20. Tasto Stop cassetta / Apertura vano cassetta
21. Tasto Pausa
22. Vano lettore CD
23. Tasto REC./DEL.
24. Tasto//Tuner Scan, Play/Pausa/ricerca automatica
25. Tasto , Stop
26. Tasto 9/TUN-, traccia/stazione radio precedente
27. Tasto :/TUN+, traccia/stazione radio successiva
28. Tasto Album/Preset precedente
29. Tasto Album/Preset successivo
30. Tasto apertura/chiusura vano CD
31. Antenna FM
32-33. Presa Line Out, uscita audio
34. Presa di alimentazione
35-36. Prese di collegamento altoparlanti
37. Non usato
38. Adattatore dischi vinile 45 rpm
39. Leva per alzare/abbassare il braccio testina
40. Selettore funzione Autostop giradischi
41. Selettore velocità giradischi (33/45/78 rpm)
42. Braccio lettura giradischi
DESCRIZIONE TELECOMANDO
1. Tasto , accensione/Stand-by
2. Tasti Preset/Album DN/UP
3. Tasto Timer/Sleep
4. Tasto Mute, per silenziare la riproduzione audio
5. OP/CL/Snooze, apre chiude il vano CD/Funzione Snooze
6. Tasto REC./DEL.
7. Tasto FM ST./ID3, radio mono/stereo/funzione ID3.
8. Tasto FUNCT, per selezionare il modo di funzionamento
dell'apparecchio
9. Tasto Mode/Clock
10. Tasto/, attiva/sospende la riproduzione audio in corso
11. Tasto , termina la riproduzione audio
12. Tasti 9/:, traccia/stazione radio precedente/successiva
13. Tasti volume +/-, regolazione volume

5
TT 1070 E
TIRARE LA LINGUETTA
TIRARE
SPINGERE
ATTIVAZIONE E SOSTITUZIONE DELLA BATTERIA DEL TELECOMANDO
Il telecomando monta una batteria tipo CR2025
Per attivare la batteria del telecomando (inclusa) togliere la linguetta plastica di
protezione.
Per la sostituzione della batteria:
1. Spingere il fermo plastico dell’alloggiamento porta batteria verso destra.
2. Estrarre l’alloggiamento porta batteria.
3. Inserire una batteria nuova facendo attenzione a rispettare le polarità.
4. Richiudere l'alloggiamento porta batteria.
ITALIANO
COLLEGAMENTO ALTOPARLANTI
Collegare il cavo degli altoparlanti alle prese (35/36) dell'apparecchio.
ALIMENTAZIONE
Questa unità funziona con alimentatore 12V 1A (in dotazione).
Non collegare l'apparecchio a prese con tensione diversa da quella indicata.
Nota: Se non diversamente specificato, le descrizioni dei comandi valgono sia per l'apparecchio che per il telecomando.
ACCENSIONE/SPEGNIMENTO
1. Inserire il cavo dell'alimentatore in dotazione nella presa di alimentazione (34) sul dispositivo e la spina dell'alimentatore in una
presa di corrente.
2. Premere la manopola (13). L'apparecchio si accenderà.
3. Premere nuovamente la manopola (13) per portare l'apparecchio in modalità Stand-by.
Questoapparecchioe' dotatodisistema di autospegnimento per risparmio energetico.Dopo un certotempodi inutilizzo l'apparecchio
si porterà in modo standby automaticamente. Premere la manopola(13) per riaccenderlo.
REGOLAZIONE ORA
1. Con l'apparecchio in standby premere a lungo il tasto MODE/CLOCK (14). Sul display lampeggerà l'indicazione 24hour.
2. Tramite i tasti i tasti :(27) o 9(26) selezionare la visualizzazione dell'ora (12/24H), confermare con il tasto MODE/CLOCK(14).
3. Tramite i tasti i tasti :(27) o 9(26) inserire l'ora corrente e confermare con il tasto MODE/CLOCK(14).
4. Tramite i tasti i tasti :(27) o 9(26) inserire i minuti correnti e confermare con il tasto MODE/CLOCK(14). Dopo alcuni secondi
l'apparecchio si riporterà in modo standby.
CONTROLLO VOLUME
1. Ruotare il Controllo Volume (13) sull'apparecchio o premere il tasto VOL+ o VOL- (13) del telecomando per aumentare o
diminuire il volume.
FUNZIONAMENTO RADIO
1. Accendere l'apparecchio e premere il tasto TUNER/BAND(12) sul display compare l'indicazione della frequenza.
2. Premendo di nuovo il tasto TUNER/BAND(12) e' possibile scegliere la banda di ricezione (AM/FM).
3. Premere più volte i tasti :/TUN+ (27) o 9/TUN- (26) sull'unità, oppure i tasti :o 9(12) del telecomando per effettuare
una ricerca passo-passo.
4. Tenere premuto per qualche secondo i tasti :/TUN+ (27) o 9/TUN- (26) sull'unità, oppure i tasti :o 9(12) del telecomando
per sintonizzarsi sulla stazione radio successiva o precedente con il miglior segnale ricevuto.
5. Per memorizzare una stazione radio:
- Portarsi sulla frequenza da memorizzare, premere il tasto MODE/CLOCK(14).
- ConitastiALBUM/PRESETUP/DOWN(28,29)selezionareilnumerodimemoriaincuisidesiderasalvarelastazione
radio.
- Premere il tasto MODE/CLOCK(14) per confermare.
- L'apparecchio è in grado di memorizzare fino a 30 stazioni.
6. Per selezionare una stazione radio memorizzata, utilizzare i tasti ALBUM/PRESET UP/DOWN(28/29).
7. Per effettuare una scansione con memorizzazione automatica delle stazioni radio, premere il tasto TUNER SCAN (24). L'appa-
recchio è in grado di memorizzare fino a 30 stazioni.
8. Premere il tasto FM ST. (7) sul telecomando per selezionare l'ascolto mono o stereo (viene visualizzato MONO/ST sul display).

6
TT 1070 E
ITALIANO
Nota: Per ottenere la migliore ricezione in FM estendete e orientate l’antenna (37). Se la ricezione non è buona provate a
regolare diversamente la lunghezza e l’orientamento dell’antenna, comunque la qualità della ricezione in FM dipende molto
dal luogo dove è posto l’apparecchio.
FUNZIONAMENTO LETTORE CD-MP3
RIPRODUZIONE
1. Accendere l'apparecchio e premere più volte il tasto FUNCTION(11) fino a far comparire sul display l'indicazione CD
2. Aprire il vano CD premendo il tasto (30) posto sull'unità, o il tasto OP./CL. (5) del telecomando e inserire il disco nel vano CD
(22), con il lato scritto rivolto verso l'alto. Richiudere lo sportello premendo nuovamente il tasto (30) sull'unità, o il tasto OP./
CL.(5) del telecomando.
3. Dopo qualche secondo il display mostrerà il numero delle tracce presenti sul disco. La riproduzione comincerà automaticamen-
te. Il display mostrerà il numero della traccia in riproduzione ed il tempo trascorso. Se si riproduce un disco con tracce MP3
comparirà tale inidicazione sul display.
4. Premere il tasto/(24) per attivare la pausa, il display mostrerà il simbolocon l'indicazione del tempo trascorso lampeg-
giante. Ripremere di nuovo il tasto per disinserire la PAUSA.
5. Premere il tasto (25) sull'apparecchio per arrestare definitivamente la riproduzione.
SALTO TRACCIA E RICERCA VELOCE
1. Premere una volta i tasti :/TUN+ (27) o 9/TUN- (26) per posizionarsi sulla traccia precedente o successiva.
2. Tenere premuto il tasto :/TUN+ (27) o 9/TUN- (26) durante l'ascolto per ricercare velocemente un particolare passaggio
musicale. Rilasciare il tasto per tornare alla normale riproduzione.
RIPETIZIONE
Premere il tasto MODE/CLOCK (14) per attivare le varie funzioni di ripetizione: singolo brano, ALBUM (intero album, solo con file
MP3), ALL (tutti i brani), RAND(riproduzione casuale), INTRO (primi 10 secondi di ogni traccia). Sul display saranno presenti
le relative icone.
Per disattivare la ripetizione premere piu' volte il tasto MODE/CLOCK (14) fino a far sparire l'icona dal display.
FUNZIONE PROGRAM
Riproduzione secondo una programmazione impostata dall'utente.
1. Se il CD è in riproduzione, arrestarla premendo il tasto (25).
2. Premere il tasto MODE/CLOCK (14), sul display comparirà la scritta P01 che indica la posizione della traccia nella sequenza da
riprodurre.
3. Selezionare il numero della traccia che si desidera riprodurre utilizzando i tasti :/TUN+ (27) o 9/TUN- (26).
4. Confermare premendo il tasto MODE/CLOCK (14), sul display comparirà la scritta P02.
5. Proseguire selezionando il numero delle altre traccie desiderate seguento i passi 3 e 4 fino ad un massimo di 20 tracce con CD
audio o 99 tracce con disco MP3. Sul display compariranno in sequenza P01, P02, P03 ecc.
6. Premere il tasto/(24) per iniziare la riproduzione programmata.
7. Premereunavolta iltasto (25)perarrestaremomentaneamentela programmazione.Premereiltasto/(24)sull'apparecchio
per riavviare nuovamente la programmazione.
8. Premere due volte il tasto (25) per disattivare e cancellare completamente la programmazione.
INGRESSO AUX IN
1. Accendere l'apparecchio e premere più volte il tasto FUNCTION(11) fino a far comparire sul display l'indicazione AUX.
2. Collegare una qualsiasi unità provvista di uscita audio tramite apposito cavo all'ingresso AUX IN (8).
3. Comandare l'unità esterna dai propri comandi.
4. Regolare il volume tramite il controllo sull'unità (13).
FUNZIONAMENTO BLUETOOTH
1. Accendere l'apparecchio e premere a lungo il tasto FUNCTION(11) fino a far comparire sul display l'indicazione BT.
2. Nella modalità Bluetooth, il led "BT" (10) comincerà a lampeggiare e il sistema entrerà automaticamente in ricerca.
3. Attivare la funzionalità Bluetooth sul dispositivo esterno da accoppiare e renderlo visibile.
4. Avviare la ricerca dei dispositivi. Al termine ricercare il dispositivo "TT1070E".
5. Inserire la password "0000" se necessario.
6. Ad accoppiamento avvenuto l'apparecchio emmetterà un suono di conferma.
7. Premere il tasto/(24) per avviare la riproduzione. La gestione delle traccie audio può essere effettuata direttamente dai
controlli sull'unità o dal telecomando.
8. Tenere premuto per qualche secondo il tasto/(24) per eliminare l'accoppiamento.

7
TT 1070 E
ITALIANO
FUNZIONAMENTO INGRESSO USB/SD
RIPRODUZIONE
1. Collegare all'ingresso USB(5) un dispositivo di memoria USB o all'ingresso SD(7) inserire una scheda di memoria SD.
2. Accendere l'apparecchio e premere più volte il tasto FUNCTION(11) fino a far comparire sul display l'indicazione USB, che sta
ad indicare il caricamento dei dati presenti nel dispositivo USB o CARD per il lettore SD. In caso di assenza del dispositivo USB
o SD, sul display comparirà l'indicazione NO USB / NO CARD.
Note:
- I'apparecchio potrebbe non supportare alcuni dispositivi SD/USB, questo è dovuto all'incompatibilità di alcuni processori.
3. Per il resto delle funzioni fare riferimento al paragrafo "FUNZIONAMENTO LETTORE CD-MP3" .
REGISTRAZIONE (ENCODING) MP3 DA GIRADISCHI/AUX IN/CD/RADIO/CASSETTA
Questa unita' permette la registrazione di brani audio da giradischi, ingresso Aux In, lettore CD, radio, cassetta su dispositivo Usb
o SD in formato MP3.
ENCODING DA CD
1. Inserire un CD audio nel lettore CD, quando inizia la lettura del disco premere il tasto STOP(25).
2. Inserire una memoria USB nell'ingresso (5) o una scheda SD nell'ingresso (7).
Se si desidera registrare solo una traccia audio:
- Selezionare tramite i tasti :/TUN+ (27) o 9/TUN- (26) il brano che si desidera convertire.
- Premere il tasto REC(23) una volta, sul display compare la scritta REC_ONE , premere di nuovo il tasto REC(23) e automa-
ticamente iniziera' la riproduzione/registrazione del brano selezionato. Se sono presenti una memoria usb e una scheda SD
contemporaneamente, selezionare tramite :/TUN+ (27) o 9/TUN- (26) dove salvare il brano da registrare.
- Al termine del brano la registrazione si fermera' automaticamente (sul display compare END REC), il brano codificato viene
salvato nella memoria Usb/SD in una cartella chiamata RECORD/CDIN.
Se si desidera registrare l'intero disco audio:
- Premere il tasto REC(23) una volta, quando sul display compare la scritta REC_ONE, premere :/TUN+ (27) o 9/TUN- (26),
sul display compare la scritta REC_ALL, premere di nuovo il tasto REC. Se sono presenti una memoria usb e una scheda SD
contemporaneamente, selezionare tramite :/TUN+ (27) o 9/TUN- (26) dove salvare il brano da registrare. Automaticamente
iniziera' la riproduzione/registrazione dell'intero disco.
- Al termine la registrazione si fermera' automaticamente, i brani codificati vengono salvati nella memoria Usb in una cartella
chiamata RECORD/CDIN.
Se si desidera registrare utilizzando la funzione PROGRAM:
- Effettuare la programmazione dei brani come descritto nel paragrafo Funzionamento lettore CD - Funzione Program.
- Premere il tasto REC(23) una volta, quando sul display compare la scritta REC_ONE, premere :/TUN+ (27) o 9/TUN- (26),
sul display compare la scritta REC_ALL, premere di nuovo il tasto REC. Se sono presenti una memoria usb e una scheda SD
contemporaneamente, selezionare tramite :/TUN+ (27) o 9/TUN- (26) dove salvare il brano da registrare. Automaticamente
iniziera' la riproduzione/registrazione della programmazione.
- Al termine la registrazione si fermera' automaticamente, i brani codificati vengono salvati nella memoria Usb in una cartella
chiamata RECORD/CDIN.
Nota: le tracce vengono registrate/copiate in modalita' 1:1 cioe' la fase di registrazione/copiatura richiede lo stesso tempo di
riproduzione.
Se si desidera registrare un disco con tracce MP3
Per effettuare la copia di un CD MP3 su una memoria Usb seguire le istruzioni come per la registrazione da CD audio; le tracce
selezionate verranno copiate senza essere riprodotte, sul display compare la traccia in fase di copiatura e la percentuale di copia
effettuata. In caso di CD MP3 con piu' cartelle e' possibile scegliere quale cartella copiare (DIR). Le tracce copiate vengono
salvate nella memoria Usb in una cartella chiamata RECORD/COPY.
ENCODING DA RADIO/GIRADISCHI/CASSETTA/AUX IN
Le istruzioni seguenti valgono sia per USB che scheda di memoria SD.
1. Accendere l'apparecchio e selezionare la funzione desiderata (Radio/Giradischi/Cassetta/Aux In).
2. Inserire una memoria USB nell'ingresso (5).
3. Selezionare la stazione radio che si desidera registrare o avviare la riproduzione dalla sorgente selezionata.
4. Premere il tasto REC(23) per inziare la registrazione, nel caso di registrazione da radio tutte le funzioni come ricerca stazioni e
richiamo stazioni memorizzate vengono disabilitate.
5. Per terminare la registrazione premere il tasto STOP(25).
6. Il brano registrato viene salvato nella memoria Usb in una cartella chiamata RECORD/LINE_IN.

8
TT 1070 E
7. E' possibile creare piu' tracce della registrazione:
- Separazione manuale: durante la registrazione premere il tasto MODE/CLOCK(14), sul display compare la scritta TS, viene creata
una nuova traccia.
- Separazione automatica: disponibile su giradischi/cassetta e Aux in, prima di avviare la riproduzione da queste sorgenti premere
il tasto MODE/CLOCK(14) per attivare la funzione (sul display compare la scritta T-ON) o per disattivarla (sul display compare
la scritta T-OF). Avviare la riproduzione e la registrazione come indicato nel capitolo precedente. L'apparecchio rileva automa-
ticamente le pause silenziose tra un brano e l'altro e separa le tracce.
Nota: a causa del tempo necessario a creare le tracce, e' possibile che alcuni secondi iniziali delle registrazioni venga perso.
Per limitare questa possibilità il lettore cassette e il giradischi possono attivare la pausa della riproduzione in attesa che la
registrazione riprenda dopo la separazione delle tracce.
COPIA DI TRACCE MP3 TRA DISPOSITIVO USB E SCHEDA SD
E' possibile copiare le tracce presenti su USB a SD e viceversa:
- Singola traccia: durante l'ascolto di una traccia (da sorgente USB o SD) premere il tasto REC.(23). Quando compare l'indicazione
ONE premere di nuovo i tasto REC.(23). La traccia verra' copiata.
- Intera cartella: a riproduzione ferma premere i tasti ALBUM UP/DOWN(28-29)per selezionare la cartella da copiare. Premere il
tasto REC.(23). Tramite i tasti :/TUN+ (27) o 9/TUN- (26) selezionare DIR e premere di nuovo i tasto REC.(23). La cartella
verra' copiata.
- Tutte le tracce: a riproduzione ferma premere il tasto REC.(23). Tramite i tasti :/TUN+ (27) o 9/TUN- (26) selezionare ALL
e premere di nuovo i tasto REC.(23). Tutte le tracce verranno copiate.
CANCELLAZIONE DI TRACCE SU DISPOSITIVO USB/SD
E' possibile cancellare le tracce presenti su USB/SD:
- Singola traccia: durante l'ascolto di una traccia (da sorgente USB o SD) premere a lungo il tasto DEL.(23). Quando compare
l'indicazione ONE premere di nuovo i tasto DEL.(23). La traccia verrà cancellata.
- Intera cartella: a riproduzione ferma premere i tasti ALBUM UP/DOWN (28-29) per selezionare la cartella da cancellare. Premere
a lungo il tasto DEL.(23). Tramite i tasti :/TUN+ (27) o 9/TUN- (26) selezionare DIR e premere di nuovo i tasto DEL.(23).
La cartella verra' cancellata.
- Tutte le tracce: a riproduzione ferma premere a lungo il tasto DEL.(23). Tramite i tasti :/TUN+ (27) o 9/TUN- (26) selezionare
ALL e premere di nuovo i tasto DEL.(23). Tutte le tracce verranno cancellate.
Nota: le tracce cancellate non sono recuperabili.
FUNZIONAMENTO GIRADISCHI
Ricordarsi di togliere con attenzione la protezione della puntina.
1. Accendere l'apparecchio e premere più volte il tasto FUNCTION(11) fino a far comparire sul display l'indicazione PHONO.
2. Aprire il cristallo di protezione giradischi(2).
3. Selezionare la velocità del disco tramite il selettore velocità giradischi (41).
4. Posizionare il disco sul piatto. Utilizzare l'adattatore in dotazione (38) nel caso il disco sia un 45 giri.
5. Sganciare il braccio testina dal fermo, alzare il braccio e posizionare la puntina sul disco. Utlizzando la leva(39) abbassare il
braccio testina. La riproduzione del disco avra' inizio.
6. Al termine della riproduzione del disco, il giradischi fermera' la rotazione se la funzione AUTOSTOP e' attiva (selettore 40); portare
la leva(39) in posizione di braccio alzato.
Nota1: puo' accadere che la funzione Autostop fermi la rotazione del disco prima della fine dell'incisione. In questo caso disattivare
la funzione posizionando il selettore (40) su OFF.
Nota2: rimuovere la protezione della puntina giradischi prima dell'utilizzo.
Nota3: assicurarsi che il braccio sia bloccato dall'apposito fermo dopo ogni utilizzo
FUNZIONAMENTO RIPRODUTTORE CASSETTE
RIPRODUZIONE CASSETTE
1. Accendere l'apparecchio e premere più volte il tasto FUNCTION(11) fino a far comparire sul display l'indicazione TAPE.
2. Premere il tasto STOP/EJECT(20) per aprire lo sportello cassette ed inserire una cassetta con il lato che desiderate ascoltare
rivolto verso l’esterno.
3. Regolare a vostro piacimento il volume.
4. Premere il tasto PLAY(17) per iniziare la riproduzione.
5. Premere il tasto PAUSE(21) per fermare momentaneamente la riproduzione, premerlo nuovamente per riprenderla.
6. Per far avanzare velocemente il nastro premete il tasto FWD(19).
7. Per riavvolgere velocemente il nastro premete il tasto REW(18).
8. Premere il tasto STOP/EJECT(20) per fermare definitivamente la riproduzione, premerlo nuovamente per estrarre la cassetta.
ITALIANO

9
TT 1070 E
REGISTRAZIONE DA ALTRE SORGENTI
Nota: assicurarsi che la linguetta di abilitazione delle registrazioni sia presente altrimenti non sara’ possibile registrare la
cassetta.
1. Inserire la cassetta nel vano.
2. Premere il tasto REC(16) per iniziare la registrazione.
3. Attivare la riproduzione della sorgente desiderata (Radio, lettore USB/SD, Bluetooth, AUX IN, giradischi, CD).
4. Utilizzare il tasto PAUSE(21) per fermare momentaneamente la registrazione, premerlo nuovamente per riprenderla.
5. Premere il tasto STOP/EJECT(20) per fermare definitivamente la registrazione.
SISTEMA ID3
L'apparecchio dispone di un sistema ID3. Se il file mp3 che si vuole riprodurre è in formato "ID3", premendo il tasto ID3(7) sul
telecomando l'apparecchio visualizzerà sul display le informazioni di "NOME TITOLO", "NOME ARTISTA" e "NOME ALBUM" .
Per disattivare questa funzione è sufficiente premere il pulsante ID3 (7) sul telecomando e passare, quindi, alla visualizzazione
normale.
PRESA CUFFIE
1. Inserire le cuffie nella presa cuffie (3). Gli altoparlanti verranno disattivati.
2. Avviare la riproduzione desiderata e regolare il volume.
USCITA LINE OUT
L'uscita LINE OUT permette di collegare l'apparecchio ad un sistema di amplificazione esterno.
Collegare un cavo RCA non fornito alle prese 32-33 e l'altro capo al sistema esterno. Avviare la riproduzione desiderata.
TIMER
L'apparecchio e' dotato di timer per l'accensione e spegnimento automatico.
1. Con l'apparecchio in standby premere a lungo il tasto TIMER(15).
2. Sul display compare l'indicazione ON TIME. Tramite i tasti i tasti :o 9 inserire l'ora (ore e minuti) di accensione desiderata,
confermare con il tasto TIMER(15).
3. Sul display compare l'indicazione OFF TIME. Tramite i tasti i tasti :o 9 inserire l'ora (ore e minuti) di spegnimento desiderata,
confermare con il tasto TIMER(15).
4. Sul display compare l'indicazione della sorgente che all'accensione si desidera riprodurre. Tramite i tasti i tasti :o 9 selezionare
la sorgente desiderata; e' possibile selezionare Tuner, CD, Usb, SD card. Confermare con il tasto TIMER(15).
5. Sul display compare l'indicazione del livello volume desiderato all'accensione. Tramite i tasti i tasti :o 9 inserire il livello di
volume desiderato, confermare con il tasto TIMER(15).
Al termine della programmazione del timer l'apparecchio visualizzerà le imformazioni impostate per poi portarsi in modo standby.
Sul display e' presente l'icona di un orologio ad indicare la funzione TIMER attiva.
Duranteilfunzionamento programmato con il timer, premendo il tastoSNOOZE(5)sultelecomandoe' possibile spegnere per 10minuti
l'apparecchio, trascorso tale tempo si avrà la riaccensione automatica fino al termine della programmazione impostata con il timer.
FUNZIONE SLEEP
E' possibile attivare lo spegnimento automatico dell'unita' (standby) dopo un certo tempo.
1. Premere il tasto SLEEP(3) del telecomando per impostare il tempo di spegnimento automatico desiderato; premendo il tasto
piu' volte e' possibile selezionare tra 90, 80, 70, 60, 50, 40, 30, 20, 10 e OFF.
2. Quando la funzione e' attiva, sul display compare l'icona SLEEP.
ITALIANO
¡
¡
10
TT 1070 E
INFORMAZIONI AGLI UTENTI
ai sensi del Decreto Legislativo N° 49 del 14 Marzo 2014
“Attuazione della Direttiva 2012/19/UE sui rifiuti di apparecchiature elettriche ed elettroniche (RAEE)”
Il simbolo del cassonetto barrato riportato sull’apparecchiatura indica che il prodotto alla fine della propria vita utile deve essere
raccolto separatamente dagli altri rifiuti. L’utente dovrà, pertanto, conferire l’apparecchiatura integra dei componenti essenziali
giunta a fine vita agli idonei centri di raccolta differenziata dei rifiuti elettronici ed elettrotecnici, oppure riconsegnarla al rivenditore al
momento dell’acquisto di nuova apparecchiatura di tipo equivalente, in ragione di uno a uno, oppure 1 a zero per le apparecchiature
aventi lato maggiore inferiore a 25 cm. L’adeguata raccolta differenziata per l’avvio successivo dell’apparecchiatura dimessa al
riciclaggio, al trattamento e allo smaltimento ambientale compatibile contribuisce ad evitare possibili effetti negativi sull’ambiente
e sulla salute e favorisce il riciclo dei materiali di cui è composta l’apparecchiatura. Lo smaltimento abusivo del prodotto da parte
dell’utente comporta l’applicazione delle sanzioni amministrative di cui al D.Lgs n. Decreto Legislativo N° 49 del 14 Marzo 2014.
TREVI persegue una politica di continua ricerca e sviluppo, pertanto i prodotti possono presentare caratteristiche diverse da quelle
descritte.
SPECIFICHE TECNICHE
Alimentazione 12V 1A con alimentatore 100-240V~50/60Hz
Consumo ........................................................15W
Standby ...................................................... <1W
Frequenza di ricezione FM ....................................87.5 - 108.0 MHz
Frequenza di ricezione AM .......................................522 - 1620 KHz
Potenza di trasm. max Bt ...................................................2,5 mW
Banda di trasmissione Bluetooth ...................................................2,4 GHz
Dimensioni unità ...................................320x210x290 mm
Dimensioni altoparlanti ...................................145x210x135 mm
ITALIANO

11
TT 1070 E
ENGLISH
NOTES ON USE
This is a precision electronic appliance; avoid using it in the following cases:
• Near strong heat sources, such as central heating plants or stoves.
• Listening to high volume for a long time could damage your hearing.
• In very humid places such as bathrooms, swimming pools, etc.
• In very dusty places.
• In places subject to strong vibrations.
• Position the appliance in such a way that there is always enough room for free air circulation (at least 5 cm).
• Do not block the air inlets.
• Keep the ear speaker during the steps of focusing point and volume adjustments, and in particular to keep the volume to a
minimum in the ignition phase.
• If any liquid enters the appliance, unplug it immediately from the socket and take it to the nearest TREVI authorised service
centre.
• Before switching on the appliance, always check that the power cable and the connection cable are properly installed.
• The apparatus shall not be exposed to dripping or splashing water. No objects filled with liquid, such as vases, should be placed
on the unit.
• No naked flame sources, such as lighted candles, should be placed on.
• Keep this manual.
CARE AND MAINTENANCE
Use a slightly damp soft cloth for cleaning. Do not use solvents and abrasive substances.
IMPORTANT
This device is designed for home use (not professional use). This appliance has been carefully built to ensure long-lasting perfect
performance. However, should any inconvenience occur, please contact your local authorised TREVI Service Centre.
TREVI follows a policy of ongoing research and development. Therefore products may have different features from those described.
CAUTIONS ON LASER
This device is equipped with a reading system with laser beam. Although the laser is low power, and with a
safety device that prevents it from operating when the door opened always adhere to the following warnings:
- Do not approach the eye to the laser lens with the device opened, the danger of damage to the retina.
- Do not attempt to dismantle or tamper with the laser unit, danger of radiation absorption.
TO ACTIVATE THE REMOTE CONRTOL AND BATTERY REPLACEMENT
The remote control comes with a cell battery already installed. To activate the
battery, remove the transparent tab at the bottom of the remote control. The remote
control is now ready to use.
To Replace With a New Battery:
1. Remove the battery compartment cover as per the illustration on the right.
2. Observe the correct polarity and install a 3V lithium battery (CR2025).
3. Close the cover.
With earphone or headphones use:
To prevent possible hearing damage, limit the amount of time listening at high volumes.

12
TT 1070 E
30
ENGLISH
LOCATION OF CONTROL
1) CASSETTE PLAYER
2) DUST COVER
3) EARPHONE JACK
4) CABINET
5) USB SLOT
6) LCD DISPLAY
7) SD SLOT
8) AUX IN JACK
9) REMOTE CONTROL RECEIVER
10) STANDBY / BT INDICATOR
11) FUNCTION
12) TUNER / BAND
13) VOLUME / STANDBY KNOB
14) MODE / CLOCK
15) TIMER/SLEEP
16) CASSETTE – RECORD
17) CASSETTE – PLAY
18) CASSETTE – FAST REWIND
19) CASSETTE – FAST FORWARD
20) CASSETTE – STOP / EJECT
21) CASSETTE – PAUSE
22) CD DOOR
23) REC / DEL
24) TUNER SCAN & PLAY/PAUSE
25) STOP
26) TUNING / SKIP DOWN
27) TUNING / SKIP UP
28) ALBUM / PRESET DOWN
29) ALBUM / PRESET UP
30) OPEN/CLOSE
31) ANTENNA FM
32) LINE-OUT JACK
33) LINE-OUT JACK
34) EXTERNAL POWER ADAPTOR JACK
35) SPEAKER-OUT JACK
36) SPEAKER-OUT JACK
37) NOT USED
38) 45 RPM ADAPTOR
39) LIFT LEVER (FOR RECORD PLAY / PUASE
40) AUTO STOP ON/OFF BUTTON
41) 33/45/78 RPM SPEED SELECTOR
42) TONE ARM
REMOTE CONTROL
1 STANDBY: TRIGGER BETWEEN STANDBY MODE AND OPERATION MODE.
2 PRESET/ALBUM DN: PERFORM SAME FUNCTION AS “ALBUM DOWN / PRESET
DOWN” BUTTON ON THE UNIT.
3 PRESET/ALBUM UP: PERFORM SAME FUNCTION AS “ALBUM UP / PRESET UP”
BUTTON ON THE UNIT.
4 TIMER / SLEEP: PERFORM SAME FUNCTION AS “TIMER / SLEEP” BUTTON ON THE
UNIT.
5 MUTE: TO MUTE AUDIO PLAYBACK.
6 OP/CL & SNOOZE: OPEN AND CLOSE THE CD DOOR; SNOOZE FUNCTION FOR
ALARM.
7 REC/DEL: PERFORM SAME FUNCTION AS “REC/DEL” BUTTON ON THE UNIT.
8 FM ST.: SELECT BETWEEN FM STEREO AND MONO RADIO
9 FUNCT: PERFORM SAME FUNCTION AS “FUNCTION” BUTTON ON THE UNIT (TO
ACTIVIATE BLUETOOTH FUNCTION, PRESS AND HOLD FUNCT BUTTON ON THE
REMOTE CONTROL TILL DISPLAY SHOWS “BT”)
10 MODE/CLOCK: PERFORM SAME FUNCTION AS “MODE/CLOCK” BUTTON ON THE
UNIT.
11 (PLAY/PAUSE): PERFORM SAME FUNCTION AS “ PLAY/PAUSE” BUTTON ON THE
UNIT.
12 (STOP)/BAND: PERFORM SAME FUNCTION AS “ STOP / BAND” BUTTON ON THE
UNIT.
13 (SKIP DOWN ): PERFORM SAME FUNCTION AS “ SKIP DOWN” BUTTON ON THE
UNIT. BESIDES, IT CAN BE USED FOR RADIO FREQUENCY SEARCHING DURING
TUNER MODE.
14 (SKIP UP ): PERFORM SAME FUNCTION AS “ SKIP UP” BUTTON ON THE UNIT.
BESIDES, IT CAN BE USED FOR RADIO FREQUENCY SEARCHING DURING TUNER
MODE.
15 VOLUME +/- : CONTROL VOLUME LEVEL.

13
TT 1070 E
ENGLISH
Connection
1. Connect External Power Adaptor To External Power Adaptor Jack
2. Connect External Speaker Box With The Speaker-Out Jack Of The Unit Back Panel.
3. Push The Standby Knob To Switch On The Unit, Standby Indicator (Red Color) Will Be Off. If The Backlight On The Lcd Display Lights Up, It Means
The Power Supply Is Normal, Now Your System Is Ready For Use.
Setting The Clock
1 When The Standby Indicator (Red Color) Light Up, Unit Is In The Standby Mode.
2 During Standby Mode, Select Between 12H Or 24H Mode: Press And Hold Clock Button For 3-5 Secondss, 12H / 24H Will Be Flashing. Pressing
Skip Up Or Skip Down Button To Select 12H / 24H Mode. Press Clock Button Again To Confirm.
3 Setting Hour: Pressing Skip Up Or Skip Down Knob To Select The Correct Hour, Then Press Clock Button Again To Confirm.
4 Setting Minute: After Step 3 Is Completed, Pressing Skip Up Or Skip Down Button To Select The Correct Minute, Then Press Clock Button Again
To Confirm.
Setting Alarm
1. During Standby Mode, Hold Timer Button For 3-5 Seconds. Setting Alarm Sequence Is “Alarm On Time > Alarm Off Time > Alarm Mode > Alarm
Volume”.
2. Setting Alarm On Time: “On” Is Lighting On The Display
I. Setting Hour: Pressing Skip Up Or Skip Down Button To Select The Correct Hour, Then Press Timer Button Again To Confirm.
Ii. Setting Minute: Pressing Skip Up Or Skip Down Button To Select The Correct Minute, Then Press Timer Button Again To Confirm.
3. Setting Alarm Off Time: “Off” Is Lighting On The Display:
I. Setting Hour: Pressing Skip Up Or Skip Down Button To Select The Correct Hour, Then Press Timer Button Again To Confirm.
Ii. Setting Minute: Prssing Skip Up Or Skip Down Button To Select The Correct Minute, Then Press Timer Button Again To Confirm.
4. Setting Alarm Mode: “Tune” Is Lighting Up On The Display:
I. Pressing Skip Up Or Skip Down Button To Select The Alarm Mode.
Ii. Sequence Is Tune > Cd > Usb > Sd, Press Timer Button Again To Confirm.
5. Setting Alarm Volume: “V - ” Is Lighting Up On The Display:
I. Turning Skip Up Or Skip Down Knob To Select The Alarm Volume, Press Timer Button Again To Confirm.
6. Setting Alarm Is Completed, The Display Will Show The Setting Again For User’s Checking
7. “Clock” Icon Is Flashing When Alarm Is In Active. “Clock” Icon Lights Up When Alarm Is Setting Is Stored But Not In Active Yet.
8. Cancel Alarm: During Standby Mode, When “Clock” Icon Is On, Press Timer Button, “Clock” Icon Will Be Off.
Snooze Function
Press “Snooze” Button On The Remote Control When Alarm In Active, Alarm Will Be Slient For 10 Minutes. After 9-10 Minutue Snooze Interval, Alarm
Will Be Active Again. Snooze Can Be Used For Repeatedly Within The 1-Hour Alarm Active Interval.
Timer Function
1. Push The Standby Knob Till The Standby Indicator (Red Color) Light Off. Unit Is Turning From Standby Mode To Operation Mode.
2. When The Unit Is Turned On, Press Sleep Button Repeatedly To Choose The Sleep Time Minutes From 90>80>70…..>10 Off.
3. Sleep Time Setting Is Stored When The “Sleep” Icon Lights Up On The Display.
4. When The Sleep Time Minutes Is Over, Unit Will Be Switched To Standby Mode Automatically.
Radio Tuning
1. Press Tuner Button To Activate “Tune” Mode.
2. Select The Desired Band By Radio Tuner Button (Am Or Fm) Again.
3. Tune To The Required Station By Pressing Skip Up Or Skip Down Button For 1-2 Seconds, And Then Release.
4. The Unit Will Start Seeking Automatically And Stop When A Radio Station Is Found.
Manual Preset Radio Stations
1. When The Desired Radio Station Is Found, Press Mode Button, Program Number Will Be Flashing.
2. Press Preset Up Or Preset Down To Choose The Program Number For Storing The Desired Radio Station.
3. Press Mode Button Again To Confirm, Program Number Will Stop To Flash.
4. Repeat Step 2 & 3 Until All Desired Radio Stations Is Being Found And Stored
5. Press Preset Up Or Preset Down To Choose The Preset Radio Stations.
6. The Number Of Stations Can Be Found And Stored Is Depended On The Reception Of Different Area And Countries.
Auto Preset Radio Stations
1. During Radio Mode, Press The Tuner Scan Button, The Unit Will Automaticlly Scan The Radio Frequency. When The Clear Signal Is Found, It Will
Automatically Store The Radio Station, Starting From Program Number 1.
2. The Number Of Stations Can Be Found And Stored Is Depended On The Reception Of Different Area And Countries.
Fm & Fm-Stereo Reception
1. Press “Fm St.” Button On The Remote Control To Seltect Fm Mono Or Fm Stereo Mode. When Stereo Signal Are Weak. It Is Preferable To Receive
The Program In Mono.
2. “St” Icon Light Up On The Display To Show Fm Stereo Mode Is Receiving.
Hints For Better Reception
1.Am: There Is A Built-In Am Bar Antenna. If Am Rececption Is Weak, Slightly Rotating Or Re-Positioning Of The Unit Will Usually Improve The
Am Reception.

14
TT 1070 E
ENGLISH
2.Fm : The Receiver Has A Built-In Fm Wire Antenna Hanging At The Rear Cabinet. This Wire Should Be Totally Unraveled And Extended For
Best Reception.
Fm & Fm-Stereo Radio Encoding
1. Press Tuner Button To Activate “Tune” Mode And Select The Desired Band By Radio Band Button (Am Or Fm).
2. Insert Memory Device (Usb Drive, Sd Or Mmc Card)
3. Press The Rec Button, It Will Take 3-5 Seconds To Read Memory Device. Then Usb Or Sd Icon Will Be Flashing.
4. Pressing Skip Up Or Skip Down Button To Select Desired Mode (Usb Or Sd) For Encoding. Then Press The Rec Button Again To Confirm. And
The System Is Starting The Encoding Mode After Few Secondss.
5. If Only Usb Drive, Sd Or Mmc Card Is Inserted, Step 4 Can Be Skipped.
6. The Usb Or Sd Icon Will Be Flashing On The Display Durnig Encoding.
7. To Finish Encoding, Press Stop Button And Display Will Show “End” And Return To “ Tuner” Mode.
Remark:-
-The Recording Speed Is 1:1 And According To The Actual Playing Time Of Fm Or Fm-St Radio
-The Recording Format Is Preset At – Mp3 Bit Rate : 128 Kbps
-During Fm & Fm-Stereo Radio Encoding, Radio Freqeuncy Is Fxied And Cannot Be Tuned
Phono & Encoding
Noted:
-Remove The Stylus Protector.
-Be Sure That The Tone Arm Is Being Detached From The Tone Arm Rest Before Operating And Re-Secured Again Afterwards.
1. Press Function Button To Select “Phon” On Display.
2. Set The Speed Selector To The Proper Position Depending On The Record To Be Played.
3. Place The Record On The Platter, Use The 45 Rpm Adaptor If Required.
4. Push The Lift Lever Upward To Raise The Tone Arm From The Arm Park, And Then Slowly Move It To The Record Side. The Platter Will Start To
Rotate.
5. Put Down The Lift Lever To Drop The Tone Arm And Touch The Record Gently. Phono Playing Starts Now.
6. Push The Lift Lever Upward To Raise The Tone Arm From The Arm Park, Now Platter Will Still Be Rotating But Phono Playing Will Stop. To Continue
The Playing, The User Needs To Put Down The Lift Lever.
7. Adjust The Volume To The Desired Level.
8. At The End Of Record, The Platter Will Automatically Stop Rotating. Push The Lift Lever Upward To Raise The Tone Arm And Move It To The Arm
Park, And Then Put Down The Lift Lever.
9. To Stop Manually, Lift The Tone Arm From The Record And Return It To The Arm Park.
Remark : As Some Kind Of Record The Auto-Stop Area Was Out Of The Unit Setting, So It Will Stop Before The Last Track Finishes. In This Case,
Select The Auto-Stop Switch To “ Off “ Position, Then It Will Run To The End Of The Record But Will Not Stop Automatically (Turn Off The Unit By
Power Button Or Switch Back The Auto-Stop Switch To “ On “ Position To Stop The Platter Rotate). Then Put Back The Tone Arm To The Arm Park.
Phono Encoding
1. Press Function Button Repeatedly To Activate “Phono” On Display And Then Insert Memory Device (Usb Drive, Sd Or Mmc Card).
2. Press The Rec Button, It Will Take 3-5 Seconds To Read Memory Device. Then Usb Or Sd Icon Will Be Flashing.
3. Pressing Skip Up Or Skip Down Button To Select Desired Mode (Usb Or Sd) For Encoding. Then Press The Rec Button Again To Confirm. And
The System Is Starting The Encoding Mode After Few Secondss.
4. If Only Usb Drive Or Sd/Mmc Card Is Inserted, Step 3 Can Be Skipped.
5. The Usb Or Sd Icon Will Be Flashing On The Display Durnig Encoding.
6. To Finish Encoding, Press Stop Button And Display Will Show “End” And Return To Phono Mode.
Remark:-
-The Recording Speed Is 1:1 And According To The Actual Plying Time Of The Phono
-The Recording Format Is Preset At – Mp3 Bit Rate : 128 Kbps
Aux In Jack & Encoding
Press Function Button Repeatedly To Activate “Aux” On Display, Then Connect The External Audio Device (Such As Cd Player) Through The Aux In
Jack. Audio Signal From The External Audio Device Can Be Played Through The System.
Aux In Encoding
1. Press Function Button To Select “Aux” On Display, Then Insert Memory Device (Usb Drive, Sd Or Mmc Card)
2. Press The Rec Button, It Will Take 3-5 Secondss To Read Memory Device. Then Usb Or Sd Icon Will Be Flashing.
3. Pressing Skip Up Or Skip Down Button To Select Desired Mode (Usb Or Sd) For Encoding. Then Press The Rec Button Again To Confirm. And
The System Is Starting The Encoding Mode After Few Secondss.
4. If Only Usb Drive Or Sd/Mmc Card Is Inserted, Step 3 Can Be Skipped.
5. The Usb Or Sd Icon Will Be Flashing On The Display Durnig Encoding.

15
TT 1070 E
ENGLISH
6. To Finish Encoding, Press Stop Button And Display Will Show “End” And Return To “Aux” Mode.
Remark:-
-The Recording Speed Is 1:1 And According To The Actual Plying Time Of The External Audio Device.
-The Recording Format Is Preset At – Mp3 Bit Rate : 128 Kbps
Cassette Tape & Recording
Stop / Eject: Press To Stop All Deck Operation. Press Again To Open The Cassette Door.
Fast Forward: Press To Start, Fast Forward Winding The Tape.
Fast Rewind: Press To Start, Fast Rewind Winding The Tape.
Play: Press To Start Playing Tape.
Pause: Press To Stop Tape Operation Temporarily. Press Again To Resume Playback.
Record: Press Together With Play Button To Start Tape Recording. (Deck A Only).
Playback
- Press Funct Button Repeatedly To Select “Tape” On Display.
- Put In Cassette Tape.
- Press Play Button On Cassette Deck To Start Playback.
- Use Pause Button When You Want To Stop Plackback Temporarily.
- Press Stop / Eject Button On Cassette Deck When Finished.
Recording
- Press Function Button To Select The Desired Mode (Turntable / Cd / Aux / Radio / Usb / Sd / Bluetooth).
- Press Record And Play Button Together On Cassette Deck, Then Signel From Desired Mode Will Be Recorded In Deck A.
Cassette Tape Recording To Usb/Sd
1. Press Function Button To Select “Tape” On Display And Then Insert Memory Device (Usb Drive, Sd Or Mmc Card).
2. Press The Rec Button; It Will Take 5 Seconds To Read Memory Device. Then Usb Or Sd Icon Will Be Flashing.
3. Press Cd 1 - Skip Down Button Or Cd 1 - Skip Up Button To Select Desired Mode (Usb Or Sd) For Recording. Then Press Rec Button Again To
Confirm.
4. If Only Usb Drive Or Sd/Mmc Card Is Inserted, Step 3 Can Be Skipped.
5. Display With Show “Wai” And Then Usb Or Sd Icon Will Be Flashing, Which Means The System Has Started Recording.
6. To Finish Recording, Press Rec Button Again And Display Will Show “End” And Return To Tape Mode.
Playback Of Mp3/Wma Song Via Usb Storage Media Or Memory Card
TheSystem IsAble To Decode And Playback All Mp3 / Wma File Which StoredIn TheMemoryMedia With Usb Connecting PortOr Sd/Mmc MemoryCard.
1. Plug-In The Usb Plug With The Face Up & Make Sure It Going Into Completely Or Insert The Memory Card In The Direction Of The Arrow As Shown
In The Label On The Underside Of The Memory Card Slot Cover. Insert Straight Without Bending.
2. Connecting The Usb Upside Down Or Backwards Could Damage The Audio System Or The Storage Media (Usb Thumb Drive / Sd/Mmc Card).
Check To Be Sure The Direction Is Correct Before Connection.
3. Pressing Function Button Repeatedly To Select “Usb” Or “Card” On Display, Then Insert Memory Device (Usb Drive, Sd Or Mmc Card).
4. The System Will Start Reading The Storage Media Automatically After Function Selection, And Display Will Show The Total Number Of Mp3/Wma
Files (Eg. 016).
5. Then The System Will Start Audio Playback From Desried Device (Usb Or Sd/Mmc) Automatically.
Play / Pause Button
- Press The “Play/Pause” Button Once To Halt Playing, Press It Again To Continue.
Stop Button
- Press Stop Button To End Up Audio Playback, Then Display Will Show The Total Number Of Mp3/Wma Files. And Then User Can Turn “Skip Up”
Or “Skip Down” Knob To Select File Forward Or Backward.
Skip Up / Skip Down Button
- During Mp3/Wma Playback, Press Skip Up Button Once To Play The Next File. Press And Hold Skip Up Button Continuously To Speed Up
Selecting Forward.
- During Mp3/Wma Playback, Turn Skip Down Button Once To Play The Previous File. Press And Hold Skip Down Button Continuously To Speed
Up Selecting Backward.
Folder Searching
Press Album Down Or Album Up To Search Folder Backward Or Forward.

16
TT 1070 E
ENGLISH
Repeat Function
During Audio Playback, Press Mode Button Repeatedly To Choose Different Playbac Mode As Below:
Repeat Once > Repeat Album > Repeat All > Random > Introduction
Remark
-If Connect The System To Mp3 Player Via The Usb Socket, Due To Variances In Mp3 Encoding Format, Some Mp3 Player May Not Be Able To
Play Via The Usb Socket. This Is Not A Malfunction Of The System.
-There Are Numerous Usb And Sd Device Producers Are. Solution And Format Are Variable Beteen Each Other. Therefore, We Do Not Garanttee
This Unit Can Support All Usb And Sd Device From Every Brand.
-Sd Card Can Be Suppored Up To 8Gb
Tracks Programming
Up To 99 Tracks Can Be Programmed For Mp3/Wma File And Play In Any Order. Before Use, Be Sure The System Is At Stop Mode Before Programming:
1. Set At “Usb” Or “Card” Function, Then Press Stop Button.
2. Press Mode Button, “Mem” Will Be Flashing On Lcd Display. Moreover, It Will Indicate Program No. And Digits For Track No. To Be Programmed.
3. Select A Desired Folder By Pressing Skip Up Or Skip Down Button, Then Press Mode Button To Confirm.
4. Then Select A Desired Track By Pressing Skip Up Or Skip Down Button, Then Press Mode Button To Confirm.
5. Repeat Steps 3 And 4 To Enter Additional Tracks Into The Memory If Necessary.
6. When All The Desired Tracks Have Been Programmed, Press “Play/Pause” Button To Play The Tracks In Assigned Order.
7. Press Stop Button To Stop Playing Of Programmed Trackes, Press Stop Button Again To Cancel Programming.
Copying Of Mp3/Wma File
The System Allows You To Copy The File From Usb To Sd Or Sd To Usb By 1 File, 1 Folder Or All Files.
I) Copy 1 Track
1. Insert The Usb Storage Media Or Sd/Mmc Card, Set In “Usb” Or “Card” Mode.
2. Press Rec Button During The Playback Of The Copying Track, Then “One” Will Be Flashing On The Display. Press Rec Button Again To Confirm.
3. The Usb Or Sd Icon Will Be Flashing On The Display. Copying Is Performing Now.
4. After Completing Of Copy, Unit Will Stop Playback Automatically.
5. Display Will Show “End” And Back To Usb Or Sd Mode.
Ii) Copy 1 Folder
1. Insert The Usb Storage Media Or Sd/Mmc Card, Set In “Usb” Or “Card” Mode & Set At Stop Mode After Unit Reading.
2. Press Album Down Or Album Up To Search Desired Folder For Copying.
3. Press Rec Button, Then “One” Will Be Flashing On The Display. Pressing Skip Up / Skip Down Button To Select “Dir” On The Display. Press
Rec Button Again To Confirm.
4. Usb Or Sd Icon Will Be Flashing On The Display. Copying Is Performing Now.
5. When The Usb Or Sd Icon Stops Flashing, It Means That The Folder Copying Is Completed.
Iii) Copy All Track
1. Insert The Usb Storage Media Or Sd/Mmc Card, Set In “Usb” Or “Card” Mode & Set At Stop Mode After Unit Reading.
2. Press Rec Button, Then “One” Will Be Flashing On The Display. Pressing Skip Up / Skip Down Button To Select “All” On The Display. Press Rec
Button Again To Confirm.
3. Usb Or Sd Icon Will Be Flashing On The Display. Copying Is Performing Now.
4. When The Usb Or Sd Icon Will Stop Flashing, It Means That All Track Copying Is Completed.
Remark:
-If Press The Rec Button During Playback Of Usb Or Sd Mode, The File Will Copy From Usb To Sd Or Sd To Usb.
File Delete From Usb / Sd Card
The System Is Able To Erase The File Stored Inside The Usb Drive Or Sd Card By Following:-
I) Delete 1 Track
1. Press And Hold Del Button For 3-5 Seconds During The Playback Of The Desired Track, Then “One” Will Be Flashing On The Display. Press Del
Button Again To Confirm.
2. “Del” Will Be Shown On The Display.
3. “Del” Will Disappear On The Display, It Means The Track Is Deleted.
Ii) Delete 1 Folder
1. Insert The Usb Storage Media Or Sd/Mmc Card, Set In “Usb” Or “Card” Mode & Set At Stop Mode After Unit Reading.

17
TT 1070 E
2. Press Album Down Or Album Up To Search Desired Folder For Deleting.
3. Press And Hold Del Button For 3-5 Seconds, “Del” Will Show On The Display. Pressing Skip Up / Skip Down Button To Select “Dir” On The
Display. Press Del Button Again To Confirm.
4. “Del” Will Be Shown On The Display. After “Del” Disappears It Means The Desired Folder Is Deleted.
Ii) Delete All Track
1. Insert The Usb Storage Media Or Sd/Mmc Card, Set In “Usb” Or “Card” Mode & Set At Stop Mode After Unit Reading.
2. Press And Hold Del Button For 3-5 Seconds, Then “One” Wll Be Flashing On The Display. Pressing Skip Up / Skip Down Button To Select “All”
On The Display. Press Del Button Again To Confirm.
3. Usb Or Sd Icon Will Be Flashing On The Display. Deleting Is Performing Now.
4. When The Usb Or Sd Icon Stops Flashing, It Means That All Track Copying Is Completed.
Remark : All The Files Inside The Usb Storage Media Or Sd Card Will Be Deleted Completely After Confirming To “Del” Button.
Compact Disc (Cd) Playback & Encoding
1. Press Function Button Repeatedly To Select “Cd” On Display.
2. Press Cd Door Button, Cd Door Will Be Opened, Put The Cd In The Tray And Press Cd Door Button Again, Cd Door Will Be Closed.
3. The System Will Start Reading The Cd:
Play / Pause Button
- Press The Play/Pause Button Once To Halt Playing, Press It Again To Continue.
Stop Button
- Press The Stop Button To End Up Audio Playback, Then Display Will Show The Total Number Of Tracks. And Then User Can Turn Skip Up / Skip
Down Knob To Select Tracks.
Skip Up / Skip Down Button
- During Cd Playback, Press Skip Up Button Once To Play The Next File. Press And Hold Skip Up Button Continuously To Speed Up Selecting
Forward
- During Cd Playback, Press Skip Down Button Once To Play The Previous File. Press And Hold Skip Down Button Continuously To Speed Up
Selecting Backward.
Folder Searching
Press Album Down Or Album Up To Search Folder Backward Or Forward.
Repeat Function
During Audio Playback, Press Mode Button Repeatedly To Choose Different Playbac Mode As Below:
Repeat Once > Repeat Album (Mp3/Wma Format Only) > Repeat All > Random > Introduction
Tracks Programming
Up To 99 Mp3 Tracks & 20 Cd Audio Format Track Can Be Programmed And Played In Any Order. Before Use, Be Sure The System Is At Stop Mode
Before Programming:
1. Press Functon Button To “Cd” And At Stop Mode
2. Press Mode Button, “Mem” Will Be Flashing On Lcd Display. Moreover, It Will Indicate Program No. And Digits For Track No. To Be Programmed.
3. Select A Desired Folder (For Mp3/Wma Disc Only) By Pressing Skip Up Or Skip Down Button, Then Press Mode Button To Confirm.
4. Then Select A Desired Track By Pressing Skip Up Or Skip Down Button, Then Press Mode Button To Confirm.
5. Repeat Steps 3 And 4 To Enter Additional Tracks Into The Memory If Necessary.
6. When All The Desired Tracks Have Been Programmed, Press “Play/Pause” Button To Play The Tracks In Assigned Order.
7. Press Stop Button To Stop Playing Of Programmed Trackes, Press Stop Button Again To Cancel Programming.
Copying Of Cd
The System Allows You To Copy The Track From Cd To Usb Or Sd By 1 Track, 1 Folder Or All Files.
I) Copy 1 Track
1. Insert The Usb /Sd Storage Media, Press Function Button Repeatedly To “Cd” Mode.
2. Press Rec Button During The Playback Of The Copying Track From Cd, Then “One” Will Be Flashing On The Display. Press Rec Button Again To
Confirm.
3. The Usb Or Sd Icon Will Be Flashing On The Display. Copying Is Performing Now.
4. After Completing Of Copy, Unit Will Stop Playback Automatically.
5. Display Will Show “End” And Back To Cd Mode.
Ii) Copy 1 Folder (For Mp3/Wma Disc Only)
1. Insert The Usb/Sd Storage Media, Set In Cd & Stop Mode After Unit Reading.
ENGLISH

18
TT 1070 E
2. Press Album Down Or Album Up Button To Search Folder For Copying.
3. Press Rec Button, Then “One” Will Be Flashing On The Display. Press Skip Up / Skip Down Button To Select “Dir” On The Display. Press Rec
Button Again To Confirm.
4. Usb Or Sd Icon Will Be Flashing On The Display. Copying Is Performing Now.
5. When The Usb Or Sd Icon Stops Flashing, It Means That The Folder Copying Is Completed.
Iii) Copy All Track
1. Insert The Usb/Sd Storage Media, Press Cd Button To “Cd” Mode.
2. Press Rec Button, Then “One” Wll Be Flashing On The Display. Press Skip Up / Skip Down Button To Select “All” On The Display. Press Rec
Button Again To Confirm.
3. Usb Or Sd Will Be Flashing On The Display. Copying Is Performing Now.
4. When The Usb Icon Stops Flashing, It Means That All Track Copying Is Completed.
Split Track Function For Usb/Sd Recording For Turntable/Cassette/Aux In
1) Manual Split Operation Procedure: During Usb/Sd Recording, The Usb/Sd Icon Will Flash On The Display. If A New Track Is Required, Press Mode
Button On The Unit Or Remote Control, Display Will Show “Ts”, Then The Unit Will Stop Recording Momentarily And Resume Again. A New File
Will Have Been Created On The Usb/Sd Device Represnting A New Track.
2) Auto Split Operation Procedure:
- Before Usb/Sd Recording, Select Audio Source, Then Press Mode Button On The Unit Or Remote Control, Display Will Show “T-On”, Which Means
The Auto Split Function Has Activated. Then Start Usb/Sd Recording, The Unit Can Automatically Detect The Silent Part Between Each Track, And
Create A New File To Move On To Start Recording The Next Track.
- If Not Required: Press Mode Button On The Unit Or Remote Control Before Usb/Sd Recording, Display Will Show “T-Of”, Which Means Auto Split
Has Been Deactivated.
- Please Note For Auto Split: Several Seconds Of The Beginning Of The Next Track May Not Be Recorded, As The Unit May Take A Few Seconds
To Create A New File On The Usb/Sd; And It Can Additionally Be The Case That Some Music Producers Intentionally Add Silent Sections Within
One Track. As A Result, This Will Very Likely Make The Unit Consider This Silent Part The Break Between Tracks And Create A New Track On The
Recording.
- Note For Auto Split: During Usb/Sd Recording From Turntable / Cassette , When The Unit Has Detected Any Particular Silent Part, The Turntable
/ Cassette Player Will Stop Momentarily. The Turntable / Cassette Player Will Resume Operation Once The Usb/Sd Device Has Begun Creating A
New File To Be Recorded.
Bluetootooth Connection
- Press And Hold Function Button Till Lcd Shows “Bt”, Then The Unit Is Ready For Connection With Your Bluetooh Device (Such As Mobile Phone).
- Switch On The Bluetooth Function Of Your Bluetooh Device, And Select “Tt1070e” Bluetooth Equipment For Connection.
- After Your Bluetooh Device Is Connected With The Unit Via Bluetooth, Start To Playback Your Device.
- This Unit Has Nfc Function Which Can Allow Your Bluetooh Device (Such As Mobile Phone) Connecting With The Unit Automatically.
- Switch On The Bluetooth And Nfc Function Of Your Device, Then Put It Near The Logo Within 5Mm On The Front Panel. Your Device Can
Automatically Seach And Connect With The Unit.
- To Disconnect With The Unit, Put Your Device Near The “Bt/N” Logo Within 5Mm On The Front Panel Again.
Id3 Display
During Mp3 Music Playback, Press Fm St. Button On Th Remote Control, It Can Switch On Or Off Id3 Display. If Id3 Display Is On, It Can Show The
Mp3 Details (English Only) Including Tile Name, Artist Name And Album Name During Mp3 Plyback.
Earphone Jack & Line Out Socket
- This System Can Be Connected With Headphone Or External Amplifier / Speaker By 3.5Mm Earphone Jack.
- This System Can Be Connected With External Device (Eg. Amplifier And Speaker) By Line-Out Socket At Rear Cabinet.
Power Saving Feature:
To Save Energy, If There Is No Audio Signal From Cd / Turntable / Cassette / Usb / Sd For A Period Of Over 10 Minutes, Then The Unit Will Automatically
Switch To Standby Mode
Technical Specifications
Power supply: 12V 1A power supply with 100-240V ~ 50 / 60Hz power supply
consumption: 15W
Standby: <1W
Reception frequency: FM 87.5 - 108.0 MHz
Reception frequency: AM 522 - 1620 KHz
Transmitting power max Bt: 2.5 mW
Bluetooth transmission band: 2.4 GHz
Unit dimensions: 320x210x290 mm
Speaker dimensions: 145x210x135 mm
ENGLISH

19
TT 1070 E
FRANÇAIS
NOTES D’EMPLOI
Cet appareil est un instrument électronique de haute précision ; évitez donc de l’utiliser dans les cas suivants :
• Près de grosses sources de chaleur comme des radiateurs et des poêles.
• L'écoute d'un volume élevé pendant longtemps pourrait endommager votre audition.
• Dans des endroits très humides comme les salles de bains, les piscines, etc.
• Dans des endroits très poussiéreux.
• Dans des endroits exposés à de fortes vibrations.
• Placez l’appareil de sorte qu’il y ait toujours assez d’espace sur ses côtés pour laisser circuler librement l’air (au moins 5 cm).
• Ne bouchez pas les fentes d’aération.
• Gardez le haut-parleur de l'oreille pendant les étapes de mise au point des ajustements ponctuels et de volume, et en particulier
pour maintenir le volume à un minimum dans la phase d'allumage.
• Si des liquides pénètrent à l’intérieur de l’appareil, débranchez-le immédiatement et portez-le au centre d’assistance agréé TREVI
le plus proche.
• Contrôlez toujours, avant d’allumer l’appareil, que les câbles d’alimentation et les câbles de branchement sont correctement
installés.
• L'appareil ne doit pas être exposé à des éclaboussures d'eau. Aucun objet rempli de liquide, comme des vases, doivent être
placés sur l'appareil.
• Aucune source de flamme nue, telle que des bougies allumées, doivent être placés sur.
• Conservez ce manuel.
MANIEMENT ET ENTRETIEN
Pourlenettoyage,ilest conseillé d’utiliser un chiffon doux légèrementhumide.Évitezl’emploidesolvantsou de substances abrasives.
IMPORTANT
Cet appareil est conçu pour un usage domestique (usage non professionnel). La bonne fabrication de cet appareil garantit un fon-
ctionnement parfait pour une longue période. Si toutefois quelques inconvénients devaient se présenter, adressez-vous au Centre
d’Assistance agréé TREVI le plus proche.
TREVI observe une politique de recherche et de développement continus. C’est pourquoi ses produits peuvent présenter des
caractéristiques différentes par rapport à celles qui sont décrites.
AVERTISSEMENT SUR LE LASER
Cet appareil est pourvu d’un système de lecture à rayon laser. Bien que le laser soit de faible puissance et muni
d’un dispositif de sécurité empêchant son fonctionnement lorsque le volet est ouvert, suivez scrupuleusement
les précautions suivantes:
- n’approchez pas les yeux de la lentille du laser lorsque l’appareil est ouvert; danger de lesion de la retine.
- n’essayez pas de demonter ou d’alterer l’unite laser; danger d’absorption de radiations.
RETIRER TAB PLASTIQUE
EXTRAIT
POUSSER
ACTIVATION ET REMPLACEMENT DES PILES DE COMMANDE A DISTANCE
La télécommande utilise une pile CR2025
Pour activer la pile de la télécommande (fournie) retirer la languette de protection
en plastique.
Pour remplacer la pile:
1. Poussez la porte de la batterie en plastique de logement loquet vers la droite.
2. Retirez le support de la batterie.
3. Insérez une nouvelle batterie, en prenant soin de respecter les polarités.
4. Fermez la porte du logement de la batterie.
Avec écouteurs ou un casque d'utilisation:
Pour prévenir d'éventuelles lésions auditives, limiter la quantité de temps d'écoute à volume élevé.

20
TT 1070 E
30
FRANÇAIS
LIEU DE CONTRÔLE
1) LECTEUR DE CASSETTE
2) COUVERTURE DE POUSSIÈRE
3) JACK D'ÉCOUTEUR
4) CABINET
5) Slot USB
6) AFFICHAGE LCD
7) SD SLOT
8) AUX IN JACK
9) RÉCEPTEUR DE TÉLÉCOMMANDE
10) INDICATEUR DE VEILLE / BT
11) FONCTION
12) TUNER / BANDE
13) BOUTON VOLUME / STANDBY
14) MODE / HORLOGE
15) TIMER / SOMMEIL
16) CASSETTE - ENREGISTREMENT
17) CASSETTE - JOUER
18) CASSETTE - REMBOURRAGE RAPIDE
19) CASSETTE - AVANCE RAPIDE
20) CASSETTE - ARRÊT / ÉJECTION
21) CASSETTE - PAUSE
22) PORTE CD
23) REC / DEL
24) TUNER SCAN & PLAY / PAUSE
25) STOP
26) ACCORD / PASSER
27) ACCORDER / SAUTER
28) ALBUM / PRESET DOWN
29) ALBUM / PRESET UP
30) OUVRIR / FERMER
31) ANTENNE FIL FILAIRE
32) JACK LINE-OUT
33) JACK DE LIGNE-OUT
34) PRISE D'ADAPTATEUR D'ALIMENTATION EXTERNE
35) JACK SPEAKER-OUT
36) JACK HAUT-PARLEUR
37) --
38) ADAPTATEUR 45 RPM
39) LEVIER DE LEVAGE (POUR LECTURE / PUISSANCE D'ENREGISTREMENT
40) BOUTON ARRÊT AUTO MARCHE / ARRÊT
41) SÉLECTEUR DE VITESSE 33/45/78 RPM
42) BRAS DE TONALITÉ
TÉLÉCOMMANDE
1 STANDBY: DÉCLENCHEMENT ENTRE LE MODE STANDBY ET LE MODE DE FON-
CTIONNEMENT.
2 PRESET / ALBUM DN: EFFECTUE LA MÊME FONCTION QUE LE BOUTON "ALBUM
DOWN / PRESET DOWN" SUR L'APPAREIL.
3 PRESET / ALBUM UP: EFFECTUE LA MÊME FONCTION QUE LE BOUTON "ALBUM UP
/ PRESET UP" SUR L'APPAREIL.
4 TIMER / SLEEP: EFFECTUE LA MÊME FONCTION QUE LE BOUTON "TIMER / SLEEP"
SUR L'APPAREIL.
5 MUTE: POUR SOURIR LA LECTURE AUDIO.
6 OP / CL & SNOOZE: OUVRIR ET FERMER LA PORTE CD; FONCTION SNOOZE POUR
ALARME.
7REC /DEL:EFFECTUELAMÊMEFONCTIONQUELEBOUTON"REC/DEL"SURL'APPAREIL.
8 FM ST .: SÉLECTIONNER ENTRE FM STÉRÉO ET MONO RADIO
9 FUNCT: EFFECTUE LA MÊME FONCTION QUE LE BOUTON "FUNCTION" DE L'APPAREIL
(POUR ACTIVER LA FONCTION BLUETOOTH, APPUYEZ ET MAINTENEZ LE BOUTON
FUNCT SUR L'AFFICHEUR DE LA TÉLÉCOMMANDE AFFICHE "BT")
10 MODE / HORLOGE: EFFECTUE LA MÊME FONCTION QUE LE BOUTON "MODE /
HORLOGE" DE L'APPAREIL.
11 (PLAY / PAUSE): EFFECTUE LA MÊME FONCTION QUE LE BOUTON "PLAY / PAUSE"
SUR L'APPAREIL.
12 (STOP) / BAND: EFFECTUE LA MÊME FONCTION QUE LE BOUTON "STOP / BAND"
DE L'APPAREIL.
13 (SKIP DOWN): EFFECTUE LA MÊME FONCTION QUE LE BOUTON "SKIP DOWN" SUR
L'APPAREIL. DE PLUS, IL PEUT ÊTRE UTILISÉ POUR LA RECHERCHE RADIO-
FRÉQUENCE EN MODE TUNER.
14 (SKIP UP): EFFECTUE LA MÊME FONCTION QUE LE BOUTON "SKIP UP" SUR L'APPA-
REIL. DE PLUS, IL PEUT ÊTRE UTILISÉ POUR LA RECHERCHE RADIOFRÉQUENCE
EN MODE TUNER.
15 VOLUME +/-: CONTROL VOLUME LEVEL.
Table of contents
Languages:
Other Trevi Stereo System manuals

Trevi
Trevi HCV 10D35 DAB User manual

Trevi
Trevi SB 8350TV User manual

Trevi
Trevi SB 8340 SW User manual

Trevi
Trevi DS 1976 V User manual

Trevi
Trevi HCX 1200 BT User manual

Trevi
Trevi AV 610 USB User manual

Trevi
Trevi HCX 1080 BT User manual

Trevi
Trevi HCV 1035 BT User manual

Trevi
Trevi TT 1072 DAB User manual

Trevi
Trevi HF 1900 BT User manual

Trevi
Trevi SB 8370 SW User manual

Trevi
Trevi MCX 1021 USB User manual

Trevi
Trevi HCX 10D6 DAB User manual

Trevi
Trevi MCX 1025 USB User manual

Trevi
Trevi HFX 1058 User manual

Trevi
Trevi MCX 1045IPD User manual

Trevi
Trevi TT 1060CD User manual

Trevi
Trevi HCX 10D8 DAB User manual

Trevi
Trevi MCX 1021 USB User manual

Trevi
Trevi MCX 1024 USB User manual