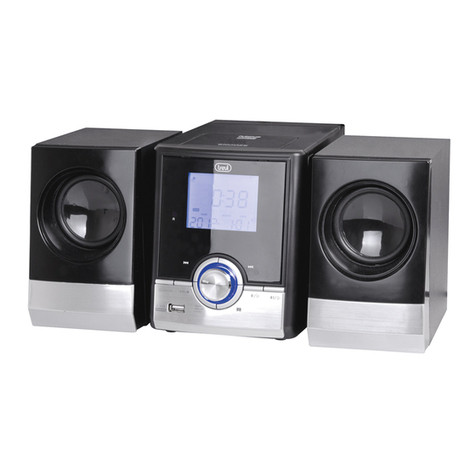
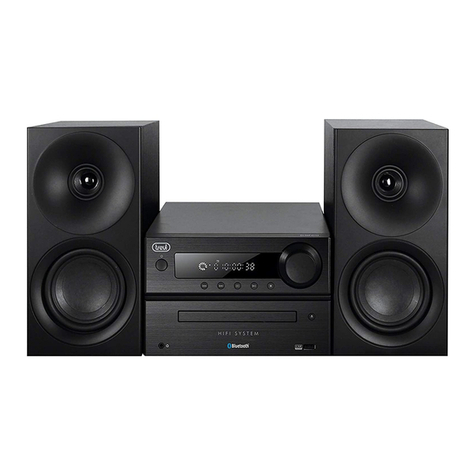
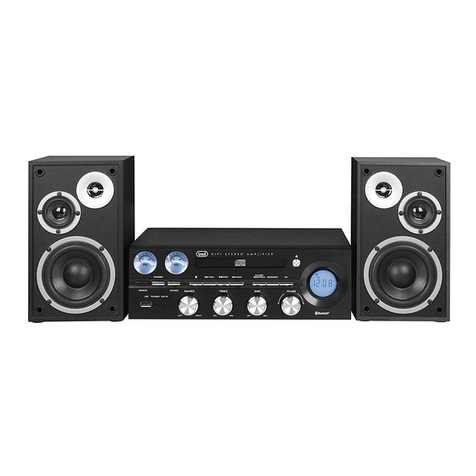
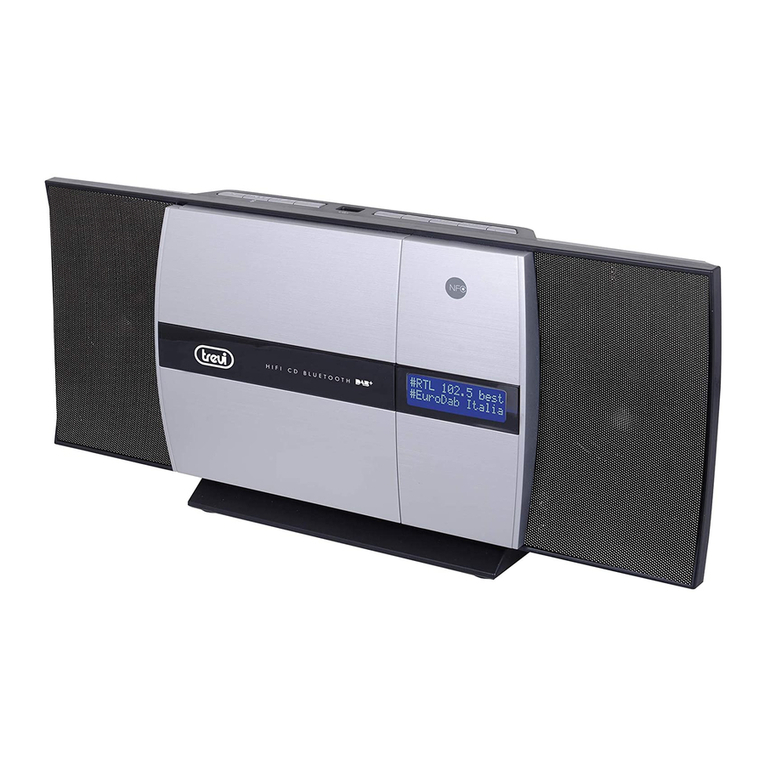
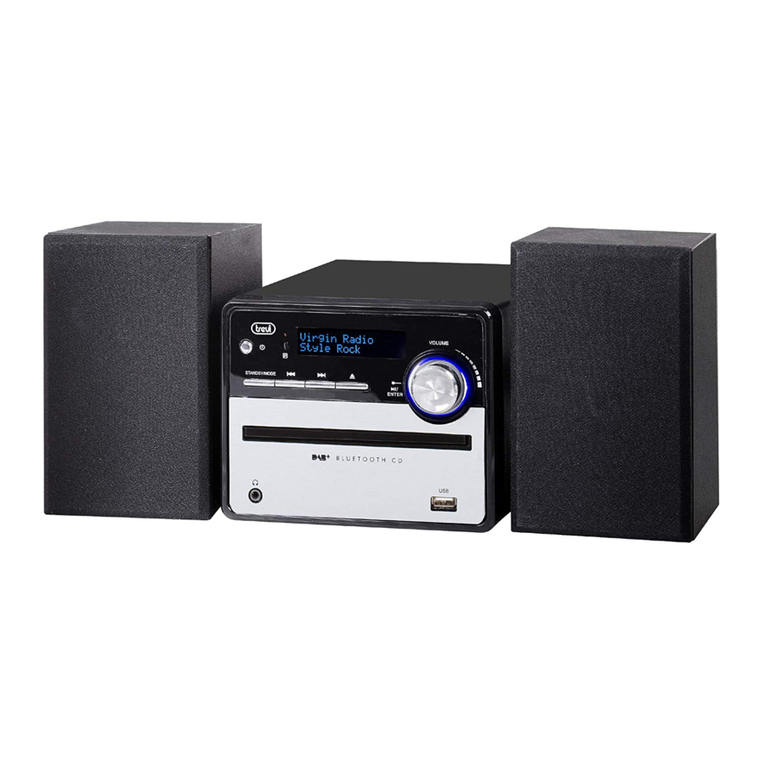
Trevi HCV 1035 BT User manual

SISTEMA HIFI STEREO CON CD/MP3/USB/BT
Manuale d'uso e collegamento
HIFI STEREO SYSTEM WITH CD/MP3/USB/BT
User manual and connection
SYSTEME STEREO HIFI AVEC CD/MP3/USB/BT
Mode d'emploi et connexion
HIFI STERO ANLAGE MIT CD/MP3/USB/BT
Bedienungsanleitung und Anschluss
ESTEREO CON CD/MP3/USB/BT
Manual de usuario y la conexión
RADIO
PLL FM
LINE IN
HCV 1035 BT
Guida d’uso
User guide
CD MP3
USB IN BT NFC

2
HCV 1035 BT
WARNING!
ATTENZIONE
WARNING: DO NOT OPEN THE SET. NEITHER CONTROLS OR SPARE PARTS TO
BE USED BY THE USER ARE TO BE FOUND INSIDE IT. APPLY TO AUTHORISED
TREVI CENTERS FOR SERVICE OPERATIONS.
RISCHIO DI SCOSSE ELETTRICHE!
NON ESPORRE A PIOGGIA E
UMIDITÀ
ATTENZIONE: NON APRITE L'APPARECCHIO. ALL'INTERNO NON VI SONO
COMANDI MANIPOLABILI DALL'UTENTE NE PARTI DI RICAMBIO. PER TUTTE
LE OPERAZIONI DI SERVIZIO RIVOLGERSI AD UN CENTRO DI ASSISTENZA
AUTORIZZATO TREVI
DANGER OF ELECTRIC SHOCK!
DO NOT EXPOSE TO
RAIN OR HUMIDITY
ATTENTION
ATTENTION: NE PAS OUVRIR L’APPAREIL, A L’INTERIEUR IL N’Y A PAS DE
COMMANDESAMANIPULERPARL’UTILISATEUROUDEPIECESDERECHANGE.
POUR TOUTES LES OPERATIONS DE SERVICE IL FAUT S’ADRESSER A UN
SERVICE D’ASSISTANCE AUTORISE TREVI.
RISQUE DE DECHARGES
ELECTRIQUES
NE PAS EXPOSER A LA PLUIE ET A
L’HUMIDITE
ACHTUNG
ACHTUNG: DAS GERÄT NICHT ÖFFNEN. IM INNERN BEFINDEN SICH KEINE VOM
BENUTZERSELBSTINSTANDSETZBARENTEILEUNDAUCHKEINEERSATZTEILE.
FÜR JEGLICHE SERVICEARBEITEN, WENDEN SIE SICH BITTE AN EINE TREVI
AUTORISIERTEN KUNDENDIENSTSTELLE.
GEFAHR ELEKTRISCHER SCHLÄGE
NICHT DER FEUCHTIGKEIT UND
DEM REGEN AUSSETZEN
ATENCION
ATENCION: NO ABRIR EL APARATO, EN SU INTERIOR NO HAY MANDOS QUE
PUEDAN SER MANIPULADOS POR EL USUARIO NI PARTES DE REPUESTO.
PARA TODAS LAS OPERACIONES DE SERVICIO DIRIGIRSE A UN CENTRO DE
ASISTENCIA AUTORIZADO TREVI.
PELIGRO DE CHOQUES
ELECTRICOS
NO EXPONER A LLUVIA Y
HUMEDAD
ATENÇÃO
PERIGO DE CHOQUES ELÉTRICOS
NÃO EXPOR A CHUVA E UMIDADE
ATENÇÃO: NÃO ABRIR O APARELHO. NO INTERIOR DO MESMO NÃO EXISTEM
COMANDOS OU PEÇAS DE SUBSTITUIÇÃO QUE POSSAM SER MANIPULADOS
PELO USUÁRIO. EM CASO DE EVENTUAL OPERAÇÃO DE SERVIÇO, DIRIGIR-SE
A UM CENTRO DE ASSISTÊNCIA AUTORIZADO TREVI
PROSOCH
PROSOCH. MHN ANOIGETE THN SUSKEUH. DEN UPARCOUN
STO ESWTERIKO THS ENTOLES POU NA MPOREI NA CEIRISTEI
O KATANALWTHS OUTE ANTALLAKTIKA TMHMATA. GIA OPO-
IADHPOTE EPISKEUH H¢ SUNTHRHSH APEUQUNQEITE SE ENA
APO TA EXOUSIODOTHMENA KENTRA ANTIPROSWPEIAS TREVI.
KINDUNOS HLEKTROPLHXIAS
MHN EKQETETE
SE BROCH KAI UGRASIA
WARNINGS

3
HCV 1035 BT
INFORMAZIONI AGLI UTENTI
ai sensi del Decreto Legislativo N° 49 del 14 Marzo 2014
“Attuazione della Direttiva 2012/19/UE sui rifiuti di apparecchiature elettriche
ed elettroniche (RAEE)”
Il simbolo del cassonetto barrato riportato sull’apparecchiatura indica che il pro-
dotto alla fine della propria vita utile deve essere raccolto separatamente dagli altri
rifiuti. L’utente dovrà, pertanto, conferire l’apparecchiatura integra dei componenti
essenziali giunta a fine vita agli idonei centri di raccolta differenziata dei rifiuti elet-
tronici ed elettrotecnici, oppure riconsegnarla al rivenditore al momento dell’acqui-
sto di nuova apparecchiatura di tipo equivalente, in ragione di uno a uno, oppure
1 a zero per le apparecchiature aventi lato maggiore inferiore a 25 cm. L’adeguata
raccolta differenziata per l’avvio successivo dell’apparecchiatura dimessa al rici-
claggio, al trattamento e allo smaltimento ambientale compatibile contribuisce ad
evitare possibili effetti negativi sull’ambiente e sulla salute e favorisce il riciclo dei
materiali di cui è composta l’apparecchiatura. Lo smaltimento abusivo del prodotto
da parte dell’utente comporta l’applicazione delle sanzioni amministrative di cui al
D.Lgs n. Decreto Legislativo N° 49 del 14 Marzo 2014.
INFORMATION TO USERS
pursuant to Legislative Decree No. 49 of March 14, 2014
“Implementation of Directive 2012/19/EU on Waste Electrical and Electronic
Equipment (WEEE)”
This wheeled bin symbol on the product indicates that at the end of its life must be
collectedseparately fromother waste.Theuser must,therefore,take theremotecontrol
integrates the essential components that got to its life to the appropriate differentiated
collection centers for electronic and electro-technical waste, or return it to the dealer
when purchasing a new appliance of equivalent type, in terms
of one to one, or one to zero for equipment having longer side of less than 25 cm.
Appropriate separate collection for the decommissioned equipment for recycling,
processing and environmentally compatible disposal helps prevent negative impact
on the environment and human health and promotes recycling of the materials making
up the product. Illegal dumping of the product by the user entails
the application of administrative sanctions stated in Legislative Decree n. Legislati-
ve Decree No. 49 of March 14, 2014.
INFORMATIONS AUX UTILISATEURS
conformément au décret législatif N° 49 du 14 Mars, 2014
“Lamiseenœuvre deladirective 2012/19/UErelative auxdéchetsd’équipements
électriques et électroniques (RAEE)”
Ce symbole de poubelle sur roues sur le produit indique que, à la fin de sa durée
de vie doit être collecté séparément des autres déchets. L’utilisateur doit donc
prendre le contrôle à distance intègre les éléments essentiels qui ont obtenu à sa
vie dans les centres de collecte différenciés appropriés pour les déchets électroni-
ques et électro-technique, ou le retourner chez le concessionnaire lors de l’achat
d’un nouvel appareil de type équivalent, en termes de un à un, ou une à zéro
pour un équipement ayant le côté plus long de moins de 25 cm. collecte séparée
appropriée pour l’équipement mis hors service pour le recyclage, le traitement et
l’élimination respectueuse de l’environnement contribue à éviter les effets négatifs
sur l’environnement et la santé humaine et favorise le recyclage des matériaux qui
composent le produit. le dumping illégal du produit par l’utilisateur substitutions
l’application des sanctions administratives prévues par le décret législatif n. Décret
législatif N° 49 du 14 Mars 2014.
Informationen für die Nutzer
gemäß Gesetzesdekret Nr 49 von 14, März 2014
“Die Umsetzung der Richtlinie 2012/19/EU über die Entsorgung von Elektro- und
Elektronik-Altgeräte (RAEE)”
Dieses Mülleimers Symbol auf dem Produkt zeigt an, dass muss am Ende seines
Lebens von anderen Abfällen getrennt gesammelt werden. Der Benutzer muss
daher nehmen die Fernbedienung die wesentlichen Komponenten integriert, die für
elektronische und elektrotechnische Abfälle in die entsprechenden differenzierten
Sammelstellen zu seinem Leben bekam, oder es an den Händler zurückgeben,
wenn ein neues Gerät gleichwertiger Art Kauf in Bezug auf von 12.59 oder eine
für Geräte mit längeren Seite von weniger als 25 cm auf Null. Die angemessene,
getrennte Sammlung für die stillgelegte Anlagen für Recycling, Aufbereitung und
umweltgerechte Entsorgung trägt dazu bei, die Umwelt und die menschliche
Gesundheit negative Auswirkungen zu vermeiden und begünstigt das Recycling
der Materialien das Produkt zusammengesetzt. Illegal Dumping des Produkts
durch den Benutzer Entails die Anwendung von Verwaltungssanktionen erklärte in
Gesetzesverordnung Nr. Dekr 49 von 14. März 2014.
Información a los usuarios
el marco del Decreto Legislativo N° 49 del 14 de marzo 2014
“Aplicación de la Directiva 2012/19/UE sobre residuos de aparatos eléctricos
y electrónicos (RAEE)”
Este símbolo de contenedor de ruedas en el producto indica que al final de su vida
útil debe ser recogido separadamente de los demás residuos. El usuario debe, por
lo tanto, tomar el control remoto integra los componentes esenciales que llegaron
a su vida útil a los centros adecuados de recogida de residuos electrónicos y
electrotécnicos, o devolverlo al distribuidor al comprar un nuevo aparato de tipo
equivalente, en términos de uno a uno, o uno a cero para el equipo que tiene lado
más largo de menos de 25 cm. la recogida selectiva apropiado para el equipo
fuera de servicio para su reciclaje, tratamiento y eliminación ambientalmente
compatible ayuda a prevenir el impacto negativo sobre el medio ambiente y la
salud, favoreciendo el reciclaje de los materiales que componen el producto. El
vertido ilegal del producto por los usuarios conlleva la aplicación de las sanciones
administrativas establecidas en el Decreto Legislativo n. Decreto Legislativo N° 49
de 14 de marzo de 2014.
A informação dos utilizadores
nos termos do Decreto Legislativo Nº 49 de 14 de março de 2014
“A aplicação da Directiva 2012/19/UE relativa aos resíduos de equipamentos
eléctricos e electrónicos (REEE)”
Estesímbolo de latão no produtoindica que, no final dasua vida útil deve serrecolhido
separadamente dos outros resíduos. O usuário deve, portanto, assumir o controlo
remoto integra os componentes essenciais que chegou a sua vida para os centros
de recolha diferenciada apropriados para os resíduos eletrônicos e eletro-técnica,
ou devolvê-lo ao revendedor aquando da compra de um novo aparelho de tipo equi-
valente, em termos de um para um, ou um a zero para o equipamento com o lado
mais longo de menos de 25 cm. A adequada recolha diferenciada para o equipamento
desmantelada para reciclagem, tratamento e eliminação ambientalmente compatível,
contribui para evitar possíveis efeitos negativos sobre o ambiente ea saúde e favorece
a reciclagem dos materiais que compõem o produto. Despejo ilegal do produto pelos
vínculos de usuários a aplicação de sanções administrativas indicado no Decreto
Legislativo n. Decreto Legislativo Nº 49 de 14 de Março de 2014.
Προειδοποιήσεις για τη σωστή διάθεση του προϊόντος.
Το σύμβολο που απεικονίζεται επάνω στη συσκευή υποδεικνύει ότι το
απόβλητο πρέπει να αποτελέσει αντικείμενο “χωριστής συλλογής” ως εκ
τούτου το προϊόν δεν πρέπει να διατίθεται μαζί με τα αστικά απόβλητα.
Ο χρήστης θα πρέπει να παραδώσει το προϊόν στα ειδικά “κέντρα
διαφοροποιημένης συλλογής” που έχουν διευθετηθεί από τις δημοτικές
διοικήσεις, ή να το παραδώσει στο κατάστημα πώλησης με την αγορά
ενός νέου προϊόντος.
Η διαφοροποιημένη συλλογή του αποβλήτου και οι ακόλουθες επεμβάσεις
επεξεργασίας, ανάκτησης και διάθεσης βοηθούν την παραγωγή συσκευών
με ανακυκλωμένα υλικά και περιορίζουν τις αρνητικές επιπτώσεις για
το περιβάλλον και την υγεία που προκαλούνται από την ακατάλληλη
διαχείριση του αποβλήτου.
Η αυθαίρετη διάθεση του προϊόντος συνεπάγεται την εφαρμογή διοικητικών
κυρώσεων.
CORRECT DISPOSAL WARNINGS
4
HCV 1035 BT
01. Altoparlanti.
02. Sportello CD.
03. Piedistallo.
04. Ricevitore Telecomando.
05. Display.
06. Tasto Accensione/ Stand-by.
07. Tasto MODE (selezione Sorgente).
08. Tasto/, riproduzione/pausa.
09. Tasto , Stop, arresto riproduzione.
10. Ingresso USB.
11. Tasto 9, selezione traccia precedente.
12. Tasto :, selezione traccia successiva.
13. Tasto VOLUME-.
14. Tasto VOLUME+.
15. Tasto apertura/chiusura sportello CD.
16. Antenna FM.
17. Ingresso Audio (AUX-IN).
ITALIANO
16
01
04
07
DESCRIZIONE COMANDI
02
03
01
05
06 15
08 09 10 11 12 13 14
17

5
HCV 1035 BT
18. Tasto Accensione/ Standby.
19. Tastierino Numerico.
20. Tasto REPEAT, ripetizione.
21. Tasto 9, selezione traccia/Radio precedente +
riavvolgimentorapido+regolazioneora(diminuzione).
22. Tasto EQUALIZER, equalizzazioni pre-impostate.
23. Tasto FOLDER-, salto alla cartella precedente.
24. Tasto X-BASS, aumento toni bassi.
25. Tasto FM, per selezionare la funzione Radio.
26. Tasto CD/USB, per selezionare la funzione CD/USB.
27. Tasto 9, selezione traccia precedente in funzione
Bluetooth.
28. Tasto :, selezione traccia successiva in funzione
Bluetooth.
29. Tasto PAIRING, accoppiamento dispositivi esterni in
modalità Bluetooth.
30.Tasto ,Stop,arrestoriproduzioneinmodalitàCD/USB.
31. Tasto/, riproduzione/pausa in modalità CD/USB.
32. Tasti regolazione Volume.
33.Tasto/,riproduzione/pausainmodalitàBluetooth.
34. Tasto MUTE, esclusione audio.
35. Tasto BLUETOOTH/AUX, per selezionare la funzione
BLUETOOTH/AUX.
36. Tasto FOLDER+, salto alla cartella successiva.
37.TastoPRESET ,selezionestazioneRadioprecedente.
38. Tasto :, selezione traccia/Radio successiva +
avanzamento rapido + regolazione ora (aumento).
39.TastoMONO/ST,selezioneMono/StereofunzioneRadio.
40. Tasto RANDOM, riproduzione casuale dei brani.
41.TastoPRESET ,selezionestazioneRadiosuccessiva.
42. Tasto SLEEP, funzione autospegnimento.
43. Tasto TIMER, funzione accensione automatica.
44. Tasto MEMORY/CLOCK, memorizzazione stazioni
Radio+ impostazione ora.
45. Tasto apertura/chiusura sportello CD.
ITALIANO
18
20
DESCRIZIONE TELECOMANDO
19
21
22
24
23
25
26
27
28
29
30 31
32
33
35
34
36
38
40
42
43
44
37
39
41
45
ATTIVAZIONE E SOSTITUZIONE DELLA BATTERIA DEL TELECOMANDO
Il telecomando utilizza una batteria tipo CR2025.
Per attivare la batteria del telecomando (inclusa) togliere la linguetta plastica di protezione.
Per la sostituzione della batteria:
1. Spingere il fermo plastico dell’alloggiamento porta batteria verso destra;
2. Estrarre l’alloggiamento porta batteria.
IMPORTANTE
- Pericolo di esplosione se la batteria viene sostituita in modo errato.
- Sostituire solo con lo stesso tipo o equivalente.
- Se il telecomando non viene utilizzato per lunghi periodi, la batteria si indebolirà e il telecomando non funzionerà, sostituirlo con
uno nuovo se si verifica quanto sopra.
- La batteria del telecomando non deve essere esposta a calore eccessivo come luce solare, fuoco o simili.

6
HCV 1035 BT
NOTE D'USO
Ascoltare a volume alto per lungo tempo, potrebbe danneggiare il vostro udito.
Questo apparecchio è uno strumento elettronico di alta precisione, evitate quindi di utilizzarlo nei seguenti casi:
• Vicino a campi magnetici.
• Vicino a fonti di calore come caloriferi e stufe.
• In luoghi molto umidi come stanze da bagno, piscine, ecc...
• In luoghi molto polverosi.
• In luoghi soggetti a forti vibrazioni.
• Nonavvicinarel’orecchioall’altoparlantedurantelefasidimessapuntoeregolazionidelvolume,einparticolare ditenereil
volume al minimo nella fase di accensione.
• Posizionare l’apparecchio in modo che ai suoi lati ci sia abbastanza spazio per la libera circolazione d'aria (almeno 5 cm).
• Se dei liquidi penetrano all’interno dell’apparecchio scollegare immediatamente la spina dalla presa e portare l’apparecchio al
più vicino centro assistenza autorizato TREVI.
• Se il sistema non funziona correttamente, scollegare il cavo di alimentazione dalla presa a muro. Ricollegare il cavo di
alimentazione, quindi accendere il sistema.
• Nessuna sorgente di fiamma nuda, quali candele accese, dovrebbe essere posta sull’apparecchio.
• L’apparecchio non deve essere esposto a stillicidio o a spruzzi d’acqua e nessun oggetto pieno di liquido, quali vasi, deve essere
posto sull’apparecchio.
• Conservare il presente manuale per futuri riferimenti.
CURA E MANUTENZIONE
Per la pulizia si consiglia l’ uso di un panno morbido, leggermente inumidito. Evitate solventi o sostanze abrasive.
IMPORTANTE
Questo dispositivo e' progettato per uso domestico non professionale. La buona costruzione di questo apparecchio ne garantisce
per lungo tempo il perfetto funzionamento. Se tuttavia dovesse presentarsi qualche inconveniente, sarà opportuno consultare il più
vicino Centro Assistenza autorizzato TREVI.
TREVI persegue una politica di continua ricerca e sviluppo. Pertanto i prodotti possono presentare caratteristiche diverse da quelle
descritte.
MONTAGGIO/SMONTAGGIO PIEDISTALLO (Vedi illustrazioni)
A. Ruotare l'unità come mostrato di seguito, allineare i blocchi del piedistallo con le aperture situate nella parte inferiore dell'unità
principale. Una volta allineate le 4 linguette di montaggio sul supporto con le 4 fessure rettangolari situate sul fondo dell'unità,
far scorrere il supporto verso la parte anteriore dell'unità finché questo non si inserisca completamente e venga bloccato in
posizione. Assicurarsi che la base non si stacchi.
ITALIANO
AVVERTENZE SUL LASER
Questo apparecchio è dotato di un sistema di lettura con raggio laser. Benché il laser sia di bassa potenza e
con dispositivo di sicurezza che ne impedisce il funzionamento a sportello aperto attenetevi scrupolosamente
alle seguenti avvertenze:
Non avvicinate l'occhio alla lente del laser con l'apparecchio aperto, pericolo di lesione della retina.
Non tentate di smontare o manomettere l'unità laser, pericolo di assorbimento di radiazioni.
AVVERTENZA AUDIO
Per evitare possibili danni all'udito, limitare il tempo di ascolto a volumi elevati.

7
HCV 1035 BTITALIANO
B. Per rimuovere il supporto, utilizzare entrambe le mani per tenere il supporto e, utilizzando due dita, sollevare le due linguette di
blocco per sbloccare la base. Far scorrere il supporto verso la parte posteriore dell'unità per sbloccare. Quando il supporto è in
posizione di sblocco, tirare il supporto verso l'alto per rimuoverlo.
INSTALLAZIONE A PARETE
ATTENZIONE:
• Fare molta attenzione a evitare che l'unità cada durante l'installazione sulla parete.
• Prima del montaggio, verificare la resistenza del muro. In caso di dubbi, rivolgersi a un tecnico qualificato.
• Utilizzare le viti di montaggio fornite.
• Controllare che tutte le viti per il montaggio a parete non siano allentate.
• Selezionare una buona posizione. In caso contrario, potrebbero verificarsi incidenti o l'unità potrebbe danneggiarsi.
Installazione dell'unità:
- Per l'installazione a parete utilizzare le viti fornite in dotazione. Vedere sotto tipo e dimensioni:
- Fissare un carta modello al muro in posizione orizzontale come di seguito;
- Utilizzare un trapano e praticare un foro sulla parete seguendo i segni delle viti sul carta modello;
- Fissare un tappo di montaggio a parete nel foro usando un martello, finché non è a filo con la superficie della parete;
- Fissare le viti al muro come mostrato di seguito (Viti totali: 2pz). Lasciare sporgere la testa della vite di 3,5- 4mm dal muro;
superficie del muro
carta modello

8
HCV 1035 BT
ITALIANO
- Appendere l'unità sulle viti.
ALIMENTAZIONE
Inserire la spina in una presa di corrente 230V~50Hz. Non collegare l'apparecchio a prese con tensione diversa da quella indicata.
Se non diversamente specificato, le descrizioni dei comandi valgono sia per l'apparecchio che per il telecomando
ACCENSIONE/SPEGNIMENTO
1. Premere sul tasto STANDBY (1);
- L'apparecchio si avvierà sull'ultima funzione scelta prima dello spegnimento.
2. Agire nuovamente sul tasto STANDBY (1) per spegnere l'apparecchio.
FUNZIONAMENTO RADIO
1. Accendere l'apparecchio e premere il tasto FM (25) sul telecomando;
2. Premere una volta i tasti 9(21) o :(38) del telecomando per aumentare o diminuire la frequenza di 0,05MHz;
3. Tenere premuto a lungo i tasti 9(21) o :(38) del telecomando per sintonizzarsi sulla stazione radio successiva o precedente.
4. Memorizzare una stazione radio: in modalità radio sintonizzarsi su una stazione, premere il tasto MEMORY (44), la scritta "MEM"
lampeggerà. Premere PRESET (41) o PRESET (37) per scegliere la posizione di memoria;
5. Premere il tasto MEMORY (44) per confermare e memorizzare la stazione;
6. Regolare il volume tramite i tasti VOLUME (32) sul telecomando.
Nota: Per ottenere la migliore ricezione in FM estendete e orientate l’antenna. Se la ricezione non è buona provate a regolare
diversamente la lunghezza e l’orientamento dell’antenna, comunque la qualità della ricezione in FM dipende molto dal luogo dove
è posto l’apparecchio.
FUNZIONAMENTO LETTORE CD-MP3
RIPRODUZIONE
1. Accendere l'apparecchio e premere il tasto CD/USB (26) sul telecomando;
2. Aprire il vano CD premendo il tasto OPEN/CLOSE (45) sul telecomando e inserire il disco con il lato scritto rivolto verso l'esterno.
Richiudere lo sportello premendo nuovamente il tasto OPEN/CLOSE (45) sul telecomando;
3. Dopo qualche secondo il display mostrerà il numero delle tracce (brani) presenti sul disco e si avviera' la riproduzione;
4. Premere il tasto/(31) sul telecomando per attivare la pausa, il display mostrerà il simbolo;
5. Per disinserire la pausa premere ancora una volta il tasto/(31) sul telecomando.
6. Premere il tasto , Stop (30) sul telecomando per arrestare definitivamente la riproduzione.
SALTO TRACCIA
1. Premere una volta i tasto precedente 9(11) o successivo :(12) sull'unità o i tasti 9(21) o :(38) del telecomando per
selezionare una traccia.
2. Premere e tenere premuto il tasto 9(11) o :(12) sull'unità o i tasti 9(21) o :(38) del telecomando durante l'ascolto per
ricercare velocemente un particolare passaggio musicale. Rilasciare il tasto per tornare alla normale riproduzione.

9
HCV 1035 BT
RIPETIZIONE DI UN SINGOLO BRANO
Premere una volta il tasto REPEAT (20) sul telecomando, l'icona compare sul display e l’apparecchio riprodurrà
continuamente la stessa traccia.
RIPETIZIONE DELL'INTERO DISCO
Premere due volte il tasto REPEAT (20) sul telecomando, l'icona compare sul display e l’apparecchio riprodurrà conti-
nuamente l'intero disco.
Per ripristinare il funzionamento normale di riproduzione dell’apparecchio, premere il tasto REPEAT (20) sul telecomando, fino a
quando i simboli scompaiono dal display.
FUNZIONE RANDOM
Riproduzione secondo una sequenza casuale del CD.
- Durante la normale riproduzione, premere il tasto RANDOM (40) sul telecomando, sul display comparirà la scritta RDM.
- Per disattivare la funzione premere nuovamente il tasto RANDOM (40) sul telecomando, la scritta RDM scomparirà dal display.
FUNZIONE PROGRAM (ATTIVABILE SOLO DAL TELECOMANDO)
E' possibile programmare fino a 32 tracce in modalità CD o 64 tracce in MP3 in qualsiasi ordine desiderato. La modalità di pro-
grammazione viene attivata in modalità STOP.
1. Se il CD/USB è in riproduzione, fermare la lettura premendo il tasto STOP (30);
2. Premere il tasto MEMORY (44) sul telecomando per attivare la funzione di programmazione;
3. Premere il tasto 9(21) o :(38) per selezionare la traccia da riprodurre per prima;
4. Premere il tasto MEMORY (44) sul telecomando per confermare la scelta;
5. Procedere seguendo i punti 3-4 per impostare il resto delle tracce;
6. Una volta completato, premere il tasto PLAY/PAUSE >II (31) per iniziare la riproduzione programmata;
7. Premere due volte il tasto STOP (30) per disattivare la programmazione.
FUNZIONAMENTO INGRESSO USB
RIPRODUZIONE
1. Accendere l'apparecchio e premere il tasto CD/USB (26) sul telecomando;
2. Collegare all'ingresso USB (10) un dispositivo di memoria USB. Attendere qualche secondo affinchè vengano caricati tutti i brani
presenti nel dispositivo, la riproduzione si avviera' automaticamente;
Nota: Il lettore potrebbe non supportare alcuni dispositivi dotati di presa USB, questo è dovuto all'incompatibilità di alcuni processori.
3. Premere il tasto PLAY/PAUSE (31) per attivare la PAUSA, il simbolo di PAUSA verrà visualizzato sul display;
4. Per disinserire la PAUSA, premere ancora una volta il tasto PLAY/PAUSE (31);
5. Premere il tasto STOP (30) per fermare definitivamente la riproduzione;
6. Fare riferimento al paragrafo "funzionamento lettore cd-mp3" per il resto delle funzioni.
INGRESSO LINE IN
1. Accendere l'apparecchio e premere il tasto BLUETOOTH/AUX (35) sul telecomando;
2. Collegare una qualsiasi unità provvista di uscita audio tramite apposito cavo all'ingresso AUX IN (17);
3. Comandare l'unità esterna dai propri comandi.
FUNZIONAMENTO BLUETOOTH
1. Accendere l'apparecchio e premere il tasto BLUETOOTH/AUX (35) sul telecomando;
2. Nella modalità Bluetooth, l'indicatore "bt" lampeggia, il sistema entra automaticamente in ricerca. Altrimenti tenere premuto per
3sec. il tasto PAIRING (29) sul telecomando;
3. Attivare la funzionalità Bluetooth sul dispositivo e renderlo visibile;
4. Avviare la ricerca dei dispositivi. Al termine selezionare il dispositivo "HCV 1035 BT";
5. Inserire la password "0000" se richiesto;
6. Premere il tasto /(33) sul telecomando per avviare la riproduzione e i tasti 9(27) o :(28) sul telecomando per la
selezione dei brani;
PROCEDURA DI COLLEGAMENTO NFC
Prima del collegamento, assicurarsi che i dispositivi di connessione (ad esempio telefono o tablet) abbiano la tecnologia NFC.
NON TUTTI GLI SMARTPHONE O I TABLET POSSIEDONO QUESTA FUNZIONE.
1. Premere il tasto BLUETOOTH/AUX (35) sul telecomando per passare alla modalità Bluetooth;
2. Accoppiare i dispositivi (ad esempio telefono o tablet) in modalità Bluetooth;
ITALIANO

10
HCV 1035 BT
3. Attivare nei dispositivi esterni (ad esempio telefono o tablet) la modalità NFC. Fare riferimento alle impostazioni NFC sul dispositivo,
confermate per consentire lo scambio di dati quando viene toccato un altro dispositivo con tecnologia NFC.
IMPOSTAZIONE DELL'ORA
L'impostazione dell'ora può essere fatta solamente ad apparecchio in modalità Stand-by:
1. Premere il tasto Accensione/ Standby (18) sul telecomando e portare l'apparecchio in modalità Stand-by;
2. Tenere premuto per 2sec. il tasto MEMORY/CLOCK (44) sul telecomando;
3. Premere il tasto 9(21) o :(38) e selezionare la visualizzazione sul display a 24 o 12 ore, quindi premere il tasto MEMORY
CLOCK (44) sul telecomando;
4. Per regolare l'ora, premere il tasto 9(21) o :(38) (premere una volta per avanzare di 1ora, tenerlo premuto per avanzare
velocemente), quindi premere il tasto MEMORY/CLOCK (44) per passare all'impostazione successiva;
5. Per regolare i minuti, premere il tasto 9(21) o :(38) (premere una volta per avanzare di 1minuto, tenerlo premuto per avanzare
velocemente), quindi premere il tasto MEMORY/CLOCK (44) per confermare.
ACCENSIONE/SPEGNIMENTO AUTOMATICO PROGRAMMATO
Questa funzione permette di impostare il tempo per l'accensione automatica dell'apparecchio:
1. Premere il tasto TIMER (43) sul telecomando, sul display comparirà l'icona " ";
2. Tenere premuto per 2 secondi il tasto TIMER (43), il display mostrerà la scritta "ON" per indicare che la funzione timer è attivata
e l'ora del timer lampeggerà;
3. Premere il tasto 9(21) o :(38) per regolare l'ora del timer di accensione, quindi premere il tasto TIMER (43) per passare
all'impostazione dei minuti;
4. Premere il tasto 9(21) o :(38) per regolare i minuti del timer di accensione, quindi premere il tasto TIMER (43) per passare
all'impostazione successiva;
5. Premere il tasto 9(21) o :(38) per regolare l'ora del timer di spegnimento, quindi premere il tasto TIMER (43) per passare
all'impostazione dei minuti;
6. Premere il tasto 9(21) o :(38) per regolare i minuti del timer di spegnimento, quindi premere il tasto TIMER (43) per passare
all'impostazione successiva;
7. Selezionare la sorgente con cui si desidera accendere l'apparecchio (CD, USB, ecc...), quindi premere il tasto TIMER (43);
8. Impostareil livello diVolumepreferito utilizzando i tasti Volume+/- sull'unità o sul telecomando, quindi premere il tasto TIMER(43);
9. L'icona " " si attiverà ad indicare che l'unità è pronta per la riproduzione programmata.
FUNZIONE SLEEP
Questa funzione consente di programmare l'apparecchio in modo che si spenga automaticamente dopo un determinato periodo di
tempo. È possibile impostare il tempo di spegnimento quando l'apparecchio è acceso:
1. Per attivare la funzione sleep, premere il tasto SLEEP (42) sul telecomando, il display mostrerà "SL90", premere più volte il tasto
SLEEP (42) per visualizzare in sequenza "80,70,60,50,40,30,20,10";
"SL90" indica "90 minuti";
"SL80" indica "80 minuti";
"SL00" indica che la funzione Sleep è disattivata;
2. Quando il display mostra il tempo desiderato, rilasciare il tasto SLEEP (42), la funzione sleep timer è ora attivata.
ITALIANO

11
HCV 1035 BT
SPECIFICHE TECNICHE
Alimentazione: 230V ~ 50Hz
Consumo: 25W
Assorbimento in Standby: <0.5W
Lettore: CD/CD-R-RW/MP3
USB: 2.0
File supportati: MP3
Bitrate supportato: MP3 (32 ~ 320 kbps)
RADIO
Banda di Frequenza Radio: FM 87.5 - 108MHz
BT/NFC
Potenza tx max Bluetooth: 2,5mW
Banda di trasmissione Bluetooth: 2,4GHz
Banda di trasmissione NFC: 13,56MHz
Potenza tx max NFC: 100mW
Profili Bluetooth compatibili: A2DP (Advanced Audio Distribution Profile), AVRCP (Audio/Video Remote Control Profile)
AMPLIFICATORI
Potenza audio: 2x3W (RMS), max 10W
Risposta di Frequenza: 20Hz~20KHz
DIMENSIONI
Unità: 450x200x100mm

12
HCV 1035 BT
ENGLISH
WARNING
Notice for customers: the following information is only applicable to equipment sold in countries applying EU directives
Disposal of Old Electrical & Electronic Equipment (Applicable in the European Union and other European countries with
separate collection systems)
This symbol on the product or on its packaging indicates that this product shall not be treated as household waste.
Instead it shall be handed over to the applicable collection point for the recycling of electrical and electronic equipment.
By ensuring this product is disposed of correctly, you will help prevent potential negative consequences for the environment and
human health, which could otherwise be caused by inappropriate waste handling of this product. The recycling of materials will
help to conserve natural resources. For more detailed information about recycling of this product, please contact your local Civic
Office, your household waste disposal service or the shop where you purchased the product.
Europe Only
Disposal of waste batteries (applicable in the European Union and other European countries with separate collection systems)
This symbol on the battery or on the packaging indicates that the battery provided with this product shall not be treated
as household waste. On certain batteries this symbol might be used in combination with a chemical symbol. The chemical
symbols for mercury (Hg) or lead (Pb) are added if the battery contains more than 0.0005% mercury or 0.004% lead. By ensu-
ring these batteries are disposed of correctly, you will help prevent potentially negative consequences for the environment and
human health which could otherwise be caused by inappropriate waste handling of the battery. The recycling of the materials will
help to conserve natural resources.
In case of products that for safety, performance or data integrity reasons require a permanent connection with an incorporated
battery, this battery should be replaced by qualified service staff only. To ensure that the battery will be treated properly, hand
over the product at end-of-life to the applicable collection point for the recycling of electrical and electronic equipment.
For all other batteries, please view the section on how to remove the battery from the product safely. Hand the battery over to the
applicable collection point for the recycling of waste batteries.
For more detailed information about recycling of this product or battery, please contact your local.
Civic Office, your household waste disposal service or the shop where you purchased the product.
This symbol indicates that this product incorporates double insulation between hazardous mains voltage and
user accessible parts.

13
HCV 1035 BTENGLISH
WARNING LISTENING
To avoid possible hearing damage, limit the listening time to high volumes.
GENERAL
Please ensure that the equipment is positioned in a well ventilated area and ensure that there is at least 10cm (4”) of free space
along the sides and top of the equipment.10cm (4”) 10cm (4”):
• Use the unit on a firm, level surface free from vibration.
• Place the unit at least 30 cm (12”) away from any CRT TV to avoid color variations across the TV screen. If the variations persist,
move the unit further away from the TV. LCD TV is not prone to such variation.
• Keep the unit away from direct sunlight, strong magnetic fields, excessive dust, humidity and electronic/electrical equipment
(home computers, facsimiles, etc.) which generate electrical noise.
• Do not place anything on top of the unit.
• Do not expose the unit to moisture, to temperatures higher than 40°C (104°F) or to extremely low temperatures.
• If your system does not work properly, disconnect the AC power lead from the wall socket. Plug the AC power lead back in, and
then turn on your system.
• In case of an electrical storm, unplug the unit for safety.
• Hold the AC power plug by the head when removing it from the wall socket, as pulling the lead can damage internal wires.
• The AC power plug is used as a disconnect device and shall always remain readily operable.
• Do not remove the outer cover, as this may result in electric shock. Refer internal service to your local service facility.
• The ventilation should not be impeded by covering the ventilation openings with items, such as newspapers, tablecloths, curtains,
etc.
• No naked flame sources, such as lighted candles, should be placed on the apparatus.
• Attention should be drawn to the environmental aspects of battery disposal.
• This unit should only be used within the range of 5°C - 35°C (41°F - 95°F).
• The apparatus is designed for use in moderate climates.
• The apparatus shall not be exposed to dripping or splashing and that no objects filled with liquids, such as vases, shall be placed
on the apparatus.
CAUTION
Danger of explosion if battery is incorrectly replaced.
Replace only with the same or equivalent type.
The mains plug is used as the disconnect device, the disconnect device shall remain readily operable.
Warning:
The voltage used must be the same as that specified on this unit. Using this product with a higher voltage other than that which
is specified is dangerous and may result in a fire or other type of accident causing damage. manufacturers will not be held
responsible for any damage resulting from use of this unit with a voltage other than that which is specified.
VOLUME CONTROL
The sound level at a given volume setting depends on speaker efficiency, location, and various other factors. It is advisable to
avoid exposure to high volume levels.
Do not turn the volume on to full at switch on. Listen to music at moderate levels. Excessive sound pressure from can cause
hearing loss.

14
HCV 1035 BT
ENGLISH
LOCATION OF CONTROLS
01. R-L speaker.
02. Disc compartment.
03. Base.
04. Remote sensor.
05. Display.
06. Stand-by button.
07. Mode button.
08. Play/Pause button.
09. Stop button.
10. USB.
11. Tuning Down, Skip Down/Fast Reverse, Time Down
button.
12. Tuning Up, Skip Up/Fast Forward, Time Up button.
13. Volume Down.
14. Volume Up.
15. CD open/Close button.
16. FM Antenna.
17. Audio In (AUX-IN).
16
01
04
07
02
03
01
05
06 15
08 09 10 11 12 13 14
17

15
HCV 1035 BTENGLISH
REMOTE CONTROL
PUTTING THE BATTERIES INTO THE REMOTE
CONTROL UNIT:
Press down on the compartment cover, and slide the cover off to open the compartment.
Place the one CR2025 battery in the remote control according to the polarity markings ("+" and "-”) inside the compartment and
on the battery.
Place the cover into the compartment, press down lightly, and push it inside until it snaps on.
NOTE:
1. If the remote control is not in use for long periods, the battery will become weak and the remote control will not function, please
replace with a new one if the above happens.
2. The battery of remote control shall not be exposed to excessive heat such as sunshine, fire or the like.
WALL MOUNT PREPARATION
To mount the unit on the wall
CAUTION:
• Be very careful to prevent the unit 2.1 kg (4.2 bs.) from falling when mounting on the wall.
• Before mounting, check the wall strength. (Do not put on the veneer plaster or whitewashed wall. The unit may fall.) If unsure,
consult a qualified service technician.
• Use the supplied mounting screws.
• Check all wall mount screws for looseness.
18. On/ Stand-by button.
19. Numeric buttons, sleep button.
20. REPEAT button.
21. Tuning Down, Skip Down/Fast Reverse, Time Down
button.
22. EQ button.
23. FOLDER down button.
24. X-BASS button.
25. FM button.
26. CD/USB button
27. Bluetooth Skip down button.
28. Bluetooth Skip up button.
29. Bluetooth PAIRING button.
30. CD/USB Stop button.
31. CD/USB Play/ Pause button.
32. Volume Up/Down button.
33. Bluetooth Play/Pause button.
34. MUTE button.
35. BLUETOOTH/AUX button.
36. FOLDER Up button.
37. Tuner PRESET Down button.
38. Tuning up, Skip up/Fast forward, Time up button.
39. FM St/Mono button.
40. RANDOM button.
41. Tuner PRESET Up button.
42. SLEEP button.
43. TIMER button.
44. MEMORY/CLOCK button.
45. Open/ Close button.
18
20
19
21
22
24
23
25
26
27
28
29
30 31
32
33
35
34
36
38
40
42
43
44
37
39
41
45

16
HCV 1035 BT
ENGLISH
• Select a good location. If not, accidents may occur or the unit may get damaged.
Driving screws: Installing the unit:
You may hang it on the wall. Use supplied or proper screws. See below for size and type.
Installing the unit:
Fix the pattern paper to the wall in horizontal position as below.
Make a hole on the wall following the screw point marks on the pattern paper by using a drill.
Fix a wall mount plug into the hole using a hammer, until it is flush with the wall surface.
Fasten the screws to the wall as shown below. (Total screws: 2 ps)
Hang the unit onto the screws.

17
HCV 1035 BTENGLISH
INSTALLATION
ATTACHING THE STAND (See Illustrations Below)
A. Turn the unit over as shown below, and align the mounting blocks on the top of the stand, with the mounting openings located on
the bottom of the main unit. Once in place, the 4 mounting tabs on the stand will align with the 4 rectangular mounting slots located
on the bottom of the unit. Make sure the mounting tabs are lined up with the slots, and slide the stand towards the front of the unit
until the mounting stand it is fully inserted, and locked in place. Make sure the base is locked firmly in place, so it does not come off.
B. To remove the stand, use both hands to hold the stand, and using two fingers, lift the two locking tabs marked with arrows to
unlock the base. Slide the stand towards the back of the unit to unlock. When the stand is in unlock position, pull the stand upward
to remove it.
FOR WALL MOUNTING (STAND MUST BE REMOVED)
It’s important to be sure there are no electric, gas or water lines located behind the wall where you are attaching the unit. We
recommend having this speaker professionally installed. Use the included wall mounting accessories and template to attach the
sound bar to the wall.
1. Use the supplied wall mounting instruction sheet to make marks on the wall for the plastic anchors. Make sure the marks are
level before drilling.
2. Drill 1/4” holes on the marks.
3. Insert the included plastic anchors into the holes until they are flush with the wall.
4. Screwing the 2 included flat head screws into the plastic anchor holes and tighten the screws.
5. When the screws are tightened, the screw heads should be about ¼” away from the mounting wall. Line up the keyhole slots
located on the back of the main unit with screws in the wall.
6. Hang the unit onto the screws.
POWER SOURCE
After checking all the connections have been made correctly, plug the AC power lead of this unit into the wall socket.
NOTE:
Unplug the AC power lead from the wall socket if the unit will not be in use for a prolonged period of time.The remote control unit
it is designed to operate on CR2025 size batteries(Not included).

18
HCV 1035 BT
ENGLISH
MUTING
The volume is muted temporarily when pressing the MUTE button on the remote control. Press again to restore the volume.
X-BASS CONTROL
When the power is first turned on, the unit will enter the extra bass mode which emphasises the bass frequencies, and “X-BASS”
indicator will appear. To cancel the extra bass mode, press the X-BASS button on the remote control.
SOUND CONTROL
Press the EQUALIZER button on the remote control, the current mode setting will be displayed. To change to a different mode, press
the EQUALIZER button repeatedly until the desired sound mode appears.“CLASSIC, POPS, JAZZ, ROCK”.
RADIO OPERATION
1. Press the STAND-BY/ON button to turn on the product.
2. Press MODE button on the remote control or FM button to turn on the FM mode.
3. Press TUNING 9and TUNING :to choose the desired station.
4. AutoScan: when the TUNING (9of :) button is pressed for more than 0.5 seconds, scanning will start automatically and the
tuner will stop at the first receivable broadcast station.
5. Memory station: under radio status, press MEMORY button, the display will flash. Press Preset + or Preset- to choose the
memory position
DISC OPERATION
DISC PLAY MODE
1. Press the STANDBY button on the remote control or ON/OFF button to turn on the power on.
2. Press MODE button on the remote control or CD/USB button to turn on the CD mode.
3. Press the OPEN/CLOSE button to open the disc compartment.
4. Playback will start from track 1 once the Player has finished reading the TOC. The PLAY INDICATOR will appear steadily on the
LCD DISPLAY.
5. While playing, press the PLAY/PAUSE button to pause, the PAUSE indicator will appear steadily on the LCD DISPLAY. Press the
PLAY/PAUSE button again to resume playing.
6. Adjust the volume using the VOLUME control.
PROCEDURE TO PLAYBACK MP3/WMA DISC
To play back CD-R/RW
1. Press the CD/USB button on the remote control, and load an MP3/ WMA disc.
2. Press the FOLDER +/- button to select desired playback folder.
3. Select desired file to be played back by pressing the SKIP FORWARD : or SKIP BACKWARD 9Button.
4. Press the PLAY/PAUSE button. Playback will start and file name will be displayed.
• In case of playback with the folder mode on, press the FOLDER +/- button, and the folder can be selected even though it is in
playback/pause mode. It will continue playback/pause mode in the 1st track of the selected folder.
PLAY MODE
REPEAT 1
When the REPEAT button is pressed once, the Repeat indicator will appear steadily on the LCD display. The current track will
be played repeatedly.
REPEAT ALL
When the REPEAT button is pressed twice, the indicator will light in the LCD display. The whole disc will be played
continuously.
To Cancel Repeat Function:
Press the REPEAT button until the repeat indicator is off.
RANDOM PLAY
When the RANDOM button is pressed three, the “RND“indicator will light in the LCD display. The tracks on the disc can be played
in random order automatically.
To Cancel Random Play:
Press the RANDOM button again. “RND” dicator will disappear.

19
HCV 1035 BTENGLISH
NOTE:
• If you press the button during random play, you can move to the track selected next by the random operation. On the other hand,
the button does not allow you to move to the previous track. The beginning of the track being played will be located.
• In random play, the unit will select and play tracks automatically. (You cannot select the order of the tracks).
SKIP AND SEARCH MODE
1. During Play or Pause mode, tap the SKIP FORWARD : or SKIP BACKWARD 9Button to go to the next track or go back to
the beginning of the current track.
2. During playback, press and hold the SEARCH FORWARD : or SEARCH BACKWARD 9 Buttons to search within the current
track with audible high speed playback.
PROGRAMME SETTING (REMOTE CONTROL ONLY)
User can program up to 32 tracks in CD mode or 64 tracks in MP3 in any desired order. Programme mode is activated while in
STOP mode.
1. Press the MEMORY button to enter programme mode.
2. Press the 9or :buttons to select the track that you want to preset.
3. Press the MEMORY button to confirm the track.
4. Repeat steps 2-3 to programme more tracks. Once it is completed, press the PLAY/PAUSE button to start playback of the
programmed tracks.
BLUETOOTH OPERATION
Bluetooth wireless technology is a short-range radio technology that enables wireless communication between various types of
digital devices, such as mobile phone or computer. It operates within a range of about 10meters (30 feet) without the hassle of having
to use cables to connect these devices. Since the Bluetooth technology does not require line of sight between the communicating
devices, it is not necessary to line up the transmitting device and the receiver, as in the case of infrared technology.
Communication System and Bluetooth Profile of this unit
There are many available Bluetooth Profiles describing the basic communication methods, specific functions and uses, to enable
communication between devices.
This unit supports the following:
Communication System: Bluetooth Specification version 2.1 Bluetooth +Enhanced Data Rate (EDR) Profile : A2DP (Advanced
Audio Distribution Profile) A2DP enables audio streaming from an A2DP equipped Bluetooth stereo audio source device (eg mobile
phone) to this unit. By converting wireless stereo audio signal to analogue audio signal, you can enjoy listening to the sound through
this speaker system. AVRCP (Audio/Video Remote Control Profile) is a technology that allows a single remote control to control all
Bluetooth enabled Audio Video equipment to which a user has access.
Notes when using unit with a mobile phone:
• This unit cannot be used to talk over the telephone even when there is a Bluetooth connection made to a mobile phone.
• Pleaserefer to the operating manual supplied withthe mobile phonefor details on operation of your mobilephone while transmitting
the sound using a Bluetooth connection.
Pairing Bluetooth devices:
Bluetooth devices need to be initially paired first before they can exchange data. Once paired, it is not necessary to pair them again
unless:
• Pairing is made with more than 8 devices. Pairing can only be made one device at a time. This unit can be paired to a maximum
of 8 devices. If subsequent device is paired, the oldest device paired, will be deleted and replaced with the new one.
• This unit is reset. All pairing information is deleted when unit is reset.
• Pairing information is deleted while re-pairing, etc.
Pairing with other Bluetooth source devices:
1. Press the STAND-BY/ON button to turn the power on.
2. Press MODE button on the remote control or BT/AUX button to turn on the BT mode.
3. Press and hold the PAIRING button for 3 seconds or more. PAIRING indicator blinks quickly. The unit is now in pairing mode and
is ready to be paired with other Bluetooth source devices.
4. Perform pairing procedure on the source device to detect this unit. “xxxx” will appear in the detected devices list (if available) in
the source device. (Refer the source device operating manual for details).
NOTE:
• Place the devices to be paired within 1 meter (3 feet) of each other when pairing.

20
HCV 1035 BT
ENGLISH
• Some source devices are unable to display lists of detected devices. To pair this unit with the source device, refer to the source
device operating manual for details.
5. Select “XXXX” from the source list. If Passcode* is required, enter “0000”. * Passcode may be called PIN Code, Passkey, PIN
number or Password.
6. Pairing indicator will stop blinking once the unit is successfully paired with the source device.(Pairing information is now
memorized in the unit.) Some audio source devices may connect with the unit automatically after pairing is completed, otherwise
follow the instructions in the source device operating manual to start connection.
7. Press the play button on main unit source device to start Bluetooth connection.
Listening to the sound
Check that:
• The source device Bluetooth functionality is ON.
• Pairing of this unit and the source device is completed.
• Unit is in connected mode (pairing indicator (BT Link) of LCD.)
1. Press the STAND-BY/ON button to turn the power on.
2. Press the MODE button to select Bluetooth function.
3. Start the Bluetooth connection from the Bluetooth stereo audio source device.
4. Press play button (on main unit, remote control or source device).
NOTE:
If the source device has an extra bass function or equalizer function, set them to off. If these functions are on, sound may be distorted.
AUX IN OPERATION
1. Use a connection lead to connect the portable audio player etc. to the AUDIO IN socket. When using video equipment, connect
the audio output to this unit and the video output to a television.
2. Press the STAND-BY/ON button to turn the power on.
3. Press the MODE button on the remote control or BT/AUX button repeatedly on main unit to select AUDIO IN function.
4. Play the connected equipment. If volume level of the connected device is too high, sound distortion may occur. Should this
happen, lower the volume of the connected device. If volume level is too low, increase the volume of the connected device.
NOTE: To prevent noise interference, place the unit away from the television
SETTING THE CLOCK TIME (REMOTE CONTROL ONLY)
In this example, the clock is set for the 24-hour (0:00) display.
1. Press the STAND-BY/ON button to turn the power off.
2. Press the CLOCK button 2 seconds.
3. Press the : or 9 button to select 24-hour or 12-hour display and then press the CLOCK button.
The 24-hour display will appear.(0:00 - 23:59)
The 12-hour display will appear.(AM 12:00 - PM 11:59)
The 12-hour display will appear.(AM 0:00 - PM 11:59)
4. To adjust the hour, press the":"or"9"button and then press the CLOCK button. Press the : or 9 button once to advance the
time by 1 hour. Hold it down to advance continuously.
5. To adjust the minutes, press the : or 9 button and then press the CLOCK button. Press the : or 9 button once to advance
the time by 1 minute. Hold it down to advance.
NOTE:
When power supply is restored after unit is plugged in again or after a power failure, time display will be blinking. Reset the clock.
To readjust the clock:
Perform " Setting the clock Time" from step.
Timer operation (Remote control only)
Timer playback:
In this example, the clock is set for the 24-hour (0:00) display.
1. Press the TIMER Button once to turn the TIME function on. The TIME indicator “ ” will appear in the DISPLAY.
2. Press the TIMER button 2 seconds, the display will show "ON" The display will show“ ”to indicate timer function on and the
"hour" digit of the timer clock will flash.
3. Press the : or 9 button to adjust the hours for timer on and then press the Time button.
4. Press the : or 9 button to adjust the minutes ours for timer on and then press the time button.
Table of contents
Languages:
Other Trevi Stereo System manuals

Trevi
Trevi SB 8340 SW User manual

Trevi
Trevi TT 1072 DAB User manual

Trevi
Trevi HCX 10D8 DAB User manual

Trevi
Trevi SB 8350TV User manual

Trevi
Trevi MCX 1021 USB User manual

Trevi
Trevi HCX 10D6 DAB User manual

Trevi
Trevi CMP 574 USB User manual

Trevi
Trevi HCX 1030 S User manual

Trevi
Trevi MCX 1045IPD User manual

Trevi
Trevi MCX 1021 USB User manual

Trevi
Trevi TT 1068 E User manual

Trevi
Trevi DS 1976 V User manual

Trevi
Trevi MCX 1024 USB User manual

Trevi
Trevi AV 610 USB User manual

Trevi
Trevi HCX 1080 BT User manual

Trevi
Trevi HFX 1058 User manual

Trevi
Trevi HCV 10D35 DAB User manual

Trevi
Trevi HF 1900 BT User manual

Trevi
Trevi HCX 1200 BT User manual

Trevi
Trevi TT 1070 E User manual