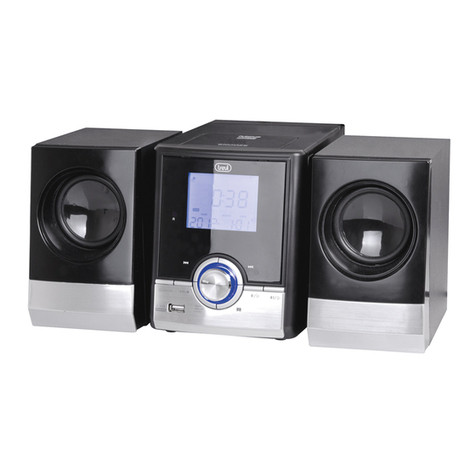
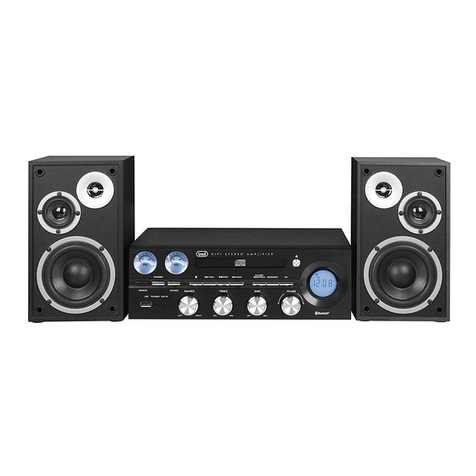
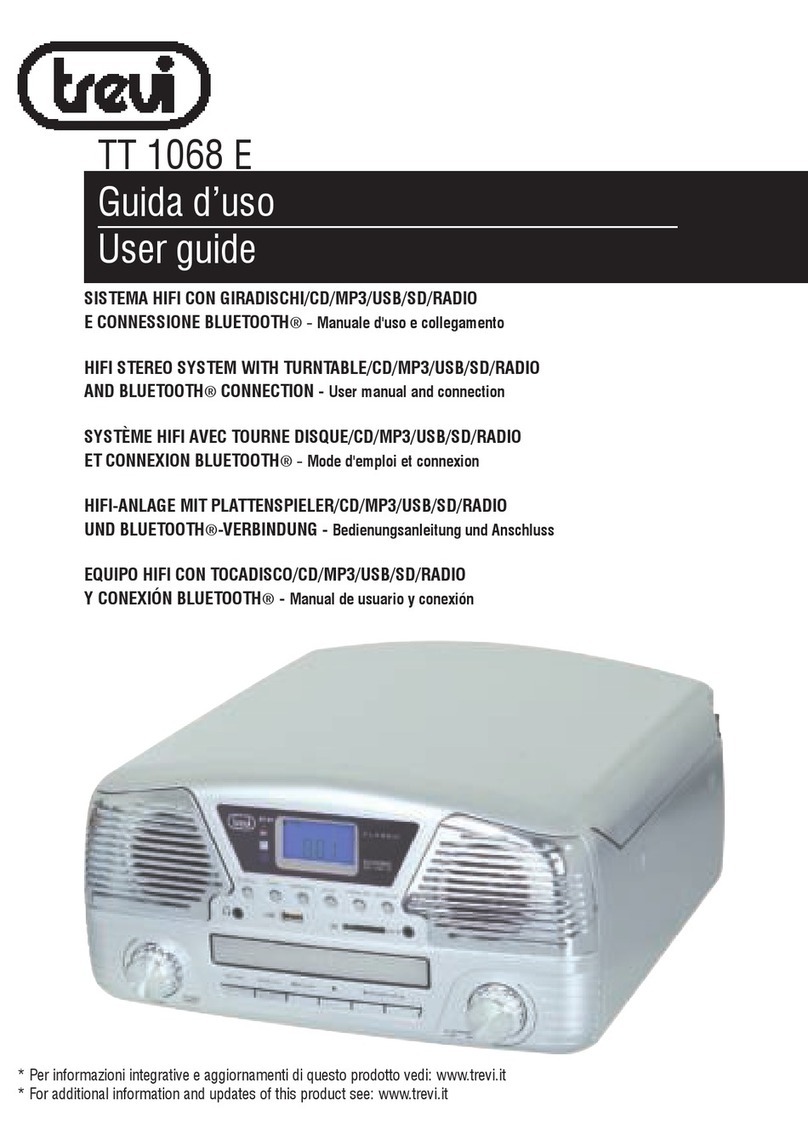
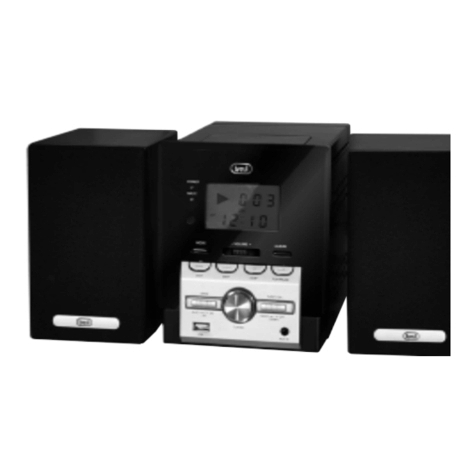
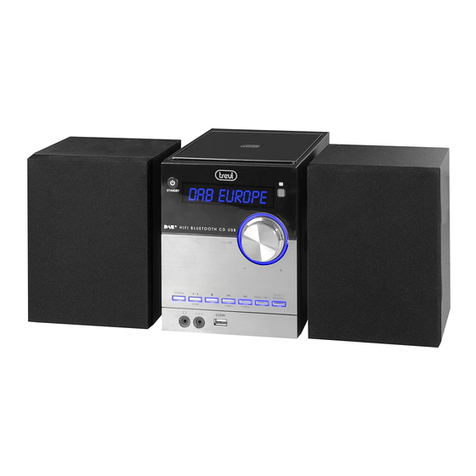
Trevi HCX 1080 BT User manual

SISTEMA HIFI STEREO CON CD/MP3/USB/BT
Manuale d'uso e collegamento
HIFI STEREO SYSTEM WITH CD/MP3/USB/BT
User manual and connection
SYSTEME STEREO HIFI AVEC CD/MP3/USB/BT
Mode d'emploi et connexion
HIFI STERO ANLAGE MIT CD/MP3/USB/BT
Bedienungsanleitung und Anschluss
ESTEREO CON CD/MP3/USB/BT
Manual de usuario y la conexión
RADIO
PLL FM
LINE IN
HCX 1080 BT
Guida d’uso
User guide
CD MP3
USB IN
BT NFC

2
HCX 1080 BT
DESCRIZIONE COMANDI
01 Standby
02 Display
03 Precedente
04 Successivo
05 Sorgente
06 Play/Pause
07 Stop
08 Volume
09 Tasto apertura CD
10 Presa Cufe
11 Vano CD
12 Ingresso USB
13 Altoparlanti
14 Uscite Altoparlanti
15 Uscita Audio
16 Ingresso Audio
17 Antenna FM
ITALIANO

3
HCX 1080 BT
DESCRIZIONE COMANDI
01 Standby
02 Tastierino Numerico
03 FF+
04 FF-
05|<</>>|/<</>>
06 Pausa
07 A-B
08 CD/USB
09 Sorgente
10 Random
11 Cerca
12 EQ
13 INTRO
14 Mute
15 Loudness
16 Volume+
17 Volume-
18 Bass+
19 Bass-
20 Treble +
21 Treble -
22 Ripeti
23 Stop
24 Play
25 Memoria
26 CH -
27 CH+
28 Programma
29 Vai a
30 Espelli
31 Reset
ITALIANO
/ / /
- Even if the remote control is operated within the effective range, its operation may be impossible if there are
any obstacles between the appliance and the remote control.
- If the remote control is operated near other appliances which generate infrared rays, or if other remote
control devices using infrared rays are used near the appliance, it may operate incorrectly.
7

4
HCX 1080 BT
AVVERTENZE SUL LASER
Questo apparecchio è dotato di un sistema di lettura con raggio laser. Benché il laser sia di bassa potenza e
con dispositivo di sicurezza che ne impedisce il funzionamento a sportello aperto attenetevi scrupolosamente
alle seguenti avvertenze:
Non avvicinate l'occhio alla lente del laser con l'apparecchio aperto, pericolo di lesione della retina.
Non tentate di smontare o manomettere l'unità laser, pericolo di assorbimento di radiazioni.
NOTE D'USO
Questo apparecchio è uno strumento elettronico di alta precisione; evitate quindi di utilizzarlo nei seguenti casi:
• Vicino a forti fonti di calore come caloriferi e stufe.
• In luoghi molto umidi come stanze da bagno, piscine, ecc.
• In luoghi molto polverosi.
• In luoghi soggetti a forti vibrazioni.
• Posizionate l'apparecchio in modo che ai suoi lati ci sia sempre abbastanza spazio per la libera circolazione di aria (almeno 5
cm).
• Non ostruite le feritoie di ventilazione.
• Se dei liquidi penetrano all'interno dell'apparecchio scollegate immediatamente la spina dalla presa e portate l'apparecchio al più
vicino centro assistenza autorizzato TREVI.
• Controllate sempre prima di accendere l'apparecchio che i cavi di alimentazione e di collegamento siano installati correttamente.
CURA E MANUTENZIONE
Per la pulizia si consiglia l’ uso di un panno morbido, leggermente inumidito. Evitate solventi o sostanze abrasive.
IMPORTANTE
La buona costruzione di questo apparecchio ne garantisce per lungo tempo il perfetto funzionamento. Se tuttavia dovesse presentarsi
qualche inconveniente, sarà opportuno consultare il più vicino Centro Assistenza autorizzato.
TREVI persegue una politica di continua ricerca e sviluppo. Pertanto i prodotti possono presentare caratteristiche diverse da
quelle descritte.
ALIMENTAZIONE
RETE
Inserire la spina in una presa di corrente C.A.230V-50Hz. Non collegare l'apparecchio a prese con tensione diversa da quella indicata.
Se non diversamente specicato, le descrizioni dei comandi valgono sia per l'apparecchio che per il telecomando
ACCENSIONE/SPEGNIMENTO
1. Premere sul tasto di STANDBY (1).
- L'apparecchio si avvierà a seconda della funzione scelta.
2. Agire nuovamente sul tasto di standby per spegnere l'apparecchio.
FUNZIONAMENTO RADIO
1. Accendere l'apparecchio portando il selettore SORGENTE (5) sulla posizione TUNER.
2. Premere una volta i tasti FF+ (3) o FF- (4) del telecomando per aumentare o diminuire la frequenza di 0,05MHz.
3. Tenere premuto a lungo i tasti FF+ (3) o FF- (4) del telecomando per sintonizzarsi sulla stazione radio successiva o precedente.
4. Premere il tasto Play/Pause (06) per avviare la ricerca automatica delle stazioni radio. L'apparecchio può memorizzare no a 40
stazioni radio.
5. Premere una volta i tasti Precedente (3) o Successivo (4) sull'unità o i tasti CH- (26) o CH+ (27) del telecomando per posizionarsi
sulla stazione memorizzata precedente o successiva.
6. Regolare il volume come desiderate con il controllo VOLUME (8).
NOTE: Per ottenere la migliore ricezione in FM estendete e orientate l’antenna. Se la ricezione non è buona provate a regolare diversamente la lunghezza e l’orientamento
dell’antenna, comunque la qualità della ricezione in FM dipende molto dal luogo dove è posto l’apparecchio.
ITALIANO

5
HCX 1080 BTITALIANO
FUNZIONAMENTO LETTORE CD-MP3
RIPRODUZIONE
1. Accendere l'apparecchio portando il selettore funzioni (5) sulla posizione CD-MP3
2. Aprire il vano CD premendo il tasto (9) e inserire il disco con il lato scritto rivolto verso l'alto. Richiudere lo sportello premendo
dolcemente.
3. Dopo qualche secondo il display mostra il numero delle tracce (brani) presenti sul disco e si avviera' la riproduzione.
4. Premere il tasto PLAY/PAUSE >II (6) per attivare la pausa, il display mostrerà il simbolo PAUSA
5. Per disinserire la pausa premere ancora una volta il tasto PLAY/PAUSE >II (6).
6. Premere per qualche minuto il tasto STOP (7) per fermare denitivamente la riproduzione.
SALTO TRACCIA
1. Premere una volta i tasti Precedente (3) o Successivo (4) sull'unità o i tasti I<< o >>I (5) del telecomando per
posizionarsi sulla traccia precedente o successiva.
2. Premere e tenere premuto il tasto FF+ (3) o FF- (4) del telecomando durante l'ascolto per ricercare velocemente un
particolare passaggio musicale. Rilasciare il tasto per tornare alla normale riproduzione.
RIPETIZIONE DI UN SINGOLO BRANO
Premere una volta il tasto Ripeti(22) sul telecomando, l'icona compare sul display e l’apparecchio riproduce continuamente
la stessa traccia.
RIPETIZIONE DELL'INTERO DISCO
Premere due volte il tasto Ripeti (22) sul telecomando, le icone ALL compaiono sul display e l’apparecchio riproduce conti-
nuamente l'intero disco.
Per ripristinare il funzionamento normale di riproduzione dell’apparecchio, premere il tasto Ripeti (22) sul telecomando, no a
quando i simboli scompaiono dal display.
FUNZIONE RANDOM
Nota: La funzione RANDOM funziona solo con i CD audio.
Riproduzione secondo una sequenza casuale del CD.
1. Se il CD è in riproduzione, fermare la lettura premendo il tasto STOP (23).
2. Su riproduzione da CD Audio, premere tre volte il tasto Random (10) sul telecomando, sul display compare la scritta RAN ON.
3. Premere il tasto PLAY/PAUSE >II (24) per iniziare la riproduzione casuale.
4. Per disattivare la funzione premere il tasto Random (10) sul telecomando, la scritta RAN OFF scompare dal display.
FUNZIONE PROGRAM
Nota: La funzione PROGRAM funziona solo con i CD audio.
Riproduzione secondo una programmazione impostata dall'utente.
1. Se il CD è in riproduzione, fermare la lettura premendo il tasto STOP (23).
2. Premere il tasto PROG (28) sul telecomando, sul display compare la scritta P__C__.
3. Premere i tasti Successivo (4) Precedente (3) per selezionare la traccia da riprodurre per prima.
4. Premere il tasto PROG (28) sul telecomando per confermare la scelta.
5. Procedere seguendo i punti 3-4 per impostare il resto delle tracce no ad un massimo di 20 tracce audio o 99 tracce MP3.
6. Premere il tasto PLAY/PAUSE >II (24) per iniziare la riproduzione programmata.
7. Premere due volte il tasto STOP (23) per disattivare la programmazione.
FUNZIONAMENTO INGRESSO USB
RIPRODUZIONE
1. Assicurarsi che non sia presente nessun CD.
2. Posizionare il selettore Sorgente (5) sulla posizione CD-MP3.
3. Collegare all'ingresso USB (12) un dispositivo di memoria usb.Attendere qualche secondo afnchè vengano letti tutti
i brani presenti nel dispositivo usb, la riproduzione si avviera' automaticamente
Nota: Il lettore potrebbe non supportare alcuni dispositivi dotati di presa USB, questo è dovuto all'incompatibilità di alcuni processori.
4. Premere il tasto PLAY/PAUSE (6) per attivare la PAUSA, il simbolo di PAUSA verrà visualizzato sul display.
5. Per disinserire la PAUSA, premere ancora una volta il tasto PLAY/PAUSE (6).
6. Premere il tasto STOP (7) per fermare denitivamente la riproduzione.
7. Fare riferimento al paragrafo "funzionamento lettore cd-mp3" per il resto delle funzioni.
6
HCX 1080 BT
ITALIANO
INGRESSO LINE IN
1. Posizionare il selettore Sorgente (5) sulla posizione Line In.
2. Collegare una qualsiasi unità provvista di uscita audio tramite apposito cavo all'ingresso AUX IN (16).
3. Comandare l'unità esterna dai propri comandi.
FUNZIONAMENTO BLUETOOTH
1. Premere il pulsante "Sorgente" per passare in modalità Bluetooth, verrà mostrato "BT" sul Display.
2. Nella modalità Bluetooth, l'indicatore di stato blu lampeggia tre volte, seguito da 2 bip, il sistema entra automaticamente in ricerca.
3. Attivare la funzionalità Bluetooth sul dispositivo e renderlo visibile.
4. Ricercare tra i dispositivi Bluetooth "HCX 1080 BT".
Unavoltaassociato,ildispositivodovrebbeconnettersiallaHCX1080BTperavviarelariproduzioneagiredellosmartphone,tablet,PC...
PROCEDURA DI COLLEGAMENTO NFC
Prima del collegamento, assicurarsi che i dispositivi di connessione (ad esempio telefono o tablet) abbiano la tecnologia NFC
NON TUTTI GLI SMARTPHONE O I TABLET POSSIEDONO QUESTA FUNZIONE.
1. Premere il tasto Sorgente sul telecomando per passare alla modalità Bluetooth
2. Prima del collegamento, assicurarsi che i dispositivi di connessione (ad esempio telefono o tablet) abbiano la tecnologia NFC
NON TUTTI GLI SMARTPHONE O I TABLET POSSIEDONO QUESTA FUNZIONE.
3. Impostare i dispositivi (ad esempio telefono o tablet) in modalità Bluetooth.
4. Impostare i dispositivi (ad esempio telefono o tablet) in modalità di lavoro NFC. Per tutti i dispositivi
conNFC,troveretel'impostazioneNFCsuldispositivo,confermateperconsentireloscambiodidatiquandovienetoccatoun
altro dispositivo con tecnologia NFC.
SPECIFICHE TECNICHE
Alimentazione AC 110 - 230 V, 50/60 Hz
Consumo 30 W
Standby< 0.5 W
RADIO
Spettro di Frequenza FM 87.5 ~ 108.5 MHz
Lettore CD / CD-R-RW / MP3
Porta USB 2.0
Jack 3.5MM
AMPLIFICATORI
Output 2x10W ( RMS) 2X20W (MAX 40W)
BASS -10dB~+10dB
TREBLE -10dB~+10dB
Risposta di Frequenza 20Hz~20KHz +- 3dB
S/N >80dB
DIMENSIONI
Unità 247X83x230mm
Speaker 115x163x157mm

7
HCX 1080 BT
ENGLISH
BEFORE WE BEGIN
Thank you for purchasing the HCX 1080 BT
HCX 1080 BT
:MICRO SYSTEM BLUETOOTH with NFC
function Digital FM tuner CD MP3 USB compatible.
This is your assurance of quality, performance and value. Our engineers have included many useful
and convenient features in this product. Please be sure to read this instruction Manual completely to
make sure you are getting the maximum benefit from each feature.
This product was manufactured using the highest quality components and standards of
workmanship. It was tested by inspectors and found to be in perfect working order before it left our
factory. For future reference, record the serial number in the space provided.
Model No: :
Serial Number: _________________________________________________________
WARNINGS
TO PREVENT FIRE OR SHOCK HAZARD DO NOT EXPOSE THIS APPLIANCE TO RAIN OR
MOISTURE.
LIGHTNING FLASH WITH ARROWHEAD SYMBOL -
Within an equilateral triangle, is intended to alert the user to the presence of uninsulated
dangerous voltage within the products enclosure that may be of sufficient magnitude to constitute
a risk of electric shock to persons.
EXCLAMATION POINT - within an equilateral triangle is used to indicate that a specific
component shall be replaced only by the component specified in that documentation for safety
reason.
The following label has been affixed to the unit, listing the proper procedure for
working with the laser beam:
CLASS 1 LASER PRODUCT LABEL
This label is attached to the place as illustrated to inform that the apparatus
contains a laser component.
WARNING LABEL INFORMING OF RADIATION - This label is placed inside the unit. As
shown in the illustration. To warn against further measures on the unit. The equipment
contains a laser radiating laser rays according to the limit of laser product of class 1.
This equipment is a Class II or double insulated electrical appliance. It has been designed in
such a way that it does not require a safety connection to electrical earth.
1

8
HCX 1080 BT
ENGLISH
2
SAFETY INTRUCTIONS
1. READ INSTRUCTIONS --- All the safety and operating instructions should be read before the
product is operated.
2. RETAIN INSTRUCTIONS --- The safety and operating instructions should be retained for
future reference.
3. HEED WARNINGS --- All warnings on the product and in the operating instructions should be
adhered to.
4. FOLLOW INSTRUCTIONS --- All operating and use instructions should be followed.
5. CLEANING --- Unplug this product from the wall outlet before cleaning. Do not use liquid
cleaners or aerosol cleaners. Use a damp cloth for cleaning.
6. WATER AND MOISTURE --- Do not use this product near water - for example, near a bath tub,
wash bowl, kitchen sink, or laundry tub; in a wet basement; or near a swimming pool; and the like.
7. ACCESSORIES --- Do not place this product on an unstable cart, stand, tripod,
bracket, or table.
The product may fall, causing serious injury to a child or adult and serious damage to
the product.
Use only with a cart, stand, tripod, bracket, or table recommended by the
manufacturer, or sold with the product. Any mounting of the product should follow
the manufacturer instructions, and should use a mounting accessory recommended
by the manufacturer. A Product and Cart Combination should Be Moved with Care -
Quick stops, excessive force and uneven surfaces may cause the product and cart
combination to overturn.
8. VENTILATION --- Slots and openings in the cabinet are provided for ventilation and to ensure
reliable operation of the product and to protect it from overheating, and these openings must not be
blocked or covered. The openings should never be blocked by placing the product on a bed, sofa,
rug or other similar surface. This product should not be placed in a built-in installation, such as a
bookcase or rack, unless proper ventilation is provided or the manufacturer* instructions have been
adhered to.
9. POWER SOURCES --- This product should be operated only from the type of power source
indicated on the marking label. If you are not sure of the type of power supply to your home, consult
your product dealer or local power company. For products intended to operate from battery power,
or other sources, refer to the operating instructions.
10. POWER-CORD PROTECTION --- Power-supply cords should be routed so that they are not
likely to be walked on or pinched by items placed upon or against them, paying particular attention
to cords at plugs, convenience receptacles, and the point where exit from the product.
11. NON-USE PERIODS --- The power cord of the product should be unplugged from the outlet
when left unused for long periods of time.
12. LIGHTNING --- For added protection for this product during a lightning storm, or when it is left
unattended and unused for long periods of time, unplug it from the wall outlet and disconnect the
antenna or cable system. This will present damage to the product due to lightening and power-line
surges.
13. OVERLOADING --- Do not overload wall outlets, extension cords, or integral convenience
receptacles as this can result in a risk of fire or electric shock.

9
HCX 1080 BTENGLISH
3
SAFETY INTRUCTIONS
14. OBJECT AND LIQUID ENTRY --- Never push objects of any kind into this product through
openings as they may touch dangerous voltage points or short-out parts that could result in a fire or
electric shock. Never spill liquid of any kind on the product.
15. SERVICING - Do not attempt to service this product yourself as opening or removing covers
may expose you to dangerous voltage or other hazards. Refer to all servicing to qualified service
personnel.
16. DAMAGES REQUIRING SERVICE - Unplug this product from the wall outlet and refer
servicing to qualified service personnel under the following conditions.
a) When the power-supply cord or plug is damaged.
c) If the product has been exposed to rain or water.
b) If liquid has been spilled, or objects have fallen into the product.
d) If the product does not operate normally by following the operating instructions. Adjust only
those controls that are covered by the operating instructions as an improving adjustment of other
controls may result in damage and will often require extensive work by a qualified technician to
restore the product to its normal operation.
e) When the product exhibits a distinct change in performance - this indicates a need for service.
17. REPLACEMENT PARTS - When replacement parts are required, be sure the service technician
has used replacement parts specified by the manufacturer or have the same characteristics as the
original part, Unauthorized substitutions may result in fire electric shock and other hazards.
18. HEAT the product should be situated away from sources such as radiators, heat registers,
stoves or other products that produce heat

10
HCX 1080 BT
ENGLISH
PREPARATION FOR USE
CONNECTIONS
4

11
HCX 1080 BTENGLISH
FM ANTENNA CONNECTION
Hints for Better FM Reception:
The FM lead wire antenna on the back panel should be extended to its full length. You may also
have to vary the direction of this antenna until you find the position that provides the best reception.
5

12
HCX 1080 BT
ENGLISH
DESCRIPTION OF UNIT AND CONTROLS
FRONT VIEW
6

13
HCX 1080 BTENGLISH
/ / /
- Even if the remote control is operated within the effective range, its operation may be impossible if there are
any obstacles between the appliance and the remote control.
- If the remote control is operated near other appliances which generate infrared rays, or if other remote
control devices using infrared rays are used near the appliance, it may operate incorrectly.
7

14
HCX 1080 BT
ENGLISH
8
Insert 2 AAA/LR03TYPE batteries (not included) into the battery compartment. Be sure that
the battery is inserted correctly to avoid damage to the remote control. Always remove the battery
when the remote control will not be used for a long period of time, as this will cause leakage to the
battery and subsequently damage to your set.
BATTERYINSTALL ATION
Slide out cover and install 2 AAA/ LR03 TYPE batteries (not included) .
Notes:
- If the distance required between the remote control and the appliance decreases, the batteries are
exhausted. In this case replace the batteries with new one.
- Power button on main unit must be ‘On’ in order for Remote Control to operate.

15
HCX 1080 BT
ENGLISH
9
Standby
To turn on the micro system, press the button on front panel of the unit or on the remote
control. Press the button again to turn off the micro system
SOURCE BUTTON
Press the S O U R C E button repeatedly to switch among CD/TUNER/LINE IN /BT modes. To
select the USB mode please select the CD MODE and press CD/ USB button on remote control to
switch into USB mode.
MUTE Button (OnRemote Control Only)
1.You can also press the MUTE
button on the remote control to turn off the sound temporarily, for
example, when answer the telephone.
Press the M U T E button again to cancel the mute function and restore the sound.
2.The mute function will also be cancelled automatically by pressing the VOLUME + or –
buttons.
VOLUMEL EVEL
Turn the VOLUME knob on front panel or press VOL +/ VOL - buttons on remote control to adjust
the volume level.
LOUDNESS
Press LOUDNESS button to enhance the bass level immediately when bass is not enough.
FUNCTION
Press successively the FUNCTION button to adjust VOLUME,BASSand TREBLEat your
convenience. Press FUNCTION once if you want to adjust the volume, twice to adjust the bass and
3 times to adjust the treble.
CD / MP3OPERATION
You can play in your Micro System your audio CD and MP3, CD -R. Please do not try to play
CD-ROM,CD -I, VCD or DVD.
1. Open the disc tray by pressing OPEN/ CLOSE button on the unit or on the remote control.
2. Insert the CDwith the printing side facing up and close gently the disc tray by pressing again
OPEN/ CLOSE .
3. Press SOURCE button to select the CD MODE.
4. Press to start the CD playback; for AUDIO CD, playback starts automatically.
5. Press stop button on unit or on remote control to stop playback.
Searching for a section wi thin a CD(OnRemote Control Only) .
During playback, press and hold /on the remote control to find a specific passage within the
track and release it at the point you want to listen to.
SETTING & BASIC OPERATION

16
HCX 1080 BT
ENGLISH
10
CD / MP3 OPERATION
Select another track orfile
Press or button on the remote control to select a particular track.
Listening to your tracks (files) repeatedly(On Remote Control Only)
1. Press REPEATbuttonrepeatedly to activate the REPEATfunction in following order:
REPEAT 1-REPEAT ALBUM (*MP3 MODE ONLY) - REPEAT ALL - OFF-
Listening to your tracks (files)randomly
(On Remote Control Only)
1. PressRANDOMbutton to play tracks in a random order.
A-B function
(On Remote Control Only)
During CD/MP3 DISC playback, you can press A-B button on remote to start from the point A
(time point you pressed), and ended point Bwhen you pressA-Bbutton again and music will play
repeatedly from A to B.
Intro function(On Remote Control Only)
This feature allows you to play the 10 first seconds of each track on the disk.
Load the disc and wait until the display shows the total playing time and number of tracks. Press
INTRObutton on remote control to activate the function, press again to cancel the function.
PROGRAM
Creating your own playlist
You can play up to 20 tracks on a CD in order.
1. Insert a CD and wait for to be read
2. Press PROGbutton on the remote control in STOPstatus.
3. Press / on the unit or on the remote control to select the track you want to
program. Press PLAYbutton on remote or on front panel of the unit to confirm your selection.
4. Press on the unit or on the remote control to play the programmed music files.
About MP3
MP3Disc compatibility with this unit is limited as follows:
Sampling Frequency: 32-48 (MP3)
Bit rate: 32-320kbps (MP3)
Do not use special letters such as / :*?< > etc
Even if the total number of files on the disc has more than 1000, it will only be shown up to 999.

17
HCX 1080 BT
1 1
RADIO OPERATION
1. Press SOURCEbutton on remote control to select TUNER MODE.
2. Tune to the desired radio station by using /CH+ , /CH-,/ FF, / FF+ for a manual
tuning.
3. For AUTO TUNING , press button on the unit orSE A RCH button on remote control to
enter in automatic searching radio station mode.
Fora best FM reception
•Make sure that you have fully extended the FM antenna wire.
Preset Radio Stations:
You can store up to 40 of your favorite stations in the tuner memory for easy recall at any time.
1) Press SOURCEbutton on remote to select TUNER, and press GOTO button, the VFD will display
“_ _ _: _ _” digital input mode, please input FM frequency of the radio station that what you want to
listen.
For example :106.20, after input station frequency by using the number buttons, press PL AY
button to confirm.
2) Once the desired radio station is tuned, press MEMORY button on remote control, VFD will
display “ C H_ _” ;input the preset number you want to store the radio station.
How to recall presets radio stations
Press GOTO button on remote control, VFD will display “ CH_ _”, and press the preset number of
the radio station to recall it. For example, press 1 to play the radio station you preset in position 1.
If the preset number is above 10, press ‘+10 ’ button on remote control and number key to input
second digit preset number.
AUXILIAIRY IN PUT OPERATION
Theunitcan be used to play the music frommanytypes of external device
1. Connect by using a 3.5mm Male-to-Male Stereo cable the external device to the LI N E IN
connector/jack of the unit.
>If your TV has only one output for audio (MONO). Connect it to the left (white) audio jack on the
unit.
2. Press
SOURCE repeatedly to select the LINE IN MODE.
3. Start playback on the external audio device. Adjust the volume on the audio device (do not set
the volume to a high level in order to avoid distortion). You may also adjust the volume on the
appliance.
To control playback function, use the controls on the external audio device.

18
HCX 1080 BT
12
USB OPERATION
You can enjoy media files saved on an USB device by connecting the USB device
to the USB port of the unit.
1. Connect the USB device to the USB port of the unit.
2. Select the USB MODE by pressing CD/USB on your remote control
3. Select a file you want to play using /CH+, /CH-,/FF, / FF+ directly thanks to
number keys.
4. Press on remote control or on the unit to start the playback.
5. Turn the VOLUME knob or press VOL+ / VOL-to increase or decrease volume level.
6. Press stop button on unit or on remote control to stop USB playback.
7. Before disconnecting the USB device, change the source by pressing SOURCE button.
Compatible USB Device:
Mp3 player: Flash type Mp3 player.
USB Flash Drive: Devices that support USB2.0 or USB 1.1.
The USB function may not be available depending on device.
Device which require additional program installation when you have connected it to a computer, are
not supported.
Do not extract the USB device while in operation.
For a large USB capacity, it may take longer than a few minute to be searched.
To prevent data loss, back up all data.
If you use a USB extension cable or USB hub, the USB device is not recognized.
Using NTFS file system is not supported. (Only FAT (16/32) file system is supported)
This unit is not supported when the total number of files is 1000 or more.
External HDD, locked devices or hard type USB devices are not supported.
PROGRAM MODE
The operation of PROGRAM MODE are as the same as that of CD / MP3. Please refer to CD / MP3
OPERATION section paragraph PROGRAM.

19
HCX 1080 BT
NFC FUNCTION
Using NFC (Near Field Communication), you can transfer your music from your phone to your
Bluetooth device including NFC feature.
The maximum reading distance is about 1 cm, which prevents unauthorized communications.
Connection procedure
1. Please press SOURCE button on remote to switch into Bluetooth mode
2. Before connecting, make sure your connecting devices (e.g. phone or Tablet) with NFC
technology.
3. Set your connecting devices (e.g. phone or Tablet) into Bluetooth working mode.
4. Set your connecting devices (e.g. phone or Tablet) in to NFC working mode. For all the devices
with NFC, you will find NFC setting on your device, confirm Allow data exchange when
it touches another device Please refer to below photo from the cell phone.
13
BLUETOOTHOPERATION
Note: Prior to use Bluetooth function, your micro system should be paired firstly with your
Bluetooth device. (“Pairing” means establish connection between Bluetooth devices such as MOBILE
PHONE, TABLETS, PC, ETC.)
1. Press the
“SOURCE” button to switch into theBLUETOOTH MODE, “BT” displays on the
VFD.
2. In Bluetooth mode, the blue status indicator flashes three times, then 2 beep sounds, the status
indicator goes RED & flashes, The micro system enters automatically searches for Bluetooth
device.
3. Turn on Bluetooth functionality on your device and make it discoverable (see your device’s
instructions to add or setup a Bluetooth device).
4. Search for Bluetooth equipment “HCX 1080 BT” is your micro system identification.
Red status indicator switches to blue lighting which means that devices are successfully paired.
(During the paring, if the Bluetooth Version is below 3.0, you need to input code “0000”)
Your Bluetooth device stores the micro system unique identification at the same time.
NOTE: The effective range of Bluetooth devices is 10 meters.
Once paired, your device should connect to the HCX 1080 BTwhenever within the
Bluetooth range (10 meters).

20
HCX 1080 BT
14
CARE AND MAINTENANCE
*Carrying for Compact Discs
1. Treat the disc carefully. Handle the disc only by its edges. Never allow your
fingers
to come in contact with the shiny, unprinted side of the disc.
2. Do not attach adhesive tape, stickers, etc. to the disc label.
3. Clean the discs periodically with a soft, lint-free, dry cloth. Never use
detergents or abrasive cleaners to clean the disc. If necessary, use a CD
cleaning kit. If a disc skips or gets stuck on a section of the disc, it is probably dirty or damaged
(scratched). When cleaning the disc, wipe in straight lines from the center of the
disc to the outer edge of the disc. Never wipe in circular motions.
4. This unit is designed to play discs bearing the identification logo as shown here
or MP3 format Disc. Other discs may not conform to the CD standard and may not
play properly.
5. Discs should be stored in their cases after each use to avoid damage.
6. Do not expose discs to direct sunlight, high humidity, high temperatures, or dust, etc. Prolonged
exposure or extreme temperatures can warp the disc.
7. Do not stick or write anything on either side of the disc. Sharp writing instruments or the ink may
damage the surface.
Care of the Cabinet
1. To prevent fire or shock hazard, disconnect your unit from the AC power source when cleaning.
2. The finish on your unit may be cleaned with a dust cloth and cared for as other furniture. Use
caution when cleaning and wiping the plastic parts.
3. Mild soap and a damp cloth may be used on the front panel.
To Clean the Lens
If the lens gets dirty, your player may skip or may not play a CD
1. Open the CD door.
2. Use a camera lens blower/brush to blow on the lens once or twice, brush the dust or particles off
the lens then blow again.
3. To remove fingerprints, use a dry cotton swab to wipe from the middle to outer edge of the lens.
Table of contents
Other Trevi Stereo System manuals

Trevi
Trevi TT 1070 E User manual

Trevi
Trevi HFX 1058 User manual

Trevi
Trevi HCV 10D35 DAB User manual

Trevi
Trevi SB 8340 SW User manual

Trevi
Trevi MCX 1045IPD User manual

Trevi
Trevi MCX 1025 USB User manual

Trevi
Trevi TT 1060CD User manual

Trevi
Trevi MCX 1021 USB User manual

Trevi
Trevi TT 1072 DAB User manual

Trevi
Trevi HCX 10D6 DAB User manual

Trevi
Trevi MCX 1021 USB User manual

Trevi
Trevi SB 8370 SW User manual

Trevi
Trevi DS 1976 V User manual

Trevi
Trevi SB 8350TV User manual

Trevi
Trevi HCX 1200 BT User manual

Trevi
Trevi TT 1068 E User manual

Trevi
Trevi MCX 1024 USB User manual

Trevi
Trevi AV 610 USB User manual

Trevi
Trevi HCV 1035 BT User manual

Trevi
Trevi HF 1900 BT User manual