TFP312
Page 5 of 6
Care and
Maintenance
TYCO Model ESFR-25 Early Suppres-
sion, Fast Response 25.2K Pendent
Sprinklers must be maintained and ser-
viced in accordance with this section.
Before closing a re protection system
main control valve for maintenance
work on the re protection system
that it controls, obtain permission to
shut down the affected re protection
system from the proper authorities
and notify all personnel who may be
affected by this action.
Sprinklers which are found to be
leaking or exhibiting visible signs of
corrosion must be replaced.
Automatic sprinklers must never be
painted, plated, coated, or other-
wise altered after leaving the factory.
Modied sprinklers must be replaced.
Sprinklers that have been exposed to
corrosive products of combustion, but
have not operated, should be replaced
if they cannot be completely cleaned
by wiping the sprinkler with a cloth or
by brushing it with a soft bristle brush.
Care must be exercised to avoid
damage to the sprinklers before,
during, and after installation. Sprin-
klers damaged by dropping, striking,
wrench twist/slippage, or the like, must
be replaced. For more information, see
the Installation section.
The owner is responsible for the
inspection, testing, and maintenance of
their re protection system and devices
in compliance with the following docu-
ments and standards:
• This technical data sheet
• Applicable standards of the National
Fire Protection Association such as
NFPA 25
• Standards of any authorities having
jurisdiction
Contact the installing contractor
or product manufacturer with any
questions.
Automatic sprinkler systems are rec-
ommended to be inspected, tested,
and maintained by a qualied Inspec-
tion Service in accordance with local
requirements and/or national codes.
Limited
Warranty
For warranty terms and conditions, visit
www.tyco-re.com.
Ordering
Procedure
Contact your local distributor for avail-
ability. When placing an order, indicate
the full product name and part number
(P/N).
Sprinkler Assemblies with
1 in. NPT Thread Connection
Specify: Model ESFR-25 (TY9226),
K=25.2, Early Suppression, Fast
Response Pendent Sprinkler with
1in. NPT thread connection, (specify)
temperature rating, Natural Brass,
P/N (specify):
165°F (74°C) ..................58- 441-1-165
212°F (100°C) .................58-441-1-214
Special Order
Sprinkler Assemblies with
ISO 7-1 Thread Connection
Specify: Model ESFR-25 (TY9226),
K=25.2, Early Suppression,
Fast Response Sprinkler with
ISO 7-1 thread connection, (specify)
temperature rating), Natural Brass,
P/N (specify):
165°F (74°C) ..................58-442-1-165
212°F (100°C) .................58-442-1-214
Sprinkler Wrench
Specify: W-Type 1 Sprinkler Wrench,
P/N 56-872-1-025
Installation
TYCO Model ESFR-25 Early Suppres-
sion, Fast Response 25.2K Pendent
Sprinklers must be installed in accor-
dance with this section.
General Instructions
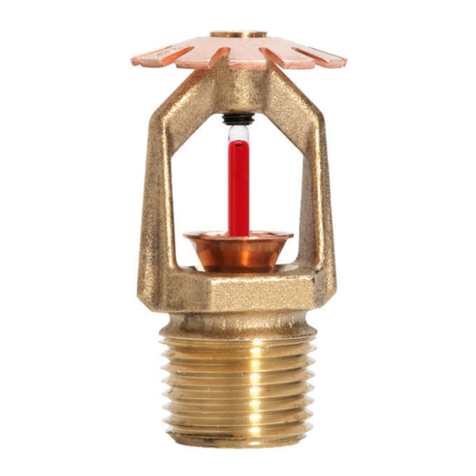
Damage to the fusible link assembly
during installation can be avoided by
handling the sprinkler by the frame
arms only and by using the appropriate
sprinkler wrench. Do not apply pres-
sure to the fusible link assembly. Failure
to do so can lead to an unstable link
assembly and premature activation of
the sprinkler. Damaged sprinklers must
be replaced.
A leak-tight 1 in. NPT sprinkler joint
should be obtained by applying a min-
imum-to-maximum torque of 20 to 30
lb-ft (26,8 to 40,2 N∙m). Higher levels
of torque can distort the sprinkler inlet
with consequent leakage or impairment
of the sprinkler.
Installing the Sprinkler
To install the sprinkler, perform the fol-
lowing steps:
Note: Install the Model ESFR-25
Pendent Sprinkler in the pendent posi-
tion as shown in Figure 2.
Step 1. With pipe thread sealant
applied, hand-tighten the sprinkler into
the sprinkler tting. Do not apply pres-
sure to the link assembly, and handle
the sprinkler only by the frame arms.
Step 2. Wrench-tighten the sprin-
kler using only the W-Type 1 Sprinkler
Wrench as shown in Figure 2, and by
fully engaging (seating) the wrench on
the sprinkler wrench ats as shown in
Figure 1.
Step 3. After installation, inspect the
link assembly of each sprinkler for
damage. In particular, verify that the
link assembly and hook are posi-
tioned as shown in Figure 1, and that
the link assembly is not bent, creased,
or forced out of normal position in any
way. Replace damaged sprinklers.
