manuals.online logo
Brands
  1. Home
  2. •
  3. Brands
  4. •
  5. VDH
  6. •
  7. Thermostat
  8. •
  9. VDH ALFA 13 User manual

VDH ALFA 13 User manual

1
User manual
ALFA 13 and
ALFANET 13
0/+99C (1)
Min./Max. Alarm Thermostat.
VDH doc. 070023 Version: v2.0 Date: 26-11-2007
Software: 060352_ALFA 13/23/33 0-100CFile: Do070023.wpd Range: 0/+100C per 1C
* Function.
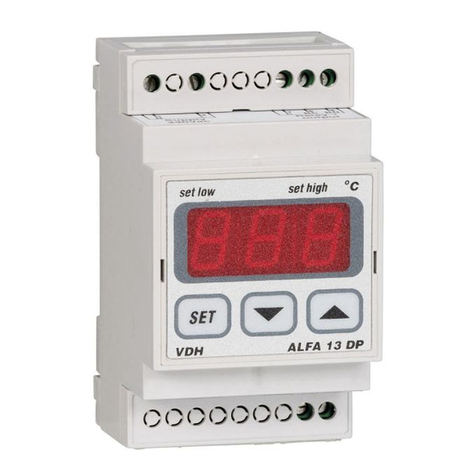
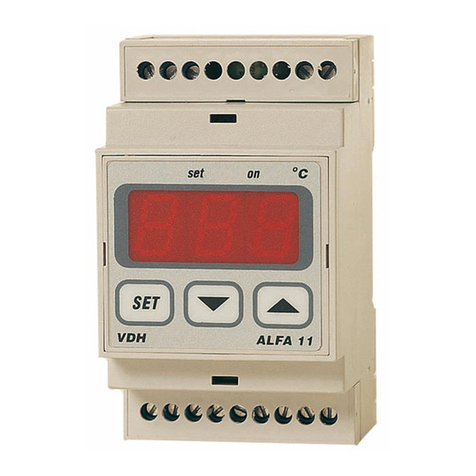
The ALFA(NET) 13 is a digital alarm thermostat for rail mounting. The thermostat watches the
minimum and maximum temperature. The ALFA(NET) 13 has one relay for both alarms. The
temperature readout is in hole degrees Celsius.
The ALFANET 13 has a RS 485 network connection so it can be read out and adjusted on the
Alfanet.
*Installation.
On the connection diagram of the ALFA(NET) 13 is shown how the sensor, power supply and relay
are connected.
After connecting the ALFA(NET) 13 to the power supply, a self-test function is started. As this test
is finished the measured temperature appears in the display.
The relay is normally activated, and with an alarm it is deactivated, and the led 'alarm' will light-up in
the display.
*Control.
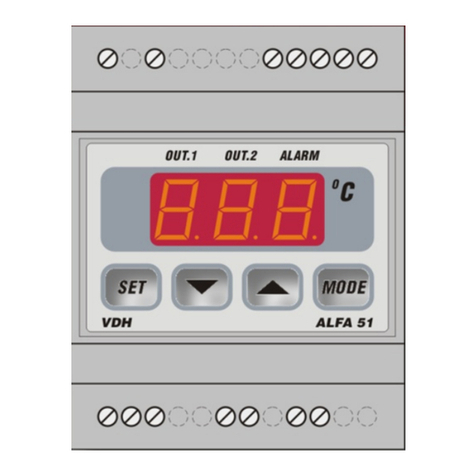
The ALFA(NET) 13 alarm-thermostat can be controlled by three push buttons on the front;
SET - view / change setpoints and reset of alarm.
UP - increase a setpoint.
DOWN - decrease a setpoint.
*Viewing setpoints.
Viewing setpoint of maximum alarm:
By pushing the SET key first and then the UP key together the maximum alarm setpoint appears
in the display. The led 'set high' starts blinking.
Viewing setpoint of minimum alarm:
By pushing the SET key first and then the DOWN key together the maximum alarm setpoint
appears in the display. The led 'set low' starts blinking.
A few seconds after releasing the keys the setpoint disappears and the measured temperature is
shown in the display.
2
*Changing setpoints.
Push the SET key together with the UP or DOWN key and the maximum alarm setpoint or
minimum alarm setpoint appears in the display. Release both keys.
Now push and hold the SET key again and together with the UP or DOWN keys the setpoint can
be changed. A few seconds after releasing the keys the measured temperature is shown again in
the display.
*Action of the alarm functions.
The ALFA(NET) 13 alarm thermostat has a minimum alarm and a maximum alarm, both with there
own setpoint. We can choose off two different kind of alarms (Parameter 27) namely:
a watchdog alarm (relay normally activated, at alarm, it falls off and the led 'alarm' burns. On
power failure the alarm relay also falls off.)
or a regulated alarm (relay normally not activated, at alarm, it will be activated and the led 'alarm'
burns.
With Parameter 28 we can choose for a auto reset alarm or a hold alarm after temperature
recovering. Also it is possible to give both setpoints there own offset and differential, see function
diagram.
Each alarm can be set at an alarm-delay time (Parameter 23 and 24), when the temperature
passes the set alarm point, the led 'alarm' first starts to blink. If the temperature will recover within
the delay time, no alarm occurs. If an alarm will continue after the delay time, the led 'alarm' burns
continuously, and the display alternates between the temperature and 'H' for high-alarm (max.) or 'L'
for low-alarm (min.) to indicate the alarm.
To reset an alarm press the SET key.
*Adjustment sensor.
The sensor can be adjusted by using the Sensor Offset (parameter 04). Indicates the ALFA(NET)
13 e.g. 2C to much, the Sensor Offset has to de decreased with 2C.
*Error messages.
In the display of the ALFA(NET) 13 the following error messages can appear:
Er - Sensor broken. Solution:
- Check if the sensor is connected correctly.
- Check the sensor (1000at 25C).
- Replace the sensor.
EE - Settings are lost. Solution:
- Reprogram the settings.
* Technical details.
Model :ALFA 13 Alarm Thermostat
ALFANET 13 Alarm Thermostat with Network
Range :0/+99C, readout per 1C
Supply :230 Vac / 1,2VA 50/60Hz (or else see Product Sticker)
Relay :SPDT 250V/16A(C-NO), 8A(C-NC) (cos phi=1)
Communication :RS 485 Network (2xTwisted-pair shielded) only at ALFANET model.
Control :by pushbuttons on the front.
Front :Polycarbonate IP65
Sensor :SM 811/2m (1000at 25C)
Sizes :90 x 53 x 58mm (hwd)
Panel hole :46 x 53mm (hw)
- Provided with memory protection during power failure.
- Connection with screw terminals on the backside.
- Equipped with self test function and sensor failure detection.
- Special version on request available.
3
*Setting internal parameters.
Next to the adjustment of the setpoint, some other internal settings are possible, like differential,
sensor-offset, setpoint range.
By pushing the DOWN key more than 10 seconds, you enter the 'internal programming menu'. In
the left display the upper and lower segment are blinking. With the UP and DOWN keys the
required parameter can be selected (see table for the parameters). If the required parameter is
selected, the value can be read-out by pushing the SET key. Pushing the UP and DOWN keys
allows you to change the value of this parameter.
If after 20 seconds no key is pushed, the ALFA(NET) 13 changes to it's normal operation mode.
*Parameters ALFA(NET) 13.
PARA-
ME-
TER
DESCRIPTION PARAMETER RANGE STANDARD
VALUE
02
03
04
Minimum setpoint
Maximum setpoint
Offset temperature sensor
0/+100C
0/+100C
-15/+15C
0
+100
0
10
11
Startup delay after power failure
Relay on at sensor failure
0..99 Minutes
0 = No, 1 = Yes
0
0
21
22
23
24
25
26
27
28
Differential maximum alarm
Differential minimum alarm
Time delay maximum alarm
Time delay minimum alarm
Offset setpoint High (Max.)
Offset setpoint Low (Min.)
Relay alarm function
(0=watchdog 1=regulated alarm)
Auto reset alarm after temperature recovering
(0=hold)
1..15C
1..15C
0..99 Minutes
0..99 Minutes
0/+20C
-20/0C
0 = No, 1 = Yes
0 = No, 1 = Yes
1
1
0
0
0
0
0
0
90
95
96
97
98
99
Network number
Software version
Production year
Production week
Serial number (x1000)
Serial number (units)
1..250
0..255
00..99
1..52
0..255
0..999
1
-
-
-
-
-
* Function diagram.
4
*Dimensions. *Connections.
*Address.
VDH Products BV Tel: +31 (0)50 - 30 28 900
Produktieweg 1 Fax: +31 (0)50 - 30 28 980
9301 ZR Roden Email: info@vdhproducts.nl
The Netherlands Internet: www.vdhproducts.nl

This manual suits for next models

1

Other VDH Thermostat manuals

VDH ALFA 15 User manual

VDH

VDH ALFA 15 User manual

VDH ALFANET 31 User manual

VDH

VDH ALFANET 31 User manual

VDH ALFA(NET) 33 User manual

VDH

VDH ALFA(NET) 33 User manual

VDH ALFANET 85 User manual

VDH

VDH ALFANET 85 User manual

VDH ALFA 59 User manual

VDH

VDH ALFA 59 User manual

VDH ALFANET 71-2SP User manual

VDH

VDH ALFANET 71-2SP User manual

VDH Alfanet 95 User manual

VDH

VDH Alfanet 95 User manual

VDH ALFA 71 MODulation User manual

VDH

VDH ALFA 71 MODulation User manual

VDH ALFA(NET) 51 User manual

VDH

VDH ALFA(NET) 51 User manual

VDH ALFA 52-VS User manual

VDH

VDH ALFA 52-VS User manual

VDH ALFA 29 User manual

VDH

VDH ALFA 29 User manual

VDH ALFA 71 PI User manual

VDH

VDH ALFA 71 PI User manual

VDH ALFA 21 User manual

VDH

VDH ALFA 21 User manual

VDH ALFANET 72 User manual

VDH

VDH ALFANET 72 User manual

VDH ALFANET 55 RTDF User manual

VDH

VDH ALFANET 55 RTDF User manual

VDH ALFA(NET) 31 User manual

VDH

VDH ALFA(NET) 31 User manual

VDH ALFA 71 User manual

VDH

VDH ALFA 71 User manual

VDH MC 785-DF KLIMA User manual

VDH

VDH MC 785-DF KLIMA User manual

VDH ALFA(NET) 51 PI User manual

VDH

VDH ALFA(NET) 51 PI User manual

VDH ALFA 51 PI User manual

VDH

VDH ALFA 51 PI User manual

VDH ALFA 51 PI User manual

VDH

VDH ALFA 51 PI User manual

VDH ALFA 23 User manual

VDH

VDH ALFA 23 User manual

VDH ALFA 71 PI User manual

VDH

VDH ALFA 71 PI User manual

VDH ALFA 25 DP User manual

VDH

VDH ALFA 25 DP User manual

Popular Thermostat manuals by other brands

ADF T1 user manual

ADF

ADF T1 user manual

Carrier Non-Programmable Thermostats Installation, start-up, and operating instructions

Carrier

Carrier Non-Programmable Thermostats Installation, start-up, and operating instructions

SmartDHOME Ecodhome TTDZ user manual

SmartDHOME

SmartDHOME Ecodhome TTDZ user manual

t.a.c. Satchwell Climatronic CSC5252 user guide

t.a.c.

t.a.c. Satchwell Climatronic CSC5252 user guide

blossom-ic HERA+ PRIMUS PRO Assembly instructions

blossom-ic

blossom-ic HERA+ PRIMUS PRO Assembly instructions

Salus 091FLRF Quick guide programming

Salus

Salus 091FLRF Quick guide programming

Carrier TSTATCCNTT01-B Installation and operating instructions

Carrier

Carrier TSTATCCNTT01-B Installation and operating instructions

Aube Technologies TH104 Installation instructions & owner's guide

Aube Technologies

Aube Technologies TH104 Installation instructions & owner's guide

CLIMAVENETA LIFE2 AT MODBUS CONTROL KIT manual

CLIMAVENETA

CLIMAVENETA LIFE2 AT MODBUS CONTROL KIT manual

Aube Technologies TH209 owner's guide

Aube Technologies

Aube Technologies TH209 owner's guide

Lux Products TX500b Series Installation and operating instructions

Lux Products

Lux Products TX500b Series Installation and operating instructions

Aprilaire 8334 user manual

Aprilaire

Aprilaire 8334 user manual

KING 1F85U-22NP Installation and operating instructions

KING

KING 1F85U-22NP Installation and operating instructions

Bryant PROGRAMMABLE DIGITAL TERMOSTAT OM 17-101 owner's manual

Bryant

Bryant PROGRAMMABLE DIGITAL TERMOSTAT OM 17-101 owner's manual

DELTA DORE TYBOX 117 manual

DELTA DORE

DELTA DORE TYBOX 117 manual

Honeywell UtilityPRO Series operating manual

Honeywell

Honeywell UtilityPRO Series operating manual

Theben RAMSES 850 top3 OT manual

Theben

Theben RAMSES 850 top3 OT manual

LUX PSP511Ca user manual

LUX

LUX PSP511Ca user manual

manuals.online logo
manuals.online logoBrands
  • About & Mission
  • Contact us
  • Privacy Policy
  • Terms and Conditions

Copyright 2025 Manuals.Online. All Rights Reserved.