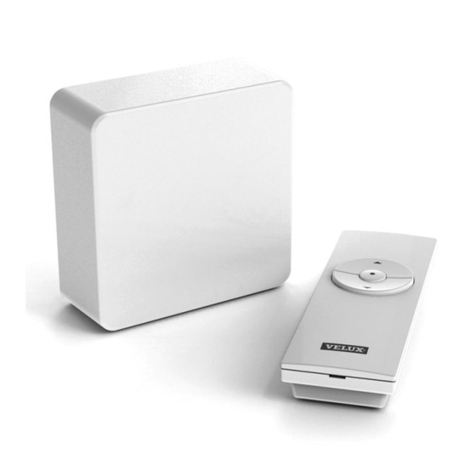
Velux Integra Kux 110 User manual

VAS 454274-2018-02
VELUX INTEGRA®
KUX 110

A
min 25 mm
min 11 mm
1
4 5
3
+
−
2
English 2-10
Deutsch 12-20
Français 22-30
Dansk 32-40
Nederlands 42-50
Italiano 52-60
Español 62-70
Bosanski 72-80
Български 82-90
Česky 92-100
Eesti 102-110
Hrvatski 112-120
Latviski 122-130
Lietuvių 132-140
Magyar 142-150
Norsk 152-160
Polski 162-170
Português 172-180
Română 182-190
Русский 192-200
Slovenščina 202-210
Slovensky 212-220
Srpski 222-230
Suomi 232-240
Svenska 242-250
Türkçe 252-260
Українська 262-270

B
+
−
m mm2
0 - 20 2 x 0.75
0 - 50 2 x 1.50
C
+
+
+
+
1
3
2

VELUX®2
ENGLISH
Contents
Important information 3-4
Contents of packaging 5
Installation of power supply unit 6
Wiring 7
Operating the product 8
Resetting 9
Declaration of Conformity 10

3 VELUX®VELUX®4
ENGLISH ENGLISH
io-homecontrol®provides advanced and secure radio technology that is easy to install.
io-homecontrol®labelled products communicate with each other, improving comfort,
security and energy savings.
www.io-homecontrol.com
Important information
Read instructions carefully before installation. Keep instructions for
future reference and hand them over to any new user.
Safety
• Power supply unit KUX 110 can be used by persons (aged 8 years and
above) with sufficient experience and knowledge if they have been
given instruction concerning safe use and understand the hazards
involved. Cleaning and user maintenance must not be done by unsu-
pervised children.
• Children must not play with the power supply unit.
• If mains cable is damaged, it must be replaced by qualified personnel
in accordance with national regulations.
• If repair or adjustment work is needed, disconnect mains supply and
ensure that it cannot be reconnected unintentionally.
• The power supply unit must not be covered (maximum ambient
temperature: 50°C).
Product
• The power supply unit has been designed for use with genuine VELUX
products. Connection to other products may cause damage or mal-
function.
• The power supply unit is compatible with products with the
io-homecontrol®logo.
• Radio frequency band: 868 MHz.
• Products marked with the crossed out wheeled bin are regarded as
electrical and electronic equipment and contain hazardous materials,
components and substances. The crossed out wheeled bin symbolises
that electrical and electronic equipment waste must not be disposed
of together with household waste. It must be collected separately at
recycling stations or other collection sites or retrieved directly from
households to increase the possibilities of recycling, reuse and utilisa-
tion of electrical and electronic equipment waste. By sorting electrical
and electronic equipment products with this symbol, you contribute
to reducing the volume of incinerated or buried waste and to reducing
any negative impact on human health and the environment. Further
information can be obtained from the local municipality’s technical
administration or from your local VELUX sales company.
• The packaging can be disposed of with usual household waste.
Maintenance
• Disconnect mains supply before carrying out any maintenance or ser-
vice work to a product connected to the power supply unit and ensure
that it cannot be reconnected unintentionally.
• Spare parts are available from your VELUX sales company. Please
provide information from the data label.
• If you have any technical questions, please contact your VELUX sales
company, see telephone list or www.velux.com.

5 VELUX®VELUX®6
ENGLISH ENGLISH
1 3
24
A
Contents of packaging
1Power supply unit
2Wall bracket for power supply unit
3Connecting cable between power supply unit and product
4Screws and rawlplugs for power supply unit, block connector and
cable clips
Installation of power supply unit
1. Install the wall bracket for the power supply unit on the
wall. It is recommended to place the power supply unit
in the room where the product to be connected has been
installed.
In case of additional power supply units, the wall brackets
must be spaced at least 11 mm apart.
2. Connect the connecting cable to the power supply unit.
Important: The po-
larity (+/-) must be kept all the way through to the product.
3. Hook the power supply unit on the wall bracket.
4. Click the lid on the power supply unit.
Installation in rooms with a high level of humidity and with
hidden wiring must comply with national regulations (contact a
qualified electrician if necessary).
The power supply unit has a built-in RF unit and will not be
operative if placed in a metal cabinet.

7 VELUX®VELUX®8
ENGLISH ENGLISH
www.velux.com/integrasupport
B C Operating the product
The product to be supplied with power must be fitted to the
window and connected to the power supply unit.
Subsequently, the following three installation steps must be
completed in order to operate the product:
1. Connect the power supply unit to the mains supply.
2. Insert the batteries into the wall switch delivered with the
product to be supplied with power.
3. Press the down arrow to complete the installation.
Wiring
Lead the connecting cable from the power supply unit to the
window. Wiring in roof windows is described in the instructions
for wiring supplied.
The 8 m long cable has a cable cross-section of 2 x 0.75 mm2.
If necessary, it can be extended by up to 12 m using the same
cable type (max total length: 20 m). If the cable must be longer
than 20 m, the cable supplied must be replaced by a cable with
a cable cross-section of 2 x 1.50 mm2(max total length: 50 m).
Connecting products to a power supply unit
When connecting more than one product, lead the cable to
a junction box from where the cables are distributed to the
individual products. The junction box should be placed as close
as possible to the products to be supplied with power.
Connecting products to additional power supply
units
When installing more than one power supply unit, use a
separate 2-core cable for each power supply unit. Do not use
multicore cables as the signals between the power supply units
and connected products may be disturbed.
Important
The polarity (+/-) must be kept all the way through to the
product.

9 VELUX®VELUX®10
ENGLISH ENGLISH
VELUX A/S: . . . . . . . . . . . . . . . . . . . . . . . . . . . . . . . . . . . . . . . . . . . . . . . . . . . . . . .
(Jens Aksel Thomsen, Market Approval)
Ådalsvej 99, DK-2970 Hørsholm. . . . . . . . . . . . . . . . . . . . . . . . . . . . . . . . . . . . . .
CE DoC 940403-02
13.12.2017
RESET24V
min 5 sec
Declaration of Conformity
We herewith declare that VELUX INTEGRA®power supply unit
KUX 110 (3UC B02)
−is in conformity with the Radio Equipment Directive 2014/53/EU and
−has been manufactured in accordance with the harmonised standards
EN 61558-2-16(2009), EN 61558-1(2005)+A1(2009),
EN 60335-1(2012), EN 62233(2008), EN 300220-2 v2.4.1,
EN 301489-1 v1.9.2, EN 301489-3 v1.6.1,
EN 55014-1(2006)+A1(2009)+A2(2011),
EN 55014-2(1997)+A1(2001)+A2(2008) and
EN 55024(2010).
When the above-mentioned power supply unit is connected to a
VELUX INTEGRA®window operator or another VELUX INTEGRA®
motor installed in a VELUX window in accordance with the instructions
and requirements, the total system complies with the essential require-
ments of the Directives 2006/42/EC, 2014/35/EU, 2014/30/EU and
2014/53/EU of the European Parliament and Council.
Resetting
The products connected can be reset by removing the lid of the
power supply unit and pressing the RESET button for at least
5 seconds.
When resetting, the connection between the mains-powered
product and wall switch KLI 310/311/312/313 is deleted and a
new pairing of the two products is required. See
velux.com/integrasupport for further guidance.
Note: The connected products will run briefly back and forth in
random order to indicate that they are ready for pairing.

DEUTSCH
11 VELUX®VELUX®12
Inhalt
Wichtige Informationen 13-14
Inhalt der Verpackung 15
Montage der Steuereinheit 16
Leitungsführung 17
Bedienung der Produkte 18
Zurücksetzung 19
Konformitätserklärung 20

DEUTSCH DEUTSCH
13 VELUX®VELUX®14
io-homecontrol
®
bietet eine fortschrittliche und sichere Radio-Funktechnologie, die einfach
zu installieren ist. io-homecontrol
®
gekennzeichnete Produkte kommunizieren miteinander
und verbessern somit Komfort, Sicherheit und Energieeinsparung.
www.io-homecontrol.com
Wichtige Informationen
Vor Montagebeginn bitte sorgfältig die gesamte Anleitung lesen. Die
Anleitung für den späteren Gebrauch aufbewahren und diese an den
jeweiligen neuen Benutzer weitergeben.
Sicherheit
• Die Steuereinheit KUX 110 kann von Personen (ab 8 Jahren und älter)
mit ausreichenden Erfahrungen und Kenntnissen benutzt werden,
wenn sie eine Einweisung in deren sichere Nutzung erhalten haben und
die damit verbundenen Gefahren verstehen. Reinigung und Wartung
dürfen nicht von unbeaufsichtigten Kindern ausgeführt werden.
• Kinder dürfen nicht mit der Steuereinheit spielen.
• Falls die Netzleitung beschädigt wird, muss der Austausch gemäß
nationalen Bestimmungen durch eine qualifizierte Elektro-Fachkraft
erfolgen.
• Falls Reparaturarbeiten oder Anpassungen erforderlich sind, zuerst
die Stromversorgung ausschalten und sicherstellen, dass diese nicht
unabsichtlich wieder eingeschaltet werden kann.
• Die Steuereinheit darf nicht überdeckt werden (maximale Umge-
bungstemperatur: 50 °C).
Produkt
• Die Steuereinheit ist für den Gebrauch mit originalen VELUX Produk-
ten konstruiert. Der Anschluss an andere Produkte kann Schäden oder
Funktionsstörungen verursachen.
• Die Steuereinheit ist mit Produkten mit dem io-homecontrol®Logo
kompatibel.
• Radiofrequenzband: 868 MHz.
• Produkte, die mit der durchgestrichenen Mülltonne gekennzeichnet
sind, werden als Elektro- und Elektronikgeräte betrachtet und dürfen
nicht mit dem Haushaltsmüll entsorgt werden. Sie müssen an entspre-
chenden Entsorgungsstellen abgegeben werden oder direkt bei den
Haushalten abgeholt werden, um die Möglichkeit des Recyclings, der
Wiederverwendung und Nutzung der Elektro- und Elektronik-
Altgeräte zu gewährleisten. Durch die Abfalltrennung der Elektro-
und Elektronikgeräte mit diesem Symbol, leisten Sie einen Beitrag
zur Reduzierung von verbranntem und begrabenem Abfall und somit
zur Reduzierung aller negativen Auswirkungen auf die menschliche
Gesundheit und die Umwelt. Weitere Informationen erhalten Sie bei
der technischen Abteilung der Kommunalverwaltung oder bei Ihrer
zuständigen VELUX Vertriebsgesellschaft.
• Die Verpackung kann mit dem Hausmüll entsorgt werden.
Wartung
• Bei Wartung und Service eines Produkts, das an die Steuereinheit
angeschlossen ist, zuerst die Stromversorgung ausschalten und
sicherstellen, dass diese nicht unabsichtlich wieder eingeschaltet
werden kann.
• Ersatzteile sind bei Ihrer zuständigen VELUX Vertriebsgesellschaft
erhältlich. Hierzu bitte die Informationen auf dem Typenaufkleber
angeben.
• Bei technischen Fragen wenden Sie sich bitte an Ihre zuständige
VELUX Vertriebsgesellschaft, siehe Telefonverzeichnis oder
www.velux.com.
DEUTSCH DEUTSCH
15 VELUX®VELUX®16
1 3
24
A
Inhalt der Verpackung
1Steuereinheit
2Wandkonsole der Steuereinheit
3Verbindungsleitung zwischen Steuereinheit und Produkt
4Schrauben und Dübel für Steuereinheit, Lüsterklemme und
Nagelschellen
Montage der Steuereinheit
1. Die Wandkonsole der Steuereinheit an der Wand befesti-
gen. Es empfiehlt sich die Steuereinheit in dem Raum zu
platzieren, in dem das anzuschlieβende Produkt montiert
ist.
Bei mehreren Steuereinheiten sind die Wandkonsolen mit
einem Abstand von jeweils mindestens 11 mm anzubringen.
2. Die Verbindungsleitung an die Steuereinheit anschlieβen.
Wichtig: Die Polarität (+/-) muss zum Produkt eingehalten
werden.
3. Die Steuereinheit an die Wandkonsole einhaken.
4. Die Abdeckung auf die Steuereinheit klicken.
Bei Montage in Feuchträumen und bei Leitungführung unter
Putz sind die geltenden Bestimmungen einzuhalten (falls erfor-
derlich wenden Sie sich an einen Elektrofachbetrieb).
Die Steuereinheit hat eine eingebaute RF- (Radiofrequenz)
Einheit und wird nicht funktionieren, wenn diese in einem
Metallschrank platziert wird.

DEUTSCH DEUTSCH
17 VELUX®VELUX®18
www.velux.com/integrasupport
B C
Leitungsführung
Führen Sie die Verbindungsleitung von der Steuereinheit zum
Fenster. Die Leitungsführung in den Dachfenstern ist in der
mitgelieferten Anleitung für die Leitungsführung beschrieben.
Die 8 m lange Kabelleitung hat einen Leitungsquerschnitt von
2 x 0,75 mm2. Bei Bedarf kann sie um 12 m desselben Leitungs-
typs (max. Gesamtlänge: 20 m) verlängert werden. Falls die
Kabelleitung länger als 20 m sein muss, ist die mitgelieferte
Verbindungsleitung durch eine Leitung mit einem Leitungs-
querschnitt von 2 x 1,50 mm2(max. Gesamtlänge: 50 m) zu
ersetzen.
Produkte an eine Steuereinheit anschlieβen
Beim Anschließen mehrerer Produkte die Verbindungslei-
tung zu einer Verteilerdose führen, von wo aus die anderen
Kabelleitungen an die jeweiligen Produkte verteilt werden. Die
Verteilerdose möglichst nahe an den mit Strom zu versorgen-
den Produkten platzieren.
Produkte an mehrere Steuereinheiten anschlieβen
Wenn mehr als eine Steuereinheit installiert wird, muss von
jeder Steuereinheit eine separate 2-adrige Kabelleitung verlegt
werden. Mehradrige Kabelleitungen dürfen nicht verwendet
werden, da die Signale zwischen den Steuereinheiten und den
Produkten gestört werden können.
Wichtig
Die Polarität (+/-) muss zum Produkt eingehalten werden.
Bedienung der Produkte
Montieren Sie das Elektroprodukt im Fenster und schlieβen Sie
es an die Steuereinheit an.
Danach müssen die folgenden drei Installationsschritte durch-
geführt werden, bevor das Produkt bedient werden kann:
1. Steuereinheit an die Netzspannung anschlieβen.
2. Batterien in den Funk-Wandschalter einsetzen, der mit dem
Elektroprodukt geliefert wurde.
3. Den HERUNTER-Knopf drücken, um die Installation zu
beenden.

DEUTSCH DEUTSCH
19 VELUX®VELUX®20
VELUX A/S: . . . . . . . . . . . . . . . . . . . . . . . . . . . . . . . . . . . . . . . . . . . . . . . . . . . . . . .
(Jens Aksel Thomsen, Market Approval)
Ådalsvej 99, DK-2970 Hørsholm. . . . . . . . . . . . . . . . . . . . . . . . . . . . . . . . . . . . . .
CE DoC 940403-02
13.12.2017
RESET24V
min 5 sec
Konformitätserklärung
Wir erklären hiermit, dass die VELUX INTEGRA®Steuereinheit
KUX 110 (3UC B02)
− der Funkanlagenrichtlinie 2014/53/EU entspricht und
− gemäß den harmonisierten Normen
EN 61558-2-16(2009), EN 61558-1(2005)+A1(2009),
EN 60335-1(2012), EN 62233(2008), EN 300220-2 v2.4.1,
EN 301489-1 v1.9.2, EN 301489-3 v1.6.1,
EN 55014-1(2006)+A1(2009)+A2(2011),
EN 55014-2(1997)+A1(2001)+A2(2008) und
EN 55024(2010) hergestellt ist.
Wenn die obige Steuereinheit nach den Anleitungen und den Vorschrif-
ten an einen VELUX INTEGRA®Fenstermotor oder an einen anderen
VELUX INTEGRA®Motor, der in einem VELUX Dachfenster montiert ist,
angeschlossen wird, wird das Gesamtsystem den wesentlichen Anfor-
derungen der Richtlinien des Europäischen Parlaments und des Rates
2006/42/EG, 2014/35/EU, 2014/30/EU und 2014/53/EU gerecht.
Zurücksetzung
Die angeschlossenen Produkte lassen sich zurücksetzen, indem
Sie die Abdeckung der Steuereinheit entfernen und den
RESET-Knopf mindestens 5 Sekunden gedrückt halten.
Mit dem Zurücksetzen wird die Verbindung zwischen dem Elek-
troprodukt und dem Funk-Wandschalter KLI 310/311/312/313
unterbrochen und eine neue Verbindung zwischen den beiden
Produkten muss hergestellt werden. Siehe dazu
velux.com/integrasupport.
Hinweis: Die angeschlossenen Produkte laufen kurzzeitig in
einer zufälligen Reihenfolge vor und zurück, um anzuzeigen,
dass sie jetzt für ein erneutes Verbinden bereit sind.

FRANÇAIS
21 VELUX®VELUX®22
Sommaire
Information importante 23-24
Contenu de l'emballage 25
Installation de l'unité de contrôle 26
Câblage 27
Utilisation du produit 28
Réinitialisation 29
Déclaration de Conformité 30

FRANÇAIS FRANÇAIS
23 VELUX®VELUX®24
io-homecontrol®repose sur une technologie avancée, sécurisée et sans-fil, facile à
installer. Les produits io-homecontrol®communiquent entre eux pour offrir plus de
confort, de sécurité et d'économies d'énergie.
www.io-homecontrol.com
Information importante
Lire attentivement la totalité de la notice avant l'installation. Conserver
cette notice pour vous y référer en cas de besoin et ne pas oublier de la
transmettre à tout nouvel utilisateur.
Sécurité
• L'unité de contrôle KUX 110 peut être utilisée par des personnes
(âgés de 8 ans et plus) ayant suffisamment d'expériences et de
connaissances s'ils ont reçu des instructions appropriées concernant
une utilisation de manière sûre et comprennent les risques associés.
Le nettoyage et la maintenance ne doivent pas être réalisés par des
enfants sans surveillance.
• Les enfants ne doivent pas jouer avec l'unité de contrôle.
• Si le câble d'alimentation est endommagé, il devra être remplacé par
un électricien qualifié conformément à la réglementation en vigueur.
• Avant toute opération de réparation ou de réglage, débrancher l'ali-
mentation électrique et s'assurer que l'on ne puisse pas la rebrancher
par inadvertance pendant ces opérations.
• L'unité de contrôle ne doit pas être recouverte (température maximale
d'usage : 50°C).
Produit
• L'unité de contrôle a été conçue pour fonctionner avec des produits de
marque VELUX. Toute connexion à des produits d'une autre marque
peut endommager le produit ou entraîner un dysfonctionnement.
• L'unité de contrôle est compatible avec des produits portant le logo
io-homecontrol®.
• Fréquence radio : 868 MHz.
• Les produits marqués d’une poubelle barrée sont considérés comme
des équipements électriques et électroniques et contiennent des
matériaux, composants et substances dangereux. Elle symbolise le
fait que les déchets d’équipements électriques et électroniques ne
doivent pas être éliminés avec les ordures ménagères. Ils doivent être
collectés séparément dans les stations de recyclage ou sur d’autres
sites de collecte ou récupéré directement auprès des ménages afin
d’augmenter les possibilités de recyclage, de réutilisation et d’utili-
sation des déchets d’équipements électriques et électroniques. En
triant les produits d’équipements électriques et électroniques portant
ce symbole, vous contribuez à réduire le volume de déchets incinérés
ou enfouis et à réduire tout impact négatif sur la santé humaine et
l’environnement. De plus amples informations peuvent être obtenues
auprès du service technique de la municipalité locale ou de votre
société de vente VELUX.
• L'emballage peut être jeté avec les ordures ménagères.
Entretien
• Débrancher l’alimentation électrique avant tous travaux d’entretien ou
de maintenance sur le produit connecté à l’unité de contrôle. S’assurer
que l’on ne puisse pas la rebrancher par inadvertance.
• Les pièces détachées sont disponibles auprès de votre société de
vente VELUX. Communiquer alors les informations se trouvant sur
l'étiquette du produit.
• Si vous avez une question technique, merci de contacter votre société
de vente VELUX, voir numéro indiqué ou www.velux.com.

FRANÇAIS FRANÇAIS
25 VELUX®VELUX®26
1 3
24
A
Contenu de l'emballage
1Unité de contrôle
2Support mural pour l'unité de contrôle
3Câble de connexion entre l'unité de contrôle et le produit
4Vis et chevilles pour l'unité de contrôle, bloc connecteur et cavaliers
de fixation
Installation de l'unité de contrôle
1. Installer sur le mur le support de l'unité de contrôle. Il est
recommandé de positionner l'unité de contrôle dans la pièce
où le produit branché a été installé.
Dans le cas d'unité de contrôle supplémentaire, les supports
doivent être espacés au minimum de 11 mm.
2. Connecter le câble à l'unité de contrôle.
Important : La polarité (+/-) doit être maintenue jusqu’au
produit.
3. Accrocher l'unité de contrôle sur le support mural.
4. Emboîter le couvercle sur l'unité de contrôle.
L'installation dans une pièce à fort taux d'humidité ou avec
câblage encastré oblige à se conformer à la réglementation
nationale correspondante (contacter un électricien qualifié si
nécessaire).
L'unité de contrôle possède un système RF (radio fréquence) et
ne sera pas opérationnelle si elle est placée dans une armoire
métallique.

FRANÇAIS FRANÇAIS
27 VELUX®VELUX®28
www.velux.com/integrasupport
B C
Câblage
Passer le câble de l'unité de contrôle à la fenêtre. Le câblage
dans la fenêtre est décrit dans la notice de câblage fournie.
Le câble de 8 m de long a une section de 2 x 0,75 mm2. Si
nécessaire, il est possible d'augmenter de 12 m supplémentaire
en utilisant le même type de câble (longueur totale max :
20 m). Dans le cas d'installation de câblage supérieure à 20 m,
le câble fourni doit être remplacé par un câble avec une section
de 2 x 1,50 mm2(longueur totale max : 50 m).
Branchement des produits à l'unité de contrôle
Lors du raccordement de plus d'un produit, il est nécessaire de
passer le câble par une boîte de dérivation vers une distribution
individuelle des produits.
La boîte de dérivation doit être placée aussi près que possible
des produits devant être alimentés.
Branchement des produits sur plusieurs unités de
contrôle
Si plusieurs unités de contrôle sont installées, il faut utiliser
un câble 2 brins pour chaque unité de contrôle. Ne pas utiliser
de câbles multibrins car les informations entre les unités de
contrôle et les produits connectés peuvent en être perturbées.
Important
La polarité (+/-) doit être maintenue jusqu’au produit.
Utilisation du produit
Le produit à brancher doit être monté sur la fenêtre et connec-
té à l’unité de contrôle.
Par la suite, les trois étapes d’installation suivantes doivent
être complétées afin de faire fonctionner le produit :
1. Connecter l’unité de contrôle à l’alimentation électrique.
2. Insérer les piles dans le clavier mural fourni avec le produit.
3. Appuyer sur la flèche du bas pour terminer l’installation.

FRANÇAIS FRANÇAIS
29 VELUX®VELUX®30
VELUX A/S: . . . . . . . . . . . . . . . . . . . . . . . . . . . . . . . . . . . . . . . . . . . . . . . . . . . . . . .
(Jens Aksel Thomsen, Market Approval)
Ådalsvej 99, DK-2970 Hørsholm. . . . . . . . . . . . . . . . . . . . . . . . . . . . . . . . . . . . . .
CE DoC 940403-02
13.12.2017
RESET24V
min 5 sec
Déclaration de Conformité
Nous déclarons que l’unité de contrôle VELUX INTEGRA®
KUX 110 (3UC B02)
− est conforme à la Directive des Équipements Radioélectriques
2014/53/UE et
− a été fabriqué selon les Normes harmonisées
EN 61558-2-16(2009), EN 61558-1(2005)+A1(2009),
EN 60335-1(2012), EN 62233(2008), EN 300220-2 v2.4.1,
EN 301489-1 v1.9.2, EN 301489-3 v1.6.1,
EN 55014-1(2006)+A1(2009)+A2(2011),
EN 55014-2(1997)+A1(2001)+A2(2008) et EN 55024(2010).
Quand l’unité de contrôle précité ci-dessus est raccordé à moteur
pour fenêtre VELUX INTEGRA®ou à une autre motorisation
VELUX INTEGRA®installée dans la fenêtre conformément aux instruc-
tions et aux exigences, l’ensemble du système satisfait aux exigences
essentielles des Directives 2006/42/CE, 2014/35/UE, 2014/30/UE et
2014/53/UE du Parlement Européen et du Conseil.
Réinitialisation
Les produits connectés peuvent être réinitialisés en retirant le
couvercle de l’unité de contrôle et en pressant le bouton RESET
pendant au moins 5 secondes.
Lors de la réinitialisation, la connexion entre le produit élec-
trique et le clavier mural KLI 310/311/312/313 est supprimé et
un nouvel appairage entre les 2 produits est requis, voir
velux.com/integrasupport pour plus d’information.
À noter : Les produits connectés fonctionneront brièvement
en avant et en arrière dans un ordre quelconque pour indiquer
qu’ils sont prêts à être appariés.

31 VELUX®VELUX®32
DANSK
Indhold
Vigtig information 33-34
Pakkens indhold 35
Montering af strømforsyningsenhed 36
Ledningsføring 37
Betjening af produktet 38
Nulstilling 39
Overensstemmelseserklæring 40

33 VELUX®VELUX®34
DANSK DANSK
io-homecontrol®er avanceret og sikker radioteknologi, som er nem at installere.
Produkter, der er mærket io-homecontrol®, kommunikerer med hinanden, hvilket giver
øget komfort, sikkerhed og energibesparelser.
www.io-homecontrol.com
Vigtig information
Læs hele vejledningen grundigt igennem før montering. Gem vejlednin-
gen til senere brug, og giv den videre til en eventuel ny bruger.
Sikkerhed
• Strømforsyningsenhed KUX 110 kan bruges af personer (fra 8 år og
derover) med tilstrækkelig erfaring og viden, hvis de har fået vejled-
ning i, hvordan den bruges sikkert, og forstår de dermed forbundne
risici. Rengøring og vedligeholdelse må ikke foretages af børn, med-
mindre de er under opsyn.
• Børn må ikke lege med strømforsyningsenheden.
• Hvis netledningen er beskadiget, skal den udskiftes af en faguddannet
person i henhold til nationale regler.
• Hvis reparation eller justering er nødvendig, skal forsyningsspæn-
dingen være afbrudt, og det skal sikres, at den ikke uforvarende kan
tilsluttes igen.
• Strømforsyningsenheden må ikke tildækkes (maks. omgivelses-
temperatur 50 °C).
Produkt
• Strømforsyningsenheden er konstrueret til brug sammen med origi-
nale VELUX produkter. Tilslutning til andre produkter kan medføre
skader eller funktionssvigt.
• Strømforsyningsenheden er kompatibel med produkter med
io-homecontrol®logoet.
• Radiofrekvensbånd: 868 MHz.
• Produkter, der er mærket med den overkrydsede skraldespand, er
elektrisk og elektronisk udstyr, som indeholder farlige materialer, kom-
ponenter og stoffer. Den overkrydsede skraldespand symboliserer, at
affald fra elektrisk og elektronisk udstyr ikke må bortskaffes sammen
med husholdningsaffald. Det skal indsamles særskilt på genbrugssta-
tioner, andre indsamlingssteder eller direkte fra husholdningerne for
at øge muligheden for genbrug, genanvendelse og udnyttelse af affald
fra elektrisk og elektronisk udstyr. Ved at sortere elektrisk og elektro-
nisk udstyr med dette symbol bidrager du til at reducere mængden af
affald, der destrueres ved forbrænding eller bliver begravet. Yderlige-
re information kan fås fra den tekniske afdeling i din kommune eller
fra dit VELUX salgsselskab.
• Emballagen kan bortskaffes sammen med almindeligt husholdnings-
affald.
Vedligeholdelse
• Ved vedligeholdelse og service af et produkt, der er tilsluttet strøm-
forsyningsenheden, skal forsyningsspændingen være afbrudt, og det
skal sikres, at den ikke uforvarende kan tilsluttes igen.
• Reservedele kan bestilles hos dit VELUX salgsselskab. Angiv venligst
informationerne fra typeetiketten.
• Eventuelle tekniske spørgsmål rettes til dit VELUX salgsselskab, se
telefonliste eller www.velux.com.
Other manuals for Integra Kux 110
1
Table of contents
Languages:
Other Velux Control System manuals

Velux
Velux KFX 100 User manual

Velux
Velux KFX 210 User manual

Velux
Velux KUX 100 User manual

Velux
Velux Integra Kux 110 User manual

Velux
Velux KUX 100 User manual

Velux
Velux Vario User manual

Velux
Velux KFX 210 User manual

Velux
Velux WUX 101 User manual

Velux
Velux KLR 300 User manual

Velux
Velux ACTIVE KIX 300 User manual
Popular Control System manuals by other brands

El-Björn
El-Björn Connect Temp/RH manual

Mitsubishi Electric
Mitsubishi Electric PUD-P-YMF-C manual

Lutron Electronics
Lutron Electronics homeworks qs Installation checklist

Gentex
Gentex NI13HL4 Programming and information guide

Renesas
Renesas RA6 Series quick start guide

Eaton
Eaton Vickers FG-3 10 Series quick start guide