manuals.online logo
Brands
  1. Home
  2. •
  3. Brands
  4. •
  5. Viega
  6. •
  7. Plumbing Product
  8. •
  9. Viega PureFlow Instruction sheet

Viega PureFlow Instruction sheet

Viega LLC
585 Interlocken Blvd.
Broomfield, CO 80021
Phone (800) 976-9819
www.viega.us
Product Instructions
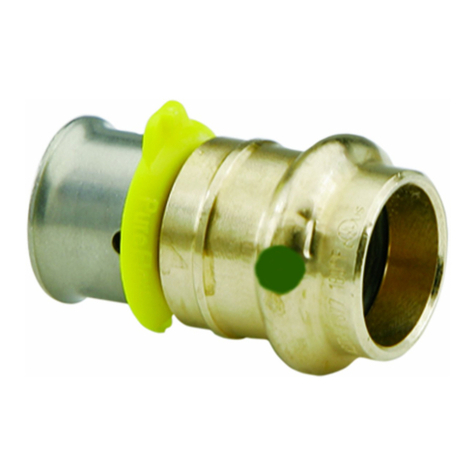
Viega PureFlow Press Fittings
Model XXXX.XX PI-PF 530530 0621 PureFlow Press Fittings (EN ES FR)
EN Product Instructions
Viega PureFlow Press Fittings
This document is subject to updates. For the most current Viega
technical literature please visit www.viega.us.
6
PureFlow
1/2”
PureFlow
1/2”
1 62
7
3
8 9 10
4
12
EN
Viega PureFlow Press Fittings
Viega products are designed to be
installed by licensed and trained plumbing
and mechanical professionals who are
familiar with Viega products and their installation.
Installation by non-professionals may void
Viega LLC’s warranty. The tool locator ring must be in the
factory-installed position while making a
press to ensure a consistent leak-proof
connection. It may be necessary to rotate the
tool locator ring to avoid interference between
the ring and tool.
The tool locator ring must be in the
factory-installed position while making a
press to ensure a consistent leak-proof
connection. It may be necessary to rotate the
tool locator ring to avoid interference between
the ring and tool.
If using hand tools continue with steps
4 to 8. If using power tools skip to
steps 9 to 12.
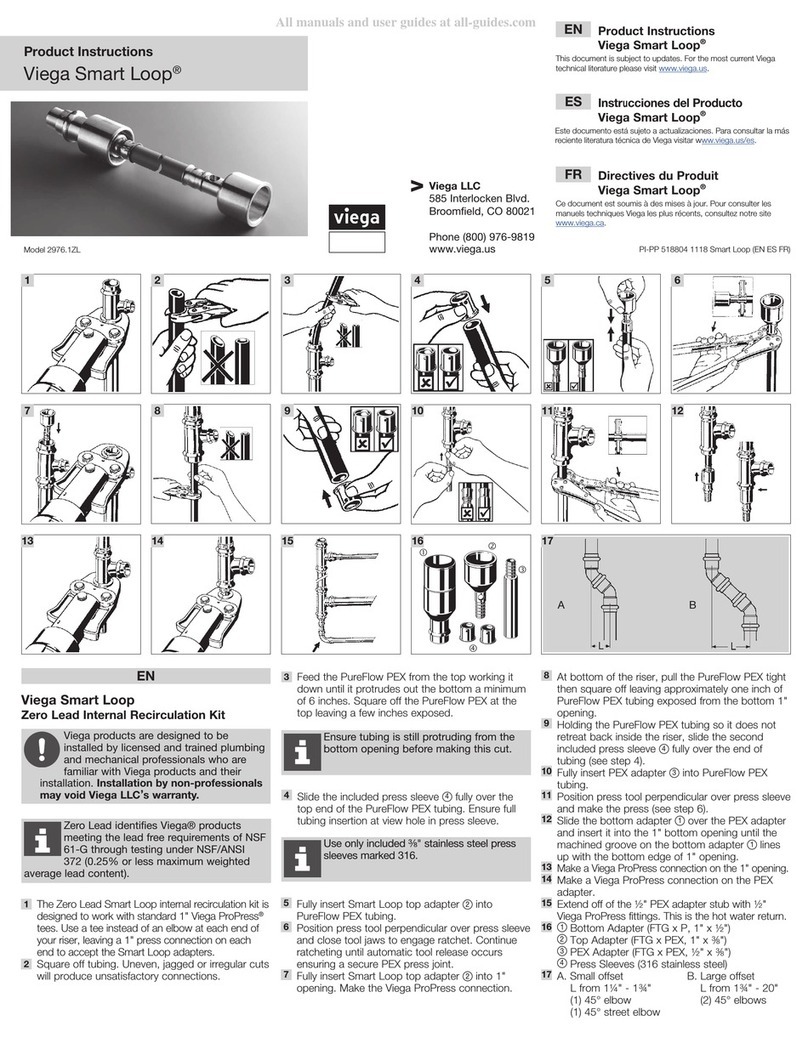
1 Square off tubing to proper length. Uneven,
jagged, or irregular cuts will produce unsatisfactory
connections.
2 Insert PureFlow Press fitting with attached sleeve
into tubing and engage fully.
3 Ensure full tubing insertion at view holes in
attached press sleeve. Full insertion means tubing
must be completely visible in at least two view
holes and partially visible in the one.
4 For the 1" tool, open the tool handles fully (thumb
grip is available to maintain open jaw). Then close
tool jaws to engage ratchet (ensure that thumb
grip is returned fully forward before closing jaws).
5 Position the PureFlow press tool perpendicular
over the press sleeve, resting it against the tool
locator ring. For 1" tool, close tool jaws to engage
ratchet (ensure that thumb grip is returned fully
forward before closing jaws). Make sure the
PureFlow press tool is properly aligned (see step 7
if it is not).
WARNING!
The connection is not leak-proof when
the tool has been opened by emergency
release. The tool locator ring must be present to
ensure a proper PureFlow Press connection.
WARNING!
The tool locator ring must be present to ensure a
proper PureFlow Press connection.
CAUTION!
Do not press twice.
CAUTION!
Do not press twice.
11
6 Close handles, using trigger to reduce grip span if
desired.
7 If the PureFlow press tool is not properly aligned
with the locator ring, use the emergency release
(using a screw driver to turn the emergency
release) to open the press tool. Once released,
align the PureFlow press tool properly and go
back to step 5.
5
8 Extend the PureFlow press tool handle and
continue ratcheting until automatic tool release
occurs at the proper compression force.
9 Insert the appropriate PureFlow press jaw into the
press tool and push in the holding pin until it locks.
10 Open jaw and position perpendicular over press
sleeve, resting it against the tool locator ring.
11 Start the pressing process; hold the trigger until
the jaw has automatically released.
12 When press connection is complete, open and
remove the jaw.
ES Instrucciones del producto
Accesorios Viega PureFlow Press
Este documento está sujeto a actualizaciones. Para obtener la
documentación técnica más reciente de Viega, visite www.viega.us.
FR Instructions produit
Raccords sertis
Viega PureFlow Press
Le présent document est soumis à des mises à jour. Pour consulter
les manuels techniques Viega les plus récents, veuillez visiter
www.viega.us.
ES
Accesorios Viega PureFlow Press
Los productos de Viega están diseñados
para ser instalados por plomeros y
mecánicos profesionales, capacitados y con
licencia, que estén familiarizados con los productos
Viega y su instalación. La instalación realizada por
personal no profesional puede anular los términos y
condiciones del producto de Viega LLC.
Con el fin de garantizar una unión
hermética consistente, durante el prensado
el anillo localizador tiene que estar en la
posición en la que fue montado en fábrica. Es
posible que sea necesario girar el anillo localizador
para evitar interferencias entre el anillo y la
herramienta.
Con el fin de garantizar una unión
hermética consistente, durante el prensado
el anillo localizador tiene que estar en
la posición en la que fue montado en
fábrica. Es posible que sea necesario girar el anillo
localizador para evitar interferencias entre el anillo
y la herramienta.
Si está usando herramientas de mano,
continúe con los pasos 4 a 8. Si está
usando herramientas eléctricas, continúe
con los pasos 9 a 12.
1 Corte la tubería en ángulo recto, a la longitud
correcta. Los cortes desiguales, serrados o
irregulares producirán conexiones incorrectas.
2 Inserte el accesorio PureFlow Press en la tubería,
con la manga de prensar incorporada, y encájelo
por completo.
3 Asegúrese de que la tubería quede
completamente insertada mediante los orificios
de inspección situados en la manga de prensar
incorporada. Una inserción completa significa
que la tubería debe quedar completamente
visible al menos en dos orificios de inspección
y parcialmente visible en el otro.
4 Para la herramienta de 1", abra completamente los
mangos de la herramienta (está previsto un cursor
para mantener abierta la mordaza). Entonces
cierre las mordazas para encajar el trinquete (antes
de cerrar las mordazas asegúrese que el cursor
esté completamente regresado).
5 Coloque la herramienta de prensado PureFlow
perpendicular a la manga de prensar, apoyándola
contra el anillo localizador de la herramienta. Para
la herramienta de 1", cierre las mordazas para
encajar el trinquete (antes de cerrar las mordazas
asegúrese que el cursor esté completamente
regresado). Asegúrese que la herramienta de
prensado PureFlow esté alineada adecuadamente
(de lo contrario, consulte el paso 7).
¡ADVERTENCIA!
La unión no queda a prueba de fugas
cuando la herramienta se ha abierto
mediante la liberación de emergencia. Debe usarse
el anillo localizador para garantizar una conexión
PureFlow Press correcta.
¡ADVERTENCIA!
Debe usarse el anillo localizador para garantizar
una conexión PureFlow Press correcta.
¡PRECAUCIÓN!
No prensar dos veces.
¡PRECAUCIÓN!
No prensar dos veces.
6 Cierre los mangos, usando el gatillo para reducir la
distancia entre los mangos, si se desea.
7 Si la herramienta de prensado PureFlow no está
alineada con el anillo localizador, use la liberación
de emergencia (usando un destornillador para
girar la liberación de emergencia) para abrir la
herramienta de prensado. Una vez liberada,
alinee la herramienta de prensado PureFlow
adecuadamente y regrese al paso 5.
8 Extienda el mango de la herramienta de prensado
PureFlow y continúe presionando hasta que se
produzca la liberación automática de la herramien-
ta al aplicar la fuerza de compresión correcta.
9 Introducir la mordaza de prensado PureFlow ade-
cuada en la herramienta de prensado y empuje el
pasador de sujeción hasta que encaje en su lugar.
10 Abra la mordaza y colóquela perpendicular sobre
la manga de prensar, apoyándola contra el anillo
localizador.
11 Iniciar el proceso de prensado; mantener
oprimido el gatillo hasta que la mordaza se abra
automáticamente.
12 Una vez finalizado el prensado, abrir la mordaza
y retirarla.
FR
Raccords sertis Viega PureFlow Press
Les produits Viega sont conçus pour être
installés par des professionnels de plomberie
et de mécanique agréés et dûment formés,
qui sont familiers avec l’utilisation et l’installation
appropriées de nos produits. L’installation par des
non-professionnels est susceptible d’entraîner
l’annulation des modalités de Viega LLC.
L'anneau de repérage d'outil doit être à la
position de l'installation en usine lors du
sertissage afin d'assurer une connexion
étanche systématique. Il pourra s’avérer néces-
saire de faire tourner l’anneau de repérage d’outil
pour éviter toute interférence entre l’anneau et
l’outil.
L'anneau de repérage d'outil doit être à la
position de l'installation en usine lors du
sertissage afin d'assurer une connexion
étanche systématique. Il pourra s’avérer néces-
saire de faire tourner l’anneau de repérage d’outil
pour éviter toute interférence entre l’anneau et
l’outil.
Si vous utilisez des outils manuels,
poursuivez avec les étapes 4 à 8. Si vous
utilisez des outils électriques, ignorez les
étapes 9 à 12.
1 Équarrissez le tuyau à la bonne longueur. Les
coupes inégales, dentelées ou irrégulières
causeront de mauvaises connexions.
2 Insérez le raccord serti PureFlow Press avec le
manchon attaché dans le tuyau et enfoncez com-
plètement.
3 Assurez-vous que le tuyau est complètement
inséré en vérifiant par les trous situés sur le
manchon serti. Une insertion complète nécessite
que les tuyaux soient entièrement visibles dans au
moins deux trous de vue et partiellement visibles
dans un trou de vue.
4 Pour l'outil 1", ouvrez entièrement les poignées de
l'outil (le cran pour le pouce permet de maintenir la
mâchoire ouverte). Refermez ensuite les mâchoires
de l'outil pour engager le cliquet (assurez-vous de
remettre le cran entièrement vers le haut avant de
fermer la mâchoire de la pince).
5 Positionnez l’outil de sertissage PureFlow perpen-
diculairement sur le manchon serti, en le reposant
contre l’anneau de repérage d’outil. Pour un outil 1",
refermez les mâchoires de l'outil pour engager le
cliquet (assurez-vous de remettre le cran entièrement
vers le haut avant de fermer la mâchoire de la pince).
Assurez-vous que l'outil de sertissage PureFlow est
bien aligné (voir l'étape 7 dans le cas contraire).
AVERTISSEMENT!
Le raccordement n’est pas étanche lorsque
l’outil a été ouvert par le relâchement
d’urgence. L’anneau de repérage d’outil doit être
en place pour garantir une bonne connexion sertie
PureFlow Press.
AVERTISSEMENT!
L’anneau de repérage d’outil doit être en place
pour garantir une bonne connexion sertie
PureFlow Press.
ATTENTION!
Ne sertissez pas à deux reprises.
ATTENTION!
Ne sertissez pas à deux reprises.
6 Fermez les poignées en utilisant la gâchette pour
réduire l’espace entre elles, le cas échéant.
7 Si l'outil de sertissage PureFlow n'est pas bien
aligné par rapport à l'anneau de repérage, utilisez
le relâchement d'urgence (utilisez un tournevis
pour tourner le relâchement d'urgence) pour ouvrir
l'outil de sertissage. Une fois relâché, alignez
correctement l'outil de sertissage PureFlow et
retournez à l'étape 5.
8 Étendez la poignée de l'outil de sertissage
PureFlow et continuez à serrer à l’aide d’un
cliquet jusqu’à ce que le relâchement automatique
de l’outil se produise à une force de compression
appropriée.
9 Insérez la mâchoire de sertissage PureFlow
appropriée dans l’outil de sertissage et poussez
tout en tenant la goupille jusqu’à ce que la
mâchoire se verrouille en place.
10 Ouvrez la mâchoire et positionnez-la
perpendiculairement sur le manchon serti, en le
reposant contre l’anneau de repérage d’outil.
11 Commencez le processus de sertissage et tenez
la gâchette jusqu’à ce que la mâchoire se relâche
automatiquement.
12 Lorsque la connexion est complètement sertie,
ouvrez la mâchoire et enlevez-la.
Other manuals for PureFlow

5

Other Viega Plumbing Product manuals

Viega 8040.18 User manual

Viega

Viega 8040.18 User manual

Viega Smart Loop Instruction sheet

Viega

Viega Smart Loop Instruction sheet

Viega 8624.1 User manual

Viega

Viega 8624.1 User manual

Viega Multiplex Trio F Series User manual

Viega

Viega Multiplex Trio F Series User manual

Viega Eco Plus User manual

Viega

Viega Eco Plus User manual

Viega 4987.41 User manual

Viega

Viega 4987.41 User manual

Viega 8611.2 User manual

Viega

Viega 8611.2 User manual

Viega Visign for Public 6 8326.15 User manual

Viega

Viega Visign for Public 6 8326.15 User manual

Viega PreVista Dry Plus 8565 User manual

Viega

Viega PreVista Dry Plus 8565 User manual

Viega Eco Plus User manual

Viega

Viega Eco Plus User manual

Viega Prevista Dry 8570.31 User manual

Viega

Viega Prevista Dry 8570.31 User manual

Viega Steptec 8467.3 User manual

Viega

Viega Steptec 8467.3 User manual

Viega 6142.33 User manual

Viega

Viega 6142.33 User manual

Viega 8139 User manual

Viega

Viega 8139 User manual

Viega 8351.1 User manual

Viega

Viega 8351.1 User manual

Viega 8570.34 User manual

Viega

Viega 8570.34 User manual

Viega Prevista Pure 8566 User manual

Viega

Viega Prevista Pure 8566 User manual

Viega Prevista 8620.2 User manual

Viega

Viega Prevista 8620.2 User manual

Viega PureFlow Press Zero Lead Instruction sheet

Viega

Viega PureFlow Press Zero Lead Instruction sheet

Viega Eco Plus User manual

Viega

Viega Eco Plus User manual

Viega BETTE Multiplex Trio F User manual

Viega

Viega BETTE Multiplex Trio F User manual

Viega Visign 4961.80 User manual

Viega

Viega Visign 4961.80 User manual

Viega 6161.52 User manual

Viega

Viega 6161.52 User manual

Viega 8655.11 User manual

Viega

Viega 8655.11 User manual

Popular Plumbing Product manuals by other brands

Kohler K-8524 installation guide

Kohler

Kohler K-8524 installation guide

Pfister Bronson LG48-BS0 Quick installation guide

Pfister

Pfister Bronson LG48-BS0 Quick installation guide

Triton T300si Installation and operating instructions

Triton

Triton T300si Installation and operating instructions

Sanela SLUN 71P Instructions for use

Sanela

Sanela SLUN 71P Instructions for use

PELHAM & WHITE PWS200-B manual

PELHAM & WHITE

PELHAM & WHITE PWS200-B manual

Helvex AC10-8 installation guide

Helvex

Helvex AC10-8 installation guide

FONTANA SENSOR FAUCETS B5081-G installation instructions

FONTANA SENSOR FAUCETS

FONTANA SENSOR FAUCETS B5081-G installation instructions

KEUCO IXMO 59551 000070 Mounting instruction

KEUCO

KEUCO IXMO 59551 000070 Mounting instruction

Pfister XSpin 020-SPNX Quick installation guide

Pfister

Pfister XSpin 020-SPNX Quick installation guide

Pfister Avalon LF-49 Series manual

Pfister

Pfister Avalon LF-49 Series manual

Bradley S19-260 Installation

Bradley

Bradley S19-260 Installation

Moen LEVEL T913 Series Specifications

Moen

Moen LEVEL T913 Series Specifications

Sentiotec Panorama Large Infra + Assembly instructions

Sentiotec

Sentiotec Panorama Large Infra + Assembly instructions

Kohler K-11344 Roughing-In Guide

Kohler

Kohler K-11344 Roughing-In Guide

MAXXMEE HY30-12 manual

MAXXMEE

MAXXMEE HY30-12 manual

Spectrum Brands Pfister Henlow LF-048-HE Quick installation guide

Spectrum Brands

Spectrum Brands Pfister Henlow LF-048-HE Quick installation guide

American Standard Signature FFAS1701-101500ZNO Installation & operation instructions

American Standard

American Standard Signature FFAS1701-101500ZNO Installation & operation instructions

Symmons Dia SLS-3512 Series Installation Brief

Symmons

Symmons Dia SLS-3512 Series Installation Brief

manuals.online logo
manuals.online logoBrands
  • About & Mission
  • Contact us
  • Privacy Policy
  • Terms and Conditions

Copyright 2025 Manuals.Online. All Rights Reserved.