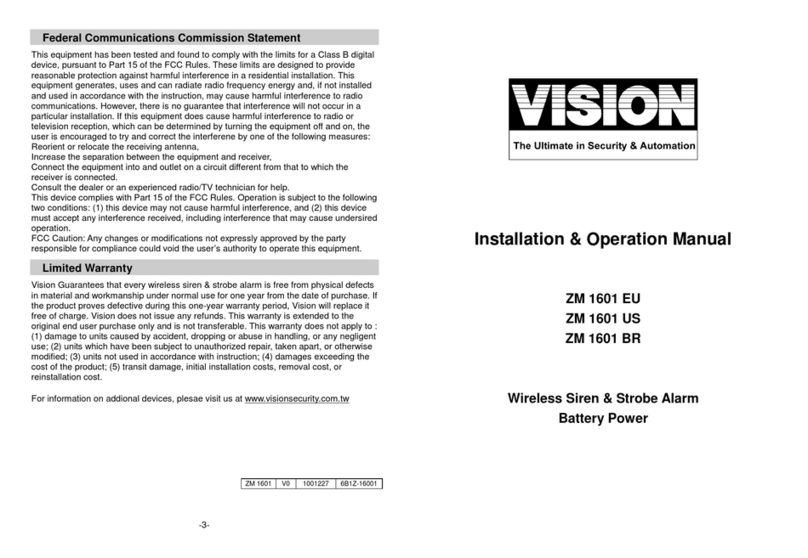
Vision 1330B User manual

Úåå+)2!-%+å).#å!ICHIå*APAN
6ERåå3EP
2-WAY PAGING SECURITY SYS TEM
1330B

4HANKå YOUå FORå PURCHASINGå THISå 6)3)/.å
"å 6EHICLEå 3ECURITYå 3YSTEMå å 4HEå
"å ISå Aå STATEå OFå THEå ARTå DEVICEå THATå
WILLå PROVIDEå YOUå WITHå YEARSå OFå TROUBLEå
FREEåSERVICEåIFåUSEDåPROPERLYå0LEASEåFA
MILIARIZEåYOURSELFåWITHåTHEåCONTENTåOFåTHISå
/WNERSå 'UIDEå TOå GETå THEå MOSTå OUTå OFå
YOURåNEWåSYSTEMå7EåTRUSTåYOUåWILLåENJOYå
USINGåTHEåPRODUCT

Úå å +) 2!-%+å).#
./4)#%å!LTHOUGHåREASONABLEåEFFORTSåHAVEåBEENåTAKENåTOåENSUREåACCURACYåINåTHISå
/WNERSå'UIDEå+IRAMEKå)NCåSHALLåNOTåBEåHELDåLIABLEåFORåANYåERRORSåOMISSIONSåPROP
ERTYåDAMAGEåORåINJURYåRESULTINGåFROMåTHEåUSEåOFåTHISåINFORMATIONåå
!LLåPRODUCTåSPECIFICATIONSåANDåFEATURESåAREåSUBJECTåTOåCHANGEåWITHOUTåNOTICE
TAB L E OF CON TENT S
,IMITEDå,IFETIMEå7ARRANTY ................................... 1
)NCLUDEDå)TEMS............................................ 2
7IRELESSå2EMOTES.......................................... 3
0AGERå5SAGEåå#ARE ....................................... 4
3YSTEMå/PERATION ......................................... 5
!RMING................................................ 5
$ISARMING ............................................. 7
0ANICå-ODE ........................................... 8
3YSTEMåh!RMEDvå&EATURES .................................. 9
'7!å'ROUNDå7HENå!RMED ............................. 9
3TAGEå3ENSORå4RIGGER................................... 9
3TATUSå,%$ ............................................. 9
3"3å3ECTORå"YPASSå3YSTEM.............................. 10
$OORå4RIGGER .......................................... 10
3TATEå-EMORY ......................................... 10
)GNITIONå4RIGGER ........................................ 11
))0å)NTELLIGENTå)GNITIONå0ROTECT .......................... 11
,IGHTå&LASH ............................................ 12
"ATTERYå"ACKUPå3IREN ................................... 12
&EATUREå0ROGRAMMING ..................................... 13
0ROGRAMå&EATURESå%XPLAINED ............................... 14
&ORCEå2ESET ............................................. 17
4RANSMITTERå,EARNING ...................................... 19
4ROUBLESHOOTING .......................................... 20

Úå å +) 2!-%+å).#
The VISION 1330B system control module is backed by a limited life-
time warranty against defective components and/or improper product
assembly to the original purchaser for as long the vehicle is owned by
that same purchaser, contingent upon installation by an Authorized VI-
SION Dealer. All product warranties become void if the VISION 1330B
system was not sold and installed by an Authorized VISION Dealer or
the system is moved to another vehicle. All other parts and/or accesso-
ries that connect to VISION 1330B systems, including the shock sensor
and status LED, are warranted for one (1) year from the original date
of purchase.
During the warranty period, Kiramek Inc. will repair or replace, at its
sole discretion, any system component that is found defective in mate-
rial or assembly during the warranty period, provided that the product
is returned to Kiramek Inc. by an Authorized VISION Dealer and is ac-
companied by a clear and legible copy of the original purchaser’s receipt.
Any damage to your VISION 1330B system that results from normal
wear-and-tear, accidents, improper use, neglect, faulty wiring, incorrect
installation, modification, removal or defacement of the product serial
number, alteration or repair outside Kiramek Inc or its Authorized VI-
SION Dealers immediately voids this warranty.
This warranty is limited to defective parts only and does not provide
any compensation whatsoever for damages associated with the VISION
1330B system or its accessories. This warranty does not cover instal-
lation labor, product removal and/or reinstallation fees. This warranty
is valid for the original purchaser only and may not be transferred to
another party. Kiramek Inc makes no warranty against theft or vandal-
ism of the vehicle in which the VISION 1330B system was installed.
This warranty shall not be interpreted as an insurance policy against
loss, nor shall Kiramek Inc be liable any in way for such loss, financial
or otherwise.
WARNING! DO NOT ATTEMPT TO INSTALL THIS VISION 1330B VISION PROD-
UCT YOURSELF BECAUSE SUCH WILL IMMEDIATELY VOID THE WARRANTY.
THIS SECURITY SYSTEM MUST BE PROFESSIONALLY INSTALLED BY YOUR AU-
THORIZED VISION DEALER TO VALIDATE YOUR WARRANTY.
Limited Lifetime Warranty

6)3)/.å " å/ 7.%23å'5)$%
1330B
INCLUDED ITEMS
#ONTROLå-ODULEåPC 0AGERå2EMOTEåPC
7AYå2EMOTEåPC
3HOCKå3ENSORåPC
'UIDESåPC
3ENSORå(ARNESSåPC
!NTENNAå(ARNESSåPC
-AINå(ARNESSåPC
3ENSORå3PLITTERåPC
!NTENNAå5NITåPC
"ACKUPå3IRENåPC
3TATUSå,%$åPC
/4(%2å).#,5$%$å)4%-3åå
• Double-Sided Mounting Tape for Antenna Unit (1pc)
• VISION Window Decals (2pcs)
• AAA Battery for Pager Remote (1pc)
• Control Module Mounting Screws (2pcs)
• Wire Ties (2pcs)
1330B

6)3)/.å " å/ 7.%23å'5)$%
WIREL ESS REMOT ES
/6%26)%7
7AYå4RANSMITTERå
PNå48"
7AYå0AGERå
PNå48"
"UTTONI
"UTTONII
"UTTONIII
&UNCTION
"UTTON
,#$
,%$
"544/.å&5.#4)/.3
Button-I• : “Normal Mode” Arm/Disarm (siren sound enabled)
Button-II• : “Silent Mode” Arm/Disarm (siren sound disabled)
Button-III• : “No Chirp” Arm/Disarm (no arm/disarm chirps)
Buttons I & II• : “Sensor Bypass” Arm
Button I or II or II (long press)• : Panic Mode
Function Button• : EL Backlight Activation (Pager only)
Function Button & Button-III• : Pager Audio/Vibration(Vibe) Toggle
0!'%2å,#$å)#/.3
BAT LOW
MUTE
"ATTERYå,/7
å(AZARDå&LASHååå
åSTå3TAGEå3ENSOR
3YSTEMå!RMED 3ILENTå-ODE
0AGERå6IBEå-ODE
$OORå/PENEDå!LERT
)GNITIONå/.å!LERT
$OORSå,OCKED
$OORSå5NLOCKED
NDå3TAGEå3ENSOR
!.4%..!

Úå å +) 2!-%+å).#
PAGER USAGE & C ARE
02%#!54)/.3
Your 2-way pager is a delicate device that can be easily damaged by exces-
sive heat, direct sunlight for extended periods, humidy, dirt, oil and water.
Never emerse your pager in water. If it gets wet, remove the battery and
allow to dry thoroughly. Never drop your pager. Strong impact can break
the LCD and/or cause internal malfunction to occur. Rough handling of the
2-way pager is not covered under warranty!
#(!.').'å4(%å"!44%29
Pager batteries last an average of 2-3 months with normal use. When the
battery needs changing, the battery low icon will appear and the pager will
beep several times. Remove the old battery then press any button for 3 sec.
and release. Now insert the new battery. Do not lose the battery cover.
#/--5.)#!4)/.å2!.'%
Your pager’s range is adversely affected by RF noise. However, the typical
in-city range is often greater than 300m (>985ft), and normal range in the
country side (or any low RF noise area) can be as high as 600m (2,000ft.).
Please keep in mind, however, that if metal objects (coins in your pocket) or
even your hand touches or surrounds the antenna, range will be adversely
affected. Also, your proximity to high-power TV station antennas and or
powerful mobile phones will also limit range.
2%30/.3)6%.%33
It typically takes up to 8 seconds before your pager will be updated with
the alert status of the vehicle (such as when the siren goes off). During
this time, the pager may become less responsive to your button presses. In
addition, the pager will not receive updates while you are pressing any but-
ton. So for example, if you press Button-I too long, the system will arm, but
your LCD may not reflect the armed status. To update your pager, simply
disarm and arm again, pressing the button for a shorter time.
å./4%
References to pager button-presses in this manual also pertain
to the 3-button transmitter (Buttons I, II or III only).

Úå å +) 2!-%+å).#
Sys tem Operation
!2-).'
./2-!,å-%4(/$åå
This method is the typical way to arm the 1330B,
with the shock sensor enabled. Ensure that all
doors are closed and then press Button-I on the Pager
remote. After you press Button-I, the doors will lock
and hazard lights will flash once (if so installed). The
siren will chirp 1 time, the Pager remote will beep once and update (see
Fig-1 below), and Status LED will light solid for 5 seconds. Triggers (sen-
sor, door, etc.) are ignored for the first 3 seconds while the LED is lit solid.
(See “Error Chirp” on the next page.)
å
3),%.4å-/$%å-%4(/$åå
This method of arming will prevent the
siren from making any sound (no con-
firmation chirps, no warning chirps, no
siren blast, etc.). Press Pager Button II
then release. The doors will lock and hazard lights
will flash once (if so installed). The Pager will beep once and update (see
Fig-2 below), and Status LED will light solid for 5 seconds. Triggers (sen-
sor, door, etc.) are ignored for the first 3 seconds while the LED is lit solid.
(See “Error Chirp” on the next page.)
0USH
"UTTONåI
$)3!2-%$ !2-%$
FIG-1: Pager LCD Icon Change After Arming
$)3!2-%$ !2-%$
FIG-2: Pager LCD Icon Change After “Silent Mode” Arming
0USH
"UTTONåII
)#/.3
&,!3(
3,/7,9
)#/.3
&,!3(
3,/7,9

6)3)/.å " å/ 7.%23å'5)$%
Sys tem Operation
./#()20å-%4(/$åå
This method of arming is identical to
the “Normal” method except there is no
siren chirp emitted after you arm. En-
sure that all doors are closed and then press
Button-III on the Pager remote. After you press But-
ton-III, the doors will lock and hazard lights will flash once (if so installed).
The Pager Remote will beep once and update (see Fig-1), and Status LED
will light solid for 5 seconds. Triggers (sensor, door, etc.) are ignored for
the first 3 seconds while the LED is lit solid. (See “Error Chirp” below.)
å
3%.3/2å"90!33å-%4(/$åå
This method of arming allows you to
disable all sensors (e.g., shock sensor)
while keeping all other alarm triggers
active (e.g., door, trunk, ignition). Press
Pager Buttons I & II at the same time then release.
The doors will lock and hazard lights will flash once (if so installed). The
siren will chirp 1 time, the Pager will beep once and update (see Fig-1),
and Status LED will light solid for 5 seconds. Triggers (sensor, door, etc.)
are ignored for the first 3 seconds while the LED is lit solid. (See “Error
Chirp” below.)
0USHå"UTTONS
I åII
0USH
"UTTONåIII
%RRORå#HIRP
When you arm the 1330B, the system ignores all trigger sectors (e.g., door,
sensor, ignition, etc.) for the first 3 seconds while Status LED is lit solid.
If there is still an unsecured sector after the 3 seconds, the siren will chirp
2 times (“error chirp”) and the hazard lights will flash twice. (In Silent
Mode, no chirps will sound.) If the unsecured sector is later secured (i.e.,
the opened door was later closed), the system will silently re-enable that
sector 5 seconds later. (Also see “Exit Delay Time Selection” on page 14.)
å./4%
You will not receive any notification on your 2-way pager dur-
ing an error chirp condition.

6)3)/.å " å/ 7.%23å'5)$%
Sys tem Operation
./#()20å-%4(/$åå
This method of disarming is identical to
the “Normal” method except there are
no siren chirps emitted after you dis-
arm. Press Pager Button-II or Button-III
then release. The doors will then unlock and hazard
lights will flash 3 times (if so installed). The Pager Remote will beep 2
times (or vibrate twice, if Vibe Mode is selected), and icons will update (see
Fig-3 above). The system is now disarmed, and you may enter the vehicle
without triggering the siren.
()'(å3%#52)49å$)3!2-
When the system is “triggering” (warn-
ing chirps, siren blast, hazard flash),
two button presses are required to dis-
arm. This feature allows you to stop the
trigger condition with only 1 press while keeping the
system armed. You can press Buttons I or II or III (see note on next page).
0USHå"UTTON
II OR III
!2-%$ $)3!2-%$
FIG-3: Pager LCD Icon Change After Disarming
$)3!2-).'
./2-!,å-%4(/$åå
This method is the typical way to disarm the
1330B, with confirmation chirps active. Press But-
ton-I on the Pager remote while the system is armed.
The doors will then unlock and hazard lights will flash
3 times (if so installed). The siren will chirp 3 times.
The Pager remote will beep 2 times (or vibrate twice, if in Vibe mode), and
icons will update (see Fig-3 below). The system is now disarmed, and you
may enter the vehicle without triggering the siren.
0USH
"UTTONåI
0USHå"UTTON
IåORåIIåORåIII
)#/.3
&,!3(
3,/7,9

Úå å +) 2!-%+å).#
0ANICå-ODE
Panic Mode allows you to trigger the the full si-
ren blast from your remote, whether the system
is armed or disarmed. Press Button-I or Button-II
or Button-III for 3 seconds. (Note that Button-II ini-
tiates “Silent Panic.”) When you release, the pager icons will update as
shown in Fig-4, and the pager will emit a siren tone (or vibrate). Vehicle
hazard lights will flash, the Status LED will flash quickly, and the siren
will go off for 30 seconds (siren will not go off if you pressed Button-II).
You can exit Panic Mode (and silence the siren) 8 seconds after you
initate Panic Mode.
Sys tem Operation
0USHå"UTTON
I ORåII OR III
FORååSEC
./2-!,å0!.)# 3),%.4å0!.)#
FIG-4: Pager LCD Icon Change During Panic Mode
)#/.3
&,!3(
2!0)$,9
å./4%
For the first 8 seconds after the pager siren tone (or vibration)
begins, you may not be able to disarm with only 2 presses. If you wait 8
seconds, two presses will always work (you can stop the siren with one
press, and disarm with the second). But during the first 8 seconds, how-
ever, it may take 3-5 presses before you can stop the siren and disarm.
4)0
The pager button you use to stop a trigger condition may change
the mode of the system. For example, if you armed with Button-II (“Silent
Mode”) and you later press Button-I while the system is triggered, trig-
gering will stop and the system will remain armed—but the system will
remain armed with the siren enabled. (The reason why is that Button-I
is “Normal Mode,” which enables the siren.)
Your first press stops the trigger (kills the siren, or kills hazard light flash
if in Silent Mode). Your second press disarms the system. (“2 presses” are
required to disarm whenever there is a system trigger, such as the siren go-
ing off.)

Úå å +) 2!-%+å).#
SYS TEM “ARMED” FEATURES
'7!å'ROUNDå7HENå!RMED
The 1330B feeds a (–) Ground output while the system is armed. Optional
components can be added to this control line, such as a Starter Kill Im-
mobilizer Relay or vehicle lighting devices. When the system is disarmed,
power to this output is removed and all attached devices shutdown. See the
Installation Guide for details on electrical specifications.
34!'%å3%.3/2å42)''%2
STå3TAGEåh7ARNINGå#HIRPSvååWhen the included shock sensor
detects a light impact to the vehicle body, the siren will chirp 5
times, the pager will beep and update icons as shown in Fig-5 be-
low. Note that any optional sensors attached to the shock sensor’s
1st Stage input can also trigger the 5 warning chirps. No siren chirps will
be produced while in Sensor Bypass Mode (or Silent Mode).
NDå3TAGEåh&ULLå3IRENvååWhen the included shock sensor de-
tects hard impact to the vehicle body, the siren will go off for 30
seconds (or until stopped by a button press on your pager remote),
and the pager will emit a siren tone and update icons as shown in
Fig-5 below. Note that any optional sensors attached to the shock sensor’s
2nd Stage input can also trigger the full siren blast sequence. The siren
will not be triggered while in Sensor Bypass Mode (or Silent Mode).
The system Status LED flashes slowly “once per second” while the system
is Armed, acting as a visual theft deterrent. The LED turns off when the
system is disarmed (unless the full siren blast had gone off).
34!453å,%$
FIG-5: Pager LCD Icon Change Upon Shock Detection
STå34!'%
)#/.3
&,!3(
2!0)$,9
NDå34!'%

6)3)/.å " å/ 7.%23å'5)$%
SYS TEM “ARMED” FEATURES
42)''%2å-%-/29
This feature informs you if the siren went off in your absence
and you were too far away for your 2-way pager to be updat-
ed about the alert. The Status LED flashes rapidly while the si-
ren is going off. When the siren stops 30 seconds later, the Status
LED will continue to flash rapidly until you disarm the system and turn on
the ignition (or until you disarm and then arm again).
When a vehicle sector (i.e., door, ignition, sensor) is triggered 8
times, the security system will automatically bypass that sector
until you disarm and arm the system again. This feature is use-
ful to prevent noise pollution caused by multiple siren triggers
in a short period of time. Parking near construction sites or having animals
jump on the vehicle can cause such shock sensor triggers to occur, espe-
cially if the sensitivity is set to maximum.
3"3å3ECTORå"YPASSå3YSTEM
$//2å42)''%2
The siren will blast for 30 seconds whenever a door is opened while the
system is armed. Vehicle hazard lights will flash if so installed, and your
pager will emit a siren tone and update icons as shown in Fig-6 below.
$//2å42)''%2
FIG-6: Pager LCD Icon Change Upon Door Trigger
)#/.3
&,!3(
2!0)$,9
34!4%å-%-/29
The 1330B remembers its armed or disarmed state if the vehicle’s battery
power is cut and later restored. However, if the system was armed when
the battery power was cut, the siren will go off when the power is restored.
(Siren will go off when power is cut only if siren is “battery backup” type.)

6)3)/.å " å/ 7.%23å'5)$%
SYS TEM “ARMED” FEATURES
))0å)NTELLIGENTå)GNITIONå0ROTECT
When you activate Remote Start Compatibility Mode,
the 1330 uses a feature called “IIP” to automatically
switch back to IG Protect Mode when needed. (IIP is
user-programmable. See “13” on page 15 for details.)
)'.)4)/.å42)''%2
)'å02/4%#4å-/$%åUSERPROGRAMMABLEåENABLEDåBYåDEFAULTåå
The siren will blast for 30 seconds when the ignition switch is turned on
while the system is armed. Vehicle lights will flash if so installed. A siren
tone will be emitted on the pager, and icons will update as shown in Fig-7
below.
2%-/4%å34!24å#/-0!4)"),)49å-/$%åUSERPROGRAMMABLE
When the ignition goes on while the system is armed, the
siren will not go off. Instead, shock sensor and ignition trig-
gers are bypassed, while door and trunk triggers remain active.
A melody tone will sound on the pager, and icons will update as shown in
Fig-7 below.
This feature allows 3rd party remote starters or turbo timer systems to run
the engine without triggering the 1330’s siren. The 1330 is still protecting
the vehicle, so any attempt to open a door will trigger the siren. And when
the remote starter or turbo timer turns off the ignition, the shock sensor
and ignition triggers are then re-activated. (A separate pager melody will
sound when IG goes off.)
ON ST
A
CC
OFF
)'.)4)/.å/.
FIG-7: Pager LCD Icon Change Upon Ignition ON
h%XHAUSTvåICONåSHOWS
)'åISåONåWHILEåARMED
)CONåDISPLAYåISåSAME
FORå)'å02/4%#4åAND
#/-0!4)"),)49å-ODES

Úå å +) 2!-%+å).#
SYS TEM “ARMED” FEATURES
7HYå))0åISå.EEDEDååMost competing “remote start / turbo timer” compat-
ible car alarms bypass all trigger inputs when the ignition goes on while
armed. If a thief opens the door the siren will go off, but the thief can then
close the door, turn on the ignition and wait. When the siren stops, he can
drive away in silence because the Ignition-ON state prevents the siren from
going off again! Yet other car alarms trigger the siren when the ignition
goes on while armed, but such is incompatible with remote start and turbo
timer systems. IIP solves this “compatibility versus security” problem.
(OWå))0å7ORKSååNormally, if the ignition is turned on while in Remote
Start Compatibility Mode, the system automatically bypasses the sen-
sor & ignition inputs but keeps door input active. However, if the 1330
was triggered before the ignition was turned on (via door or sensor), IIP
automatically switches back to IG Protect Mode and will trigger the siren
when the ignition is turned on. The siren will blast for 30 sec. and repeat
up to 7 times while the ignition remains on. (Also see “13” on page 15.)
,)'(4å&,!3(
The 1330B has two built-in light flash relays (“+” control, for left/
right turn signals), making this feature easy to install in most vehi-
cles. Note that your VISION dealer may need to change the polarity,
requiring the purchase of an optional VISION 896H-1C relay.
When installed, lights will flash continuously while the siren is going off
(during the full 30 seconds), flash 1 time during arm and 3 times during
disarm, flash 5 times during “Warning” triggers (e.g., shock sensor 1st-
stage trigger), and flash 2 times during Error Chirp.
"!#+50å"!44%29å3)2%.
Whenever the vehicle’s battery power is cut, the battery backup siren will
be triggered (only if your 1330B system came with a battery backup siren).
The full siren blast will continue to go off until either the siren’s internal
battery dies or the vehicle’s battery power is restored and you disarm the
system. Two keys are included with the siren so you can manually turn
off the backup siren — useful if your vehicle’s battery dies and the siren
goes off, or for occasions where you need to send your vehicle in for main-
tenance.

Úå å +) 2!-%+å).#
FEATURE PROGRAMMING
To program features, have your vehicle’s key ready to turn the
ignition (IG) “on-and-off” several times. (TIP: Use the “ACC” posi-
tion as IG “off” because its easier to switch.) Perform the following
3-step procedure to alter the features shown in Table-1 below:
Disarm1. the system. (Or “Arm-then-Disarm” if repeating this procedure.)
Turn2. IG on-and-off the same number of times as the feature you wish to
program (refer to “No.” in Table-1 below), within 20 sec. of disarming.
(For example, if you want to change “Auto Arm,” you must turn the IG
on-and-off 8 times within 20 sec.)
Push3. Button-I on the pager or transmitter. (Your chosen setting has
toggled. Vehicle hazard lights will then flash the same number of times
as the feature you just programmed.)
When the hazard lights finish flashing in Step-3 above, you may pro-•
gram another feature by restarting this procedure at Step-1.
./4%3
(1) After you program a feature, vehicle lights will flash the same num-
ber of times as the feature you just programmed, but there will be no indication
of the “setting” you just toggled to—simply test your 1330 system to confirm your
programming. (2) There is no “reset to factory default” feature.
4!",% &EATUREå3ELECTIONå-ENU
.O &EATUREå$ESCRIPTION 4OGGLEå3ETTINGS
)'å0ROTECTå-ODEåå2EMOTEå3TARTå#å-ODE
)'å0ROTECT 23#-
6EHICLEå,IGHTSå/.å$URINGå2EMOTEå3TART /&& /.
!UTOå!RM
/&& /.
%XITå$ELAYå4IMEå3ELECTION åSEC åMIN
!UTOå2EARM /&& /.
))0å4RIGGERå3ELECTION !LL $OOR
0AGERåST3TAGEå4RIGGERå.OTIlCATION /. /&&
)GNITION#ONTROLLEDå$OORå,OCKING /&& /.
%XTERIORå)LLUMINATION /&& /.
4RANSMITTERå,EARNINGåå&ORCEå2ESETå#ODE $EFAULTå2ESETå#ODEåå
&!#4/29å$%&!5,4å3%44).'3å3(/7.å).å"/,$å4%84å!"/6%

6)3)/.å " å/ 7.%23å'5)$%
PROGRAM FEATURES EXPL AINED
When set to /., vehicle lights will illuminate for safety while the Ignition
is turned on by a remote start system. (Only works if optional light flash is
installed, and only if 2EMOTEå3TARTå#OMPATIBILITYå-ODE is also turned /..)
When set to )'å0ROTECTå-ODE, the system will trigger the siren when the
Ignition goes on while armed, as described on page 11 of this manual.
When set to 2EMOTEå3TARTå#OMPATIBILITYå-ODEå23#-, the system will by-
pass the Shock Sensor and Ignition triggers and IIP will become active
when IG goes on while armed, as described on page 11 of this manual.
)'å0ROTECTå-ODEåå2EMOTEå3TARTå#OMPATIBILITYå-ODE
6EHICLEå,IGHTSå/.å$URINGå2EMOTEå3TARTå
This feature automatically arms the system when you do the following:
(1) Turn IG on, (2) Turn IG off, (3) Open and Close any door. Upon seeing
these events, the system will arm 20 seconds after the last door is closed.
The doors will NOT be locked (so you won’t be locked out if you leave your
keys in the car by accident), but the system will be armed. Your 2-way
pager will NOT be updated that the system is now armed.
!UTOå!RM
After Arming, there is a default åSEC delay before the system will accept
alarm triggers (e.g., door, trunk, ignition, sensor). This delay is sufficient
to let the vehicle settle after you exit and close the door so the shock sensor
will not be triggered by residual vibration. You can change this delay to
åMIN for compatibility with vehicles that have long door lock pulses or
engine cooling fans. When set to “15 min.”, The Ignition and Door input
triggers will continue to activate 3 seconds after arming, but the Sensor
input will not activate until 15 minutes after arming.
%XITå$ELAYå4IMEå3ELECTION

6)3)/.å " å/ 7.%23å'5)$%
PROGRAM FEATURES EXPL AINED
This feature automatically rearms the system 60 seconds after it is dis-
armed, unless a door is opened or the Ignition goes on during the 60 sec-
onds. Doors will be locked when the system rearms. And unlike Auto
Arm, your Pager will update when Auto Rearm arms the system. Note that
this feature is incompatible with vehicles that automatically illuminate the
dome light upon door unlock, unless the 1330B’s door input is wired directly
to the “door switch” (and not wired to “door dome light switch”). The reason
is that the system will not rearm if it sees “a door open” condition.
!UTOå2EARM
When 2EMOTEå3TARTå#OMPATIBILITYå-ODE is /., you may select which “trig-
ger sectors” IIP uses to temporarily switch the system back into IG Protect
Mode while IG is off. You have two programming choices: å!,,åswitch
to IG Protect Mode upon sensing a door open condition and/or a sensor
trigger; or å$//2 switch to IG Protect Mode upon sensing only a door
open condition.
Here is how IIP responds when set to “!,,”:
If a door is opened and/or if a sensor was triggered• , the system will au-
tomatically switch to IG Protect Mode and trigger the siren, and turning
on IG will continue to trigger the siren up to 7 times (30 sec. each time).
IIP will then automatically switch back to Remote Start Compatibility
Mode when the system is disarmed by the remote.
Here is how IIP responds when set to “$//2”:
If a door is opened• , the system will automatically switch to IG Protect
Mode and trigger the siren, and turning on IG will continue to trigger
the siren up to 7 times (30 sec. each time). IIP will then automatically
switch back to Remote Start Compatibility Mode when the system is
disarmed by the remote.
If only a sensor was triggered (no door opened)• , and later if the ignition
goes on, the siren will not go off and the shock sensor will be bypassed in
accordance with normal “Remote Start Compatibility Mode” functional-
ity (as described on page 11).
))0å4RIGGERå3ELECTION

Úå å +) 2!-%+å).#
PROGRAM FEATURES EXPL AINED
When set to
/.
(default), the 2-way pager will beep several times when-
ever there is a 1st-Stage sensor trigger, such as a light shock to the vehicle
(and the siren will chirp 5 times, if not in Silent Mode).
When set to
/&&
, the 2-way pager will not beep when there is a 1st-Stage
trigger, but the siren will continue to chirp 5 times (if not in Silent Mode).
0AGERåST3TAGEå4RIGGERå.OTIFICATION
When set to
/&&
(default), doors will not lock when the Ignition is turned
on nor unlock when the Ignition goes off (while system is disarmed).
When set to
/.
, the doors will lock 5 seconds after the Ignition is turned
on, and unlock immediately when the Ignition is turned off.
)GNITION#ONTROLLEDå$OORå,OCKING
When set to
/&&
(default), vehicle lights will not illuminate after disarm-
ing.
When set to
/.
, vehicle lights will flash 3 times upon disarming and then
light solid for 30 seconds (or until the Ignition switch is turned on) to illu-
minate the area surrounding the vehicle for greater security.
%XTERIORå)LLUMINATION
When you turn the Ignition on-and-off 20 times, you can then select one
of two features: (1) Transmitter Learning or (2) Force Reset Code. The
Transmitter Learning feature allows you to add new transmitters to your
system. The Force Reset Code feature allows you to program a unique code
that will allow you to disarm the system even without your transmitter.
The factory default Force Reset Code is “6,” but you should change this as
soon as possible to your own unique code for greater security.
To choose Force Reset Code, you must turn the Ignition on again (for the
21st time), and then leave the Ignition on—follow steps given on page 17.
Transmitter Learning is done with the Ignition turned off (no need to turn
it on for the 21st time)—follow steps given on page 19.
4RANSMITTERå,EARNINGåå&ORCEå2ESETå#ODE

Úå å +) 2!-%+å).#
FORCE RESET
In the event the battery in your remote dies or the remote itself is lost, the
1330B can be manually reset (i.e., “disarmed”) using a secure procedure.
0URPOSE
The default Reset Code is factory set to “6.” It is strongly recommended
that you change this code to something unique soon after your 1330B sys-
tem is installed.
The following procedure will allow you to change the Reset Code:
Perform Steps 1 & 2 as described on page 13, turning the Ignition on-1.
and-off 20 times. Hazard lights will then flash 20 times.
After the vehicle hazards flash 20 times, turn IG on and leave it on.2.
The Status LED will light solid for 20 seconds and then it will start to3.
flash very slowly (up to 30 times). Decide beforehand what code you
want to program (1~30). When the number of flashes matches the code
you wish to program, quickly turn off IG. The Status LED will now flash
the same number of times as the Reset Code you just programmed, and
the siren will chirp 3 times and vehicle hazards will flash 3 times.
./4% Make time now to record your new Reset Code and store it in
a safe place.
0ROGRAMMINGå9OURå5NIQUEå2ESETå#ODE
With the system armed, open the driver’s side door.1. The siren will now
go off.
With the door still open, turn the Ignition ON and2.
OFF the same number of times as the Reset Code you
programmed. (If no unique Reset Code has been pro-
grammed, then turn the Ignition ON and OFF 6 times.)
When the siren finishes sounding for 30 seconds, the siren will turn off
and the system will then be disarmed.
5SINGå9OURå2ESETå#ODEåTOå$ISARM
ON ST
A
CC
OFF
Table of contents
Other Vision Security System manuals

Vision
Vision ZM 1602 IN-5 User manual

Vision
Vision ZM1601 User manual

Vision
Vision ZM 1601 EU User manual

Vision
Vision V-LED1 User manual

Vision
Vision V-LCD1 User manual

Vision
Vision ZM1621MY-5 User manual

Vision
Vision ZM 1602 US User manual

Vision
Vision VISEZM1601-5 User manual

Vision
Vision ZM1601IN-5 User manual

Vision
Vision XDVR2POSM User manual
Popular Security System manuals by other brands

ChinaPST
ChinaPST PST-G10A user manual

Secure Care
Secure Care KinderGUARD ID installation manual

Honeywell
Honeywell PROSiXSIRENO Installation and setup guide

Dynacord
Dynacord PROMATRIX 9000 Release notes

Honeywell
Honeywell ADEMCO VISTA-40 Installation and setup guide

Orion
Orion SC144 Quick installation guide