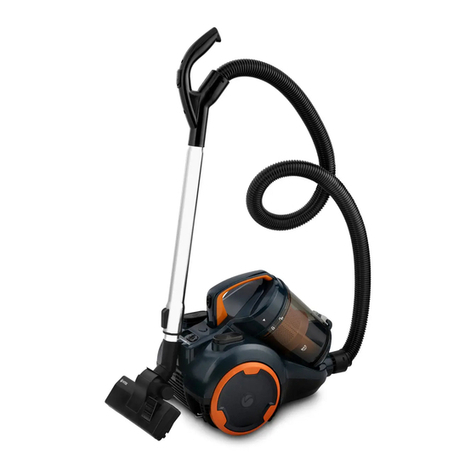
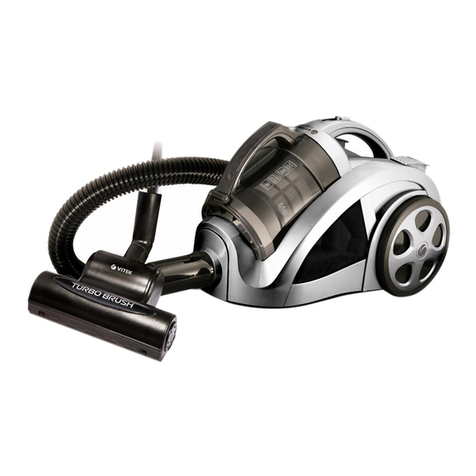
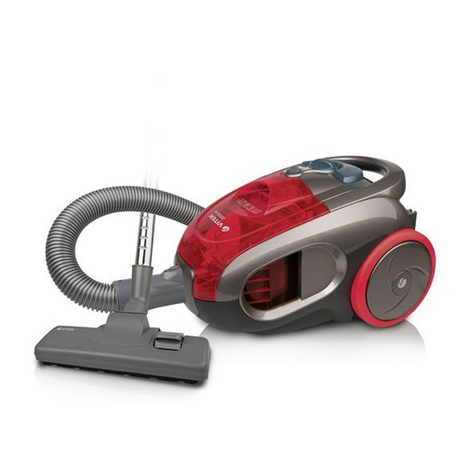
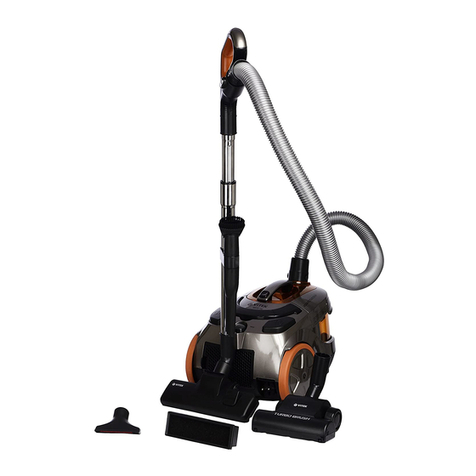
Vitek VT-1894 G/OR User manual

A VITEK АУДИО-ВИДЕО И
БЫТОВАЯ ТЕХНИКА
VT-1894 G/OR
Vacuu cleaner
Пылесос
Инструкция по эксплуатации
Ш Manual instruction 3
1ИЯ Die betriebsanweisung 7
ППН Инструкция по эксплуатации 11
1Я Пайдалану нускасы 16
ЕД Ыструкщя з експлуатацм 20
VT-1894.indd 1 25.05.2015 12:34:07


ENGLISH
VACUUM CLEANER
This unit is intended for room cleaning.
Description
1. Floor/carpet brush
2. “Floor/carpet” switch
3. Telescopic pipe loc
4. Telescopic extension pipe
5. Manual suction air flow power
6. Flexible hose handle
7. Flexible hose
8. Flexible hose ending
9. Air inlet
10. Dust bin handle/vacuum cleaner carrying
handle
11. Dust bin
12. Dust bin release button
13. On/Off button
14. Suction power control
15. Brush storage
16. Outlet filter grid
17. Outlet HEPA-filter
18. Power cord winding button
19. Dust bin lid
20. Inlet filter
21. Separator
22. Dust bin flas
23. Dust bin lower lid
24. Lower lid loc
25. Protective filter
26.Combined attachment: crevice nozzle/
dust attachment
ATTENTION!
For additional protection you can install a residual
current device with nominal operation current not
exceeding 30 mA into the mains; contact specialist
for installation.
SAFETY MEASURES
Read this instruction manual carefully before using
the unit and eep it for the whole operation period.
Mishandling the unit can lead to its brea age
and cause harm to the user or damage to his/her
property.
To reduce the hazard of fire and to prevent an electric
shoc or injury observe the safety measures given
below.
• Use the device in strict accordance with the in
struction manual.
• Before connecting the unit to the mains, ma e
sure that voltage specified on the unit corre
sponds to your home mains voltage.
• To avoid fire do not use adapters for connecting •
the unit to the mains.
• Do not leave the plugged in vacuum cleaner un
attended.
• To reduce hazard of electric shoc , do not use
the vacuum cleaner outdoors. Unplug the vac
uum cleaner every time before cleaning and
when you do not use it.
• To avoid damages transport the unit only in origi
nal pac age.
• Do not touch the power plug or the body of the
vacuum cleaner with wet hands.
• Hold the winding cord with hand to avoid the plug
hitting against the floor.
• Do not cover the unit outlet with any objects.
• Do not switch the unit on if any of its air openings
are bloc ed.
• Keep hair, free hanging clothes, fingers and other
parts of your body away from the vacuum cleaner
suction opening.
• Do not disconnect the unit from the mains by
jer ing the power plug from the soc et. When
unplugging the unit, hold the plug, do not pull
the cord.
• Be especially cautious while cleaning the stair
landings.
• Do not use the vacuum cleaner for collecting of
such highly inflammable liquids as gasoline and
solvents. Do not use the unit in the places where
such liquids are stored.
• Do not use the vacuum cleaner for collecting
burning or smo ing cigarettes, matches, cinders
as well as fine dust, for example, of plaster, con
crete, flour or ashes.
• Do not use the vacuum cleaner, if:
- the dust bin is not installed or improperly as
sembled;
- inlet, outlet and protective filters are not installed.
• Ma e sure regularly that the power cord and the
plug are not damaged.
• For children safety reasons do not leave polyeth
ylene bags, used as a pac aging, unattended.
• Attention! Do not allow children to play with
polyethylene bags or packaging film. Danger of
suffocation!
• Never allow children to use the unit as a toy.
Close supervision is necessary when children
or disabled persons are near the operating unit.
• This unit is not intended for usage by children
or disabled persons unless they are given all
the necessary and understandable instructions
by a person who is responsible for their safety
on safety measures and information about dan
ger that can be caused by improper usage of
the unit.
Do not use the power cord or flexible hose as a
handle for carrying the vacuum cleaner, do not
3
VT-1894.indd 3 25.05.2015 12:34:09

ENGLISH
close the door if the power cord runs through
the doorway, do not let the power cord come in
contact with sharp edges or corners of furniture.
Do not roll over the power cord with the vacuum
cleaner while room cleaning - it can damage the
cord.
• Never use the vacuum cleaner if the power cord
or the power plug is damaged, the unit wor s im
properly or after it was dropped. Do not try to re
pair the unit by yourself. Contact an authorized
service center for all repair issues.
THE UNIT I INTENDED FOR HOU EHOLD U AGE
ONLY
PRECAUTIONS
• If the suction power of the vacuum cleaner de
creases rapidly while cleaning, switch it off imme
diately, remove the power plug from the soc et
and chec the telescopic pipe and the flexible
hose for obstruction. Remove the obstruction
and only then you can continue cleaning.
• Do not use the vacuum cleaner near hot sur
faces, ashtrays and in the places where inflam
mable liquids are stored.
ASSEMBLING THE VACUUM CLEANER
After unit transportation or storage at low
temperature it is necessary to keep it for at
least two hours at room temperature before
switching on.
• Unpac the vacuum cleaner completely and
chec it for damages. In case of any damages do
not switch the vacuum cleaner on or use it.
• Before switching the vacuum cleaner on for the
first time ma e sure that your home mains volt
age corresponds to the vacuum cleaner operat
ing voltage.
• Always switch the vacuum cleaner off and unplug
it while replacing the brush-attachments and
during maintenance.
Attaching and re oving the flexible hose
• Insert the flexible hose ending (8) into the air in
let (9), matching the ledges on the ending with
the grooves in the air inlet, and turn the ending
cloc wise until loc ing.
• To remove the flexible hose turn the flexible
hose ending (8) countercloc wise and detach
the hose.
Attaching the telescopic pipe and the brush-
attach ents
• Attach the telescopic extension pipe (4) to the
handle of the flexible hose (6). Extend the lower
part of the telescopic extension pipe to the re
quired length, having preliminarily pressed the
button of the loc (3). Choose the necessary at
tachment - floor/carpet brush (1), turbo brush
(26) or combined attachment (27) - and attach it
to the telescopic extension pipe (4).
Floor/carpet brush (1)
Set the switch (2) on the brush (1) to the required
position (depending on the type of the surface being
cleaned).
Co bined attach ent (26)
This attachment is intended not only for cleaning
radiators, crevices, corners and space between
cushions, but also for collecting dust from furniture
surface as well; pile prevents the damage of polished
furniture surface.
Note: Always switch the vacuum cleaner off and
take the power plug out of the socket before
replacing the brush attachments and cleaning the
dust bin (11).
USING THE VACUUM CLEANER
Attention! Always switch the vacuum cleaner
on only with the dust bin 11), inlet filter 20),
outlet HEPA-filter 17) and protective 25) filter
installed. Always check if the dust bin 11) is
assembled properly and the filters 17, 20, 25)
are installed properly.
• Before using the unit, unwind the power cord to
the required length and insert the power plug into
the mains soc et. The yellow mar on the power
cord warns about the maximum cord length. Do
not unwind the power cord further than the red
mar .
• Press the on/off button (13) to switch the vacuum
cleaner on.
• During the operation you can control the suc
tion power using the suction power control (14)
and air flow power control (5) on the flexible hose
handle (6).
• After the unit operation switch the vacuum
cleaner off by pressing the button (13) and un
plug the unit.
• To wind the power cord press and hold the button
(18), hold the winding cord with hand to avoid its
whipping and damage.
• Between operations use the brush storage (15).
• Use the handle (10) for carrying the vacuum
cleaner or the dust bin (11).
AUTO SWITCH-OFF FUNCTION
• The vacuum cleaner is equipped with auto
switch-off function in case of motor overheating.
4
VT-1894.indd 4 25.05.2015 12:34:09

ENGLISH
• In case of motor overheating, the automatic ther
mal switch will be on, and the vacuum cleaner will
be switched off.
• In this case remove the power plug from the
mains soc et immediately.
• Chec the telescopic pipe and flexible hose for
obstruction and remove if any.
• Let the vacuum cleaner cool down for at least 30
minutes before switching it on again.
• Connect the unit to the mains, switch it on, if the
vacuum cleaner can not be switched on, this may
mean, that it is otherwise damaged. In this case
contact the authorized service center for repair.
CLEANING AND CARE
Remove garbage and dust from, disassemble and
clean the dust bin (11) after every usage of the
vacuum cleaner.
Start cleaning only after removing dust and garbage
from the dust bin (11).
Re oving of the dust bin (11) and re oval of
dust and garbage fro it
• Switch the vacuum cleaner off by pressing the
on/off button (13) and unplug it. Holding the
handle (10), press the release button (12) and re
move the dust bin (11).
• Place the dust bin over a garbage bin. Open the
lid (23) by pressing the lid loc (24). Remove ac
cumulated dust and garbage from the dust bin
(11).
Disasse bling and cleaning of the dust bin (11)
• Switch the vacuum cleaner off and unplug it,
ta e the dust bin (11) off, remove dust and gar
bage from it.
• Holding the dust bin (11) by the flas (22), turn
the lid (19) countercloc wise and ta e it off.
• Ta ing the inlet filter (20) by the ledges, turn it
countercloc wise to UNLOCK and remove it.
• Clean the inlet filter (20) from dust, to do this
remove the foam filter from the filter (20) body,
wash the filter itself and the foam filter under a
warm water jet and dry them thoroughly.
• Turn the separator (21) countercloc wise and re
move it. Wash the separator (21) and the flas
(22) under warm water jet and dry them thor
oughly.
ATTENTION! Before assembling the dust bin
make sure that all removable parts are clean
and dry.
Asse bling of the dust bin (11)
• Insert the separator (21) with corresponding
shape flas (22). Match the ledges on the sepa
5
rator (21) with the grooves of the flas (22) and
turn the separator cloc wise all the way.
• Install the foam filter into the inlet filter body (20).
• Place the inlet filter (20) on the separator (21),
having matched the ledges on the filter with the
grooves on the separator, and rotate the filter
cloc wise towards LOCK.
• Install the lid of the dust bin (19) matching the
ledges on the lid (19) with the grooves on the
dust bin flas (22) and turn the lid (19) cloc wise
as far as it will go, the dust bin release button (12)
should be opposite the lower lid loc (24).
• Install assembled dust bin (11) to its place until
the loc (12) clic s.
Cleaning the outlet HEPA-filter
Clean the outlet HEPA-filter (17) regularly.
• Ta e the outlet filter grid (16) off by pressing the
loc .
• Remove the HEPA-filter (17), wash it under a
warm water jet and dry it thoroughly.
• Install the HEPA filter (17) bac to its place.
• Install the grid (16) to its place.
Cleaning the protective filter (25)
If the protective filter (25) is visibly dirty, ta e it out,
wash it, dry it thoroughly and install it bac to its
place.
Note:
- Do not wash the filters (17, 20, 25), the separator
(21) and the flas (22) in a dishwashing machine.
- Before installing the filters (17, 20) ma e sure
that they are dry.
- Do not dry the filters (17, 20, 25) and other re
movable parts with a hairdryer.
Attention! Keep the filters clean, because the
overall performance of the vacuum cleaner
depends on it; clean the filters no less than
3-4 times a year, and more often at severe
obstruction.
Cleaning the vacuu cleaner body
• Wipe the vacuum cleaner body with a soft, slightly
damp cloth and then wipe it dry.
• Do not immerse the body of the vacuum cleaner,
the power cord and the power plug of the unit into
water or other liquids. Provide that no water gets
inside the vacuum cleaner body.
• Never use solvents or abrasives to clean the sur
face of the vacuum cleaner.
STORAGE
• Before ta ing the vacuum cleaner away for stor
age, clean its body, the dust bin (11) and the fil
ters (17, 20, 25).
VT-1894.indd 5 25.05.2015 12:34:09
Table of contents
Languages:
Other Vitek Vacuum Cleaner manuals

Vitek
Vitek VT-1818 GY User manual

Vitek
Vitek VT 1838 Series User manual

Vitek
Vitek VT-8119 User manual

Vitek
Vitek VT-1848 R User manual

Vitek
Vitek VT-1809 User manual

Vitek
Vitek VT-8116 User manual

Vitek
Vitek VT-1891 User manual

Vitek
Vitek VT-1803 User manual

Vitek
Vitek VT-1807 User manual

Vitek
Vitek VT-1885 B User manual

Vitek
Vitek VT-1805 User manual

Vitek
Vitek VT-1830 SR User manual

Vitek
Vitek VT-8120 User manual

Vitek
Vitek VT-1808 B/GY User manual

Vitek
Vitek VT-1802 User manual

Vitek
Vitek VT-8138 User manual

Vitek
Vitek VT-1803 B User manual

Vitek
Vitek VT-1894 OR User manual

Vitek
Vitek VT-1822 SR Simple manual

Vitek
Vitek Tornado VT-1824 SR User manual