manuals.online logo
Brands
  1. Home
  2. •
  3. Brands
  4. •
  5. Weslo
  6. •
  7. Elliptical Trainer
  8. •
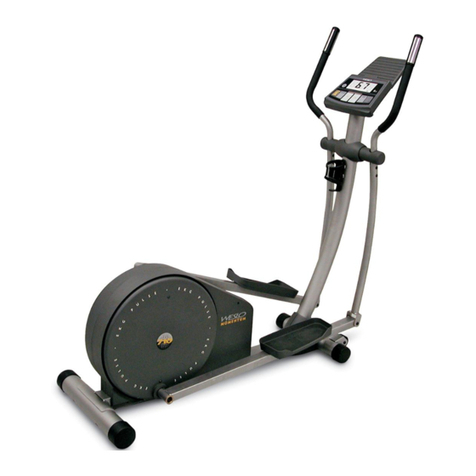
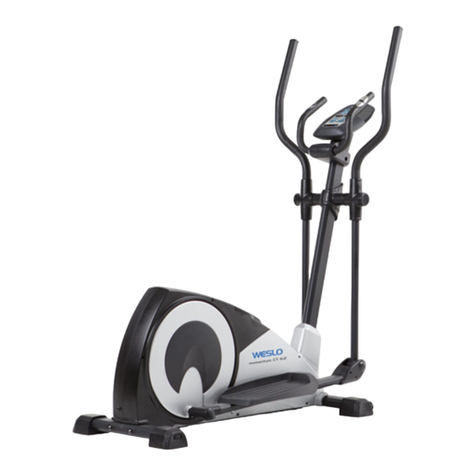
  9. Weslo Momentum5.0 Elliptical User manual

Weslo Momentum5.0 Elliptical User manual

Other manuals for Momentum5.0 Elliptical

1

This manual suits for next models

2

Other Weslo Elliptical Trainer manuals

Weslo ALTA User manual

Weslo

Weslo ALTA User manual

Weslo Momentum 405 Elliptical Operating and maintenance manual

Weslo

Weslo Momentum 405 Elliptical Operating and maintenance manual

Weslo Momentum 605 Elliptical Operating and maintenance manual

Weslo

Weslo Momentum 605 Elliptical Operating and maintenance manual

Weslo WLEX31212.0 User manual

Weslo

Weslo WLEX31212.0 User manual

Weslo Momentum5.9 Elliptical User manual

Weslo

Weslo Momentum5.9 Elliptical User manual

Weslo Momentum 850 Elliptical User manual

Weslo

Weslo Momentum 850 Elliptical User manual

Weslo Momentum 4.0 Elliptical User manual

Weslo

Weslo Momentum 4.0 Elliptical User manual

Weslo Momentum R 7.8 Elliptical User manual

Weslo

Weslo Momentum R 7.8 Elliptical User manual

Weslo WLEL19022 User manual

Weslo

Weslo WLEL19022 User manual

Weslo Momentum 710 Elliptical User manual

Weslo

Weslo Momentum 710 Elliptical User manual

Weslo Momentum 800 Elliptical Operating and maintenance manual

Weslo

Weslo Momentum 800 Elliptical Operating and maintenance manual

Weslo WLEL71807.0 User manual

Weslo

Weslo WLEL71807.0 User manual

Weslo Body Shop 9 User manual

Weslo

Weslo Body Shop 9 User manual

Weslo Momentum 745 Elliptical User manual

Weslo

Weslo Momentum 745 Elliptical User manual

Weslo Skier Plus WLUVSK10160 User manual

Weslo

Weslo Skier Plus WLUVSK10160 User manual

Weslo Momentum 4.8 Elliptical User manual

Weslo

Weslo Momentum 4.8 Elliptical User manual

Weslo Momentum CT 5.9 User manual

Weslo

Weslo Momentum CT 5.9 User manual

Weslo Eclipse 2 Elliptical User manual

Weslo

Weslo Eclipse 2 Elliptical User manual

Weslo Momentum 4.0 Elliptical User guide

Weslo

Weslo Momentum 4.0 Elliptical User guide

Weslo gllider III User manual

Weslo

Weslo gllider III User manual

Weslo Momentum 605 Elliptical Quick start guide

Weslo

Weslo Momentum 605 Elliptical Quick start guide

Weslo Momentum 605 Elliptical User manual
Weslo

Weslo Momentum 605 Elliptical User manual

Weslo Momentum 800 Elliptical System manual

Weslo

Weslo Momentum 800 Elliptical System manual

Weslo Momentum 800 Elliptical Quick start guide

Weslo

Weslo Momentum 800 Elliptical Quick start guide

Popular Elliptical Trainer manuals by other brands

NordicTrack AudioStrider 990 PRO NTEL09811.2 user manual

NordicTrack

NordicTrack AudioStrider 990 PRO NTEL09811.2 user manual

Progear Fitness Air elliptical pro 1307 owner's manual

Progear Fitness

Progear Fitness Air elliptical pro 1307 owner's manual

Torque Fitness XPLLP owner's manual

Torque Fitness

Torque Fitness XPLLP owner's manual

Octane Fitness PRO3700C Operation manual

Octane Fitness

Octane Fitness PRO3700C Operation manual

Xterra FS5.8e owner's manual

Xterra

Xterra FS5.8e owner's manual

Bodyguard E-40 user manual

Bodyguard

Bodyguard E-40 user manual

Vision Fitness X6600iNetTV Assembly guide

Vision Fitness

Vision Fitness X6600iNetTV Assembly guide

NordicTrack E 7.2 Elliptical null

NordicTrack

NordicTrack E 7.2 Elliptical null

NordicTrack E4.1 Elliptical null

NordicTrack

NordicTrack E4.1 Elliptical null

NordicTrack E4.1 Elliptical null

NordicTrack

NordicTrack E4.1 Elliptical null

Pro-Form 690 Hr Elliptical null

Pro-Form

Pro-Form 690 Hr Elliptical null

Pro-Form 800 Hr Heart Rate Control Elliptical null

Pro-Form

Pro-Form 800 Hr Heart Rate Control Elliptical null

Bonn Germany Concept 2.2 user manual

Bonn Germany

Bonn Germany Concept 2.2 user manual

Precor Resolute RSL 620 Assembly guide

Precor

Precor Resolute RSL 620 Assembly guide

NordicTrack E 9.2 Elliptical HASZNALATI UTASITAS

NordicTrack

NordicTrack E 9.2 Elliptical HASZNALATI UTASITAS

Sears FREE SPIRIT C249 30737 0 owner's manual

Sears

Sears FREE SPIRIT C249 30737 0 owner's manual
True FS-64 Assembly manual

True

True FS-64 Assembly manual

Sport-thieme ST 310 manual

Sport-thieme

Sport-thieme ST 310 manual

manuals.online logo
manuals.online logoBrands
  • About & Mission
  • Contact us
  • Privacy Policy
  • Terms and Conditions

Copyright 2025 Manuals.Online. All Rights Reserved.

CAUTIO
Read all precautions and instruc-
tions in this manual before using
this equipment. Keep this manual
for future reference.
Model o. 831.29763.0
Serial o.
Write the serial number in the
space above for reference.
Serial Number
Decal
• Assembly
• Operation
• Maintenance
• Part List and Drawing
Sears, Roebuck and Co.
Hoffman Estates, IL 60179
ELLIPTICAL EXERCISER
Userʼs Manual
2
WAR I G DECAL PLACEME T
This drawing shows the location(s) of the warning
decal(s). If a decal is missing or illegible, call
1-866-699-3756 and request a free replace-
ment decal. Apply the decal in the location
shown. Note: The decal(s) may not be shown at
actual size.
TABLE OF CO TE TS
WARNINGDECA P ACEMENT ..............................................................2
IMPORTANTPRECAUTIONS ................................................................3
BEFOREYOUBEGIN ......................................................................4
ASSEMB Y ...............................................................................5
HOWTOUSETHEE IPTICA .............................................................15
MAINTENANCEANDTROUB ESHOOTING ...................................................19
EXERCISEGUIDE INES ...................................................................21
PART IST ..............................................................................22
EXP ODEDDRAWING ....................................................................23
ORDERINGREP ACEMENTPARTS ..................................................BackCover
90DAYFU WARRANTY ..........................................................BackCover
3
WAR I G: To reduce the risk of serious injury, read all important precautions and
instructions in this manual and all warnings on your elliptical before using your elliptical. Sears
assumes no responsibility for personal injury or property damage sustained by or through the use of
this product.
IMPORTA T PRECAUTIO S
1. Before beginning any exercise program,
consult your physician. This is especially
important for persons over age 35 or
persons with pre-existing health problems.
2. Use the elliptical only as described in this
manual.
3. It is the responsibility of the owner to ensure
that all users of the elliptical are adequately
informed of all precautions.
4. The elliptical is intended for home use only.
Do not use the elliptical in a commercial,
rental, or institutional setting.
5. Keep the elliptical indoors, away from
moisture and dust. Do not put the elliptical in
a garage or covered patio, or near water.
6. Place the elliptical on a level surface, with at
least 3 ft. (0.9 m) of clearance in the front
and rear of the elliptical and 2 ft. (0.6 m) on
each side. To protect the floor or carpet from
damage, place a mat under the elliptical.
7. Inspect and properly tighten all parts
regularly. Replace any worn parts
immediately.
8. Keep children under age 12 and pets away
from the elliptical at all times.
9. The elliptical should not be used by persons
weighing more than 250 lbs. (113 kg).
10. Wear appropriate clothes while exercising;
do not wear loose clothes that could become
caught on the elliptical. Always wear athletic
shoes for foot protection while exercising.
11. Hold the handlebars or the upper body arms
when mounting, dismounting, or using the
elliptical.
12. The pulse sensor is not a medical device.
Various factors may affect the accuracy of
heart rate readings. The pulse sensor is
intended only as an exercise aid in
determining heart rate trends in general.
13. The elliptical does not have a freewheel; the
pedals will continue to move until the
flywheel stops. Reduce your pedaling speed
in a controlled way.
14. Keep your back straight while using the
elliptical; do not arch your back.
15. Over exercising may result in serious injury
or death. If you feel faint or if you experience
pain while exercising, stop immediately and
cool down.
4
BEFORE YOU BEGI
Pulse Sensor
Upper Body Arm
Pedal Disc
*Water bottle is not included
Pedal
Wheel
Console
Water Bottle Holder*
eveling Foot
Handlebar
Thank you for selecting the new WES O®
MOMENTUM CT 5.0 elliptical. The MOMENTUM CT
5.0 provides a selection of features designed to make
your workouts at home more effective and enjoyable.
For your benefit, read this manual carefully before
you use the elliptical. If you have questions after
reading this manual, please see the back cover of this
manual. To help us assist you, note the product model
number and serial number before contacting us. The
model number and the location of the serial number
decal are shown on the front cover of this manual.
Before reading further, please familiarize yourself with
the parts that are labeled in the drawing below.
5
M10 Split
Washer (45)–4
M
M10
Washer (83)–2
M8 Locknut
(38)–8
Small Wave
Washer (69)–2
M5 Split
Washer (28)–6
M8 x 25mm Patch
Screw (56)–2
M8 Washer
(55)–2
M6 Bolt Set (25)–2
Large Wave
Washer (76)–2
M4 x 16mm
Self-tapping
Screw (52)–12
M10 x 78mm Button
Bolt (34)–4
M10 x 20mm Patch
Screw (7)–4
M10 x 25mm
Patch Screw (40)–2
M8 x 80mm Patch
Bolt (79)–2
M8 x 43mm Button
Bolt (50)–6
#10 x 16mm
Screw (27)–6
ASSEMBLY
Assembly requires two persons. Place all parts of the elliptical in a cleared area and remove all packing mate-
rials; do not dispose of the packing materials until assembly is completed.
In addition to the included tool(s), assembly requires a Phillips screwdriver , an adjustable
wrench , and a rubber mallet .
See the drawings below to identify the small parts needed for assembly. The number in parentheses below each
drawing is the key number of the part, from the PART IST near the end of this manual. The number following
the key number is the quantity needed for assembly. ote: If a part is not in the hardware kit, check to see if
it has been preassembled. If a part is missing, please call 1-866-699-3756. To avoid damaging parts, do
not use power tools for assembly.
6
2. Insert the Front Stabilizer Cover (68) into the
Front Stabilizer (63).
Attach the Front Stabilizer Cover (68) with two
M4 x 16mm Self-tapping Screws (52).
3. While a second person lifts the rear of the
Frame (1), attach the Rear Stabilizer (9) to the
Frame with two M10 x 78mm Button Bolts (34).
2
1.
Identify the Front Stabilizer (63), which has a
Wheel (21) on each end.
Orient the Front Stabilizer (63) so that the small
holes face downward.
While a second person lifts the front of the
Frame (1), attach the Front Stabilizer (63) to the
Frame with two M10 x 78mm Button Bolts (34).
63
21
21
34
Small
Holes
1
63
52
68
1
To make assembly easier, read the
information on page 5 before you begin.
3
34
9
1
7
4. Insert the Rear Stabilizer Cover (67) into the
Rear Stabilizer (9).
Attach the Rear Stabilizer Cover (67) with two
M4 x 16mm Self-tapping Screws (52).
4
52
9
67
5
5. Orient the Upright (2) as shown. Have a second
person hold the Upright near the Frame (1).
See the inset drawing. ocate the wire tie in
the Upright (2). Tie the lower end of the wire tie
to the Wire Harness (73). Then, pull the upper
end of the wire tie until the Wire Harness is
routed through the Upright.
Tip: To prevent the Wire Harness (73) from
falling into the Upright (2), secure the Wire
Harness with the wire tie.
Tip: Avoid pinching the Wire Harness (73).
Slide the Upright (2) onto the Frame (1). 2
73
1
1
2
73
Wire Tie
Wire Tie
Avoid pinching the
Wire Harness (73)
8
7
7. Attach the Water Bottle Holder (29) to the
Upright (2) with two M4 x 16mm Self-tapping
Screws (52).
2
29
52
6
6. Attach the Upright (2) to the Frame (not shown)
with four M10 x 20mm Patch Screws (7) and
four M10 Split Washers (45). Do not tighten
the Patch Screws yet.
2
745
45 7
9
9
23
Screw
Batteries
Battery Cover
9. The Console (23) requires four AA batteries (not
included); alkaline batteries are recommended.
IMPORTA T: If the Console has been
exposed to cold temperatures, allow it to
warm to room temperature before inserting
batteries. Otherwise, you may damage the
console displays or other electronic compo-
nents. Remove the battery cover and insert the
batteries into the battery compartment. Make
sure to orient the batteries as shown by the
diagram inside the battery compartment.
Then, reattach the battery cover.
8. Identify the eft and Right Handlebars (85, 86),
which are marked with “ eft” and “Right” stick-
ers.
Have a second person hold the eft and Right
Handlebars (85, 86) near the Upright (2).
See the inset drawing. ocate the wire tie in
the right side of the Upright (2). Tie the lower
end of the wire tie to the right Pulse Wire (84).
Then, pull the upper end of the wire tie upward
out of the top of the Upright. Repeat this
action on the left side of the Upright.
Tip: Avoid pinching the wires. Attach the eft
and Right Handlebars (85, 86) to the Upright (2)
with two M8 x 80mm Patch Bolts (79) and two
M8 ocknuts (38).
8
85 38
86 79
86
2
84
84
38 Wire Tie
Wire Tie
2
Avoid pinching
the wires
84
10
10. Attach the Rear Upright Cover (75) to the eft
and Right Handlebars (85, 86) with two M4 x
16mm Self-tapping Screws (52). Do not fully
tighten the Screws yet.
10
85
75
52
86
11. Untie and discard the wire ties on the Wire
Harness (73) and the Pulse Wires (84).
While a second person holds the Console (23)
near the Upright (2), connect the console wires
to the Wire Harness (73), to the Ground Wire
(90), and to the Pulse Wires (84).
Insert the excess wire into the Console (23) or
into the Upright (2).
11 23
2
84
73
90