manuals.online logo
Brands
  1. Home
  2. •
  3. Brands
  4. •
  5. Winix
  6. •
  7. Air Cleaner
  8. •
  9. Winix XQ Pro User manual

Winix XQ Pro User manual

WHERE TO USE
12~18 in 12~18 in
Allow 12 ~ 18 in. of space between TVs, radios, and other
electronics
Electromagnetic interference from certain electronics may
cause product malfunction.
Place indoors away from direct sunlight
Direct exposure may cause product malfunction or failure.
Only place on hard, flat surfaces
Flimsy or slanted surfaces may result in abnormal noise and
vibrations.
Allow 12 ~ 18 in. from walls for maximum air flow
Grill
Button Control Section
Display
CD Carbon Filter
Rear Panel
Side Vent
Pre-Filter
Front Panel
True HEPA Filter
Air Quality Indicator
(2) Pre-Filter
(2) CD Carbon Filters
(2) True HEPA Filters
Unit
User
Manual
Alexa Setup Guide /
Wi-Fi Setup Guide
MODEL PART DIAGRAM
DISPLAY 01
06
07 08
02 03 04 05
01 02 03 04 05 06 07
CONTROLS
01. Child Lock Indicator
LED light indicates whether Child Lock mode is
enabled or disabled.
02. Timer Indicator
If the timer has been set, the LED light indicates
the set time of operation.
03. Wi-Fi Indicator
Indicates whether Wi-Fi Mode is enabled or disabled.
01. Wi-Fi / Pairing Button
• A quick press will turn Wi-Fi on/off.
• A long press of 3 seconds will activate pairing mode.
• A Wi-Fi indicator will display on the front while
Wi-Fi is active.
02. Filter Life / Filter Reset Button
• A quick press will show the remaining filter
life; indicated on the front display (100 ~ 0%).
• A long press of 10 seconds will reset the filter
life indicator.
- Use when replacing the filters.
- Filter Reset Button can be used when the
power is turned off.
- The filter life will be reset to 100%.
03. Sleep Mode / Child Lock Button
• A quick press of the Sleep Mode / Child Lock
Button cycles the unit in order from Sleep
Mode → General Mode →Sleep Mode.
• In Sleep Mode, the Sleep Mode LED icon on
the front indicator dims to 50% brightness. All
other LEDs are turned off.
• If you press Sleep Mode / Child Lock Button
for 3 seconds, Child Lock will be initiated
and the buttons will not operate. A chime will
sound if pressed.
CONTROL PANEL
INITIAL OPERATION
1. Remove the front/rear panel by grasping its
upper edge and gently pulling forward.
- To remove the front/rear panel, release the
latch at the lower edge of the panel.
2. Remove the Pre-Filter, then the plastic bag
of filters behind it.
3. Remove filters from protective plastic bag.
4. Install the filters until they fit securely in
place.
03. True HEPA Filter (back)
02. CD Carbon Filter (middle)
01. Pre-Filter (front)
5. After filters are installed, close the front
panel.
6. Insert the power cord into an electrical
outlet.
Latch
02
01
03
Latch
When to Replace Filters
Filter Indicator Light When to Service When to Replace
Pre-Filter none Clean once every 14 days Permanent
CD Carbon Filter
Can NOT be WASHED Lasts Approx. 12 months
True HEPA Filter
• When the Check Filter Indicator LED is on, it is time to replace the True HEPA Filter and CD Carbon Filter.
• Intervals between filter replacement may vary depending on environment.
MAINTENANCE
CLEANING CARE
Cleaning the Filters:
Use a vacuum cleaner or soft brush to clean the
Pre-Filter
• If it is excessively soiled, rinse in room
temperature water.
• Do not use detergent or soap.
• Allow the filter to dry for 24 hours or more
before using.
• Intervals between filter cleaning may vary
depending on the air quality in the environment.
Cleaning the Smart Sensor:
Cotton
swab
Lens
1. Use a damp cotton
swab to wipe the
lens and intake area
of the Smart Sensor.
• To clean the sensor
area, use only
water. Do not use
volatile substances
such as alcohol or
acetone.
2. Wipe away any remaining moisture with a dry
cotton swab.
NOTICE
• Do not use benzene, alcohol, or other
volatile fluids, which may cause damage or
discoloration.
• Do not use hot water over 104
o
F.
Cleaning the Exterior & Interior:
1. Open the front panel and clean the interior
with a vacuum cleaner.
• A handheld vacuum or hose attachment will
work best.
2. Dampen a cloth with room temperature water
and wipe down the interior and exterior of the
unit.
3. Wipe the unit down with a clean, dry cloth.
• Ensure no moisture remains before plugging
the unit back in.
* For optimal performance, clean every 1 - 2 months.
Cleaning the Top:
1. Grasp the back of
the grill and lift up.
2. Wipe the interior
and grill with a soft,
damp cloth.
3. To reinstall the grill,
insert the two front
tabs of the grill into
the corresponding
holes in the product.
NOTICE
• When cleaning the unit, always unplug the
power cord first and then wait until the unit
has cooled down.
• Never disassemble, repair, or modify this unit
yourself.
• Do not use flammable sprays or liquid
detergents.
• Do not allow children to clean or maintain the
unit.
• Before cleaning or maintaining, ensure unit is
unplugged.
REPLACING FILTERS
Resetting Filter Life:
After replacing your True HEPA Filter, place the Pre-Filter back in and close the Front
Panel. While the unit is on, hold the Filter Reset Button for at least 10 seconds until
you hear the beep. After the beep, the Filter Replacement Indicator will disappear. Your
Winix True HEPA is now reset.
04. Sleep Mode Indicator
Indicates whether Sleep Mode is enabled or disabled.
05. Filter Replacement Indicator
LED light indicates when it is time to change the filter.
06. Ultrafine Dust Density Indicator
• The LED Ultrafine Dust Density Indicator
displays the quality of air in your environment.
When the unit senses an air quality change,
it automatically adjusts the LED Indicator to
display the respective air quality.
• LED Numeric Smart Sensor displays air quality
measures fine particles down to 2.5 microns.
07. Mode Indicator
Indicates whether Auto & Fan Speed Mode is
enabled or disabled.
08. PlasmaWave
®
Indicator
Indicates whether PlasmaWave®is enabled or disabled.
04. PlasmaWave
®
Operation Button
• Turns the PlasmaWave
®
feature on/off.
• When the unit is running, you may hear a
chirping or buzzing sound. The sound is from
large particles passing through PlasmaWave
®
, it
is normal and does not signify product failure.
05. Timer Button
• A quick press of the Timer Button will set the timer.
• The timer can be set in hours, in the order of
0(default) →1 →2 →4 →8 →12 →0.
• The amount of time, in hours, is indicated on the
front numeric display.
• Timer Indicator displays when timer is in use.
06. Fan Speed Button
• Enables manual operation of the unit's fan
speeds.
• Press to cycle through and set the desired fan
speed (Auto, Low, Medium, High, Turbo).
• Auto Mode:
- Auto Mode automatically adjusts fan speeds
according to your indoor air quality. The fan
speed will adjust to low when air quality is good,
medium when fair, and to high when poor.
07. Power Button
• Turns the unit on or off.
• During the first 30 seconds of powering up, the
Air Quality Indicator will cycle through Blue,
Green, Amber and Red colors. Smart Sensor takes
approximately 4 minutes to detect the air quality in
the environment before normal operation begins.
True HEPA Filter
03
CD Carbon Filter
02 PlasmaWave
04
Pre-Filter
01
4-STAGE AIR PURIFICATION
Air Purification means it
removes inanimate particles
Do not pull on the power cord when
unplugging the unit.
Do not tie or knot the power cord when
unit is in operation.
If the unit becomes submerged in water,
unplug it and contact customer service.
Do not unplug or move the unit while in
operation.
Do not plug additional appliances into the
same outlet or power supply.
Do not touch the plug with wet hands.
Unplug the unit when not in operation for
extended periods of time.
Do not place around heating elements.
Do not use around mist or fumes from
industrial oil or around large quantities of
metallic dust.
The cord can become damaged by
forcefully bending, pulling, twisting,
bundling, pinching or placing heavy
objects on it.
Do not install in any sort of motor or
transport vehicle (trucks, boats, ships,
etc.).
Do not place in an area with excessive
amounts of noxious gases.
Do not place near any flammable materials
(aerosols, fuel, gases etc.).
Do not have the unit facing into wind or
drafts.
Do not place below any electrical outlet.
Do not place in excessively humid areas
where the unit may become wet.
Do not place unit closer than 12 inches
from the wall during operation. It may
cause condensation on the wall and the
surrounding area.
SAFETY AND CAUTIONS
Before operating this equipment, carefully read
and follow these safety cautions.
Ensure filters are inserted before running unit.
Running the unit without filters can shorten the
lifespan of the unit and cause electric shock or
injury.
Be sure foreign objects are NOT inserted into the
vents on the unit.
Objects can include pins, rods, and coins.
Do not touch any part of the interior of the unit
with wet hands.
The high voltage may cause electric shock.
Ensure unit intake and outlet vents do not become
blocked.
Blockage may lead to increased internal
termperatures, causing product failure and
deformation.
Do not use the unit as a step stool or place heavy
objects on the unit.
Personal injury may occur or product failure and
deformation.
WARNING
Follow these instructions to reduce the risk of
serious injury or death and to reduce risk of
damaging the unit.
• If the power cord is damaged, it must be
replaced by a special cord. Reassembly is
available from the manufacturer or its service
agent.
• This appliance is not intended for use by
a person (including children) with reduced
physical, sensory or mental capabilities, or
lack of experience and knowledge of the unit,
unless they have been given supervision or
instruction concerning use of the appliance by
a person responsible for their safety.
• Children should be supervised to ensure that
they do not play with the appliance.
• This unit is not intended to be used to preserve
documents or art conservation.
SAFETY INSTRUCTIONS
Thank you for purchasing a Winix air purifier. This product is for household use only.
• Do not repair or modify the unit yourself.
• All repairs should be completed by a qualified
Winix technician.
• The plug for this unit is polarized with one
blade wider than the other. Do not force the
plug into an electrical outlet. Do not alter the
plug in any way. If the plug does not fit into
the outlet, reverse the plug. If it still does not
fit, contact a qualified technician to install a
proper outlet.
• Do not use if the power cord or plug is
damaged or the connection to the wall outlet is
loose.
• Use AC 120V only.
• Do not damage, break, forcefully bend, pull,
twist, bundle, coat, pinch, or place heavy
objects on the power cord.
• Periodically remove dust from the power
plug. This will reduce the risk of shock due
to humidity build up.
• Remove the power plug from the outlet before
cleaning the unit. When removing the power
plug, grasp by holding the plug itself, never
hold by the cord.
• If the power plug is damaged, it must be
replaced by the manufacturer or a qualified
technician.
• Remove the power plug from the outlet when
not in use.
• Do not handle the power plug with wet hands.
• Do not operate the unit when using indoor
smoke-generating insecticides.
• Do not clean unit with benzene or paint thinner.
Do not spray insecticides on the unit.
• Do not use the unit where it is humid or
where the unit may become wet, such as the
bathroom.
• Do not insert fingers or foreign objects into air
intake or outlet.
• Do not use the unit near flammable gases.
Do not use near cigarettes, incense, or other
spark-creating items.
• Unit will not remove carbon monoxide emitted
from heating appliances or other sources.
• Unplugging the product disconnects the
remote functions.
IMPORTANT CAUTIONS FOR USING YOUR AIR PURIFIER:
WARNING: Follow the instructions in this manual to reduce the risk of electric shock, short
circuit, and/or fire.
IMPORTANT PRECAUTIONS FOR USING YOUR AIR PURIFIER
• Do not block the intake or outlet vents.
• Do not use near hot objects, such as a stove.
• Do not use where the unit may come into contact with steam.
• Do not use the unit on its side.
• Keep away from products that generate oily residue, such as a deep fryer.
• Do not use detergent to clean the unit.
• Do not operate without a filter.
• Do not wash and reuse the True HEPA Filter or the CD Carbon Filter.
• Hold the handle on the back of the unit to transport.
• Do not hold by the front panel.
• Do not stick any small objects into the air outlet vents or fan.
TWO YEARS WARRANTY
The terms of the warranty are as follows:
1. This product is manufactured under stringent
quality control and inspections.
2. The warranty will be voided if product failure
is a result of negligence or misuse by the
consumer.
3. A proof of purchase must be presented upon
claiming a Product Warranty.
4. Store the proof of purchase in a safe place or
register your product on winixamerica.com to
upload your proof of purchase.
5. This warranty is valid only in the USA and
Canada.
* for more information visit
https://winixamerica.com/terms-and-
conditions/
Product Name
Air Purifier
Model Name
XQ Pro
Purchase Date
Warranty Period
Two (2) Years
Place of Purchase
Place of Purchase
tel.
Customer
Address
Name
Tel.
After purchase, be sure to complete all of the
above information.
Warning: Changes or modifications to this unit not expressly approved by the party responsible for
compliance could void the user's authority to operate the equipment.
Note: This equipment has been tested and found to comply with the limits for a Class B digital
device, pursuant to Part 15 of the FCC Rules. These limits are designed to provide reasonable
protection against harmful interference in a residential installation. This equipment generates,
uses and can radiate radio frequency energy and, if not installed and used in accordance with
the instructions, may cause harmful interference to radio communications. However, there is no
guarantee that interference will not occur in a particular installation. If this equipment does cause
harmful interference to radio or television reception, which can be determined by turning the
equipment off and on, the user is encouraged to try to correct the interference by one or more of the
following measures:
• Reorient or relocate the receiving antenna.
• Increase the separation between the equipment and receiver.
• Connect the equipment into an outlet on a circuit different from that to which the receiver is
connected.
• Consult the dealer or an experienced radio/TV technician for help.
This device contains license-exempt transmitter(s)/receiver(s) that comply with Innovation, Science
and Economic Development Canada's license-exempt RSS(s). Operation is subject to the following
two conditions:
• This device may not cause interference.
• This device must accept any interference, including interference that may cause undesired
operation of the device.
"In French: Cet appareil contient des émetteurs/récepteurs exemptés de licence et conformes
aux normes Innovation, Science et Economic. RSS(s) sans licence de Développement Canada. Le
fonctionnement est soumis aux deux conditions suivantes:
• cet appareil ne doit pas causer d’interférences nuisibles, et
• cet appareil doit accepter toute interférence reçue, y compris les interférences pouvant provoquer
un fonctionnement non souhaité."
The energy efficiency of this ENERGY STAR
certified model is measured based on a ratio
between the model’s CADR for smoke and the
electrical energy it consumes, or CADR/Watt.
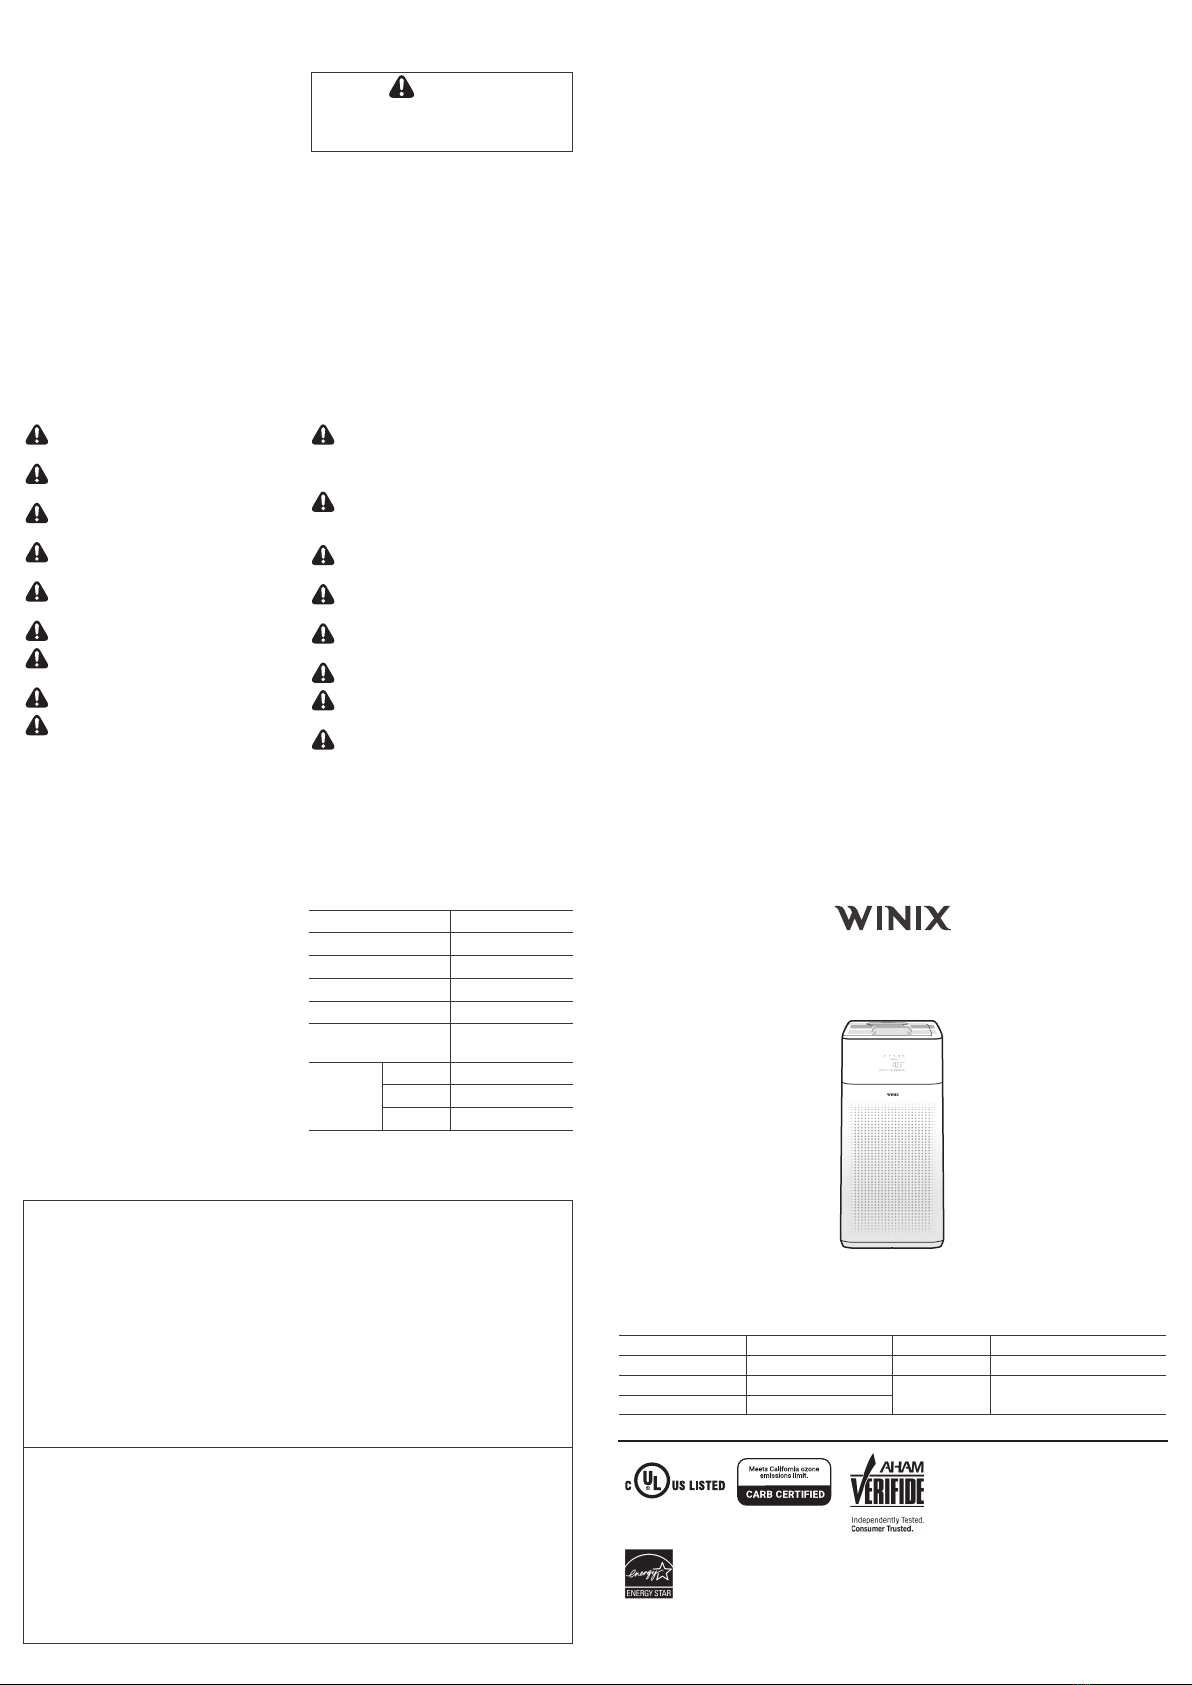
XQ Pro USER MANUAL
AIR PURIFIER
SPECIFICATIONS
Model
XQ Pro
Dimensions
14.6in(W) × 14.6in(D) × 31.3in(H)
Voltage
AC120V/60Hz
Weight
30.86lbs
Power Rate
90W
Filter SKU
Filter X / SKU: 1712-0089-01
Verified Room Size
698sq.ft.
The exterior, design, and product specifications may be changed without prior notice to improve product performance.
•Dedicated Call Center: ☎(877) 699-4649
•Website: www.winixamerica.com
Contact Winix for product
related inquiries and
customer service
To expedite service, please specify the
model name and number, the nature of the
problem, your contact information, and
your address.
• The product warranty is printed on the back of this guide.
• This product is manufactured for use only in North America.
• This product is suitable for 120V only.
2610-0323-00 Rev.00

Other Winix Air Cleaner manuals

Winix PlasmaWave WACU300 User manual

Winix

Winix PlasmaWave WACU300 User manual

Winix A231 User manual

Winix

Winix A231 User manual

Winix FreshHome PlasmaWave WACP150 User manual

Winix

Winix FreshHome PlasmaWave WACP150 User manual

Winix 9800 User manual

Winix

Winix 9800 User manual

Winix Zero AUS-1050AZBU User manual

Winix

Winix Zero AUS-1050AZBU User manual

Winix PlasmaWave 5300 User manual

Winix

Winix PlasmaWave 5300 User manual

Winix 9500 User manual

Winix

Winix 9500 User manual

Winix PlasmaWave WACU300 User manual

Winix

Winix PlasmaWave WACU300 User manual

Winix ZERO Pro User manual

Winix

Winix ZERO Pro User manual

Winix PlasmaWave WAC-9000 User manual

Winix

Winix PlasmaWave WAC-9000 User manual

Winix PlasmaWave WAC-5000 User manual

Winix

Winix PlasmaWave WAC-5000 User manual

Winix XLC User manual

Winix

Winix XLC User manual

Winix Zero S Specification sheet

Winix

Winix Zero S Specification sheet

Winix PlasmaWave 5300 User manual

Winix

Winix PlasmaWave 5300 User manual

Winix NK100 User manual

Winix

Winix NK100 User manual

Winix ZERO 4 User manual

Winix

Winix ZERO 4 User manual

Winix HR1000 User manual

Winix

Winix HR1000 User manual

Winix HR1000 User manual

Winix

Winix HR1000 User manual

Winix C535 User manual

Winix

Winix C535 User manual

Winix C555 User manual

Winix

Winix C555 User manual

Winix AUS-0850AAPU User manual

Winix

Winix AUS-0850AAPU User manual

Winix 5500-2 User manual

Winix

Winix 5500-2 User manual

Winix 6300 User manual

Winix

Winix 6300 User manual

Winix AAPU500-JLE User manual

Winix

Winix AAPU500-JLE User manual

Popular Air Cleaner manuals by other brands

Air+Health Skye Setup

Air+Health

Air+Health Skye Setup

Cello DUET user manual

Cello

Cello DUET user manual

Luma EC220W owner's manual

Luma

Luma EC220W owner's manual

MODULE-AIR AF-36 VT Series Operating instructions & parts manual

MODULE-AIR

MODULE-AIR AF-36 VT Series Operating instructions & parts manual

FreshHome PlasmaWave WACP150 Use & care guide

FreshHome

FreshHome PlasmaWave WACP150 Use & care guide

Oransi mod user manual

Oransi

Oransi mod user manual

Honeywell QuietClean HHT-215 series Important safety instructions

Honeywell

Honeywell QuietClean HHT-215 series Important safety instructions

Crystal air PRO 420 Cleaning instructions

Crystal air

Crystal air PRO 420 Cleaning instructions

Idylis AC-2063 manual

Idylis

Idylis AC-2063 manual

White Rodgers pmnACM/ACB owner's manual

White Rodgers

White Rodgers pmnACM/ACB owner's manual

O3Zone OZ-1-A Installation, Programming and Maintenance Instructions

O3Zone

O3Zone OZ-1-A Installation, Programming and Maintenance Instructions

Holmes Smoke Grabber HAP75 owner's guide

Holmes

Holmes Smoke Grabber HAP75 owner's guide

Taurus Serenity Ozonic user manual

Taurus

Taurus Serenity Ozonic user manual

Hunter HEPAtech 30078 owner's manual

Hunter

Hunter HEPAtech 30078 owner's manual

pureguardian AC4220 Use & care instructions

pureguardian

pureguardian AC4220 Use & care instructions

AllerAir AirTube series brochure

AllerAir

AllerAir AirTube series brochure

NuWave OXYPURE ZERO E1000 quick start guide

NuWave

NuWave OXYPURE ZERO E1000 quick start guide

Trotec Airozon 5000 operating manual

Trotec

Trotec Airozon 5000 operating manual

manuals.online logo
manuals.online logoBrands
  • About & Mission
  • Contact us
  • Privacy Policy
  • Terms and Conditions

Copyright 2025 Manuals.Online. All Rights Reserved.