3
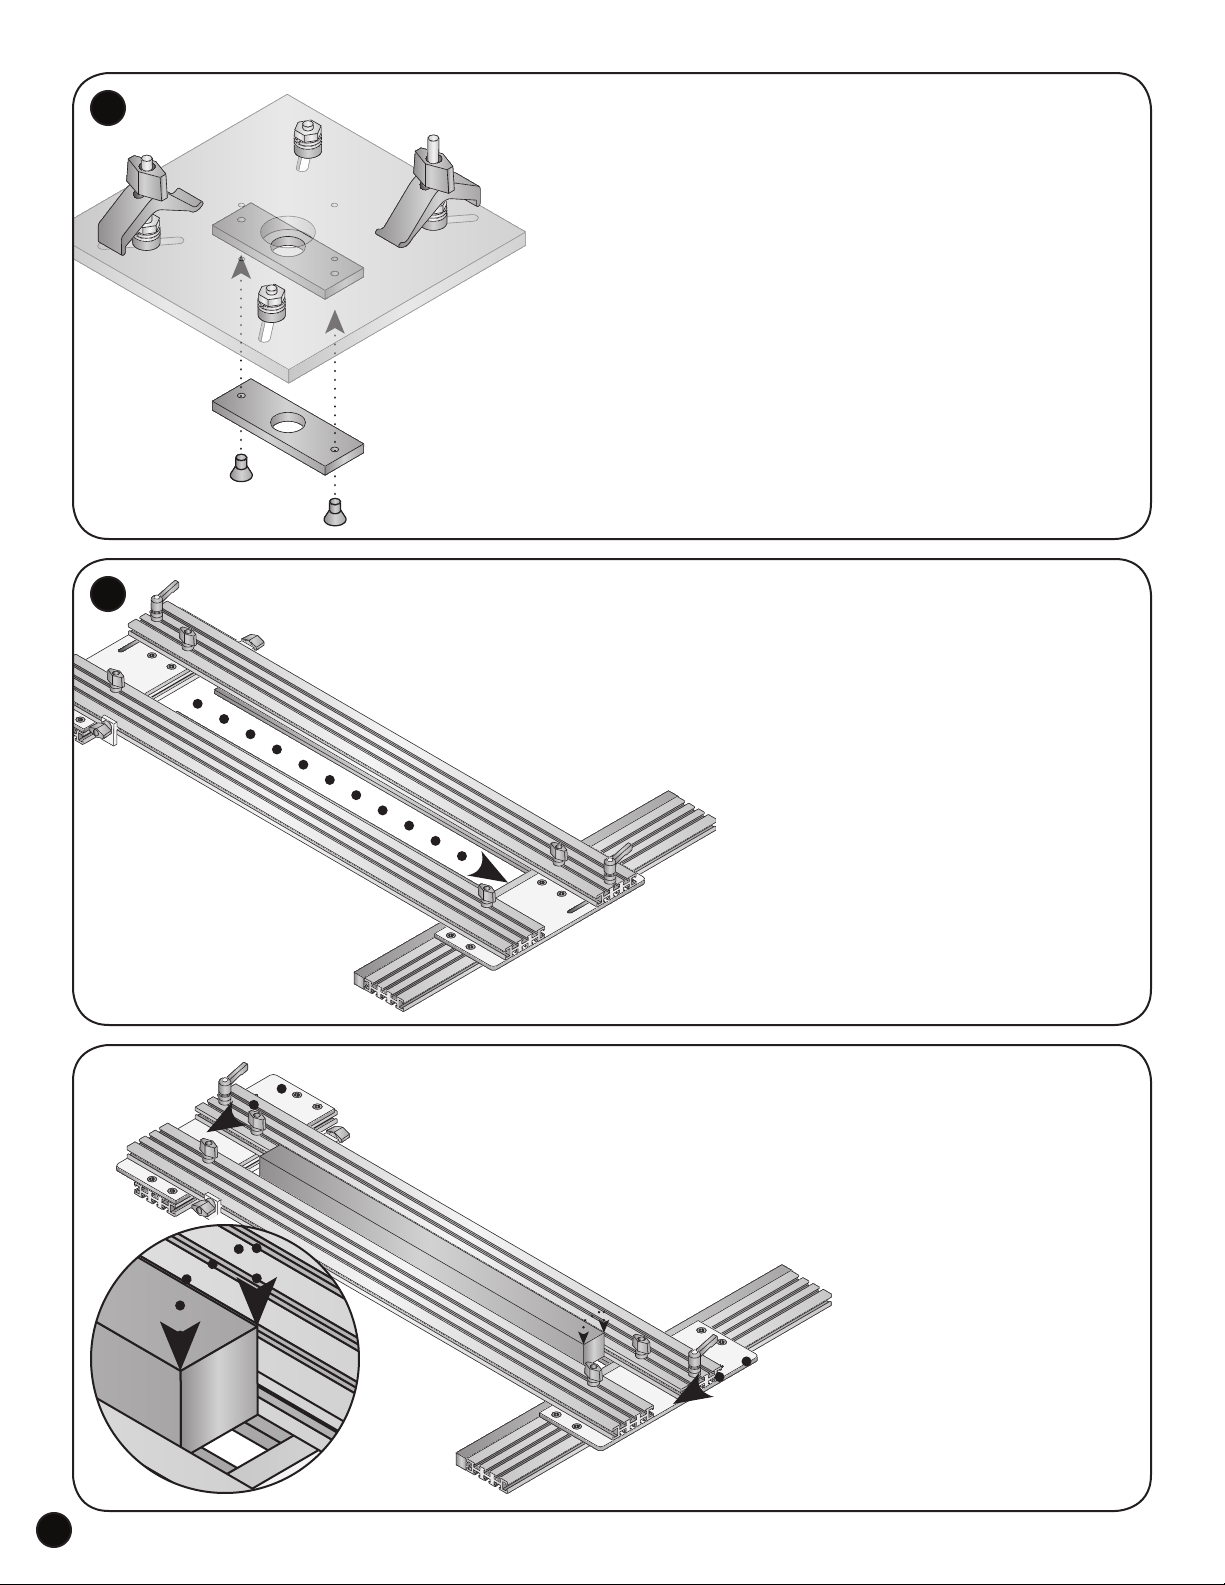
ATTACH PLATE GUIDE & ROUTER TO PLATE
AttachthePlateGuide(7900G) totheRouterPlate(7900P)usingthe1/2”
screws(MF035) andaPhillipsscrewdriver(not provided).Followthedirections
inthe4973 Plate HardwareandattachyourroutertotheRouterPlate(7900P).
Anytypeofroutercanbeusedbut,tocutstoppeddadoes(dadoes that don’t
exit the edge(s) of the workpiece),you’llneedtouseaplungerouter.
AnoptionaldrillstyleRouterPlate(PN 7900PD)is
availableforsemi-permanentmountingofyourrouter,but
itrequiresdrillingmountingholesintheRouterPlate.
7
8
SIZE 1/4” FENCES
Loosenthe1/4”MDFFences,re-positionthemsotheirfrontendsareslightly
overlappingthefrontoftheEdgeFenceandtightenthescrews.
SELECT ROUTER BIT - IMPORTANT!!!
Forbestresultswerecommendour13700 1/2” Downshear bitforusewiththisjig,
howeveranybitupto3/4”diameterwillwork.Tocutthedadointwopasses,thebit
diametercan’tbelessthenhalfthewidthofthedado.Ifyourdadoiswiderthan
twicethebitdiameter,you’llhavetomakeextrapasses.
A3/4”bitwillcutdadoesupto1-1/2”wide,a1/2”
bitupto1”,andsoforth.Smallerdiameterbits
maylimitthedepthofthedadoyou’reabletocut.
Once you select a bit, the jig should never be used with
another bit without A) Installing another set of 1/4” MDF
Fences (7900A) and going through the sizing operation. Or B)
Removing & rotating the 7900A’s 180º and sizing the new edge.Install
thebitinyourrouterandsetthedepthofcuttojustbelowthe1/4”Fences.
SIZE 1/4” FENCES - CONT
Ripapieceof3/4”thickscraproughly1-1/2”widex24”long.Place
itbetweentheStationaryandAdjustableTracks,restingontopofthe1/4”MDF
Fences.LoosentheknobsontheAdjustableTrackandslideitovertowardsthe
StationaryTrack,withthe1-1/2”widescrapbetweenthem.Tightenthe
knobsateachendoftheAdjustableTrackandremovethescrap.
1-1/2”
Wide
Scrap installed
between
tracks, on
top of fences
MF035 x2
7900G
7900P
4973