manuals.online logo
Brands
  1. Home
  2. •
  3. Brands
  4. •
  5. Woodhaven
  6. •
  7. Tools
  8. •
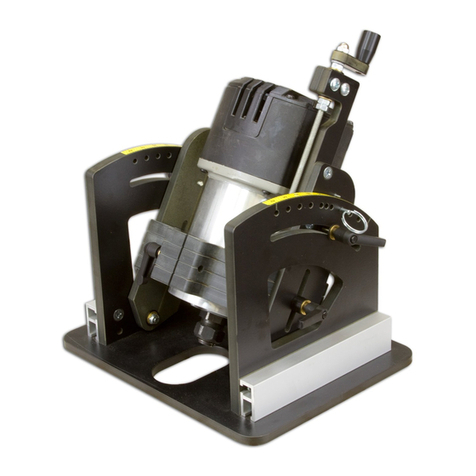
  9. Woodhaven Angle-Ease 1470 User manual

Woodhaven Angle-Ease 1470 User manual

The Angle-Ease fits
motors from these routers:
Router Model FITS 3.5”
ANGLE-EASE
FITS 4.2”
ANGLE-EASE
Porter Cable 7518 No Yes
Milwaukee 5625 No W/ Shim
Porter Cable 892 Yes W/ Adapter R1
Porter Cable 690 Yes W/ Adapter R1
DeWalt 616/618 Yes W/ Adapter R1
Bosch 1617/1618 Yes W/ Adapter R1
1470 & 1472 Angle-Ease™
or
6002 & 6004 Angle-Ease
Owners Manual
Please Read Carefully!
Additional Parts List:
Parts listed below are not shown in the hardware
drawings. Refer to photos in the instructions:
Part Description Quantity
1470AS Side/Arm Assembly, pair . . . . . . . . . . . . . . . . 1
1470C 7-1/2” Double Track . . . . . . . . . . . . . . . . . . . . . 2
1475A1 Adjuster Arm .......................... 1
1475A2 Arm Plate ............................. 1
1475B Height Adjuster . . . . . . . . . . . . . . . . . . . . . . . . 1
Ringpin1 Pin .................................... 2
5863 1-1/8” Knob ............................ 2
5864 1-5/8” Knob ............................ 2
In addition, you will get ONE of the motor
blocks and plates below, depending on the
Angle-Ease model you purchased:
1470B 3.5” Motor Block . . . . . . . . . . . . . . . . . . . . . . . . 1
1472B 4.2” Motor Block. . . . . . . . . . . . . . . . . . . . . . . . 1
1470P Angle Ease Router Table Plate . . . . . . . . . . . 1
6000PA Horizontal Table Angle-Ease Plate . . . . . . . . 1
Part# Description Qty.
MF015 1” Screw 6
Part# Description Qty.
WN001 Nylon washer 4
Part# Description Qty.
WB002 Washer 4
Part# Description Qty.
5791B Barrel Nut 3
Part# Description Qty.
5760B Oval Nut 12
Part# Description Qty.
MF010 3/4" Screw 8
Part# Description Qty.
BUSH002 1/4" Spacer 4
BEFORE BEGINNING
 Identifyandverifythatyouhaveallthepartslisted.
Readtheinstructionsatleastonce,familiarizingyourselfwith
theparts,beforebeginningassembly.You’llneedtwo7/16”
wrenches,a#3Phillipsscrewdriverandaflatbladescrewdriver.
Part# Description Qty.
5771B 3/4" Screw 2
1
ATTACH HARDWARE
 Alignthepointerinthearmonbothside/armassemblieswiththe10ºmark
onthescale. Insertapin (Ringpin1) throughthe10ºholeinthesideandintothe
holeinthearm.Installawasher(WB002)andanylonwasher(WN001)onthe
studoftheknobs(5863).Laytheside/armassemblyflatonthearmandslide
anothernylonwasher(WN001)betweenthearmandtheside.Useacreditcard
orputtyknifetoalignthewasherwiththecurvedslotinthesideandthethreaded
holeinthearm.Insertthestudoftheknobthruthecurvedslotintheside,
screwingitintothearm,thentightentheknob.

 Insert1”screws(MF015)thruthethreecountersunkholesineachsideand
startanovalnut(5760B - flat side first)oneachscrew.Slidea7-1/2”double
track(1470C) ontotheovalnutsoneachside.Centerthedoubletrackend-to-end
ontheside,checkthesideforsquareonaflatsurfaceandtightenthescrews.

 Removethepinfromeacharm,loosenthehandleandrotatethearm
tothe0ºmarkontheside,thenreinstallthepinandtightentheknob.
ATTACH ROUTER BLOCK
 Settherouterblock (1470B or 1472B) onend,
withtheclampingknobintherouterblockatthe
bottom.Insertabarrelnut(5791B)intheholein
thefaceoftherouterblocknearthetop.Useaflat
bladescrewdrivertoalignthethreadedholeinthe
barrelnutwiththecrossholeintherouterblock.
 Installawasher(WB002)andtwo1/4”spacers
(BUSH002)ontheknobs(5864). Settheside/armassembly
withtheadjusterarmattachedtoit,withthearminthe
grooveintherouterblock.Installtheratchethandlethru
theslotinthearm,screwingitintothebarrelnut.Slidethe
routerblockasfardownonthearmaspossible(towards
the double track)andtightentheknob.Fliptheassembly
overandconnecttheremainingside/armassemblytothe
oppositesideoftherouterblockinthesamemanner.
Ringpin1
WN001
MF015 x3
5760B x3
5863
WB002
WN001
5864
WB002
BUSH002 x2
5791B x2
INSTALL HEIGHT
ADJUSTER ARM
 Selecttheside/arm
assembly(1470AS) thathas
thearmwiththesquared-off
cornerandattachtheadjuster
arm(1475A1)toitusing
two3/4”screws(MF010).
 Pivotthearmas
necessarytoaccessthelower
mountingholeinthearm.
MF010 x2
1470AS
1475A1
1470C
2
ATTACH ASSEMBLY TO PLATE
 Insert3/4”screws(MF010)thruthesix
countersunkholesintherouterplate (1470P or
6000PA)andstartovalnuts(5760B - flat side
first)ontheendsofthescrews.Linetheoval
nutsupwiththeT-slotinthedoubletracks
andslidetheassemblyontotheovalnuts.
 Ifyouhavethe1470Pplate,positiontheassembly
sothefrontedgeofthesidesare15/16”fromthefront
edgeoftheplateandtightenthescrews.Theopeninginthe
routerblockshouldbeoverthebitopeningintherouterplate.
 Ifyouhavethe6000PAplate(not shown),positionthe
assemblysothebackedgeofthesidesareflushwiththeback
edgeoftheplateandtightenthescrews.Theopeninginthe
routerblockshouldbeoverthebitopeningintherouterplate.
INSTALL REMAINDER OF HEIGHT ADJUSTER
 Installabarrelnut(5791B)intheholeinthefrontof
therouterblock.Useaflatbladescrewdrivertoalignthethreaded
holeinthebarrelnutwiththecrossholeintherouterblock.

Spreadapartthetwonylonwashersonthethreadedrodoftheheightadjuster(1475B) sotherod
slipsinthegrooveintheadjusterarmandthewashersareoneachsideofit.Screwthethreadedrod
intothebarrelnutuntilthenylonwasheronthetopoftheadjusterarmissnugagainstthetopofthe
adjusterarm.
 Placethearmplate (1475A2)withit’sgroovecoveringthethreadedrodandfastenitto
theadjusterarmusingthetwo3/4”screws(5771B).Alignthetopandbottomedgesofthe
armplatetothecorrespondingedgesoftheadjusterarm(1475A1) andtightenthescrews.
 Adjustthetwonutsonthethreadedrod,alongwiththewashers,against
theundersideoftheadjusterarm.Tightenthenutsagainsteachotherwhen
youhaveadjustedtheup/downslopoutoftheheightadjuster.
ROUTER INSTALLATION
 Loosentheclamphandleintherouterblockandinsert
yourrouterintherouterblocksotheendof
themotorisflushwiththerouterblock,or
protrudingoutpastit..

The router motor should always be
fully inserted in the router block! Never
insert a router motor partially in the
router block! 

Theroutermotorcanberepositioned
anywhereinthemotorblockaslong
asitiscompletelyinthemotor
blockatalltimes.Tightenthe
clamphandlejustenoughto
holdtheroutermotor.Donotover-
tightenoryoumaydamageyourrouter.
5771B x2
5791B
1475B
MF010 x6
5760B x6
15/16” from
Front Edge
1475A2
3
ANGLE SETTINGS
 Therearepinsettingsat0,5,
10,15,20,22-1/2,25,30,35,40
&45degrees,oryoucansetyour
desiredangleusingthescaleontop
ofthesidesasaguide.Tosetan
angle,removethetwopins(ifused),
loosenthetwoangleadjustment
knobsandpivottheroutertothe
desiredangle.Replacethepins(if
theangleisoneofthepinsettings
above)andtightentheknobs.
 Anglesettingsotherthan
thoseprovidedcanbesetusing
adraftingsquareorbevelgauge
placedbetweentheplateand
thefaceoftherouterblock.
HEIGHT ADJUSTMENT
IMPORTANT!! Loosen the
height knob nearest the Height
Adjuster just 1/4 to 1/2 of a turn
and loosen the opposite height
knob 2 full turns. Retighten the
knob nearest the Height Adjuster
first, then retighten opposite knob.
Turnthecrankhandleon
theHeightAdjustertomovethe
routerupordown.Ifyoucannot
achievethedesiredheight,you
mayhavetorepositiontherouter
intherouterblock(seerouter
installationsectionabove).
USING THE ANGLE EASE
 Therearetworatchetknobsforlockingtheheightandtwoforlockingtheangle.
Performoneoftheseadjustmentsatatimeinsteadofattemptingbothadjustments
atthesametime.Makesureyourbitislockedsecurelyintherouter
colletandthatallknobsaretightenedsecurelybeforeusing.
 Dependingonyourtableopeningsize,
youmayhavetosettheAngle-Easeat0º
degreestoinsertitinyourroutertable.
 Toreducetheriskofinjurywerecommend
thatyoutiltthecutterintothefence(or
table)hidingmoreofthecuttercompared
totiltingthecutterawayfromthefence(or
table)andexposingmoreofthecutter.
©Copyright WOODHAVEN INC. 5/15/15
(800) 344-6657 or WWW.WOODHAVEN.COM
A: Remove Pins,
B: Loosen Knobs
C: Adjust Angle
A: Loosen
Knobs
B: Adjust
Height

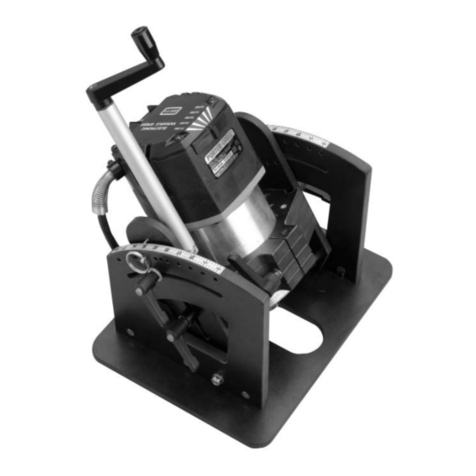
This manual suits for next models

3

Other Woodhaven Tools manuals

Woodhaven 7500 User manual

Woodhaven

Woodhaven 7500 User manual

Woodhaven 6012 User manual

Woodhaven

Woodhaven 6012 User manual

Woodhaven 8610 User manual

Woodhaven

Woodhaven 8610 User manual

Woodhaven 3000 User manual

Woodhaven

Woodhaven 3000 User manual

Woodhaven 3000 User manual

Woodhaven

Woodhaven 3000 User manual

Woodhaven Angle-Ease 1470 User manual

Woodhaven

Woodhaven Angle-Ease 1470 User manual

Woodhaven 8615 User manual

Woodhaven

Woodhaven 8615 User manual

Woodhaven 6002 User manual

Woodhaven

Woodhaven 6002 User manual

Woodhaven 5435 User manual

Woodhaven

Woodhaven 5435 User manual

Woodhaven 8715 User manual

Woodhaven

Woodhaven 8715 User manual

Woodhaven EZ Lift 1429 User manual

Woodhaven

Woodhaven EZ Lift 1429 User manual

Woodhaven 8395 User manual

Woodhaven

Woodhaven 8395 User manual

Woodhaven 204 User manual

Woodhaven

Woodhaven 204 User manual

Woodhaven Angle Ease 1425 User manual

Woodhaven

Woodhaven Angle Ease 1425 User manual

Woodhaven 7902 User manual

Woodhaven

Woodhaven 7902 User manual

Woodhaven 3210 User manual

Woodhaven

Woodhaven 3210 User manual

Woodhaven 5432 User manual

Woodhaven

Woodhaven 5432 User manual

Woodhaven 8628 User manual

Woodhaven

Woodhaven 8628 User manual

Woodhaven 8625 User manual

Woodhaven

Woodhaven 8625 User manual

Woodhaven HD Panel Master 5432 User manual

Woodhaven

Woodhaven HD Panel Master 5432 User manual

Popular Tools manuals by other brands

Matco Tools TLS788 manual

Matco Tools

Matco Tools TLS788 manual

Hardinge 16C Mounting instructions

Hardinge

Hardinge 16C Mounting instructions

Black & Decker W006B instruction manual

Black & Decker

Black & Decker W006B instruction manual

Renishaw NC4 installation guide

Renishaw

Renishaw NC4 installation guide

Würth 0891 110 500 Translation of the original operating instructions

Würth

Würth 0891 110 500 Translation of the original operating instructions

RODCRAFT RC6758 Operator's manual

RODCRAFT

RODCRAFT RC6758 Operator's manual

Dualco 10610 instructions

Dualco

Dualco 10610 instructions

NEO TOOLS 08-821 manual

NEO TOOLS

NEO TOOLS 08-821 manual

SKF TMHP 10E Instructions for use

SKF

SKF TMHP 10E Instructions for use

RIDGID PFMR15050N manual

RIDGID

RIDGID PFMR15050N manual

Kurt CROSSOVER ANGLOCK VISE DX8 Operating instructions manual

Kurt

Kurt CROSSOVER ANGLOCK VISE DX8 Operating instructions manual

Gage Bilt GB7720 manual

Gage Bilt

Gage Bilt GB7720 manual

Georges Renault ECL1 manual

Georges Renault

Georges Renault ECL1 manual

SPATIAL ArcGIS quick start guide

SPATIAL

SPATIAL ArcGIS quick start guide

Expondo MSW-MBJ21.2 user manual

Expondo

Expondo MSW-MBJ21.2 user manual

infaco A3M V2.0 Instructions for using

infaco

infaco A3M V2.0 Instructions for using

Silony Medical VERTICALE Navigation manual

Silony Medical

Silony Medical VERTICALE Navigation manual

Yokota TKA-150-C manual

Yokota

Yokota TKA-150-C manual

manuals.online logo
manuals.online logoBrands
  • About & Mission
  • Contact us
  • Privacy Policy
  • Terms and Conditions

Copyright 2025 Manuals.Online. All Rights Reserved.