manuals.online logo
Brands
  1. Home
  2. •
  3. Brands
  4. •
  5. Yealink
  6. •
  7. IP Phone
  8. •
  9. Yealink Telkom W52P Troubleshooting guide

Yealink Telkom W52P Troubleshooting guide

TPG BizPhone
P a g e | 1 of 2
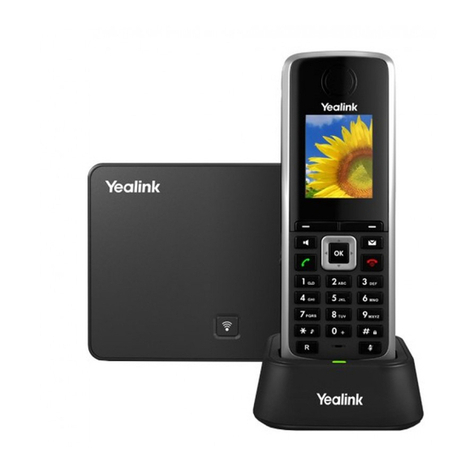
IP DECT W52P
Quick Startup Guide
Packaging Contents
The following contents are included in your W52P package:
Assembling the Phone
1. Connect the network and power for the base station in one of
the following ways, as shown below.
2. Connect the handset and optional headset, as shown below.
3. Insert the battery into the handset, as shown below.
4. Charge the handset, as shown below.
The charging status of the handset is indicated in the top
right-hand corner of the LCD screen.
Startup the Phone
The IP Phone is pre-registered to the base station. After the IP
Phone is connected to the network and the power, it will
automatically start the initialization process by connecting to TPG
BizPhone’s servers to obtain the configuration and updates
(maximum 10 minutes).
The LCD screen will indicate the current status of the process
(initializing or configuration updating). The phone may reboot few
time during this process. After the final reboot, the phone is ready
to use.
P a g e | 2 of 2
BASIC OPERATIONS
Turning Handsets On
Long press until the LCD screen lights up.
Place the handset in the charger cradle. The handset will be
turned on automatically.
Turning Handsets Off
Long press to turn the handsets off.
HANDSET SETTINGS
Add a Contact
Press the OK key to enter the main menu and then select
Directory.
Enter the desired values in the Name, Number and Mobile
fields.
Press the Options soft key and then select New Contact.
Press the Save soft key to accept the change.
Delete a Contact
Press the OK key to enter the main menu, and then select
Directory.
Press or to highlight the desired entry.
Press the Options soft key, and then select Delete to delete
the selected entry.
Assign a Speed Dial Number
Press the OK key to enter the main menu and then select
Settings -> Telephony -> Speed Dial.
Press or to highlight the desired speed dial key
and then press the Assign soft key.
Press or to highlight the desired entry and then
press the OK soft key.
If both the office and mobile numbers are stored, Press
or to highlight the desired number and then press
the OK soft key again.
Volume Adjustment
Press or during a call to adjust the volume of the
currently used audio device.
Press or when the handset is idle to adjust the ringer
volume.
BASIC CALL FEATURES
Placing Calls
Enter the desired number when the handset is idle, and then
press .
Placing Calls from Local Directory
Press when the handset is idle.
Press or to highlight the desired entry, and then
press .
If both the office and mobile number are stored, press or
to highlight the desired number, and then press
again.
Placing Calls using the Speed Dial Key
Long press the Speed Dial key to place a call to the number
assigned to it.
Placing Calls from Call History
Press the History soft key, and then select the desired Call
History list.
Press or to highlight the desired entry, and then
press .
Answering Calls
Press the Accept soft key or press or press .
Ending Calls
Press .
Call Hold
Press Options soft key during a call, and then select Hold.
Call Resume
If there is only a call on hold, press the Resume soft key.
If there are two calls on hold, press the Resume soft key to
resume the current call, press the Swap soft key to swap
between calls.
Call Transfer –Blind Transfer
Press the Options soft key during a call, and then select
Transfer.
Enter the number you want to transfer the call to.
Press the Transfer soft key.
Call Transfer –Attended Transfer
Press the Options soft key during a call, and then select
Transfer.
Enter the number you want to transfer the call to.
Press to dial out.
Press the Transfer soft key after the call is answered
Call Forward
Press OK key to enter the main menu, and then select Call
Features -> Call Forward.
Press or to highlight the desired line, and then
press the OK soft key.
Press or to highlight the desired forwarding type
(Always/Busy/No Answer), and then press the OK soft key.
Select Enabled from the Status field.
Enter the number you want to forward the incoming calls to in
the Target field.
Press or to select the desired ring time to wait before
forwarding (only for No Answer forward) in the After Ring
Time field.
Press the Save soft key to accept the change.
NOTE: For more information about other features, refer to the BizPhone User Reference Guide (contact your Administrator)
Other manuals for Telkom W52P

60

Other Yealink IP Phone manuals

Yealink T46 User manual

Yealink

Yealink T46 User manual

Yealink W52 User manual

Yealink

Yealink W52 User manual

Yealink T48G User manual

Yealink

Yealink T48G User manual

Yealink T4 series User manual

Yealink

Yealink T4 series User manual

Yealink T55A Teams User manual

Yealink

Yealink T55A Teams User manual

Yealink SIP-T40P User manual

Yealink

Yealink SIP-T40P User manual

Yealink SIP-T23G User manual

Yealink

Yealink SIP-T23G User manual

Yealink Yealink SIP-T20P User manual

Yealink

Yealink Yealink SIP-T20P User manual

Yealink Yealink SIP-T21P User manual

Yealink

Yealink Yealink SIP-T21P User manual

Yealink SIP-T29G User manual

Yealink

Yealink SIP-T29G User manual

Yealink Telkom W52P User manual

Yealink

Yealink Telkom W52P User manual

Yealink T41 User manual

Yealink

Yealink T41 User manual

Yealink T48S Skype For Business Edition User manual

Yealink

Yealink T48S Skype For Business Edition User manual

Yealink T42S User manual

Yealink

Yealink T42S User manual

Yealink Yealink SIP-T46G User manual

Yealink

Yealink Yealink SIP-T46G User manual

Yealink Simply User manual

Yealink

Yealink Simply User manual

Yealink Yealink SIP-T20P User manual

Yealink

Yealink Yealink SIP-T20P User manual

Yealink T41 User manual

Yealink

Yealink T41 User manual

Yealink SIP-T40P User manual

Yealink

Yealink SIP-T40P User manual

Yealink Yealink SIP-T28P User manual

Yealink

Yealink Yealink SIP-T28P User manual

Yealink T3 Series User manual

Yealink

Yealink T3 Series User manual

Yealink T Series Operating and safety instructions

Yealink

Yealink T Series Operating and safety instructions

Yealink SIP-T32G User manual

Yealink

Yealink SIP-T32G User manual

Yealink Telkom W52P User manual

Yealink

Yealink Telkom W52P User manual

Popular IP Phone manuals by other brands

Fanvil X3G user manual

Fanvil

Fanvil X3G user manual

Obihai OBi1000 Seires quick start guide

Obihai

Obihai OBi1000 Seires quick start guide

Cisco 8831 Features

Cisco

Cisco 8831 Features

D-Link DPH-125MS - VoiceCenter VoIP Phone Quick install guide

D-Link

D-Link DPH-125MS - VoiceCenter VoIP Phone Quick install guide

Cisco DATAVOX 7941 quick start guide

Cisco

Cisco DATAVOX 7941 quick start guide

Grandstream Networks GXV3240 user manual

Grandstream Networks

Grandstream Networks GXV3240 user manual

Aastra OpenPhone 73 user guide

Aastra

Aastra OpenPhone 73 user guide

ATCOM AT800 Series user manual

ATCOM

ATCOM AT800 Series user manual

HYBREX DK9 Series manual

HYBREX

HYBREX DK9 Series manual

Polycom SoundPoint IP 650 Quick reference guide

Polycom

Polycom SoundPoint IP 650 Quick reference guide

Mitel MiVoice 5312 Administrator's guide

Mitel

Mitel MiVoice 5312 Administrator's guide

Altigen IP 710 user manual

Altigen

Altigen IP 710 user manual

Motorola 150IP-3P user manual

Motorola

Motorola 150IP-3P user manual

Ericsson IP8830E user guide

Ericsson

Ericsson IP8830E user guide

Nortel i2002 user guide

Nortel

Nortel i2002 user guide

Polycom VVX410 Phone guide

Polycom

Polycom VVX410 Phone guide

Avaya IP OFFICE 3.2 2420 user manual

Avaya

Avaya IP OFFICE 3.2 2420 user manual

UniData Communication Systems WPU-7800 Admin manual

UniData Communication Systems

UniData Communication Systems WPU-7800 Admin manual

manuals.online logo
manuals.online logoBrands
  • About & Mission
  • Contact us
  • Privacy Policy
  • Terms and Conditions

Copyright 2025 Manuals.Online. All Rights Reserved.