manuals.online logo
Brands
  1. Home
  2. •
  3. Brands
  4. •
  5. Yealink
  6. •
  7. IP Phone
  8. •
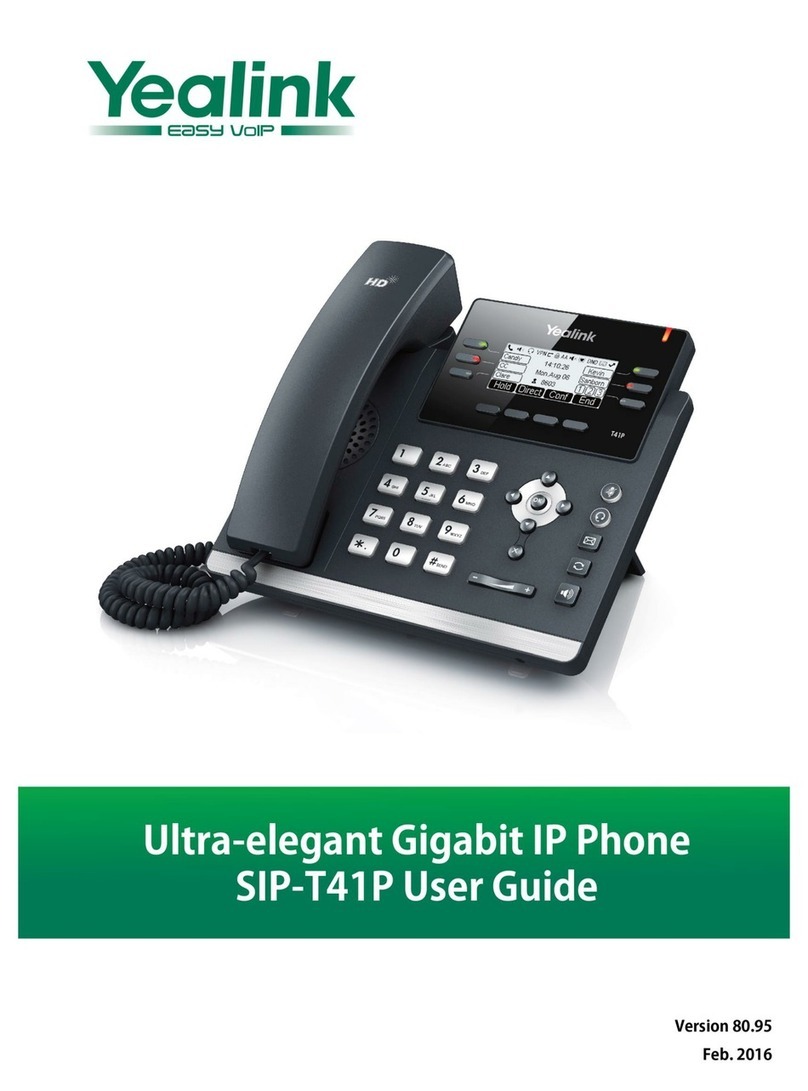
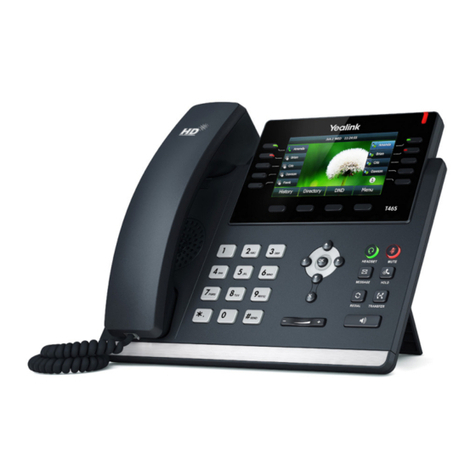
  9. Yealink Yealink SIP-T26P User manual

Yealink Yealink SIP-T26P User manual

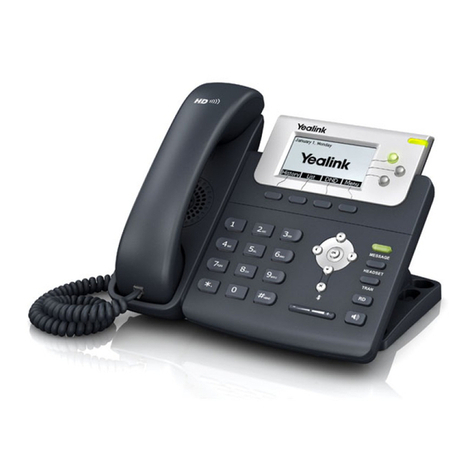
Enterprise IP Phone SIP-T26P
Quick Start Guide(V70.2)
Table of Contents
English................................................ 1
Deutsch.............................................. 7
Español.............................................. 13
Italiano............................................... 19
Français............................................. 25
1. Attach the stand, as shown below:
2. Connect the handset and optional headset, as shown below:
The following items are included in your package. If you find anything missing, contact your
system administrator.
Packaging Contents
Assembling the Phone
Stand Power Adapter
Handset Cord
Handset
IP Phone
Ethernet Cable
Stand attached
Note: The headset should be purchased separately.
1
E
N
G
L
I
S
H
(optional)
Quick Start Guide
2
E
N
G
L
I
S
H
Startup
3. Connect the network and power, as shown below:
Internet
a. AC Power Option
b. PoE (Power over Ethernet) Option
Note: If inline power (PoE) is provided, you do not need to connect the power adapter. Make sure the Ethernet
cable and hub/switch are PoE compliant.
Power Adapter
(DC 5V)
PC Connection
(Optional)
PC Connection
(Optional)
IEEE 802.3af compliant
PoE Hub/Switch
You have two options for network and power connections. Your system administrator will advise
you on which one to use.
After the IP phone has been connected to the
network and supplied with power, it automatically
begins a process of initializing itself on the network.
After that, you can begin to configure the phone via
web user interface or phone user interfafce.
Initializing
Please wait ...
3
E
N
G
L
I
S
H
Accessing the web user interface:
Account Settings: Click on Account->Account X (X=1,2,3)
Parameters of the account:
Network Settings:
Account Settings:
Configuring via phone user interface
Configuring via web user interface
Configuring your Phone
Register status icons on the LCD screen:
Note: Please locate your computer in the same network segment of the IP phone (192.168.0.X) to access the
web user interface. Contact your system administrator for more information.
Note: Check with your system administrator if any error appears during the registration process or if a specific
configuration is required for your registration.
Note: The wrong network settings may result in inaccessibility of your phone and may have an impact on the
network performance. Contact your system administrator for more information.
1. Press the OK key when the phone is idle to get the IP address of the phone.
You can configure the network settings in the following ways:
It shows the register status of the current account.
You can select On/Off to enable/disable the account.
It is shown on the LCD to identify the account.
It is shown as caller ID when placing a call.
It is provided by ITSP for registration (required).
It is authenticated ID for authentication provided by ITSP (required).
It is provided by ITSP for registration (required).
DHCP: By default, the phone attempts to contact a DHCP server in your network in order to obtain
its valid network settings, e.g., IP address, subnet mask, gateway address and DNS address.
Static IP Address: If your phone can not contact a DHCP server for any reason, you need to
configure IP address, subnet mask, gateway address, primary DNS address and
secondary DNS address for the phone manually.
PPPoE: If you are using an xDSL modem, you can connect your phone to the Internet via PPPoE
mode. Contact the ITSP for the account and password.
Press the Menu soft key when the phone is idle, select Settings->Advanced Settings
(Password:admin)->Network->WAN Port/PC Port/VLAN/Webserver Type/802.1x Settings/VPN to
configure the network settings.
Press the Menu soft key when the phone is idle, select Settings->Advanced Settings
(Password:admin)->Accounts to configure the account settings.
2. Open the web browser of your computer, enter the IP address into the address bar (e.g.,
"http://192.168.0.10" or "192.168.0.10") and press Enter.
Register Status:
Account Active:
Label:
Display Name:
User Name:
Register Name:
Password:
SIP Server:
3. Enter the user name (default: admin) and password (default: admin) in the pop-up dialogue
box and click OK.
Network Settings: Click on Network->Internet Port(WAN)
Note: Refer to Configuring via web user interface for the parameter informantion.
Registered Registration Failed Registering
4
E
N
G
L
I
S
H
Basic Call Features
Placing a Call
Answering a Call
Ending a Call
Call Mute and Un-mute
Redial
Call Hold and Resume
To place a call on hold:
Using the handset:
Using the speakerphone:
Using the headset:
Using the handset:
Using the speakerphone:
Using the headset:
Using the handset:
Using the speakerphone:
Using the headset:
1. With the handset on-hook, press .
1. Pick up the handset.
2. Enter the number, and then press the Send soft key.
1. With the headset connected, press to activate the headset mode.
2. Enter the number, and then press the Send soft key.
Note: During a call , you can alternate between headset, hands-free speakerphone and handset modes by
pressing the Headset key or the Speakerphone key or picking up the handset. Headset mode requires a
headset connected.
Note: You can ignore an incoming call by pressing the Reject soft key.
2. Enter the number, and then press the Send soft key.
Pick up the handset.
Press .
Hang up the handset or press the Cancel soft key.
Press .
Press or the Cancel soft key.
Press the Cancel soft key.
Press to enter the Dialed Calls list, press or to select the desired call, and then press
or the Send soft key.
Press twice when the phone is idle to call the last dialed number.
To resume the call, do one of the following:
Press to mute the microphone during a call.
Press again to un-mute the call.
If there is only a call on hold, press or the Resume soft key.
Press or the Hold soft key during an active call.
5
E
N
G
L
I
S
H
Semi-Attended Transfer
Attended Transfer
Call Conference
Call Forward
Blind Transfer
Call Transfer
Speed Dial
To configure a speed dial key:
To use the speed dial key:
Note: You can split the conference call into two individual calls by pressing the Split soft key.
If there is more than one call on hold, press or to select the desired call, and then press
or the Resume soft key.
You can transfer a call in the following ways:
1. Press or the Tran soft key during an active call. The call is placed on hold.
2. Enter the number you want to transfer to, and then press .
3. Press or the Tran soft key when the second party answers.
To enable call forward:
Always Forward----Incoming calls are all forwarded unconditionally.
Busy Forward----Incoming calls are forwarded when the phone is busy.
No Answer Forward----Incoming calls are forwarded when the phone is not answered
after a preset time period.
1. Press the Menu soft key when the phone is idle, and then select Features->Call Forward.
2. Select the desired forward type:
3. Enter the number you want to forward to. For No Answer Forward, enter the ring time to wait
before forwarding.
4. Press the Save soft key to accept the change.
1. Press or the Conf soft key during an active call. The call is placed on hold.
2. Enter the number of the second party, and then press the Send soft key.
4. Hang up the handset to disconnect all parties.
1. Press the Menu soft key when the phone is idle, and then select Features->DSS Keys->
Memory Keys (or Line Keys).
2. Select the desired DSS key, and then press the Enter soft key.
4. Press the Save soft key to accept the change.
Press the speed dial key to dial out the preset number.
3. Select Speed Dial from the Type field, select the desired line from the Account ID field, and enter
the number in the Value field.
in the conference.
3. Press or the Conf soft key again when the second party answers. All parties are now joined
2. Enter the number you want to transfer to, and then press .
3. Press or the Tran soft key when you hear the ring-back tone.
3. Press or the Tran soft key.
2. Enter the number you want to transfer to.
6
E
N
G
L
I
S
H
Customizing Your Phone
Voice Message
Contact Directory
Ring Tone
Volume Adjustment
To add a contact:
To edit a contact:
Call History
Note: You can add contacts from the call history easily. For more information, refer to Call History above.
To delete a contact:
To listen to voice mail messages:
Press the Send soft key to place a call.
Select Detail to view detailed information about the entry.
Select Add to Contacts to add the entry to the local directory.
Select Add to Blacklist to add the entry to the blacklist.
Select Delete All to delete all the entries from the list.
Press during a call to adjust the receiver volume of the handset/speakerphone/
headset.
Press when the phone is idle to adjust the ringer volume.
Press the Delete soft key to delete the entry from the list.
The Message Waiting Indicator on the idle screen indicates that you have new voice messages
waiting. The Message key LED lights up.
1. Press or the Connect soft key.
2. Follow the voice prompts to listen to your voice messages.
1. Press the History soft key when the phone is idle, press or to scroll through the list.
2. Select an entry from the list, you can do the following:
If you press the Option soft key, you can also do the following:
1. Press the Dir soft key when the phone is idle, and then select Local Directory->Contacts.
2. Press the Add soft key to add a contact.
1. Press the Dir soft key when the phone is idle, and then select Local Directory->Contacts.
3. Press the OK soft key when “Delete Selected Item?” prompts on the LCD screen.
1. Press the Menu soft key when the phone is idle, and then select Settings->Basic Settings->
Ring Tones.
2. Press or to select the desired ring tone.
3. Press the Save soft key to accept the change.
3. Edit the contact information.
4. Press the Save soft key to accept the change.
3. Enter a unique contact name in the Name field, and enter the phone number in the proper field.
2. Press or to select the desired contact, press the Option soft key and then select Detail
from the prompt list.
2. Press or to select the desired contact, press the Option soft key and then select Delete
from the prompt list.
7
D
E
U
T
S
C
H
1. Befestigen Sie den Ständer gemäß der nachfolgenden Abbildung:
2. Verbinden Sie den Hörer und ein optionales Headset gemäß nachfolgender
Abbildung:
Folgendes Zubehör ist im Lieferumfang enthalten. Sollte etwas fehlen, wenden Sie sich bitte an
Ihren Systemadministrator.
Lieferumfang
Installation des Telefons
Ständer Netzadapter
Hörerkabel
Hörer
IP-Telefon
Ethernet-Kabel
Befestigter Ständer
Hinweis: Das Headset ist separat erhältlich.
(optionales)
Erste Schritte
8
D
E
U
T
S
C
H
Inbetriebnahme
3. Nehmen Sie die Anschlüsse ans Netzwerk und Stromnetz wie folgt vor:
Internet
a. Netzanschluss (AC)
b. Anschluss via PoE (Power-over-Ethernet)
Hinweis: Falls ein Ethernet-Anschluss (PoE) vorhanden ist, wird der Netzadapter nicht benötigt. Vergewissern
Sie sich, dass das Ethernet-Kabel und der Hub/Schalter PoE-konform sind.
Netzadapter
(DC 5V)
PC-Verbindung
(optional)
PoE-Hub/Schalter, konform mit IEEE 802.3af
Es gibt zwei Methoden für den Anschluss des Netzwerks und Stromnetzes. Ihr Systemadministrator
wird Sie darüber beraten, welche Methode für Sie geeignet ist.
Nachdem das IP-Telefon an das Netzwerk
angeschlossen wurde und mit Strom versorgt wird,
startet es automatisch die eigene Initialisierung im
Netzwerk. Danach können Sie das Telefon über die
Weboberfläche oder die Benutzeroberfläche des
Telefons konfigurieren.
PC-Verbindung
(optional)
Initializing
Please wait ...
9
D
E
U
T
S
C
H
Zugriff auf die Weboberfläche:
Kontoeinstellungen: Klicken Sie auf Konto->Konto X (X=1,2,3)
Einstellungen des Kontos:
Netzwerkeinstellungen:
Kontoeinstellungen:
Konfiguration über die Benutzeroberfläche des Telefons
Konfiguration über die Weboberfläche
Konfiguration Ihres Telefons
Symbole im LCD-Display für den Registrierungsstatus:
Hinweis: Bitte lokalisieren Sie Ihren Computer in dem gleichen Netzwerksegment wie des IP-Telefons
(192.168.0.X), um auf die Weboberfläche zugreifen zu können. Bitte wenden Sie sich für weitere
Informationen an Ihren Systemadministrator.
Hinweis: Wenden Sie sich an Ihren Systemadministrator, falls während der Registrierung Fehler auftreten oder
eine bestimmte Konfiguration für die Registrierung benötigt wird.
Hinweis: Falsche Netzwerkeinstellungen können zur Unzugänglichkeit Ihres Telefons und zu einer
Beeinträchtigung der Netzwerkleistung führen. Bitte wenden Sie sich für weitere Informationen an
Ihren Systemadministrator.
1. Drücken Sie im Ruhezustand des Telefons die Taste OK , um die IP-Adresse Ihres Telefons
anzeigen zu lassen.
Sie können die Netzwerkeinstellungen wie folgt konfigurieren:
Zeigt den Registrierungsstatus des aktuellen Kontos an.
Wählen Sie zum Ein/Aus des Kontos die Option Ein/Aus.
Erscheint im Display zur Identifizierung des Kontos.
Anruferkennung, die während eines Anrufs angezeigt wird.
Wird von ITSP für die Registrierung bereitgestellt (erforderlich).
Eine autorisierte ID, die von ITSP für Autorisierungszwecke bereitgestellt
wird (erforderlich).
Wird von ITSP für die Registrierung bereitgestellt (erforderlich).
DHCP: Per Werkseinstellung wird das Telefon versuchen, einen DHCP-Server in Ihrem Netzwerk zu
kontaktieren, um die gültigen Netzwerkeinstellungen zu beziehen, z.B. IP-Adresse,
Subnetz-Maske, Gateway, DNS-Server.
Statische IP-Adresse: Falls Ihr Telefon aus irgendeinem Grund keinen DHCP-Server kontaktieren
kann, müssen Sie die Konfiguration von IP-Adresse, Subnetz-Maske, Gateway und
primärem und sekundärem DNS-Server manuell vornehmen.
PPPoE: Falls Sie ein xDSL-Modem verwenden, können Sie Ihr Telefon per PPPoE-Modus mit dem
Internet verbinden. Wenden Sie sich für das Konto und Passwort an ITSP.
Drücken Sie im Ruhezustand des Telefons die Taste Menü und wählen Sie anschließend
Einstellungen->Erweitert (Passwort: admin)->Netzwerk->WAN-Port/PC-Port/VLAN/Webserver Typ/
802.1x Einstellungen/VPN, um die Netzwerkeinstellungen zu konfigurieren.
Drücken Sie im Ruhezustand des Telefons die Taste Menü und wählen Sie anschließend
Einstellungen->Erweitert (Passwort: admin)->Konten, um die Kontoeinstellungen zu konfigurieren.
2. Öffnen Sie an Ihrem Computer den Internet Browser und geben Sie die IP-Adresse in die
Adressleiste ein (z.B. „http://192.168.0.10“ oder „192.168.0.10“). Klicken Sie anschließend auf
Enter.
Status:
Konto aktiv:
Name:
Displayname:
Benutzername:
Registrierter Name:
3. Geben Sie in das geöffnete Dialogfenster den Benutzernamen (per Werkseinstellung: Admin)
und das Passwort (per Werkseinstellung: Admin) ein; klicken Sie anschließend auf OK.
Netzwerkeinstellungen: Klicken Sie auf Netzwerk->Internet-Port (WAN)
Hinweis: Informationen über die Einstellungen finden Sie unter Konfiguration über die Weboberfläche.
Registriert Registrierung fehlgeschlagen Registrierung läuft
Password:
SIP Server:
10
D
E
U
T
S
C
H
Allgemeine Anruffunktionen
Anrufe tätigen
Anrufe entgegennehmen
Anrufe beenden
Anrufe stumm oder wieder laut schalten
Wahlwiederholung
Anrufe halten und fortsetzen
Anrufe in der Warteschleife parken:
Mit dem Hörer:
Mit der Freisprecheinrichtung:
Mit Headset:
Mit dem Hörer:
Mit der Freisprecheinrichtung:
Mit Headset:
Mit dem Hörer:
Mit der Freisprecheinrichtung:
Mit Headset:
1. Drücken Sie bei aufgelegtem Hörer die Taste .
1. Nehmen Sie den Hörer ab.
2. Geben Sie die Nummer ein und drücken Sie die Funktionstaste Anrufen.
1. Drücken Sie bei angeschlossenem Headset die Taste , um den Headset-Modus zu
aktivieren.
2. Geben Sie die Nummer ein und drücken Sie die Funktionstaste Anrufen.
Hinweis: Während eines Gesprächs können Sie zwischen den Modi Headset, Freisprecheinrichtung und Hörer
umschalten, indem Sie entweder die Taste Headset oder Speakerphone drücken oder den Hörer
abnehmen. Im Headset-Mode muss ein Headset angeschlossen sein.
Hinweis: Mit der Funktionstaste Abw. können Sie Anrufe wegdrücken.
2. Geben Sie die Nummer ein und drücken Sie die Funktionstaste Anrufen.
Nehmen Sie den Hörer ab.
Drücken Sie die Taste .
Legen Sie den Hörer auf oder drücken Sie die Funktionstaste Abbrch.
Drücken Sie die Taste .
Drücken Sie die Taste oder Abbrch.
Drücken Sie die Funktionstaste Abbrch.
Drücken Sie die Taste , um die Liste Getätigte Anrufe zu öffnen. Wählen Sie mit den
Tasten oder die gewünschte Nummer und drücken Sie dann die Taste oder Anrufen.
Drücken Sie im Ruhezustand des Telefons die Taste , um die zuletzt gewählte Nummer
anzurufen.
Sie haben mehrere Möglichkeiten, das Gespräch fortzusetzen:
Drücken Sie während eines Anrufs die Taste , um das Mikrofon stumm zu schalten.
Drücken Sie die Taste erneut, um den Anruf wieder laut zu schalten.
Wenn nur ein Anruf in der Warteschleife geparkt ist, drücken Sie die Taste oder Weiter.
Drücken Sie während eines laufenden Gesprächs die Taste oder Halten.
Wenn mehr als ein Anruf in der Warteschleife geparkt ist, wählen Sie zunächst mit den
Tasten oder einen Anruf und drücken Sie dann die Taste oder Weiter.
11
D
E
U
T
S
C
H
Weiterleitung bei Rufzeichen
Weiterleitung mit Rücksprache
Konferenzschaltung
Anrufumleitung
Direkte Weiterleitung
Anrufe weiterleiten
Kurzwahl
Konfiguration von Kurzwahltasten:
Verwendung der Kurzwahltasten:
Hinweis: Sie können eine Konferenzschaltung in zwei unabhängige Anrufe aufteilen, indem Sie die
Funktionstaste Teilen drücken.
Anrufe lassen sich wie folgt weiterleiten:
1. Drücken Sie während eines laufenden Gesprächs die Taste oder Vermitt.. Der Anruf wird
in der Warteschleife geparkt.
1. Drücken Sie während eines laufenden Gesprächs die Taste oder Vermitt.. Der Anruf wird
in der Warteschleife geparkt.
1. Drücken Sie während eines laufenden Gesprächs die Taste oder Vermitt.. Der Anruf wird
in der Warteschleife geparkt.
2. Geben Sie die Nummer ein, an die der Anruf weitergeleitet werden soll, und drücken Sie dann
die Taste .
3. Sobald der Anruf auf der zweiten Leitung entgegengenommen wird, drücken Sie die Taste
oder Vermitt..
Anrufumleitung aktivieren:
Immer weiterl.----Alle eingehenden Anrufe werden vorbehaltlos umgeleitet.
Bei Besetzt----Eingehende Anrufe werden umgeleitet, wenn die Leitung besetzt ist.
Bei Abwesenheit----Eingehende Anrufe werden umgeleitet, wenn sie innerhalb einer
voreingestellten Zeit nicht entgegengenommen werden.
1. Drücken Sie im Ruhezustand des Telefons die Funktionstaste Menüund wählen Sie anschließend
Leist. Merkm.->Anrufweiterschaltung.
2. Wählen Sie die gewünschte Art der Rufumleitung:
3. Geben Sie die Nummer ein, an die der Anruf umgeleitet werden soll. Stellen Sie für die Option
Bei Abwesenheit den Zeitraum zwischen dem Eingang des Anrufs und der Umleitung ein.
4. Übernehmen Sie die Änderungen durch Drücken der Funktionstaste Speich..
1. Drücken Sie während eines laufenden Gesprächs die Taste oder Konferenz. Der Anruf wird
in der Warteschleife geparkt.
2. Geben Sie die Nummer der zweiten Leitung ein und drücken Sie anschließend die
Funktionstaste Anrufen.
4. Legen Sie den Hörer auf, um alle Beteiligten zu trennen.
1. Drücken Sie im Ruhezustand des Telefons die Funktionstaste Menüund wählen Sie anschließend
Leist. Merkm.->Tasten programmieren->Funktionstasten(oder Displaytasten).
2. Wählen Sie die gewünschte DSS-Taste und drücken Sie dann die Funktionstaste Eingabe.
4. Übernehmen Sie die Änderungen durch Drücken der Funktionstaste Speich..
Drücken Sie die Kurzwahltaste, um die gespeicherte Nummer zu wählen.
3. Wählen Sie unter Funktion die Option Kurzwahl und unter Konto die gewünschte Leitung. Geben
Sie dann die Nummer im Feld Wert ein.
3. Drücken Sie, sobald der Anruf auf der zweiten Leitung entgegengenommen wird, erneut die
Taste oder Konferenz. Alle Beteiligten der Konferenz sind nun zugeschaltet.
2. Geben Sie die Nummer ein, an die der Anruf weitergeleitet werden soll, und drücken Sie dann
die Taste .
3. Sobald das Rufzeichen ertönt, drücken Sie die Taste oder Vermitt..
3. Drücken Sie die Taste oder Vermitt..
2. Geben Sie die Nummer ein, an die der Anruf weitergeleitet werden soll.
12
D
E
U
T
S
C
H
Benutzerdefinierte Einstellungen des Telefons
Klingelton
Lautstärke einstellen
Drücken Sie während eines Anrufs die Taste , um die Empfängerlautstärke des Hörers
/der Freisprecheinrichtung/des Headsets einzustellen.
Drücken Sie im Ruhezustand des Telefons die Taste , um die Klingellautstärke
einzustellen.
Anrufliste
Drücken Sie die Funktionstaste Anrufen, um einen Anruf zu tätigen.
Wählen Sie Detail, um detaillierte Informationen des Eintrags anzuzeigen.
Wählen Sie Speichern, um den Eintrag zum lokalen Verzeichnis hinzuzufügen.
Wählen Sie Zur blacklist, um den Eintrag zur schwarzen Liste hinzuzufügen.
Wählen Sie Alle löschen, um alle Einträge der Liste zu löschen.
Mit der Funktionstaste Entf. entfernen Sie den Eintrag aus der Liste.
1. Drücken Sie im Ruhezustand des Telefons die Funktionstaste Rufl.. Mit den Tasten oder
scrollen Sie durch die Liste.
2. Nachdem Sie einen Eintrag gewählt haben, können Sie wie folgt vorgehen:
Wenn Sie die Funktionstaste Option drücken, haben Sie folgende Möglichkeiten:
1. Drücken Sie im Ruhezustand des Telefons die Funktionstaste Menüund wählen Sie anschließend
Einstellungen->Grundeinstellungen->Rufton.
2. Mit den Tasten oder wählen Sie einen Klingelton aus.
3. Übernehmen Sie die Änderungen durch Drücken der Funktionstaste Speich..
Sprachnachricht
Sprachnachrichten anhören:
Die Anzeigelampe für wartende Nachrichten im inaktiven Display weist darauf hin, dass eine
neue Sprachnachricht eingegangen ist. Die LED-Anzeige der Nachrichten-Taste leuchtet auf.
1. Drücken Sie die Taste oder Öffnen.
2. Folgen Sie den Ansagen, um die Nachricht abzuspielen.
Telefonbuch
Kontakt hinzufügen:
Kontakt bearbeiten:
Hinweis: Es ist außerdem möglich, Kontakte aus der Anrufliste hinzuzufügen. Weitere Informationen finden Sie
oben im Abschnitt Anrufliste.
Kontakt löschen:
1. Drücken Sie im Ruhezustand des Telefons die Funktionstaste Verz. und wählen Sie anschließend
Lokales Verzeichnis->Telefonbuch.
2. Drücken Sie die Taste Neu, um einen Kontakt hinzuzufügen.
1. Drücken Sie im Ruhezustand des Telefons die Funktionstaste Verz. und wählen Sie anschließend
Lokales Verzeichnis->Telefonbuch.
1. Drücken Sie im Ruhezustand des Telefons die Funktionstaste Verz. und wählen Sie anschließend
Lokales Verzeichnis->Telefonbuch.
3. Drücken Sie, wenn im LCD-Display die Anzeige „Gewählten Eintrag löschen?“ erscheint, die
Funktionstaste OK.
3. Aktualisieren Sie nun die Kontaktdaten.
4. Übernehmen Sie die Änderungen durch Drücken der Funktionstaste Speich..
3. Geben Sie im Feld Name einen einmaligen Kontaktnamen und im entsprechenden Textfeld die
Telefonnummer ein.
2. Wählen Sie mit den Tasten oder den gewünschten Kontakt. Drücken Sie die
Funktionstaste Option und wählen Sie in der angezeigten Liste die Option Detail.
2. Wählen Sie mit den Tasten oder den gewünschten Kontakt. Drücken Sie die
Funktionstaste Option und wählen Sie in der angezeigten Liste die Option Löschen.
13
Contenido del embalaje
E
S
P
A
O
L
Ñ
Teléfono IP Auricular Base
(opcional)
Alimentador
Cable del auricular Cable Ethernet Guía de inicio rápido
Montaje del teléfono
Base colocada
1. Fije la base como se muestra a continuación:
2. Conecte el auricular y el casco (opcional) como se muestra a continuación:
Nota: El casco debe comprarse por separado.
En el embalaje se incluyen los artículos siguientes. Si detecta que falta algo, contacte con el administrador de su sistema.
14
Puesta en funcionamiento
Internet
Initializing
Please wait ...
E
S
P
A
Ñ
O
L
15
Configuración del teléfono
E
S
P
A
Ñ
O
L
16
Funcionalidades básicas de llamadas
E
S
P
A
O
L
Ñ

Other manuals for Yealink SIP-T26P

16

Other Yealink IP Phone manuals

Yealink T22P User manual

Yealink

Yealink T22P User manual

Yealink T43U Troubleshooting guide

Yealink

Yealink T43U Troubleshooting guide

Yealink VP59 Teams User manual

Yealink

Yealink VP59 Teams User manual

Yealink SIP-T32G User manual

Yealink

Yealink SIP-T32G User manual

Yealink Yealink SIP-T48G User manual

Yealink

Yealink Yealink SIP-T48G User manual

Yealink T57W User manual

Yealink

Yealink T57W User manual

Yealink SIP-T2XP Use and care manual

Yealink

Yealink SIP-T2XP Use and care manual

Yealink Yealink SIP-T28P User manual

Yealink

Yealink Yealink SIP-T28P User manual

Yealink SIP-T48S User manual

Yealink

Yealink SIP-T48S User manual

Yealink T26P User manual

Yealink

Yealink T26P User manual

Yealink Yealink SIP-T20P Original operating instructions

Yealink

Yealink Yealink SIP-T20P Original operating instructions

Yealink T20P User manual

Yealink

Yealink T20P User manual

Yealink Yealink SIP-T22P User manual

Yealink

Yealink Yealink SIP-T22P User manual

Yealink MP54 User manual

Yealink

Yealink MP54 User manual

Yealink T43U User manual

Yealink

Yealink T43U User manual

Yealink T42G User manual

Yealink

Yealink T42G User manual

Yealink SIP-T2 Series User manual

Yealink

Yealink SIP-T2 Series User manual

Yealink Yealink SIP-T22P User manual

Yealink

Yealink Yealink SIP-T22P User manual

Yealink T4 series User manual

Yealink

Yealink T4 series User manual

Yealink SIP-T42S IP User manual

Yealink

Yealink SIP-T42S IP User manual

Yealink Telkom W52P User manual

Yealink

Yealink Telkom W52P User manual

Yealink SIP VP-T49G User manual

Yealink

Yealink SIP VP-T49G User manual

Yealink T46G Skype For Business Edition User manual

Yealink

Yealink T46G Skype For Business Edition User manual

Yealink T41 User manual

Yealink

Yealink T41 User manual

Popular IP Phone manuals by other brands

Cisco 30 VIP troubleshooting guide

Cisco

Cisco 30 VIP troubleshooting guide

Mitel 112 installation guide

Mitel

Mitel 112 installation guide

ADTRAN Aastra 9133i IP user guide

ADTRAN

ADTRAN Aastra 9133i IP user guide

Aastra 6753I Quick reference guide

Aastra

Aastra 6753I Quick reference guide

Grandstream Networks GXV-3140 Technical specifications

Grandstream Networks

Grandstream Networks GXV-3140 Technical specifications

Cisco 8800 Series Deployment guide

Cisco

Cisco 8800 Series Deployment guide

Mitel MiVoice 5340e Quick reference guide

Mitel

Mitel MiVoice 5340e Quick reference guide

Altigen Alti-IP 600H Phone quick reference

Altigen

Altigen Alti-IP 600H Phone quick reference

Teltronics ClearCom12 manual

Teltronics

Teltronics ClearCom12 manual

Fanvil D800 user manual

Fanvil

Fanvil D800 user manual

Ericsson Dialog 5446 Quick reference guide

Ericsson

Ericsson Dialog 5446 Quick reference guide

Snom 320 Quick installation

Snom

Snom 320 Quick installation

Kingtel KT-6111D6 Owner's instruction manual

Kingtel

Kingtel KT-6111D6 Owner's instruction manual

Cisco 6941 - Unified IP Phone Slimline VoIP Quick reference guide

Cisco

Cisco 6941 - Unified IP Phone Slimline VoIP Quick reference guide

Aastra 6753I installation guide

Aastra

Aastra 6753I installation guide

switel DC2000 user manual

switel

switel DC2000 user manual

Grandstream Networks GXP2160 Quick installation guide

Grandstream Networks

Grandstream Networks GXP2160 Quick installation guide

NEC UNIVERGE SV9100 DT820 Reference sheet

NEC

NEC UNIVERGE SV9100 DT820 Reference sheet

manuals.online logo
manuals.online logoBrands
  • About & Mission
  • Contact us
  • Privacy Policy
  • Terms and Conditions

Copyright 2025 Manuals.Online. All Rights Reserved.