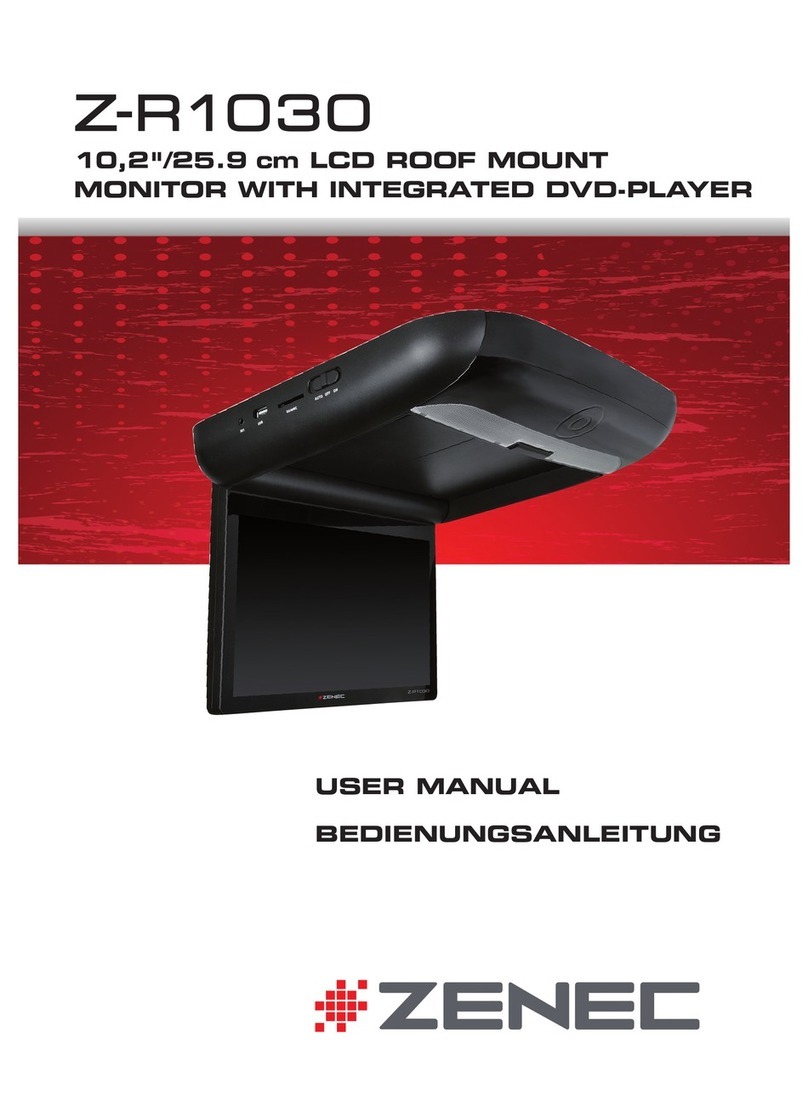
ZENEC Z-R1030 User manual

UŽIVATELSKÝ NÁVOD
Z-R1030
10,2"/25.9 cm LCD STROPNÍ MONITOR S INTEGROVANÝM
DVD-PŘEHRÁVAČEM

27
26
Z-R1030
Thank you for your purchase of this ZENEC product!
With the Z-R1030 monitor, you have chosen a technically mature high quality product that
will give you a long service life and very high reliability, since this product has been manu-
factured using only high quality parts. Even though this unit has been designed for intuitive
and easy operation, it is recommended that you read this manual learning how to operate
this device in detail, so you are able to use all implemented features and functions. Please
retain this operating manual in a safe place for future reference. Read the warranty condi-
tions at the end of this manual, to make sure you bene t from full warranty coverage.
If you have further questions about this product, please consult the dealer where it was
purchased, or the ZENEC distributor in your country.
KEY FEATURES
• 10.2“/25.9 cm 16:9 LCD roof mount monitor with integrated DVD-player
• 16:9 display with 800 x 480 pixels panel resolution and anti-glare coating
• Large viewing angle, left/right > 65° / top > 45° / down > 55°
• Operation via touch sensors and on-screen menu guidance
• Slot-in CD/DVD loader compatible with CD-DA, CD-RW, CD-R, CD-ROM(XA), DVD-
ROM, DVD±R, DVD±RW, MP3, WMA, AVI, Xvid (DVD region code 2)
• Integrated Dolby Digital decoder
• Slot port for SD/MMC cards compatible with MP3, WMA, AVI, Xvid
• 2 x USB 2.0 port (external up to 32 GB / internal up to 16 GB) compatible with MP3, WMA,
AVI, Xvid
• Multi-norm video system with NTSC & PAL source signal auto switching
• Integrated IR-transmitter for operation of wireless headphones
• Integrated LED dome lights
• 2 x A/V RCA-inputs
• 1 x A/V RCA-output
•IR-remote control
Compatibility
This monitor is compatible with PAL and NTSC video streams. The internal video signal
processing circuitry automatically recognizes and syncs with PAL or NTSC video sources.
Applications
This roof mount monitor is compatible with most A/V formats and can be combined with any
common video device, featuring an RCA (CVBS) composite video output.

27
26
Z-R1030
LIEFERUMFANG
Parts Name Quantity
Monitor 1
IR remote control with battery 1
A/V cable 1
ST4.2 x 16 mm screws 8
PM4 x 12 mm screws 4
Metal mounting plate 1
User’s manual 1
Rubber gasket 1
CAUTION:
■Use only the contents of this package to install and use the DVD player. Use of any
accessories not provided with this player may result in damage to the player.
TABLE OF CONTENT
SAFETY INFORMATION ................................................................................................... 28
IR REMOTE CONTROL ...............................................................................................29-31
ROOF MOUNT MONITOR ............................................................................................ 32-34
BASIC OPERATION ..................................................................................................... 35-39
MAIN MENU ....................................................................................................................... 40
SYSTEM SETUP ........................................................................................................... 41-42
CONNECTIONS AND WIRING ..................................................................................... 43-44
MOUNTING ................................................................................................................... 45-46
TROUBLESHOOTING ....................................................................................................... 47
SPECIFICATIONS .............................................................................................................. 48
MAINTENANCE ................................................................................................................. 49
WARRANTY ..................................................................................................................50-51

29
28
SAFETY INFORMATION
1. Read these instructions entirely.
2. Keep these instructions within reach. Whoever uses the unit should have access to this
manual.
3. Heed all warnings. Follow the instructions.
4. This unit is designed to be used in a vehicle with 12V DC battery and negative ground.
5. Do not operate the unit in any other way than described in this manual. Failure to follow
the instructions within this manual may void your warranty.
6. Do not disassemble or alter the unit in any way, because it will void your warranty. Do
not attempt to repair or to service the unit yourself, but contact an authorized ZENEC
dealer instead.
7. Use only original accessories which are designed and manufactured for the unit, other-
wise you will risk damage. Install the unit according to the mounting manual, using the
supplied mounting accessories. The forces of acceleration upon accidents are some-
times huge. Incorrect mounted units are a big risk for the driver and the car passengers.
8. Protect the unit from water and other liquids, which can enter the casing. A short circuit
or even re could result.
9. To prevent a short circuit, never insert or stick any metallic objects (such as coins or
metal tools) into the unit.
10. Before you replace a defective fuse, try to nd the cause for the short circuit. Please
pay attention to the cables of the power supply! If the short circuit doesn’t result from a
failure of the power supply or wiring, you can replace the defective fuse with a new one
(same values). If the short-circuit is still present, please contact an authorized ZENEC
dealer.
11. When connecting to any other device, read its user’s guide for detailed safety instructions.
Do not connect incompatible products.
12. Be careful not to drain the car battery while using the unit when the car engine is turned
off. Because the unit uses a considerable amount of energy and the battery will be
charged only while the engine is running, it might happen that the battery will discharge
to a point where it’s not longer possible to start the engine.
13. According to the law in different European countries, driving with monitors which are
showing moving pictures, except navigation system use, in the viewing range of the dri-
ver is not allowed because the driver might be distracted from traffic. Please respect the
traffic regulations of your country, or you might face penalties in case of an accident or
even loose insurance coverage. Please pay attention to the volume inside your vehicle,
because you are obliged to notice exterior sounds like police sirens etc.
14. Don’t expose the unit to hard impacts. A mechanical or electrical malfunction of the unit
could be the result.
15. Should any problems or questions occur during installation, please consult your ZENEC
dealer/importer.

29
28
Z-R1030
IR REMOTE CONTROL
1. [POWER] button
■Press the [POWER] button to turn the player on or off.
2. [SETUP] button
■Press the [SETUP] button to access the setup menu to modify the DVD player settings.
3. [MUTE] button
■Press the [MUTE] button to turn the sound on or off.
4. [EJECT] button
■Press the [EJECT] button to eject the disc.
5. Numeric buttons
■Press one of the numeric buttons to enter numbers directly, such as for settings or track
numbers.
6. [SRC] button
■Press the [SRC] button to select the video input mode (DVD →A/V-IN1 →A/V-IN2).
■Press the [SRC–] button for 2 seconds when you are in the DVD-mode to reach the SD/
MMC or the USB mode. You just can plug one medium. When you plug both, the unit will
nd only USB1.
7. [MENU] button
■Press the [MENU] button to view the DVD disc’s main menu.
8. [PREVIOUS] button
■Press the [PREVIOUS] button to go to the previous chapter on DVD or track on CD, USB,
SD, etc.
9. [ARROW and ENTER] buttons
■Press the [ARROW] button to navigate in a menu and change setting values.
Nr. Beschreibung Funktionen
1 Menü (MENU) Gedrückt halten um in das OSD Menü zu gelangen, kurz drücken zum verlassen des Menüs
212 Abspielen/Pause
37 / a Drücken für schnellen Rücklauf 2x, 4x, 8x, 16x, 32x normale Geschwindigkeit
4wNavigation oben
58 / d Drücken für schnellen Vorlauf 2x, 4x, 8x, 16x, 32x normale Geschwindigkeit
6sNavigation unten
7 Quelle (SOURCE) Auswahl des Video Eingangs: Disc, AV1, AV2, USB oder SD/MCC card
8;Die CD/DVD wird ausgeworfen
9Öffnet den Monitor Öffnen des Deckenmonitors
10 ENT. Eingabe/Bestätigung
11 Deckenlicht Deckenbeleuchtung
12 Deckenlicht Schalte Schalter für das Deckenlicht. Steht der Schalter auf Auto wird das Licht beim öffnen der Tür eingeschaltet
13 SD Schacht Lesegerät für SD Karten
14 USB Port Zum Anschluß von USB Sticks
15 AV Eingang 3,5mm Eingansbuchse für Audio/Video Ausgang
Nr. Beschreibung Funktionen
1 Ein/Aus (POWER) Schaltet das Gerät Ein/Aus
2 Einstellungen (SETUP) Drücken um in das Einstellmenü des Gerätes zu kommen
3 Stumm (MUTE) Schaltet den Ton Ein/Aus
4 Auswurf (EJECT) Die CD/DVD wird ausgeworfen
5 0-9 Nummerntasten Direkteingabe der Zahlen für Titel und Einstellungen
6 Quelle (SRC) Auswahl des Video Eingangs: Disc, AV1, AV2, USB oder SD/MCC card
7 Menü (MENU) Gedrückt halten um in das OSD Menü zu gelangen, kurz drücken zum verlassen des Menüs
87Zurück zum vorherigen Titel
9 Pfeile und Bestätigung Navigation oben/links/rechts/unten und Bestätigung
10 5Drücken für schnellen Rücklauf 2x, 4x, 8x, 16x, 32x normale Geschwindigkeit
11 Zufälliges Abspielen Spielt die Titel in zufälliger Reihenfplge ab
12 A~B Drücken um einen Teil eines Titels A-B wiederholt zu spielen/Eine Seite weiter bei der Kanalliste
13 AUDIO Einstellmenü für Audio
14 Zurück (RETURN) Zurück zum Hauptmenü, nochmal drücken um an die letzte Position der Wiedergabe zu gehen
15 Winkel (ANGLE) Auswahl des Blickwinkels
16 ZOOM Zoom Einstellung des Bilds
17 Wiederholen (REPEAT) Wiederholen eines Titels/Ordners/alles/aus
18 Untertitel (SUBTITLE) Wahl der Untertitelsprache
19 6Drücken für schnellen Vorlauf 2x, 4x, 8x, 16x, 32x normale Geschwindigkeit
20 TITLE Keine Funktion
21 3Stoppt die Wiedergabe, erneutes drücken von PLAY startet wieder von der letzten Position. Doppelt
drücken stoppt die Wiedeabe komplettrg
22 8Nächster Titel
23 12 Abspielen/Pause
24 VOL -/+ Erhöht/Reduziert die Lautstärke
25 Anzeige (DISPLAY) Zeigt die Anzeigefunktionen (Titel, Kapitel und Zeit)
26 Gehe zu (GOTO) Startet die Wiedergabe bei einem gewählten Titel/Kapitel

31
30
10. [ FAST REVERSE] button
■Press the [FAST REVERSE] button to fast reverse playback at 2x, 4x, 8x, 16x and 32x
speeds.
11. [RANDOM] button
■Press the [RANDOM] button to play chapters or tracks in random order.
12. [A-B] button
■Press the [A-B] button to repeat playback from point A to point B.
13. [AUDIO] button
■DVD: Press the [AUDIO] button to change the audio language during DVD playback.
■VCD: Press the [AUDIO] button to change the audio channel (left, right and stereo) during
VCD and CD playback.
14. [RETURN] button
■Press the [RETURN] button to return to the main menu, press again to return to the last
position of playback at DVD mode only.
15. [ANGLE] button
■Press the [ANGLE] button to select a different lming angle. This feature only works if the
DVD is recorded with multiple angles.
16. [ZOOM] button
■Press the [ZOOM] button to set the zoom for movie viewing.
17. [REPEAT] button
■Press the [REPEAT] button to repeat the track or the entire disc.
18. [SUBTITLE] button
■Press the [SUBTITLE] button to select and turn on subtitles during playback.
19. [FAST FORWARD] button
■Press the [FAST FORWARD] button to fast forward playback at 2x, 4x, 8x, 16x and 32x
speeds.
20. [TITLE] button
■Press the [TITLE] button to view the DVD disc’s title menu.
21. [ STOP] button
■Press the [ STOP] button to stop playback, press the [PLAY] or the [ENTER] button to
start playing at the last position; Press the [STOP] button twice to fully stop playback,
Press the [PLAY] or [ENTER] button to start playing at the beginning of DVD.
22. [ NEXT] button
■Press the [NEXT] button to go to the next chapter on DVD or track on CD.
23. [PLAY / PAUSE] button
■Press the [PLAY / PAUSE] button to play or pause the CD or DVD.
24. [VOL – / VOL+] buttons
■Press the [VOL – / VOL+] buttons to decrease / increase the volume.
25. [DISPLAY] button
■Press the [DISPLAY] button to display the playback information (such as title, chapter,
track and time).
26. [Goto] button
■Press the [GOTO] button to start playback at a selected chapter, track or time.

31
30
Z-R1030
1. Pull out the battery holder.
Follow the arrow 1 slide it to the right toward the battery while at the same time pull the
battery holder away from the remote control.
2. Place the battery.
Place the new lithium battery (CRD2025) with the (+) side up.
3. Push the holder back.
Using the nger to push in the holder back until the locking sound is heard.
USING THE IR REMOTE CONTROL
■Aim the IR remote control directly at the DVD player, then press any button.
■Use the IR remote control no further than ve feet (3 meter) from the sensor.
■Direct sunlight or very bright light reduces sensitivity to the remote signal commands.
■Any obstruction between the remote sensor and remote control may disrupt reception.
NOTE:
If the remote control does not function, or if the operating range becomes reduced, replace
the old battery with new one.
1. Dispose used battery properly.
2. Do not misuse battery by shorting the positive + and negative terminal or put into re
which may cause the battery to explode.
3. Battery and battery holder can be a choking hazard. Keep the remote control away
from young children.

33
32
ROOF MOUNT MONITOR
HARD KEYS AND SENSOR BUTTONS
Nr. Description
Function or control
1 MENU Touch and hold to display the OSD menu, touch again to close the OSD menu
212 Play / pause
37
/
a
Previous chapter / navigation left; press and hold to fast reverse at 2x, 4x, 8x, 16x, 32x normal speed
4wNavigation up
58/d Next chapter or track / navigation right; press and hold to fast forward at 2x, 4x, 8x, 16x, 32x normal speed
6sNavigation down
7 SOURCE Selects the video input source: Disc, AV1, AV2, USB or SD card
8;Eject disc
9Panel open switch Press to release monitor panel
10 ENT. Enter/confirm choose
11 Dome Light To illuminate car
12 Dome Light switch Switch for Dome Light. When switch is set to "AUTO", the light turns on when car door is open
13 SD card slot Reader for SD card
14 USB port Connection for USB device
15 AV-in socket 3,5mm Jack socket for Audio/Video output
Nr. Description
Function or control
1 POWER Turns player OFF or ON
2 SETUP Press to access the setup menu to modify the player settings
3MUTE Turns the sound OFF or ON
4 EJECT Ejects the disc
50~9 number keys Press to enter numbers directly, such as for settings or track numbers
6 SRC Selects the video input source: Disc, AV1, AV2, USB or SD card
7 MENU Press and hold to display the OSD menu, press again to close the OSD menu
87Press to go to the previous chapter or track
9 Arrows and ENTER Navigation up/left/right/down and confirm choose
10 5Press and hold to fast reverse at 2x, 4x, 8x, 16x, 32x normal speed
11 RANDOM Press to play chapters or tracks in random order
12 A~B Press to repeat playback from point A to point B /Move down a page in the channel list
13 AUDIO Audio settings menu
14 RETURN Press to return the main menu, press again to return the last position of playback
15 ANGLE Choose view angle
16 ZOOM Press to set the zoom for movie viewing
17 REPEAT Press to repeat one/folder/all/off
18 SUBTITLE Choose subtitle language
19 6Press and hold to fast forward at 2x, 4x, 8x, 16x, 32x normal speed
20 TITLE No function
21 3Press to stop playback, press PLAY or ENTER to start again form last position. Double press for fully stop playback
22 8Press to go to the next chapter or track
23 12 Play / pause
24 VOL -/+ Press to decrease / increase volume
25 DISPLAY Press to display the playback information (such as title, chapter, track and time)
26 GOTO Press to start playback at selected chapter, track or time
17
Nr. Description
Function or control
1 MENU Touch and hold to display the OSD menu, touch again to close the OSD menu
212 Play / pause
37
/
a
Previous chapter / navigation left; press and hold to fast reverse at 2x, 4x, 8x, 16x, 32x normal speed
4wNavigation up
58 / d Next chapter or track / navigation right; press and hold to fast forward at 2x, 4x, 8x, 16x, 32x normal speed
6sNavigation down
7 SOURCE Selects the video input source: Disc, AV1, AV2, USB or SD card
8;Eject disc
9Panel open switch Press to release monitor panel
10 ENT. Enter/confirm choose
11 Dome Light To illuminate car
12 Dome Light switch Switch for Dome Light. When switch is set to "AUTO", the light turns on when car door is open
13 SD card slot Reader for SD card
14 USB port Connection for USB device
15 AV-in socket 3,5mm Jack socket for Audio/Video output
Nr. Description
Function or control
1 POWER Turns player OFF or ON
2 SETUP Press to access the setup menu to modify the player settings
3MUTE Turns the sound OFF or ON
4 EJECT Ejects the disc
50~9 number keys Press to enter numbers directly, such as for settings or track numbers
6 SRC Selects the video input source: Disc, AV1, AV2, USB or SD card
7 MENU Press and hold to display the OSD menu, press again to close the OSD menu
87Press to go to the previous chapter or track
9 Arrows and ENTER Navigation up/left/right/down and confirm choose
10 5Press and hold to fast reverse at 2x, 4x, 8x, 16x, 32x normal speed
11 RANDOM Press to play chapters or tracks in random order
12 A~B Press to repeat playback from point A to point B / Move down a page in the channel list
13 AUDIO Audio settings menu
14 RETURN Press to return the main menu, press again to return the last position of playback
15 ANGLE Choose view angle
16 ZOOM Press to set the zoom for movie viewing
17 REPEAT Press to repeat one/folder/all/off
18 SUBTITLE Choose subtitle language
19 6Press and hold to fast forward at 2x, 4x, 8x, 16x, 32x normal speed
20 TITLE No function
21 3Press to stop playback, press PLAY or ENTER to start again form last position. Double press for fully stop playback
22 8Press to go to the next chapter or track
23 12 Play / pause
24 VOL -/+ Press to decrease / increase volume
25 DISPLAY Press to display the playback information (such as title, chapter, track and time)
26 GOTO Press to start playback at selected chapter, track or time
19 18
16
20

33
32
Z-R1030
1. [MENU] sensor button
■Press the [MENU] sensor button to enter the main menu. Press the button again to
select a menu item.
2. [PLAY/PAUSE] sensor button
3. [PREVIOUS] cursor-left sensor button
4. [CURSOR-UP] sensor button
5. [NEXT] cursor-right sensor button
6. [CURSOR-down] button
7. [SOURCE] button
■Press the [A/V] sensor button to select the video input mode (DVD → A/V-IN1 → A/V-
IN2). ■
Press the [SRC] sensor button for 2 seconds when you are in the DVD-mode to reach
the
SD or the USB mode. You can plug in just one medium. When you plug in both, the unit
will nd no medium.
8. [EJECT] sensor button
■Press the [EJECT] sensor button to eject the disc.
9. [OPEN] button
■Press the [PANEL OPEN] button to open the LCD panel.
10. [ENTER] sensor button to con~rm a selection.
11. Dome Light
■Provides an interior light for the vehicle.
12. Dome Light switch
■Move to the ON/OFF position, then press it to turn the dome light on or off.
13. SD Card slot
14. USB 1 port (standard port)
15. AV1 - IN
■Receives IR signals from the remote control and sends IR signals to IR wireless
headphone.
16. Fixing holes
■Connect the player to the mounting plate with screws inserted into these holes.
17. Disc slot
■Insert the CD or DVD disc into the slot.
18. [POWER] sensor button
■Press the [POWER] button to turn on or turn off the player
19. [RESET] pin
■Press the [RESET] pin with a pencil or other narrow-tipped tool to reset the unit.
20. USB 2 port
21. IR window
■ Receives IR signals from the remote control and sends IR signals to IR
wireless headphone.

35
34
ROOF MOUNT MONITOR DISPLAY OPERATION
TO OPEN THE DISPLAY
1. Press the OPEN button to unlock the LCD panel.
2. Swing the LCD panel downward to the desired angle.
CAUTION:
■ The LCD display open to a maximum angle of 120° degrees. Do not attempt to open it
further.
TO CLOSE THE DISPLAY
1. Swing the LCD panel upward until you hear the lock
click.
CAUTION:
■ Make sure that cords and other items do not get caught in the panel when you close it.
For your safety, be sure to close the LCD panel when not in use.
OPEN BUTTON
CLOSE
120°

35
34
Z-R1030
BASIC OPERATION
TURNING ON THE PLAYER
Press the button on the remote control or on the front panel. The player turns on, and
the input source and format are displayed on the screen:
NO DISC Noti cation
DVD Input source
NOTE:
■The default input is DVD.
■If the message NO DISC is displayed on the screen, insert disc media or press SRC
button to change input source.
SELECTING THE INPUT SOURCE
■During Power ON, press the SRC button to switch from one mode to another.
■The operating modes changes in the following order:
DVD > A/V 1 > A/V 2 > DVD
■Press the SCR button for 2 seconds when you are in DVD-mode to reach the SD or
USB mode.
NOTE:
■You can plug in only one medium. When you plug in both, the unit will nd no medium.
■If both USB ports are occupied with ~ ash memory devices, this unit will only recognize
USB 1 source. Switching in between USB 1 and USB 2 is not possible.

37
36
PLAYING A DISC
1. If the input source isnt already set to DVD, press SRC button on the remote control or
the device to change the input source to DVD.
2. Insert a disc to DVD into the disc slot on the right side of the player. After several
seconds, the screen displays the message loading.
■Press the Play/Pause button or the ENTER button, to start playback.
■To stop playback, press the STOP button.
■To play the previous track or chapter, press the PREVIOUS button.
■To play the next track or chapter, press the NEXT button.
■To pause or resume playback, press the PLAY/PAUSE button.
3. Press the EJECT button to eject the disc from the player.
4. Press the POWER button to turn off the player.
MUTE ON OR OFF
■ Press the MUTE button to mute the sound during disc playback.
Press the MUTE button again to activate the sound.
DVD PLAYBACK OPTIONS
To access the DVD root menu
Press the MENU button during the playback to display the menu. A DVD is divided into
sections called titles and chapters. When you play a DVD, a root menu of the disc appears
on the screen of your monitor. The contents of the menu vary from disc to disc. Press the
MENU button during playback to display the menu again.
NOTE:
■ Some DVDs only allow you to select disc playback options using the DVD root menu.
Display playback information
During the playback, press the DISPLAY button to show the DVD menu.
A DVD usually contains chapters and titles, that may differ depending on the DVD in use.
Changing audio language during playback (Multi-Audio)
1. Press the AUDIO button to change the audio track during DVD playback. The current
audio language number, the total number of audio channels (languages) available and
current language are shown.
2. If there are multiple languages available, press the AUDIO button again to cycle through
the available languages. The audio display disappears automatically if the AUDIO but-
ton is not pressed again within 3 seconds.
NOTE:
■Some DVDs only allow access to this function through the DVD menu.

37
36
Z-R1030
Selecting subtitles during DVD playback
1. Press the SUBTITLE button to change the subtitle language you want during DVD
playback. The current language number, the total number of the subtitle languages and
current language are displayed.
2. If there are multiple languages available, press the SUBTITLE button again to cycle
through the available languages.
3. To turn subtitles off, press the SUBTITLE button until SUBTITLE OFF is displayed.
The subtitle display disappears automatically if the SUBTITLE button is not pressed
again within 3 seconds.
NOTE:
■Some DVDs only allow access to this function through the DVD menu.
Changing Viewing Angle during Playback (Multi-Angle):
To change viewing angle:
1. Press the ANGLE button to cycle through available viewing angles during DVD
playback. The current angle number and the total number of angles available appear on
the screen.
2. Press the ANGLE button again to select a different angle, then press it again to exit and
return to the normal viewing angle. The angle display disappears automatically if the
ANGLE button is not pressed again within 3 seconds.
NOTE:
■Viewing angles are available for a DVD if the back of the DVD case contains a multiple
angles icon.
Using Repeat Playback
To repeat a chapter, a title, or both:
During playback, press the REPEAT button repeatedly to cycle through the available
settings:
■Chapter: Repeats the current chapter.
■Title: Repeats the current title.
■All: Repeats all chapters and titles.
■Off: Resumes normal playback.
To repeat a custom segment:
1. During playback, press the A-B button to set the starting point A.
2. Press the A-B button again to set the ending point B. The player plays the segment
between point A and point B repeatedly.
3. To cancel the repeat playback and resume normal playback, press the A-B button
again.
Using zoom
To zoom the image:
■ During disc playback, press ZOOM to switch through the available zoom settings.
(2x, 3x, 4x, 1/2x, 1/3x, 1/4x and normal)

39
38
PLAYING AUDIO CD’S
To display playing time and the current track:
During CD playback, press the DISPLAY button to display the disc type, the current time,
the current track number and the total number of the tracks are displayed on the screen.
REPEAT PART OR THE ENTIRE CD
During playback, press the REPEAT button repeatedly to cycle through the available
settings: ■ Title: Repeats the current track.
■ All: Repeats the entire CD.
■ Off: Resume normal playback.
To repeat a custom segment:
1. During playback, press the A-B button to set the starting point A.
2. Press the A-B button again to set the ending point B. The player plays the segment
between point A and point B repeatedly.
3. To cancel the repeat playback and resume normal playback, press the A-B button
again.
SD/USB mode
■Press the SCR button for 2 seconds when you are in the DVD-mode to reach the SD/
MMC or USB mode.
■The operation of the SD/MMC or USB mode is the same like the operation of the DISC
mode.
NOTE:
■You can just plug in one medium. When you plug in both, the unit will nd no medium.

39
38
Z-R1030
PLAYING MP3 CD’S
When a MP3 disc is inserted into the player, the menu screen appears automatically. You
can use the menu screen to select the folders and tracks you want, or the player plays the
tracks in the order they were burned onto the disc.
To select folders and tracks
1. Press the DISPLAY button on the remote control. The list of les and folders
opens. Press the [] or [] button on the remote control to select a folder from the
list.
2. Then press the ENTER button. The screen displays the les in the folder you selected.
3. Press the [] or [] button on the remote control to select a le, then press the ENTER
button to play the le.
4. Press the []-button to move to the next le. Or press the []-button to move to the
previous le.
To repeat a ~le or folder of an MP3 disc
During MP3 playback, press the REPEAT button to cycle through the available settings:
■ Repeat single: Repeats the current le.
■Repeat all: Repeats the contents of the current folder.
■Repeat off: Turns off repeat and resumes to normal playback.
NOTE:
This icon in front of an item indicates that this is a folder. Not a MP3 le.
This icon in front of an item indicates that this is a MP3 le.

41
40
MAIN MENU
Access the Menu
■To adjust the picture, use the MENU button to select the features you would like to
adjust.
Adjustment selections are as follows:
1. Press and hold the MENU button on the remote control for more than one second, or
press [
] on the unit. The operation menu opens.
2. Repeatedly press [] or [] buttons to select the desired menu item.
3. Press the MENU button repeatedly to select one of the following settings, then
press
the [] or [] button to change the value.
The adjustable menu options are:
■Contrast: Adjust the contrast of the picture.
■Brightness: Adjust the brightness of the picture.
■Color: Adjust the color of the picture.
■Tint: Adjust the tint of the picture (it is only available with NTSC system).
■Wide Screen: Selects display mode: Wide (16:9)/Normal (4:3).
■FMT Freq: ON OFF
■Beep: ON OFF
■RESET: Reset menu to default values.

41
40
Z-R1030
SYSTEM SETUP
Access System Setup
1. Press the SETUP button on the remote control, to bring up the system setup of the
device.
Menu settings Description
General settings
ANGLE
MARK
Activate or deactivate the Angle Mark function. Function
depends on DVD content, e.g. if identical scenes are shot
in a different camera angle.
OSD LANG
Select the on-screen language you want to deploy
for the DVD menu operation (ENGLISCH, FRENCH,
SPANISH, ITALIAN).
CAPTIONS Activate or deactivate subtitles.
SCREEN
SAVER
Activate or deactivate the screen saver. With playback
paused for 5 minutes or longer, the screen saver is
enabled automatically.
Audio settings DOWNMIXSelect Dolby Digital AC3 downmix (LT/RT, STEREO).
Preference settings
TV TYPE Select a video standard format (PAL, NTSC).
AUDIO
Select the audio language of DVD playback if several
audio tracks are present on the DVD (for example
ENGLISH, FRENCH, SPANISH, RUSSIAN, CHI-
NESE and so on).
SUBTITLE
Select the subtitle language for DVD playback that is
shown on-screen (for example ENGLISH, FRENCH,
SPANISH, RUSSIAN, CHINESE oder OFF).
DISC MENU
Select the langauge in which the DVD menu shall be
displayed. (ENGLISH, FRENCH, SPANISH, CHI-
NESE, RUSSIAN etc).
PARENTAL Select parental lock level (1 to 8).
PASSWORD
Enter a new password using the numeric keys on the
remote control. Passwords must have four digits. The
default password is 3308.
DEFAULT Reset all settings on device to factory default.

43
42
CUSTOMIZING DVD SETTINGS
To set the general setup page:
1. Press the SETUP button on the remote control. The DVD setup menu opens.
2. Press the [] / [] buttons to select General setup page, then the list opens.
3. Press the [] / [] buttons to select the desired setting item. The items
include TV DISPLAY, ANGLE MARK, OSD LANG, CAPTIONS and SCREEN
SAVER.
4. Press the ENTER button to open the list, then press [] or [] to choose the setting
values.
5. Press the ENTER button to con rm.
6. Press the SETUP button to exit the setup menu.
To set the speaker setup page:
1. Press the SETUP button on the remote control. The DVD setup menu opens.
2. Press the [] / [] buttons to select speaker setup page, then the list opens.
3. Press the [] / [] buttons to select the desired setting item. The
items include DOWNMIX, DUAL MONO and DYNAMIC.
4. Press the ENTER button to open the list, then press the [] or [] buttons to choose
the setting values.
5. Press the ENTER button to con rm.
6. Press the SETUP button to exit the setup menu.
To set the preference page:
1. This setting is only available in stop mode or when no disc in the player.
2. Press the SETUP button on the remote control. The DVD setup menu opens.
3. Press the [] / [] buttons to select preference page, then the list opens.
4. Press the [] / [] buttons to select the desired setting item. The items include TV
TYPE, AUDIO, SUBTITLE, DISC MENU, PARENTAL, PASSWORD and DEFAULT.
5. Press the ENTER button to open the list, then press [] or [] to choose the setting
values.
6. Press the ENTER button to con rm.
7. Press the SETUP button to exit the setup menu.
NOTE:
This icon indicates that it is locked, you can not change the rating (parental control
level).
This icon indicates that it is unlocked. You can change the rating (parental control
level).

43
42
Z-R1030
CONNECTIONS AND WIRING
Connecting diagram
1. GND (Black)
2. Door contact (Green)
3. 12V B+ (Yellow)
4. ACC (Red)
7. Inverter switch
(Yellow)
(Red)
(White)
(Yellow)
(Red)
(White)
5. A/V IN 2
6. A/V OUT
8. A/V IN
1 Socket
9.
USB
Port
10. SD card reader
11. Dome light switch

45
44
1. GND wire (black)
Connect this wire to a suitable vehicle chassis ground point.
2. Door contact wire (green)
Connect this wire to the automatic interior illumination system of your vehicle.
3. Battery +12V wire
Connect this wire to a permanent +12V power supply in your vehicle, or to the positive
pole of the battery.
4. ACC ignition wire (red)
Connect this wire to the ignition contact of your vehicle.
5. A/V In 2
For a permanent connection to an external video source you can nd the A/V In 2 wire
at the upper side of the roof mount monitor.
6. A/V Output
The A/V output is suitable for connection with an external monitor.
7. Inverter switch
This switch allows to tailor the roof mount monitor to be compliant with the door contact
of the vehicle. Default position is (+). If your vehicle deploys a ground switched door
contact layout, put this switch into (-) position.
8. A/V In 1
A/V In 1 can be found on the side of the roof mount monitor.
9. USB Port
10. SD card slot
11. Interior illumination switch.
Other manuals for Z-R1030
2
Table of contents
Other ZENEC Car Video System manuals

ZENEC
ZENEC ZE-NC510 User manual

ZENEC
ZENEC NC3131D User manual

ZENEC
ZENEC ZE-NC5010 User manual

ZENEC
ZENEC Z-N326 Instruction sheet

ZENEC
ZENEC ZE-NC510 Mounting instructions

ZENEC
ZENEC ZE-NC2051D User manual

ZENEC
ZENEC INFOTAINER Z-N328 User manual

ZENEC
ZENEC ZE-NC3810 User manual

ZENEC
ZENEC ZE-NC5011D User manual

ZENEC
ZENEC Z-E2050 User manual

ZENEC
ZENEC ZE-MR1020-DVD User manual

ZENEC
ZENEC E GO ZE-NC3152 User manual

ZENEC
ZENEC ZE-NC520 User manual

ZENEC
ZENEC ZE-NC3810 User manual

ZENEC
ZENEC Z-N326 User manual

ZENEC
ZENEC Z-R1030 User manual

ZENEC
ZENEC Z-E2055 User manual

ZENEC
ZENEC ZE-NC2010 User manual

ZENEC
ZENEC ZE-NC2011D User manual

ZENEC
ZENEC Z-E4626/H Quick start guide