Zycoo CooVox-T600 User manual

Quick Installation Guide
F O R S M A L L B U S I N E S S
IP PHONE SYSTEM
CooVox-T600

CooVox-T600
CooVox-T600 is a professional-grade IPPBX system specially designed
for medium and large enterprises. It supports up to 600 extensions, 150
simultaneous calls, and 150 simultaneous conference attendees. The
equipped large-capacity of 1TB hard disk can support and save up to
15,000 hours of call recordings. Therefore, CooVox-T600 is ideal for
enterprises demanding high performance and stability of IP PBX
systems. CooVox-T600 can provide users with more convenience in
application and management.
Thank you for using the ZYCOO IP PBX,
Please read the instructions carefully before use.

CONTENTS
1....................Package Contents
2.................Hardware Installation
2.....................Safety Precautions
6 . . . . . . . . . . . . . . . . . . . . Product Installation
11 ..................Physical Connection
12.......................LED Definitions
13 .........Basic System Configuration
13...........................Web Login
14 ..................Further Information

1
Thank you for purchasing ZYCOO IP phone system. These are the items
Included with your IP phone system purchase:
IP PBX T600(1PCS)Power Adapter(1PCS)
Quick Installation Guide
(1PCS)
Antenna(only for GSM)
Warranty Card
(1PCS)
Package Contents
Two mounting brackets
and fittings
Network cable(1PCS)

2
Hardware Installation
To avoid any device damage and bodily injury caused by improper use, please
observe the following rules.
The followings are the instructions for setting up ZYCOO CooVox-T200 IP PBX.
Please refer to the illustration and follow the simple steps below to quickly install your
IP phone system.
Safety Precautions
1
2
3
4
5
Please make sure that the power is kept off during the whole installation process.
Wear an ESD-preventive wrist strap, and make sure that the wrist strap has a
good skin contact and is well grounded.
The device works only under the correct power supply. Please confirm that the
power supply is consistent with the voltage marked by the device, and it is
suggested to use the included power supply.
Before the device is powered on, please confirm that the power circuit will not be
overloaded so as not to cause unnecessary damage.
To avoid the risk of electric shock, do not open the casing when the device is
working!
Before cleaning the device, cut off the power supply. Do not clean it with a
waterish material; never use any other liquid cleaning method.
6

3
Site Requirements
40℃
0℃
Environment
Operating
Storage
Temperature Humidity
0℃~40℃
-40℃~70℃
10%~90% RH Non-condensing
5%~90% RH Non-condensing
Clearness
To ensure normal operation and long service life of the device, please install it in an
environment that meets the requirements described in the following subsection.
Please keep a proper temperature and humidity in the equipment room. Too high/low
humidity may lead to bad insulation, electricity leakage, mechanical property changes
and corrosions. Too high temperature may accelerate aging of the insulation materials
and can thus significantly shorten the service life of the device. For normal
temperature and humidity of the device, please check the following table.

4
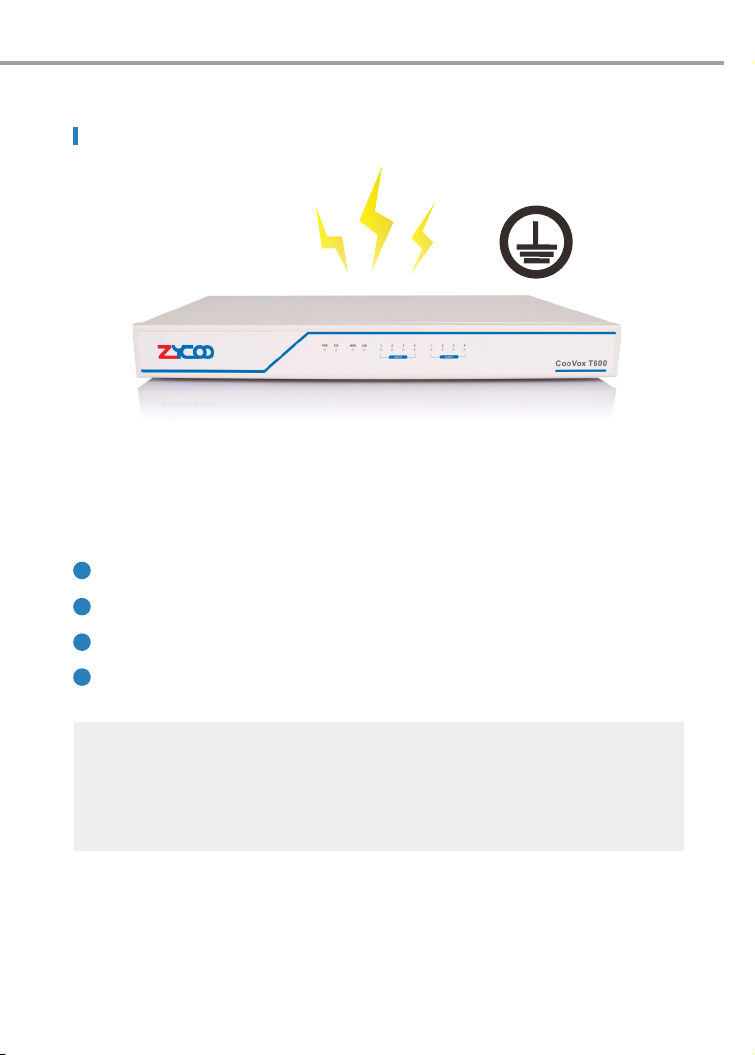
Electromagnetic Inteerence
The dust accumulated on IP PBX can be absorbed by static electricity and result in
poor contact of metal contact points. Some measures have been taken for the device
to prevent static electricity, but too strong static electricity can cause deadly damage
to the electronic elements on the internal circuit board. To avoid the effect of static
electricity on the operation of IP PBX, please attach much importance to the following
items:
Please set a 5-10cm gap around the device and keep the room well ventilated.
Please avoid placing any heavy object on the device.
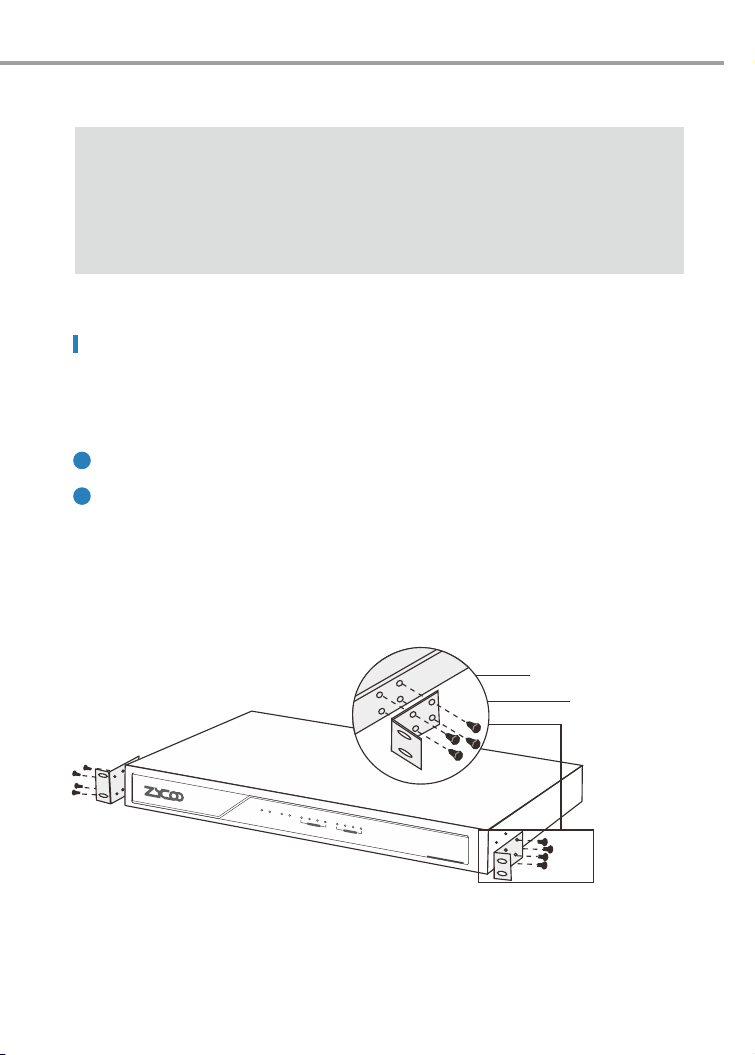
1
2
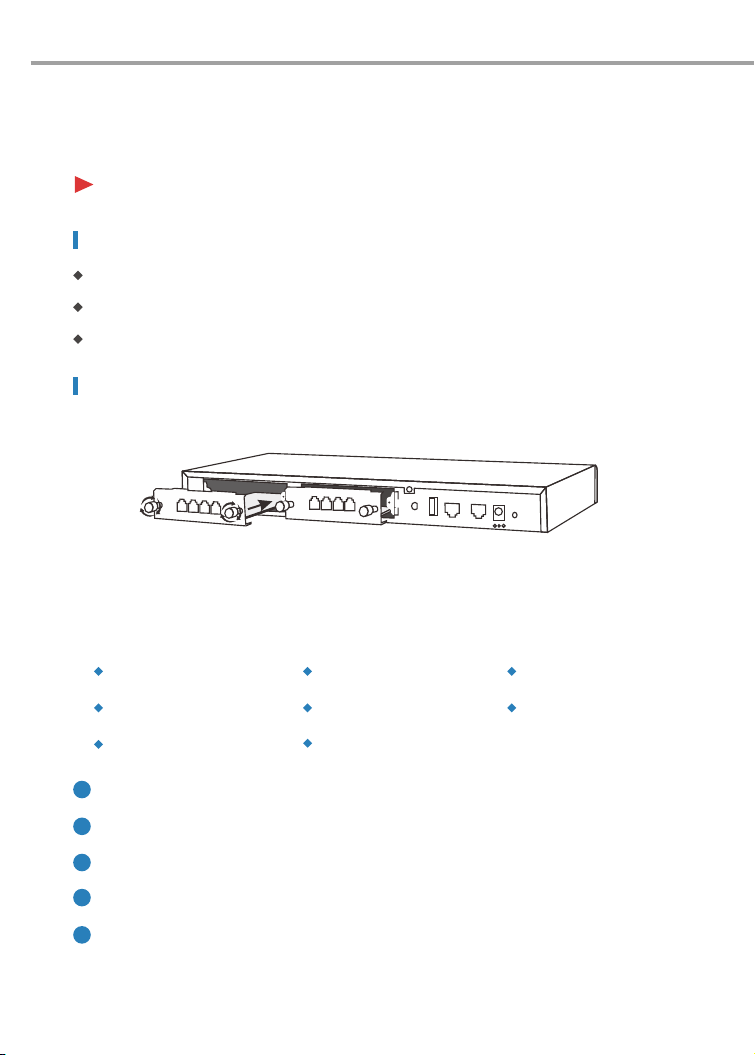
Electronic elements including capacitance and inductance on the device can be af-
fected by external interferences, such as conducted emission by capacitance cou-
pling, inductance coupling, and impedance coupling. To decrease the interferences,
please make sure to take the following measures:
Use the power supply that can effectively filter interference from the power grid.
Keep the devices far from high-frequency, strong-current devices, such as radio
transmitting station.
Use electromagnetic shielding when necessary.
1
2
3

5
Lightening Protection
Ensure the rack and devices are well earthed.
Make sure the power socket has a good contact with the ground.
Keep a reasonable cabling system and avoid induced lightning.
Use the signal SPD (Surge Protective Device) when wiring outdoor.
Note:
the device is specially designed for the usage of communication operators’
computer room; please obey the following requirements for installation and
maintenance.
Extremely high voltage currents can be produced instantly when lightning occurs and
the air in the electric discharge path can be instantly heated up to 20,000℃. As this
instant current is strong enough to damage electronic devices, more effective lightning
protection measures should be taken:
1
2
3
4

6
4FXS Module
4GSM Module
4WCDMA Module
2FXOS Module
2GSM Module
1PRI Module
Module Installation
+
4 3 2 1
+
+
4 3 2 1
+
SLOT1
+
ANT
USBCONSOLE ETHRST
DC 12 V
-
Product Installation
This IP PBX can support installing two extension modules at the same time.
Optional modules are as follows.
4FXO Module
2WCDMA Module
Check if the module is clean and intact.
Please ensure power of IP PBX is cut off.
Please ensure the direction of the module is correct (ZYCOO-logo side up).
Push the module into the module slot through the guide rail.
Tighten the locking screws on the both ends of the module.
1
2
3
4
5
Phillips screwdriver
ESD-preventive wrist wrap
Cables
Installation Tools

7
Rack Installation
1.Do not touch any device on the module, just to prevent the module from being
damaged by static electricity.
2.This operation must be done with power cut off. The module does not support
hot- plugging.
Caution:
To install the device in an EIA standard-sized, 19-inch rack, follow the instructions
described below:
Rack-mounting Bracket
Screw
Check the grounding and stability of the rack.
Secure the supplied rack-mounting brackets to each side of the device with
supplied screws as illustrated in the following figure.
1
2
PWR SYS WAN LAN 12341234
SLOT1 SLOT2
CooVox T600

8
Install IP PBX to the right place in the rack, and then attach the brackets to the
device.
3
After the brackets are attached to the device, use suitable screws (not provided)
to secure the brackets to the rack, as illustrated in the following figure.
Notes:
1.Please ensure the correct installation for the grounding of the rack, which is
the most important guarantee of avoiding ESD, electricity leakage, lightening,
and electromagnetic interference;
2.Please mount devices in sequence from the bottom to top of the rack to avoid
overloading;
3.Please avoid any heavy thing placed on the device to avoid any unexpected
accidents;
4.Please ensure heat dissipation and air circulation.
3
PWR SYS WAN LAN 12341234
SLOT1 SLOT2
CooVox T600

9
Connecting the device to ground is to quickly release the lightning over-voltage
and over-current of the device, which is also a necessary measure to protect the
body from electric shock.
In different environments, the device may be grounded differently. Two measures
are given in the following, of which the Grounding bar is better for the protection of
lightening. Users can try to choose the most appropriate measure according to
different situation.
If CooVox-U100 IP PBX is installed in the computer room, and the room has
dedicated Grounding bar, then the using of ground wire to connect the device with
the Grounding bar is put to the first consideration as shown in the following figure.
[1] IP PBX(Rear panel)
[2] Grounding Terminal
[3] Grounding Cable
[4] Grounding Bar
Connect to Ground
1
2
3
[3]
[4]
[2] [1]
1
2
3
4
SLOT1
WAN
LAN
USB
1
2
3
4
SLOT2
HDMIPWR
100~2 40V AC

10
If the device is installed in the normal environment, the device can be grounded
via the PE (Protecting Earth) cable of the AC power supply as shown in the
following figure.
If you intend to connect the device to the ground via the PE (Protecting Earth)
cable of AC power cord, please make sure the PE (Protecting Earth) cable in the
electrical outlet is well grounded in advance.
Notes:
[1] IP PBX(Rear panel)
[2] AC Power Cord(with PE cable)
4
L N
[1]
[2]
1
2
3
4
SLOT 1
WAN
LAN
USB
1
2
3
4
SLOT 2
HDMI PWR
100~240V AC

11
Physical Connection
4 3 2 1 4 3 2 1
SLOT2SL
OT1
USB HDMILANWAN
PWR
100~ 240V AC
+
+
+
+
Power Adapter
PSTN Router
computer

12
LED Denitions
PWR
SYS
ETH
Indication Function Status Explaination
1-4
(SLOT1/2)
Power Status
System Status
Data Status
SLOT1/2 Status
On
Off
Blink
Off
Blink
Off
FXS
FXO
GSM
L1
L2
Green
Blink
Off
Red
Blink
Off
Red
Blink
Off
Red
Off
Red
Green
Off
Power On
Power Off
System Works
System Fails
Data Transport
No Data Transport
Module Loading Success
Channel Ringing
Module Loading Failure
Module Loading Success
Channel Ringing
Module Loading Failure
Module Loading Success
Channel Ringing
Module Loading Failure
Module Loading Success
Module Loading Failure
CPE signal
NET signal
No signal
L3
L4
E1
/
T1
(PRI
/
R2)
Red
Green
Off
Red
Green
SS7 signal
MFCR2 signal
No signal
Disconnected/ Alarm
Connected/ No Alarm

13
Basic System Conguration
1
2
3
4You may notice a browser security warning. Please ignore the notice and process
to access the CooVox-T600 Web interface.
Connect the CooVox-T600 with a PC directly via the WAN or LAN port. Make sure
the PC and the IP-PBX are in the same network segment, that is, 192.168.1.xx if
you are connected to WAN or 192.168.10.xx if you have connected to LAN.
Enter the device's default IP address into the browser address bar to access the
Web interface. WAN port: https://192.168.1.100; LAN port: https://192.168.10.100.
Open a web browser, preferably Firefox, Google Chrome, or IE 11 or higher.
Web Login
5Use the default login credential to access the CooVox-T600. After logging in,
please change the administrator password in time to ensure system security.
Default username & password: admin

14
Fuher Conguration
Thank you for the purchase of ZYCOO products. The above steps introduce basic
configurations for CooVox–T600. For further configurations, please refer to the user
manual. If you have other questions, please contact the ZYCOO local dealers or
distributors from where you purchased this product.
ZYCOO Co., Ltd.
Tel: +86 (28)85337096
Website: www.zycoo.com
Support: [email protected]
Addr:
No. 1602, 16th Floor, Building No. 599, Century City
South Road, High-tech Zone, Chengdu, Sichuan
Province, China

15

16

17
ZYCOO Co., Ltd.
Leading IP Phone System Provider
Address:No. 1602, 16th Floor, Building No. 599, Century City South Road,
High-tech Zone, Chengdu, Sichuan Province, China
Telephone:+86 (28)85337096 ext 813 / 815
Website:www.zycoo.com
Table of contents
Other Zycoo IP Phone manuals

Zycoo
Zycoo CooVox T100 User manual

Zycoo
Zycoo CooVox T Series User manual

Zycoo
Zycoo ZP502 User manual

Zycoo
Zycoo ZP302 User manual

Zycoo
Zycoo CooVox T100S User manual

Zycoo
Zycoo CooFone-H83 User manual

Zycoo
Zycoo CooVox T200 User manual

Zycoo
Zycoo COOFONE-D60 User manual

Zycoo
Zycoo CooFone-D30 User manual

Zycoo
Zycoo CooFone-D30 User manual