3M Accuspray 16580 User manual

3M™Accuspray™ SprayGun Owner’sManual
Guide d'utilisation des pistolets de pulvérisation Accuspray™ 3M™
Manual de Instrucciones de la Pistola Atomizadora Accuspray™ de 3M™
Read Warnings andInstructions
This Manual Covers 3M™Accuspray™ SprayGuns
(PN16580, 16579, 16578).
Lire les mises en garde et lesdirectives.
Ce guide porte sur les pistolets de
pulvérisationAccuspray™ Spray 3M™ (modèles16580,
16579, et 16578).
Lea las Advertencias eInstrucciones
Este Manual cubre las Pistolas Atomizadoras
Accuspray™ de 3M™ (PN 16580, PN 16579, PN 16578).
For more information visit ourwebsite
3MCollision.com/accuspray-system.
Pour obtenir de plus amples renseignements, veuillez consulter notre site Web à l’adresse 3MCollision.com/
accuspray-system.
Para más información, visite nuestro sitio
3MCollision.com/es/accuspray-system.
ORIGINAL INSTRUCTIONS
DIRECTIVES D'ORIGINE
INSTRUCCIONES ORIGINALES
PDF Scaled @100%

Base File Name:
Software:
3M™ Accuspray™
Spray Gun Owner’s Manual
Requester: Justin Haas
Reference:
Die # / Doc. Size: 4.25" x 5.5"
Item Spec#: 34-8726-5204-4
Supersedes#: 34-8724-8188-1
Cat/Product#:
16580
Structure#: SS-66216
PA:
GA:
InDesign CC 2020
PROCESS
BLACK
10.12.20 New Artwork
10.26.20
Changes per annotated PDF.
10.28.20 Changes per annotated PDF.
11.03.20 Final release.
Description:
34872652044.indd

6194462-1 4
SA
TN
SA
TN
1
3M Automotive 3M Center
Aftermarket Division St. Paul, MN 55144-1000
651 733 1110
July 26, 2019
Dear Valued 3M Customer,
3M Company, Automotive Aftermarket Division, certifies that the following 3M spray guns meet
requirements for classification as High Volume Low Pressure (“HVLP”) spray equipment when
operated in accordance with 3M recommended directions for use. 3M AAD defines “HVLP”
based on the guidelines outlined in EPA 40 CFR Part 63, Subpart 6H (Jan. 9, 2008):
Accuspray One Spray Gun Series
Accuspray Spray System, HG Series
Accuspray Spray System, HGP Series
Note –Test Air Caps are available for the purposes of demonstrating that 3M spray equipment meets the
HVLP definition.
Please contact Monica Bastien, 3M AAD Regulatory Compliance Associate, at 651-733-1849 if
there are any additional questions.
Sincerely,
Alonzo Knowles
Regulatory Supervisor
3M Automotive Aftermarket Division

2

3
ENGLISH
!" * (%!
3Μ&$'%0 ,+&$&+!-+)$)"+!-!*!&%
$%%
B%+)2,!#!%AAB8E8?@
+,#2DD@CC8@???
!%$*$' $!'$%!$%"! %&*&&&%#'" &!$"$!'&%!"* )& &""
%% &$#'$ &%!&%&! %& !)! )&& $$ %& $%!$%"&! %
&$!'& !$! '$% !$' #' &&!
B 5,*')06 %5,*')06'!%+%&+!%*')0,% ,%!+*
*" !$%$"&! !$ & "'$"!%!$#'" &%% !$
"$&'$! &! %""&!&'%!&&
)+%,$)*3 @EDFH2@EDF?2@EDFF2@EDGF %##"!+ ')&,+*. ! !%#,
+ * ')+%,$)*4
$ '$!$$ ""
)&$%,+,)35A?69+&95A?HH62. )56!*%0A8!!+%,$)4 '%&$&! *"
! !$%&!&!!) ! $! +&! %&! &!&$)& &%&!&
$&(%
!%)0!)+!-A??E7CA72!)+!-2A?@C7BC7
& $%%"&! %"$!(%! %!")& '!$ "$&%""
@A@??3A?@? +0&$ !%)04%)#')!%!'#*&)*!%4!*"****$%+%)!*"
),+!&%
@HDB3A?@B +&$!1!%%*')0!%(,!'$%+&)&+!%$+)!#*4+0)(,!)$%+*
@CCEA3A??DI@3A??H ,)+)+$%+(,!'$%+4 &!*+*+&&)*,)+)+$%+
(,!'$%+!%#,!%!+*%!##)0 %#!%(,!'$%+4 ,)0)*A%B
G??FH8BE3A?@E< /'#&*!-+$&*' )*8)+BE3&%8#+)!#(,!'$%+&)/'#&*!-
+$&*' )*8*!$+ &%)(,!)$%+*
• A / C
&'$ &
+4,#2!%%*&+
! $ &
4)+$% %!#!)+&)
$%! '&!$+&!!"&& %&% &!' &*
&
)ORUHQW*XPHU\'LUHFWRU6FH7HFK$$'5HJ
&WU\$SSOLFDWLRQ(QJLQHHULQJ
$%%
0%HDXFKDPS)UDQFH$YHQXH%RXOH3DUF%DUUDFKLQ
%HDXFKDPS9DOG2LVH)UDQFH
$
3

English
3M™ Accuspray™ Spray Gun Safety Statements ............................................................................................................4
Intended Use:....................................................................................................................................................................4
Explanation of Signal Word Consequences........................................................................................................................4
TechnicalSpecifications:...................................................................................................................................................5
Spray GunOverview .........................................................................................................................................................6
CONTENTS .......................................................................................................................................................................6
General Set Up and Spray Gun Use ...................................................................................................................................7
Replacement Parts and Accessories................................................................................................................................12
Troubleshooting ..............................................................................................................................................................12
Français
Énoncés relatifs à la sécurité concernant le pistolet de pulvérisation Accuspray™ 3M™................................................16
Usage prévu : .................................................................................................................................................................16
Explication des conséquences liées aux mots indicateurs...............................................................................................16
Spécificationstechniques...............................................................................................................................................18
Aperçu– Pistolet depulvérisation...................................................................................................................................18
Préparation et utilisation générale du pistolet depulvérisation ........................................................................................19
Pièces de rechange etaccessoires .................................................................................................................................25
Dépannage.....................................................................................................................................................................25
Español
Declaraciones de Seguridad de la Pistola Atomizadora Accuspray™ de3M™................................................................29
Intención deUso:............................................................................................................................................................29
Explicación de las consecuencias de los símbolos deseguridad .....................................................................................29
EspecificacionesTécnicas:..............................................................................................................................................31
Resumen de la PistolaAtomizadora................................................................................................................................31
Contenido.......................................................................................................................................................................31
Desempaque ..................................................................................................................................................................31
Configuración General y Uso de la PistolaAtomizadora...................................................................................................32
Refacciones yAccesorios................................................................................................................................................37
Búsqueda deFallas ........................................................................................................................................................37

5
ENGLISH
SAFETY INFORMATION
Please read, understand, and follow all safety information contained in these instructions prior to the use of this
Spray Gun Kit. Retain these instructions for future reference.
Intended Use:
This Spray Gun Kit is intended to provide the means to apply liquid coatings via a spraying process. This Spray Gun Kit is used
in automotive, industrial, and consumer finishing applications. It is expected that all users be fully trained in the safe operation
of this Spray Gun Kit. Use in any other application has not been evaluated by 3M and may lead to an unsafe condition.
Explanation of Signal Word Consequences
WARNING: Indicates a hazardous situation which, if not avoided, could result in serious injury or death.
CAUTION: Indicates a hazardous situation which, if not avoided, could result in minor or moderate injury
and/or property damage.
NOTICE: Indicates a situation which, if not avoided, could result in property damage only.
WARNING
• To reduce the risks associated with chemical exposure, hazardous pressure, fire/explosion, or environmental
contamination:
‐
Read, understand and follow all safety statements in applicable equipment user’s manuals to avoid possible safety
hazards.
‐
Ensure you are familiar with the controls, functionality, and proper use of the equipment.
‐
Use only in a well ventilated area.
‐
Never perform unapproved modifications or maintenance on this product.
‐
Always comply with local, state, and national laws and regulations governing ventilation, fire protection, operation,
maintenance, and housekeeping. Consult applicable SDS(s) and material container labels for each material being sprayed
in the work area.
• To reduce the risks associated with fire and explosion:
‐
Ensure VOC concentration is kept below ignition threshold per liquid coating material SDS(s).
‐
All ignition sources such as smoking or electrical devices must be kept out of the spray area.
‐
Always maintain a readily available, approved fire extinguisher or other approved fire fighting equipment in or near the
spray area.
‐
When operating this unit, use only undamaged suitably solvent-resistant and appropriately pressure-rated static-
conductive air hoses.
‐
Users are expected to comply with local regulations for working in explosive environments and any requirements for the
material to be sprayed (consult material SDS) and use appropriate PPE for both. [Note: This may include grounding with
shoes, heel straps, and static conductive (or static dissipative) gloves.]
• To reduce the risks associated with chemical exposure, hazardous pressure and impact:
‐
Do not maintain or service the spray gun other than as instructed in the user’s manual.
• To reduce the risks associated with chemical exposure and hazardous pressure:
‐
Do not use this product around unsupervised children.
‐
Keep out of reach of children.
‐
Never point a spray gun at anyone else or place any part of your body in front of the spray gun.
‐
Before use check spray equipment for damage and proper function. Repair/replace worn, damaged or malfunctioning
components with 3M approved components.
‐
Ensure the equipment you are using with this product is suitable for the use application.

6
• To reduce the risks associated with bursting and chemical exposure:
‐
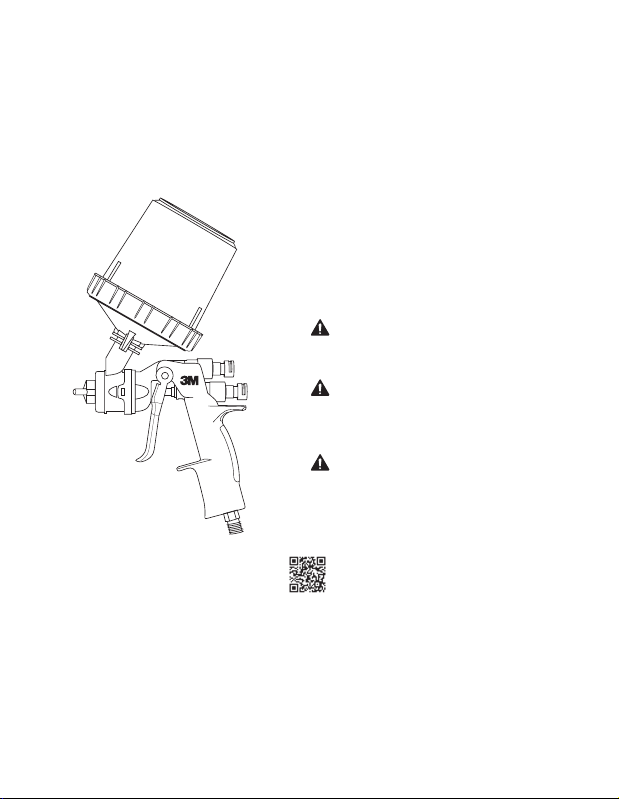
Do not operate spray gun system without a functional inlet pressure gauge. See pressure recommendations in user’s
manual for each spray gun nozzle.
‐
Ensure air and liquid input pressure and all applicator system regulators are properly adjusted per material’s
recommendations prior to each use. Do not exceed working pressure per user’s manual.
‐
Always follow required air and liquid pressure relief procedures for relieving air and liquid pressure from the spray
equipment.
• To reduce the risks associated with chemical exposure:
‐
Always wear appropriate personal protective equipment for eye, skin, respiratory and hearing protection per the
applicable SDS(s) and material container labels at all times when spraying.
• To reduce the risks associated with hazardous noise:
‐
Always wear hearing protectors when you are exposed to noise. Consult your work environment and local regulations
regarding use of personal protective hearing protection.
CAUTION
• To reduce the risks associated with tripping, falling and tipping:
‐
Route air hoses away from trac areas, sharp edges, moving parts and hot surfaces. Do not pull on air hoses to move
the compressor.
• To reduce the risks associated with impact:
‐
Always inspect to ensure that the atomizing head is properly attached and secure.
• To reduce the risks associated with sharp points:
‐
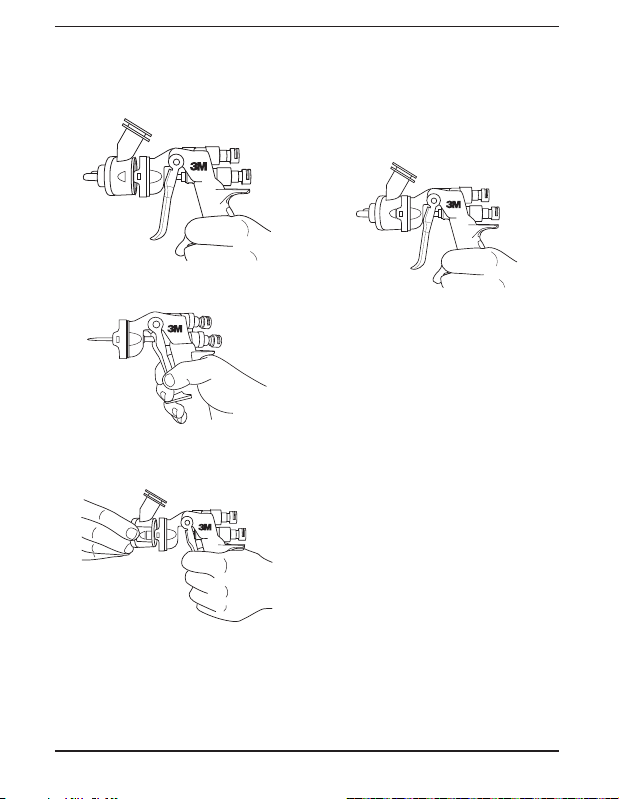
Do not touch the sharp end of the fluid needle when exposed and handle fluid needles carefully during replacement.
• To reduce the risks associated with muscle strain:
‐
Avoid using spray equipment continuously without taking occasional breaks.
NOTICE
‐
Dispose of device components in accordance with local laws and regulations.
‐
Ensure equipment is cleaned prior to storage.
‐
Ensure equipment is stored indoors at room temperature.
‐
Do not put in gun washer. Do not leave immersed in cleaning solvents. See manual for appropriate cleaning process.
‐
Solvent left in the spray gun air passages could result in a poor quality coating finish. Do not use any cleaning method
which may allow solvent into the spray gun air passages. Do not expose air flow control valve and gauges to solvent as
damage may occur.
TechnicalSpecifications:
Operator Hand/Arm Vibration level: less than 2.5m/s²
Declared vibration level in accordance with EN 12096,
measurements carried out in accordance with standard EN
ISO 28662-1 and EN ISO20643.
Declared Dual-Number Noise Emission Values according
to EN ISO4871
A-WEIGHTED EMISSION SOUND PRESSURE LEVEL AT
THEWORKSTATION:
Measured value: LpA = 71,4 dB(A) (ref20μPa)
Uncertainty: KpA = 2,5dB
A-WEIGHTED SOUND POWERLEVEL:
Measured value: LWA = 83,1 dB(A) (ref 1pW)
Uncertainty: KWA = 2,5dB
Values determined according to noise test code EN 14462
using the basicstandards
EN ISO 11201 - grade 2, and EN ISO3741
Usage Rated II 2G Ex h IIB T4
NOTE: The sum of a measured noise emission value and
its associated uncertainty represents an upper bound of
the range of values which can occur in themeasurements.

7
ENGLISH
IMPORTANT NOTE: The noise and vibration values stated are from laboratory testing in conformity with stated codes and
standards and are not sucient risk evaluation for all exposure scenarios. Values measured in a particular work place may
be higher than the declared values. The actual exposure values and amount of risk or harm experienced to an individual
is unique to each situation and depends upon the surrounding environment, the way in which the individual works, the
particular material being worked, work station design, as well as upon the exposure time and the physical condition of
the user. 3M cannot be held responsible for the consequences of using declared values instead of actual
exposure values for any individual risk assessment.
Spray GunOverview
3M™Accuspray™ SprayGuns were designed from the inside out for the eective, ecient, and economical application of
paints, adhesives, coatings and finishes. This spray gun has a large spray pattern with very low overspray. The soft, tight,
adjustable pattern with complete atomization results in a high finish quality and absolute control. Each ultra-light weight
spray gun is designed for easy handling, reliability and durability and for minimum maintenance costs. Combine your
3M™Accuspray™ SprayGun with the 3M™ PPS™ Paint Preparation System and enjoy additional savings of time and
cleaningsolvents.
3M™Accuspray™ SprayGun is for professional use only. Hazards can occur from equipment misuse. Any misuse of the
equipment or accessories, such as over pressurizing, modifying parts, using incompatible chemicals and fluids, or using
worn or damaged parts can cause serious bodily injury, fire, explosion or property damage. Read and follow all Safety
Statements andInstructions.
CONTENTS
Unpacking
Remove the components from the box. Inspect for concealed damage and/or missing items. If you discover any damage
and/or missing pieces, contact your distributorimmediately.
Your 3M™Accuspray™ SprayGun Kitcould include one or more of the following, depending on the kit that was purchased:
• 1 Spray Gun Body
• 1 Air Flow Control Valve
• 1.2 mm atomizing head
• 1.3 mm atomizing head
• 1.4 mm atomizing head
• 1.8 mm atomizing head
• 2.0 mm atomizing head
• 10 Color Identification Clips (2 each of 5 colors)
• PPS™ Standard Size Mixing Cup and Collar
• PPS™ Standard Size Lids and Liners
• PPS™ Sealing Plugs
• PPS™ Generic Mix Ratio Insert
3M™Accuspray™ Spray Gun
The 3M™Accuspray™ SprayGun is for use with compressed air
systems and features a black composite* body, 13 scfm (370.5 L/min)
air consumption and 1/4” (1/4” BSP) air inlet.
Maximum inlet pressure with full trigger pull**
1.2 mm and 1.3 mm nozzles = 24 psi (1.65 bar)
1.4 mm, 1.8 mm, 2.0 mm nozzles = 20 psi (1.4 bar)
* Product material compatibility information available uponrequest.
** Maximum inlet pressure will yield approximately 10 psi (0.69 bar)
at the air cap.

8
General Set Up and Spray Gun Use
Note: Complete steps below before connecting spray gun to air source.
One atomizing head may already be semi-attached to the spray gun body in the package. You only need to fully engage and
secure onto the spray gun body. Follow the procedure below.
Attaching the AtomizingHead
1. Pull trigger back andhold.
2. Slide the atomizing head over the fluid needle and push
towards the spray gun body making sure the release
buttons are aligned with the latchopenings.
3. Secure the atomizing head and listen for the “clicking”
sound for full engagement then release thetrigger.
Note: It is not necessary to pull the trigger back when
changing the atomizing head. To change the atomizing
head simply depress release buttons and pull the atomizing
head away from the spray gun body. Make sure fluid needle
is clean when replacing the atomizing head. Then follow
“Attaching the Atomizing Head” procedure for connecting
atomizinghead.
Attaching Air Fittingor RegulatingEquipment
It will be necessary to connect an air fitting, an air regulator
or air flow control valve to the air inlet located at the base of
the spray gun body.
Note: Do not use the spray gun body to tighten the
connection with air flow controlvalve.
Note: When used with flammable materials this device
must be grounded. A test for adequate grounding
should be performedregularly.

9
ENGLISH
General Set Up and Spray Gun Use cont.
Spray GunIdentification
Attach color clips into the groove on the fan and fluid
adjustment knobs, to identify the application of the spray
gunuse.
Example of attaching airflow controlvalve:
1. Manually attach the air flow control valve to the air inlet
by hand threading theconnection.
2. Use two wrenches to connect the air flow control valve.
Adjust to fit the air inlet and adjust the other to fit the
air flow control valve then tighten theconnection.
Setting the AirPressure
For optimum spray performance, pull trigger back (fluid and
air/full trigger pull) and adjust operating pressure to read 20
psi (1.4bar) for 1.4 mm, 1.8 mm, and 2.0 mm nozzles, and
24 psi (1.65 bar) for 1.2 mm and 1.3 mm nozzles.
Adding the PPS™ Components
3. To facilitate measurement of materials to be sprayed
according to manufacturer’s guidelines, place the
3M™ PPS™ Mix Ratio Film Insert into the 3M™
PPS™ mixing cup.
4. Insert the 3M™ PPS™ disposable liner into the
3M™ PPS™ mixing cup.
5. Pour material to be sprayed into the 3M™PPS™
mixing cup. Stir as needed.
Note: When operating this unit, use only undamaged,
suitably solvent-resistant and appropriately pressure-rated
static-conductive air hoses.

10
6. Place the 3M™PPS™ lid with built-in filter on top
of the 3M™PPS™ mixing cup with liner and snap
into place.
7. Position the 3M™PPS™ collar onto the
3M™PPS™ mixing cup with liner and turn until
tight. Insert 3M™PPS™ sealing plug prior to
shaking or storage.
8. Attach spray gun to filled 3M™PPS™cup.
Note: Prior to painting, users are expected to be
appropriately grounded (by either shoes or heel straps) and
should wear static-dissipative or static-conductive gloves.
Adjusting the FluidFlow
The fluid flow can be adjusted byusing the fluid needle
adjustment knob as noted in Fig. 1.The spray gun in the kit
is preset in the closed position (pull trigger to verify; there
should be minimal fluid needle movement). To allow fluid
flow, gently turn the fluid needle adjustment knob counter-
clockwise 3 full turns. These adjustment procedures
will serve only as a starting point. Fine tuning of these
adjustments will be based on your material andtechnique.
Fig. 1
Fluid Needle
Adjustment
Knob

11
ENGLISH
General Set Up and Spray Gun Use cont.
Adjusting the Fan PatternSize
The fan size is regulated by the fan adjustment knob
as noted in Fig. 2.The spray gun in the kit is preset in
the closed position (gently turn the fan adjustment knob
clockwise to verify; knob should not move). Next, turn the
knob counter-clockwise full rotation. The fan adjustment will
allow you to spray from a small round to a full fanpattern.
Fig. 2
Fan Adjustment
Knob
Vertical Pattern
Horizontal Pattern
Note: The spray pattern can also be changed from vertical
to horizontal by rotating the air cap a 1/4turn.
Do not point the spray gun up while cleaningit.
Do not immerse the spray gun insolvent.
Do not wipe the spray gun with a cloth soaked in solvent;
wring out theexcess.
Do not use metal tools to clean the air cap holes as this may
scratch them; scratches can distort the spraypattern.
Note: Do Not Put In Gun Washer. Read, understand and follow all safety statements as well as wear
appropriate, approved personal protective equipment per the applicable SDS and material container labels for
cleaningsolutions.
Periodically, lubricate moving components such as the fluid needle, fan adjustment threads, fluid needle adjustment threads
and spring.

12
ATTENTION
Note: Do Not Put In GunWasher.
Solvent left in the spray gun air passages could result in a
poor quality paint finish. Do not use any cleaning method
which may allow solvent into the spray gun air passages.
Do not expose air flow control valve and gauges to solvent
as damage mayoccur.
Cleaning Process
1. Relieve the air and fluid pressure from the spray gun and cup beforeservicing.
2. To retain unused paint or temporarily store mixed material, see your Local, State, Federal and OSHA guidelines, along
with paint manufacturer’s recommendations forstorage.
3. To flush spray gun, run water or compatible and compliant solvent into the spray gun fluid passage while triggering the
spray gun until the cleaning fluid appears clear.
Note: If feasible, clean atomizing head prior to disposal. Dispose of all used atomizing heads and spray gun bodies in
accordance with federal, state and local regulations. To change the atomizing head, refer to the section “Attaching the
AtomizingHead”onpage8.

13
ENGLISH
Replacement Parts and Accessories
Description PN
3M™ Accuspray™ Fluid Needle 16571
3M™ Accuspray™ HVLP Test Air Cap 16572
3M™ Accuspray™ Air Flow Control Valve 16573
3M™ Accuspray™ ONE Replacement Spray Gun Kit 16579
3M™ Accuspray™ Atomizing Head Refill Kit, 2.0 mm 16609
3M™ Accuspray™ Atomizing Head Refill Kit, 1.8 mm 16611
3M™ Accuspray™ Atomizing Head Refill Kit, 1.4 mm 16612
3M™ Accuspray™ Atomizing Head Refill Kit, 1.3 mm 16614
3M™ Accuspray™ Atomizing Head Refill Kit, 1.2 mm 16615
3M™ Accuspray™ Magnetic Spray Gun hanger 16236
Troubleshooting
Problem Cause Remedy
Gun leaking fluid
behind trigger Atomizing head seals Replace atomizing head and clean needle
Trigger sticking Dirty needle Clean needle
Leaking air around
Atomizing head seal Atomizing head not
secured in latches Remove atomizing head and reattach in gunbody and listen
for double click
Atomizing head won’t
stay on gun Frayed latch tabs on
atomizing head Replace atomizing head
Gun leaking fluid in
gun holder Wrong gun holder or
support Use 3M gun hanger PN16236
Gun body leaking air
behind trigger Bad Poppet seal Replace gun: Call 1-877-MMM-CARS or(1-877-666-2277)
Can't hear double
click when attaching
atomizing head
Frayed latch tabs on
atomizing head Replace atomizing head
New atomizing head
leaking fluid Scored seals in
atomizing head Clean needle and replace atomizing head

14
Product Selection and Use: Many factors beyond 3M’s control and uniquely within user’s knowledge and control can
aect the use and performance of a 3M product in a particular application. As a result, customer is solely responsible
for evaluating the product and determining whether it is appropriate and suitable for customer’s application, including
conducting a workplace hazard assessment and reviewing all applicable regulations and standards (e.g., OSHA, ANSI, etc.).
Failure to properly evaluate, select, and use a 3M product and appropriate safety products, or to meet all applicable safety
regulations, may result in injury, sickness, death, and/or harm to property.
Warranty, Limited Remedy, and Disclaimer: Unless a dierent warranty is specifically stated on the applicable 3M product
packaging or product literature (in which case such warranty governs), 3M warrants that each 3M product meets the
applicable 3M product specification at the time 3M ships the product. 3M MAKES NO OTHER WARRANTIES OR CONDITIONS,
EXPRESS OR IMPLIED, INCLUDING, BUT NOT LIMITED TO, ANY IMPLIED WARRANTY OR CONDITION OF MERCHANTABILITY,
FITNESS FOR A PARTICULAR PURPOSE, OR ARISING OUT OF A COURSE OF DEALING, CUSTOM, OR USAGE OF TRADE. If a 3M
product does not conform to this warranty, then the sole and exclusive remedy is, at 3M’s option, replacement of the 3M
product or refund of the purchase price.
Limitation of Liability: Except for the limited remedy stated above, and except to the extent prohibited by law, 3M will not
be liable for any loss or damage arising from or related to the 3M product, whether direct, indirect, special, incidental, or
consequential (including, but not limited to, lost profits or business opportunity), regardless of the legal or equitable theory
asserted, including, but not limited to, warranty, contract, negligence, or strict liability.
All written and visual data contained in this document reflects the latest
product information available at the time of publication.
3M reserves the right to make changes at any time without notice.
3M Automotive AftermarketDivision
3M Center, Bldg.223-6S-07
St. Paul, MN55144-1000
1-877-MMM-CARS(666-2277)
3MCollision.com
© 3M 2020.
3M, Accuspray and PPS are trademarks of 3M Company, used under license in Canada.
60-4550-8679-7
7100099202
34-8726-5204-4

FRANÇAIS
15
(064(
!6$7.
-7,..(6
$'$/(105,(74
$,8,5,10'7/$4&+>$24?58(06(2174.D$761/1%,.('(.$1/2$*0,($0$'$&(46,),(37(.(5
2,561.(65'(27.8>4,5$6,10,0',37>5&,'(55175.14537D,.5510676,.,5>5&10)14/>/(06$7:
',4(&6,8(5'D76,.,5$6,104(&1//$0'>(52$45106&10)14/(5$7:(:,*(0&(5(08(467'(537(..(5,.5
5106'>5,*0>5&1//('(55;56?/(5'(27.8>4,5$6,10=+$7681.7/((6%$55(24(55,10A5;56?/(5
"B(5(:,*(0&(55106)10'>(5574.(5.,*0(5',4(&64,&(5>010&>(5'$05.(4?*.(/(06
2$46,(51752$46,('(.D-$08,(4
,561.(6'(27.8>4,5$6,10&&7524$;
'(5>4,(5;56?/('(
27.8>4,5$6,10&&7524$;'(5>4,(
5;56?/('(27.8>4,5$6,10&&7524$;
'(5>4,(
(/$437(C(5&+$2($7:'D$,4'D(55$,5106)1740,5$),0'('>/1064(437(.(55;56?/(5'(27.8>4,5$6,10
5106&10)14/(5=.$'>),0,6,10'(55;56?/(5"76,.,5>(2$4.$,8,5,10'7/$4&+>$24?58(06(2174
.D$761/1%,.('(
!,8175$8(<'D$764(537(56,105=&(6>*$4'8(7,..(<&1//70,37(4$8(&10,&$$56,(04(52105$%.(
'(.$&10)14/,6>$7:4?*.(/(065$75(,0'(.$,8,5,10'7/$4&+>$24?58(06(2174.D$761/1%,.('(
(0&1/215$06.(
14',$.(/(06
.10<1019.(5
!72(48,5(74))$,4(54>*.(/(06$,4(5
,8,5,10'7/$4&+>$24?58(06(2174.D$761/1%,.('(

16
$*(&( ) , ) %$
Χομπαγνιε 3Μ$1$-$)(/',# *,-?1(.*)/,&;/.)')$&
())
J(.,8/$&$("IIJ?M?GH
.:/&88:?:8LLHKK?HGGG
0"(&(")&(0)$*)'+4$,(*+"4+$ '+()&%$) " *0#*0( "%+&(%+ *)* ) *+-- $)
))$* "")&&" ")""% $ '+0 ))%+) $) '+4+-$%(#)%+)&0 * %$)#$* %$$0)
!*3%#+&(%+ **%+$+#0(%#%1"*%+$+#0(%4 $* * %$
+$ '+
($. -*$-.)&.*/&1 ,$-.$)(< /-*,4 =.< /-*,4 =J
*)/,*$(./,.(/$.
.&*%+)( &* %$*%+%!*&(0,+""))#*0( "*%+
%$ * %$)&(* +" 1()&&" ")/"4+* " )* %$"4%!*
D*,)/$. 9HMLNP8HMLNG8HMLNN8HMLON..)/-&-*,)/$.-.,)/--+/$
)'*,(((.-(/' ,)-:
+#0(%)0( %+ $*(,""")00$*
(( !,$.$)( 9<IG =@@<IGPP =8)0< =-./(()',I
#$!!,-: ""+)*(* %$3.&
)&*""% 4(#%$ )* %$"4$ %$)+ ,$*$)#",*%+)")#$#$*)/!%+(
(* ,)
$,.$1,&.$1&'#$(,$ IGGM>KI>8$,.$18IGHK>JK>
%(#) )&0 * %$) )&%) * %$)%$%(#)$*%+*%+$&(* /'+ )*&&" "
HIHGG9IGHG /,$. &'#$(,$:,$($*-" ( ,/3&)(*.$)(:1&/.$)(.
, /.$)(-,$-+/-:
HPLJ9IGHJ . ,$&;.)'$-.$)(.*/&1 ,$-.$)(*)/,(/$.-:3$"(-('.$,
- /,$.
HKKMI9IGGLQH9IGGP . ,$&.,$.'(. --/,!-);--$)/-.$+/*)/,&'. ,$&
.,$.'(.-/,!4)'*,$-&'. ,$&'(/.(.$)(/3$&$$,:
&---*, $-$)(I.J
OGGNP?JM9IGHMC .')-*#,-3*&)-$1-@,.$JM 9. ,$&()( &.,$+/ *)/,.')-*#,-
3*&)-$1-@ .#)-.3$"(-
•I3#K
$*+( * $(% *
.:/&8$((-).8:?:
%#+) $* ( *(
:,.'( $,./,.#($+/
()%$$+*%( )0/(#&" (" *$ '+0*" $)"%##+$+*0
%# * * *(
)ORUHQW*XPHU\'LUHFWRU6FH7HFK$$'5HJ
&WU\$SSOLFDWLRQ(QJLQHHULQJ
())
0%HDXFKDPS)UDQFH$YHQXH%RXOH3DUF%DUUDFKLQ
%HDXFKDPS9DOG2LVH)UDQFH
(
) $
* (
Translated

FRANÇAIS
17
RENSEIGNEMENTS SUR LA SÉCURITÉ
S’assurer de lire, de comprendre et de respecter toutes les consignes de sécurité ci-dessous avant d’utiliser cette
trousse de pistolet de pulvérisation. Conserver ces directives aux fins de consultation ultérieure.
Usage prévu :
Cette trousse de pistolet de pulvérisation est conçue pour fournir les moyens d’appliquer des enduits liquides à l’aide
d’un processus de pulvérisation. Cette trousse de pistolet de pulvérisation est utilisée dans les applications de finition
automobile, industrielle et grand public.Tous les utilisateurs doivent recevoir une formation complète sur l’utilisation
sécuritaire de cette trousse de pistolet de pulvérisation. L’utilisation dans le cadre de toute autre application n’a pas été
évaluée par 3M et peut poser un risque.
Explication des conséquences liées aux mots indicateurs
MISE EN GARDE : Indique une situation qui présente des dangers qui, s’ils ne sont pas évités, peuvent
causer la mort ou des blessures graves.
AVERTISSEMENT : Indique une situation qui présente des dangers qui, s’ils ne sont pas évités, peuvent
causer des blessures et/ou des dommages matériels mineurs ou modérés.
AVIS : Indique une situation qui présente des dangers qui, s’ils ne sont pas évités, pourraient
causer des dommages matériels seulement
MISE EN GARDE
• Mesures pour réduire les risques associés à l’exposition à des produits chimiques, à la pression dangereuse, à des
incendies/explosions ou à la contamination de l’environnement :
‐
Lire, comprendre et suivre tous les énoncés relatifs à la sécurité contenus dans le manuel d’utilisation du matériel
applicable pour éviter tout risque potentiel pour la sécurité.
‐
S’assurer d’être familier avec les commandes, la fonctionnalité et l’utilisation appropriée du matériel.
‐
N’utiliser que dans un endroit bien ventilé.
‐
Ne jamais eectuer de modifications ou d’entretien non approuvés sur ce produit.
‐
S’assurer de toujours respecter toutes les lois et tous les règlements nationaux, provinciaux et locaux en matière de
ventilation, de protection contre les incendies, d’utilisation, d’entretien et de nettoyage. Consulter la fiche signalétique de
sécurité de produit applicable et l’étiquette du contenant de chaque produit qui sera pulvérisé dans l’aire de travail.
• Mesures pour réduire les risques d’incendie et d’explosion :
‐
S’assurer que la concentration en COV est maintenue sous le seuil d’inflammation par fiche signalétique de sécurité de
produit d’enduit liquide.
‐
Tenir toutes les sources d’inflammation, telles que la cigarette et les appareils électriques, à l’écart de l’aire de pulvérisation.
‐
Toujours garder à portée de la main un extincteur approuvé ou tout autre matériel de lutte contre les incendies dans l’aire
de pulvérisation ou à proximité de cette dernière.
‐
Lorsque vous utilisez cette unité, servez-vous uniquement des tuyaux d’air qui sont en bon état, qui résistent
convenablement aux solvants, qui résistent à la pression de fonctionnement et qui sont conducteurs d’électricité statique.
‐
Les utilisateurs devraient se conformer aux réglementations locales pour le travail dans des milieux explosifs ainsi
qu’aux exigences du matériau à pulvériser (consulter la fiche signalétique de sécurité de produit du matériau) et utiliser
un ÉPI approprié pour les deux. [Remarque : Cela peut inclure la mise à la terre en portant des chaussures à semelle
conductrice, des brides de talons et des gants antistatiques (conducteurs d’électricité statique).]
• Mesures pour réduire les risques d’exposition à des produits chimiques, à une pression dangereuse et aux chocs :
‐
Respecter l’entretien ou la maintenance du pistolet de pulvérisation comme indiqué dans le manuel d’utilisation.
• Mesures pour réduire les risques d’exposition aux produits chimiques et à la pression dangereuse :
‐
Ne pas utiliser ce produit en présence d’enfants sans surveillance.
‐
Tenir hors de portée d’enfants.

18
‐
Ne jamais pointer un pistolet de pulvérisation vers une autre personne ni se placer (même en partie) devant le pistolet
de pulvérisation.
Avant l’utilisation, s’assurer que le matériel de pulvérisation n’est pas endommagé et qu’il fonctionne adéquatement.
Réparer/remplacer les composants usés, endommagés ou défectueux par des composants approuvés par 3M.
‐
S’assurer que le matériel utilisé avec ce produit est adapté à l’utilisation.
• Mesures pour réduire les risques d’éclatement et d’exposition à des produits chimiques :
‐
Ne pas utiliser le système de pistolet de pulvérisation sans un manomètre de pression d’entrée fonctionnel. Consulter les
recommandations relatives à la pression du manuel d’utilisation pour chaque tête de pulvérisation du pistolet.
‐
S’assurer que la pression d’admission d’air et de liquide et que tous les régulateurs du système d’application sont réglés
conformément aux recommandations du produit pulvérisé avant chaque utilisation. Ne pas dépasser la pression de
fonctionnement indiquée dans le manuel d’utilisation.
‐
Toujours suivre les procédures nécessaires pour limiter la pression en vue de faire chuter la pression d’air et de liquide
du matériel de pulvérisation.
• Mesures pour réduire les risques liés à l’exposition à des produits chimiques :
‐
Toujours porter le matériel de protection individuelle approprié pour protéger les yeux, la peau et les voies respiratoires,
conformément aux fiches signalétiques de sécurité de produit applicables et aux étiquettes du contenant du produit,
pendant la pulvérisation.
• Mesures pour réduire les risques de bruits dangereux :
‐
Toujours porter des dispositifs de protection de l’ouïe lorsque l’on est exposé à un bruit.
‐
Consulter les règlements de son milieu de travail et les règlements locaux concernant l’utilisation d’une protection
individuelle de l’ouïe.
AVERTISSEMENT
• Mesures pour réduire les risques liés aux trébuchements, aux chutes et aux basculements :
‐
Éloigner les tuyaux d’air et de liquide et les rallonges électriques des endroits passants, des arêtes vives, des pièces
mobiles et des surfaces chaudes. Ne pas tirer sur les tuyaux d’air pour déplacer le compresseur.
• Mesures pour réduire les risques associés aux chocs :
‐
Toujours inspecter la tête de pulvérisation pour s’assurer qu’elle est correctement fixée et sécurisée.
• Mesures pour réduire les risques liés aux pointes acérées :
‐
Ne pas toucher l’extrémité acérée du pointeau lorsque celle-ci est exposée, et manipuler les pointeaux avec soin au
moment de leur remplacement.
• Mesures pour réduire les risques liés à la fatigue musculaire :
‐
Éviter d’utiliser le matériel de pulvérisation continuellement sans prendre de pauses.
AVIS
‐
Mettre au rebut les composants du dispositif conformément à la réglementation et aux lois locales.
‐
S’assurer que le matériel est nettoyé avant l’entreposage.
‐
S’assurer que le matériel est entreposé à l’intérieur à température ambiante.
‐
Ne pas immerger le pistolet dans une solution nettoyante. Ne pas maintenir immergé dans des solvants de nettoyage.
Consulter le manuel pour utiliser la méthode de nettoyage appropriée.
‐
Les résidus de solvant laissés dans les conduites d’air du pistolet pourraient produire une finition de mauvaise qualité de
l’enduit. N’utiliser aucune méthode qui pourrait laisser le solvant pénétrer les conduites d’air du pistolet de pulvérisation.
Éviter d’exposer la soupape de régulation du débit d’air et les indicateurs au solvant, car cela pourrait les endommager.
This manual suits for next models
5
Table of contents
Languages:
Other 3M Paint Sprayer manuals
Popular Paint Sprayer manuals by other brands

Anest Iwata
Anest Iwata WA 200 instruction manual

Westfalia
Westfalia 80 30 27 instruction manual

AIRLESSCO
AIRLESSCO LP460 Service & operation manual

Octane Fitness
Octane Fitness OCT-HPBS user manual

Birchmeier
Birchmeier REA 15 AC1 Instructions for use

Casotti
Casotti DUPIGET PRECISION Operation and maintenance manual