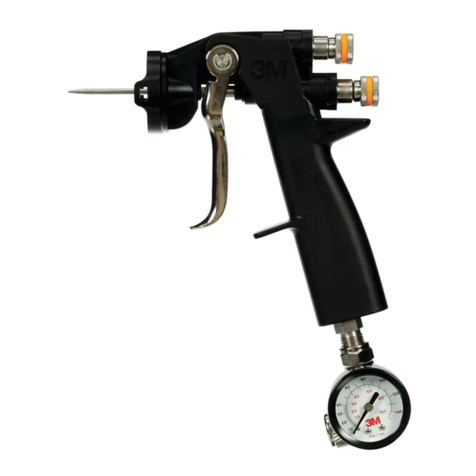
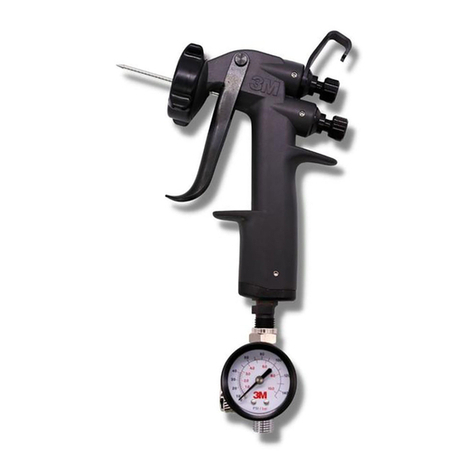
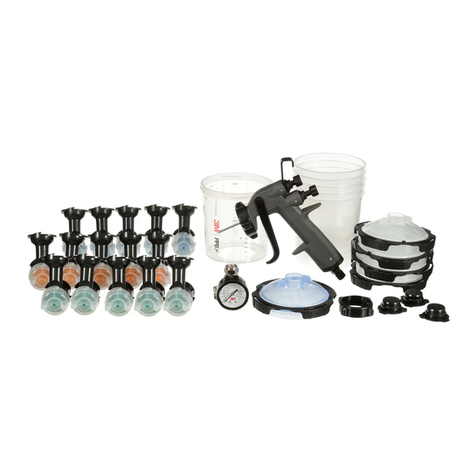
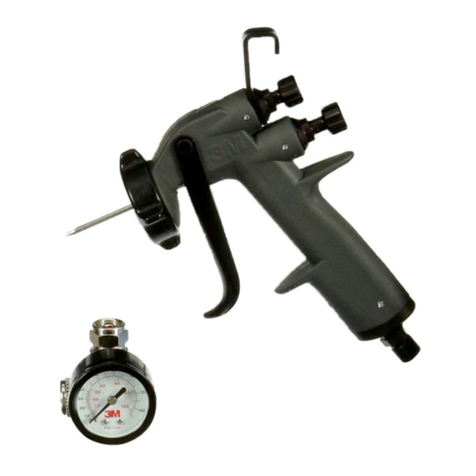
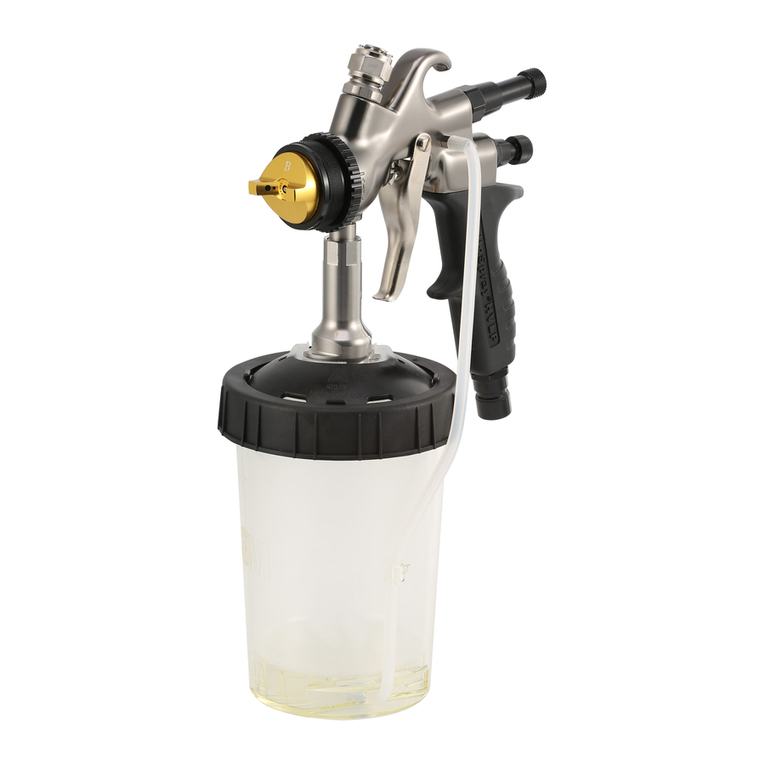
3M Performance Spray Gun User manual

3M™Performance Spray Gun
System Owner’s Manual
ENGLISH: 3M™ Performance Spray Gun System Owner’s Manual�������� 1
DEUTSCH: Bedienungsanleitung zum
3M™ Hochleistungslackierpistolen-System ����������������������������������������������21
FRANÇAIS: Manuel d’utilisation du système de pistolet de
peinture haut rendement 3MMC ������������������������������������������������������������������43
ITALIANO: 3M™ Performance Spray Gun System -
Manuale dell’utente���������������������������������������������������������������������������������������65
ESPAÑOL: Manual del propietario del Sistema de pistola
pulverizadora de alto rendimiento de 3M™����������������������������������������������85
NEDERLANDS: 3M™ Gebruikershandleiding voor het
Performance spuitpistoolsysteem������������������������������������������������������������� 105
DANSK: Brugervejledning til
3M™ Performance sprøjtepistolsystem����������������������������������������������������125
NORSK: 3M™ Performance sprøytepistol Brukerveiledning��������������� 145
SUOMI: 3M™ Performance maaliruiskujärjestelmä –
omistajan opas���������������������������������������������������������������������������������������������� 165
PORTUGUÊS: Sistema de pistolas de pulverização
de desempenho 3M™ Manual doProprietário��������������������������������������� 185
ΕΛΛΗΝΙΚΑ:3M™ Εγχειρίδιο Κατόχου Συστήματος
Ψεκασμού με Πιστόλι Performance
���������������������������������������������������������� 205
ΕΛΛΗΝΙΚΑ:Ръководство за експлоатация на система с
пистолет за пулверизация с висока производителност на 3M™
���227
HRVATSKI: 3M™ Priručnik za uporabu sustava
pištolja za raspršivanje ������������������������������������������������������������������������������� 249
ČESKY: Uživatelská příručka ke stříkací pistoli
3M™ Performance Spray Gun������������������������������������������������������������������ 269
EESTI: 3M™ Performance pihustuspüstoli
süsteemi kasutusjuhend����������������������������������������������������������������������������� 289
עברית:מערכת אקדח ריסוס Performance מבית
3M™ – מדריך למשתמש ������������������������������������������������������������������������������ 309
MAGYAR: 3M™ Performance szórópisztolyrendszer –
Használati útmutató������������������������������������������������������������������������������������ 329
LATVISKI: 3M™ Performance izsmidzināšanas pistoles
sistēmas lietotāja rokasgrāmata ��������������������������������������������������������������� 349
LIETUVIŲ: 3M™ Performance pulverizatoriaus
naudojimo vadovas ������������������������������������������������������������������������������������� 369
POLSKI: Podręcznik właściciela systemu pistoletów
natryskowych 3M™ Performance������������������������������������������������������������ 389
ROMÂNĂ: 3M™ Manual de utilizare pentru sistemul de aplicare
cu pistol de pulverizare performant��������������������������������������������������������� 409
РУССКИЙ:Высокопроизводительная система
аэрозольного нанесения с помощью пистолетов
3M™: руководство пользователя
���������������������������������������������������������� 429
SRPSKI: Priručnik za 3M™ Performance Spray Gun System��������������� 451
SLOVENSKY: 3M™ Performance Spray Gun –
používateľská príručka ���������������������������������������������������������������������������������471
SLOVENŠČINA: Sistem pištole 3M™, Navodila za uporabo��������������� 491
SVENSKA: Ägarhandbok till 3M™ Performance Sprutpistolsystem ��� 511
TÜRKÇE: 3M™ Performans Sınıfı Püskürtme
Tabancası Sistemi Kullanıcı Kılavuzu��������������������������������������������������������� 531
УКРАЇНСЬКА:Посібник з експлуатації системи
високопродуктивного пістолета-фарборозпилювача 3M™
�������������551


ENGLISH
3M™ Performance Spray Gun
System Owner’s Manual
ORIGINAL INSTRUCTIONS
Read Warnings and Instructions� This Manual Covers
3M Performance Spray Guns (26878, 26778,
26832)� For more information visit our website
www�3MCollision�com�

Description:
Base File Name:
Software:
SGS Contact:
Email:
Printer:
Printer Location:
Supplier:
Performance
Spray Gun System Owner’s Manual
Requester: Justin Haas
Reference:
Die # / Doc. Size: 8.5x11 folded to 8.5x5.5.
Item Spec#:
34-8726-1946-4
Supersedes#:
Cat/Product#: 26878
Structure#:
SS-42188
34872619464.indd
GA:
InDesign CC 2020
PROCESS
BLACK
09.10.20 Version 2. Output Single page high res pdf for printer kat
28.10.20 Update as per annotations SA

6116032-3
1
09.10.20 Version 2. Output Single page high res pdf for printer kat
28.10.20 Update as per annotations SA
Dieline
3
ENGLISH
3M Automotive 3M Center
Aftermarket Division St� Paul, MN 55144-1000
651 733 1110
February 29, 2020
Dear Valued 3M Customer,
3M Company, Automotive Aftermarket Division, certifies that the following 3M spray
guns meet requirements for classification as High Volume Low Pressure (“HVLP”) spray
equipment when operated in accordance with 3M recommended directions for use� 3M
AAD defines “HVLP” based on the guidelines outlined in EPA 40 CFR Part 63, Subpart
6H (Jan� 9, 2008):
3M™ Performance Spray Gun Series
Accuspray™ One Spray Gun Series
Accuspray™ Spray System, HG Series
Accuspray™ Spray System, HGP Series
Note –Test Air Caps are available for the purposes of demonstrating that 3M spray
equipment meets the HVLP definition�
Please contact Monica Bastien, 3M AAD Regulatory Compliance Associate, at
651-733-1849 if there are any additional questions�
Sincerely,
C� Alonzo Knowles
Regulatory Technical Manager
3M Automotive Aftermarket Division

4
ORIGINAL
EU Declaration of Conformity
Company
Division
3M Company
Automotive Aftermarket Division
Address
3M Center, Building 223-6N-01
St Paul, MN USA 55144-1000
Does hereby declare under our sole responsibility that this equipment or product(s) comply with the applicable
essential requirements of the legislation listed below; along with the referenced standards or specifications.
Object - Product name and/or model number(s) and/or unique identification:
3M
“Performance Spray Gun”
Type and/or description and/or intended purpose or equipment class and/or
particular conditions applicable to the use of the Object:
Part numbers: 26878, 26778, 26832, and all kit products which include these
part numbers
Serial number or range (if applicable):
Year of manufacture: “20ab”–to–“2099”, where “ab” is any 2-digit number.
Illustration - Typical
Conforms to the following Union harmonization legislation; together with all amendments to-date:
Directives:
Machinery Directive 2006/42/EC, ATEX Directive, 2014/34/EU
Standards / specifications / provisions complied with; in full or in part as applicable:
EN ISO 12100:2010
Safety of machinery. General principles for design. Risk assessment and risk
reduction
EN 1953:2013
Atomizing and spraying equipment for coating materials. Safety requirements
EN 14462:2005+A1:2009
Surface treatment equipment. Noise test code for surface treatment
equipment including its ancillary handling equipment. Accuracy grades 2 and 3
EN ISO 80079-36:2016
Explosive atmospheres - Part 36: Non-electrical equipment for explosive
atmospheres - Basic method and requirements
•
II 2G Ex h IIB T4
Signature
Date
Place
St. Paul, Minnesota USA
Name of Signer
Title
Wade D. Kretman
Technical Director
Person authorized to compile the technical file, established in the Community
Name and Title
Address
Dr. Mary (HM) Anstice, Country Technical Mgr., Industrial
Business Sponsor
3M United Kingdom PLC, Ratcliffe Road, Atherstone,
Warwickshire, CV9 1PJ, England, UK +44-1827-710373
12/20/2019

5
ENGLISH
English – Contents
3M™ Performance Spray Gun Safety Statements ����������������������������������������������������������������������������������������� 6
IntendedUse���������������������������������������������������������������������������������������������������������������������������������������������������������� 6
Explanation of Safety Symbols Consequences������������������������������������������������������������������������������������������������ 6
TechnicalSpecifications ���������������������������������������������������������������������������������������������������������������������������������������7
Spray GunOverview �������������������������������������������������������������������������������������������������������������������������������������������� 8
Contents����������������������������������������������������������������������������������������������������������������������������������������������������������������� 8
General Set Up and Spray Gun Use ������������������������������������������������������������������������������������������������������������������� 9
Replacement Parts and Accessories����������������������������������������������������������������������������������������������������������������� 19
Troubleshooting ���������������������������������������������������������������������������������������������������������������������������������������������������19
Spray Equipment Warranty and LimitedRemedy������������������������������������������������������������������������������������������ 20

6
SAFETY INFORMATION
Please read, understand, and follow all safety information contained in these instructions prior to
the use of this Spray Gun Kit. Retain these instructions for future reference.
Intended Use:
This Spray Gun Kit is intended to provide the means to apply liquid coatings via a spraying process�
This Spray Gun Kit is used in automotive, industrial, and finishing applications� It is expected that all
users be fully trained in the safe operation of this Spray Gun Kit� Use in any other application has not
been evaluated by 3M and may lead to an unsafe condition�
Explanation of Signal Word Consequences
WARNING: Indicates a hazardous situation which, if not avoided, could result in serious
injury or death
CAUTION: Indicates a hazardous situation which, if not avoided, could result in minor or
moderate injury and/or property damage�
NOTICE: Indicates a hazardous situation which, if not avoided, could result in property
damage only�
WARNING
•To reduce the risks associated with chemical exposure, hazardous pressure, fire/explosion, or
environmental contamination:
• Read, understand and follow all safety statements in applicable equipment user’s manuals to
avoid possible safety hazards�
• Ensure you are familiar with the controls, functionality, and proper use of the equipment�
• Use only in a well ventilated area�
• Never perform unapproved modifications or maintenance on this product�
• Always comply with local, state, and national laws and regulations governing ventilation, fire
protection, operation, maintenance, and housekeeping� Consult applicable SDS(s) and material
container labels for each material being sprayed in the work area�
•To reduce the risks associated with fire and explosion:
- Ensure VOC concentration is kept below ignition threshold per liquid coating material SDS(s)�
- All ignition sources such as smoking or electrical devices must be kept out of the spray area�
- Always maintain a readily available, approved fire extinguisher or other approved fire fighting
equipment in or near the spray area�
- When operating this unit, use only undamaged suitably solvent-resistant and appropriately
pressure-rated static-conductive air hoses�
- Users are expected to comply with local regulations for working in explosive environments
and any requirements for the material to be sprayed (consult material SDS) and use
appropriate PPE for both� [Note: This may include grounding with shoes, heel straps, and
static conductive (or static dissipative) gloves�]
•To reduce the risks associated with chemical exposure, hazardous pressure and impact:
• Do not maintain or service the spray gun other than as instructed in the user’s manual�
• If fasteners were removed for hardware maintenance or accessories, ensure that all fasteners are
replaced and tightened before operation�
•To reduce the risks associated with chemical exposure and hazardous pressure:
- Do not use this product around unsupervised children�
- Never point a spray gun at anyone else or place any part of your body in front of the spray gun�
- Before use check spray equipment for damage and proper function� Repair/replace worn,
damaged or malfunctioning components with 3M approved components�
- Ensure the equipment you are using with this product is suitable for the use application�
•To reduce the risks associated with bursting and chemical exposure:
- Do not operate spray gun system without a functional inlet pressure gauge� See pressure
recommendations in user’s manual for each spray gun atomizing head�
- Ensure air and liquid input pressure and all applicator system regulators are properly adjusted
per material’s recommendations prior to each use� Do not exceed working pressure per
user’s manual�
- Always follow required air and liquid pressure relief procedures for relieving air and liquid
pressure from the spray equipment�

7
ENGLISH
•To reduce the risks associated with chemical exposure:
- Always wear appropriate personal protective equipment for eye, skin and respiratory protection
per the applicable SDS(s) and material container labels at all times when spraying�
•To reduce the risks associated with hazardous noise:
- Always wear hearing protectors when you are exposed to noise� Consult your work environment
and local regulations regarding use personal protective hearing protection�
CAUTION
•To reduce the risks associated with tripping, falling and tipping:
- Route air and liquid hoses and any extension cords away from traffic areas, sharp edges, moving
parts and hot surfaces� Do not pull on air hoses to move the compressor�
•To reduce the risks associated with impact:
- Always inspect to ensure that the atomizing head is properly attached and secure�
•To reduce the risks associated with sharp points:
- Do not touch the sharp end of the fluid needle when exposed and handle fluid needles carefully
during replacement�
•To reduce the risks associated with muscles strain:
- Avoid using spray equipment continuously without taking occasional breaks�
NOTICE
- Dispose of device components in accordance with local laws and regulations�
- Ensure equipment is cleaned prior to storage�
- Ensure equipment is stored indoors at room temperature�
- Do not put in gun washer� Do not leave immersed in cleaning solvents� See manual for
appropriate cleaning process�
- Solvent left in the spray gun air passages could result in a poor quality coating finish� Do not use
any cleaning method which may allow solvent into the spray gun air passages� Do not expose air
flow control valve and gauges to solvent as damage may occur�
The code of P affixed to this product indicates that the product in question has the designation
of machinery, designation of series or type, and manufacturer’s address identified in this
documentation, in compliance with the Machinery Directive 2006/42/EC.
Technical Specifications:
Declared Dual-Number Noise Emission Values according to EN ISO 4871
A-WEIGHTED EMISSION SOUND PRESSURE LEVEL AT THE WORKSTATION:
Measured value: LpA = 81,8 dB(A) (ref 20μPa)
Uncertainty: KpA = 2,5 dB
A-WEIGHTED SOUND POWER LEVEL:
Measured value: LWA = 89,8 dB(A) (ref 1 pW)
Uncertainty: KWA = 2,5 dB
Values determined according to noise test code EN 14462 using the basic standards
EN ISO 11201 - grade 2, and EN ISO 3741
Usage Rated -
NOTE: The sum of a measured noise emission value and its associated uncertainty represents an upper
bound of the range of values which can occur in the measurements�
IMPORTANT NOTE: The noise values stated are from laboratory testing in conformity with stated
codes and standards and are not sufficient risk evaluation for all exposure scenarios� Values measured
in a particular work place may be higher than the declared values� The actual exposure values and
amount of risk or harm experienced to an individual is unique to each situation and depends upon the
surrounding environment, the way in which the individual works, the particular material being worked,
work station design, as well as upon the exposure time and the physical condition of the user� 3M
cannot be held responsible for the consequences of using declared values instead of actual exposure
values for any individual risk assessment�

8
3M™ Performance Spray Gun Overview
3M™ Performance Spray Guns are engineered for performance� The versatile selection of replaceable
atomizing heads offer like-new spray performance every time� The lightweight, impact resistant gun
body features a newly designed locking collar that allows for quick atomizing head changes for an
easy switch between paints or coatings and cleanup� Atomizing heads connect directly to 3M™ PPS™
Series 2�0 Spray Cup System�
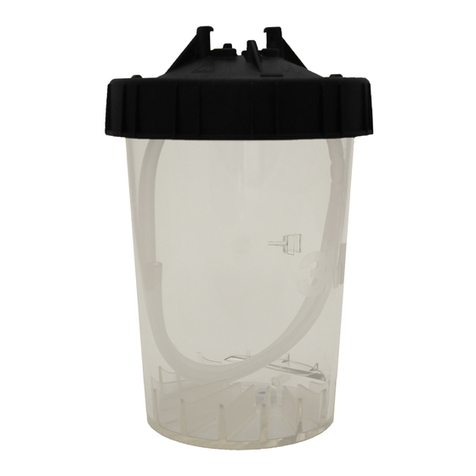
Directly connect your 3M™ Performance Spray gun to the 3M™ PPS™ Series 2�0 Spray Cup System�
3M invented the first disposable paint cup system nearly 20 years ago—the 3M™ PPS™ Paint
Preparation System� Painters needed a cleaner, faster, more efficient method of mixing and applying
paint� Reinvented from top to bottom, the 3M™ PPS 2�0 Spray Cup system delivers the next evolution
of the 3M™ PPS™ painting revolution�
Hazards can occur from equipment misuse� Any misuse of the equipment or accessories, such as over
pressurizing, modifying parts, using incompatible chemicals and fluids, or using worn or damaged parts
can cause serious bodily injury, fire, explosion or property damage�
Read and follow all Safety Statements and Instructions.
CONTENTS
Unpacking
Remove the components from the box� Inspect for concealed damage and/or missing items� If you
discover any damage and/or missing pieces, contact your distributor immediately�
Your 3M™ Performance Spray Gun Kit could include one or more of the following, depending on the kit
that was purchased:
• 3M™ Performance Spray Gun
• Air Flow Control Valve
• 3M™ Performance Spray Gun
Locking Collar
• 3M™ PPS™ Series 2�0 Spray Cup
System Standard Size Mixing Cup
• 3M™ PPS™ Series 2�0 Spray
Cup System Standard Size Lids
and Liners
• 3M™ PPS™ Series 2�0 Spray Cup
System Sealing Plugs
• 1�2 3M™ Performance Gravity HVLP Atomizing Head
• 1�3 3M™ Performance Gravity HVLP Atomizing Head
• 1�4 3M™ Performance Gravity HVLP Atomizing Head
• 1�6 3M™ Performance Gravity HVLP Atomizing Head
• 1�8 3M™ Performance Gravity HVLP Atomizing Head
• 2�0 3M™ Performance Gravity HVLP Atomizing Head
• 1�1 3M™ Performance Pressure HVLP Atomizing Head
• 1�4 3M™ Performance Pressure HVLP Atomizing Head
• 1�8 3M™ Performance Pressure HVLP Atomizing Head
• 3M™ Performance Spray Gun Pressure Whip
3M™ Performance Spray Gun
The 3M™ Performance Spray Gun is designed for use with a compressed air system, featuring a
composite* spray gun body requiring 13 scfm (370�5 L/min) and a 1/4"(1/4"BSP) air inlet�
Maximum inlet pressure for HVLP with full trigger pull**
Gravity Atomizing Heads: 1�2, 1�3, 1�4, 1�6, 1�8, 2�0 = 20 psi (1�38 bar)
Pressure Atomizing Heads: 1�1, 1�4, 1�8 = 18 psi (1�24 bar)
OPR = Operating Pressure Range***:7- tbd psi (0�5-tbd bar)
* Product material compatibility information available upon request�
** Maximum inlet pressure for HVLP will yield approximately 10 psi (0�69 bar) at the air cap�
*** OPR is the inlet pressure range for safe function of the spray gun�

9
ENGLISH
Attaching the Atomizing Head
1� Fully pull trigger back and hold�
2� Slide the atomizing head over the fluid
needle and push towards the spray gun
body making sure locking collar is in the
“+ configuration” with locking lugs at the
counter clockwise stop at 3 and 9 o’clock�
3� Secure the atomizing head by rotating the
retainer ring, clockwise until the retainer ring
tabs are locked in the “Xconfiguration”�
Removing the Atomizing Head
1� Fully pull trigger back and hold�
2� Rotate the locking collar counter-clockwise
3� Pull the atomizing head away from the gun
body to remove�
GENERAL SET UP AND SPRAY GUN USE – GRAVITY
Note: Complete steps below before connecting spray gun to air source�

1010
4� Wipe fluid needle clean�
Attaching Air Fitting or
Regulating Equipment
It will be necessary to connect an air fitting, an air
regulator or air flow control valve to the air inlet
located at the base of the spray gun body�
Example of attaching air flow control valve:
1� Manually attach the air flow control
valve to the air inlet by hand threading
the connection�
2� Use one wrench to connect the air flow
control valve� Adjust to fit the air flow valve
nut, then tighten the connection�
Setting the Air Pressure
Gravity for HVLP: For optimum spray
performance, pull trigger back and adjust
operating pressure to read 20 psi (1�38 bar) for
the 1�2, 1�3, 1�4, 1�6, 1�8 and 2�0 atomizing heads�
Note: When operating this unit, use only
undamaged, suitably solvent-resistant and
appropriately pressure-rated static-conductive
air hoses�
Adding the 3M™ PPS™ Series 2.0 Spray
Cup System Components
1� Insert the 3M™ PPS™ Series 2�0 Spray Cup
System disposable liner into the 3M™ PPS™
Series 2�0 Spray Cup System mixing cup�
2� Pour material to be sprayed into the 3M™
PPS™ Series 2�0 Spray Cup System mixing
cup� Stir as needed�
3� Place the 3M™ PPS™ Series 2�0 Spray Cup
System lid with built-in filter on top of the
3M™ PPS™ mixing cup with liner and snap
into place�

11
ENGLISH
11
4� Turn until tight� Insert 3M™ PPS™ Series
2�0 Spray Cup System sealing plug prior to
shaking or sealing�
5� Attach spray gun to filled 3M™ PPS™ Series
2�0 Spray Cup System cup�
Adjusting the Fan Pattern Size
The fan size is regulated by the fan adjustment
knob� The spray gun in the kit is preset in the
closed position (gently turn the fan adjustment
knob clockwise to verify; knob should not move)�
Next, turn the knob counter-clockwise 2 rotation�
The fan adjustment will allow you to spray from a
small round to a full fan pattern�
Adjusting the Fluid Flow
The fluid flow can be adjusted by using the fluid
needle adjustment knob� The spray gun in the
kit is preset in the closed position (pull trigger
to verify; there should be minimal fluid needle
movement)� To allow fluid flow, gently turn the
fluid needle adjustment knob counter-clockwise
4 full turns� These adjustment procedures will
serve only as a starting point� Fine tuning of
these adjustments will be based on your material
and technique�
Fan Adjustment
Knob
Fluid Needle
Adjustment
Knob
The spray pattern can be changed from vertical
to horizontal by rotating the air cap a 1/4 turn�
HORIZONTAL PATTERN
VERTICAL PATTERN

1212
Cleaning Process
1� Relieve the air and fluid pressure from the
spray gun and cup before servicing�
2� To retain unused paint or temporarily store
mixed material, see your Local, State,
Federal and OSHA guidelines, along with
paint manufacturer’s recommendations for
storage�
3� To flush spray gun, run water or compatible
and compliant solvent into the spray gun
fluid passage while triggering the spray gun,
with fluid tip pointed straight down, until the
cleaning fluid appears clear�
Note: If feasible, clean atomizing head prior to
disposal� Dispose of all used atomizing heads
and spray gun bodies in accordance with federal,
state and local regulations� To change the
atomizing head, refer to the sections “Attaching
the Atomizing Head” in General Set up and Spray
Gun use sections
Do not point the spray gun up while cleaning it�
Do not immerse the spray gun in solvent�
Do not wipe the spray gun with a cloth soaked in
solvent; wring out the excess�
Do not use metal tools to clean the air cap holes
as this may scratch them; scratches can distort
the spray pattern�
Note: Do Not Put In Gun Washer. Read,
understand and follow all safety statements as
well as wear appropriate, approved personal
protective equipment per the applicable SDS
and material container labels for cleaning
solutions.
Periodically, lubricate moving components such
as the fluid needle, fan adjustment threads, fluid
needle adjustment threads and spring�
ATTENTION
Note: Do Not Put In Gun Washer.
Solvent left in the spray gun air passages could
result in a poor-quality paint finish� Do not use
any cleaning method which may allow solvent
into the spray gun air passages�
Do not expose air flow control valve and gauges
to solvent as damage may occur�

13
ENGLISH
13
GENERAL SET UP AND SPRAY GUN USE - PRESSURE
Note: Complete steps below before connecting spray gun to air source�
Attaching the Atomizing Head
1� Pull trigger back and hold�
2� Slide the atomizing head over the fluid
needle and push towards the spray gun
body making sure locking collar is in the
“+ configuration” with locking lugs at the
counter clockwise stop at 3 and 9 o’clock�
3� Secure the atomizing head by rotating the
retainer ring, clockwise until the retainer ring
tabs are locked in the “Xconfiguration”�
Removing the Atomizing Head
1� Fully pull trigger back and hold�
2� Rotate the locking collar counter-clockwise
3� Pull the atomizing head away from the gun
body to remove�

1414
4� Wipe fluid needle clean�
Attaching Air Fitting or
Regulating Equipment
It will be necessary to connect an air fitting, an air
regulator or air flow control valve to the air inlet
located at the base of the spray gun body�
Example of attaching air flow control valve:
1� Manually attach the air flow control valve
to the air inlet by hand threading the
connection�
2� Use one wrench to connect the air flow
control valve� Adjust to fit the air flow valve
nut, then tighten the connection�
Setting the Air Pressure
Pressure for HVLP: For optimum spray
performance, pull trigger back and adjust
operating pressure to read 18 psi (1�24 bar) for the
1�1, 1�4, and 1�8 atomizing heads�
Note: When operating this unit, use only
undamaged, suitably solvent-resistant and
appropriately pressure-rated static-conductive
air hoses�
Attaching Pressure Fluid Hose
Connector to Gun
1� Remove retention pin from pressure fluid
hose connector bracket
2� Slide bracket over air inlet fitting within
slotted track in the same direction atomizing
heads slide on to gun frame�
3� Re-attach retention pin into pressure fluid
hose connector bracket holes�

15
ENGLISH
15
Fluid Hose to Atomizing Head Connection
& Disconnection
1� With atomizing head securely locked on
frame, align connector wings parallel to
needle or front-to-back�
2� Slide connection over the spout of the
atomizing head and push the connection
onto the atomizing head�
3� Twist the connection while continuing to
push upward until the connector bottoms
out on the atomizing head as shown in the
fully connected image below�
Removing the Pressure Fluid Hose
Connector from Gun
1� Remove retention pin from connector
bracket holes
2� Remove bracket from air inlet fitting�
3� Twist the connection while gently pulling
downward�

1616
Connecting Pressurized Hose
1� Connect pressurized paint or coating supply
hose to bottom threaded fitting of pressure
fluid hose connector by wrench tightening
with two wrenches in the locations
shown below�
Disconnecting Pressurized Hose
1� Release Pressure from paint or coatings
supply hose�
2� Disconnect pressurized paint or coating
supply hose from bottom threaded fitting of
the pressure fluid hose connector by wrench
loosening with two wrenches in the locations
shown below�
Note: Use of a shut off valve is recommended
(sold separately: 3M™ Performance Spray Gun
Ball Valve - 26839)
Adjusting the Fan Pattern Size
The fan size is regulated by the fan adjustment
knob� The spray gun in the kit is preset in the
closed position (gently turn the fan adjustment
knob clockwise to verify; knob should not move)�
Next, turn the knob counter-clockwise 2 rotation�
The fan adjustment will allow you to spray from a
small round to a full fan pattern�
Adjusting the Fluid Flow
The fluid flow can be adjusted by using the fluid
needle adjustment knob� The spray gun in the
kit is preset in the closed position (pull trigger
to verify; there should be minimal fluid needle
movement)� To allow fluid flow, gently turn the
fluid needle adjustment knob counter-clockwise
4 full turns� These adjustment procedures will
serve only as a starting point� Fine tuning of
these adjustments will be based on your material
and technique�
Fan Adjustment
Knob
Fluid Needle
Adjustment
Knob
The spray pattern can be changed from vertical
to horizontal by rotating the air cap a 1/4 turn�
HORIZONTAL PATTERN
VERTICAL PATTERN

17
ENGLISH
17
Cleaning Process
1� Relieve the air and fluid pressure from the
spray gun and cup before servicing�
2� To retain unused paint or temporarily store
mixed material, see your Local, State,
Federal and OSHA guidelines, along with
paint manufacturer’s recommendations for
storage�
3� To flush spray gun, run water or compatible
and compliant solvent into the spray gun
fluid passage while triggering the spray gun,
with fluid tip pointed straight down, until the
cleaning fluid appears clear�
Note: If feasible, clean atomizing head prior to
disposal� Dispose of all used atomizing heads
and spray gun bodies in accordance with federal,
state and local regulations� To change the
atomizing head, refer to the sections “Attaching
the Atomizing Head” in General Set up and Spray
Gun use sections
Do not point the spray gun up while cleaning it�
Do not immerse the spray gun in solvent�
Do not wipe the spray gun with a cloth soaked in
solvent; wring out the excess�
Do not use metal tools to clean the air cap holes
as this may scratch them; scratches can distort
the spray pattern�
Note: Do Not Put In Gun Washer. Read,
understand and follow all safety statements as
well as wear appropriate, approved personal
protective equipment per the applicable
SDS and material container labels for
cleaning solutions.
Periodically, lubricate moving components such
as the fluid needle, fan adjustment threads, fluid
needle adjustment threads and spring�
ATTENTION
Note: Do Not Put In Gun Washer.
Solvent left in the spray gun air passages could
result in a poor-quality paint finish� Do not use
any cleaning method which may allow solvent
into the spray gun air passages�
Do not expose air flow control valve and gauges
to solvent as damage may occur�

1818
Locking Collar Removal
If desired, the atomizing head locking collar
can be removed from gun frame in order to
thoroughly clean head of gun body�
1� While atomizing head locking collar is in the
“+ configuration” and without an atomizing
head attached to the spray gun body, pull
locking collar firmly forward�
2� Reverse process to re-attach locking collar
ensuring that the retention bumps on the ID
align with spray gun body head protrusions�
Other manuals for Performance Spray Gun
1
This manual suits for next models
3
Table of contents
Other 3M Paint Sprayer manuals