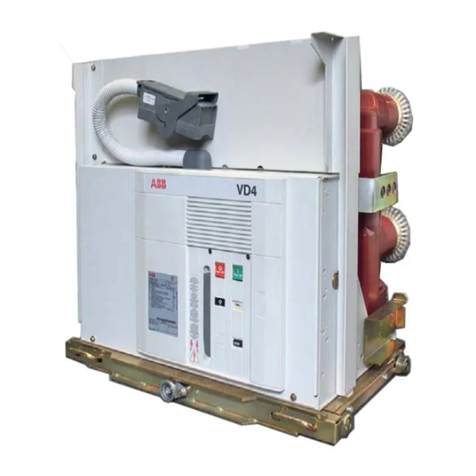
ABB VHK 20 Installation and operating instructions

IB 6.2.7.7-3I
Rev. 0, Jan-99
INSTALLATION/MAINTENANCE INSTRUCTIONS
Medium Voltage
Vacuum Power Circuit Breakers
VHK Model 20/21
VHKR Model 80
Model 21
ABB Power T&D Company, Inc.
Distribution Systems Division
MM

IB 6.2.7.7-3
2
TABLE OF CONTENTS
INTRODUCTION ........................................................................................................... 3
RECEIVING AND STORAGE........................................................................................ 4
INSTALLATION............................................................................................................. 4
GENERAL.................................................................................................................... 4
GENERAL INSPECTION................................................................................................. 5
VACUUM INTERRUPTER EXAMINATION .......................................................................... 5
BARRIER AND INSULATION INSPECTION ........................................................................ 5
INSTALLING FRONT BARRIER ....................................................................................... 5
MANUAL OPERATION FOR INSPECTION......................................................................... 5
PADLOCK PROVISION.................................................................................................. 6
INTERLOCKS ............................................................................................................... 6
INSTALLING CIRCUIT BREAKER INTO COMPARTMENT.................................................... 8
CIRCUIT BREAKER REMOVAL - MODEL 21.............................................................. 8
REMOVAL FROM CONNECT POSITION ....................................................................... 8
REMOVAL FROM TEST POSITION................................................................................ 9
REMOVAL FROM DISCONNECT POSITION ................................................................. 9
SAFE OPERATIONS RECOMMENDATIONS...................................................................... 9
ADJUSTMENTS, TESTS AND PERIODIC MAINTENANCE........................................ 9
INSULATION CLEANING.............................................................................................. 10
DC MILLIVOLT DROP TEST / MICRO-OHM TEST.......................................................... 10
CONTACT WEAR AND CONTACT PRESSURE................................................................ 10
CONTACT GAP .......................................................................................................... 10
Contact Gap Check............................................................................................... 11
CONTACT SEQUENCING............................................................................................. 11
CLOSING AND OPENING TIMES .................................................................................. 12
CLOSING AND OPENING SPEEDS................................................................................ 12
Operating Mechanism .......................................................................................... 13
Trip Latch Engagement (Bite).............................................................................. 13
CONTROL DEVICE ..................................................................................................... 13
CLOSE LATCH ROD RELEASE TRAVEL ....................................................................... 14
LUBRICATION............................................................................................................ 13
DIELECTRIC TESTS.................................................................................................... 13
ELECTRICAL CHARACTERISTICS OF CONTROL DEVICES................................ 14
DC AND AC CLOSING OPERATING SEQUENCE ........................................................... 15
AC CLOSING OPERATING SEQUENCE ........................................................................ 15
GROUND AND TEST DEVICES ................................................................................. 17
RENEWAL PARTS...................................................................................................... 17

IB 6.2.7.7-3I 3
TABLE OF CONTENTS (CONTINUED)
APPENDIX............................................................................................................................ 18
FIGURE A1 - ...CIRCUIT BREAKER ASSEMBLY WITH LIFTING YOKE INSTALLED.................... 18
FIGURE A2 - CIRCUIT BREAKER REAR - MODEL 21 ......................................................... 19
FIGURE A3 - FRONT CIRCUIT BREAKER PANEL - MODEL 21 ............................................ 20
FIGURE A4 - FRONT CIRCUIT BREAKER PANEL - MODEL 30 ............................................ 21
FIGURE A5 - MANUAL CHARGING OF ELECTRICALLY OPERATED CIRCUIT BREAKERS ....... 22
FIGURE A6 - RACKING MECHANISM & INTERLOCKS......................................................... 23
FIGURE A7 - RACKING MECHANISM - FINAL ADJUSTMENT ............................................... 24
FIGURE A8 - METHOD OF RACKING CIRCUIT BREAKER.................................................... 25
FIGURE A9 - CONTACT PRESSURE (MODELS 21 AND 80)................................................. 26
FIGURE A10 - TRIP LATCH ENGAGEMENT ADJUSTMENT .................................................... 27
FIGURE A11 - CONTROL DEVICE ADJUSTMENT ................................................................. 28
FIGURE A12 - TYPICAL DC SCHEMATIC OF CONTROL CIRCUIT .......................................... 29
FIGURE A13 - TYPICAL AC SCHEMATIC OF CONTROL CIRCUIT........................................... 30
TABLE A1 - CONTROL CIRCUIT OPERATING VOLTAGE RANGE ........................................ 31
TABLE A2 - CONTROL CIRCUIT TYPICAL CURRENT VALUES............................................ 31
TABLE A3 - VHK OPERATING PARAMETERS.................................................................. 32
These instructions do not purport to cover all details or variations nor to provide for every possible
contingency to be met in connection with installation, operation, or maintenance. Should further
information be desired or should particular problems arise which are not covered sufficiently for the
purchaser’s purpose the matter should be referred to the nearest District Office or send E-mail to:
dsinfo@ustra.mail.abb.com.

IB 6.2.7.7-3
4
INTRODUCTION
This manual contains instructions for inspection,
application, installation, operation, testing,
adjustment and maintenance of all VHK Model
20/21 and VHKR Model 80 vacuum power circuit
breakers. Use of these instructions will facilitate
proper application and maintenance of the circuit
breaker and prolong its life and usefulness.
The specific ratings for each breaker are located
on each Breaker Nameplate.
Throughout this manual, there are three terms that
must be heeded.
CAUTION
Not adhering to these instructions can result in
damage to the breaker.
WARNING
Not adhering to these instructions can result in
personal injury or DEATH, and damage to the
breaker.
DANGER
Not adhering to these instructions will result in
personal injury or DEATH, and permanent damage
to the breaker and other equipment.
RECEIVING AND STORAGE
Immediately upon receipt of the circuit breaker,
examine it to determine if any damage or loss was
sustained during transit. If abuse or incorrect
handling is evident, file a damage claim at once
with the carrier and promptly notify the nearest
District Office. The company is not responsible for
damage of goods after delivery to the carrier. We
will, however, lend assistance if notified of claims.
Unpack the circuit breaker as soon as possible
after receipt. If unpacking is delayed, difficulty
may be experienced in making a claim for
damages not evident upon receipt. Use care
during unpacking in order to avoid damaging any
of the circuit breaker parts. Check the contents of
each device against the packing list before
discarding any packing material. If any shortage
of material is discovered, promptly notify the
nearest District Office. Information specifying the
purchase order number, device serial numbers
and part numbers of the damaged or missing
parts should accompany the claim.
The circuit breaker should be installed in its
permanent location as soon as possible. If the
breaker is not to placed into service for some time,
it is advisable to provide some means of
protection. This may be done by keeping the
breaker in its original shipping crate and storing it
in a warm, dry, uncontaminated atmosphere. If
the breaker cannot be stored properly due to
circumstances beyond your control, it must be
thoroughly checked before being put into service.
This is to insure it has not absorbed any moisture,
or has become rusted or generally contaminated
in any way.
INSTALLATION
General
Prior to installation of the circuit breaker into the
compartment, certain preliminary inspections
should be made to insure proper operation. This
section lists the recommended inspection
procedures.
ABB
VHK vacuum circuit breakers are shipped with
the contacts closed, Closing Springs discharged
and Opening Springs charged. This is to protect
against the possibility of the contacts striking the
inside of the vacuum interrupter enclosure and
damaging themselves during shipping.
WARNING
Prior to any disassembly or inspection of the circuit
breaker, the closing springs must be discharged,
and the breaker should be open. Failing to do so
could result in personal injury.
If the circuit breaker is equipped with an
Undervoltage Trip Device (a.k.a.,
UVTD
), the
Retaining Strap applied to the
UVTD
at the factory
must be removed. The Retaining Strap was
applied to hold the Armature of the
UVTD
in the
energized position so the breaker could be closed.

IB 6.2.7.7-3I 5
If the Retaining Strap is not removed, the
UVTD
will not be able to trip the breaker.
If it is necessary to raise or move the breaker,
attach a lifting yoke to the truck or a fifth wheel to
transport the breaker as required. See Figure A1
in the Appendix.
General Inspection
Inspect the condition of the circuit breaker vacuum
interrupters and electrical connections prior to
installing the circuit breaker into the compartment.
Even though each circuit breaker is completely
adjusted and tested at the factory, shipping and
handling conditions, and/or incorrect storage could
cause defects.
The front cover and barrier assembly (Figure A3
or A4) must be removed for access to and
inspection of the vacuum interrupters and their
associated adjustments.
Vacuum Interrupter Examination
WARNING
If the circuit breaker has been energized, or it is
unsure if the circuit breaker has ever been
energized, the mid-band ring (on vacuum
interrupters so equipped) must first be discharged
before any work is performed on or near the
interrupters. A grounding stick must be used to
discharge the ring by fastening the ground cable of
the stick to a known ground and touching the
grounding tip of the stick to each mid-band ring.
The insulated vacuum container should be
examined carefully for cracks in the area of the
metal-to-insulation interface seals on both ends
and around the Mid-Band Ring. Since a certain
amount of transmitted light is usually required to
detect cracks, the inspection should be done in a
well lighted area. If the mid-band ring, when so
equipped, has been bent by accidental impact,
that area should be specially scrutinized for seal
damage. Small external chips will not impair the
useful life of the interrupter.
Barrier and Insulation Inspection
All barriers and insulated parts should be checked
for damage. Any dust or dirt should be removed
by compressed air or with a clean lint-free cloth. If
these parts have become contaminated with any
heavy dirt or grease, a clean, lintless cloth
saturated with alcohol should be used.
The lead support moldings are polyester glass and
occasionally have some resin rich cracks or
crazing that develops. These do not indicate
defective material and should not cause concern.
Installing Front Barrier
Install the assembly and fasten with four lower
front barrier screws and one screw on each side,
inside the front barrier.
Note: It is recommended that a dielectric
withstand test be performed prior to initially putting
this or any type vacuum circuit breaker into
service. Refer to "Dielectric Tests" in the
"Adjustments, Tests and Periodic Maintenance"
section for the correct test procedure.
Manual Operation For Inspection
The electrically operated circuit breakers can be
charged manually with a removable Manual
Charge Handle for bench tests or emergency
operation. The removable Manual Charge Handle
is an accessory and is supplied only when
ordered.
Position the handle onto the Manual Charging
Lever
hooked section in the long slot on the Pawl
Carrier (See Figure A5 in the Appendix).
The
small tabs on the Manual Charging Handle will fit
in the small holes of the Pawl Carrier. Push down
on the Manual Charging Handle until it will not
travel any further. This partially charges the
Closing Springs. Repeat this operation until the
charging mechanism is heard to snap over center
(approximately 10 operations), and the Spring
Indicator clearly shows the message SPRINGS
CHARGED. The circuit breaker can now be
closed by pulling out on the Manual Close Lever.
The Circuit Breaker can then be closed by
pressing the Manual Trip Button. See Figures A3
and A4 in the Appendix.

IB 6.2.7.7-3
6
Padlock Hasp Provision
Refer to Figure A6 located in the Appendix. The
Racking Mechanism Padlock Hasp provision
permits the breaker to be padlocked in the
DISCONNECT and TEST positions. This
provision is accomplished by the Padlock Hasp
blocking the Blocking Lever attached to the
Racking Release Assembly, preventing the Rack
Screw from being rotated clockwise to the
release
position. If not functioning properly, the Adjustable
Link must be adjusted as follows.
1. Remove the lower Front Panel of the
breaker.
2. Remove the Retaining Ring from one of
the pins securing the Adjustable Link.
3. Rotate the free end of the Adjustable Link
to vary its length, so that when
reconnected to the pin, the padlock
functions as noted above.
4. Replace the Retainer.
5. This adjustment might effect feature "D" of
the "Interlocks (
Racking Mechanism
)",
below, and it should be checked also.
NOTE: As a special option, the breaker may be
ordered with Three-Position Padlocking, which
also permits the breaker to be padlocked in the
CONNECT position.
Interlocks
(Racking Mechanism
)
The four mechanical interlocks that work in
conjunction with the Racking Mechanism to
protect both user and breaker should function as
specified below. If malfunction is identified and
the recommended adjustments do not correct the
problems consult the factory before placing the
breaker in service.
Refer to the next sections "Installing Circuit
Breaker Into Compartment" and "Removing Circuit
Breaker" for a complete description of the Racking
Mechanism components and operation.
A. When in the WITHDRAW position, the
Closing Springs will discharge automatically.
If the Closing Springs have been previously
charged, they will discharge when the racking
mechanism reaches this position. This is
accomplished by a linkage, activated by an
Adjusting Screw on a welded tab at the center
of the Rack Shaft. This pulls the Discharge
Link Assembly which releases the Close Latch
to its unlatched position. If the interlock does
not function as specified, adjust as follows:
1. Make sure Racking Mechanism is in the
DISCONNECT position.
2. Following the instructions in "Removal
from DISCONNECT Position," rotate the
Rack Screw counterclockwise. The
Manual Close Lever should begin moving
after one-half (1/2) turn from the
DISCONNECT position.
3. If the Manual Close Lever requires more
than one-half (1/2) turn to begin moving,
then adjustment of the Adjusting Screw on
the Racking Shaft will have to be made.
The gap between the Adjusting Screw and
the Discharge Link Assembly is between
0.010” – 0.031”. See Figure A7 in the
Appendix.
B. The Rack Screw cannot be turned to move the
breaker starting from the DISCONNECT,
TEST and CONNECT positions, unless the
Release Lever is first operated. A finger in the
Index Lever engages one of three holes in the
Rack Screw corresponding to each of the
previously mentioned positions, preventing it
from rotating. Turning the Release Lever to
the left disengages the finger from the hole,
allowing the Rack Screw to be rotated.
1. If the Rack Screw can be rotated without
turning the Release Lever, check if the
Release Lever is jammed in the left
(
release
) position. If so, see if it can be
freed.
2. Visually inspect that the finger of the Index
Lever is engaging in the corresponding
hole in the Rack Screw.

IB 6.2.7.7-3I 7
NOTE: If the Release Lever cannot be turned to
the left, make sure breaker is first in the Open
position.
C. The Release Lever cannot be operated when
the breaker is in the closed position. This
prevents connecting or disconnecting the
breaker from the Primary Stabs in the
compartment with the breaker closed. A
Racking Lock Bracket, operated by the
breaker’s Jackshaft, blocks the Index Lever
when the Jackshaft is in the closed position. If
the interlock is not functioning as noted,
perform the following inspections. Refer to
Figure A6 in the Appendix.
1. Check that the Racking Lock Bracket is
connected to the Jackshaft via a Link. If
not connected then reconnect.
NOTE: The Operations Counter and the
Open/Closed Indicator are also driven by the
same Racking Lock Bracket.
2. Check that nothing in the Racking
Mechanism is bent.
D. When the circuit breaker is between the
WITHDRAW, DISCONNECT, TEST and
CONNECT positions, any attempt to close the
breaker will discharge the Closing Springs
,
and the contacts will not close. This is referred
to as "Trip Free" operation. The finger of the
Index Lever rides on the circumference of the
Rack Screw, holding the Release Lever in its
released position. A linkage between the
Release Lever and Trip Latch then holds the
Trip Latch in its unlatched position. If this
interlock is not functioning as noted, perform
the following:
1. Confirm that the Trip Latches are properly
adjusted and functioning. Position the
Rack Screw so the Rack Mechanism is in
the DISCONNECT, TEST or CONNECT
position. Charge and Close the breaker,
and then press the Manual Trip Button.
NOTE: If the breaker does not trip the Trip
Latch and/or linkage is at fault. Contact
the Customer Service Center for
assistance.
NOTE: When the Racking Mechanism is
between the WITHDRAW, DISCONNECT,
TEST, or CONNECT positions the Manual
Trip Button should have a slight amount of
play so as not to “Bottom Out”. The
Adjustable Link and the Link to Trip Lever
(See Figure A6 in the Appendix) both can be
adjusted to accomplish this. Adjustment is as
follows:
1. If adjustment is necessary, the “Link to
Trip Lever” should be adjusted first to get
the slight play in the Trip Linkage.
2. If necessary, the Adjustable Link can be
adjusted after first removing one of the
securing Retainer Rings.
3. The interlock should now be properly
adjusted. Confirm by retesting the
interlock.
4. If the interlock is now functioning properly,
replace the retainer removed in step 2.
5. If the Adjustable Link setting is changed,
the Padlock Hasp Provision in the
previous section will have to rechecked for
proper operation.
Installing Circuit Breaker Into Compartment
(See Figure A8 in the Appendix)
NOTE: Model 80 breakers do not have Racking
Mechanisms. They are bolted-in units.
NOTE: CLOCKWISE rotation of racking crank for
inserting breaker. COUNTERCLOCKWISE
rotation of racking crank for removal of breaker.
1. Turn Motor Disconnect Switch (if so equipped)
to the OFF position. Refer to Figures A3 and
A4 in the Appendix.
NOTE: Step 2 is possible only if Racking
Mechanism is in CONNECT, TEST or
DISCONNECT positions, and the breaker is
Open)
2. Make sure the Racking Mechanism is in the
WITHDRAW position. This can be done by
first turning the Release Lever to the left.
While holding the Release Lever to the left,
engage the Racking Crank (accessory) into

IB 6.2.7.7-3
8
the
Rack Screw and rotate crank
counterclockwise until a definite resistance is
felt (Do Not Force).
NOTE: If the Index Lever is observed (and/or
heard, by a "click" sound) to instead engage in
one of the holes of the Rack Screw, causing the
Release Lever to turn back to the right, the
Racking Mechanism is still not in the
WITHDRAW position. Step 2 must be repeated.
NOTE: If the Closing Springs were previously
charged, they will automatically discharge when
the Racking Mechanism reaches the
WITHDRAW position.
3. Engage the Fifth Wheel accessory into the
Hole Guide in the breaker’s truck. See Figure
A1 in the Appendix. Push the circuit breaker
into the switchgear compartment until a
definite stop is felt. This stop is the rollers of
the breaker’s Racking Arms hitting the back
edge of the Racking Ports of the
compartment.
4. Turn the Release Lever to the left, engage
Racking Crank into the Rack Screw, and
rotate Crank clockwise until racking
mechanism automatically stops at the
DISCONNECT position. The breaker is now
held captive in the compartment by the rollers
of the Racking Arms and the Racking Ports of
the compartment.
5. To rack the circuit breaker to TEST position,
turn the Release Lever to the left, turn Crank
clockwise one-quarter (¼) turn, and then
release the Release Lever. It will remain in
the
released
position. Continue cranking
clockwise until the racking mechanism
automatically stops at the TEST position.
6. With the circuit breaker now in the TEST
position, turn the Motor Disconnect Switch to
the ON position to electrically charge the
Closing Springs. If a Motor Disconnect Switch
was not provided, the Closing Springs will
automatically charge when the breaker
approaches the TEST position.
Check for proper operation by closing and
opening (tripping) the circuit breaker both
electrically and mechanically. This includes
control switches, relays, etc.
WARNING
For safety, when racking the circuit breaker "to" or
"from" the CONNECT position, the compartment
door must be closed, and the racking crank
inserted through the opening provided in the
compartment door.
7. To rack circuit breaker to the CONNECT
position, close the compartment door, and
reinsert the crank into the Racking Screw via
the Access Door in the compartment door.
See Figure A8.
8. Turn the Release Lever to the left, rotate Crank
clockwise one-quarter (¼) turn, and then
release the Release Lever. It will remain in the
released
position. Continue cranking clockwise
until the Racking Mechanism automatically
stops at the CONNECT position.
CAUTION
Do not attempt to rack circuit breaker any further,
damage to the racking mechanism may result.
CIRCUIT BREAKER REMOVAL
(MODEL 21)
Removal From CONNECT Position
WARNING
For safety, when racking the circuit breaker "to" or
"from" the CONNECT position, the compartment
door must be closed, and the racking crank
inserted through the opening provided in the
compartment door.
1. Open Access Door in the front compartment
door, and engage Racking Crank into the
Rack Screw. See Figure A8.
2. Turn the Release Lever
to the left, rotate the
Crank counterclockwise one-quarter (¼) turn,
and then release the Release Lever. It will
remain in the
released
position. Continue
rotating the crank counterclockwise until the
Racking Mechanism automatically stops at the
TEST position.

IB 6.2.7.7-3I 9
Removal From TEST Position
1. Turn the Release Lever to the left, rotate the
Crank one-quarter (¼) turn counterclockwise,
and then release the Release Lever. It will
again remain in the
released
position.
Continue Cranking counterclockwise until
Racking Mechanism automatically stops at the
DISCONNECT position.
Removal From DISCONNECT Position
1. Turn the Rack Release Lever to the left, and
turn Crank counterclockwise one-quarter (¼)-
turn. Release the Rack Release Lever. It will
again remain in the released position.
Continue cranking counterclockwise until a
resistance is felt (approximately 2-3 turns) (Do
Not Force.) The breaker is now in the
WITHDRAW position.
If the Closing Springs were previously
charged, they will automatically discharge as
the Racking Mechanism reaches the
WITHDRAW position.
2. The circuit breaker can now be removed from
the compartment by pulling on the handle
located on the Front Barrier.
Safe Operations Recommendations
It is recommended that any circuit breaker be
withdrawn and stored in the withdrawn position
whenever it is to be maintained in the OPEN
position with no planned switching.
It is recommended that a Ground & Test Device
(a.k.a. G&T Device) be connected to the proper
compartment when any work is to be done on any
bus or feeder circuit. See section "Ground and
Test Devices" for a description.
ADJUSTMENTS, TESTS AND
PERIODIC MAINTENANCE
The circuit breakers are designed and tested to
insure minimum maintenance. The few
adjustments that are noted are required only when
an operational check indicates a problem. Of
course, during the maintenance checks, all
accessible bolts, units and screws should be
routinely checked to insure that they are tight.
It is recommended that the circuit breaker be
inspected after the first 1000 mechanical
operations and on a yearly basis unless
environmental considerations and operating
experience indicate that more or less frequent
inspections are appropriate.
Vacuum interrupters, as used on the VHK vacuum
circuit breakers, have an inherently long contact
life and will provide trouble-free service under
varied application conditions as long as the circuit
breaker is applied within its rating. The
interrupters have been tested up to 2000% KSI
minimum. It is unlikely that a circuit breaker will
be subjected to this much duty in its life, and it is
not expected that the interrupters will have to be
replaced due to excessive contact erosion.
The wear condition of the individual vacuum
interrupters will vary, however, depending on
circuit conditions and such variables as single
phase versus three-phase interruption, X/R ratio
(asymmetry) and relay delay times. Therefore, the
interrupters in all three phases may not erode
equally. Additionally, interrupting high short-circuit
current will cause contact erosion to occur faster
than load current interruptions.
There is, however, a check for Contact Wipe
(Contact Spring overtravel), which is a measure of
contact erosion. This check is covered under the
subsection "Contact Wear and Contact Pressure."
When Contact Wipe is less then the minimum
specified and there is not any mechanical
problem, the interrupter should be replaced due to
contact erosion.
If, after the first inspection period, there is no
indication of any problems, actual operating
experience with specific circuits will indicate the
future amount of maintenance needed for the
various circuit breakers, and the procedure can be
modified as required.
Where unusual service conditions exist, as
covered by ANSI Standard C37.04, it must be
presumed that these conditions were considered
at the time of order, the equipment supplied was
IB 6.2.7.7-3
1
0
designed for special application, and an
appropriate supplemental maintenance program
has been developed. These maintenance
instructions only cover circuit breakers used under
the standard service conditions.
At the selected maintenance period, the following
maintenance, tests and adjustments (if necessary)
should be made:
Insulation Cleaning
WARNING
If the circuit breaker has been energized, or it is
unsure if the circuit breaker has ever been
energized, the mid-band ring (on vacuum
interrupters so equipped) must first be discharged
before any work is performed on or near the
interrupters. A grounding stick must be used to
discharge the ring by fastening the ground cable of
the stick to a known ground, and touching the
grounding tip of the stick to each mid-band ring.
Any dirt, dust or grease should be removed from
the surfaces of the entire current carrying structure
and vacuum interrupter. Wiping the surface with a
clean, lint-free cloth is normally sufficient. If there
is heavy grease, alcohol should be used.
DC Millivolt Drop Test / Micro-ohm Test
During maintenance periods, the condition of the
breaker current circuit can easily be determined by
performing a Millivolt Drop Test or a Micro-ohm
test. This test should be performed regardless of
whether the circuit breaker had interrupted low or
high currents, or has minimum operations.
NOTE: The values for resistance, given in Table
A3, are for new breakers. It is normal and
acceptable for a used breaker to have resistance
values as much as 100% greater than these
values.
Refer to Table A3 in the Appendix for the Millivolt
drop and Resistance values for the circuit
breakers covered, from lead to lead. If the
Primary Disconnects (a.k.a., Tulips) are to be
included in the test path, a 2.000" ± 0.005"
diameter smooth (62rms) copper conductor must
be inserted into the open end of each Primary
Disconnect to achieve the proper contact
pressure.
Contact Wear and Contact Pressure
(Contact Wipe)
The amount of contact wear can be determined by
measuring what is referred to as Contact Wipe (or
overtravel). This can be accomplished by closing
the breaker and carefully measuring the gap
between the Nut and the Trunion Block of the
Contact Spring Assembly. See Figure A9 in the
Appendix.
WARNING
Keep hands clear of all moving parts. Serious
injuries can result if a person comes in contact with
breaker parts when the breaker is being opened or
closed, or closing springs are being charged or
discharged. Use extension tools for manipulating
breaker parts.
This adjustment is initially set at the factory to a
range of 0.093 - 0.101 (2.4mm – 2.6mm). As the
breaker sees service and the contacts start to
erode, this value will decrease. Asymmetrical and
single phase interruption will cause contact
erosion and wipe deterioration to occur differently
for all three poles. Once the Wipe has decreased
to 0.031" and it is determined that the breaker is
operating properly, the interrupter assembly will
need replacement. The measurement is made as
follows:
1. Close the breaker and measure between the
Nut and Spring Base. See Figure A9.
2. The gap should be in the range shown in
Table A3.
3. When the Contact Wipe is less than 0.031”,
and it has been determined that the breaker
closes fully, and there is not a mechanical
problem than the Interrupter should be
replaced due to contact erosion.
Contact Gap
Upon opening the breaker, the resulting gap
between the vacuum interrupter contacts is
referred to as Contact Gap. This gap is also the
distance the contacts travel upon closing. This
can range from a minimum of 0.310 " (7.9mm) on
a new breaker, to a maximum of 0.540" (13.5mm)

IB 6.2.7.7-3I 1
1
on a used breaker with an interrupter nearing
replacement. As the breaker sees service, and
the contacts start to erode, this value will increase.
The following procedure describes how to
determine the Contact Gap
.
The necessary tools
are: an ink pad and a thin flat straight edge with
approximate dimensions should in Figure A9 in
the Appendix. Proceed with the circuit breaker
withdrawn from the compartment.
WARNING
If the circuit breaker has been energized, or it is
unsure if the circuit breaker has ever been
energized, the mid-band ring (on vacuum
interrupters so equipped) must first be discharged
before any work is performed on or near the
interrupters. A grounding stick must be used to
discharge the ring by fastening the ground cable of
the stick to known ground, and touching the
grounding tip of the stick to each mid-band ring.
Contact Gap Check (See Figure A9).
1. Open the breaker and discharge the
closing springs.
2. The Racking Mechanism must be in either
the DISCONNECT, TEST or CONNECT
position.
3. Apply ink from the Ink Pad to the end of
the Straight Edge.
4. Slide the Straight Edge along the bottom
of the Molded Chair Assembly until the
Straight Edge contacts the Pushrod. This
will be the first of two markings needed.
See Figure A9.
5. Close the breaker and repeat Steps 3 and
4.
6. The Gap is the distance measured
between the two lines. The acceptable
limits are listed in Table A3, located in the
Appendix.
Contact Sequencing (Synchronization)
Before checking contact sequence, verify that the
Contact Wipe and Gap for each pole is correct.
Refer to the subsections "Contact Wipe" and
"Contact Gap". It is not expected that the contact
sequence should exceed the 4 millisecond limit,
therefore, before attempting to readjust, verify that
the test equipment and procedure are correct.
Also consider, especially when testing with
electronic equipment, that multiple 2 millisecond
vacuum interrupter contact bounces are
permissible during normal closing, and these
bounces can influence the contact time
measurements. If there are any questions,
consult the factory.
If it is determined that the contact sequence is not
within 4 milliseconds, adjustment is required.
Usually, readjustment of one pole should be
sufficient so that all three poles touch within 4
milliseconds. The gap of the pole to be changed
should be decreased if the contacts of that pole
are touching after the other two poles, or
increased if the contacts are touching before the
other two poles. The gap is decreased by turning
the Pushrod
clockwise, and increased by turning
the Pushrod counterclockwise, as viewed from the
top of the breaker.
WARNING
Keep hands clear of all moving parts. Serious
injuries can result if a person comes in contact with
breaker parts when the breaker is being opened or
closed, or closing springs are being charged or
discharged. Use extension tools for manipulating
breaker parts.
Before the Pushrod can be turned, the breaker
must be in the Open position, Closing Springs
discharged and the Pushrod Pin removed. See
Figure A9 in the Appendix. With the breaker
Open, the vacuum in the interrupter maintains a
constant upward force of approximately 25 pounds
on the moving contact and Pushrod. Therefore,
before removing pin, the contact must be held
down in the open position by temporary spacers.
After removing the Retaining Ring and Pushrod
Pin, rotate Pushrod as required.
One quarter (1/4) turn of the Pushrod will change
the gap by approximately 0.019" (0.5mm). After
rotating the pushrod, carefully reposition it
vertically to align the holes and the stud. Replace
the pin and retainer and remove the temporary
spacer. During the readjustment procedure, note
that the Contact Wipe and Contact Gap
dimensions must be maintained. The Contact

IB 6.2.7.7-3
1
2
Gap and Contact Wipe are inversely related;
increasing one decreases the other, and visa-
versa. Also, note that no more than one-half (1/2)
turn should be required when readjusting for
contact sequence.
After completing the contact sequence procedure,
recheck the Contact Wipe and gap for each pole.
If the specified Contact Gap, Contact Wipe and
contact sequencing cannot all be obtained, and it
is determined that the breaker is operating
properly, the interrupter is in need of replacement.
The front cover and interphase barrier assembly
can now be reinstalled. Return the rack screw to
its original position by turning it counterclockwise
approximately two to three turns until it stops.
Closing and Opening Times
After the operation intervals, it is recommended
that the Closing and Cpening Times be checked.
This can be done by use of a cycle counter, travel
recorder or oscillograph to monitor the time from
coil energizing to contact kiss (closing) or part
(opening).
Note: Normally, the Closing Time is not critical.
The breaker performance is satisfactory if the
Closing Speed, Opening Speed and Opening
Time are within specification. See Table A3 in the
Appendix for the nominal values for these
parameters.
The circuit breaker closing and opening times
should be within the time ranges for normal
operation.
Note the following:
•Times are from signal initiation to primary
contact kiss (make) or break.
•Times for DC controls supplied by a rectified
unconditioned power source, and all AC
controls, may wander by as much as ±4ms
due to the "current-zeroes" associated with
such currents.
•Below 0°C, the closing times will increase
(but with no reduction in closing force), and
opening times will usually be within the
limits.
•Adjustments to correct times, if found to be
outside limits, are critical and the nearest
District Office should be contacted for
recommendations.
Closing and Opening Speeds
The Closing and Opening speeds of the Primary
Contacts can be determined by use of a travel
recorder, which records their linear travel versus
time. The output can be fed into a travel recorder
or oscilloscope.
Before the Closing and Opening speeds are
checked, the Contact Wipe should first be
inspected. This is because, in addition to the
energy provided by The Opening Springs, the
Contact Springs provide additional acceleration
energy through the wipe distance upon contact
part. As the Primary Contacts erode, the Contact
Wipe decreases, and the opening speed will
decrease. Speed should still be within
acceptable limits if the wipe is still within limits.
Refer to Table A3 in the Appendix.
WARNING
Do not attempt to increase the opening speed by
readjusting the push rod to gain more contact wipe.
If either of the speeds is too slow, and the Contact
Wipe is within the limits specified, examine the
breaker for any moving parts that appear to be
binding. If none can be found, consult the factory
for assistance.
Operating Mechanism
Trip Latch Engagement (Bite) (See Figure
A10).
The Latch Engagement Adjusting Screw (3) is
located at the right of the right-hand mechanism
housing (1). It can be reached easily from the top
of the breaker, after removal of the top cover
plate.
To adjust the Latch (2) Engagement, proceed as
follows:

IB 6.2.7.7-3I 1
3
1. Back off Adjusting Screw (3) to assure
excessive latch engagement.
2. Close the circuit breaker.
3. Turn Adjusting Screw (3) down slowly until the
Latch just releases, tripping the circuit
breaker.
4. Back off the Adjusting Screw (3) 2 turns.
WARNING
Keep hands clear of all moving parts. Serious
injuries can result if a person comes in contact with
breaker parts when the breaker is being opened or
closed, or closing springs are being charged or
discharged. Use extension tools for manipulating
breaker parts.
Control Device (See Figure A11)
The Control Device is adjusted before leaving the
factory. It is recommended that no attempt be
made to adjust the internal relays and contacts of
this device in the field. If replacement of the
Control Device is required, the Close Latch
Release Rod (5)
overtravel
may be adjusted as
described below.
Close Latch Rod Release Overtravel
1. Back off on Close Latch Release Rod (5) and
check that the circuit breaker will not close
electronically or manually by pushing up on
the Close Latch Release Rod to the full
extent of its travel.
2. Charge the Closing Springs. Push up the
Close Latch Release Rod to the full extent of
its travel and hold.
3. While holding the Close Latch Release Rod
in this position, turn up on the Close Latch
Release Rod until the circuit breaker closes.
Turn the Close Latch Release Rod up an
additional 1-1/2 turns.
Lubrication
All mechanism parts, bearings, pins etc. of the
VHK vacuum circuit breakers have been
lubricated with Anderol 757 during factory
assembly. While any adjustments, tests and/or
periodic maintenance is being performed, it is
recommended that the grease for those parts be
examined.
If the grease should become contaminated or
unduly oxidized (hardened and darkened), or if
parts are replaced, any relubrication should be
done with the same lubricant, available from ABB
as part number 712994-C00 (1 LB can).
Note the following:
•The mechanism should be periodically inspected
for lubrication contamination. The frequency of
inspection is dependent upon experience with
the operating environment.
•Anderol is a Lithium soap-based synthetic
lubricant. Anderol is not compatible with many
other lubricants. Mixing with other incompatible
lubricants will cause caking and discoloration
and will require complete purging and
relubrication of breaker parts.
•Do not apply grease to latch or roller surfaces.
•Do not use light oil to lubricate any mechanism
parts. In emergency situations, Anderol 732 may
be used as a temporary lubricant, if adequate
time (several hours) is allowed for the solvents to
evaporate prior to any mechanical operations. It
is mandatory that the breaker undergo thorough
lubrication with Anderol 757 as soon as possible.
Note that bearing surfaces must be repacked,
requiring disassembly of the mechanism. Do not
operate the circuit breaker without completing
this procedure.
•Use of solvents to free contaminated lubricant is
strictly forbidden without immediate relubrication
using Anderol 757.
•The charging motor has sealed bearings. No
lubrication is required.
Dielectric Tests
It is recommended that dielectric withstand tests
be made prior to use and at routine maintenance
periods to verify the integrity of vacuum circuit
breakers. If, during the dielectric withstand test,

IB 6.2.7.7-3
1
4
the required test voltage cannot be sustained
across the open contacts of the vacuum
interrupter, the interrupter may be faulty and must
be replaced. Always insure that the contact air
gap is correct before conducting primary circuit
dielectric tests.
WARNING
Do not run any primary circuit dielectric withstand
tests on isolated interrupters with open contacts
above rated voltage, unless test personnel are
adequately shielded or are no less than six feet
from the test unit.
WARNING
If the circuit breaker has been energized, or it is
unsure if the circuit breaker has ever been
energized, the mid-band ring (on vacuum
interrupters so equipped) must first be discharged
before any work is performed on or near the
interrupters. A grounding stick must be used to
discharge the ring by fastening the ground cable of
the stick to known ground, and touching the
grounding tip of the stick to each mid-band ring.
Note the following:
•Dielectric test voltages higher than rated voltage,
applied across open contacts, may cause a
vacuum interrupter to emit some X-radiation,
which could be a health hazard on prolonged
exposure at close range. Accordingly, even
though the emission is low, it is considered
appropriate to exercise caution. Therefore, do
not run any primary circuit dielectric withstand
tests on isolated interrupters with open contacts
above rated voltage unless test personnel are
adequately shielded or they are no less than six
feet from the test unit.
•It is to be noted that no hazardous X-radiation is
produced with closed contacts at any test
voltage, nor with open contacts at rated voltage,
and there should be no cause for concern. If
the breaker is tested in its compartment at the
test voltages recommended below, the steel
enclosure will provide sufficient shielding to
protect personnel from X-radiation at the normal
distances maintained for electrical safety.
NOTE: Only an AC hi-pot test is recognized as a
valid test. DC, Meggers, etc. are not valid for hi-
pot testing.
The following test values should be used for
dielectric testing the new breaker, and are to be
applied for a one-minute period:
•Primary Circuit, new interrupters
36kV for 7.5kV and 15kV
19kV for 5kV
•Secondary Circuit
1100VAC (except motor)
540VAC (motor)
Once in service, the different circuits should be
tested at 75% of these ratings.
If it is desired to make a dielectric test on the
secondary control wiring, turn the spring charging
Motor Disconnect Switch to the "OFF" position.
Apply test voltage (1100VAC) for one minute to
each of the secondary contacts of the circuit
breaker.
If it is desired to make a dielectric test on the
spring charging motor, turn the Motor Disconnect
Switch to the "ON" position. Apply test voltage
(540VAC) for one minute to the motor circuit.

IB 6.2.7.7-3I 1
5
ELECTRICAL CHARACTERISTICS OF
CONTROL DEVICES - (
REFER TO
FIGURES A12 AND A13 IN THE
APPENDIX)
NOTE: The charging time of the breaker with the
new Ryobi Motors is approximately four seconds.
For operating voltage ranges and normal current
draw for various nominal control voltages, refer to
Tables A1 and A2 in the Appendix. The current
values given are average steady state values.
Momentary inrush currents for all charging motors
and coils are approximately three times these
values.
Please refer to the specific schematic diagrams
and other operational information furnished with
your order. Typical schematics for general
electrical information can be found in the
Appendix.
DC and AC Closing Operating Sequence
With the circuit breaker open, closing springs
discharged, control power source energized, and
motor disconnect switch to ON position, operation
occurs as follows:
1. Immediately upon the availability of control
power across disconnects "5" and "02", the
spring charging motor is energized, which in
turn charges the closing springs. When the
closing springs are charged, limit switch
contact "LSb" is opened, and limit switch
contact "LSa" is closed.
2. Operation of the close control switch (with its
power source), connected to disconnects "03"
or "7" and disconnect "6", energizes the latch
release coil (X) through the circuit breaker
auxiliary switch "b" contact, the normally
closed lockout relay contact "Yb", limit switch
contact "LSa". The latch release coil (X)
releases the closing latch. The springs then
discharge to close the circuit breaker.
3. When the springs discharge, limit switch
contacts "LSb" closes and switch contact
"LSa" opens.
4. When limit switch "LSb" in the motor circuit
closes, the spring charging motor is
energized, which in turn recharges the closing
springs.
5. When the circuit breaker closes, all auxiliary
switch "b" contacts open and all auxiliary
switch "a" contacts close.
6. When the limit switch contact "LSb" closes,
the lockout relay coil (Y) is energized and
opens lockout relay contact "Yb", which de-
energizes the latch release coil (X). Lockout
relay contact "Ya" closes, which seals-in the
lockout relay coil (Y) as long as the "close"
contact is maintained. The purpose of the
lockout relay coil (Y) is to prevent pumping of
the closing mechanism when closing against a
faulted circuit.
7. After the breaker has closed and the "close"
switch is released by the operator, the lockout
relay coil (Y) is de-energized. This allows the
normally-closed lockout relay contact "Yb" to
close, and the normally-open lockout relay
contact "Ya" to open.
8. The circuit breaker can be tripped by
operation of the trip control switch, connected
to disconnects "3" or "04" and disconnect "10",
which energizes the circuit breaker trip coil
(TC) through the auxiliary switch "a" contact.
9. The Undervoltage Device, if furnished,
provides a direct acting lock-open and
undervoltage tripping feature. This device
must be energized to initially close the
breaker, and also to maintain the breaker in a
closed position.
10. The latch check switch, if furnished, insures
that the tripping mechanism must be reset
prior to energizing the closing latch release
coil (X).
AC Closing Operating Sequence
(Prior to January 1996)
With the circuit breaker open, the closing springs
uncharged, the control power source energized
across disconnects "5" & "02" and "01" & "6", and
the motor disconnect switch to ON position,
operation occurs as follows:

IB 6.2.7.7-3
1
6
1. Immediately upon the availability of control
power at terminals "05" and "02", the spring
charging motor is energized, which in turn
charges the closing springs. When the
closing springs are charged, limit switch
contact "LSa" is closed. Also, upon availability
of control power at disconnects "01" and "6"
through auxiliary switch "b" contact, and after
the closing springs have been charged, the
lockout relay coil (Y) will be energized through
the circuit breaker auxiliary switch "b" contact
and the parallel resistors R1 and R2. The
lockout relay will pick up and close contact
"Ya".
2. Connecting wires "03" or "7" to control power
via operation of the close control switch
energizes the latch release coil (X) through
the circuit breaker auxiliary switch "b" contact,
the normally open lockout relay contact "Ya",
and the limit switch contact "LSa". The latch
release coil (X) releases the closing latch.
The springs then discharge to close the circuit
breaker.
3. When the springs discharge, limit switch
contact "LSb" closes and limit switch contact
"LSa" opens.
4. When limit switch contact "LSb" in the motor
circuit closes, the spring charging motor is
energized, which in turn recharges the closing
springs.
5. When the circuit breaker closes, all auxiliary
switch "b" contacts open and all auxiliary
switch "a" contacts close.
6. When the limit switch contact "LSb" closes,
the lockout relay coil (Y) is de-energized and
opens lockout relay contact "Ya", which de-
energizes the latch release coil (X). Lockout
coil (Y) is locked out as long as the
Close
signal is maintained. This is because the
maintained control power on disconnects "03"
or "7" puts resistor R1 in parallel with lockout
coil (Y). The additional current flow through
parallel resistors R2 & R3 and the associated
increased voltage drop leaves insufficient
voltage to pick up the lockout relay. The
purpose of the lockout relay is to prevent
pumping of the circuit breaker’s mechanism
when closing against a faulted circuit.
7. After the breaker has closed and when the
closing control switch is released by the
operator, the lockout relay coil (Y) remains de-
energized due to the auxiliary switch "b"
contact in the closing circuit being open.
8. The Circuit Breaker can be tripped by
operation of the Remote Trip Switch which is
connected to Disconnects “04” and “10”. This
energizes the breaker Trip Coil (TC) through
the auxiliary switch “a” contact.
9. The Undervoltage Device, if furnished,
provides a direct acting lock-open and
Undervoltage tripping feature. This device
must be energized to initially close the
breaker, and to maintain the breaker in a
closed position.
10. The Latch Check Switch (LCS), if furnished,
insures that the operating mechanism must be
reset prior to energizing the closing latch
release coil (X).
11. The remote mounted capacitor trip feature
(recommended for AC trip), if furnished,
provides an electrical energy storage network.
Should a loss of control power occur at the
instant of a tripping signal, sufficient energy
will be furnished to insure an electrical tripping
operation.
12. The stopping device switch, if applicable,
prevents electrical reclosing of the Circuit
Breaker after a manual trip until the stopping
device switch has been manually reset.

IB 6.2.7.7-3I 1
7
GROUND AND TEST DEVICES
These devices are supplied when ordered with
certain component variations such as Test Ports
and Interlocks. The three basic types are:
•Simple, three or six–terminal.
•Simple, three or six–terminal electrically
(remote) operated.
•Complex, six-terminal, electrically (remote)
operated with manual selector switch.
These devices are basically maintenance free for
their normal operating life. Racking procedures
are similar to the standard breaker as outlined
(except that they only have a WITHDRAW AND
CONNECT position), and all detailed operational
instructions are attached to the devices.
RENEWAL PARTS
Only those renewal parts that will be required to
insure proper and timely maintenance for normal
operation of the VHK vacuum circuit breakers are
recommended to be stocked. Copies of the
applicable Renewal Parts Bulletin for specific
circuit breakers will be furnished on request from
the Component Sales Department (407-323-
8220).
The minimum quantity of assemblies and items
recommended in these bulletins are based upon
accumulated tests and operating experience.
Total assemblies are recommended for
convenient replacement, when it is necessary to
return the breaker to service as quickly as
possible. The bulletins also contain specific part
ordering instructions.

IB 6.2.7.7-3 APPENDIX
1
8
CIRCUIT BREAKER ASSEMBLY WITH LIFTING YOKE INSTALLED
FIGURE A1
LIFTING YOKE
ASSEMBLY
FRONT
COVER
FRONT COVER MOUNTING
HARDWARE
FIFTH WHEEL HOLE
LIFTING
YOKE
MOUNTING
TEE
HANDLES

APPENDIX IB 6.2.7.7-3I 1
9
CIRCUIT BREAKER REAR – MODEL 21
FIGURE A2
INTERRUPTER
INSULATED
VACUUM
ENVELOPE
MID – BAND
RING
PRIMARY DISCONNECTS
(A.K.A. TULIPS)

IB 6.2.7.7-3 APPENDIX
2
0
FRONT CIRCUIT BREAKER PANEL – MODEL 21
FIGURE A3
MANUAL TRIP
BUTTON
MANUAL CLOSE
LEVER
MANUAL
DISCONNECT
LEVER
MOTOR
DISCONNECT
SWITCH
OPERATIONS
COUNTER
CLOSE/OPEN
INDICATOR
This manual suits for next models
2
Table of contents
Other ABB Circuit Breaker manuals

ABB
ABB AKD-5 User manual

ABB
ABB SACE Emax 2 User manual

ABB
ABB HD4-HPA Series Quick guide

ABB
ABB VHK-R Installation and operating instructions

ABB
ABB SACE Emax 2 User manual

ABB
ABB Ekip UP Series User manual

ABB
ABB SACE Emax 2 Product manual

ABB
ABB VM1 User manual

ABB
ABB SACE Emax 2 User manual

ABB
ABB FSK II S + Operating instructions

ABB
ABB DS 261 User manual

ABB
ABB SACE Emax E1 User manual

ABB
ABB SACE Emax Guide

ABB
ABB Tmax MIR-V User manual

ABB
ABB VM1/A/P Quick guide

ABB
ABB GE Power Break II User manual

ABB
ABB SACE Tmax XT5 User manual

ABB
ABB HD4/ESB Series Quick guide

ABB
ABB ADVAC 03 Installation and operating instructions

ABB
ABB MS 450 User manual