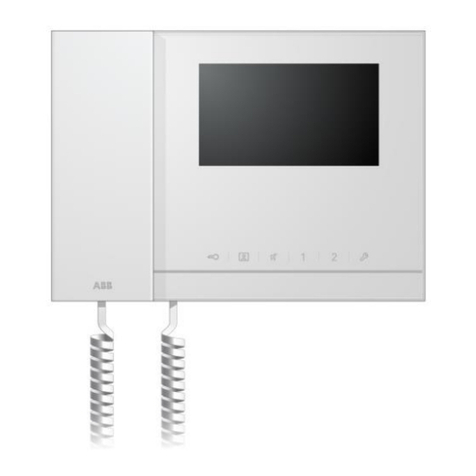
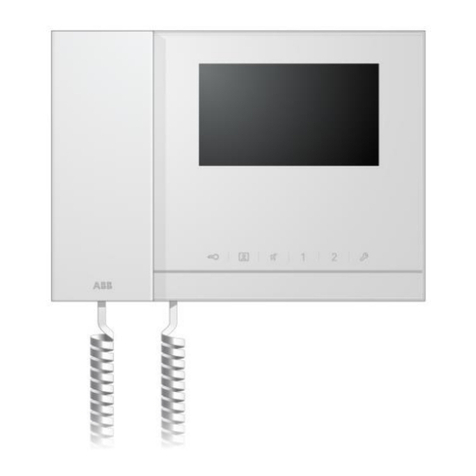
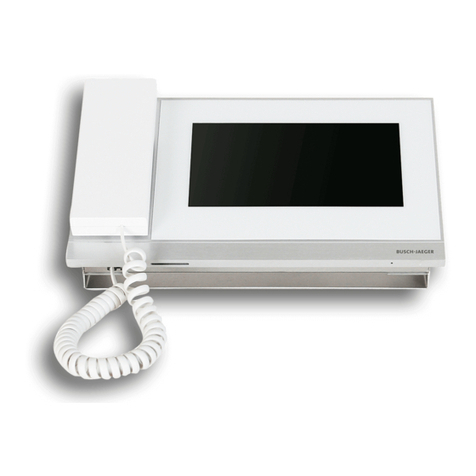
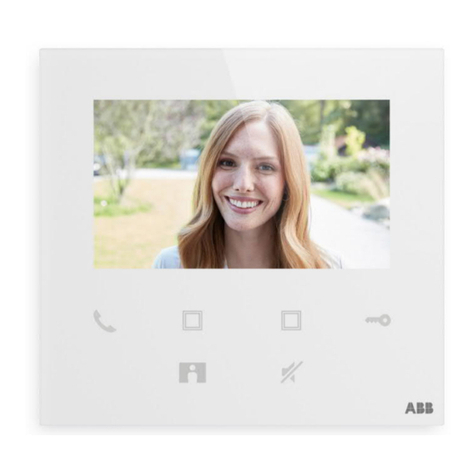
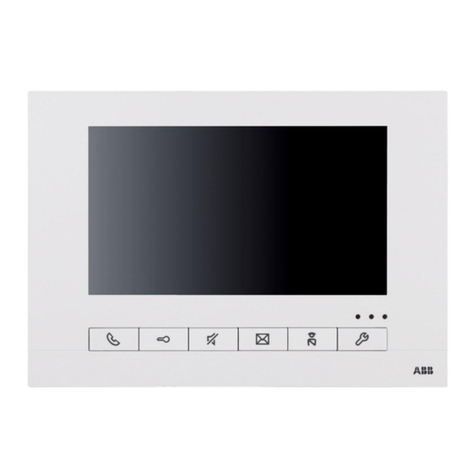
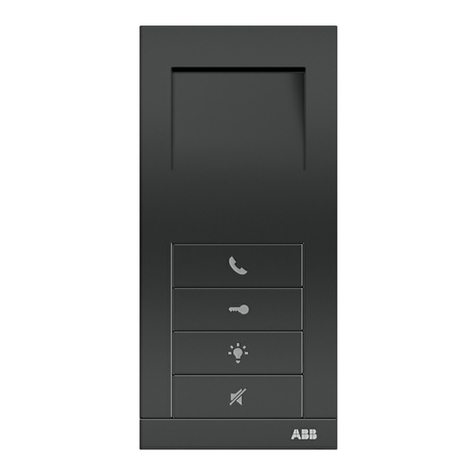
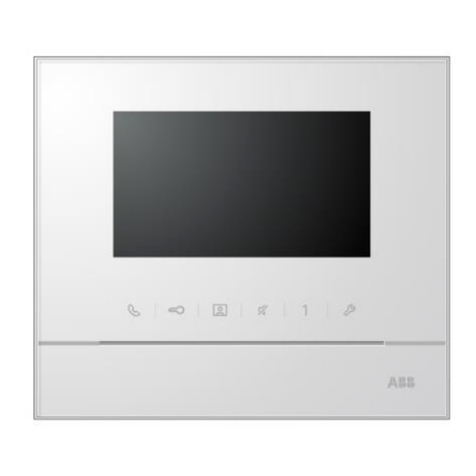
ABB Welcome M M2303 User manual

VER:1.0 ││31.03.2014
ABB-Welcome M
Pos: 2 /DinA 4 - Anl eitun gen Onl ine /Inh alt /KN X/D oo rEntry /832 20-A P- xx x/Tit el blat t - 832 20-AP -xxx - AB B @ 1 9\ mod_ 132 3249 806 476 _15. docx @ 11 108 4 @ @ 1
M2303
Guard Unit
===E nde der Lis te für Tex tmarke C over == =

ABB
-Welcome
| — 2 —
Pos: 4 /Busc h-Ja ege r (N eust rukt ur)/Mo dul -St ruktu r/O nli ne-D ok u ment ation /Inh al tsve rzei ch nis ( --> Fü r alle D oku men te <-- )/In haltsv e rzeic hni s @ 19\ mod _13 206 490 4438 6_1 5.d ocx @ 109 653 @ @ 1
1Safety.......................................................................................................4
2Intended use.............................................................................................4
3Environment..............................................................................................4
3.1 ABB devices.............................................................................4
4Operation..................................................................................................6
4.1 Standard operation....................................................................6
4.1.1 Control elements.......................................................................6
4.1.2 Welcomescreen and status bar.................................................8
4.2 Control actions........................................................................10
4.2.1 Incoming call / During a call.....................................................10
4.2.2 Display settings during calls.....................................................11
4.2.3 Intercept mode........................................................................12
4.2.3.1 VIP settings ............................................................................14
4.2.4 Communication.......................................................................17
4.2.5 Surveillance............................................................................19
4.2.6 Switch actuator .......................................................................20
4.2.7 User list ..................................................................................21
4.2.8 History....................................................................................23
4.2.9 Settings (Basic).......................................................................26
4.2.9.1 Ringtone settings....................................................................26
4.2.9.2 Volume settings ......................................................................27
4.2.9.3 Date and time settings.............................................................28
4.2.9.4 Other settings .........................................................................29
4.2.9.5 Language settings...................................................................30
4.2.9.6 Information..............................................................................31
4.2.10 Settings (Advanced)................................................................32
4.2.10.1 Switch actuator settings...........................................................33
4.2.10.2 Program button settings ..........................................................35
4.2.10.3 User list management .............................................................36
4.2.10.4 Call code settings....................................................................40
4.2.10.5 Password settings...................................................................41
4.2.10.6 Reset factory default ...............................................................42
4.2.10.7 Reset Password & Clear All Data.............................................43
4.3 Cleaning.................................................................................44
4.4 Adjusting the device................................................................45
5 Technical data.........................................................................................46
ABB
-Welcome
| — 3 —
6Mounting / Installation..............................................................................47
6.1 Requirements for the electrician...............................................47
6.2 General installation instructions...............................................48
6.3 Mounting.................................................................................49
===E nde der Liste f ür Textma rke TOC == =

ABB
-Welcome M
Safety
| — 4 —
Pos: 6 /Busc h-Ja ege r (N eust rukt ur)/Mo dul -St ruktu r/O nli ne-D ok u ment ation /Ü be rschri ften (- -> Für alle D okum ent e < --)/1. Eb ene/S - T /Si cher heit @ 18\ mod_13 026 127 917 90_ 15. d ocx @ 103 357 @ 1 @ 1
1Safety
Pos: 7 /Busc h-Ja ege r (N eust rukt ur)/Mo dul -St ruktu r/O nli ne-D ok u ment ation /S icher hei t (--> Für all e Dok um ente <- -)/Wa rn hinw eise /S ic herhei t - 23 0 V @ 18\m od_ 130 260 681 675 0_15 .docx @ 1033 08 @ @ 1
Warning
Electric voltage!
Risk of death and fire due to electrical voltage of 100-240 V.
– Work on the 100-240V supply system may only be performed by
authorised electricians!
– Disconnect the mains power supply prior to installation and/or
disassembly!
Pos: 8 /Busc h-Ja ege r (N eust rukt ur)/Mo dul -St ruktu r/O nli ne-D ok u ment ation /Ü be rschri ften (- -> Für alle D okum ent e < --)/1. Eb ene/A - F /Bes tim mun gsge mä ßer Geb rau ch @ 18\ mod _13 027 6332 131 6_1 5.do cx @ 1034 83 @ 1 @ 1
2Intended use
Pos: 9 /DinA 4 - Anl eitun gen Onl ine /Inh alt /KN X/D oo rEntry /832 20-A P- xx x/B esti mmu ngsg em aess e r Ge bra uch - 83 220 -AP -xxx- 500 @ 2 0\mo d_1 324 561 168 699 _15. doc x @ 11 272 8 @ @ 1
The M2303 is an integral part of the ABB Welcome M door communication system and
operates exclusively with components from this system. The device must only be
installed in dry indoor rooms.
Pos: 10 /B usc h-J aeg er (Neus truk t ur)/M odul -Strukt ur/O nline -Dok u me ntatio n/Ü be rsch rifte n ( --> Fü r alle D oku men te < --)/1. E bene /U - Z/U mwelt @ 18\ mod _13 026 141 5896 7_1 5.d ocx @ 103 383 @ 1 @ 1
3Environment
Pos: 11 /B usc h-J aeg er (Neus truk t ur)/M odul -Strukt ur/O nline -Dok u me ntatio n/U mw elt ( --> F üral l e Dok u me nte <--)/H inwei s e/Hi nw eis -U mwelt - H inwei s El ektr oge räte @ 1 8\mo d_1 302 763 973 434 _15. doc x @ 10 350 0 @ @ 1
Consider the protection of the environment!
Used electric and electronic devices must not be disposed of with
domestic waste.
– The device contains valuable raw materials which can be recycled.
Therefore, dispose of the device at the appropriate collecting
depot.
Pos: 12 /Di nA 4 - A nl eitu ngen Onl in e/Ueb ers c hrift en/2 ./ AB B Gera ete @ 19 \ mod_1 323 162 843 832_ 15. docx @ 11 087 5 @ 2 @ 1
3.1 ABB devices
Pos: 13 /B usc h-J aeg er (Neus truk t ur)/M odul -Strukt ur/O nline -Dok u me ntatio n/U mw elt ( --> F üral l e Dok u me nte <--)/H inwei s e/Hi nw eis -U mwelt - A BB E lektro ger äte @ 19\ mo d_1 3231 627 458 39_ 15.d oc x @ 110 867 @ @ 1
All packaging materials and devices from ABB bear the markings and test seals for
proper disposal. Always dispose of the packaging material and electric devices and their
components via the authorized collecting depots and disposal companies.

ABB
-Welcome M
Environment
| — 5 —
ABB products meet the legal requirements, in particular the laws governing electronic
and electrical devices and the REACH ordinance.
(EU-Directive 2002/96/EG WEEE and 2002/95/EG RoHS)
(EU-REACH ordinance and law for the implementation of the ordinance (EG)
No.1907/2006)

ABB
-Welcome M
Operation
| — 6 —
Pos: 18 /Di nA 4 - A nl eitu ngen Onl in e/Ueb ersc hrift en/1 ./B edie nun g @ 18\ mod_ 130 261 392 416 5_15 . docx @ 1 033 65 @ 1 @ 1
4Operation
Pos: 19 /Di nA 4 - A nl eitu ngen Onl in e/Ueb ers c hrift en/2 ./ Nor male r Bet rieb @ 18 \mo d_1 302 768 8209 65_ 15. docx @ 10 3540 @ 2 @ 1
4.1 Standard operation
Pos: 20 /Di nA 4 - A nl eitu ngen Onl in e/Ueb ers c hrift en/3 ./ Bedie nel e men te @ 20\ mod _13 232 6022 055 9_1 5.do cx @ 1 116 47 @ 3 @ 1
4.1.1 Control elements
Pos: 21 /Di nA 4 - A nl eitu ngen Onl in e/In hal t/KN X/D o orEnt ry/83 220 -A P-x xx/B e dienel eme nte - 8 322 0-A P-xx x @ 18\ mo d_1 3032 128 536 05_ 15.d ocx @ 103 673 @ @ 1
Fig. 1 Over view of the control buttons

ABB
-Welcome M
Operation
| — 7 —
No. Function
1Handset
When a call is coming, pick up handset to activate the communication
within 30 seconds and hang up handset to end the call.
2 4.3“Touch screen.
3Unlock button
Press this button to open the door at any time.
If the LED flashes slowly, this means an incoming call.
If the LED flashes rapidly, it means system is busy or the door has been
opened over the set time (The sensor must be connected first).
4Surveillance button
In standby mode, press this button to survey the default outdoor station.
5 Programmable button 1,2,3
5A *Programmable buttons for additional functions, e.g. control the switch
actuator.
5B Default function of button 1 is release the lock connected with an
outdoor station (COM-NC-NO)
6 System setting button
Enter into the system setting for various functions of the device.
*For their use, please contact your electrical installer.

ABB
-Welcome M
Operation
| — 8 —
4.1.2 Welcome screen and status bar
Fig. 2 Start
On the start page, the following functions are available:
No. Function
1Intercept
- Press this button to switch to intercept settings.
2Communication
- Press this button to enter the communication menu
3Surveillance
In standby mode, press this button to survey the default outdoor station.
4 Switch actuator
- Press this button to enter the switch actuator menu and enable the
existing actuators here.
5User list
- Touch this button and then check the contact list.
6History
- Press this button to enter the history menu. All events and alarms from
indoor stations can be found here.
7System settings (basic)
- Press this button to set some basic functions for the device,
e.g. ringtone, volume and local language.
START
1
2013/01/01 00:00
2 3 4
967 8
10
5
11 12 13

ABB
-Welcome M
Operation
| — 9 —
8System settings (advance)
- Press this button to set the various advanced functions for the
device, e.g. switch actuator setting and user list management.
9Date and time
- Press this button to switch to date and time settings.
10 Cleaning locking
- This icon appears when the display is locked to prevent functions being
triggered during cleaning.
11 Alarm history
- This icon appears when new alarm information is available in the alarm
history.
- Touch this icon and then events will be displayed.
12 Call history
- The icon appears when new call information is available in the call
history.
- Touch this icon and then events will be displayed.
13 Intercept
- The icon appears when the guard unit is in the intercept mode.
Pos: 22 /B usc h-J aeg er (Neus truk tur )/M odul -Strukt ur/O nline -Dok u me ntatio n/S teu er mod ule - Onli n e-Dok ume ntati on (-- > F ür alle D ok ume nte <- -)/ +++++ ++ +++++ S eiten umb ruch + +++ ++ +++++ + @ 9\m od_ 126 8898 668 093 _0. docx @ 521 49 @ @ 1

ABB
-Welcome M
Operation
| — 10 —
Pos: 26 /Di nA 4 - A nl eitu ngen Onl in e/Ueb ersc hrift en/2 ./B edie nak ti onen @ 2 0\m od_ 1323 262 294 281 _15. doc x @ 11 191 1 @ 2 @ 1
4.2 Control actions
Pos: 27 /Di nA 4 - A nl eitu ngen Onl in e/Ueb ersc hrift en/3 ./S pr ech- und V ideov erbi ndu ng @ 20\ mod _13 232 6236 870 0_1 5.do cx @ 1119 27 @ 3 @ 1
4.2.1 Incoming call / During a call
Pos: 28 /Di nA 4 - A nl eitu ngen Onl in e/In halt /KN X/D o orEnt ry/83 220 -A P-xx x/S p rech - u nd Vide ov er bind ung - 8 322 0-AP -xxx @ 20\ mod_1 3232 623 418 52_ 15. d ocx @ 111 919 @ @ 1
Fig. 3 Incoming call
When calling, the following functions are available:
No. Function
1Time left of the connection.
2Number of outdoor stations.
3Surveillance
Press this button to surveil the analog camera of the outdoor
station if there is one.
4 Snapshot
- Press this button to take a snapshot.
5Display settings
- Press this button to enter the display settings.
6End the connection.
Pos: 29 /B usc h-J aeg er (Neus truk tur )/M odul -Strukt ur/O nline -Dok u me ntatio n/S teu er mod ule - Onli n e-Dok ume ntati on (-- > F ür alle D ok ume nte <- -)/ +++++ ++ +++++ S eiten umb ruch + +++ ++ +++++ + @ 9\m od_ 126 8898 668 093 _0. docx @ 521 49 @ @ 1
1
5
6
END
030s
Outdoor
-
1
< >
1-1
2
3
4

ABB
-Welcome M
Operation
| — 11 —
Pos: 30 /Di nA 4 - A nl eitu ngen Onl in e/Ueb ersc hrift en/3 ./T uer oeff nen @ 2 0\ mod_1 323 263 277 453 _15. docx @ 11 193 5 @ 3 @ 1
4.2.2 Display settings during calls
Pos: 31 /Di nA 4 - A nl eitu ngen Onl in e/In halt /KN X/D o orEnt ry/83 220 -A P-xx x/ Tue r o effne n - 832 20-AP -x xx @ 20\ mod_ 132 326 795 847 9_15 . docx @ 1 121 09 @ @ 1
Fig. 4 Display settings during calls
The following functions are available if you press button.
No. Functions
1Adjust the saturation of the display through the ”Plus / Minus” buttons.
2 Adjust the brightness of the display through the “Plus / Minus” buttons.
1
END
120s
Outdoor
-
1
+
-
3
2

ABB
-Welcome M
Operation
| — 12 —
4.2.3 Intercept mode
Pos: 31 /Di nA 4 - A nl eitu ngen Onl in e/In halt /KN X/D o orEnt ry/83 220 -A P-xx x/ Tue r o effne n - 832 20-AP -x xx @ 20\ mod_ 132 326 795 847 9_15 . docx @ 1 121 09 @ @ 1
Fig. 5 Intercept mode
In the “Intercept”, the following functions are available:
No. Function
1Activate or deactivate the intercept function by ticking the checkbox
2Activate the intercept function to intercept calls for all users or for VIPs only
by ticking the checkbox
- ”all” means that the guard unit will intercept calls for all users..
- “VIP” means that the guard unit will intercept calls for VIPs only
3Set VIPs (available only when there are VIPs)
- Press this button to set the VIPs.
4 Choose the type of intercept by ticking the checkbox
- “Permanent” mode and “Repeat” mode are available.
5“Plus / Minus” buttons.
6Back
- Press this button to return to the start page without saving the settings.
7OK
- Press this button to save the settings.
8 In the “Repeat” mode, the timer(s) must be activated by ticking the
checkbox.
Back
INTERCEPT
×
Intercept For
ALL
Type
Per
manent
Start Time 1
×
08
30
×
18
30
Start Time 2
End Time 1
08
30
18
30
End Time 2
OK
-
+
Set VIP
1
5
2 3
8
4
7
6

ABB
-Welcome M
Operation
| — 13 —
- When the timer is activated, set the start time and end time via the “Plus /
Minus” buttons.
- Before adjusting to the “Hour” or “Minute”., the active range is
highlighted in blue
- End time > Start time
The function can only be set through master guard unit.

ABB
-Welcome M
Operation
| — 14 —
4.2.3.1 VIP settings
Press to set the VIPs,. A total of 64 entries can be added.
Fig. 6 VIP settings
The following functions are available:
No. Functions
1Select “User Name”, press “Add“ button, and then you can add
new VIPs by user name (from the contact lists).
2Select “Physical Address”, press “Add“ button, and then you can add new
VIPs by their physical address.
3“VIP”
- Press the “VIP” button to check the VIP list .
4“Add”
- Press the “Add” button to add new VIPs.
5“Back”
- Press the “Back” button to return to the “Intercept” page.
6“Scroll”
- Switch to other settings by ticking the scroll box.
Set VIP
Back
User Name
Add
VIP
6
1
4
5
Physical Address
3
VIP SETTING
2

ABB
-Welcome M
Operation
| — 15 —
Press to set VIPs.
Fig. 7 VIP list
The “VIP list” menu has the following functions:
No. Functions
1VIP list
- Displays all VIPs.
2“View”
- Press this button to display specific information of the selected VIP.
3“Delete”
- Press this button twice to delete the selected VIP.
4“Back”
- Press this button to return to the VIP settings menu.
VIP
Back
VIP List
Alexander.G
Delete
View
1
3
4
Bodin.K
2
1/5
Christian.G
Elizabeth.G
Tom

ABB
-Welcome M
Operation
| — 16 —
Select “Physical address” and press the “Add” button to enter “Add” menu.
Fig. 8 Add VIPs by physical address
No. Functions
1Enter a physical address with the numeric keypad.
2 “Add”
- Press this button to add a new VIP. Enter the correct physical address
before pressing this button.
3“Back”
- Press this button to return to the VIP settings menu.
Back
VIP SETTING
Add
1
2
3

ABB
-Welcome M
Operation
| — 17 —
4.2.4 Communication
Pos: 31 /Di nA 4 - A nl eitu ngen Onl in e/In halt /KN X/D o orEnt ry/83 220 -A P-xx x/ Tue r o effne n - 832 20-AP -x xx @ 20\ mod_ 132 326 795 847 9_15 . docx @ 1 121 09 @ @ 1
Fig. 9 Call indoor station
The “call indoor station” menu has the following functions:
No. Functions
1Click on the “Call indoor station”.
2Enter a physical address or logic address to make a call to an indoor
station. (select physical address or logic address from the call settings)
3“Contact”
Press “Contact” button to display the contact list, and make a call directly
by user name.
4“Call”
- Press this button to make a call after you enter the number.
5“Back”
- Press this button to return to the start page.
Back
CALL INDOOR STATION
Call
2
4
5
Contact
1
3

ABB
-Welcome M
Operation
| — 18 —
Fig. 10 Call guard unit
The “Call guard unit” menu has the following functions:
No. Functions
1Click on the “Call guard unit.
2Enter a guard unit address.
If the called guard unit is in the same building, press number 1~9 to make
a call.
If the called guard unit is not in the same building, press the building
number + guard unit address to make a call, e.g. building No.(1~60)+guard
unit address (1~9).
3“Call”
- Press this button to make a call after you enter the number.
4“Back”
- Press this button to return to the start page.
Back
CALL GUARD UNIT
Call
2
3
4
1

ABB
-Welcome M
Operation
| — 19 —
4.2.5 Surveillance
Pos: 31 /Di nA 4 - A nl eitu ngen Onl in e/In halt /KN X/D o orEnt ry/83 220 -A P-xx x/ Tue r o effne n - 832 20-AP -x xx @ 20\ mod_ 132 326 795 847 9_15 . docx @ 1 121 09 @ @ 1
Fig. 11 Surveillance
Press button to survey the default outdoor station. The following functions are available:
No. Functions
1Press this button to survey the next outdoor station.
2Use the handset to establish an audio connection with the current outdoor
station under connection.
END
015s
Outdoor
-
1
< >
1-1 1

ABB
-Welcome M
Operation
| — 20 —
4.2.6 Switch actuator
Pos: 31 /Di nA 4 - A nl eitu ngen Onl in e/In halt /KN X/D o orEnt ry/83 220 -A P-xx x/ Tue r o effne n - 832 20-AP -x xx @ 20\ mod_ 132 326 795 847 9_15 . docx @ 1 121 09 @ @ 1
Fig. 12 Switch actuator
The “Switch actuator”, menu has the following function:
No. Functions
1Actuator list
- Establish an actuator list by clicking on “system settings (advance) -
switch actuator“ in turn.
2“Enable”
- Press this button to activate the selected actuator.
3“Back”
- Press this button to return to the start page.
Back
SWITCH ACTUATOR
Enable
Actuator 1 (001)
1/1
3
4
2
Table of contents
Other ABB Intercom System manuals

ABB
ABB Welcome M2233 Series User manual

ABB
ABB M22343 Series User manual

ABB
ABB Welcome IP H8236 Series User manual

ABB
ABB 83220-SM-xxx-500 User manual

ABB
ABB 83205-SM-500 Series User manual

ABB
ABB Welcome IP User manual

ABB
ABB Welcome M M2233 User manual

ABB
ABB Welcome IP User guide

ABB
ABB CM-06DN Series User manual

ABB
ABB Welcome M M25102 C Series User manual

ABB
ABB W2252 BL User manual

ABB
ABB H8137xPx-S User manual

ABB
ABB H81381P Series User manual

ABB
ABB Welcome User manual

ABB
ABB Video Outdoor Station User manual

ABB
ABB WelcomeTouch 83220-SM 500 Series User manual

ABB
ABB H8138.K Series User manual

ABB
ABB H82351 Series User manual

ABB
ABB M2231 SERIES User manual

ABB
ABB ABB-Welcome M2240-W User manual