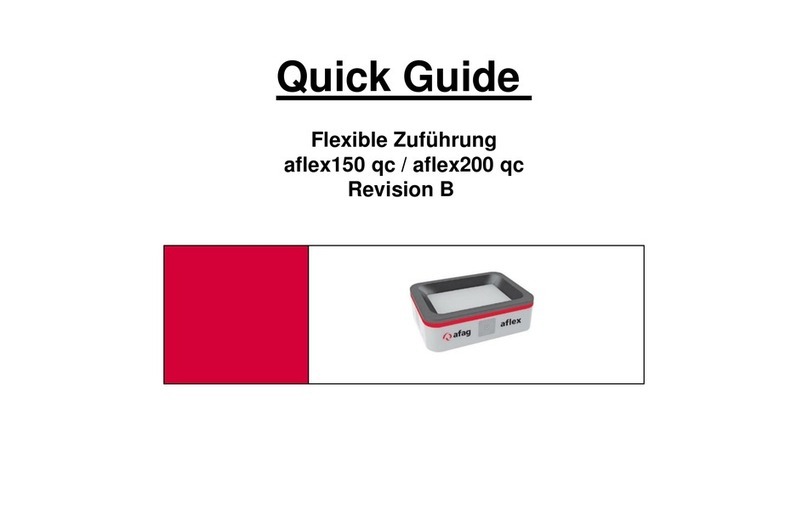
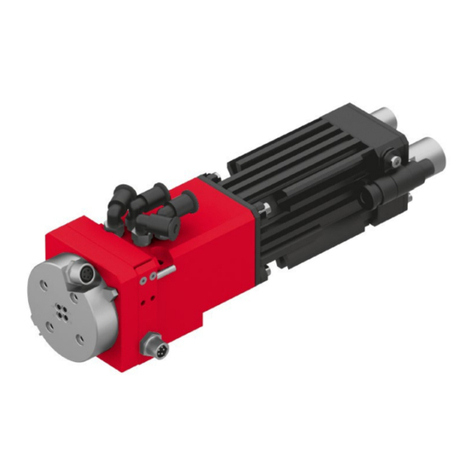
Afag aflex 150 Installation instructions

Flexible feeding system
aflex 150 / aflex 200
Original Operating Manual
Copyright by Afag GmbH

Page 2 2017-01-13 Release: 02.0
This operating manual is valid for:
Type
Order number
aflex 150
with white POM plate for transported material
50436237
with black POM plate for transported material
50436238
with white PTFE plate for transported material
50436239
with background lighting and white POM plate for transported
material
50436240
with background lighting and white PTFE platefor transported
material
50436241
with structured plate for transported material
50436242
aflex 200
with white POM plate for transported material
50436243
with black POM plate for transported material
50436244
with white PTFE plate for transported material
50436245
with background lighting and white POM plate for transported
material
50436246
with background lighting and white PTFE platefor transported
material
50436247
with structured plate for transported material
50436248
Version of this documentation BA_aflex150-200_R02.0_DE
Release: 02.0
Date: 2017-01-13

Release: 02.0 2017-01-13 Page 3
Table of Contents
1Declaration of installation for a complete machine........................................ 5
2Safety instructions............................................................................................ 6
Explanation of symbols and instructions .............................................................................................. 6
Basic safety instructions ...................................................................................................................... 7
2.2.1 Electrical Connection.................................................................................................................. 7
2.2.2 Danger zones ............................................................................................................................. 7
Intended use ....................................................................................................................................... 8
Obligations of the operator ................................................................................................................. 8
3Description of the device................................................................................ 10
General............................................................................................................................................. 10
Function description .......................................................................................................................... 11
Technical data................................................................................................................................... 12
Electrical/Control Components .......................................................................................................... 16
4Installation instructions.................................................................................. 17
Transport .......................................................................................................................................... 17
Assembly of the device ...................................................................................................................... 17
4.2.1 Drilling pattern for assembly .................................................................................................... 17
4.2.2 Dismantling adaptor plate........................................................................................................ 18
4.2.3 Assembly of the flex sockets..................................................................................................... 19
4.2.4 Assembly of the adaptor plate on the mounting level............................................................... 19
4.2.5 Assembly of aflex on the adaptor plate..................................................................................... 19
Connection of the device ................................................................................................................... 20
Power supply..................................................................................................................................... 20
Connection of the control .................................................................................................................. 21
5Software description....................................................................................... 23
Installation of the Software ............................................................................................................... 23
User groups....................................................................................................................................... 24
Start page ......................................................................................................................................... 25
5.3.1 Control unit States ................................................................................................................... 26
5.3.2 Advanced display Administrator ............................................................................................... 29
5.3.3 Connection set-up.................................................................................................................... 30
Main menu........................................................................................................................................ 30
Control interface ............................................................................................................................... 34
5.5.1 Aflex control panel ................................................................................................................... 34
5.5.2 Aflex configurations ................................................................................................................. 37
5.5.3 Control unit power output ....................................................................................................... 39
5.5.4 Simulation of the external control ............................................................................................ 40
Sub menu controller .......................................................................................................................... 43
Page 4 2017-01-13 Release: 02.0
Sub menu clients ............................................................................................................................... 49
5.7.1 Client Nodes Functions............................................................................................................. 51
5.7.2 T4X Client Node ....................................................................................................................... 53
5.7.3 Profibus Module ...................................................................................................................... 57
Sub menu Fieldbus configuration....................................................................................................... 58
Sub menu aflex module ..................................................................................................................... 62
5.9.1 Soft Release Mode ................................................................................................................... 66
Software update........................................................................................................................... 67
5.10.1 The Bootloader.................................................................................................................... 67
5.10.2 Software update Control Unit .............................................................................................. 67
5.10.3 Software update Client Node............................................................................................... 70
6First commissioning ....................................................................................... 72
Assembly of the system ..................................................................................................................... 72
Connect to control unit...................................................................................................................... 72
Configure Control Unit....................................................................................................................... 72
Configure client nodes....................................................................................................................... 72
Configure software modules.............................................................................................................. 73
Integration with higher control.......................................................................................................... 73
6.6.1 Development of transfer values ............................................................................................... 75
6.6.2 Digital input/output ................................................................................................................. 76
6.6.3 Telnet-Server ........................................................................................................................... 82
6.6.4 Profibus module....................................................................................................................... 85
6.6.5 Input commands ...................................................................................................................... 87
6.6.6 Output commands ................................................................................................................... 90
7Operating manual............................................................................................ 92
Safety instructions for operation........................................................................................................ 92
LED Display ....................................................................................................................................... 92
8Maintenance instructions ............................................................................... 93
9Order address.................................................................................................. 94
10 Disposal........................................................................................................ 94

Release: 02.0 2017-01-13 Page 5
1 Declaration of installation for a complete machine
Declaration of installation according to EG guidelines for machines 2006/42/EG, Appen-
dix II B
The manufacturer: Afag GmbH, Wernher-von-Braun-Straße 1, D-92224 Amberg
www.afag.com –Tel. +49 (0)9621 650 27-0
declares herewith that the incomplete machine: Aflex flexible feeding device
Description: aflex 150 / aflex 200
The basic safety and health requirements of the machine guidelines 2006/42/EG Appendix I are com-
plied.
The incomplete machine further complies with the
relevant EG guidelines:
machine guidelines 2006/42/EG
low-voltage directive 2014/35/EU
EMV guidelines 2014/30/EU
Practical harmonised norms:
EN ISO 12100-2010
The technical documentation for this incomplete machine was created according to Appendix II Part B.
The manufacturer is obligated to transmit these technical documentations electronically to national au-
thorities upon request.
Authorized representatives for the compilation of this operating manual:
Claus Piechatzek
Product manager ZT
Afag GmbH
The commissioning of the incomplete machine is prohibited until the incomplete machine is not
built into a machine and it complies with the regulations of the EG guideline for machine and the
EG-Declaration of conformity according to Appendix II A exists.
Place, Date Company: Afag GmbH
Amberg, 12.01.2016 First name Name
Herrn Klaus Bott
Director
Afag GmbH

Page 6 2017-01-13 Release: 02.0
2 Safety instructions
Explanation of symbols and instructions
Symbols: Installation and commissioning shall be done only by qualified personnel
according to operating manual.
Please observe the importance of following explanation symbols andinstructions.They
are divided and classified in danger levels according to ISO 3864-2.
DANGER
Indicates a direct potential danger.
When the information is not followed, it can lead to death or sever
body injuries (disability).
WARNING
Indicates a possible threatening situation.
When the information is not followed, it can lead to death or sever
body injuries (disability).
CAUTION
Indicates a possible dangerous situation.
When the information is not followed, it can lead to property dam-
age and mild or indirect body injuries.
Instruction
Indicated general instructions, useful application-tips and opera-
tion recommendations which however have no impact on the
safety or health of personnel.

Release: 02.0 2017-01-13 Page 7
Basic safety instructions
This operating manual serves as the base to start the flexible feeding device aflex and
to operate it. This operating manual, in particular the safety instructions must be ob-
served which work on or with aflex. Furthermore, the respective valid rules and regu-
lations for accident prevention must be observed for the operation site. The operating
instructions must always be kept at the operation site of the aflex.
The device may only be operated by technically qualified personnel. Qualified person-
nel are persons that are responsible and authorized for the safety of the system due
to their training, experience and teaching, as well as their knowledge of relevant norms,
regulations, accident prevention rules and operating conditions, who carry out the re-
spective required activities and thus identify possible dangers and can avoid them
(Definition for specialists according to IEC 364).
Disturbances that impair the safety of personnel, of aflex or other material assets must
be eliminated immediately.
The following instructions serve not only for the personal safety of the operating per-
sonnel, as well as the safety of the described products and the devices connected to
them:
2.2.1 Electrical Connection
Instruction
Disconnect the voltage supply before assembly or disman-
tling, as well as structural changes.
Observe valid accident prevention rules and safety regula-
tions in specific application cases.
Check if the working voltage of the device complies with
the local working voltage before commissioning.
EMERGENCY-STOP-Equipment must remain effective in all
operating conditions. Unlocking the EMERGENCY-STOP-
Equipment may not ensure uncontrolled restart.
The electrical connections must be covered!
Protective earth connections must be checked for proper
functioning after assembly.
2.2.2 Danger zones
Instruction
The flexible feeding devices from Afag are built according to EG
machine guidelines, state of the art and the recognized technical
safety regulations. Nevertheless during use, danger to life and

Page 8 2017-01-13 Release: 02.0
limb of the operators or third parties or impairments to aflex or
other material assets can arise.
Intended use
The aflex serves for the excitation of conveyed goods, in particular piece goods through me-
chanical vibrations. With regard to the maximum permissible dimensions and weights of con-
veyed goods, the instructions in chapter 3.3
Table 1: Technical data
Table 1: Technical data must be observed. Proper use also includes observing all
instructions in the operating manual, as well as observing all safety instructions.
WARNING
The aflex must not be used:
a) In humid and wet areas.
b) At temperatures below 10°C or above 50°C
c) In areas with easily flammable media
d) In areas with explosive media
e) In heavily polluted or dusty environments
f) In an aggressive environment (e.g., saline atmosphere)
Obligations of the operator
A safety-related condition and use of the aflex is the prerequisite for safe operation.
Therefore the operator is obligated to ensure that the following points are complied
with:
Ensure that the aflex is operated by authorized personnel only.
Prohibit hazardous and dangerous work. Check the handling by the staff.
Have the personnel confirm with a signature that the operating instructions have
been understood.
Ensure that a copy of the complete operating manual is permanently accessible at
the aflex.
Check the operating manual regularly for a complete and legible condition.
Prescribe appropriate personal protective equipment (PPE) for activities with in-
creased risk of injury.
Pinpoint the responsibilities according to the various tasks, installation, commission-
ing and operation.
You must immediately notify your supervisor personally of any occurring and recog-
nizable malfunctions.

Release: 02.0 2017-01-13 Page 9

Page 10 2017-01-13 Release: 02.0
Instruction
All persons working at the aflex as well as persons who are em-
ployed under the Temporary Employment Act have a duty to co-
operate for safety and health protection at the workplace. You
must be instructed about using the aflex.
Instruction
Reasonably foreseeable misuse, the dangers for the user, third parties
or for the
aflex can bring along with it:
a) The feeding of components whose size and geometry differs
from the size and geometry provided for the aflex
b) Operating the aflex outside the physical application limits de-
scribed in chapter "Commissioning / Operation"
c) Improper assembly, commissioning and operation of the aflex.
d) Changing the control software without prior consultation with
the manufacturer
e) Operating the aflex at or with obvious faults and / or defects.
f) Cleaning work without observing the safety precautions for
aflex work on site.
g) Improper assembly, commissioning and operation of the aflex.
Instruction
No modifications or alterations to the aflex base device may be
carried out without the manufacturer's approval.
Instruction
Any further use or constructional alteration is deemed to be inap-
propriate and will lead to the termination of the warranty claim.
3 Description of the device
General
The aflex system consists of an aflex and a modular control system. This control unit
consists of individual control modules, which, mounted on a DIN rail, communicates

Release: 02.0 2017-01-13 Page 11
via the BackSideBus In the standard configuration, this control consists of one control
unit and two T4X driver units.
The advantages of the aflex system are:
- Building of an individual system adapted to the respective application
- Simple expansion or replacement of individual control units
- Quick and easy parametrization of the modules via the configuration software
- Selection between different fieldbus interfaces
- Simple assembly and commissioning of the control
The different types of flexible feeding devices differ in size and application spectrum (see
Table 1: Technical data
Table 1: Technical data)
Function description
On the aflex, the components are separated and isolated through vibrations. If re-
quired, the components can be conveyed into any areas by defined conveying direc-
tions. These movements must be adapted to the components.
The components are conveyed to the aflex as bulk material. As a rule, an electromag-
netically controlled bunker is used for this purpose. The valid tapping coordinates are
determined via a camera systemand the component is conveyed to the further stations
by means of a handling system.
With optimal implementation of the aflex application, this is controlled in short pulses
during the component feed. Ideally, at least one component can be tapped after each
pulse. A continuous feeding of components is thereby produced.
The aflex is controlled, in the simplest case, via eight digital inputs/outputs, TCP/IP or
optionally via a field bus, such as, for example, the Profibus.

Page 12 2017-01-13 Release: 02.0
Technical data
Figure 1: Dimension sheet aflex
Table 1: Technical data
Description
Unit
aflex 150
aflex 200
Dimensions
A
[mm]
210
295
B
[mm]
160
240
C
[mm]
150
220
D
[mm]
100
165
E
[mm]
64.3
90.5
F
[mm]
21
21
G
[mm]
18
18
H
[mm]
12
12
I
[mm]
55
55
K
[mm]
32.5
32.5
L
[mm]
32
32
M
[mm]
89
131.5
N
[mm]
64
104

Release: 02.0 2017-01-13 Page 13
O
[mm]
17
22
Max. part size
[mm]
< 10
< 20
Max. part weight
[g]
< 5
< 20
Voltage supply
[V]
24V
24V
Total current [max]
[A]
10 A
10 A
Recommended fuse
C10A / 10A GL T
C10A / 10A GL T
Relative duty cycle of the actuator
[%]
< 15%
< 15%
Surrounding temperature
[°C]
0…80°C
0…80°C
Weight
[kg]
3
7.3
Standard interface
Multi I/O, Ethernet
Multi I/O, Ethernet
Optional interface
Profibus
Profibus
Integrated background lighting
optional
optional
Protection class
IP54
IP54
Table 2: Technical data of the control unit
Description
Symbol
Unit
Evaluation
Min.
Type
Max.
Working voltage DC smoothed
VCC
[V]
23.0
DC
24.0
DC
25.0
DC
Input current control unit
IG
[A]
0.064
0.080
4
Reverse polarity protection
Voltage supply
Yes
Signal voltage "1" Digital output
VDO
[V]
VCC –
1.0
VCC
VCC +
0.5
Signal voltage "0" Digital output
VDO
[V]
0
0,002
1
Output current Digital output
IDO
[mA]
4
Input voltage Digital output
VDI
[V]
20.0
24.0
30.0
Input current Digital output
IDI
[mA]
10
10.1
10.5
Reverse polarity protection Digi-
tal input/output
Yes
PWM Power output
VOUT
[V]
VCC -
0.5
VCC
VCC +
0.5
Pulse width Power output
[%]
0
100
Frequency power output
FOUT
[kHz]
39.7
40
40.3
Output current Power output
IOUT
[A]
4
Reverse polarity protection
Power output
No
Operation/Storage temperature
[°C]
+-0 - +40 °C / +-0 - +
85.+°C
Relative humidity
max. 40% without conden-
sation
Protection class
IP 30

Page 14 2017-01-13 Release: 02.0
Table 3: Technical data of the driver unit T4X
Description
Symbol
Unit
Evaluation
Min.
Type
Max.
Working voltage DC smoothed
VCC
[V]
23.0 DC
24.0
DC
25.0 DC
Input current
IG
[A]
43
6.0
Reverse polarity protection
Voltage supply
Yes
Output voltage Output
VOUT
[V]
VCC –
0.5
VCC
VCC + 0.5
Output current Output
IOUT
[A]
4
Pulse width Output
[%]
0
100
Frequency output
FOUT
[Hz]
6
200
Reverse polarity protection
Power output
No
Operation/Storage temperature
[°C]
+-0 - +40 °C / +-0 - + 85.+°C
Relative humidity
max. 40% without condensa-
tion
Protection class
IP 30
Table 4: Technical data of the Profibus module PB node
Description
Symbol
Unit
Evaluation
Min.
Type
Max.
Working voltage DC smoothed
VCC
[V]
23.0
DC
24.0
DC
25.0
DC
Input current
IG
[A]
0.050
0.080
0.120
Reverse polarity protection
Voltage supply
Yes
Operation/Storage temperature
[°C]
+-0 - +40 °C / +-0 - + 85.+°C
Relative humidity
max. 40% without conden-
sation
Protection class
IP 30

Release: 02.0 2017-01-13 Page 15
Table 5: Technical data of the background lighting
Description
Symbol
Unit
Evaluation
Min.
Type
Max.
Working voltage DC smoothed
VCC
[V]
23.0
24.0
25.0
Input current aflex 150
IG
[A]
0.4
0.5
0.7
Wavelengths aflex 150 - red
λ
[nm]
625
Input current aflex 200
IG
[A]
1.0
1.1
1.3
Wavelengths aflex 200 - white
λ
880

Page 16 2017-01-13 Release: 02.0
Electrical/Control Components
Instruction
Work on the electrical supply can only be done by qualified per-
sonnel.
Figure 2: Overview of electrical components
Control Unit: Intelligence and memory of the aflex controller
Driver units: Outputs for controlling the aflex actuators
PB-Node: Optional field bus interface for communication with the higher-level control
via Profibus.
All control modules communicate via a BackSideBus which is mounted in a standard
35x7.5mm DIN rail. DIN rail and BackSideBus are included in the scope of supply.
Instruction
For reasons of copyright protection, it is not permitted to copy,
modify, decompile and/or decompile the control software and cre-
ate derived programs through it. Exceptions require our express
approval.

Release: 02.0 2017-01-13 Page 17
4 Installation instructions
Transport
WARNING
Improper use of transport equipment (floor conveyors, indoor
crane, help aids, slings, etc.) can lead to bruises and other inju-
ries. Required behaviour:
Observe and comply with transport and assembly instruc-
tions
Use appropriate means of transport
CAUTION
When transporting, the vibrating conveyor may only be raised on
the base.
The conveyor rail is a lifting point.
Assembly of the device
To enable the aflex to work with reliable functionality, follow the steps below. In case
of non-observance a fault-free operation cannot be guaranteed.
4.2.1 Drilling pattern for assembly
Figure 3: Drilling pattern in mounting level
Table 6: Dimension for drilling pattern
Description
Aflex 150
Aflex 200
Drilling distance X in [mm]
170
255
Drilling distance Y in [mm]
120
200
Diameter of the central bore in [mm]
100

Page 18 2017-01-13 Release: 02.0
Diameter of the 4 fixing bores in [mm]
12.7 -0,3
4.2.2 Dismantling adaptor plate
Remove the four side countersunk head screws with the corresponding hexagon
socket screwdriver. Subsequently, remove the aflex smoothly fromthe top ofthe adap-
tor plate.
Figure 4: Dismantling adaptor plate
Figure 5: Dismantling adaptor plate
Instruction
Pulling off is limited by 20 cm (Connection cables)
Max.
20cm

Release: 02.0 2017-01-13 Page 19
4.2.3 Assembly of the flex sockets
Insert the flex bushings flush into the pre-drilled mounting plate.
Figure 6: Assembly of the flex sockets
Diameter of the 4 fixing bores in [mm] 12.7 -0,3
4.2.4 Assembly of the adaptor plate on the mounting level
Set the adaptor plate on the flex sockets and screw this with the delivered M6 screws
and the corresponding securing disc.
Instruction
Observe the following:
- Maximum torque 0.9Nm
- Mounting level realized as plate >17 mm
Figure 7: Assembly of the adaptor plate
4.2.5 Assembly of aflex on the adaptor plate
Set the aflex on the mounted adaptor plate.
Take care that the cable is not jammed!
Screw the aflex again with the adaptor plate.

Page 20 2017-01-13 Release: 02.0
Use the original countersunk-head screws.
Observe that maximum torque of this countersunk head screw for fixing
of aflex on the adaptor plate: 2.9 Nm
Figure 8: Assembly of the adaptor plate
Connection of the device
The actuator of aflex is connected via the 16-pole sockets on the bottom side.
Use the delivered connection cable with the corresponding connector for it.
The back lighting is connected over the three-pole connector.
Further information for pin assignment is found in the circuit diagram. This is included
in the appendix.
Power supply
WARNING
Work on the electrical supply may only be carried out by
trained, authorized qualified personnel!
The grid feed must take place on the customer's side via a
residual current circuit breaker!
Aflex may only be operated with power supply mentioned
on the name plate!
The energy feed of aflex takes place with 24V DC low-voltage. The energy supply must
be made available by the operator. The manufacturer recommends a 10 amp slow fuse
or a circuit breaker of the C 10A characterization.
The exact specification is available in the chapter 3.3 Technical data.
The assembly may only be carried out by a qualified personnel.
Pay at-
tention
to the ca-
ble
!
This manual suits for next models
1
Table of contents
Other Afag Industrial Equipment manuals

Afag
Afag CS 16/30 User manual

Afag
Afag CS 25/60 User manual

Afag
Afag ES-20 User manual

Afag
Afag GE-25-P User manual

Afag
Afag EPS mini YZ User manual

Afag
Afag CR 20-ZA Quick reference guide

Afag
Afag PDZ-128 User manual

Afag
Afag RA-40-2F Series User manual

Afag
Afag PEL20 User manual

Afag
Afag GMK 20 Series User manual

Afag
Afag NVD 3 Series User manual

Afag
Afag HLF07-P Product guide

Afag
Afag NVB07/0.5 Product guide

Afag
Afag SA-1 Series User manual

Afag
Afag RA-40-2F Series User manual

Afag
Afag SA-3 Series User manual

Afag
Afag PEZ-80 User manual

Afag
Afag CS 6 User manual

Afag
Afag UG 20 Series User manual

Afag
Afag ES40 User manual