manuals.online logo
Brands
  1. Home
  2. •
  3. Brands
  4. •
  5. AJAX
  6. •
  7. Security Sensor
  8. •
  9. AJAX MotionCam PhOD Jeweller User manual

AJAX MotionCam PhOD Jeweller User manual

Updated September 19, 2022
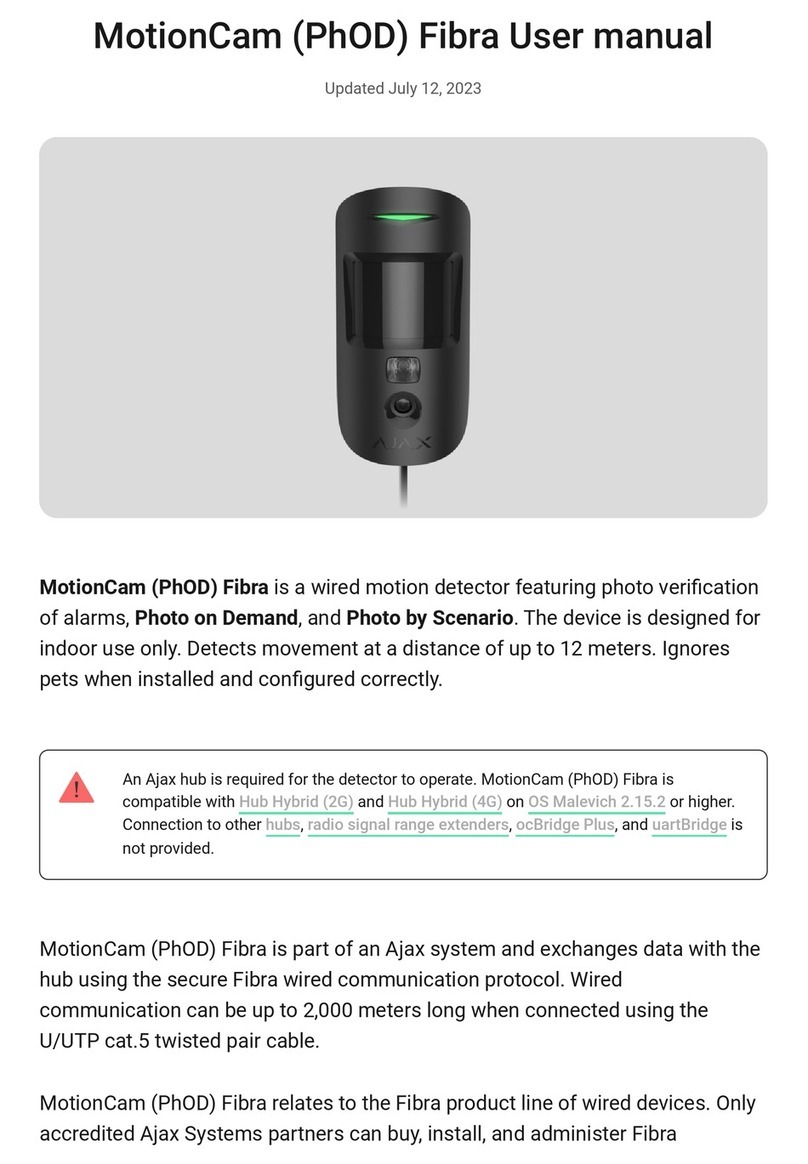
MotionCam (PhOD) Jewelleris a wireless motion detector supporting photo
verification of alarms, Photo on Demand, and Photo by Scenario features.
Intended for indoor installation. It can recognise movement at a distance of up
to 12 meters. Ignores pets when installed and set up correctly.
A hub is required for the detector to operate.
MotionCam (PhOD) Jeweller works as part of the Ajax security system,
communicating with the hub over two secure radio protocols: the detector uses
Jeweller to transmit alarms and events and Wings to transmit photos. The hub
communication range is up to 1,700 meters in an open space.
A
without the support of Photo on Demand and Photo by
Scenario is also available.
MotionCam (PhOD) Jeweller requires a hub to operate. The list of compatible
hubs and range extenders is available in the table below:
Hubs Radio signal range extenders
1. LED indicator.
2. Motion detector lens.
3. Infrared backlight. Used to take photos in dark and low-light conditions.
4. Camera.
5. SmartBracket mounting panel. To remove the panel, slide it down.
6. Perforated part of the mounting panel. Necessary to trigger a tamper in case
of any attempt to detach the detector from the surface. Do not break it off!
7. . Triggers when an attempt is made to detach the detector
from the surface or remove it from the mounting panel.
8. Power button of the detector.
9. Detector QR code. Used to connect to the Ajax security system.
Connection to other , , and
is not provided.
MotionCam (PhOD) Jeweller is a wireless motion detector supporting photo
verification. It detects movement in the secure area with an infrared sensor by
capturing moving objects with a temperature close to the human body. After a
motion is detected, the built-in camera takes a series of photos, allowing you to
dynamically assess what is happening at the site, saving users from
unnecessary anxiety and security companies from false calls of patrol.
When an armed detector identifies motion, it instantly sends an alarm to the hub,
which activates the sirens connected to the system, triggers , and
notifies users and the security company. All MotionCam (PhOD) Jeweller alarms
and events are recorded in the notification feed of the Ajax app.
Users know exactly where motion is detected. The notifications contain the hub
name (name of the secured facility), name of the device, and to
which the detector is assigned.
Photo verification allows you to assess what is happening in the secured facility
with a built-in camera, which can take from 1 to 5 images with a resolution of
160 × 120 and 320 × 240, as well as up to 3 images with a resolution of 640 ×
480 pixels. With photo verification, you can receive visual confirmations of
alarms from MotionCam (PhOD) Jeweller and other Ajax devices. You can also
check the situation: find out what the children are doing, check if your pet is OK,
or simply monitor the situation at home.
The detector has an infrared backlight for shooting in the dark, which activates
with insufficient light. MotionCam (PhOD) Jeweller takes black and white photos
when shooting in these conditions.
There are three types of photo verification: photo by alarm, photo by scenario,
and photo on demand.
If the Photo by Alarm option is configured in the MotionCam (PhOD) Jeweller
settings, the detector alarms in the Ajax apps are accompanied by photos or an
animated series, depending on the selected viewing mode. The detector takes a
photo only when armed.
The detector does not switch to the armed mode instantly. The switching time depends
on two factors: the exit delay (specified in the detector settings) and the hub–detector
ping interval (hub settings, Jeweller section).
In the first case, the delay is set by an administrator or a PRO user with system
configuration rights. In the second case, the delay occurs because the hub takes one
ping interval to notify the detector about the security mode changing.
Click on the MotionCam (PhOD) Jeweller alarm notification in the event feed to
view the photos. Photos are available to all users with access to the event feed.
A series of photos are played back in the application as animation. It helps to
evaluate the unfolding of the incident over time. You can also view all the photos
individually by clicking on the icon at the bottom of the screen.
You can save photo verification as video or images by clicking the download
icon.
Photo on Demand feature allows users to take pictures with the built-in cameras
of detectors with photo verification. With this feature, you can check the
situation at the facility: find out what the children are doing, check if your pet is
OK, or simply monitor the situation at home. Depending on the settings, photos
can be taken at any time or when MotionCam (PhOD) Jeweller is armed.
By default, the Photo on Demand feature is disabled for all users. Users with the
right to manage privacy settings (hub settings, Privacy section) determine who
can take and view photos on demand and which detectors with photo
verification can take pictures. PRO users cannot manage privacy settings, but
they can take photos on demand if granted such permission.
Privacy settings do not apply to photos taken by detectors triggered in case of
an alarm. All system users who have access to the hub event feed can view the
photos taken in case of an alarm.
Photos on demand are not sent to the security company monitoring station.
users can take and view photos on demand only from a personal account if
a hub administrator has granted them the appropriate access rights. Taking and viewing
photos on demand is not available for a security company profile in the PRO Desktop
app.
The Photo by Scenario feature allows you to create a scenario for motion
detectors with photo verification, according to which they will take pictures in
case of alarm from other Ajax devices.
By default, the Photo by Scenario feature is disabled for all detectors. A user
with access to privacy settings can enable this feature. Users of PRO apps
cannot manage the privacy settings, but can grant this right to any user of the
system.
In the system settings, you can also set exactly when a detector with photo
verification can take pictures according to a scenario: at any time or when
MotionCam (PhOD) Jeweller is armed.
Photos by scenario are available to all users of the system with access to the
event feed. The event of taking a photo after the alarm from other devices is
sent to the security company monitoring station via SIA (DC-09) and other
proprietary protocols. The event code is 730.
The photos taken by scenario are available to the CMS engineers if the CMS
software supports photo verification. Photos by scenario are also available in
the app.
Photos by scenario will not be sent to the CMS if only a with the
monitoring station is used.
Jeweller and Wings are two-way wireless data transfer protocols that provide
fast and reliable communication between hub and devices. The detector uses
Jeweller to transmit alarms and events. Wings are used to transmit photos.
Both protocols support encryption and authentication to prevent forgery.
Connection with devices is monitored via a system of hub–detector polls. Their
statuses are displayed in real-time in the Ajax apps. The polling frequency is set
by a user or a PRO with system configuration rights.
The photo delivery time to Ajax apps depends on the selected resolution,
detector connection to the radio signal range extender, Wings signal strength,
and the Internet connection speed. The alarm messages are delivered
immediately.
Photo resolution
Delivery time*
When connected
directly to the hub**
When connected to the
hub using ReX 2 (ReX 2
transmits photos via
Wings)***
When connected to the
hub using ReX 2 (ReX
2 transmits photos via
Ethernet)****
160 × 120 pixels up to 6 seconds up to 8 seconds up to 6 seconds
320 × 240 pixels
(default) up to 9 seconds up to 18 seconds up to 10 seconds
640 × 480 pixels up to 17 seconds up to 31 seconds up to 16 seconds
*The detector needs up to 3 seconds to start the Photo on Demand shooting.
** The delivery time of one photo when the signal strength between the hub andthe
detector is 2–3 bars and the hub is connected via Ethernet, Wi-Fi or 4G.
*** Values were calculated with a signal strength of 3 bars between ReX 2 and the detector
or between the hub and ReX 2. The hub works via Ethernet, Wi-Fi or 4G.
**** Values were calculated with a signal strength of 3 bars between ReX 2 and the
detector. The hub is connected via Ethernet, Wi-Fi or 4G.
The detector perceives people and other objects as heat spots. The device
monitors these heat spots and, if they move, registers an alarm. Under ideal
conditions, the human body temperature (36.6°C on average) differs from the
ambient temperature, and their contrast allows the motion detector to accurately
record the movement of a person.
In situations where the ambient temperature is very close to the human body
temperature, the detector may not work properly and may give false alarms.
Temperature compensation is used in all Ajax motion detectors, so MotionCam
(PhOD) Jeweller detects motion over the entire operating temperature range.
When properly installed and configured, MotionCam (PhOD) Jeweller does not
react to animals up to 50 centimeters tall and weighing up to 20 kilograms.
The detector is installed at a height of 2.4 meters without any obstruction to its
view — for example, in the corner of the room, where the view won’t be blocked
by closets or other furniture.
The correct setting also requires a proper choice of the detector sensitivity:
If MotionCam (PhOD) Jeweller is installed below the recommended height, then
the animals will move in the hypersensitive zone. The detector can raise the
alarm if a dog walks on its hind legs or jumps on an armchair. It will also raise
the alarm if the animal can jump to the level of the detector or move near it.
The Ajax security system can transmit alarms to the Ajax PRO Desktop
monitoring app as well as the central monitoring station (CMS) in the formats of
Sur-Gard (Contact ID), SIA (DC-09), ADEMCO 685, and other proprietary
protocols. A complete list of supported protocols is
High — the detector does not respond to cats (up to 25 cm tall).
Medium — it does not respond to small dogs (up to 35 cm tall).
Low — it does not respond to animals up to 50 cm tall.
protocols. A complete list of supported protocols is
.
MotionCam (PhOD) Jeweller can transmit the following events:
Photos on demand are not sent to the security company monitoring station.
users can take and view photos on demand only from a personal account if
a hub administrator has granted them the appropriate access rights. Taking and viewing
photos on demand is not available for a security company profile in the PRO Desktop
app.
When an alarm is received, the operator of the security company monitoring
station knows exactly what happened and where to send the rapid action team.
The addressability of each Ajax device allows you to send not only events to
PRO Desktop or CMS but also the type of the device, its name, and the virtual
room to which the detector is assigned. Note that the list of transmitted
parameters may differ depending on the type of CMS and the selected protocol
for communication with the monitoring station.
The ID and the number of the device can be found in its .
1. Motion alarm.
2. MotionCam (PhOD) visual alarm verifications.
3. Photo by Scenario.
4. Tamper alarm / recovery.
5. Loss / restoration of connection with the hub.
6. Temporary deactivation / activation of the detector.
7. Unsuccessful attempt to arm the security system (with the
enabled).
Photos are sent to the security company monitoring station if the CMS software
supports photo verification. A list of such CMSs is . At the same
time, supports receiving photo verification without additional
setup.
1. Install the or .
2. Create an if you don’t have one. Add a compatible hub to the app,
make the necessary settings, and create at least one .
3. Make sure that the hub is switched on and has Internet access via Ethernet
and/or mobile network. You can check the connection in the Ajax app or by
looking at the LED on the hub enclosure. It should light up white or green.
4. Make sure that the hub is disarmed and does not start updates by checking
its status in the Ajax app.
1. Open the . If your account has access to multiple hubs or if you are
using the PRO app, select the hub to which you want to add MotionCam
(PhOD) Jeweller.
2. Go to the Devices tab and click Add Device.
3. Name the detector, scan, or type in the QR code (placed on the detector
enclosure and the package box), select a room and a group (if
is enabled).
To connect MotionCam (PhOD) Jeweller to the hub, the detector must be located at the
same secured facility as the system (within the range of the hub radio network). For the
detector to work via the , you must first add the
detector to the hub, then connect it to ReX 2 in the settings of the range extender.
The detector connected to the hub will appear in the list of hub devices in the
Ajax app. Updating the statuses of devices in the list depends on the Jeweller
settings; the default value is 36 seconds.
If the connection fails, turn the detector off and try again in 5 seconds. Note that
if the maximum number of devices has already been added to the hub
( ), you will be notified when you try to add a new
one.
The hub and the device operating at different radio frequencies are incompatible. The
radio-frequency range of the device may vary by region. We recommend purchasing and
using Ajax devices in the same region. You can check the range of operating radio
frequencies with the .
MotionCam (PhOD) Jeweller only works with one hub. When connected to a new
hub, the detector stops sending commands to the old one. When added to a new
hub, the detector is not removed from the device list of the old hub. This must be
done through the Ajax app.
When a malfunction is detected (for example, there is no connection via
Jeweller), the Ajax app displays a malfunction counter on the device icon.
All malfunctions are shown in the detector states. Fields with malfunctions will
4. Press Add.
5. Switch on the device by holding the power button for 3 seconds.
be highlighted in red.
A malfunction is displayed if:
The icons display some of MotionCam (PhOD) Jeweller states. You can view
them in the Ajax app in the Devices tab.
Icon Meaning
Jeweller signal strength. Displays the signal strength between the hub and the
detector. The recommended value is 2–3 bars.
Battery charge level of the detector.
The detector temperature is out of acceptable limits: below –10°C and
above +40°C.
The detector enclosure is open (tamper is triggered).
No connection with the hub or radio signal range extender via Jeweller.
No connection with the hub or radio signal range extender via Wings.
The detector battery is low.
The detector has a malfunction. The list of malfunctions is available in the
detector states.
Displayed when the detector is operating via a
.
The detector operates in the Always Active mode.
Entry and/or exit delay is enabled.
MotionCam (PhOD) Jeweller will be armed when Night Mode is enabled.
MotionCam (PhOD) Jeweller has detected motion. The icon is displayed when
the detector is armed.
MotionCam (PhOD) Jeweller is temporarily disabled.
MotionCam (PhOD) Jeweller has been deactivated due to exceeding the preset
number of alarms.
MotionCam (PhOD) Jeweller has tamper triggering events temporarily
deactivated.
The states include information about the device and its operating parameters.
The states of MotionCam (PhOD) Jeweller can be found in the Ajax app:
Parameter Value
Malfunction
Clicking on opens the MotionCam (PhOD)
Jeweller malfunctions list.
The field is displayed if a malfunction is
detected.
Temperature
Detector temperature. It is measured on the
processor and changes gradually.
The acceptable measurement error between the
value in the app and the ambient temperature is
2°C.
The value is updated as soon as the detector
identifies a temperature change of at least 1°C.
Jeweller Signal Strength
Signal strength between the hub or range
extender and the detector on the Jeweller
channel. The recommended value is 2–3 bars.
Jeweller is a protocol for transmitting
MotionCam (PhOD) Jeweller events and alarms.
Connection via Jeweller
Connection status on the Jeweller channel
between the hub or the range extender and the
detector:
Wings Signal Strength
Signal strength between the hub or the range
extender and the detector on the Wings channel.
The recommended value is 2–3 bars.
Wings is a protocol for transmitting MotionCam
(PhOD) Jeweller photo verifications.
1. Go to the Devices tab.
2. Select MotionCam (PhOD) Jeweller from the list.
Online — the detector is connected to the
hub or the range extender.
Offline — the detector is not connected to
the hub or the range extender.
(PhOD) Jeweller photo verifications.
Connection via Wings
Connection status on the Wings channel
between the hub or the range extender and the
detector:
Battery Charge
The battery charge level of the device:
When the batteries are low, the Ajax apps and
the security company will receive appropriate
notifications.
After sending a low battery notification, the
detector can work for up to 2 months.
Lid
The status of the detector tamper that responds
to detachment or opening of the device
enclosure:
Delay time when entering: from 5 to 120
seconds.
Delay when entering (alarm activation delay) is
Online — the detector is connected to the
hub or the range extender.
Offline — the detector is not connected to
the hub or the range extender.
OK
Battery low
Open — the detector was removed from the
SmartBracket or its integrity was
compromised.
Closed — the detector is installed on the
SmartBracket mounting panel. The integrity
of the device enclosure and the mounting
panel is not compromised. Normal state.
Delay When Entering, sec
Delay when entering (alarm activation delay) is
the time the user has to disarm the security
system after entering the secured area.
Delay When Leaving, sec
Delay time when leaving: from 5 to 120
seconds.
Delay when leaving (arming delay) is the time
the user has to leave the secured area after the
security system arming.
Night Mode Delay When Entering, sec
Delay time when entering in the Night Mode:
from 5 to 120 seconds.
Delay when entering (alarm activation delay) is
the time the user has to disarm the security
system after entering the premises.
Night Mode Delay When Leaving, sec
Delay time when leaving in the Night Mode:
from 5 to 120 seconds.
Delay when leaving (arming delay) is the time
the user has to leave the premises after the
security system arming.
Always Active
When this option is enabled, the detector is
constantly armed, detects motion, and raises
alarms.
Sensitivity
Sensitivity level of the motion detector:
Low — it does not respond to animals up to
50 cm tall.
Normal (by default) — it does not respond to
small dogs (up to 35 cm tall).
High
— the detector does not respond to
Temporary Deactivation
Shows the status of the device temporary
deactivation function:
Photo on Demand
Displayed if Photo on Demand is enabled in the
hub settings in the Privacy section.
Firmware Detector firmware version.
ID Detector ID. Also available on the QR code on
the detector enclosure and its package box.
Device № Number of the device loop (zone).
To change MotionCam (PhOD) Jeweller settings in the Ajax app:
High
— the detector does not respond to
cats (up to 25 cm tall).
No — the device works in the normal mode.
Lid only — the hub administrator has
disabled notifications about triggering of the
device tamper.
Entirely — the detector is entirely excluded
from the operation of the system. The device
does not execute system commands and
does not report alarms or other events.
By number of alarms — the device is
automatically disabled when the preset
number of alarms is exceeded (specified in
the
settings).
1. Go to the Devices tab.
2. Select MotionCam (PhOD) Jeweller from the list.
3. Go to Settings by clicking on the gear icon .
Settings Value
Name
Detector name. Displayed in the list of hub
devices, SMS text, and notifications in the event
feed.
To change the detector name, click on the pencil
icon .
The name can contain up to 12 Cyrillic
characters or up to 24 Latin characters.
Room
Selecting the virtual room to which the
MotionCam (PhOD) Jeweller is assigned.
The name of the room is displayed in the SMS
text and notifications in the event feed.
Delay When Entering, sec
Delay time when entering: from 5 to 120
seconds.
Delay when entering (alarm activation delay) is
the time the user has to disarm the security
system after entering the secured area.
Delay When Leaving, sec
Delay time when leaving: from 5 to 120
seconds.
Delay when leaving (arming delay) is the time
the user has to leave the secured area after the
security system arming.
Arm in Night Mode
If this option is enabled, the detector will go into
the armed mode when the system is set to the
Night Mode.
Delay time when entering in the
Night Mode
:
4. Set the required parameters.
5. Click Back to save the new settings.

Other AJAX Security Sensor manuals

AJAX DualCurtain Outdoor User manual

AJAX

AJAX DualCurtain Outdoor User manual

AJAX MotionProtect Fibra User manual

AJAX

AJAX MotionProtect Fibra User manual

AJAX LifeQuality Jeweller User manual

AJAX

AJAX LifeQuality Jeweller User manual

AJAX LeaksProtect User manual

AJAX

AJAX LeaksProtect User manual

AJAX FireProtect 2 User manual

AJAX

AJAX FireProtect 2 User manual

AJAX LeaksProtect User manual

AJAX

AJAX LeaksProtect User manual

AJAX DoorProtect User manual

AJAX

AJAX DoorProtect User manual

AJAX DoorProtect User manual

AJAX

AJAX DoorProtect User manual

AJAX LeaksProtect User manual

AJAX

AJAX LeaksProtect User manual

AJAX DoorProtect User manual

AJAX

AJAX DoorProtect User manual

AJAX FireProtect 2 (Heat) Jeweller User manual

AJAX

AJAX FireProtect 2 (Heat) Jeweller User manual

AJAX FireProtect User manual

AJAX

AJAX FireProtect User manual

AJAX GlassProtect User manual

AJAX

AJAX GlassProtect User manual

AJAX FireProtect 2 Jeweller User manual

AJAX

AJAX FireProtect 2 Jeweller User manual

AJAX MotionProtect Plus User manual

AJAX

AJAX MotionProtect Plus User manual

AJAX FireProtect 2 Heat/CO Jeweller User manual

AJAX

AJAX FireProtect 2 Heat/CO Jeweller User manual

AJAX MotionProtect User manual

AJAX

AJAX MotionProtect User manual

AJAX DoorProtect User manual

AJAX

AJAX DoorProtect User manual

AJAX DoorProtect Plus Jeweller User manual

AJAX

AJAX DoorProtect Plus Jeweller User manual

AJAX MotionProtect Jeweller User manual

AJAX

AJAX MotionProtect Jeweller User manual

AJAX CombiProtect User manual

AJAX

AJAX CombiProtect User manual

AJAX GlassProtect User manual

AJAX

AJAX GlassProtect User manual

AJAX MotionProtect Plus Fibra User manual

AJAX

AJAX MotionProtect Plus Fibra User manual

AJAX MotionProtect Curtain User manual

AJAX

AJAX MotionProtect Curtain User manual

Popular Security Sensor manuals by other brands

Zumtobel ED-SxED manual

Zumtobel

Zumtobel ED-SxED manual

Profort luxSpot manual

Profort

Profort luxSpot manual

Gira 2399 02 operating instructions

Gira

Gira 2399 02 operating instructions

U-Prox WDC user manual

U-Prox

U-Prox WDC user manual

ADWEL WTD-501 operating manual

ADWEL

ADWEL WTD-501 operating manual

PCB Piezotronics 482C16 Installation and operating manual

PCB Piezotronics

PCB Piezotronics 482C16 Installation and operating manual

Bushnell Speed RadaR Gun user manual

Bushnell

Bushnell Speed RadaR Gun user manual

ADEMCO 1875EX installation instructions

ADEMCO

ADEMCO 1875EX installation instructions

Bosch DS840LSN installation instructions

Bosch

Bosch DS840LSN installation instructions

ProMinent DULCOLEVEL Original operating instructions

ProMinent

ProMinent DULCOLEVEL Original operating instructions

GasTech G-SHIELD-FIRE instructions

GasTech

GasTech G-SHIELD-FIRE instructions

Fisher Research Labs XLT-100 operating manual

Fisher Research Labs

Fisher Research Labs XLT-100 operating manual

Samsung ADT SmartThings F-ADT-WTR-1 Setup guide

Samsung

Samsung ADT SmartThings F-ADT-WTR-1 Setup guide

Elko Inels RFSF-18 manual

Elko

Elko Inels RFSF-18 manual

Simon XTi quick guide

Simon

Simon XTi quick guide

WATERS CORPORATION TQ Operator's guide

WATERS CORPORATION

WATERS CORPORATION TQ Operator's guide

Emos P56300 manual

Emos

Emos P56300 manual

schmersal SFB-PN-IRT-8M12-IOP operating instructions

schmersal

schmersal SFB-PN-IRT-8M12-IOP operating instructions

manuals.online logo
manuals.online logoBrands
  • About & Mission
  • Contact us
  • Privacy Policy
  • Terms and Conditions

Copyright 2025 Manuals.Online. All Rights Reserved.