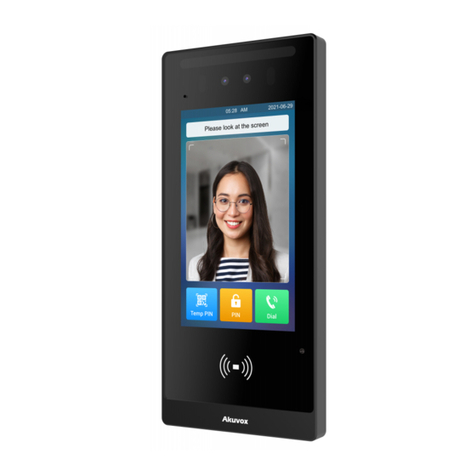
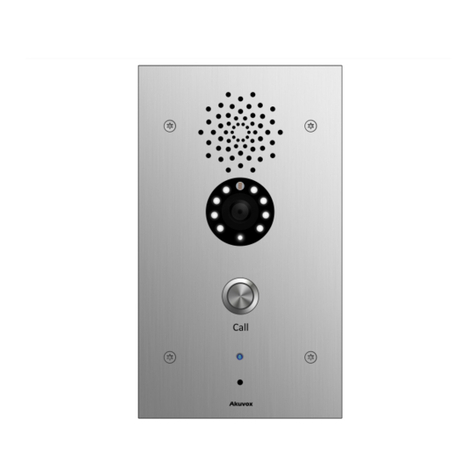
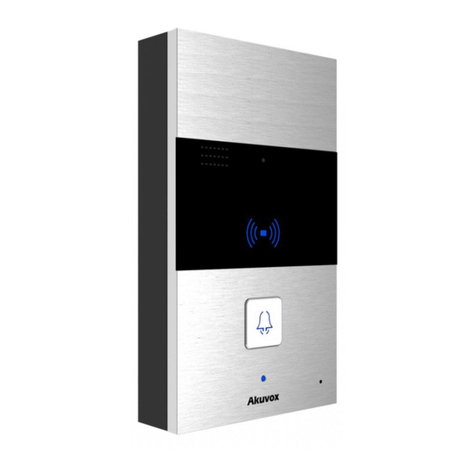
Akuvox E16 Series Service manual


About This Manual
Thank you for choosing Akuvox E16 series door phones. This manual is intended for the
administrators who need to properly configure the door phone. This manual applies to the
116.30.4.21 version, and it provides all the configurations for the functions of E16 series
door phones. Please visit the Akuvox forum or consult technical support for any new
information or the latest firmware.

Note
•
Informative information and advice for the efficient use of the device.
Introduction of Icons and Symbols

Related Documentation
You are advised to refer to the related documents for more technical information via the link
below:
https://knowledge.akuvox.com

www.akuvox.com
E16 Door Phone Administrator Guide
1
Content
1 Product Overview............................................................................................................... 4
2 Change Log........................................................................................................................ 5
3 Model Specification............................................................................................................6
4 Access the Device...............................................................................................................9
4.1
Access the Device Setting on thedevice..............................................................................9
4.2
Access the Device Setting on the Web Interface...................................................................9
5 Time and Language Setting...............................................................................................11
5.1
Language Setting............................................................................................................... 11
5.2
Time Setting....................................................................................................................... 11
5.3
LED Setting.........................................................................................................................13
5.3.1
Configure Card Reader LED Setting ................................................................................13
5.3.2
Configure LED White Light Setting ................................................................................. 13
5.4
Screen Display configuration..............................................................................................14
5.4.1
Configure Screensaver................................................................................................... 14
5.4.2
Upload Screensaver........................................................................................................15
5.4.3
Home Screen Configuration ........................................................................................... 16
5.5
Volume & Tone Configuration.............................................................................................16
5.5.1
Volume Configuration .....................................................................................................17
5.5.2
Upload Open Door Tone ..................................................................................................18
5.5.3
Configure Door Access Prompt Text .............................................................................. 19
6 Network Setting ............................................................................................................... 20
6.1
Device Network Connection Setting................................................................................... 20
6.2
Device Deployment in Network...........................................................................................21
6.3
NAT Setting........................................................................................................................ 22
7 Intercom Call Configuration.............................................................................................. 24
7.1
IP call & IP CallConfiguration............................................................................................. 24
7.1.1
Make IP calls...................................................................................................................24
7.1.2
IP Call Configuration .......................................................................................................24
7.2
SIP Call &SIP Call Configuration......................................................................................... 25
7.2.1
SIP Account Registration................................................................................................ 25
7.2.2
SIP Server Configuration ................................................................................................ 26
7.2.3
Configure Outbound Proxy Server.................................................................................. 27
7.2.4
Configure Data Transmission Type................................................................................ 28
7.3
Dial Options Configuration................................................................................................. 29
7.3.1
Quick Dial By Number Replacement on theDevice........................................................29
7.3.2
Quick Dial by Number Replacement on the WebInterface ............................................ 30
7.4
Auto-answer Configuration................................................................................................ 30
7.5
Enabling Prevent SIP Hacking............................................................................................ 31
7.6
Call Settings....................................................................................................................... 32
7.6.1
Maximum Call Duration Setting......................................................................................32
7.6.2
Maximum Dial Duration Setting ...................................................................................... 33
7.6.3
Audio& Video Codec Configuration for SIP Calls............................................................33
7.7
Configure DTMF Data Transmission.................................................................................. 35
8 Contact List Configuration................................................................................................ 37

www.akuvox.com
E16 Door Phone Administrator Guide
2
8.1
Contact List Configuration on the Device........................................................................... 37
8.2
Contact List Configuration on the WebInterface................................................................38
9 Relay Switch Setting.........................................................................................................40
9.1
Relay Switch Setting...........................................................................................................40
9.2
Web Relay Setting.............................................................................................................. 41
9.2.1
Configure Web Relay on the WebInterface .................................................................... 41
9.2.2
Configure Web Relay on the Device................................................................................43
9.3
Relay Schedule................................................................................................................... 44
10 Door Access Schedule Management ................................................................................45
10.1
Configure Door Access Schedule..................................................................................... 45
10.1.1
Create Door Access Schedule on the Web.................................................................... 45
10.1.2
Create Door Access Schedule on the Device ................................................................ 47
10.1.3
Import and Export Door Access Schedule .................................................................... 48
10.1.4
Edit the Door Access Schedule ..................................................................................... 48
11 Door Unlock Configuration .............................................................................................. 50
11.1
Access Authentication......................................................................................................50
11.2
Configure PIN Code for DoorUnlock................................................................................ 50
11.2.1
Configure Public PIN code ............................................................................................50
11.2.2
Configure Private PIN Code on theDevice................................................................... 51
11.2.3
Configure Private PIN Code on the WebInterface....................................................... 52
11.2.4
Configure Private PIN Access Mode .............................................................................54
11.3
Configure RF Card for DoorUnlock.................................................................................. 54
11.3.1
Add RF Card on the WebInterface................................................................................54
11.3.2
Add RF Card to the Device ............................................................................................ 55
11.3.3
Configure RF Card Code Format...................................................................................56
11.4
Configure Facial Recognition for Door Unlock..................................................................56
11.4.1
Enroll Face Data on the Device..................................................................................... 56
11.4.2
Upload Face Data on the Web Interface....................................................................... 57
11.4.3
Configure Facial Recognition........................................................................................58
11.5
Configure Door Access Using Configured Files ................................................................ 59
11.5.1 Editing the User(s)-specific Door Access Data...........................................................59
11.6
Unlock by QR Code...........................................................................................................60
11.7
Unlock by NFC.................................................................................................................. 61
11.8
Unlock by HTTP Command on Web Browser................................................................... 61
11.9
Unlock by Exit Button by theDoor.................................................................................... 62
11.10
Unlock by Reception Tab................................................................................................63
11.11
Unlock by DTMF Code.................................................................................................... 64
11.11.1Configure DTMF White List......................................................................................... 65
11.12
Body Temperature Measurement for Door Access.............................................65
11.12.1
Body Temperature Measurement Configuration........................................................ 65
12 Security..........................................................................................................................68
12.1
Tamper Alarm Setting.......................................................................................................68
12.2
Security Notification Setting.............................................................................................69
12.2.1
Email Notification Setting .............................................................................................69
12.2.2
SIP Call Notification...................................................................................................... 71
12.3
Web Interface Automatic Log-out.................................................................................... 71
12.4
Action URL........................................................................................................................72
13 Monitor and Image..........................................................................................................75

www.akuvox.com
E16 Door Phone Administrator Guide
3
13.1
MJPEG Image Capturing.................................................................................................. 75
13.2
Live Stream...................................................................................................................... 76
13.3
RTSP Stream Monitoring.................................................................................................. 77
13.3.1
RTSP Basic Setting....................................................................................................... 77
13.3.2
RTSP Stream Setting.................................................................................................... 78
13.4
ONVIF............................................................................................................................... 79
13.5
Camera Mode................................................................................................................... 80
14 Logs............................................................................................................................... 82
14.1
Call Logs...........................................................................................................................82
14.2
Door Logs .............................................................................................................. 82
14.3
Temperature Log..............................................................................................................83
15 Debug.......... ...................................................................................................................85
15.1
System Log for Debugging...............................................................................................85
15.2
PCAP for Debugging.........................................................................................................85
15.3
Remote Debug Server.......................................................................................................86
15.4
Face Recognition Debug...................................................................................................87
15.5
User Agent........................................................................................................................87
16 Firmware Upgrade.......................................................................................................... 88
17 Backup...........................................................................................................................89
18 Auto-provisioning via Configuration File.......................................................................... 90
18.1
Provisioning Principle...................................................................................................... 90
18.2
Configuration Files for Auto-provisioning........................................................................ 90
18.3
AutoP Schedule................................................................................................................ 91
18.4
PNP Configuration............................................................................................................92
18.5
DHCP Provisioning Configuration.....................................................................................92
18.6
Static Provisioning Configuration.....................................................................................94
19 Integration with Third Party Device.................................................................................. 97
19.1
Integration via Wiegand....................................................................................................97
19.2
Integration via HTTP API.................................................................................................. 98
19.3
Lift Control........................................................................................................................99
19.4
Integrate with third-party Access Control Server............................................................100
20 Password Modification................................................................................................. 102
21 System Reboot&Reset.................................................................................................. 103
21.1
Reboot............................................................................................................................103
21.2
Reset.............................................................................................................................. 104
22 Abbreviations ............................................................................................................... 106
23 FAQ.............................................................................................................................. 109
24 Contact Us................................................................................................................... 113

www.akuvox.com
E16 Door Phone Administrator Guide
4
1 Product Overview
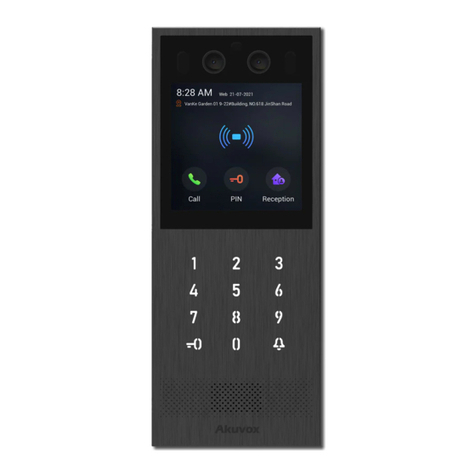
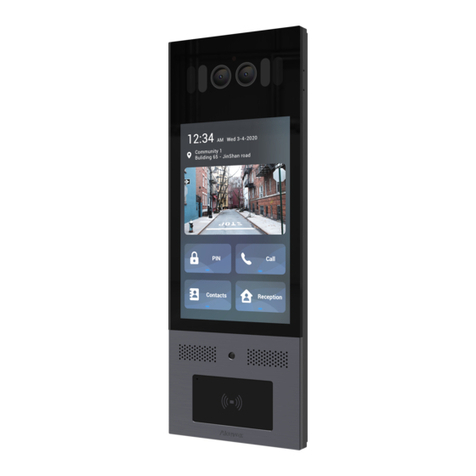
Akuvox E16 series products are Android-based IP video door phones with touch screens. It
incorporates audio and video communications, access control, and video surveillance. Its
finely-tuned Android OS, SmartPlus, and AI-based communication technology allow
featured customization to better suit your operation habits. E16 series multiple ports, such
as RS485 and Wiegand ports, can be used to easily integrate external digital systems, such
as elevator controllers and fire alarm detectors, helping to create a holistic control of the
building entrance and its surroundings and giving you a great sense of security via a
variety of access such as card access, NFC, Bluetooth, QR code and newly added door
access in an accompaniment with body temperature measurement. E16 series door
phones apply to residential buildings, office buildings, and theircomplex.

www.akuvox.com
E16 Door Phone Administrator Guide
8
POE Full Load Consumption
9.8W
Power Adapter Standby Power
5.5W
Power Adapter Full Load Consumption
10W
Color Option
Black
Wall Mounting
√
Flush Mounting
√
Desk Mounting
X
POE Stand by Power
5.5W
POE Full Load Consumption
9.8W
Power Adapter Standby Power
5.5W
Power Adapter Full Load Consumption
10W
Color Option
Black

www.akuvox.com
E16 Door Phone Administrator Guide
9
4 Access the Device
E16 series door phones' system settings can be either accessed on the device directly or
on the device web interface.
4.1
Access the Device Setting on the device
If you want to access the device setting in order to configure and adjust the parameters,
you can do it directly on the device. To access the device setting, you can long press on
the initial screen for approximately five seconds, then enter the default PIN code
admin and press Confirm.
4.2
Access the Device Setting on the Web Interface
You can also use the Akuvox IP scanner tool to search the device's IP address on the same
LAN. Then enter the device IP address on the web browser in order to login to the device
web interface where you can configure and adjust parameters etc. Then use the IP
address to login into the web browser by user name and password admin and admin.

www.akuvox.com
E16 Door Phone Administrator Guide
10
Note
•
You can also obtain the device IP address using the Akuvox IP scanner to log
into the device web interface. Please refer to the URL below for the IP
scanner application:
https://knowledge.akuvox.com/docs/how-to-obtain-ip-address-via-ip-scanner-1
Note
•
Google Chrome browser is strongly recommended.
•
The initial user name and password are admin and please be case-sensitive
to the user names and passwords entered.

www.akuvox.com
E16 Door Phone Administrator Guide
11
5 Time and Language Setting
5.1
Language Setting
You can select device language, and customize interface text including configuration
names and prompt text display on the device and on the web interface.
To select the device language, go to Setting > Time/Lang > LCD Language interface.
To customize configuration names and prompt text, you need to export and edit the .json
file before uploading the file to the device. Setting > Time/Lang > Words Of Language
Upload.
5.2
Time Setting
Time setting on the web Setting > Time/Lang > Time interface allows you to set up time
and date manually while allowing you to use the NTP server address that you obtained to
automatically synchronize your time and date. And when your time zone is selected, the
device will automatically notify the NTP server of its time zone so that the NTP server can
synchronize the time zone setting in your device.

www.akuvox.com
E16 Door Phone Administrator Guide
12
Note
•
When the check box is not ticked, parameters related to the NTP server
cannot be edited.
Parameter Set-up:
•
Automatic Date&TimeEnabled: enable it if you want the device’s date and time to be
automatically set up and synchronized with the default time zone and the NTP server
(Network Time Protocol).
•
Time Zone: select the specific time zone depending on where the device is used and
then press Confirm tab for the confirmation. The default time zone is GMT+0.00.
•
Primary Server: enter the primary NTP server you obtained in the NTPServer.
•
Date/Time: set the date and time for the device manually when you disable the
automatic date and time service.

www.akuvox.com
E16 Door Phone Administrator Guide
13
5.3
LED Setting
5.3.1
Configure Card Reader LED Setting
You can enable or disable the LED lighting on the card reader area as needed on the web
interface. Meanwhile, if you do not want the card reader LED light to stay on, you can also
set the timing for the exact time span during which the LED light can be disabled to reduce
the electrical power consumption. To configure the configuration on the web Device >
Light > LED Of Swiping Card Area interface.
Parameter Set-up:
•
Enabled: tick the check box you want to enable the card reader LED lighting and vice
versa.
•
Start Time- End Time (H): enter the time span for the LED lighting to be valid, eg. if
the time span is from 18-22, it means the LED light will stay on during the time span
from 6:00 pm to 10:00 pm during one day (24 hours).
5.3.2
Configure LED White Light Setting
LED White light is used to reinforce the lighting for facial recognition as well as for QR
code access in the dark environment. To configure the function, go to Device >
Light > White Light interface.
Parameter Set-up:

www.akuvox.com
E16 Door Phone Administrator Guide
14
Note
•
IR LED light should be triggered first before the white light can be valid in the
facial recognition, however, IR LED light does not need to be triggered for the
white light function in the QR code scan.
•
Mode: if you select Auto, then the white light will be turned on automatically for face
recognition and QR code scan for door opening. If you select Off, then the white light
will be disabled.
•
Max White Light Value: set the white light value from1-5, and the default white light
value is 3. The greater value it is, the brighter the light will be.
5.4
Screen Display configuration
E16 series door phones allow you to enjoy a variety of screen displays to enrich your visual
and operational experience through the customized setting to your preference.
5.4.1
Configure Screensaver
Await screen is mainly a function for screen protection. You can make the device go into
idle status for a predefined time span when there is no operation on the device, or no one
is detected approaching. To configure the configuration on web Device > LCD >
Standby Interface Display interface.
Parameter Set-up:
•
ScreenSaver Mode: tick the check box to enable the screen saverfunction.

www.akuvox.com
E16 Door Phone Administrator Guide
15
Note
•
The pictures uploaded should be in JPG format with 2M pixels
maximum.
•
The previous pictures with a specific ID order will be overwritten when
the repetitive designation of pictures to the same ID order occurred.
•
Screensaver Time (Sec): set the screen saver start time from 5 seconds up to 2. For
example, if you set the start time as 5 minutes, then the screen saver will start if
there is no operation on the device or no one is approaching during the five minutes
interval.
•
Sleep: set how long you expect the screen saver to last before turning off the
device’s screen. You select the screen saver duration from 2 seconds to 30.
•
Wakeup Mode: select the screen wake-up mode. If you select Auto mode then the
screen will be awakened when someone approaches without it being touched upon,
and if Manual mode is selected, then you have to touch and wake up the screen.
5.4.2
Upload Screensaver
You can upload screensaver pictures separately or in batch to the device and to the device
web interface. To configure the configuration on web Device > LCD > Upload Screensaver
interface. You can upload a maximum of 5 pictures, and each picture will be displayed in
rotation according to the ID order with a specific time duration (Time Interval) you set.

www.akuvox.com
E16 Door Phone Administrator Guide
16
5.4.3
Home Screen Configuration
You can change the home screen display through the configuration of tab name and tab
arrangement on the device web interface if needed. Path: Device > LCD > Key In
Homepage Of The Building Theme.
Parameter Set-up:
•
Name: enter a new name to replace the original type of name, but it does not change
the attribute of the type.
•
Type: select the tab type corresponding to the index number which indicates the tab
position. For example, if you want to make the Speed Dial tab be displayed in
position one, you can change the type in index number 1 to Speed Dial. And you can
change another tab position accordingly.
•
Value: enter the IP or SIP number to be attached to the reception icon for the speed
dial. The number entered will be dialed out as you press the reception icon on the
home screen. This field is only valid for speed dial. You can type in five-speed dial
numbers maximum and every two of the number must be separated by “;”.
5.5
Volume & Tone Configuration
Volume and tone configuration in E16 door phone refers to the call volume (speaker), Mic
volume, and prompt volume (eg. open door tone). Moreover, you can upload the tone you
like to enrich your personalized user experience.
Other manuals for E16 Series
3
This manual suits for next models
1
Table of contents
Other Akuvox Intercom System manuals

Akuvox
Akuvox R20A Manual

Akuvox
Akuvox IT82 Series User manual

Akuvox
Akuvox E12 User manual

Akuvox
Akuvox R20B Series Manual

Akuvox
Akuvox E16 Series Service manual

Akuvox
Akuvox R26 Manual

Akuvox
Akuvox E21 Series Manual

Akuvox
Akuvox C313 Series User manual

Akuvox
Akuvox R28 Series Manual

Akuvox
Akuvox X915 Series User manual