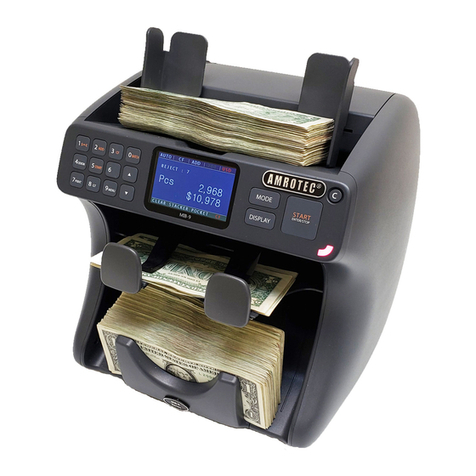
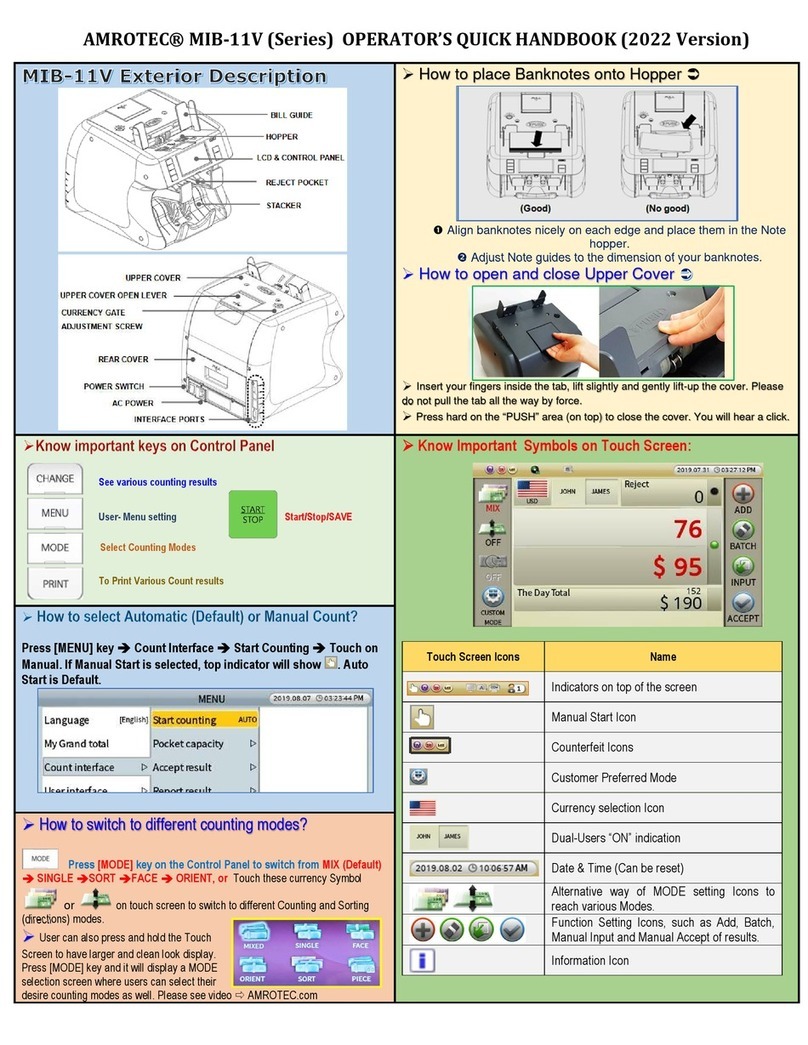
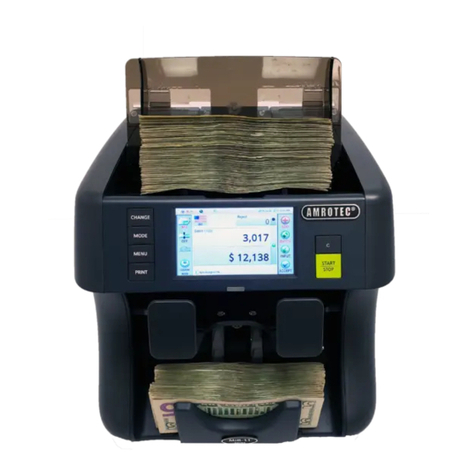
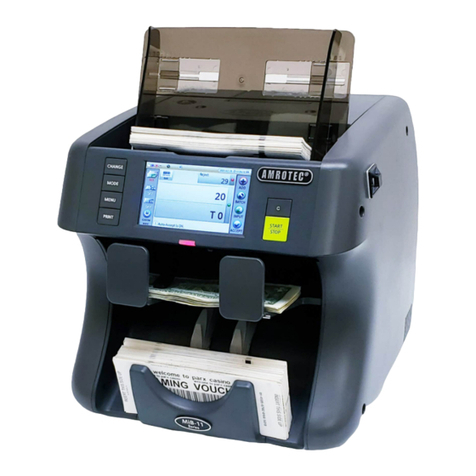
Amrotec MiB-11V User manual

Currency Discrimination Counter MiB-11V SERVICE MANUAL V1
1
Leading Image Processing Technology
We've been there when you needed
MIB-11V (Value)
Currency Discrimination Counter
Service Manual
(V1.1)
Note
The information or material contained in this document is the property of AMROTEC® -
registered trademark of Amro-Asian Trade, Inc. Any recipient of the information or material
contained in this document shall not disclose or divulge, directly or indirectly, this document or
the information or material contained herein without the prior written consent of Amro-Asian
Trade, Inc.
The above duty of confidence also entails a prohibition of reproduction of this text without
specific authority, in writing, from Amro-Asian Trade, Inc.
This guide covers the installation, operation and troubleshooting of Mib-11V
Currency Discriminating Counter. We recommend reading this guide thoroughly
before operating the Currency Discriminator. Then, as you become more familiar
with Mib-11V, use it as a reference guide to look up information when you need it.

Please read the safety precautions below before operating MiB-11V Currency Discriminator Counter. These
safety precautions guideline must be observed to avoid any potential hazards that could resulted in
personal injuries or damage to MiB-11V Currency Discriminator Counter.
Electrical Safety Information
Always be careful in operating the Machine. To reduce the risk of fire, electrical shocks,
and other injuries, keep these safety considerations in mind when installing, operating,
and maintaining of your Machine.
Stability
Place the Machine on a secure and stable surface on a desk. The Machine can seriously
get damaged if it falls from the desk or during movement.
Power Supply
Machine should always be connected to correct power as listed on this user manual and
on the label located on the rear side of the Machine.
Grounding
Machine must be plugged into a grounded (three-hole) outlet. Grounded plugs and
outlets are designed for your safety - do not try to make a three-prong plug fit into a two-
prong outlet by modifying the plug or outlet in any way. please contact your service
provider or a qualified certified electrician if you are unable to plug the Machine into your
electrical outlet or power stripe.
Overload
Do not plug too many electrical Machines into a wall outlet or into a power strip. Do not
use an extension cord in any situation. An overloaded outlet could be a reason of a fire
and electrical shock hazard, further could damage the Machine severely.
Cleaning
Before cleaning the Machine, unplug the Machine from the power outlet. Clean external
surface of Machine with a soft cloth slightly dampened with water. Do not use aerosol
cleaners.
Gas Leaks
Never place the Machine close to a gas outlet nor operate the Machine around the outlet.
In case of a gas leak, it could spread into electrical part of the Machine causing spark
resulting in fire or explosion.

Currency Discrimination Counter MiB-11V SERVICE MANUAL V1
3
Precaution
1. Never push any objects of any kind onto the Machine side covers or insert any object
through any opening of the Machine.
2. Do not operate your Machine in any wet location, or outdoors or if you are wet. Always
keep liquid away from the Machine. If water spills occur, turn off and unplug the
Machine immediately and contact your service provider.
3. Do not allow anything to rest on the power cord, line cord, or PC interface cable. Do
not place the Machine where power cords can be damaged or unplugged by person
walking or stepping on them.
4. Do not allow pets near the Machine or to chew on the power cord or PC interface
cable.
5. Use supplies or cleaning materials only as directed. Keep all supplies and materials
out of the way of children.
6. Make sure that the Machine is installed near an outlet and is easily accessible.
7. Never remove side covers or guards that require a tool for removal. This Machine is
not designed for user or operators to service the Machine by themselves. Always refer
servicing to authorized service personnel.
8. Never defeats interlock switches. This Machine is designed to restrict operator access
to unsafe areas. Covers, guards and interlock switches are provided to ensure that the
Machine will not operate with covers opened.
9.Risk of explosion if battery is replaced by an incorrect type. Dispose of used batteries
according to the instruction.
Managing the performance of the Machine
This Machine is equipped with many sophisticated sensors. Without periodical and
proper maintenance and servicing, Machine cannot perform well and last long. Please
read the ‘Maintenance’ section on this User manual and perform basic surface cleaning
every day. Contact your service provider or sales representative to sign up with yearly
maintenance plan with them.
Hazardous Safety Notes
Your Machine and related accessories included in the original packaging are designed
and tested to meet strict safety requirements. Please read the following instructions
carefully before operating your Machine and refer to them as needed to ensure the
continued safe operation of your Machine.

Either the symbol , or a similar symbol, combined with the triangle shaped
warning sign from ISO 3864-2, or the following statement or equivalent text shall be
used:
FCC Compliance Statement
FCC Notice
This equipment has been tested and found to comply with the limits for a Class A digital
device, pursuant to part 15 of the FCC Rules. These limits are designed to provide
reasonable protection against harmful interference when the equipment is operated in a
commercial environment. This equipment generates, uses and can emit radio frequency
energy and, if not installed and used in accordance with the instruction manual may
cause harmful interference in radio communications. Operation of this equipment in a
residence area is likely to cause harmful interference in which case the users will be
required to correct the interference at their own expense.
THIS MACHINE COMPLIES WITH PART 15 OF FCC RULES.
OPERATION IS SUBJECT TO THE FOLLOWING CONDITIONS:
THIS MACHINE MAY NOT CAUSE HARMFUL INTERFERENCE, AND THIS
MACHINE MUST ACCEPT ANY INTERFERENCE RECEIVED, INCLUDING
INTERFERENCE THAT MAY CAUSE UNDESIRED OPERATION.
Changes or modifications of this product not expressly
approved by manufacturer, could void the user’s
authority to operate the equipment.
WARNING
Keep away Hazardous moving parts from moving Stacker blades.
WARNING
Hazardous moving ports!
Keep fingers and other body parts away

Currency Discrimination Counter MiB-11V SERVICE MANUAL V1
5
This manual shows user general symbols for safety information and symbols to identify
special dangers.
Refer to the below Icons before reading Manual.
Icon Word Explanation
DANGER
WARNING
This symbol with the signal word (Danger/
Warning) refers to an immediate risk / threat to
life or body injury.
CAUTION
This symbol is to identify safety information.
Ignoring this warning can result in damage to
the Machine or endanger data consistency.

Recommended Tools
P
icture
Name and Spec.
Picture
Name and Spec.
L Wrench
Ø1.5
Hexagonal
Screwdriver
5mm
L Wrench
Ø2
Screwdriver(+)
6mm
Spanner
7mm
Screwdriver(-)
2.5mm
Screwdriver(-)
1.5mm
Long-Nose
Multi-Meter
Nipper
Dust Blower
Aerosol
Anti-Static Gloves
Rubber Coated
Dust Air Blower
Dust Blower: Dust may cause to make a short in PCB so periodically clear dust apt to be
accumulated inside of machine.
Anti-Static Gloves: In maintenance or repairing, recommended to put it on to protect static caused
to make a short.

Currency Discrimination Counter MiB-11V SERVICE MANUAL V1
7
TABLE OF CONTENTS
Chapter 1 Machine Packing and Handling ----------------------------------------------- 10-11
Chapter 2 Machine Description, Control Panel & Display Screen --------------- 11
2-1. Description of the Parts---------------------------------------------------- 11
2-2. Description of Control ------------------------------------------------------ 12
2-3. Overview of Touch Screen ------------------------------------------------ 13-14
Chapter 3 Preparation of Machine Operation ------------------------------------------- 15
How to open and close “Upper Cover and “Rear Cover/Door” ---- 15
How to place banknotes onto the Hopper --------------------------------- 16
Counting ------------------------------------------------------------------------------ 17
Chapter 4 Specifications ----------------------------------------------------------------------- 18
Chapter 5 Admin Menu ------------------------------------------------------------------------- 19-20
5-1 Loading default ---------------------------------------------------------------- 20
5-2 Change passwords ----------------------------------------------------------- 20
5.3 Machine setting ---------------------------------------------------------------- 21
5.3.1 Station ID ----------------------------------------------------------------- 21
5.3.2 Ethernet ------------------------------------------------------------------- 21
5.3.3 FTP Information -------------------------------------------------------- 21
5.3.4 Black list ------------------------------------------------------------------ 21
5.3.5 Printer ---------------------------------------------------------------------- 22
5.3.6 Customer display ------------------------------------------------------ 22
5.3.7 Way of motor stop ----------------------------------------------------- 22
5.4 Function on/off ----------------------------------------------------------------

23
5.4.1 CF Detectors ------------------------------------------------------------- 23
5.4.2 Mode Setting ------------------------------------------------------------ 23
5.4.3 Auto default loading -------------------------------------------------- 24
5.4.4 User setting -------------------------------------------------------------- 24
5.4.5 Grand Total --------------------------------------------------------------- 25-26
5.4.6 Log data ------------------------------------------------------------------- 27
Chapter 6 Service Menu ------------------------------------------------------------------------ 28-29
6.1 Save default -------------------------------------------------------------------- 29
6.2 Admin PWD --------------------------------------------------------------------- 30

6.3 Download target --------------------------------------------------------------- 30
6.4 Machine management ------------------------------------------------------- 30
6.4.1 Program update -------------------------------------------------------- 30
6.4.2 Touch calibration ------------------------------------------------------- 31
6.4.3 Machine test ------------------------------------------------------------- 31-32
6
.4.4 Log data
-
--
--
---
-------
-
----------------------
-----------------------------
33
6.4.5 Counting report --------------------------------------------------------- 33
6.5 Machine setting ---------------------------------------------------------------- 34
6.5
.1 Setting of date/time
----------------------------------------------------
34

Chapter 9 Rollers ------------------------------------------------------------------------------------ 54
Chapter 10 Pulley & Belt --------------------------------------------------------------------------- 55
10.1 Right side – pulley ------------------------------------------------------------ 55
10.2 Right side – belt --------------------------------------------------------------- 55
10.3 Left side – pulley and belts ------------------------------------------------ 56
Chapter 11 Adjustment ----------------------------------------------------------------------------- 57
11.1 Hopper Sensor ----------------------------------------------------------------- 57
11.2 Timing for Bracket Solenoid ----------------------------------------------- 58
11.3 Gap between Separator and ADF roller -------------------------------- 58-60
6.5.2 Set A/S call ---------------------------------------------------------------- 34
6.5.3 Ethernet -------------------------------------------------------------------- 34
6.5.4 Save Image Data -------------------------------------------------------- 34-35
6.5.5 Reason View -------------------------------------------------------------- 35
6.5.6 Set Currency Map ------------------------------------------------------- 35-36
6.5.7 Set Machine Serial Number ------------------------------------------ 36
6.6 Value Setting (CF Level) ------------------------------------------------------- 36
6-6-1 CF level by Particular Currency Type ---------------------------- 37
6-6-2 CF level by different Currency Type ------------------------------ 37
6.6.3 CF level adjustment by denomination of currency type --- 37-38
6.6.4 CF level adjustment by Banking and Retail Version -------- 38
6.6.5 CF level adjustment by “ALL” -------------------------------------- 38-39
6.6.6 Hopper level -------------------------------------------------------------- 39
6.6.7 Double level ---------------------------------------------------------------
39
6.7 Function on/off ------------------------------------------------------------------- 40
6.7.1 CF Items --------------------------------------------------------------------
40
6.8 Information ------------------------------------------------------------------------ 40-41
6.9 Calibration ------------------------------------------------------------------------- 41
6.9.1 Tape Calibration --------------------------------------------------------- 42-43
6.9.2 CIS Calibration ----------------------------------------------------------- 44-45
6.9.3 UV Calibration ------------------------------------------------------------
45-46
6.9.4 MR --------------------------------------------------------------------------- 47-48
6.9
.5 IR
-------------------------
-----------------------
------
--
-------
-
-----------
--
48
6.9.6 Hopper Calibration -----------------------------------------------------
48
Chapter 7 Sensors ---------------------------------------------------------------------------------- 49-50
Chapter 8 Boards ----------------------------------------------------------------------------------- 51
8.1 Side View of machine ---------------------------------------------------------- 51
8.2 Rear View of machine ---------------------------------------------------------- 52
8.3 Front View of machine --------------------------------------------------------- 52
8.4 Main Board ------------------------------------------------------------------------
8.5 OPE Board ------------------------------------------------------------------------
53
53

Currency Discrimination Counter MiB-11V SERVICE MANUAL V1
9
11-4 Timing between ADF and Pick-up Roller ------------------------------- 60
11.5 Information that requires your attention -------------------------------- 61
11.5.1 Connector ---------------------------------------------------------------- 61-62
11.5.2 Pulley Motor ------------------------------------------------------------- 62
11.5.3 Bracket CIS -------------------------------------------------------------- 63
Chapter 12 S/W Upgrade and Image Data Downloading --------------------------------- 64
12.1 Software Upgrade -------------------------------------------------------------- 64
12.2 Image Data Downloading ---------------------------------------------------- 65-70
Chapter 13 Maintenance ---------------------------------------------------------------------------- 71
13.1 Clean all sensors and Rollers ---------------------------------------------- 72-73
13.2 Dust Tray cleaning ------------------------------------------------------------- 73-74
Chapter 14 LCD Error Message ------------------------------------------------------------------ 75
14.1 Initializing Running Error ---------------------------------------------------- 75-76
14.2 Error on counting -------------------------------------------------------------- 76
Chapter 15 Board & Component ---------------------------------------------------------------- 77
15.1 Connection Diagram ---------------------------------------------------------- 77
15.2 Board Descriptions ------------------------------------------------------------ 78-82
Chapter 16 Assembly Drawings ----------------------------------------------------------------- 83-123

Chapter
1. Machine Packing and Handling
Packing List
No.
Part
Name
Qty
Remark
1
M
i
B
-
11V
M
achine
1
Unit
2
A
C Pow
er Co
r
d
1 pc.
3
User Manual
1 pc.
4 Sensor Cleaning Cloth 1 pc.
Work Area
To help ensure trouble-free operation of the Machine, it is strongly recommended that you place the
Machine on a flat, stable surface on your desktop or workstation.
Do not place the Machine:
in direct sunlight
Near heat sources or air conditioners vent
In dusty or dirty environment
Handling
When handling or moving the Machine, do not lift
the Machine with grasping the Front Area. The
picture
on the right illustrates how to lift the Machine
correctly by holding at the bottom portion of the
Machine from
rear ends.
Power On / Off
Plug one end of the power cord into the A/C socket at the
rear side of the Machine and the other end into a standard
AC power wall outlet (properly grounded) or to a power
strip.
Turn the Power On or Off by pressing power Switch button located at the rear side of the Machine
(See section 2.1 Description of Parts at page 11). After initializing, Machine will enter into main
display and ready for operation. Confirm that all of the counting results are saved prior to powering
off the Machine (ignore if you decided not to save counting results).
Machine Interface
[ Micro SD]
For optional function
[ USB Type A]
Machine firmware can be upgraded with USB Memory Stick (Flash drive)
(Preferable method).
[ LAN Port]
1. The counting results can be sent to PC though LAN.
2. PC can be connected to a third-party software via LAN port.
3. The Machine can also be upgraded through LAN.
[ RJ11 Jack]
External Display for customer [optional] can be connected to these 2 ports. Two
Users can attach their own External Displays to these ports to show their
individual counting results.
[RS232C Serial Port]
Machine has a RS232C serial interface port for connecting your Dot matrix or
Thermal printer to print out counting result. To connect your printer to the
Machine, follow the steps as below:
1. Make sure that both the Machine and the printer are turned off.
2. Connect the end of printer cable to the RS232C Serial port of the Machine.

Currency Discrimination Counter MiB-11V SERVICE MANUAL V1
11
Chapter
2. Machine Description, Control Panel & Display Screen
[Warning]
If user inserts improper cable terminal into the port, the Machine could get shut off. Please check
the right port before inserting cable terminal.
2-1 Description of the Parts
[FRONT VIEW]
[REAR VIEW]
UPP
ER CO
V
ER
REA
R C
OVER
A
C P
OW
ER
INTE
RFACE PORTS
POWER SWITCH
UPPER CO
VER O
PEN LEV
ER
CURRENCY GATE
ADJU
STMENT
KNOB

2-2 Description of Control
Overview of Control panel (With detail information)
Indication Description
- Manually START the Machine (when Manual Start is set)
- Emergency STOP & START during counting.
- Save or set any counting or sorting modes or functions.
- This key represents ‘OK’ and ‘YES.’
- CLEAR the count result or return to previous menu screen.
- CANCEL the present setting.
- User can remove jammed notes by pressing this key.
- This key represents ‘Cancel’, ‘Close’ and ‘No.’
- To change various display screens to see current count result
details, rejects reasons and so on.
- This Key is also used to change some menu or sub-menus selection
- To Enter into User-defined mode. Up to 16 such combination of
discriminating and sorting modes can be set by users in advanced
and can be easily access from the control panel menu by touch.
- To Enter into User-setting Menu (User can set various Parameters).
This menu is password projected. Also, to Exit from Setting Menu.
- To print each count result if external printer is connected.

Currency Discrimination Counter MiB-11V SERVICE MANUAL V1
13
2-3 Overview of Touch Screen

No. Name Description
1
In
dicators
1-1
Auto or Manual Icon
To show Auto or Manual start. While Auto start is
default, this Icon will appear if manual start is
activated
.
1-2
Counterfeit Icons These icons indicate which counterfeit detectors are
act
ive (
UV/ IR/
MR
d
etector
s
)
o
r turned
on.
1-3
Interface Ports activity
To show Customer display or PC is connected to
Ma
ch
ine
.
1-4
User Define Mode To show User Define Mode is activated or not
a
ct
ivated.
2 Currency Flag Icon
To show the currency type is set for counting
operation.
User can change currency by touching this icon (if
other currency software is purchased with your
Mach
ine
)
.
3 Dual-Users
2 persons can use the Machine having their own
settings and count results. To set the user, touch the
alternative button.
Double Touch can change to another user (Username
can be edited)
4 Date & Time To show Date & Time which can be changed
according
to your local
dat
e and tim
e.
5 Mode Setting Icons To display various Counting (Discriminating or facing
or orient
or U
ser
-
define
)
modes
fo
r selection.
6 Function Setting Icons
To display various functions from ADD, BATCH,
Ma
nu
al Inpu
t et
c.
7 Pocket LED To display whether Stacker or Reject pocket is empty
o
r
full
.
8
Stacker & Reject
Pocket capacity,
ba
tch setting
To display Pre-set Batch amount or maximum stacker
capacity (set to 200) & Reject pocket capacity set (set
as
1
00
)
.
9 Information To display additional information to user for selected
modes
.
10 Denomination &
number
To display counting results of each denomination
banknotes counted. User can remove this section
from
display
if ch
oose to.
11 Reject Bills
To display how many bills are rejected during a count.
To see detail view of reject reasons, touch the R Icon
on the di
splay.
12 Stacker To display total quantity and total value of counted
bills at Stacker. Touch this section to see Detail view.
13 The Day Total
To display the Day Total amount
The user can remove this information from the display
if chooses.

Currency Discrimination Counter MiB-11V SERVICE MANUAL V1
15
Chapter 3. PREPARATION OF MACHINE OPERATION
When Upper or Rear Cover is opened, Machine will display alarm message
How to open and close ‘Upper Cover’ and ‘Rear Cover / Door’
[Upper Cover]
Gently insert your fingers inside the tab and lift-up the Upper cover. Press hard on the “PUSH” area to
close the cover. You will hear a locking sound ensuring cover is properly locked in placed and closed.
[CAUTION]
PLEASE MAKE SURE THAT UPPER COVER IS CLOSED PROPERLY. OTHERWISE, MACHINE
WILL MALFUNCTION AND SEND MANY NOTES TO REJECT POCKET.
[Rear Door Cover]

How to place banknotes onto the Hopper
It is very important to place the banknotes on the hopper correctly and towards the end because
recognition performance of the banknotes is highly affected by the arrangement of banknotes in a stack.
Number of rejected banknotes can increase when banknotes are not placed towards the end and not
aligned and arranged properly. Refer to the pictures below for the correct placement of banknotes onto the
Machine Hopper.
[CAUTION]
PLEASE MAKE SURE THAT THERE ARE NO CLIPS, BANDS OR SIMILAR FOREIGN OBJECTS
ATTACHED TO BANKNOTES. FOREIGN OBJECTS CAUSES MACHINE MALFUNCTION AND
MAY DAMAGE SENSORS SEVERELY.
(Good) (No good)
(Good) (No good)

Currency Discrimination Counter MiB-11V SERVICE MANUAL V1
17
Counting
In AUTO mode, Machine starts to count banknotes automatically after it detects the existence of
banknotes on the hopper. In MANUAL mode, the Machine will start to count banknotes only if the
banknotes are placed onto the hopper and ‘START’
key is pressed. While counting, the
Machine will display the number of the banknotes on LCD display and it halts operation when it
meets one of the below conditions;
No bills on the hopper
Stacker Pocket is full.
Reject Pocket is full.
The number of counted banknotes reached the preset batch number set in BATCH
function.
Errors have occurred.
If an error or jam occurred during operation and Machine stops as reason, then an error message will
be displayed. To clear the error, press ‘C’ key. The Machine will try to solve the problem
automatically, however, if it fails to clear the error or jam and error message repeats on the display
screen, then, user to open the Upper cover door or Rear cover door as instructed by error message
that displayed on the screen. Remove jammed banknotes from jammed location and close the cover
correctly. Machine will then be able to clear the error message and resume operation when user
press “START”.
(EMERGENCY Stoppage of the Machine during operation)
While Machine is in operation, Press ‘START’ button to stop counting operation immediately in
case of an emergency.
To resume counting operation, press ‘START’ button.
[CAUTION] EMERGENCY
Stop during operation
Please
‘START’
button to stop Machine operation while the Machine is
counting. To resume operation, press
‘START’
button again.

Chapter 4. SPECIFICATIONS
Item
Unit
Spec
ificatio
n
Recogn
itio
n Sensor
Qty
Dual
(2)
CI
S (Contact Image Sensor
s
)
Hopper capacity Notes MAX. 300 (optional 1,000 w/Extension)
Stacker capacity Notes 200 [Max.300 for new banknotes]
Reject pocket capacity Notes 100 Max
Display
Type
Dot
4.3
”
Col
or
Capacitive
Touch S
creen
Connectivity interfaces 3 RS232C Port (9 Pin D-SUB & 2 Moduler Jack),
1 USB (Type A), LAN, 1 Micro SD Slot
Curren
ci
es ava
i
lable
U
p to 40
Banknote size range mm W: 100 ~ 185, H: 60 ~ 90
Banknote thickness
range mm 0.08 ~ 0.12
Counting Speed Notes/min
(Approx.)
1500NPM (Piece count)
1200NPM (all Discriminating Modes)
(
800/10
0
0/120
0 N
PM
)
Working Mode COUNT/ MIXED/ SINGLE/ FACE/ ORIENT / SORT/
Etc
.
Preset
B
atch Number
1
–
2
00
Cou
nterfei
t D
ete
c
tion
MR
-
Arr
ay, IR
-
Arr
ay
, UV
Power Requirements
100-240V~, 50~60Hz,2.0A
Po
wer Consum
ption
W
Approx.
St
andby:
12
, Operation:
90
Operational
req
uirements
10~40° / 0~85% RH (Non-Condensing)
Size (W x D x H) Inch
mm
11.3” [W] x 13.8” [D] x 12.4” [H]
2
8
7
[W] x 3
48
[D] x 3
12
[H]
W
eight
Lbs.
/
Kg
Appro
x.
26.4
lbs.
or
1
2
Kgs
Notes:
- This Machine specifications can be changed without further notice to improve its reliability, function or
design.
- The contents of this user's guide can also be changed without prior notice.

Currency Discrimination Counter MiB-11V SERVICE MANUAL V1
19
Chapter 5. ADMIN MENU
Admin menu
Administrator or trained operator can make
changes to the functions and parameters at
this menu with a password.
ADMIN MENU (Administrator Menu)
Administrator or trained operator can make changes to
the functions and parameters under this menu with a
password. Press key on the
Control Panel and
Enter [12345]
in Password screen
or simply touch ‘ADMIN MENU’ in the [MENU] to
access to sub-menus which are described in great
details at the below:
MENU
SUB M
ENU
Description
Loading default
We do not recommend using of this menu
item even for trained Uses. Please contact
your Sales representative. If this loading
default is performed, user will lose all their
user-settings.
Change password We do not recommend changing ADMIN
password even f
or trained Uses.
Machine setting
Station ID Set the ID number of each Machine
Ethernet Set up Ethernet connectivity
FTP Information Set up FTP information (not used)
Blacklist
Manage
sus
picious banknotes list.
Printer Set up External Dot or Thermal Printer
Customer display Set up an external customer display
purchase from manufacturer.
Way of Motor stop Choose how to stop the motor
Function on/off
CF items Turn on/off CF sensors (Only Reserved for
highly trained or Administrator)
Auto Default Loading Turn on or off ‘Auto Default Loading’
function. If select ‘On’, Machine will go back
to default condition when off and on the
power.
User setting Concurrent User Set up concurrent user function

Set User Info Input Username and Password
Grand Total
Auto clear Set up GT saving period
Clear Target Select which total shall be cleared
Initialize all Initialize all total data
Summary The summary of Day/Grand Total
Each user Check GT for each user
Log data Export log data Log data can be exported to USB memory
stick or screen
[Note: More information included for each function on Machine in each menu]
5.1 Loading default: (Not Recommended to change back to factory Default setting)
If for some reasons trained users perform this factory Loading default, aall user’s pre-set and pre-
defined Modes, preferences, and various parameters set will be erased and return to initial setting of
factory. The Factory default settings are very standard and very few areas are customized.
Function Default Value
Speed (NPM)
Approx. 1200 (Discriminating Modes)
MAX. 1500 (Count Mode - Piece count)
[Count interface]
Starting counting Auto
Pocket capacity
Stacker
Pocket 200
Reject Pocket 100
Accept result Auto-accept ON
After-accept Only add count-result to grand-total
Report result
Auto-print off
Printing
Target Select in printing
[User interface]
Selection way In list (On a pop-up menu.)
Sorting order Ascendant
LCD brightness 90
Beep
Warning
on/off On
Button on/off On
Power saving Waiting time 10 min.
Saving type Make the backlight of LCD darker
5.2 Change passwords
It is our highly recommendation that only trained
users or Adminstrator of this Machine to access
to this menu and change Administrator
password.
Other manuals for MiB-11V
4
Table of contents
Other Amrotec Cash Counter manuals

Amrotec
Amrotec MiB-9 User manual

Amrotec
Amrotec MiB-9 User manual

Amrotec
Amrotec MiB-1 User manual

Amrotec
Amrotec MIB-11F User manual

Amrotec
Amrotec X-1 Series User manual

Amrotec
Amrotec MiB-1 User manual

Amrotec
Amrotec MIB-11F User manual

Amrotec
Amrotec MiB-11V User manual

Amrotec
Amrotec MiB-9 User manual

Amrotec
Amrotec S-200 User manual