manuals.online logo
Brands
  1. Home
  2. •
  3. Brands
  4. •
  5. Anova
  6. •
  7. Outdoor Furnishing
  8. •
  9. Anova L1390 User manual

Anova L1390 User manual

anovafurnishings.com
888.535.5005 tel
OR
ASSEMBLY INSTRUCTIONS
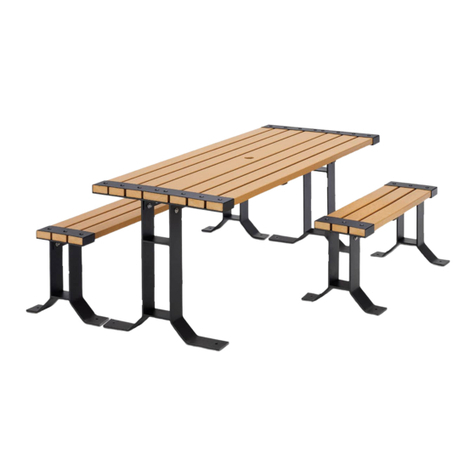
L1390 6-Seat Rendezvous Table with Flat Seats
L1392 6-Seat Rendezvous Table with Contour Seats
L1444 6-Seat Latitude Table with Flat Seats
L1446 6-Seat Latitude Table with Contour Seats
TOOLS NEEDED:
Ratchet with 1/2” Socket• 
1/2” Open End or Box End Wrench• 
5/32” Allen Wrench• 
Rubber Mallet• 
6 x
Plug
60 x
5/16 X 1.0”
Hex Head Bolt
ASSEMBLY:
The assembly is a two-person operation.
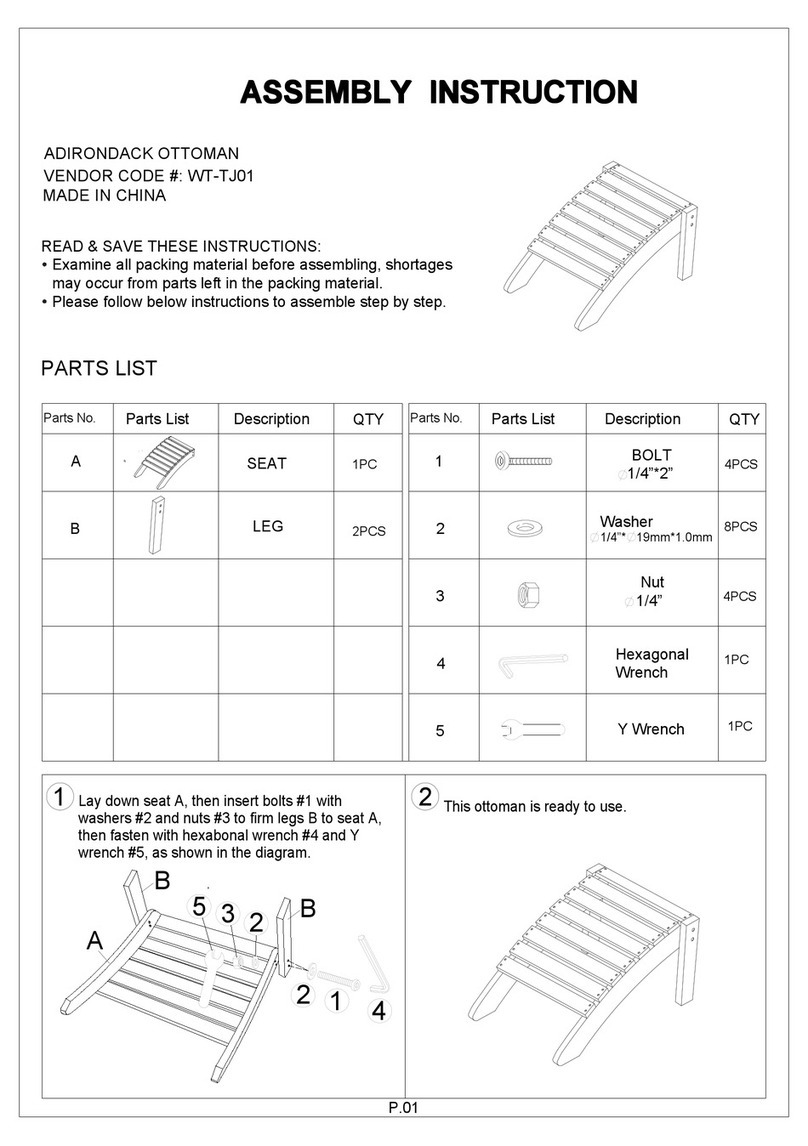
Inspect the shipping container contents for damage and to determine that all components and hardware are present.1.
Assemble the Table over the shipping packaging or padded work area to avoid scratching the product.2.
NOTE: Before assembling the Nuts to the Bolts, it is recommended that a light oil or petroleum jelly be applied to the screw threads.
Open the Hardware package and nd the six black plastic Plugs. Insert a Plug in the hole on the bottom of each of the Seat3.
Supports. Use the Rubber Mallet to seat the Plugs.
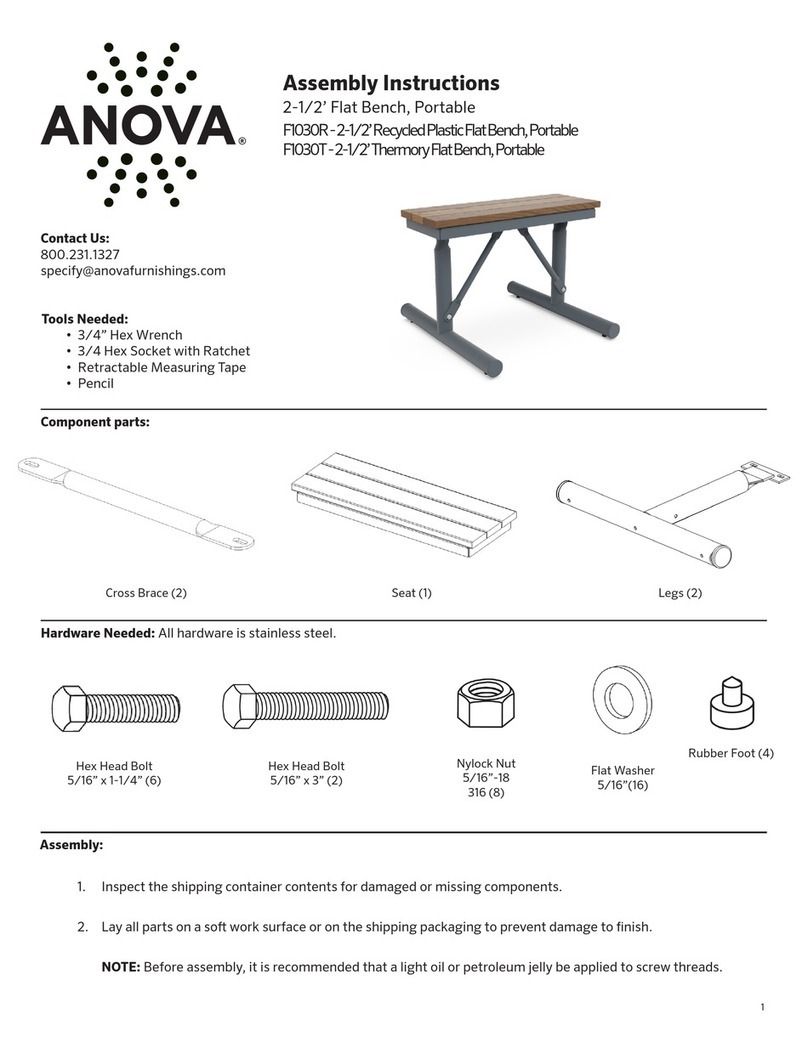
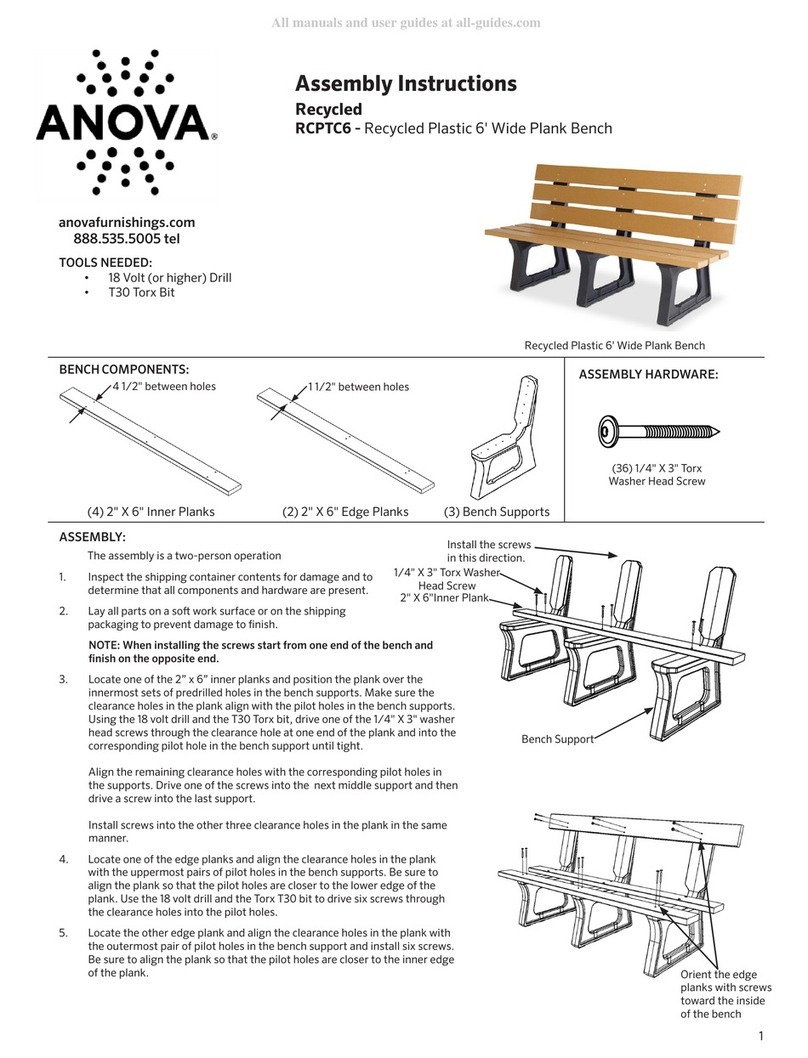
TABLE COMPONENTS:
6 x Seat Support1 x Lower Leg
Bracket
60 x
5/16” Flanged Nut
OR
1 x Table Top
ASSEMBLY HARDWARE:
120 x
5/16” Flat
Washer
6 x Seat Mount
14 x
1/4” Flat Washer
1 x Table Top Pan
Plug
Seat Support
14 x
1/4 x 1.5” Button
Head Allen Screw
6 x Flat or
Contour Seat
Rendezvous models shown
seat shape and pattern may vary
2 of 4
Locate the Lower Leg Bracket. Install a 5/16”4.
Flat Washer on one of the 5/16” Hex Head
Bolts and insert the Bolt through one of the
mounting holes in the Lower Leg Bracket and
into the lower mounting hole in one of the
Seat Supports. Place a 5/16” Flat Washer and
Flanged Nut on the end of the Bolt and tighten
nger tight.
Table Top Pan
5/16” Hex Head Bolt
Seat Support
5/16” Flat Washer
Seat Support
Flanged Nut
5/16” Flat Washer
Seat Support
Lower Leg Bracket
5/16” Bolt
5/16” Flat
Washer
Flanged Nut
5/16” Flat Washer
Packing cardboard or
other so work surface
Repeat Step 4 for the remaining5.
Seat Supports using 5/16” Bolts with a
5/16” Flat Washer on the top and bottom
and Flanged Nuts to secure. Leave the
hardware nger tight until aer the Table
Top Pan is secured (Step 7).
Locate the Table Top Pan and place it on top of the platform created by the raised ends of the Seat Supports. Adjust the6.
placement of the Table Top Pan until one set of mounting holes in the Pan align with the corresponding set of mounting holes in
one of the Seat Supports.
Place a 5/16” Flat Washer on the end of one of the 5/16” Hex Head Bolts and insert the Bolt through the Pan mounting hole in
the inner bolt circle and through hole in the Support. Fasten the Bolt using a 5/16” Flat Washer and Flanged Nut on the bottom
of the Bolt. Leave the Bolt and Nut nger tight. Repeat this for the remaining ve 5/16” Hex Head Bolts. You may have to adjust
the Seat Supports or the Table Top Pan in order to get the mounting holes to align.
3 of 4
Place a 1/4” Flat Washer on the end of one of the Button Head Allen Screws and insert the screw through one of the Pan7.
mounting holes in the outer bolt circle and into the corresponding threaded hole in the Seat Support. Leave the Screw nger
tight. Repeat this for the remaining ve 1/4” Button Head Allen Screw locations in the top of the Table Top Pan. You may have to
adjust the Seat Supports or the Table Top Pan in order to get the mounting holes to align.
Aer all the Button Head Allen Screws are installed, tighten all of the hardware in the Lower Leg Bracket and in the Table Top
Pan. Be careful not to over tighten the Button Head Allen Screws; the inserts they thread into could unseat and begin to spin
with the Screw.
Seat Mount
Seat Support
Mounting Plate
Table Top Pan
5/16” Hex Head Bolt
Button Head
Allen Screw
1/4” Flat Washer
Button Head
Allen Screw
1/4” Flat Washer
Seat Mount
5/16” Flat Washer
Flanged Nut
5/16”Flat Washer
Seat Support
Mounting Plate
Locate one of the Seat Mounts. Position the Seat Mount on the lower end of one of the Seat Supports so that the mounting8.
holes in the Seat Mount align with the mounting holes in the Seat Support Mounting Plate. Install four 5/16” Hex Head Bolts
with 5/16” Flat Washers (top and bottom) and Flanged Nuts.
Install the remaining Seat Mounts in the same manner.
Do not drag the assembled unit across any surface.• 
This product requires only periodic cleaning with a sponge and a solution of mild detergent and water to• 
remove surface dirt. Do not clean with a solvent or petroleum based products.
Furniture must not be used other than for its intended purpose and should be inspected regularly for loose,• 
missing, or broken hardware, and general instability.
Furniture that is damaged or appears to be unstable must be removed from service and be repaired or replaced.• 
Repairs must be made using only factory authorized parts and methods.• 
WARNING
CARE AND
MAINTENANCE
211 North Lindbergh Blvd.
St. Louis, MO 63141
tel: 888.535.5005
web: anovafurnishings.com
11/2012
Li the Table Top and move it over the top of the Table Top Pan. Rotate the Table Top until the square frame on the bottom of the9.
Table Top matches the orientation of the Table Top Pan. Carefully lower the Table Top down onto the Table Top Pan.
Secure the Table Top to the Table Top Pan using the remaining eight Button Head Allen Screws (2 screws on each side) with a
1/4” Washer on each of the Screws. You may have to li the Table Top slightly to get the holes to align.
Leave the Screws nger tight until all the Screws are started, then use the 5/32” Allen Wrench to tighten the Screws. Be careful
not to over tighten the Screws; the inserts they thread into could unseat and begin to spin with the Screw.
5/16” Flat
Washer
5/16” Hex
Head Bolt
5/16” Flat
Washer
Flanged Nut
5/16” Flat Washer
5/16” Hex Head Bolt
5/16” Flat Washer
Flanged Nut
Contour Seat
OR
Flat Seat
Table Top
Table Top Pan
1/4” Button
Head Allen Screw
1/4” Flat Washer
1/4” Button
Head Allen Screw
1/4” Flat Washer
Place one of the Seats (Flat or Contour) over one of the Seat Mounts. Use four 5/16” Hex Head Bolt with 5/16” Flat Washers10.
(inside and outside) and Flanged Nuts.
Install the remaining Seats in the same manner.
Move the Table to the location where it will be used.11.
Aer two weeks, retighten all hardware.12.

This manual suits for next models

3

Other Anova Outdoor Furnishing manuals
Anova L1364 User manual

Anova

Anova L1364 User manual

Anova L1391 User manual

Anova

Anova L1391 User manual

Anova FBW6R User manual

Anova

Anova FBW6R User manual

Anova F1031 User manual

Anova

Anova F1031 User manual

Anova Perspective series User manual

Anova

Anova Perspective series User manual

Anova F2030 User manual

Anova

Anova F2030 User manual

Anova Wainwright RCPWT63 User manual

Anova

Anova Wainwright RCPWT63 User manual

Anova Signature L1501 User manual

Anova

Anova Signature L1501 User manual

Anova RCPWF6 User manual

Anova

Anova RCPWF6 User manual

Anova F1032 User manual

Anova

Anova F1032 User manual

Anova Airi AE2690LF User manual

Anova

Anova Airi AE2690LF User manual

Anova F1030R User manual

Anova

Anova F1030R User manual

Anova D1007 User manual

Anova

Anova D1007 User manual

Anova D1111 User manual

Anova

Anova D1111 User manual

Anova D1121 User manual

Anova

Anova D1121 User manual

Anova L1364 User manual

Anova

Anova L1364 User manual

Anova Perforated Steel Café Chair D1145 User manual

Anova

Anova Perforated Steel Café Chair D1145 User manual

Anova Courtyard F1030 User manual

Anova

Anova Courtyard F1030 User manual

Anova BRP101 User manual

Anova

Anova BRP101 User manual

Anova D1007 User manual

Anova

Anova D1007 User manual

Anova F3017 User manual

Anova

Anova F3017 User manual

Anova Rendezvous L1360 User manual

Anova

Anova Rendezvous L1360 User manual
Anova BRP121 User manual

Anova

Anova BRP121 User manual

Anova F1051 User manual

Anova

Anova F1051 User manual

Popular Outdoor Furnishing manuals by other brands

Kettler 0193337-2100 Assembly instructions

Kettler

Kettler 0193337-2100 Assembly instructions

Keter DUOTECH 17204254 user manual

Keter

Keter DUOTECH 17204254 user manual

deVRIES TRENDY PURE GREENLINE 135 XL Care & assembly instructions

deVRIES

deVRIES TRENDY PURE GREENLINE 135 XL Care & assembly instructions

BENITO Urban Leman UM397E Anchoring instructions

BENITO

BENITO Urban Leman UM397E Anchoring instructions

Sunjoy S-BS1011SST-A Assembly Intructions

Sunjoy

Sunjoy S-BS1011SST-A Assembly Intructions

Yardistry 12' x 12' MERIDIAN GAZEBO YM11769 Installation and operating instructions

Yardistry

Yardistry 12' x 12' MERIDIAN GAZEBO YM11769 Installation and operating instructions

real living WHITMORE GBO23-912C Assembly instructions

real living

real living WHITMORE GBO23-912C Assembly instructions

YitaHome Pure & Easy FTPLPB-K07-TZC-02 Assembly instructions

YitaHome

YitaHome Pure & Easy FTPLPB-K07-TZC-02 Assembly instructions

Grange Elite Arch Assembly instructions

Grange

Grange Elite Arch Assembly instructions

Costway OP70328 Instruction booklet

Costway

Costway OP70328 Instruction booklet

kingsley-bate NT-70 Assembly instructions

kingsley-bate

kingsley-bate NT-70 Assembly instructions

Primus FOLDING GAZEBO DELUXE STEEL Assembly, and care manual

Primus

Primus FOLDING GAZEBO DELUXE STEEL Assembly, and care manual

domi LGMF1619 Assembly manual

domi

domi LGMF1619 Assembly manual

Pedrali IGLOO instructions

Pedrali

Pedrali IGLOO instructions

Sunjoy L-GZ778PST-A Assembly instructions

Sunjoy

Sunjoy L-GZ778PST-A Assembly instructions

PHI VILLA E02GF0704-053-01 Use and care guide

PHI VILLA

PHI VILLA E02GF0704-053-01 Use and care guide

Hanover Traditions TRADDN7PCSW6-BLU manual

Hanover

Hanover Traditions TRADDN7PCSW6-BLU manual

Twoey Outside 2550 quick start guide

Twoey Outside

Twoey Outside 2550 quick start guide

manuals.online logo
manuals.online logoBrands
  • About & Mission
  • Contact us
  • Privacy Policy
  • Terms and Conditions

Copyright 2025 Manuals.Online. All Rights Reserved.