Do not drag the assembled unit across any surface.•
This product requires only periodic cleaning with a sponge and a solution of mild detergent and water to•
remove surface dirt. Do not clean with a solvent or petroleum based products.
Furniture must not be used other than for its intended purpose and should be inspected regularly for loose,•
missing, or broken hardware, and general instability.
Furniture that is damaged or appears to be unstable must be removed from service and be repaired or replaced.•
Repairs must be made using only factory authorized parts and methods.•
WARNING
CARE AND
MAINTENANCE
211 North Lindbergh Blvd.
St. Louis, MO 63141
tel: 888.535.5005
web: anovafurnishings.com
09/2013
Bench End
Screw
Washer
Nut
Contour
Bench Seat
Bench End
Screw Washer
Nut
Contour
Bench Seat
Packaging plastic and
cardboard to avoid
scratching the product
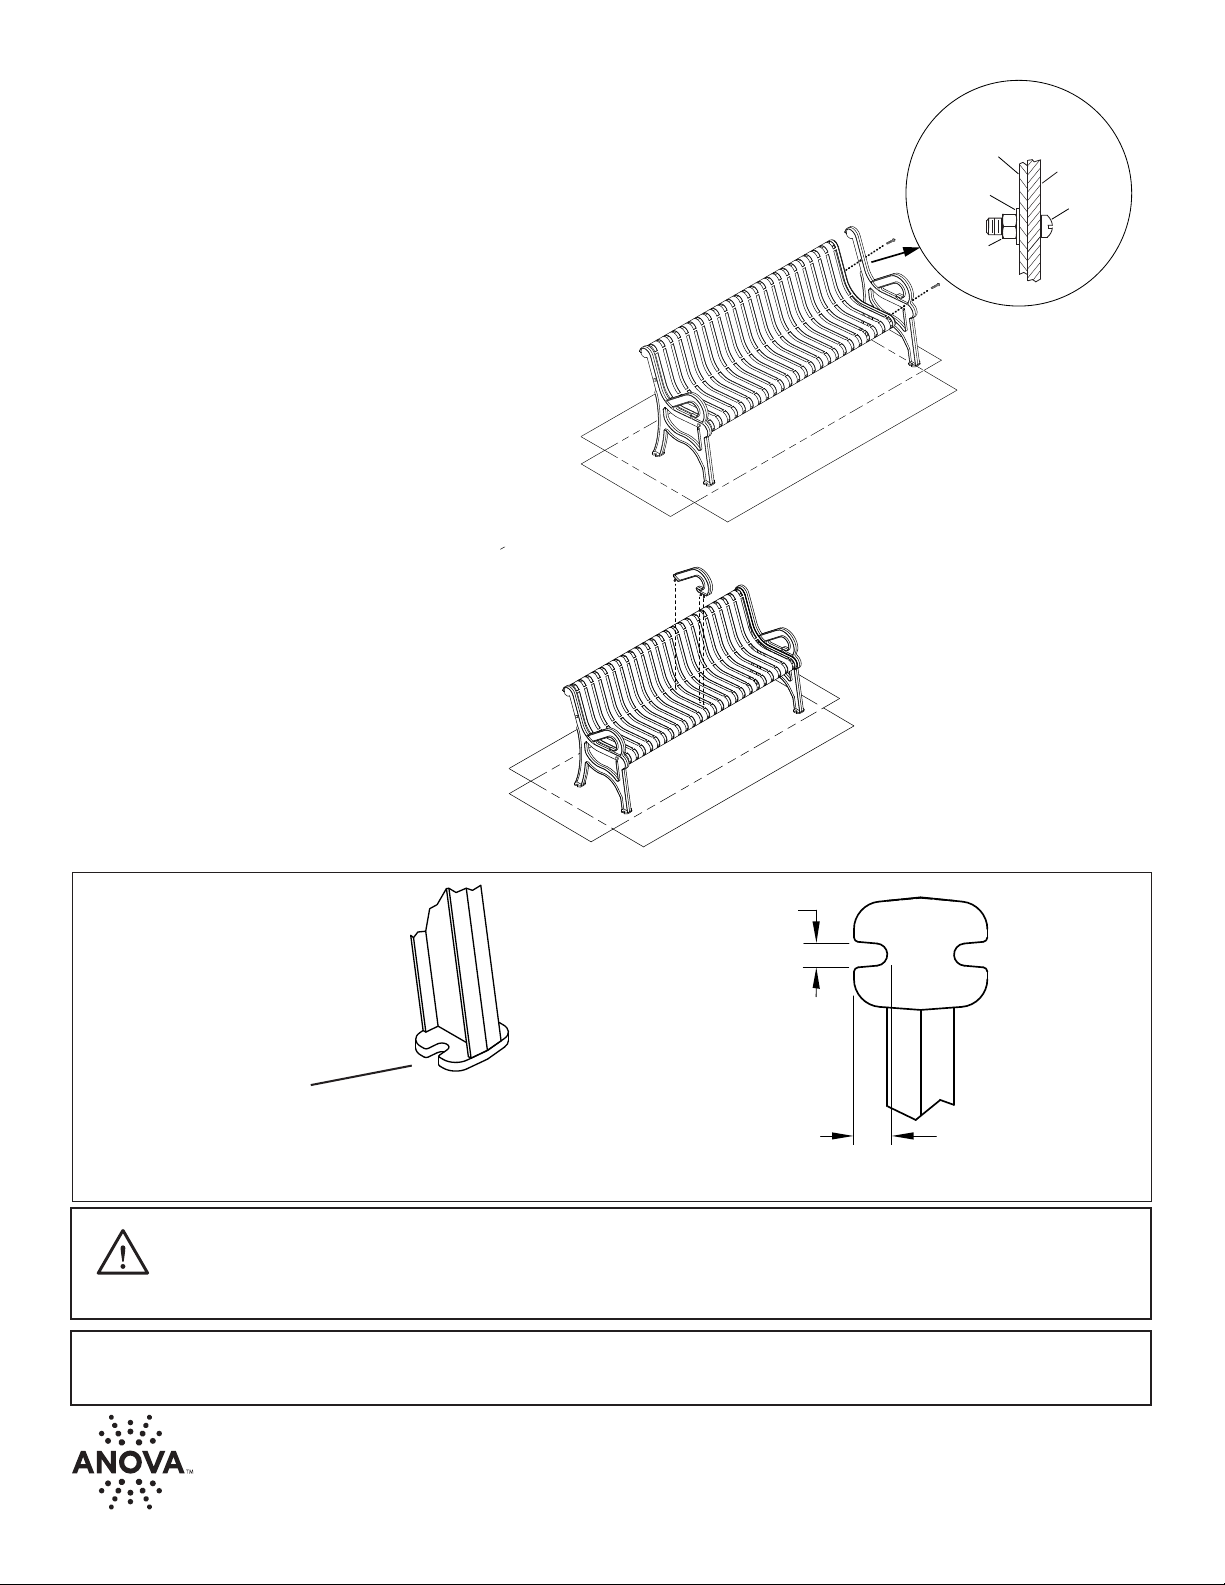
.50”
.66”
Bench End
Screw
Washer
Nut
Contour
Bench Seat
Bench End
Screw Washer
Nut
Contour
Bench Seat
Packaging plastic and
cardboard to avoid
scratching the product
.50”
.66”
The feet of the Bench Ends
feature a surface mount cutout
for securing the Bench with
customer supplied surface
mount hardware.
Bench End
Screw
Washer
Nut
Contour
Bench Seat
Bench End
Screw Washer
Nut
Contour
Bench Seat
Packaging plastic and
cardboard to avoid
scratching the product
.50”
.66”
Surface mount cutout dimensions
Install a Screw, Washer, and Nut through the other set
of mounting holes in that end of the Bench Seat. Again,
leave the hardware nger tight.
4. Attach the other Bench End to the Bench Seat as shown.
Leave the hardware nger tight so adjustments can be
made to level the Bench Seat.
5. Tighten the Bench Seat hardware using the Screwdriver
and Ratchet Wrench while checking the seat surface
with a Level; minor adjustments can be made while
tightening the hardware to make the seat level.
6. Retighten all hardware two weeks aer initial assembly.
Bench End
Screw
Washer
Nut
Contour
Bench Seat
Bench End
Screw Washer
Nut
Contour
Bench Seat
Packaging plastic and
cardboard to avoid
scratching the product
.50”
.66”
The Models L1360A L1506A benches
have three additional holes in the center
seat slat to mount a Center Armrest.
Position the Armrest with the threaded
studs inserted through the mounting
holes. Fasten the Armrest using a
Flat Washer and Nylock Nut on each
mounting stud.


