manuals.online logo
Brands
  1. Home
  2. •
  3. Brands
  4. •
  5. ANZ
  6. •
  7. Payment Terminal
  8. •
  9. ANZ POS MOBILE2 User manual

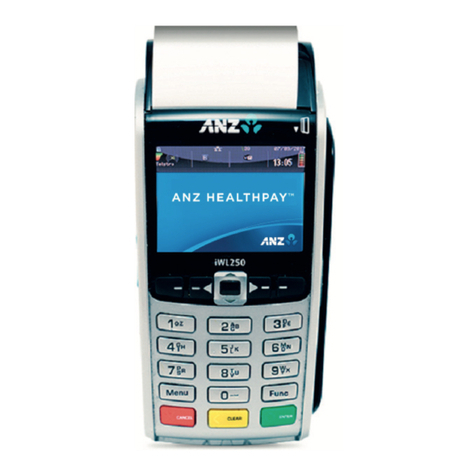
ANZ POS MOBILE2 User manual

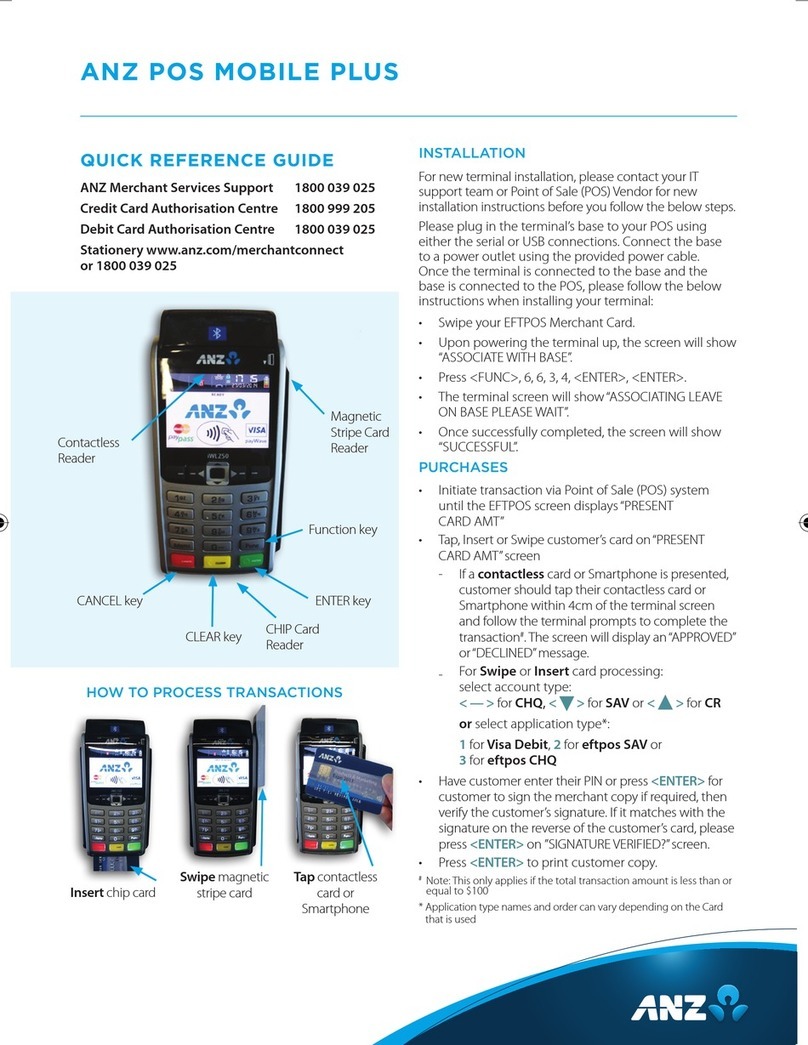
QUICK REFERENCE GUIDE
ANZ Merchant Services Support 1800 039 025
Credit Card Authorisation Centre 1800 999 205
Debit Card Authorisation Centre 1800 039 025
Stationery www.anz.com/merchantconnect
or 1800 039 025
PURCHASES
• Key in purchase amount on idle screen and
press <ENTER>
• Key in cash out amount (if required) or <ENTER>
to continue
• Confirm total amount is correct and press <ENTER>
• Tap, Insert or Swipe card on‘PRESENT CARD AMT’screen
- If a contactless card or Smartphone is presented,
customer should tap their contactless card or
Smartphone within 4cm of the terminal screen
and follow the terminal prompts to complete the
transaction*. An ‘APPROVED’ or ‘DECLINED’ message
will be displayed on the terminal.
- For Swipe or Insert card processing:
select account type:
< — > for CHQ,< > for SAV or <>for CR
or select application type#:
1for Visa Debit, 2for eftpos SAV or
3for eftpos CHQ
• Have customer enter their PIN^ or press <ENTER>
for customer to sign the merchant copy if required
• Verify the customer’s signature with the signature on
the reverse of the customer’s card. If signatures match,
press <ENTER> on‘SIGNATURE VERIFIED?’screen
• Press <ENTER> to print customer copy.
* This only applies if the total transaction amount is less than or equal
to $100.
# Application type names and order can vary depending on the Card
that is used.
^ If low value payment function has been switched on, PIN entry will
not be required for a credit purchase transaction that is equal to or less
than the respective scheme’s low value payment limit. Please refer to
ANZ POS Mobile
TM 2 Merchant Operating Guide for further information.
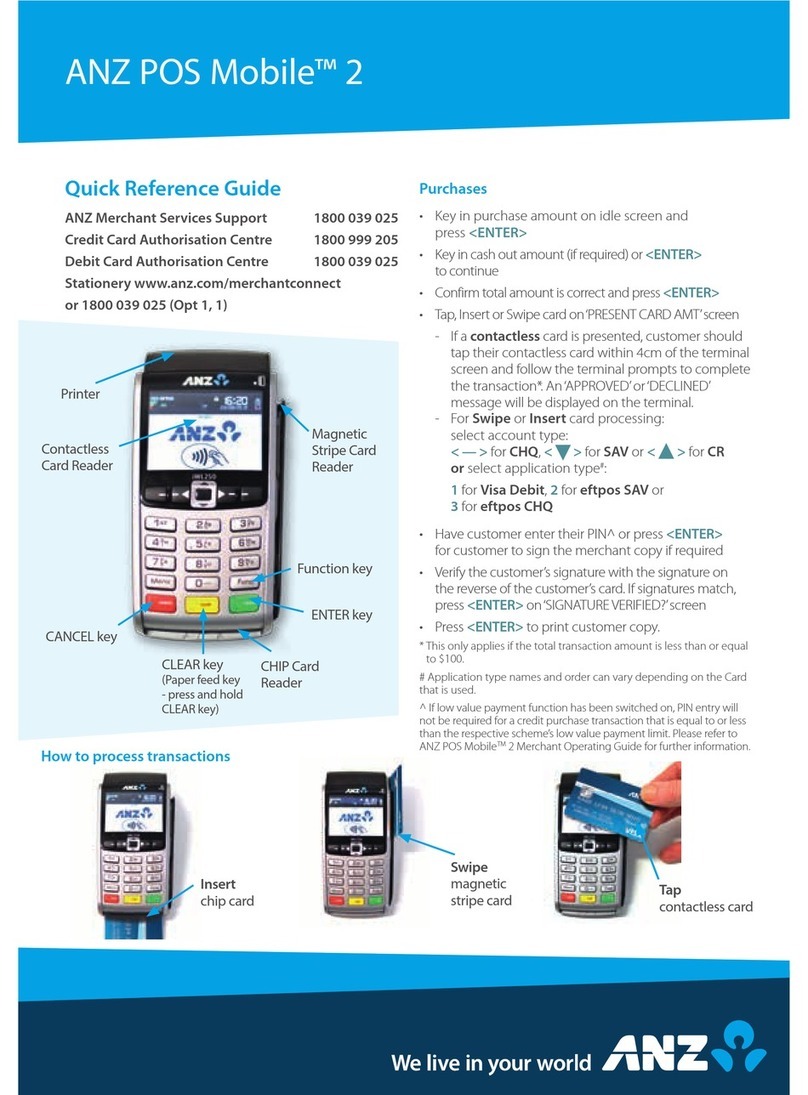
Swipe
magnetic
stripe card Tap
contactless card
or Smartphone
Insert
chip card
CANCEL key
CLEAR key
(Paper feed key
- press and hold
CLEAR key)
ENTER key
CHIP Card
Reader
Function key
Magnetic
Stripe Card
Reader
Contactless
Reader
Printer
HOW TO PROCESS TRANSACTIONS
ANZ POS MOBILE™ 2
REFUNDS
• Press <ENTER> until the ’ANZ EFTPOS MENU’
screen appears. Press the <>key to go to
’REFUND’ and then press <ENTER> or press the
number associated to it to select it
• Swipe your ANZ EFTPOS & multiPOS merchant
card (Terminal ID Card)
• Enter refund amount then press <ENTER>
• Confirm amount then press <ENTER>
• Tap, Insert or Swipe customer’s card on ’PRESENT
CARD RFND’ screen
• For Swipe or Insert card processing:
select account type:
< — > for CHQ,< > for SAV or <>for CR
or select application type#:
1for Visa Debit, 2for eftpos SAV or
3for eftpos CHQ
• Have customer enter their PIN if applicable or
press <ENTER> for customer to sign the merchant
copy if required
• Verify the customer’s signatures with the signature
on the reverse of the customer’s card. If signatures
match, please press <ENTER> on ‘SIGNATURE
VERIFIED?’ screen
• Press <ENTER> to print customer copy.
# Application type names and order can vary depending on the Card
that is used.
LAST TRANSACTION – COPY
• Press <ENTER> until the ‘ANZ EFTPOS MENU’ screen
appears. Press the <>key to go to “SUPERVISOR”
menu and then press <ENTER> or press the number
associated to it to select it
• Press <>key to go to ‘COPY’ and then press
<ENTER> or press the number associated to
it to select ‘COPY’option
PRINTING TOTAL REPORTS
• Press <ENTER> until the ‘ANZ EFTPOS MENU’
screen appears. Press the < > key to go to
‘REPORTS’ and then press <ENTER> or press
the number associated to it to select it
• Select‘TOTAL’by pressing the number associated to it
- SUB TOTALS: press the number associated
to it to select the Sub Totals Report (displayed
by card type – including AMEX & Diners)
- SUMMARY TOTALS: Press <>key to go
to ‘SUMMARY TOTALS’option and then press
<ENTER> or press the number associated to
it to select ‘SUMMARY TOTALS’Report (Complete
Summary Total – excluding AMEX & Diners)
- LAST TOTALS : Press <>key to go to ‘LAST
TOTALS’option and then press <ENTER>
or press the number associated to it for Last
Settlement Summary Total Report
- SHIFT TOTALS: press <>key to go to‘SHIFT
TOTALS’option and then press <ENTER> or press
the number associated to it
- SHIFT – press <>key to go to‘SHIFT TOTALS’
option and press <ENTER> or press the number
associated to it, then press <ENTER> to close
off shift & print report
- LAST – press <>key to go to‘SHIFT TOTALS’
option and press <ENTER> or press the number
associated to it, then <ENTER> to print last
shift totals
SETTLEMENT
ANZ offers same day settlement, every day. For ANZ
business account holders, funds are available on
the same day for transactions settled before 9.00pm
(Melbourne time) For non-ANZ business account holders,
ANZ transfers the funds to the merchant’s bank on the
following business day and the availability of the funds
will be determined by the merchant’s bank.
• Press <ENTER> until the ‘ANZ EFTPOS MENU’ screen
is displayed. Press the <>key to go to ‘REPORT’
menu then press <ENTER> or press the number
associated to it to select it
• Press <>button until‘SETTLEMENT’ is displayed
and press <ENTER> or press the associated number
to select it
- Select SUB TOTALS by pressing <>button
and press <ENTER> or the number associated
to it, then Subtotal will be printed. Or
- Select SUMMARY TOTALS by pressing the
<>button and press <ENTER> or the number
associated to it to print Summary total. Terminal
will proceed to settlement and settlement
receipt will be printed.
CLEARING ELECTRONIC FALL BACK
TRANSACTIONS
If you see an asterisk (*) displayed on your screen,
please follow this process to clear stored transactions.
• To clear EFB transactions press <Func> 8, 8,
<ENTER> <ENTER> <ENTER>
Note: The terminal will clear EFB transactions automatically after
being in idle mode for a certain amount of time.
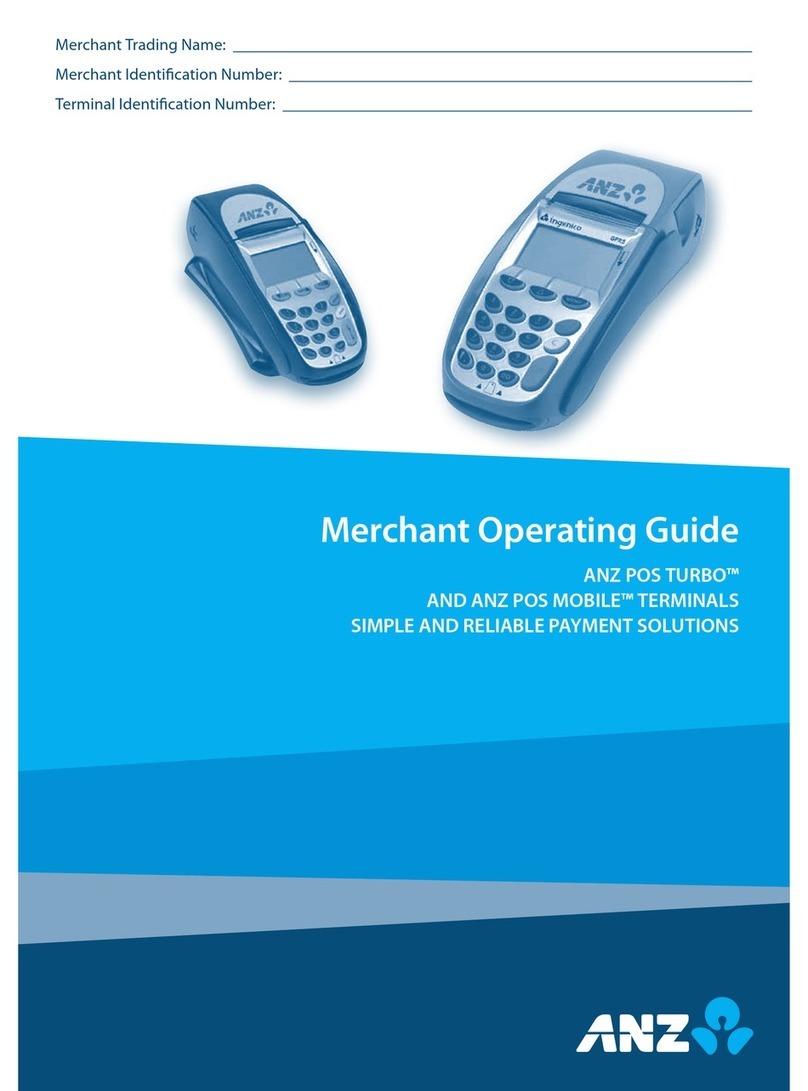
CHARGING THE TERMINAL BATTERY
• Place the base on a clear, flat surface near the
mains power outlet.
• Place the terminal on the base by securely
connecting the terminal to the docking connector
on the base
• Connect the base power supply to the base
socket as shown below
Example of connecting base power supply to the
base socket
• Connect the other end of base power supply to
the main power outlet on the wall
• Check that the plug symbol is displayed on the
upper right hand side of the terminal screen indicating
that the terminal is connected into the power outlet
• Check that the battery symbol is flashing or moving
on the terminal screen indicating that charging is
in progress.
HOW TO LOAD PRINTER PAPER
A red line will appear on the paper, indicating that
the paper roll must be replaced. To re-load a new roll:
• Open the paper compartment by lifting the
catch located at the rear of the terminal and
pull the cover to the rear of the terminal
• Insert the paper roll (diameter 40mm) in the
compartment
• Pull the paper up to the top of the terminal and
hold in position
• Maintain the paper roll position and close the lid
• Press the top of the lid in the centre until it clips
into position
Note: do not tamper with or remove the terminal housing
CONFIGURING COMMUNICATION MODE
If you require your terminal to change communication
modes between 3G, WIFI, IP or Dial-Up, please follow
the steps below.
1. Press <Func> 9, 9, 0, 5 and then press <ENTER>
2. At “Swipe Merchant Card” Press <ENTER>
3. Press <ENTER> to go to”COMMS MODE”Screen
4. Press 1 to select Dial-up communication mode Press
6 to select GPRS communication mode Press 7 to
select IP communication mode
5. Press <ENTER> until the ANZ main screen appears
How to Connect to WIFI Network:
Note: To connect to WIFI, ensure the Primary Comms Mode on the
terminal is set to 7 – IP
1. Press the right arrow key on the terminal
2. At Utility Function, type in 82077
3. Select Networks
4. Select New Network to scan for available networks
5. Select Automatic Scan
6. Select your desired network
7. Enter the WIFI password by using the letters and
numbers on the keypad and press ENTER
Note: For special characters, press‘0’repeatedly until you see the
desired character
8. The terminal will now display WIFI Network
Connected
9. On the top left corner of the screen the WIFI
Network will display.
6. Press <Func> 2, 4, 6, 8 <ENTER><ENTER>. “TMS
Logon Successful”should display on the terminal.
7. Press <Func> 8, 7 <ENTER><ENTER>. “ANZ
Initialisation Approved” should display on the
terminal.
TERMINAL FAULTS – SELF HELP
If your terminal is experiencing technical issues (e.g. blank
screen/screen is stuck) attempt the following steps:
1. Press <Func> 8, 6 <ENTER><ENTER>. The terminal will
Power Reset.
2. Press <Func> 2, 4, 6, 8 <ENTER><ENTER>. “TMS Logon
Successful” should display on the terminal.
Press <Clear> to go to Main Screen.
3. Press <Func> 8, 7 <ENTER><ENTER>. “Initialisation
Approved”should display on the terminal.
Press <Clear> to go to Main Screen. The terminal
is now ready to process a transaction.
If unsuccessful please contact ANZ Merchant Services on
1800 039 025 for further assistance.
Note: when terminal is not connected to the base, it can be switched off
by pressing and holding the <Func> and <Clear> key together.
To turn on press <ENTER> key.
TERMINAL SECURITY
Please ensure that the terminal is placed in a secure
location enabling the cardholder to use the keypad
without being observed by security cameras, CCTV
devices or by any other person.
Only authorised ANZ employees are permitted to install
or perform maintenance of your terminal.
ANZ CONTACTLESS PAYMENTS
A GREAT PAYMENT EXPERIENCE FOR YOUR
CUSTOMERS.
Contactless payments are becoming more and more
popular. With the phone at the centre of everyday life,
tap to pay mobile payments are fast becoming another
convenient way for customers to pay.
Mobile payments work the same way as contactless cards
for customer payments across all contactless terminals.
Customers simply add their eligible cards to their
compatible devices and then use it to tap and pay.
THINGS YOU AND YOUR STAFF NEED TO
KNOW.
Below are some steps you can follow to ensure your staff
and customers have a seamless payment experience;
• Ensure your terminal is easily accessible to customers.
• Always let the customer present their card or smart
device as they may need to hold the device to
authenticate transactions.
• Initially, customers may take a little longer with their
payment transactions as they find the ‘sweet spot’
with their device.
• For transactions over $100, customers may be
prompted to enter their PIN into the terminal.
Always follow the terminal prompts when
processing transactions.
If you’re not already accepting contactless payments,
contact us on 1800 086 325 to find out more on how we
can upgrade your device today.
SCENARIOS YOU MIGHT ENCOUNTER
Contactless payments can be made using a range of
products in market:
• Plastic Cards
• Smart Phones
• Wearables
Mobile payments give you and your customers the
processing speed of contactless transactions.
Australia and New Zealand Banking Group Limited (ANZ) ABN 11 005 357 522. Item No. 86685 06.2017 W5XXXX
anz.com

Other ANZ Payment Terminal manuals

ANZ POS MOVE User manual

ANZ

ANZ POS MOVE User manual

ANZ POS Mobile 2 User manual

ANZ

ANZ POS Mobile 2 User manual

ANZ multiPOS Turbo User manual

ANZ

ANZ multiPOS Turbo User manual

ANZ Worldline Move 5000 User manual

ANZ

ANZ Worldline Move 5000 User manual

ANZ POS Turbo 2 User manual

ANZ

ANZ POS Turbo 2 User manual

ANZ Worldline Move 5000 User manual

ANZ

ANZ Worldline Move 5000 User manual

ANZ POS PLUS Instruction sheet

ANZ

ANZ POS PLUS Instruction sheet

ANZ POS PLUS User manual

ANZ

ANZ POS PLUS User manual

ANZ TURBO User manual

ANZ

ANZ TURBO User manual

ANZ Medicare Easyclaim User manual

ANZ

ANZ Medicare Easyclaim User manual

ANZ HealthPay User manual

ANZ

ANZ HealthPay User manual

ANZ POS MOVE User manual

ANZ

ANZ POS MOVE User manual

ANZ POS Plus 2 User manual

ANZ

ANZ POS Plus 2 User manual

ANZ pos turbo plus User manual

ANZ

ANZ pos turbo plus User manual

ANZ POS Turbo Plus User manual

ANZ

ANZ POS Turbo Plus User manual

Popular Payment Terminal manuals by other brands

TELEPASS Electronic payment device user manual

TELEPASS

TELEPASS Electronic payment device user manual

XAC XCL AT-150 SERIES installation guide

XAC

XAC XCL AT-150 SERIES installation guide

VeriFone Vx700 installation guide

VeriFone

VeriFone Vx700 installation guide

PAX A80 Quick setup guide

PAX

PAX A80 Quick setup guide

Ingenico Link/2500 Connecting guide

Ingenico

Ingenico Link/2500 Connecting guide

Moneris vx810 duet user manual

Moneris

Moneris vx810 duet user manual

LUNU V1.0 user guide

LUNU

LUNU V1.0 user guide

Windcave Move 5000 quick start guide

Windcave

Windcave Move 5000 quick start guide

dejavoo Z8 Quick reference guide

dejavoo

dejavoo Z8 Quick reference guide

Moneris iCT250 manual

Moneris

Moneris iCT250 manual

Evo ingenico Move 3500 3G Setup guide

Evo

Evo ingenico Move 3500 3G Setup guide

Ingenico DESK/5000 Quick reference guide

Ingenico

Ingenico DESK/5000 Quick reference guide

Alberici Timebox B Operator's manual

Alberici

Alberici Timebox B Operator's manual

Poindus VariPOS D510 manual

Poindus

Poindus VariPOS D510 manual

paystone Verifone Vx520 quick start guide

paystone

paystone Verifone Vx520 quick start guide

POS-X TP4 All-in-One Guide

POS-X

POS-X TP4 All-in-One Guide

I-Tech ADTR-IP66 Series quick reference

I-Tech

I-Tech ADTR-IP66 Series quick reference

Global Payments Register Setup guide

Global Payments

Global Payments Register Setup guide

manuals.online logo
manuals.online logoBrands
  • About & Mission
  • Contact us
  • Privacy Policy
  • Terms and Conditions

Copyright 2025 Manuals.Online. All Rights Reserved.