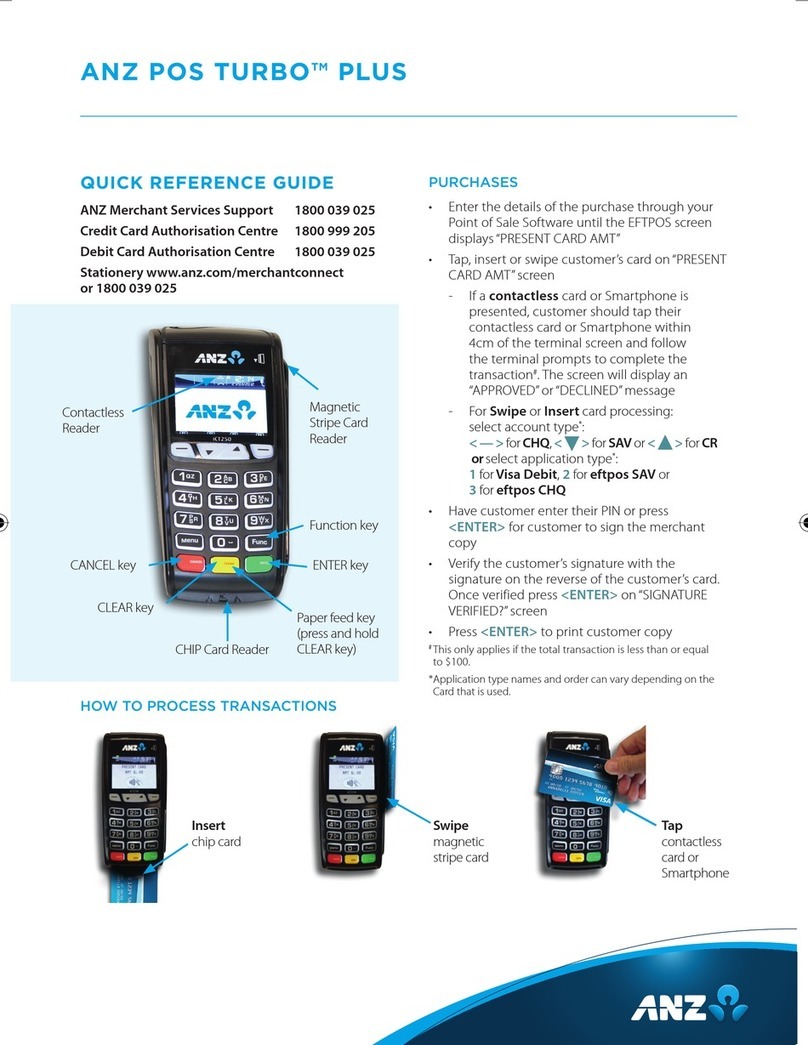
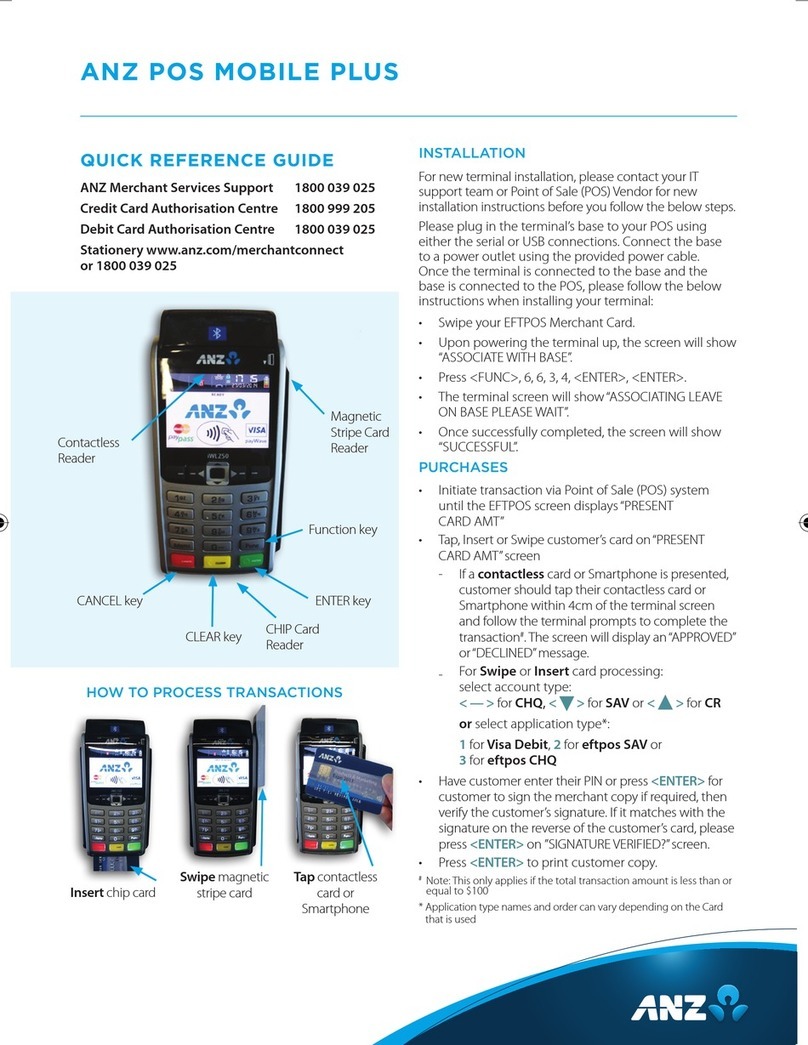
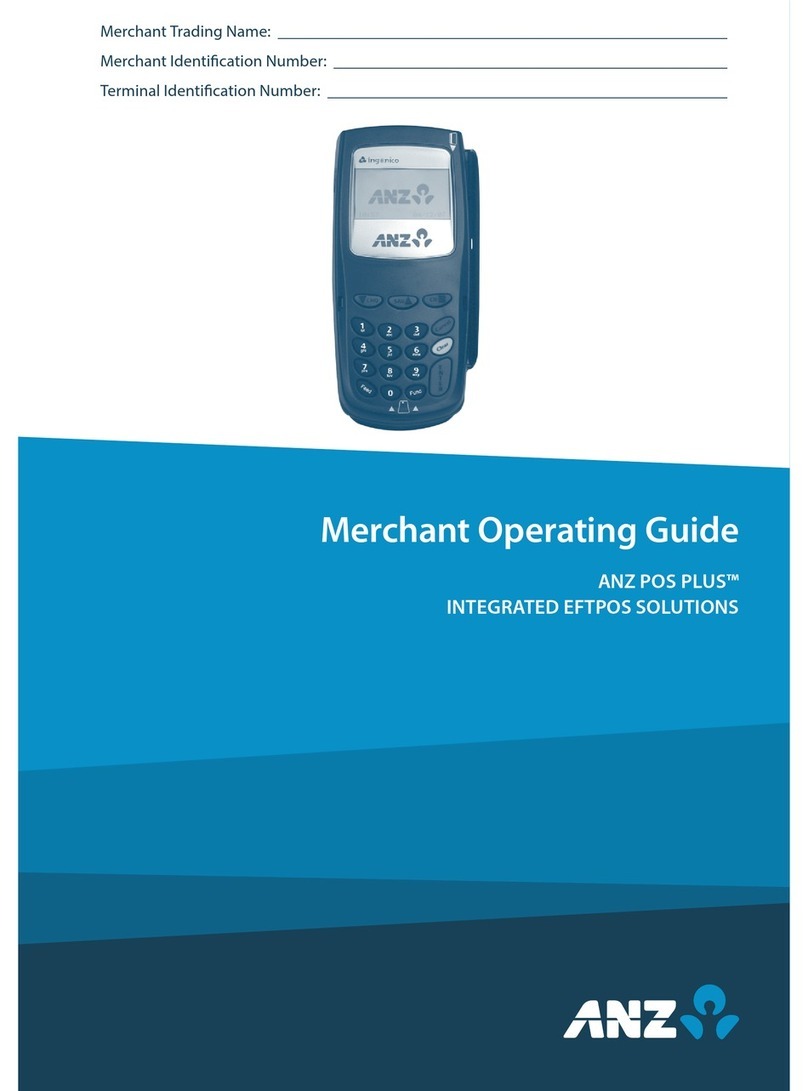
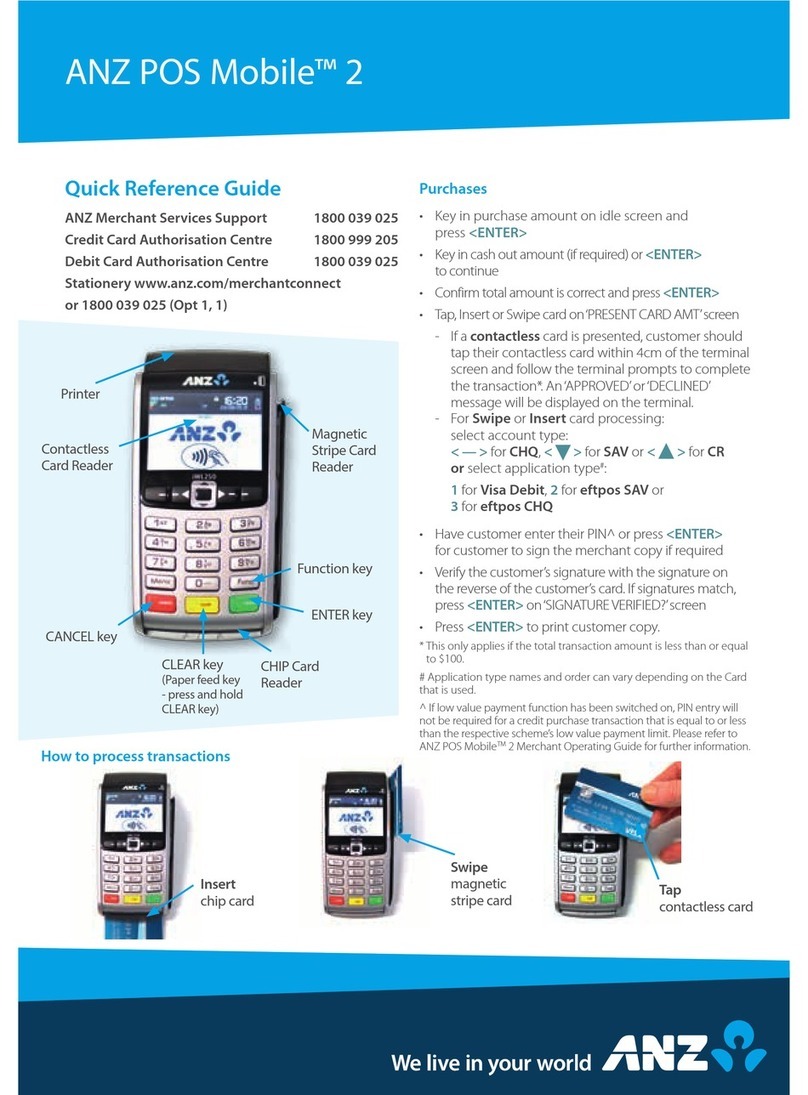
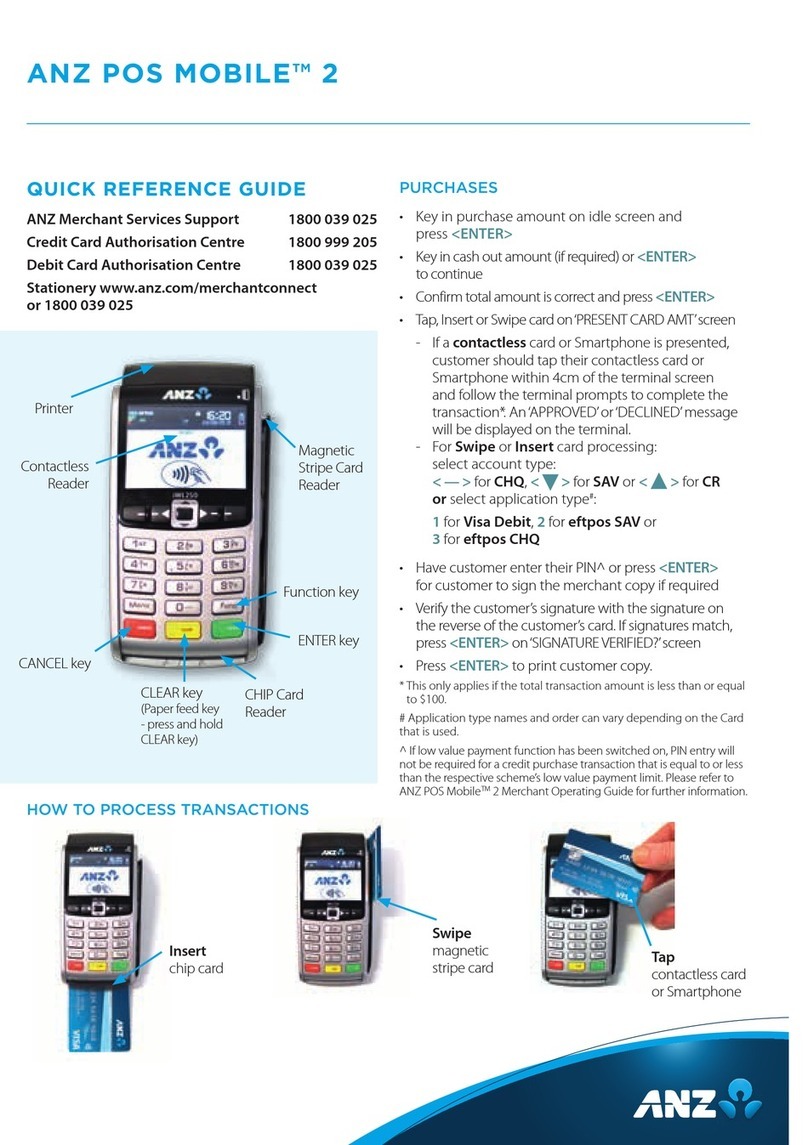
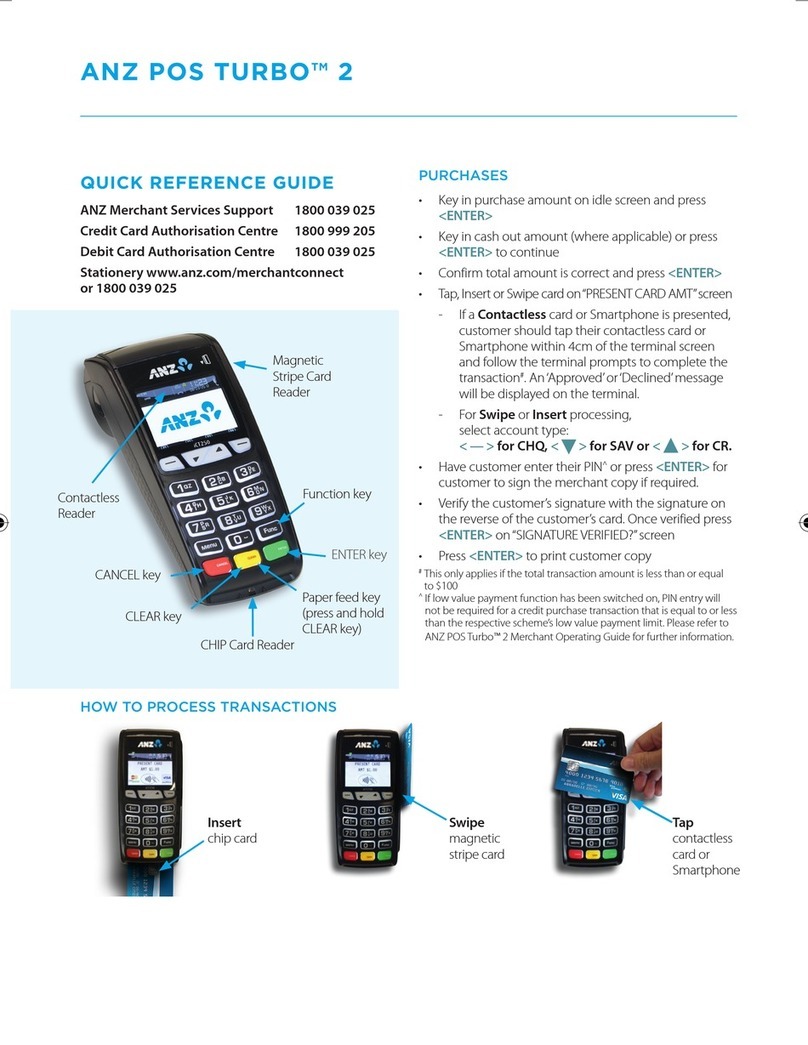
ANZ TURBO User manual

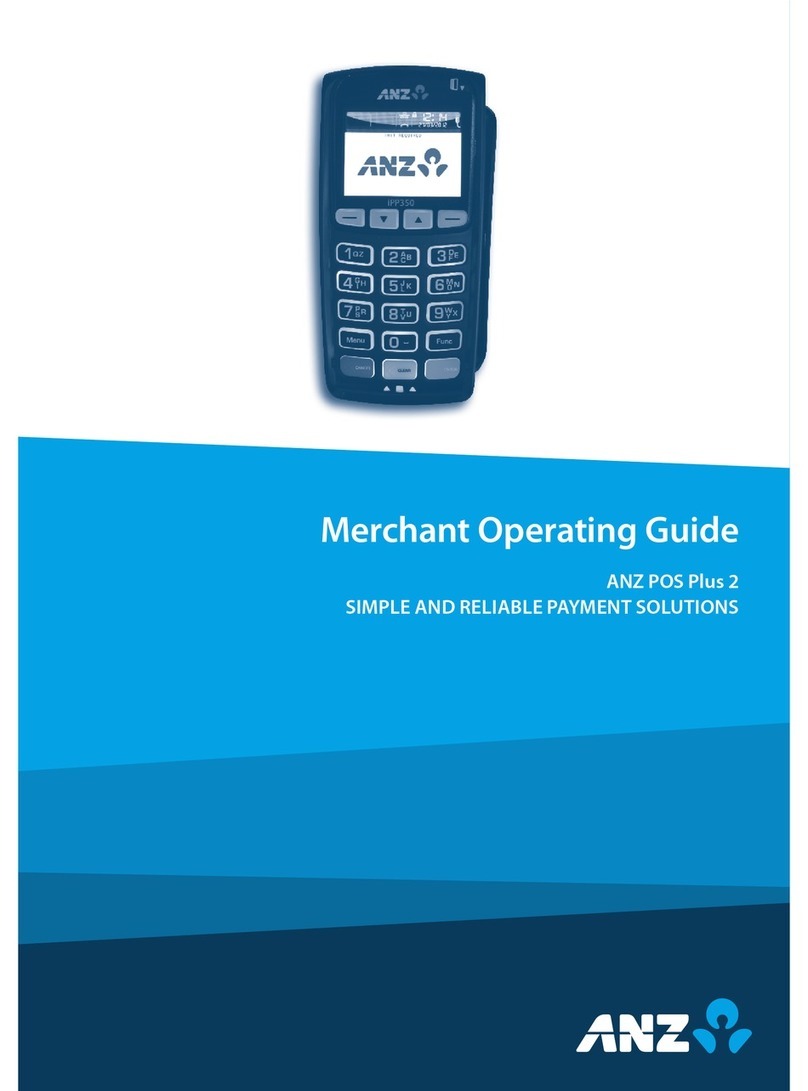
Merchant Operating Guide
ANZ POS TURBO™
AND ANZ POS MOBILE™ TERMINALS
SIMPLE AND RELIABLE PAYMENT SOLUTIONS
Merchant Trading Name:
Merchant Identication Number:
Terminal Identication Number:

2–3
Contents
1. Welcome 5
1.1 Merchant Agreement 5
1.2 Important Contact Details 5
1.3 Authorisation 6
1.4 Floor Limits 6
1.5 Change of Business Details 8
2. Cards You Can Accept 9
3. Merchant Cards 10
4. Equipment Maintenance 11
5. Stationery 11
6. Fraud Minimisation 12
7. Errors and Disputes 18
7.1 Typical Causes of Returns and Corrections 18
7.2 Chargebacks 18
8. ANZ POS Turbo 19
8.1 Terminal Features 19
8.2 Terminal Keypad 19
8.3 Card Reader 20
8.4 How to Load Printer Paper 21
9. ANZ POS Mobile 22
9.1 Terminal Features 22
9.2 Terminal Keypad 22
9.3 Card Reader 23
9.4 How to Load paper 23
9.5 Charge and Communication Points 24
9.6 Sim Card 24
9.7 Safety 25
10. Modes of Operation 27
10.1 Start Screen 27
10.2 Security Mode 27
10.3 Training Mode 28
11. Processing a Sale 30
11.1 How to Process a Cheque or Savings Purchase Transaction 30
11.2 How to Process a Credit Purchase Transaction using a Magnetic Stripe Card 31
11.3 How to Process a Credit Purchase Transaction using a Chip Card 32
12. Processing a Cash Out Only Transaction 35
13. Processing a Refund Transaction 37
14. Electronic Fallback Processing (EFB) 40

4–5
1. Welcome
We are excited to welcome you as an ANZ Merchant and look forward to a long association
with you.
This Operating Guide provides you with information on cards you can accept, ways to
reduce fraud and what to do if errors or disputes are incurred. Clear and easy-to-follow
instructions on how to process Transactions via your ANZ Terminal are provided by
showing the terminal screen displays and instructions on what you need to do when you
see these display screens.
Please take time to read this manual thoroughly and ensure that your sta read it too.
1.1 Merchant Agreement
Your ANZ Merchant Agreement contains valuable information and important
requirements relating to operating procedures. Instructions in this Merchant Operating
Guide form part of the ANZ Merchant Agreement and may be varied or replaced by ANZ
at any time.
ANZ strongly recommends that you follow the security checks and procedures in this
guide to assist in identifying and minimising fraudulent, invalid or unacceptable
Transactions.
ANZ may conduct an investigation if a Transaction is believed to be fraudulent. The
operators of the applicable card schemes may also conduct their own investigations.
Your Merchant Agreement outlines the circumstances in which you will be liable for such
Transactions. If it is found that you have processed invalid or unacceptable Transactions,
you may be liable for the value of those Transactions. Please refer to your Merchant
Agreement for more details.
1.2 Important Contact Details
ANZ Merchant Services (24 hours/7 days a week): 1800 039 025 or m[email protected]
Online Stationery Ordering: anz.com/merchantconnect
Authorisation Centre:
- Credit Cards (Visa and MasterCard®) 1800 999 205
- Charge Cards (Diners Club) 1800 331 112
- Charge Cards (American Express/JCB) 1300 363 614
- Debit Cards (Cheque/Savings Accounts) 1800 039 025
NOTE: Calls to 1800 numbers from a mobile phone will incur normal mobile phone charges.
15. Manual Transaction Processing 46
15.1 Paper Voucher Processing 46
15.2 Handkey (Manual Entry) Processing 53
16. Mail, Telephone and eCommerce Order Processing 55
16.1 How to Process a Mail Order Transaction 55
16.2 How to Process a Telephone Order Transaction 57
16.3 How to Process a eCommerce Order Transaction 59
17. Optional Features 61
17.1 Tip Transactions 61
17.2 Pre-Authorisation 67
17.3 Customer Preferred Currency 75
18. Terminal Error Messages 79
19. Settlement 82
20. Print Totals 83
21. Reprint the Last Record 87
22. Transaction Detail Report 88
23. Filing and Retention of Transaction Records and Vouchers 108

1.3 Authorisation
Your terminal is designed to automatically seek Authorisation from the cardholder’s Card
Issuer while processing an Electronic Transaction.
Authorisation conrms that the card number is a valid card number and that there are
sucient funds in the account. Despite a Transaction being ‘authorised’, the merchant
bears the risk that the customer is not the true cardholder.
Authorisation does not amount to verication that the Transaction is genuine nor does it
authenticate the customer.
NOTE:
• Authorisation of the Transaction does not mean that the true cardholder has authorised
the Transaction
• Authorisation does not protect the merchant from Chargebacks
• The bank, ANZ, cannot guarantee that a Transaction has been conducted by the true cardholder
Authorisation Declined
Where an Authorisation is declined, please seek an alternative method of payment.
If the customer cannot pay, the goods should be reclaimed. For goods that cannot be
reclaimed (eg. food items, petrol etc), request photographic identication such as a
Driver’s Licence or take a description of the person and arrange with the customer to
provide an alternative method of payment. If unsuccessful, report the incident to
the Police.
1.4 Floor Limits
A Floor Limit is a dollar amount set for a particular type of card Transaction processed via
your merchant facility. Please note, Floor Limits relate to all Transactions.
Your Letter of Oer outlines all Authorised Floor Limits that are specic to your business.
Some of these limits are specic to your business or industry, please insert these
Authorised Floor Limits in the appropriate spaces provided.
Authorised Floor Limits
Credit Card Floor Limits (including Visa and MasterCard Debit Transactions)
Manual (Imprinter): Please insert your Authorised Floor Limit
Electronic Fallback: Please insert your Authorised Floor Limit
Internet: $0
Mail Order & Telephone Order: $0
All Other Electronic Transactions: $0
6–7
Debit Card Floor Limits (not including Visa and MasterCard Transactions)
• Service stations, taxis/limousines, liquor and convenience stores $60
• Supermarkets $200
• All Other $100
Charge Card Floor Limits
Diners Club: American Express:
NOTE: A Zero Floor Limit applies to all Handkey Mail/Telephone Order and eCommerce Transactions.
You must phone the Authorisation Centre for Transactions over your Authorised Floor
Limit using the above phone numbers (refer to section 1.2) to verify if the account has
sucient funds available to cover the Transaction. If approval is not obtained for
Transactions above your Authorised Floor Limit, you risk the Transaction being
charged back.
When you contact the Authorisation Centre, a Transaction will be ‘approved’ or ‘declined’.
If declined, please advise the customer to contact the Card Issuer and seek an alternative
method of payment.
NOTE: An alpha character may be provided as part of the approval code. Select the numeric key
corresponding to the alpha character and press ‘SAV’ to scroll through options. Example: If character
‘C’ is required, select number ‘2’ on the pinpad and press the ‘SAV’ key until you scroll to character ‘C’,
then press ENTER.
NOTE: A Transaction may still be charged back despite being authorised by the Authorisation Centre.
Retain Card
If the Card Issuer has cancelled the card, the Authorisation Centre may ask you try to retain
the card.

1.5 Change of Business Details
Your ANZ Merchant Agreement describes various situations in which you must notify us of
a change to your circumstances.
Please contact ANZ Merchant Services on 1800 039 025 if there are any changes to your:
• Business name and/or address
• Business type or activities including changes in the nature or mode of operation
of your business
• Mailing address
• Ownership
• Bank/branch banking details
• Telephone or fax numbers.
Should your business be sold, cease to trade or no longer require an ANZ Merchant Facility,
please contact ANZ Merchant Services on 1800 039 025.
The ANZ Merchant Services General Conditions sets out your obligations when your
business is sold, ceases to trade or no longer requires an ANZ Merchant Facility.
You must ensure that all stationery, promotional material, Transaction Vouchers, Card
Imprinters and equipment (including Electronic Terminals) is returned to ANZ, based on
the closure instructions provided by ANZ Merchant Services.
Please Note: It is the authorised merchant’s responsibility to ensure that the Merchant
Facility is returned. Failure to do so, may result in the continual charge of Terminal Rental
Fees until all equipment is returned in accordance with condition 16(iv) of the ANZ
Merchant Services General Conditions.
8– 9
2. Cards You Can Accept
Credit Cards
Cardholders can use credit cards (MasterCard® and Visa) to access their credit card
accounts. Cardholders can also access cheque and savings accounts where those accounts
are linked to the credit card.
Cardholders can access these accounts through the ANZ terminal using their PIN (Personal
Identication Number) or signature.
Debit Cards (Bank-issued)
Issued by banks and nancial institutions, debit cards give cardholders access to funds
held in linked cheque or savings accounts but cannot be used to access funds from credit
card accounts.
Bank-issued debit cards require a PIN if processed through a terminal to operate. If they are
processed using Electronic or Paper Fallback, a signature would then be used.
Debit Cards (Scheme-issued)
Cardholders possessing a MasterCard or Visa debit card can select whether they use a PIN
or signature for their Transaction. Depending on the particular card that is used, the
terminal may prompt for signature only.
The cardholder should request the card to be processed as a ‘Debit’ Transaction if they
want to use a PIN or as a ‘Credit’ Transaction if they want the Transaction to be veried by
their signature.
Charge Cards
Processing charge cards is essentially the same as processing credit card Transactions. To
accept charge cards, you must have an agreement with the charge card Issuer (eg. Diners
Club, American Express and JCB).

3. Merchant Cards
You have been provided with two Merchant Cards. These are designed to assist you with
dierent tasks, including processing Refund Transactions and Manual Paper Voucher
Transactions.
Always keep your Merchant Cards in a safe place.
It is important that the correct cards are used at all times.
Replacement Merchant Cards can be ordered from ANZ Merchant Services on
1800 039 025.
multiPOS and EFTPOS Merchant Card
• To Authorise a Refund Transaction, swipe through
Magnetic Stripe Card Reader
• To exit Security Mode, swipe through Magnetic Stripe
Card Reader
• To imprint your manual EFTPOS Merchant Summary
Vouchers for cheque and savings Transactions
• As reference for your Terminal Identication Number
(TID).
Merchant Summary Card
Your Merchant Summary Card is required when you
imprint your Merchant Summary Voucher for Manual
Credit Card Transactions and as a reference for your ANZ
Merchant Identication Number (MID).
10–11
4. Equipment Maintenance
It is your responsibility to provide a clean operating environment for your terminal. Liquids
and dust may damage the terminal components and can prevent it from operating. To
order a Magnetic Stripe Card Reader Cleaner, please visit anz.com/merchantconnect or
contact ANZ Merchant Services on 1800 039 025.
Its important to clean your terminal regularly to maintain its operating eciency as you
may be charged if it is damaged. The terminal and screen may be wiped clean using a
damp cloth. Do not use abrasive materials. Use a soft brush to keep the keypad
dust-free.
NOTE: Please do not tamper with or remove the terminal housing. Do not disconnect your terminal’s
power supply or communication line unless instructed to do so by ANZ Merchant Services.
5. Stationery
You have been supplied with an initial stock of stationery including:
• 6 Paper Rolls (for electronic terminals only)
• 25 x Credit Card Summary Envelopes
• 25 x Credit Card Sales Vouchers
• 25 x Credit Card Refund Vouchers
• 25 x Merchant Summary Vouchers
• 25 x Cheque/Savings Summary Envelopes
• 25 x Cheque/Savings Sales Vouchers
• 25 x Cheque/Savings Refund Vouchers
• 25 x EFTPOS Summary Vouchers
• Magnetic Stripe Card Reader Cleaner
To re-order stationery, please visit anz.com/merchantconnect or contact ANZ Merchant
Services on 1800 039 025.

6. Fraud Minimisation
Before Commencing any Transaction:
• Conrm that you are authorised to accept that particular card
• Check whether the card appears damaged or altered
How to Safeguard Against Fraud:
• Do not let anyone service or remove your terminal without viewing proper
identication
• Do not allow equipment to be used by unauthorised persons
• Keep Merchant Cards secure from unauthorised use
• When making a manual imprint of a card, destroy the carbon (black) sheets
• Do not divulge cardholder information (eg. card names or numbers)
• Retain the card until you have completed the security checks and obtained
Authorisation for the Transaction
Is Your Customer Acting Suspiciously?
• Appear nervous, overly talkative or in a hurry
• Arrive on closing time
• Try to rush you or distract you
• Carry the card loose or by itself
• Have no means of identication
• Make numerous purchases under your Authorised Floor Limit
• Make purchases without regard to size, quality or price of goods
• Ask to split Transactions into smaller amounts
• Ask for Transactions to be manually entered
• Sign the Voucher or Transaction Voucher slowly or unnaturally
• Do not locate your terminal under a security camera or any other CCTV device
If You Are Suspicious:
• Ask for photographic identication (eg. Driver’s Licence or passport) and ensure that
the details match the cardholder’s name. Record the details on your copy of the
Transaction Voucher
• For MasterCard and Visa Transactions, call the Authorisation Centre on
1800 999 205 (select option 1)
• You may be asked a series of ‘YES’ or ‘NO’ questions to help the operator determine
whether you should proceed with the Transaction
NOTE: Never place yourself at risk - your safety comes rst.
Please report all fraudulent activities to the Police immediately.
12–13
Split Ticket Transactions
A Transaction may be deemed invalid and charged back to you if, in ANZ’s reasonable
opinion, it relates to one or more purchases made in the same merchant establishment
which have been split into two or more Transactions.
Fraud Minimisation for Credit Cards
The following checks are vital in helping you identify and minimise fraudulent credit card
Transactions via your ANZ Merchant Facility.
Card Front:
• Ensure that the name on the card is appropriate to the customer. Identity theft may
have occurred if you are presented with a card containing the name of a cartoon
character, a feminine name on a card presented by a male or other questionable
scenarios
• The printing on the card should look professional
• The card must have current validity dates (a card can only be used from the rst day of
the ‘valid from’ month to the last day of the ‘until end’ month)
• Cards should look 3-dimensional and contain familiar security features such as a
hologram, signature panel and CVC (explanation to follow). It should not appear
suspicious or be made of inferior material
Embossed Cards:
• The cardholder name and number should be raised and not attened (unless it is a
genuine unembossed card)
• The rst four digits of the embossed number must match the pre-printed four digits on
the card
• The embossing should be clear and even
Unembossed Cards:
• A cardholder name may or may not be included
• Can be used for electronic Transactions only
• The cardholder name and number are printed rather than raised
Signature:
• A signature should appear within the signature panel on the card
• The signature or signature panel should not appear to have been altered
• The customer’s signature on the Transaction Voucher should match the signature on
the card

Card Validation Code (CVC2):
The Card Validation security feature is
activated in all ANZ POS Terminals
when processing Mail Order and
Telephone Order Transactions. To
activate the CVC2 for other
Transactions please contact ANZ
Merchant Services on 1800 039 025.
If activated, a new screen will appear
when processing nancial
Transactions.
Card Validation Code.
Turn the cardholder’s credit card over and locate the last 3-digits of the number printed on
the signature panel. If the Transaction is initiated via mail, telephone or Internet, instruct
the cardholder to locate and quote the 3-digits on the signature panel.
Terminal Display
At this display screen, key in the Card Validation Code
then press ENTER.
NOTE: American Express cards have a four digit code located on the front of the card. Diners Club
cards have a three digit code on the reverse of the signature panel.
After Processing the Transaction:
• Check the card number details against those printed on the Transaction Record
• Ensure that ‘Approved’ or an approval number/code is printed on the Transaction
Record.
Fraud Minimisation for Debit Cards
The following procedures are vital in helping you identify and minimise fraudulent debit
card Transactions via your Merchant Facility.
Debit Transactions are to be processed by swiping the presented card and having the
customer enter their PIN or signature depending on the debit card type.
Cards Left at Premises
From time to time customers may accidentally leave their debit or credit cards behind at
your premises. To ensure any potential fraud is minimised and to better align with broader
industry practices, a change to existing handling process is required.
Upon discovering a card left at your premises, you are to perform the following tasks:
- Retain the card in a safe place for a period of up to two business days;
- Hand the card to the customer claiming the card only after having established the
claimant’s identity by comparing signatures; and
14–15
- If the requisite two business days have passed, destroy the card
Should the cardholder enquire about their missing card, instruct them to contact their
issuing institution.
PCI DSS and Data Storage
What is the Payment Card Industry Data Security Standard (PCI DSS)?
PCI DSS is a set of standards implemented by the Card Schemes, MasterCard – Site Data
Protection (SDP), and Visa – Account Information Security (AIS), to manage the risk to
merchants of data breaches or hacker access. The standards apply to all merchants who
store credit card data in any formation, have access to credit card details, or have systems
which enable internet access to their company by the public.
Benets to your business
• Ensuring the security of cardholder data can lessen the likelihood of a data breach
being traced back to your business
• Your business will experience continued patronage due to customers’ condence in the
secure storage of vital information
• Helps to identify potential vulnerabilities in your business and may reduce the
signicant penalties and costs that result from a data breach.
Failure to take appropriate steps to protect your customer’s payment card details means
you risk both nancial penalties and cancellation of your merchant facility in the event of a
data compromise.
Key areas of focus
PCI DSS covers the following six key principles:
• Build and maintain a secure network
• Protect cardholder data
• Maintain a vulnerability management program
• Implement strong access control measures
• Regularly monitor and test networks
• Maintain an information security policy
What you need to do
MasterCard and Visa have created a set of tools and resources to assist you to implement
the PCI DSS. Visa’s program is called Account Information Security (AIS). MasterCard’s
program is called Site Data Protection (SDP).
For more information on working towards PCI DSS compliance, visit the PCI Security
Standards Council website at: pcisecuritystandards.org/index.shtml
Storage of prohibited cardholder data
As a merchant, it is vital to protect your customers as well as your business against misuse
of credit & debit account information. It is essential that you do not store prohibited
cardholder data after a transaction is completed.
VERIFICATION NO?
Specic data such as a cardholder name, account number and the expiration date may be
stored, but only if stored in accordance with the Payment Card Industry Data Security
Standard (PCI DSS).
Prohibited cardholder data including magnetic stripe data (track data), and Customer
Verication Value (CVV) must not be stored after a transaction is complete.
For more information into storage of prohibited data and processing procedures, please
visit visa-asia.com/secured
Manual Debit Card Processing Procedure
If you are unable to process a debit Transaction online due to a terminal, communications
or system failure, you may choose to process the Transaction using the Manual Paper
Voucher system. Please report any terminal, communications and system failures to ANZ
Merchant Services immediately and obtain Authorisation to process the debit Transaction
manually.
Under no circumstances is a Debit Card Transaction to be processed as a Manual
Transaction where the card’s magnetic stripe is damaged or is unable to be read
by the Electronic Terminal. If this occurs please seek an alternative payment
method from the cardholder.
Before manually processing any other debit Transactions, you must swipe the
cardholder’s card through the terminal to check if the failure has been rectied.
NOTE: The correct Paper Voucher should be used for the type of card being used and account being
accessed. Please ensure you are using the correct Vouchers before processing the Manual Transaction
(for more information, please refer to section 15.1)
Authorisation must be obtained for all Transactions over your Authorised Floor Limit. (For
more information on Authorised Floor Limits refer to section 1.4)
A Manual Debit Card Voucher is NOT to be prepared when the terminal error message
indicates:
• Card damage
• Card error refer
• Card not accepted
• Invalid expiry date
Another form of payment should be requested in this case.
Terminal Security
Your ANZ EFTPOS terminal is equipped with a number of in-built innovative security
features which are designed to protect your customers’ information. By implementing the
recommendations below, you can help protect your business, your customers and your
reputation from credit and debit card fraud or misuse.
16– 17
Recommendations
• Always ensure that terminals are secure and under supervision during operating hours
(including any spare or replacement EFTPOS terminals you have)
• Ensure that only authorised employees have access to your EFTPOS terminals and are
fully trained on their use
• When closing your store or kiosk, always ensure that your EFTPOS terminals are securely
locked and not exposed to unauthorised access
• Never allow your EFTPOS terminal to be maintained, swapped or removed without
advance notice from ANZ - be aware of unannounced service visits Only allow
authorised ANZ personnel to maintain, swap or remove your EFTPOS terminal, and
always ensure that security identi cation is provided
• Inspect your EFTPOS terminals on a regular basis, to ensure that the terminal casing is
whole with external security stickers remaining unbroken and of a high print quality
• Ensure that there are no additional cables running from your EFTPOS terminal
• Make sure that any CCTV or other security cameras located near your EFTPOS
terminal(s) can not observe Cardholders entering details
Important
Notify ANZ Merchant Services (24 hours / 7 days a week) on 1800 039 025 immediately if:
- Your EFTPOS terminal is missing
- You, or any member of your sta, is approached to perform maintenance, swap or
remove your EFTPOS terminal without prior notication from ANZ and/or Security
Identication is not provided
- Your EFTPOS terminal prints incorrect receipts or has incorrect details
- Your EFTPOS terminal is damaged or appears to be tampered with

8. ANZ POS Turbo
This Operating Guide provides everything you need to know about processing debit and
credit Transactions using your ANZ POS Turbo terminal. This terminal is designed to accept
payment using Magnetic Stripe and Chip Cards.
Please take time to read it thoroughly and ensure that your sta read it too.
8.1 Terminal Features
The ANZ POS Turbo terminal incorporates a backlit graphic screen with large graphic
display, 18-key backlit keypad and thermal ‘easy loading’ printer.
8.2 Terminal Keypad
‘SOFT-FUNCTION’ KEYS – CHQ (Green), SAV (Green) and CR (Red)
These soft-function keys allow you to access the particular account type required.
They are also used as function keys for special features such as security.
NUMBER KEYS (Black)
Use the number keys to enter in the Transaction amounts, Authorisation Numbers and
when the handkey function is required.
18–19
Paper FEED key
CHQ, SAV & CR
(soft-function keys)
CANCEL key
CLEAR key
ENTER key
Function key
Printer
Chip Card Reader
Magnetic Stripe
Card Reader
7. Errors and Disputes
A Return and Correction (R&C) refers to a Voucher from a debit or credit card Transaction
that cannot be processed consequently the Transaction is debited from your bank account
and returned to you for correction.
7.1 Typical Causes of Return and Corrections
• Incorrect Vouchers used and incorrect additions on Merchant Summary Vouchers
• Incomplete information eg. card imprint cannot be read on the Voucher
• Banking of Vouchers from other Schemes eg. American Express
When you receive a R&C, an explanation will be given as to why it cannot be processed.
Make sure you rectify the problem before re-submitting the Voucher for processing.
Please ensure that the corrected Vouchers are submitted as soon as possible to ensure that
the Issuing Bank does not reject them as a result of being banked out of time.
7.2 Chargebacks
Please refer to the General Conditions of your ANZ Merchant Agreement. You may be
charged back for the value of a credit or debit (Schemes-issued) card sale where you have
failed to follow the Bank’s procedures as stated in this Merchant Operating Guide or in the
General Conditions of your ANZ Merchant Agreement.
NOTE: You must retain information about a Transaction whether processed manually or
electronically for a period of 30 months from the date of the Transaction or such other period
required by Law or notied by ANZ.
Chargebacks can occur for a number of reasons:
• A Transaction has been processed using an invalid card ie. the card has expired or is not
yet valid
• A sale over your Floor Limit is processed without Authorisation
• A split sale is processed using two or more Vouchers
• A credit Voucher was not processed for returned goods
• A sale is processed without the cardholder’s authority
A Transaction can also be charged back to you if a cardholder disputes a Transaction and
you are unable to produce copies of the relevant Transaction Vouchers.
NOTE: The examples given above are not an exhaustive list of the circumstances in which a
Transaction may be charged back to you. Please refer to the General Conditions of your Merchant
Agreement for further information on Chargebacks.
If you need assistance understanding a particular Return and Correction or Chargeback,
please contact ANZ Merchant Services on 1800 039 025 (24 hours a day, 7 days a week).

8.4 How to Load Printer Paper
• It is recommended that you
switch o the terminal’s
power supply before
loading paper
• Lift the paper compartment
cover
• Remove the empty paper roll
• Drop in the new paper roll
with the cut end of the roll
protruding from underneath.
No feeding of the paper
through rollers is required
• Firmly close the cover, turn the
terminal power on and press
the paper FEED button
NOTE: Do not tamper with or remove the terminal housing
20–21
FEED key
Metal blade to
tear o paper
Paper compartment cover
ENTER (Green)
The ENTER key will turn the terminal on. It also conrms that all values and details
(including signatures and PINs) are correct in the EFT portion of the purchase, cash-out
(refer to section 12) and Refund Transactions (refer to section 13). It conrms that the
Transaction can be sent to the Bank for verication and approval. It is also used to cycle
forward through the soft-function key menus.
CANCEL (Red)
The CANCEL key is used to cancel the current function and return the terminal to the idle
state. It is also used to cycle backwards through the soft-function key menus.
CLEAR (Yellow)
Press the CLEAR key to correct any invalid data entry. The CLEAR key will also cycle
backwards through the Transaction steps if an error is made.
FUNC (Black)
Use the FUNC key to access the terminals function menus and Manual Handkey processing.
FEED (Black)
Use the FEED key to perform a 20mm paper feed.
8.3 Card Reader
Magnetic Stripe Card Reader
The card can be read via the Magnetic Stripe Card Reader
located on the right hand side of the terminal.
The card can be read by swiping from the top to the
bottom of the terminal (or vice versa), with the magnetic
stripe facing down towards the terminal.
Use a regular movement to ensure a reliable card reading.
Chip Card Reader
Insert the Chip credit or debit card horizontally into the bottom of
the terminal with the metal chip facing upwards. Leave the Chip
Card in this position throughout the Transaction.
The Chip credit or debit card can be removed from the terminal
when signature verication is required or as instructed by the
terminal.

22–23
9. ANZ POS Mobile
9.1 Terminal Features
The ANZ POS Mobile terminal incorporates the keypad and thermal printer. It also includes
a battery charger to plug into the rear of the terminal.
9.2 Terminal Keypad
‘SOFT-FUNCTION’ KEYS – CHQ (Green), SAV (Green) and CR (Red)
These soft-function keys allow you to access the particular account type required. They are
also used as function keys to access special features such as security.
NUMBER KEYS (black)
Use the number keys to enter in the amount of Transactions, authorisation numbers and
when the handkey function is required.
ENTER (Green)
The ENTER key will turn the terminal on. It also conrms that all values and details
(including signatures and PINs) are correct in the EFT portion of the purchase, cash out
(refer to section 12) and refund Transactions (refer to section 13). It conrms that the
Transaction can be sent to the Bank for verication and approval. It is also used to cycle
forward through the soft-function key menus.
CANCEL (Red)
The CANCEL key is used to cancel the current function and return the terminal to the idle
state. It is also used to cycle backwards through the soft-function key menus.
CLEAR (Yellow) Press the CLEAR key to correct any invalid data entry. The CLEAR key will
also cycle backwards through the Transaction steps if an error is made.
Chip Card Reader
Magnetic Stripe
Card Reader
Paper FEED key
CHQ, SAV & CR
(soft-function keys) CANCEL key
CLEAR key
ENTER key
Function key
Printer
Paper
compartment
cover
FEED key
Metal blade to
tear o paper
FUNC (black)
Use the FUNC key to access the terminal’s function menus and handkey processing.
FEED (black)
Use the FEED key to perform a paper feed from the printer.
9.3 Card Reader
Magnetic Stripe Card Reader
The card can be read via the Magnetic Stripe Card
Reader located on the right hand side of the
terminal.
The card can be read by swiping either from the top
to the bottom of the terminal (or vice versa), with
the magnetic-stripe pointing face-down towards
the terminal.
Use a regular movement to ensure a reliable card reading.
Chip Card Reader
Insert the Chip credit or debit card horizontally into the
bottom of the terminal with the metal chip facing upwards.
Leave the Chip Card in this position throughout the
Transaction.
The Chip credit or debit card can be removed from the
terminal when signature verication is required or as
instructed by the terminal.
9.4 How to Load Printer Paper
• Lift the paper compartment cover
• Remove the empty paper roll
• Drop in the new paper roll with the
cut end of the roll protruding from
underneath. No feeding of the
paper through rollers is required
• Close the cover and press the paper
FEED button
Note: Do not tamper with or remove the terminal housing.

9.7 Safety
Your Mobile terminal uses GPRS (General Packet Radio Service) technology to provide
high-speed data transmission. It is rare, but in some circumstances, GPRS technology may
cause a risk of personal injury and/or damage to property.
As a result, you should note the following important warnings and always exercise caution
in operating, storing and transporting your Mobile terminal.
In-Car Safety
Using your Mobile terminal while in a vehicle may interfere with the vehicle’s electronic
systems and, in some cases, may cause malfunctions in those electronic systems (eg. ABS
anti-lock systems, fuel injection systems).
Although most electronic equipment is shielded from radio frequency energy, GPRS
technology may aect some damaged or improperly shielded electronic equipment.
Please check with your vehicle manufacturer to determine if on-board electronic
equipment is adequately shielded from radio frequency energy.
Medical Electronic Equipment
Please consult the manufacturer of any personal medical devices (such as pacemakers or
hearing aids) to determine if they are adequately shielded from any external radio
frequency energy.
You must turn o your terminal in health care facilities if instructed by any signs in
the area.
Aircraft
Your Terminal must be turned o before boarding any aircraft unless given permission by
the crew. The terminal should not be used in the air.
Children
Please store your terminal in a secure area. Children should not play with your Mobile
terminal as they may injure themselves or damage the terminal.
Blasting Areas
To avoid potentially interfering with blasting operations, please turn your unit o when in
a “blasting area” or in areas that state: “Turn o Two-Way Radio”. As an example,
construction crews often use remote control radio frequency devices to set explosives.
24–25
9.5 Charge and Communication Connection Points
The ANZ POS Mobile has two connection points on the back of
the terminal (below the printer cover).
The connection points include:
• Power Connector
• Serial Connector (for use by the manufacturer only)
Battery
The ANZ POS Mobile terminal features a 7.2 V / 1600
mAH Li-Ion (Lithium Ion) battery that will allow a
minimum of 100 basic Transactions to be completed
with one fully charged battery. A full charge of the
battery will take up to 4 hours to complete.
The plug symbol shown on the upper left hand side of the display screen indicates that the
device is connected into the power socket in the wall.
“Bar Scrolling” on the terminal’s display indicates that
charging is in progress.
Before commencing a shift, it is important to fully charge
the battery to ensure the maximum number of
Transaction can be completed.
The terminal has a “power down” default of 10 minutes to
help conserve battery life. The “power down” feature
allows the terminal to switch o automatically after 10
minutes of inactivity. Timing can be altered by contacting
ANZ Merchant Services on 1800 039 025.
9.6 SIM Card
A SIM Card is provided with your ANZ Mobile
terminal. If your SIM Card cannot be read or has not
been inserted, the following symbol will be displayed
on your screen.
The symbol may also be displayed if the terminal is
unable to nd network coverage or is not connected
to the network.
Not Used
Battery Charger Connection
01/01/2010 12:08
SWIPE
CARD
01/01/2010 12:08
SWIPE
CARD

10. Modes of Operation
10.1 Start Screen
Your ANZ terminal is ready to begin accepting Transactions.
10.2 Security Mode
Security Mode is used to prevent unauthorised use of the terminal when it is left
unattended.
NOTE: Your multiPOS and EFTPOS Merchant Card must be used to exit Security Mode. Please ensure
that the card is available prior to entering Security Mode.
How to Enter Security Mode
From the start screen, keep pressing ENTER until the
‘Supervisor’ screen is displayed.
Select XTRA from the menu by pressing the CHQ
soft-function key.
Press 1 to enter Security Mode.
Press ENTER to conrm Security Mode is required.
This screen will display when the terminal is locked in
Security Mode.
SECURITY MODE?
ENTER OR CLEAR
TERMINAL FUNCTIONS
Supervisor
XTRA INIT COPY
SWIPE
OR
INSERT
CARD
SWIPE OR
INSERT
CARD
01/01/2010 12:08
SWIPE OR
INSERT
CARD
01/01/2010 12:08
26–27
Potentially Explosive Atmospheres
Your terminal should be turned o when in any area with a potentially explosive
atmosphere. It is rare, but in some cases, your terminal could generate sparks which may
cause a re risk or other hazard.
Examples of areas with a potentially explosive atmosphere include fuelling areas such as
petrol stations, below decks on boats, fuel or chemical transfer or storage facilities and
areas where the air contains chemicals or particles such as grain, dust or metal powders.
Please ensure that you do not transport or store ammable gas, liquid or explosives in the
same compartment as your terminal.
Before using your terminal in a vehicle powered by liqueed petroleum gas (such as
propane or butane), ensure that the vehicle complies with the relevant re and safety
Australian regulations.

Transactions can be processed from this point (ie.
initialisation, purchase, cash-out, refund, totals,
settlement and the reprint last record function).
The merchant name and address for all Transaction
Records is replaced with:
ANZ BANK
***TRAINING ONLY***
NOT A VALID TRANSACTION
The message lines at the bottom of the receipt will not be printed and the Terminal ID will
always be 12345678901.
Log on, Transaction, totals, settlement and reprint receipt functions are available in
training mode.
NOTE: Remember to exit Training Mode to process ‘live’ Transactions.
How to Exit Training Mode
Press the FUNC key.
Key in 9999 then press ENTER.
Press CLEAR. The start screen will be displayed to
allow Transactions.
TRAINING MODE
ENTER OR CLEAR
FUNCTION
SWIPE
OR
INSERT
CARD
28– 29
SWIPE OR
INSERT
CARD
01/01/2010 12:08
How to Exit Security Mode
Swipe your multiPOS and EFTPOS Merchant Card.
The start screen will be displayed to begin
10.3 Training Mode
Training mode is an ideal tool for familiarising yourself and your sta with basic functions.
NOTE: Only magnetic stripe Transaction training is supported.
How to Enter Training Mode
Press the FUNC key.
Key in 9999 then press ENTER.
Press ENTER.
SWIPE
OR
INSERT
CARD
TRAINING MODE
ENTER OR CLEAR
FUNCTION
SWIPE OR
INSERT
CARD
01/01/2010 12:08

11.2 How to Process a Credit Purchase Transaction using a Magnetic Stripe Card
Perform card security checks then swipe the
cardholder’s card.
Key in the purchase amount then press ENTER.
Press ENTER. (Cash-out is not available from credit
card accounts).
Verify the amount is correct and accept by pressing
ENTER.
Select CR for credit account.
The selected account is displayed.
Have the cardholder enter their PIN if known then
press ENTER or just press ENTER.
The terminal prints a signature record.
Have the customer sign this and compare it to the
signature on the reverse of the customer’s card.
PURCHASE AMOUNT
$600
CASH OUT AMOUNT
$0
TOTAL AMOUNT
$600
CHEQUE ACCOUNT
$600.00 KEY PIN
PROCESSING
PLEASE WAIT
SIGNATURE
REQUIRED
SELECT ACCOUNT
CHQ SAV CR
SWIPE OR
INSERT
CARD
01/01/2010 12:08
30–31
11. Processing a Sale
11.1 How to Process a Cheque or Savings Purchase Transaction (Applies to both
Magnetic Stripe and Chip Cards)
Except in the case of purchases in separate departments within a retail outlet, you must
include all items, goods and services purchased in a single Transaction for the total amount of
such purchases, except in the case of a partial payment or delayed delivery situation. Please
refer to the General Conditions, Section 6(iv) for further information on these exceptions.
Perform card security checks then swipe or insert the
cardholder’s card. (Magnetic Stripe cards are to be
swiped through the Magnetic Stripe Card Reader
whereas Chip Cards are to be inserted and left in the
Chip Card Reader.)
Key in the purchase amount then press ENTER.
Key in the cash amount using the numeric keys if
cash-out is required. If not, just press ENTER. (Cash-
out is not available from credit card accounts).
Verify the amount is correct and accept by pressing
ENTER.
Select CHQ for cheque account or SAV for savings
account.
The selected account is displayed.
Have the cardholder enter their PIN then press ENTER.
Please ensure that you check for approval of the
Transaction before completing the sale.
Press ENTER to print the customer copy or CLEAR to
return to the start screen.
NOTE: If the Transaction is rejected, the terminal displays an error message outlining the reason.
Notify the customer, advise them to contact their Card Issuer and seek an alternative form of
payment.
PURCHASE AMOUNT
$600
CASH OUT AMOUNT
$0
CUSTOMER COPY?
ENTER OR CLEAR
TOTAL AMOUNT
$600
CHEQUE ACCOUNT
$600.00 KEY PIN
PROCESSING
PLEASE WAIT
APPROVED
SELECT ACCOUNT
CHQ SAV CR
SWIPE OR
INSERT
CARD
01/01/2010 12:08

Select CR for credit account.
The selected account is displayed.
Press ENTER.
The terminal prints a signature record.
Have the customer sign this and compare it to the
signature on the reverse of the customer’s card.
Remove the card from the terminal. If the signatures
match, press ENTER. If not, press the CANCEL or
CLEAR key to abort the Transaction.
If the Transaction is approved, this screen is displayed
and a customer copy is printed. Please check for
approval of the Transaction before completing the
sale. If rejected, the terminal displays an error
message outlining the reason. Notify the customer,
advise them to contact their Card Issuer and seek an
alternative form of payment. If the Transaction is
cancelled, the terminal will also print out a second
merchant Transaction Record with “TRANSACTION
CANCELLED TL” and “SIGNATURE ERROR” printed on
the bottom of the receipt. No signatures are required.
NOTE: If ENTER, CLEAR or CANCEL are not pressed within one minute, the Transaction is assumed to
be approved and the terminal will return to the start screen.
CHEQUE ACCOUNT
APPROVED
PROCESSING
PLEASE WAIT
$600.00 KEY PIN
************
SIGNATURE
REQUIRED
REMOVE CARD
SIGNATURE VERIFIED?
SELECT ACCOUNT
CHQ SAV CR
32–33
If the signatures match, press ENTER.
If they do not, press the CANCEL or CLEAR key to
abort the Transaction.
If the Transaction is approved, this screen is displayed
and a customer copy is printed. Please check for
approval of the Transaction before completing the
sale. If rejected, the terminal displays an error
message outlining the reason. Notify the customer,
advise them to contact their Card Issuer and seek an
alternative form of payment. If the Transaction is
cancelled, the terminal will also print out a second
merchant Transaction Record with “TRANSACTION
CANCELLED TL” and “SIGNATURE ERROR” printed on
the bottom of the receipt. No signatures are required.
NOTE: If ENTER, CLEAR or CANCEL are not pressed within one minute, the Transaction is assumed to
be approved and the terminal will return to the start screen.
11.3 How to Process a Credit Purchase Transaction using a Chip Card
The process below provides a sample of a typical chip-based Transaction. Please be aware
that there may be variances in the Transaction ow based on the card conguration
chosen by the Card Issuer. Please ensure the terminal prompts are followed at all times
and the cardholder is requested to interact with the terminal whenever applicable.
Perform card security checks then insert the
cardholder’s Chip Card into the Chip Card Reader at
the bottom of the terminal. Leave the Chip Card
inserted until the Transaction has been nalised.
Enter the purchase amount then press ENTER.
Press ENTER.
(Cash-out is not available from credit card accounts).
Verify the amount is correct and accept by
pressing ENTER.
SIGNATURE
VERIFIED?
APPROVED
PURCHASE AMOUNT
$600
CASH OUT AMOUNT
$0
TOTAL AMOUNT
$600
SWIPE OR
INSERT
CARD
01/01/2010 12:08

12. Processing a Cash-Out Only Transaction
Customers may request cash-out (with or without making a purchase) by debiting their
cheque or savings account. Cash-out is NOT available from credit card accounts.
Cash-out is only available if this Transaction type has been enabled on the terminal
otherwise the option will not appear on the display. To remove this option, you must call
ANZ Merchant Services.
Perform card security checks then press ENTER.
Scroll through to ANZ EFTPOS screen by pressing
ENTER and then select CASH by pressing the SAV soft-
function key.
Key in the cash-out amount then press ENTER.
Verify the amount is correct and accept by
pressing ENTER.
Swipe or insert the cardholder’s card. (Magnetic
Stripe cards are to be swiped through the Magnetic
Stripe Card Reader whereas Chip Cards are to be
inserted and left in the Chip Card Reader.)
Select the appropriate account type (CHQ for cheque,
SAV for savings). Cash-out is not available from credit
accounts.
The selected account is displayed.
Have the customer enter their PIN then
press ENTER.
SWIPE OR INSERT CARD
SAVINGS ACCOUNT
$600.00 KEY PIN
CASH OUT AMOUNT
$600
TOTAL AMOUNT
$600
SWIPE OR
INSERT
CARD
01/01/2010 12:08
ANZ EFTPOS
PUR CASH RFND
SELECT ACCOUNT
CHQ SAV CR
34–35
Additional Screens Associated with a Chip Card Transaction
Alternative screens that you may also see during a chip Transaction are as follows:
Have the cardholder enter their PIN if known then
press ENTER or if the card allows just press ENTER.
This screen is displayed if the card needs to be
removed from the terminal.
The terminal requires the Chip Card to be inserted
during the Transaction.
Displays when there are no applications on the Chip
Card supported by the terminal. If magnetic stripe
fallback is supported the terminal will prompt to
swipe the card.
Remove the card from the Chip Reader and swipe it
through the Magnetic Stripe Card Reader.
<NAME> represents the card scheme. VISA CREDIT,
MASTERCARD or AMEX are the dierent applications
that a Transaction may use.
The cardholder presses ENTER to conrm application
selection.
***REMOVE CARD***
INSERT CARD
CHIP CARD NOT SUPPORTED
APPLICATION <NAME>
REMOVE CARD
USE MAG STRIPE
$600.00 KEY PIN
****
USE APPLICATION?
<NAME>
ENTER=YES CLR=NO

13. Processing a Refund Transaction
Refunds are easy to process if a customer returns goods purchased from you.
A Refund should only be processed to the same card that was used in the original sales
Transaction. Refund is only available if this Transaction type has been enabled on the
terminal otherwise the option will not appear on the display.
NOTE: If a Refund Transaction is performed on an international card, please advise the cardholder
that the refund amount displayed on their statement may vary from the purchase amount due to the
changes in currency exchange rates. For more information on processing international card
payments, please refer to the ‘Customer Preferred Currency’ section 17.3.
How to Process a Cheque or Savings Refund Transaction
Perform card security checks then press ENTER.
Scroll through to ANZ EFTPOS screen by pressing
ENTER and then select RFND by pressing the CR
soft-function key.
Swipe your multiPOS and EFTPOS Merchant Card
(refer to section 3 for more information).
Key in the refund amount then press ENTER.
Verify the amount is correct and accept by pressing
ENTER.
Swipe or insert the cardholder’s card. (Magnetic
Stripe cards are to be swiped through the Magnetic
Stripe Card Reader whereas Chip Cards are to be
inserted and left in the Chip Card Reader.)
Select CHQ for cheque account or SAV for
savings account.
The selected account is displayed.
36–37
TOTAL AMOUNT
SWIPE OR
INSERT
CARD
01/01/2010 12:08
ANZ EFTPOS
PUR CASH RFND
REFUND AMOUNT
$600.00?
SWIPE
MERCHANT CARD
SWIPE OR INSERT CARD
CHEQUE ACCOUNT
SELECT ACCOUNT
CHQ SAV CR
If the Transaction is approved, this screen is displayed
and a customer copy is printed. Please check for
approval of the Transaction before completing the
sale. If rejected, the terminal displays an error
message outlining the reason.
Notify the customer, advise them to contact their
Card Issuer and seek an alternative form of payment.
If the Transaction is cancelled, the terminal will also
print out a second merchant Transaction Record with
“TRANSACTION CANCELLED TL” printed on the
bottom of the receipt.
Press ENTER to print a customer copy or CLEAR to
return to the start screen.
APPROVED
PROCESSING
PLEASE WAIT
CUSTOMER COPY?
ENTER OR CLEAR

Swipe or insert the cardholder’s card. (Magnetic
Stripe cards are to be swiped through the Magnetic
Stripe Card Reader whereas Chip Cards are to be
inserted and left in the Chip Card Reader).
Select CR for credit account.
The selected account is displayed.
Have the cardholder enter their PIN if known then
press ENTER or if the card allows just press ENTER.
A signature record is printed if a PIN has not been
entered. Have the customer sign this and compare it to
the signature on the reverse of the customer’s card.
If the signatures match, press ENTER. If they do not,
press the CANCEL key to cancel the Transaction.
If the Transaction is approved, a customer Transaction
Record will be printed. Please check for approval of
the Transaction before completing the Refund. Hand
the customer their copy of the Transaction Record
and their card. If rejected, the terminal will display an
error message outlining the reason (please refer to
section 18). Notify the customer and advise them to
contact their Card Issuer.
APPROVED
PROCESSING
PLEASE WAIT
SWIPE OR INSERT CARD
SELECT ACCOUNT
CHQ SAV CR
CREDIT ACCOUNT
SIGNATURE
REQUIRED
SIGNATURE
VERIFIED?
$600.00 KEY PIN
38– 39
Have the customer enter their PIN then
press ENTER.
If the Transaction is approved, this screen is displayed
and the merchant Transaction Record is printed.
Please check for approval of the Transaction before
completing the refund. If rejected, the terminal will
display an error message outlining the reason. Check
the message in the Terminal Error Messages section
(section 18) and advise the cardholder as appropriate.
Press ENTER to print a customer copy or CLEAR to
return to the start screen. Hand the customer their
copy of the Transaction Record and their card.
How to Process a Credit Refund Transaction (including Chip Card Refunds)
Perform card security checks then press ENTER.
Scroll through to ANZ EFTPOS screen by pressing
ENTER and then select RFND by pressing the CR
soft-function key.
Swipe your multiPOS and EFTPOS Merchant Card
(refer to section 3 for more information).
Key in the refund amount then press ENTER.
Verify the amount is correct and accept by
pressing ENTER.
CUSTOMER COPY?
ENTER OR CLEAR
APPROVED
SWIPE OR
INSERT
CARD
01/01/2010 12:08
ANZ EFTPOS
PUR CASH RFND
REFUND AMOUNT
$600.00?
TOTAL AMOUNT
$600.00?
SWIPE
MERCHANT CARD
$600.00 KEY PIN
PROCESSING
PLEASE WAIT
This manual suits for next models
1
Table of contents
Other ANZ Payment Terminal manuals

ANZ
ANZ Worldline Move 5000 User manual

ANZ
ANZ POS PLUS User manual

ANZ
ANZ POS PLUS Instruction sheet

ANZ
ANZ HealthPay User manual

ANZ
ANZ Medicare Easyclaim User manual

ANZ
ANZ POS MOBILE2 User manual

ANZ
ANZ POS Mobile 2 User manual

ANZ
ANZ POS Turbo Plus User manual

ANZ
ANZ Worldline Move 5000 User manual

ANZ
ANZ POS Plus 2 User manual