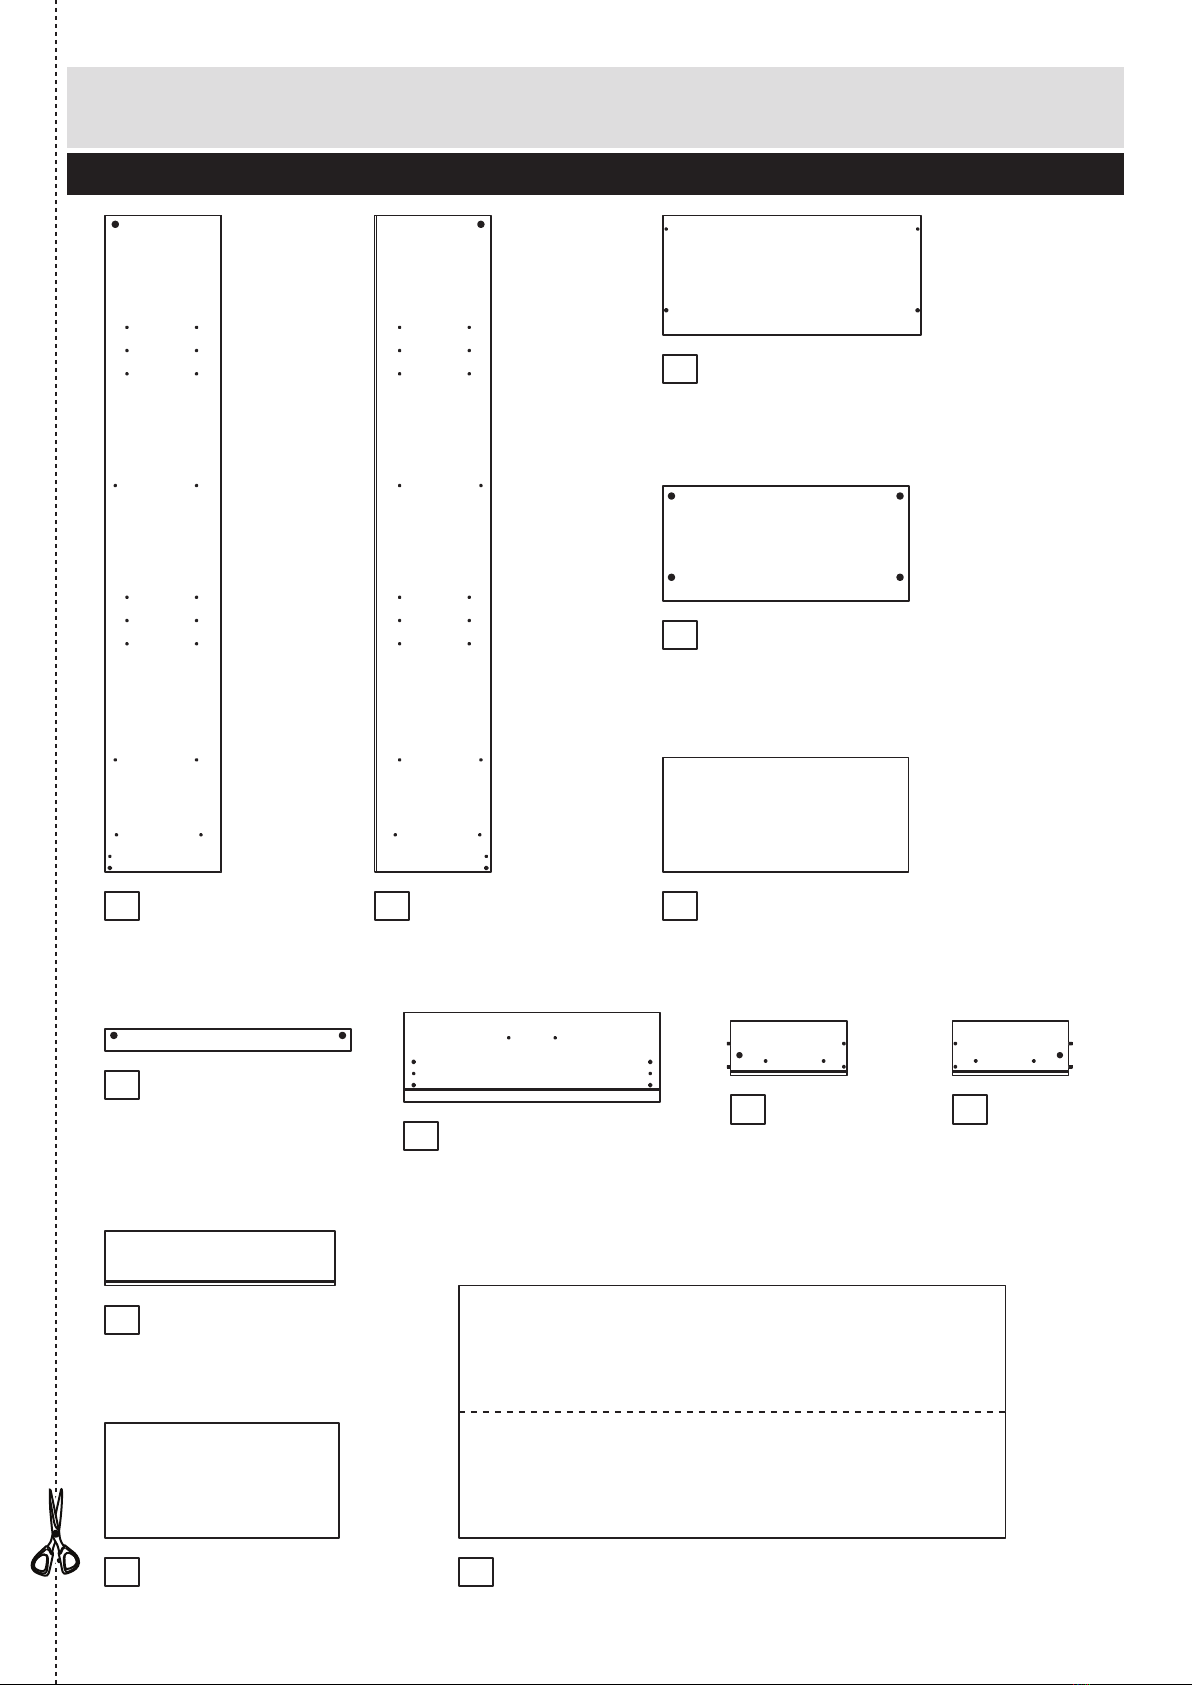
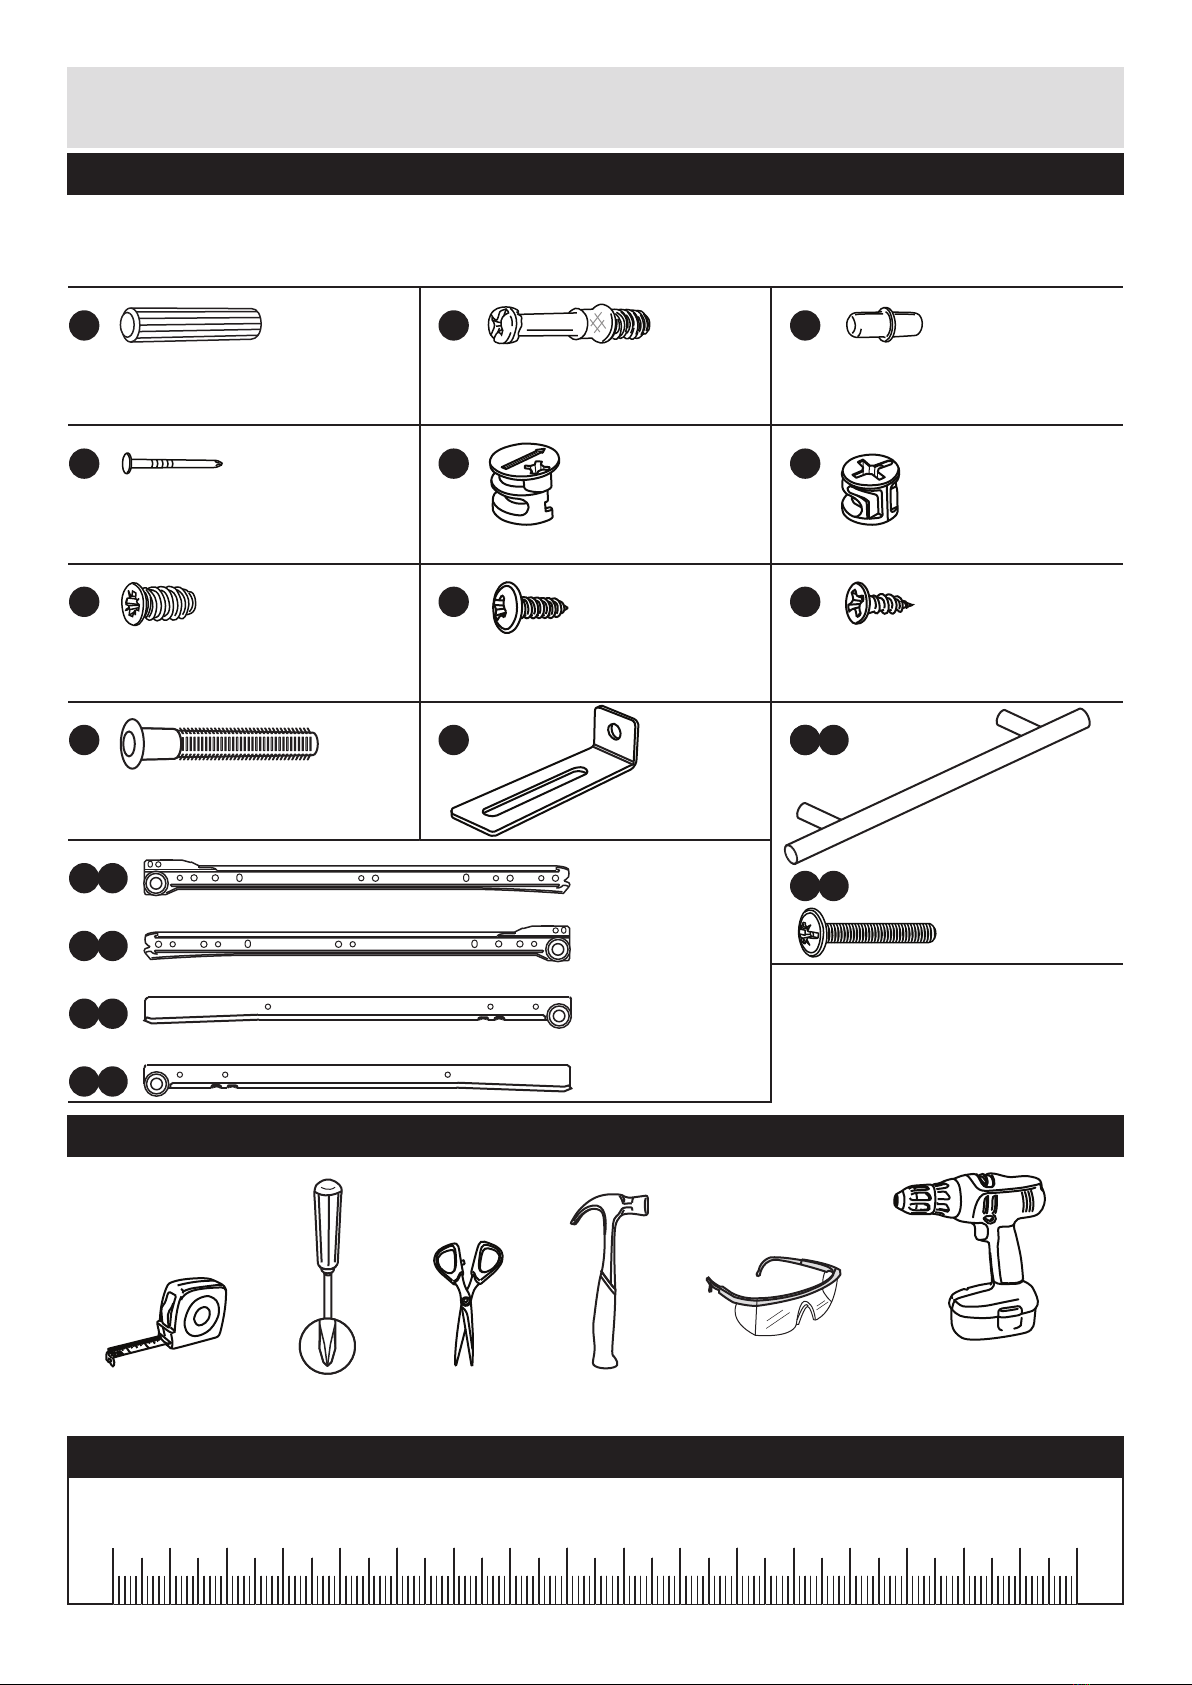
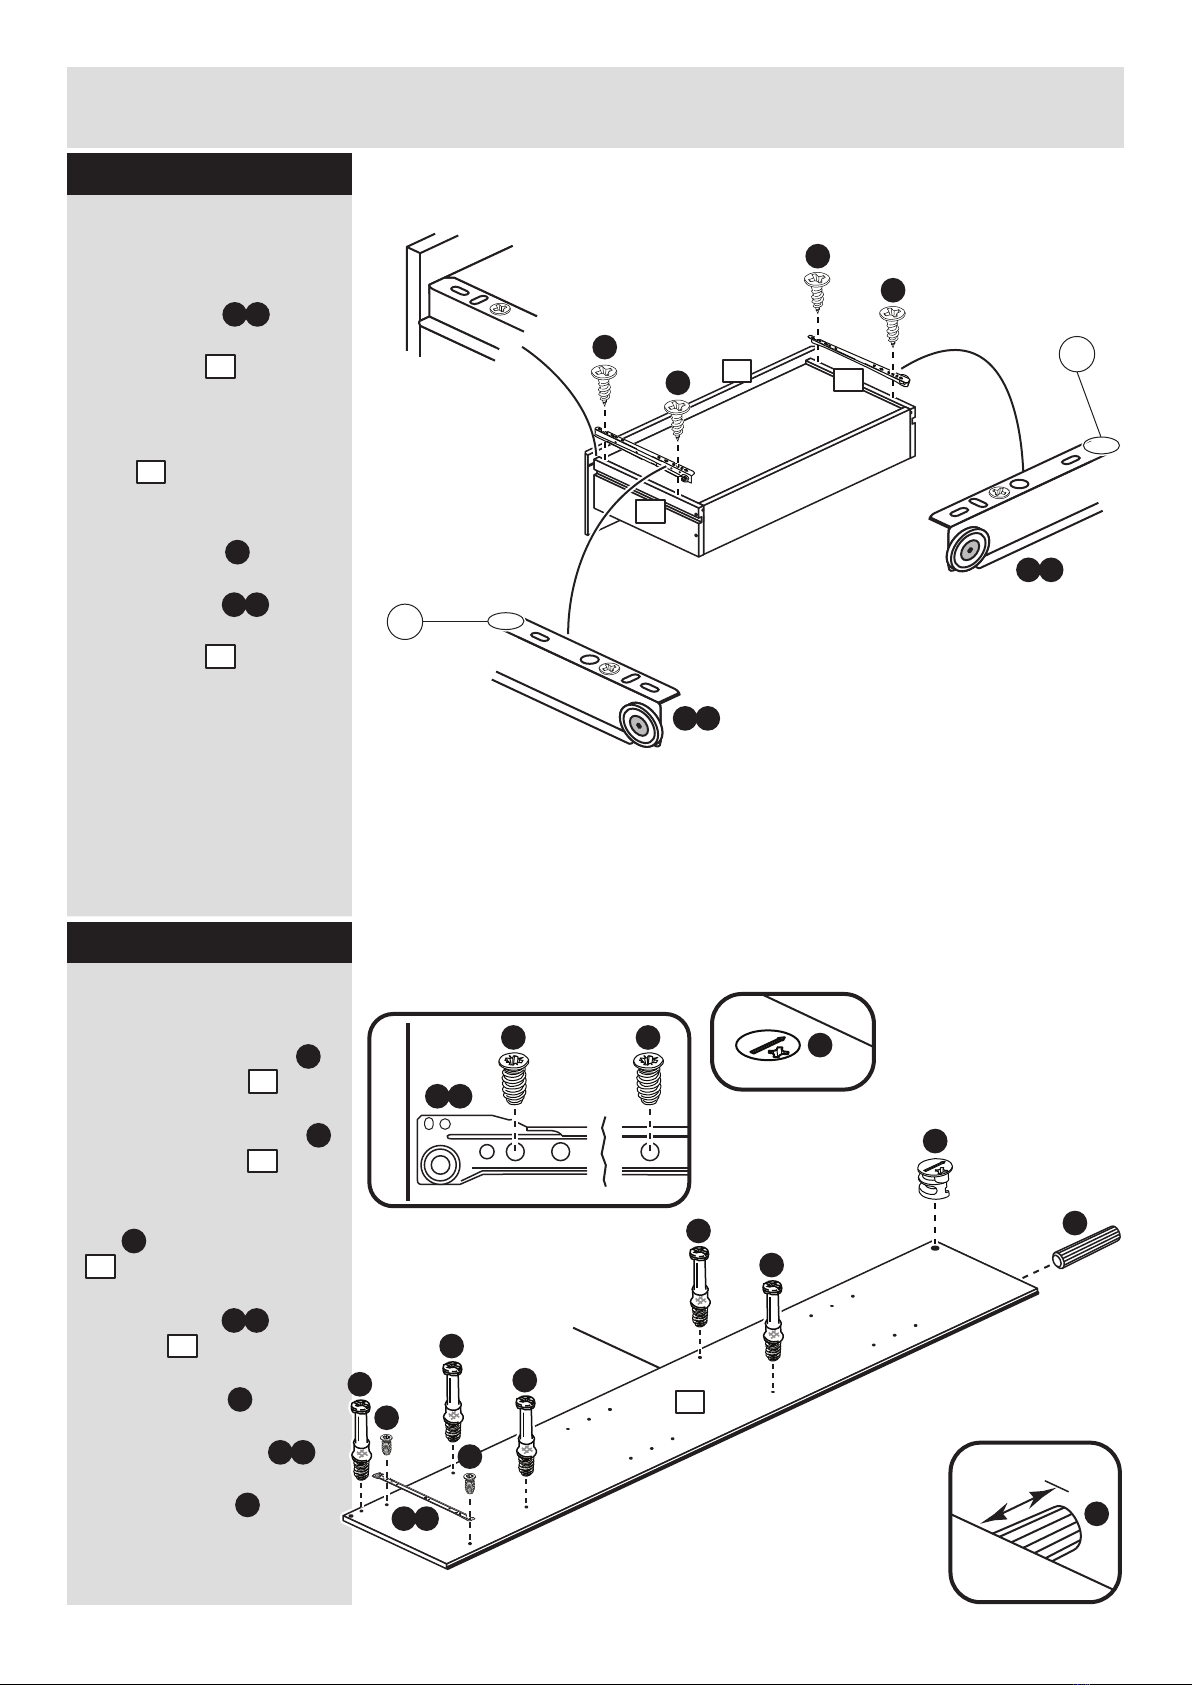
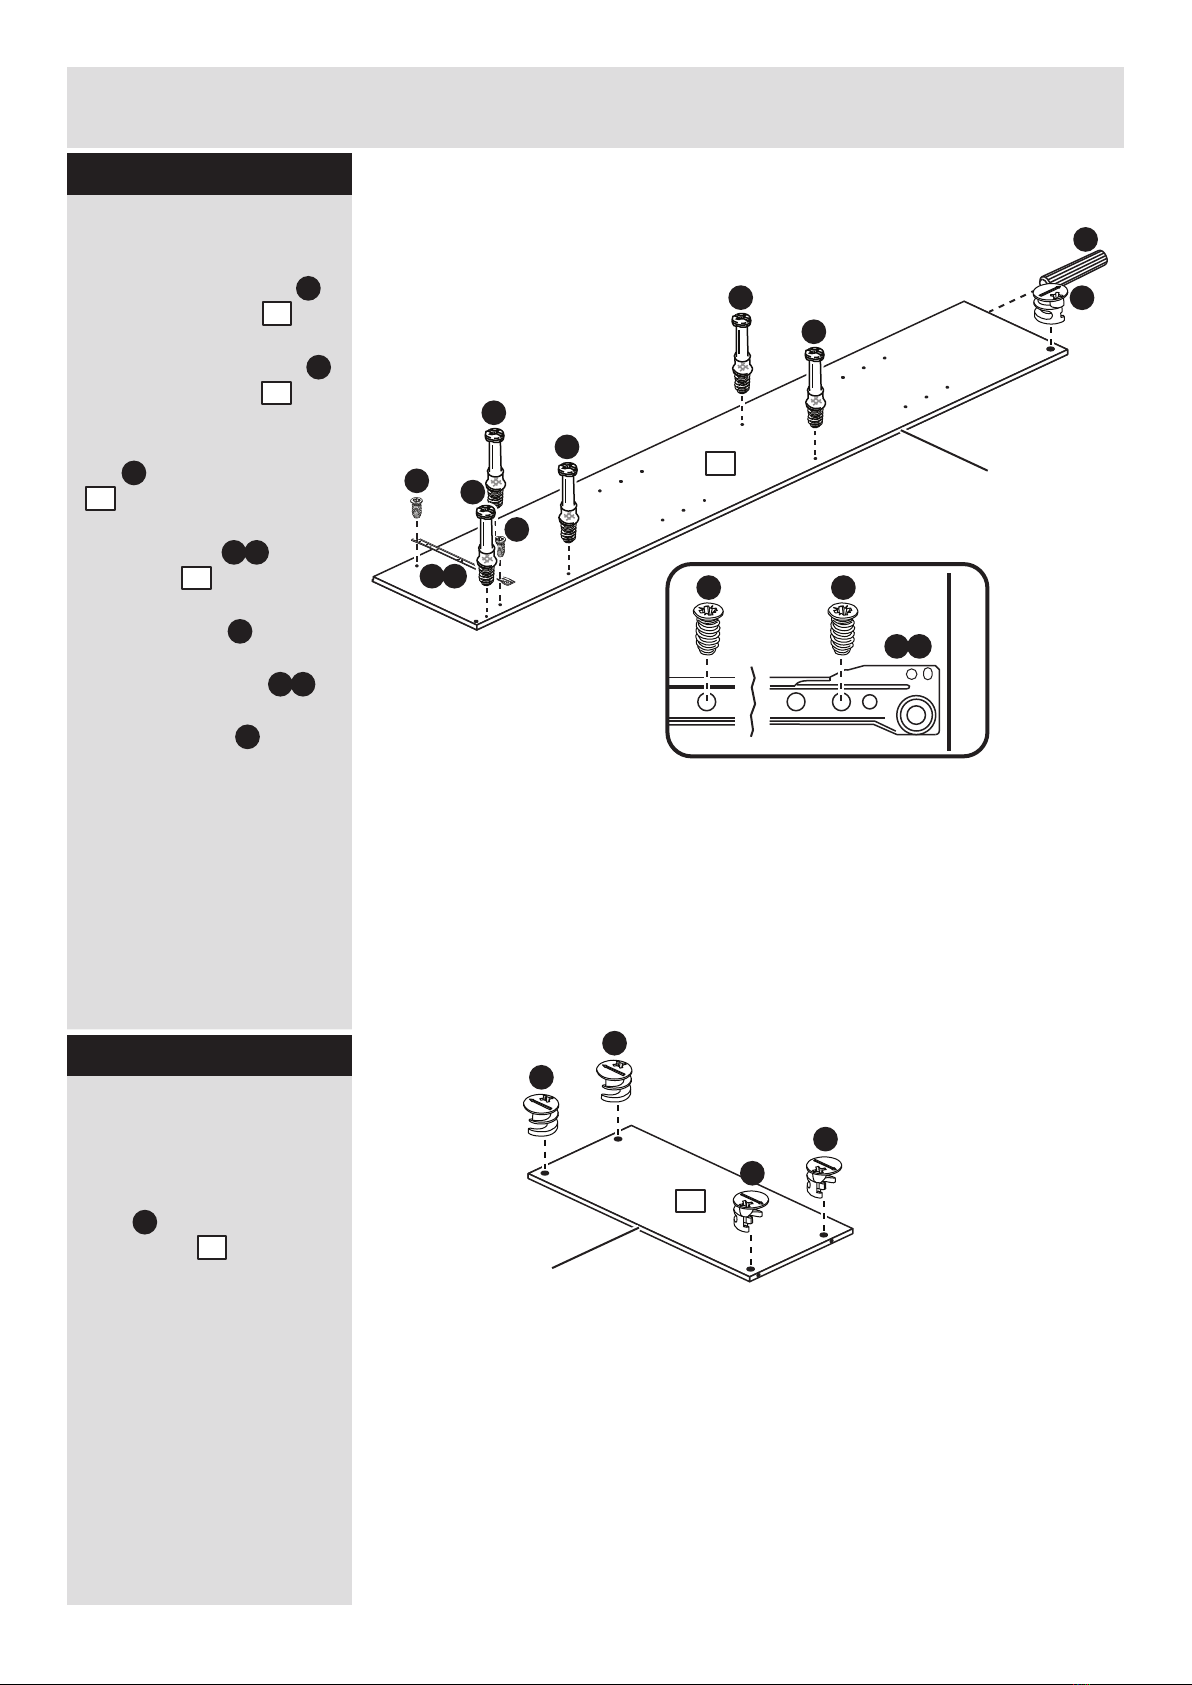
Argos Anderson 609/6489 User manual
Other Argos Indoor Furnishing manuals

Argos
Argos Darcy 424/5366 User manual

Argos
Argos Venetia 630/3505 User manual

Argos
Argos Aspley 481/9651 User manual

Argos
Argos WOW RATTAN EFFECT MINI CORNER 6174954 User manual

Argos
Argos 033 0501 Series User manual

Argos
Argos 473/8639 User manual

Argos
Argos 900/2566 User manual

Argos
Argos Atlas 152/9432 User manual

Argos
Argos 600/3575 User manual

Argos
Argos 932/6943 User manual

Argos
Argos Atlas 147/1999 User manual

Argos
Argos Caspian 365/6499 User manual

Argos
Argos 482/8893 Datasheet

Argos
Argos 600/0774 User manual

Argos
Argos Malibu 630/3165 User manual

Argos
Argos Malibu 282/2736 User manual

Argos
Argos SAN DIEGO 412/7893 User manual

Argos
Argos Cube Coffee Table User manual

Argos
Argos Nest of Tables 609/1439 User manual

Argos
Argos Malibu 426/8154 User manual


Popular Indoor Furnishing manuals by other brands


Coaster
Coaster 4799N Assembly instructions

Stor-It-All
Stor-It-All WS39MP Assembly/installation instructions

Lexicon
Lexicon 194840161868 Assembly instruction

Next
Next AMELIA NEW 462947 Assembly instructions

impekk
impekk Manual II Assembly And Instructions

Elements
Elements Ember Nightstand CEB700NSE Assembly instructions