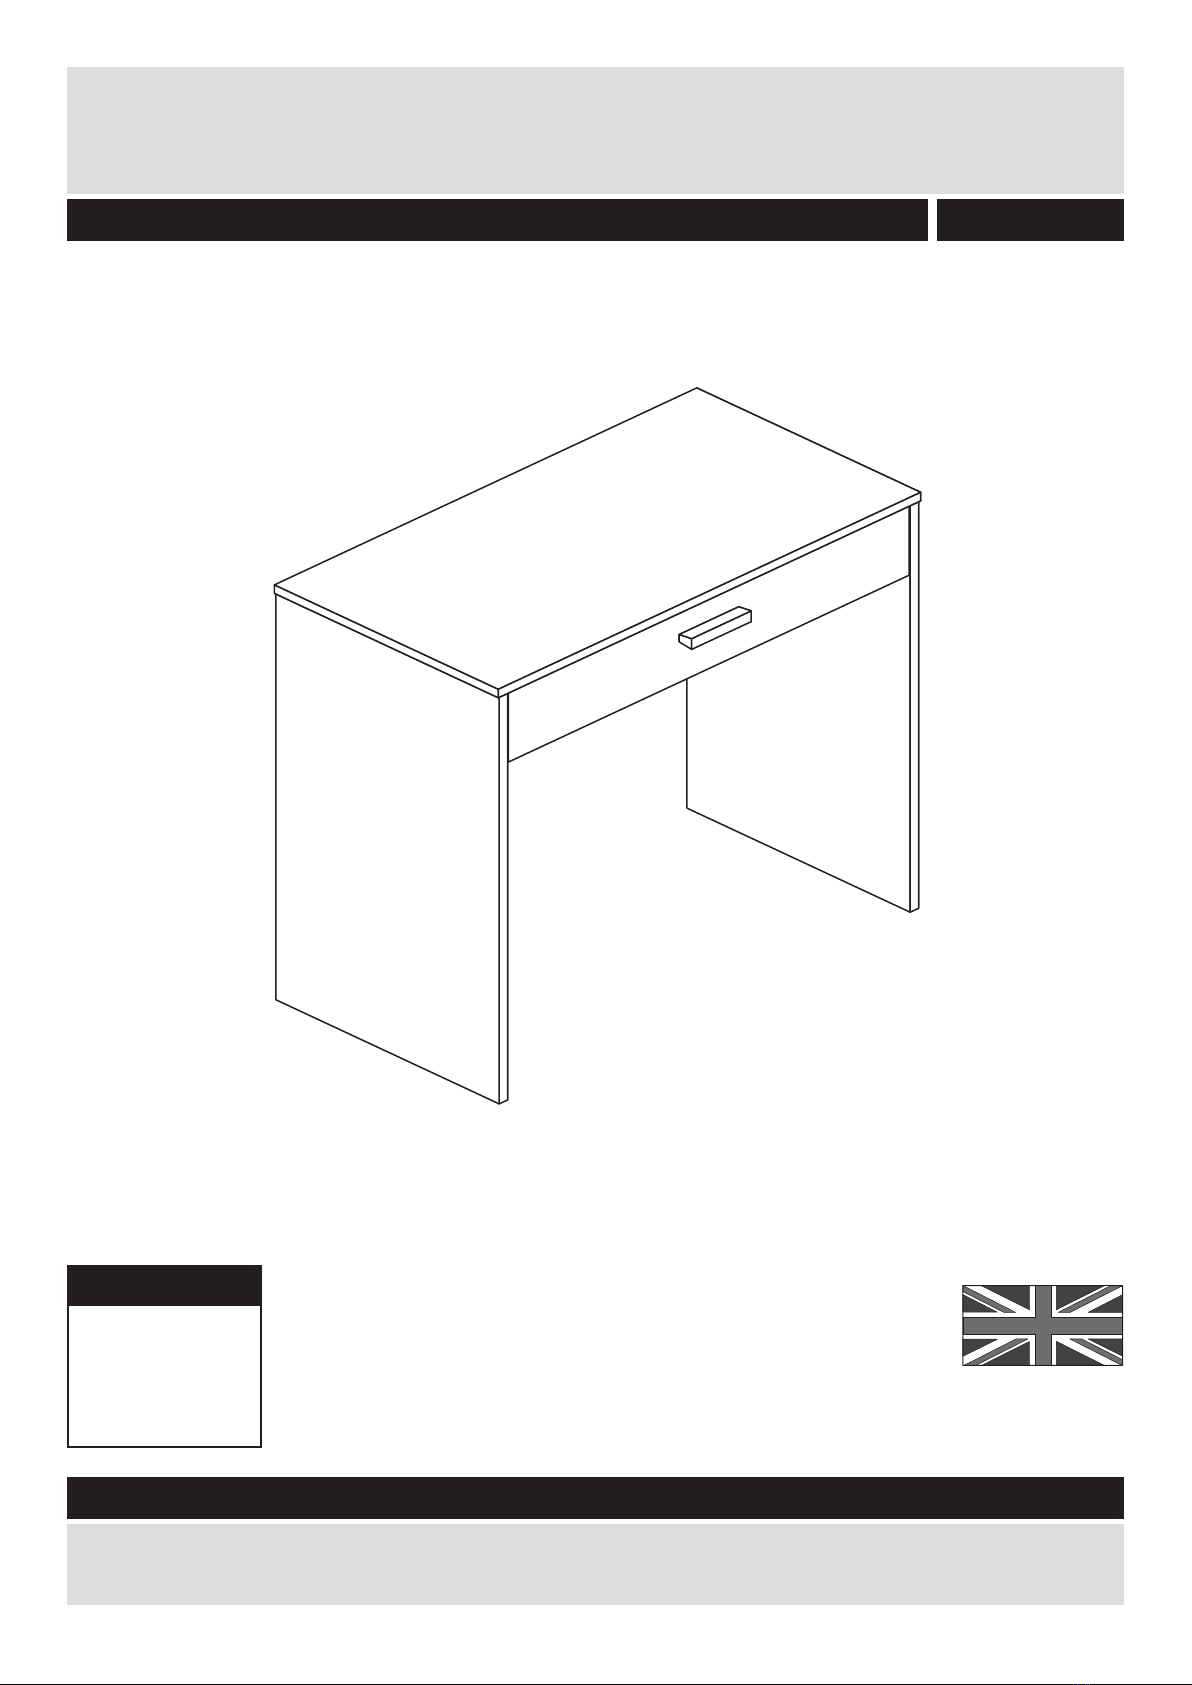
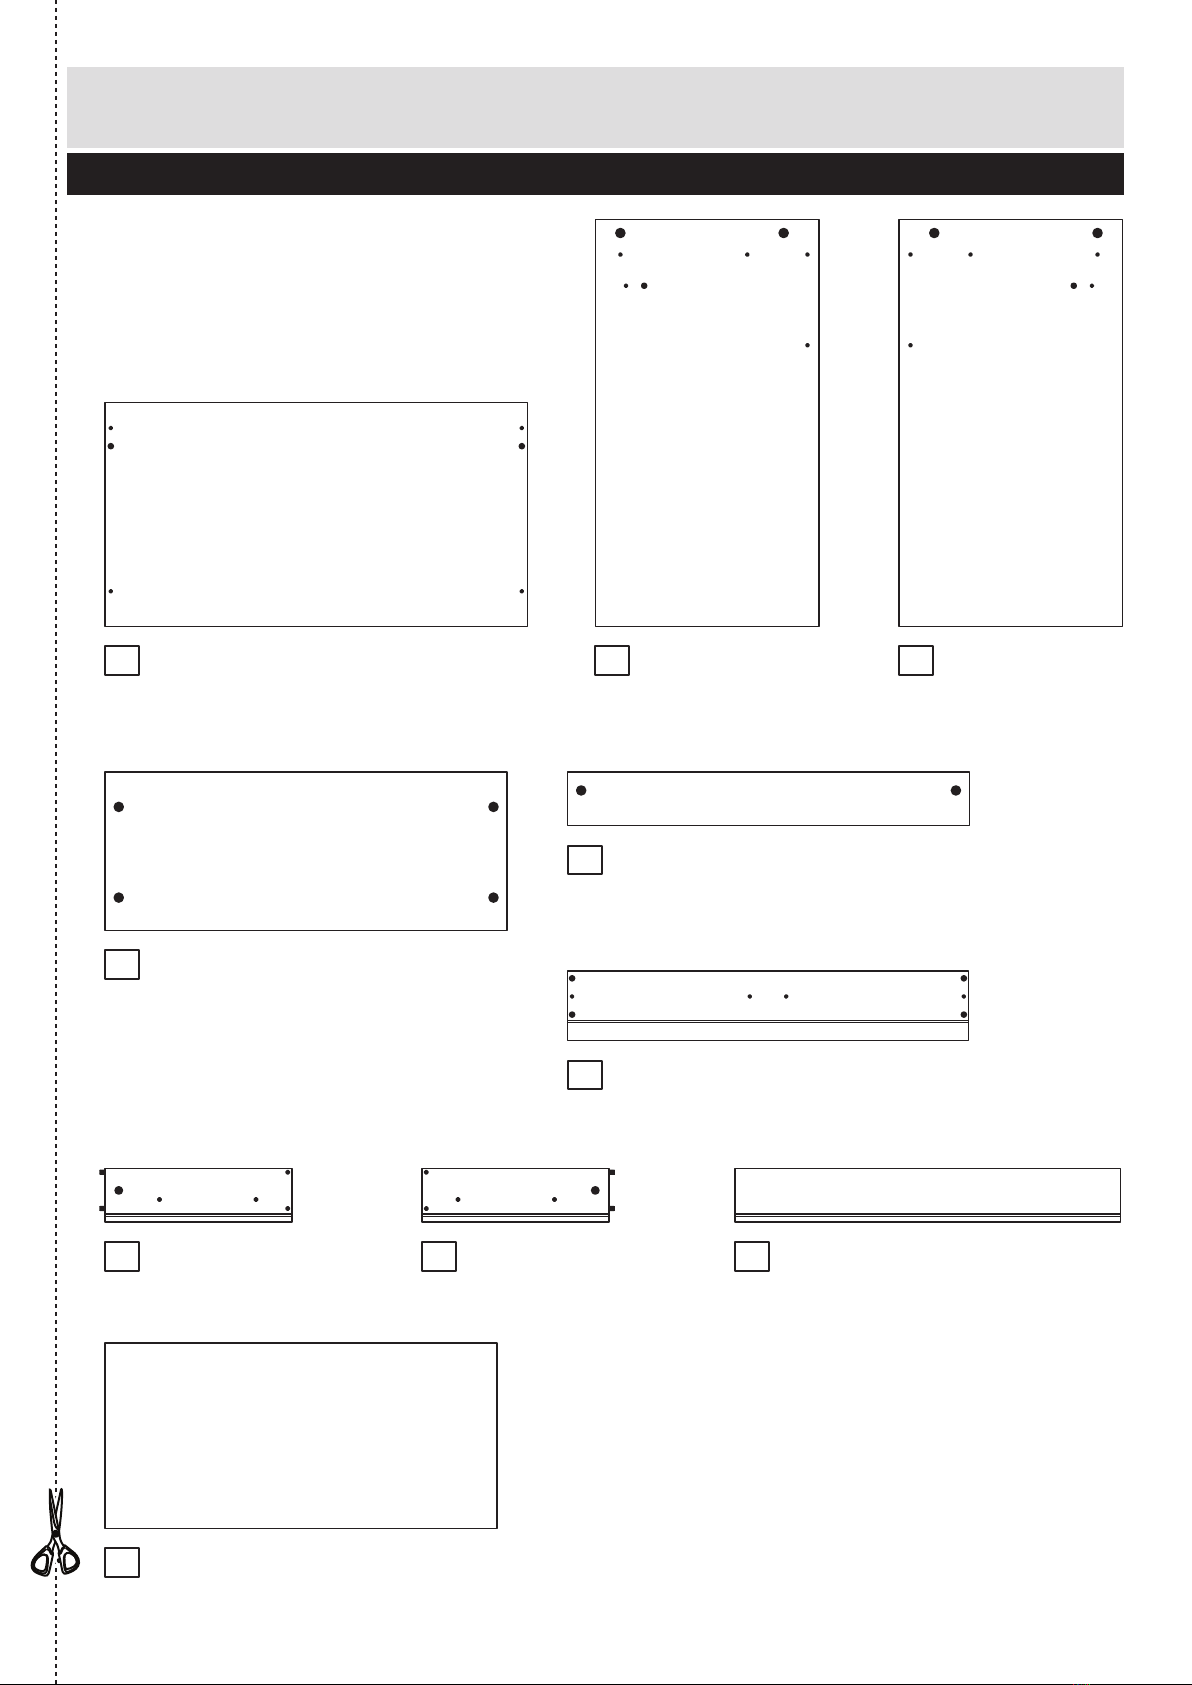
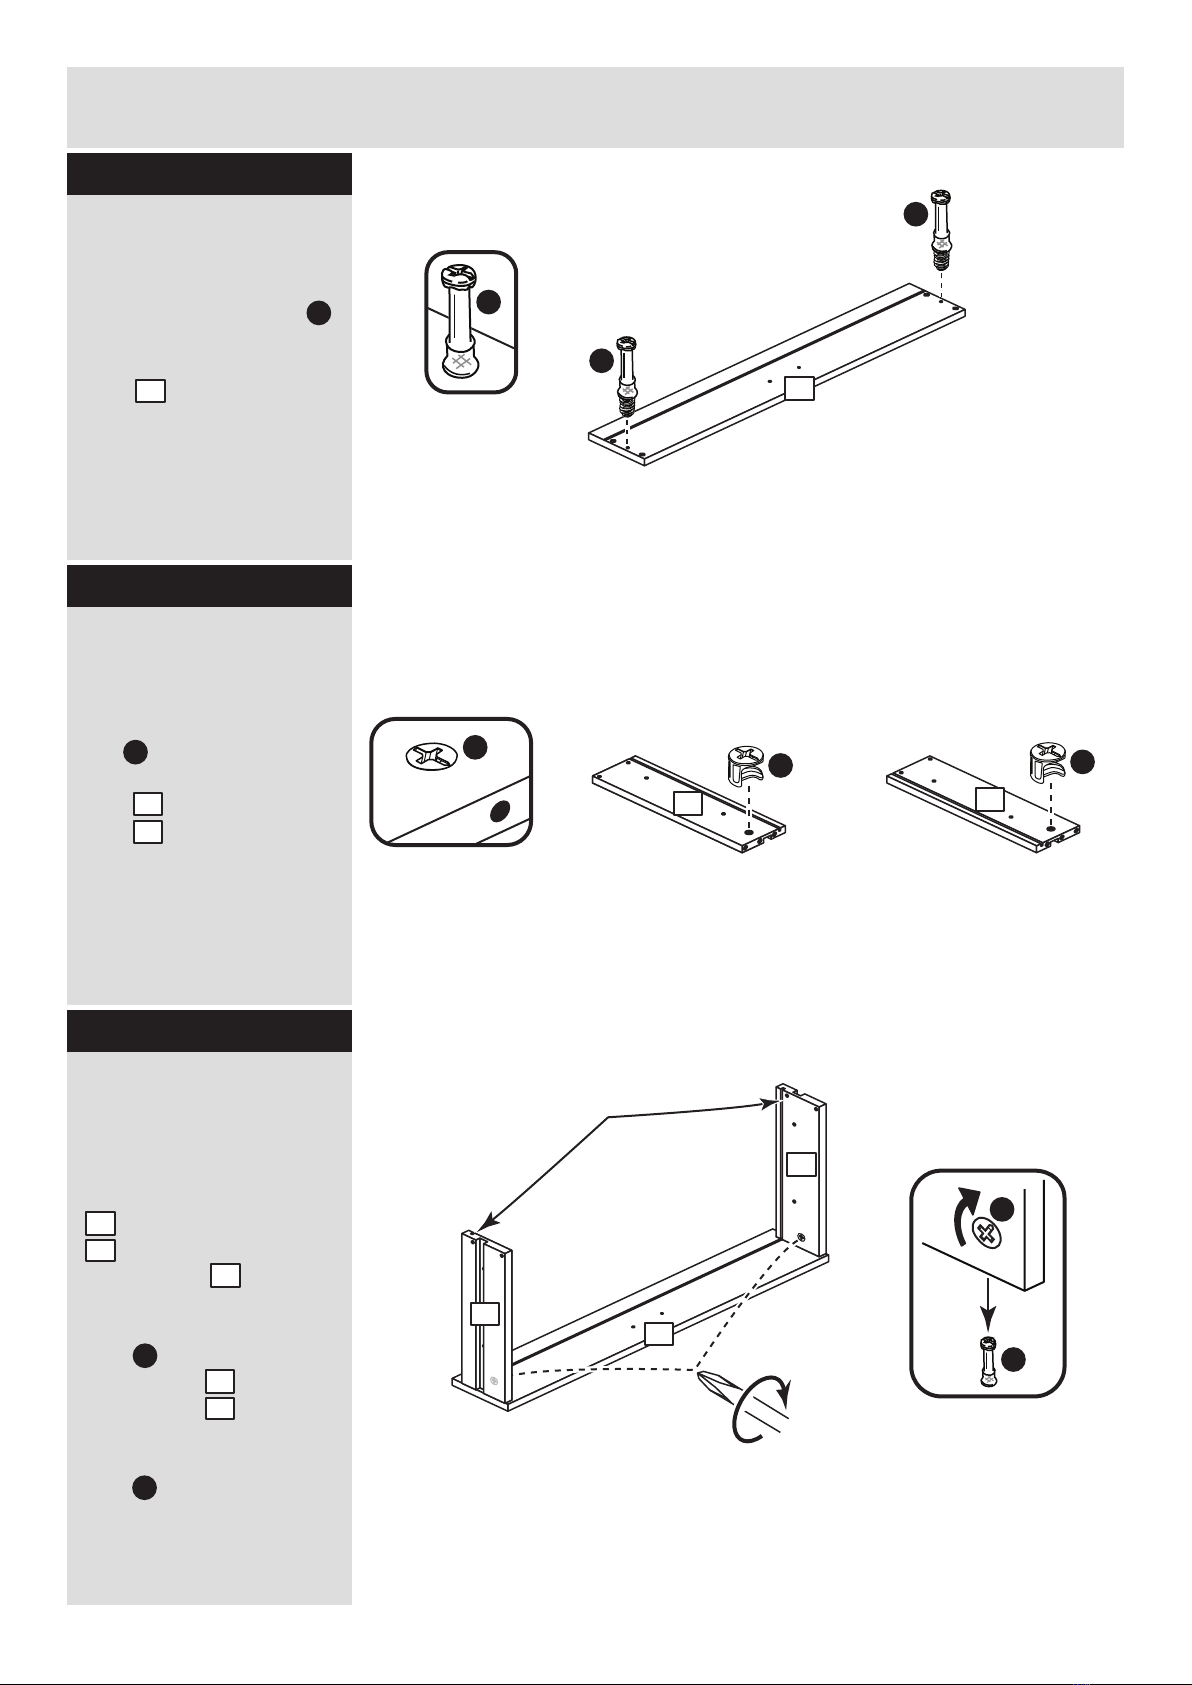
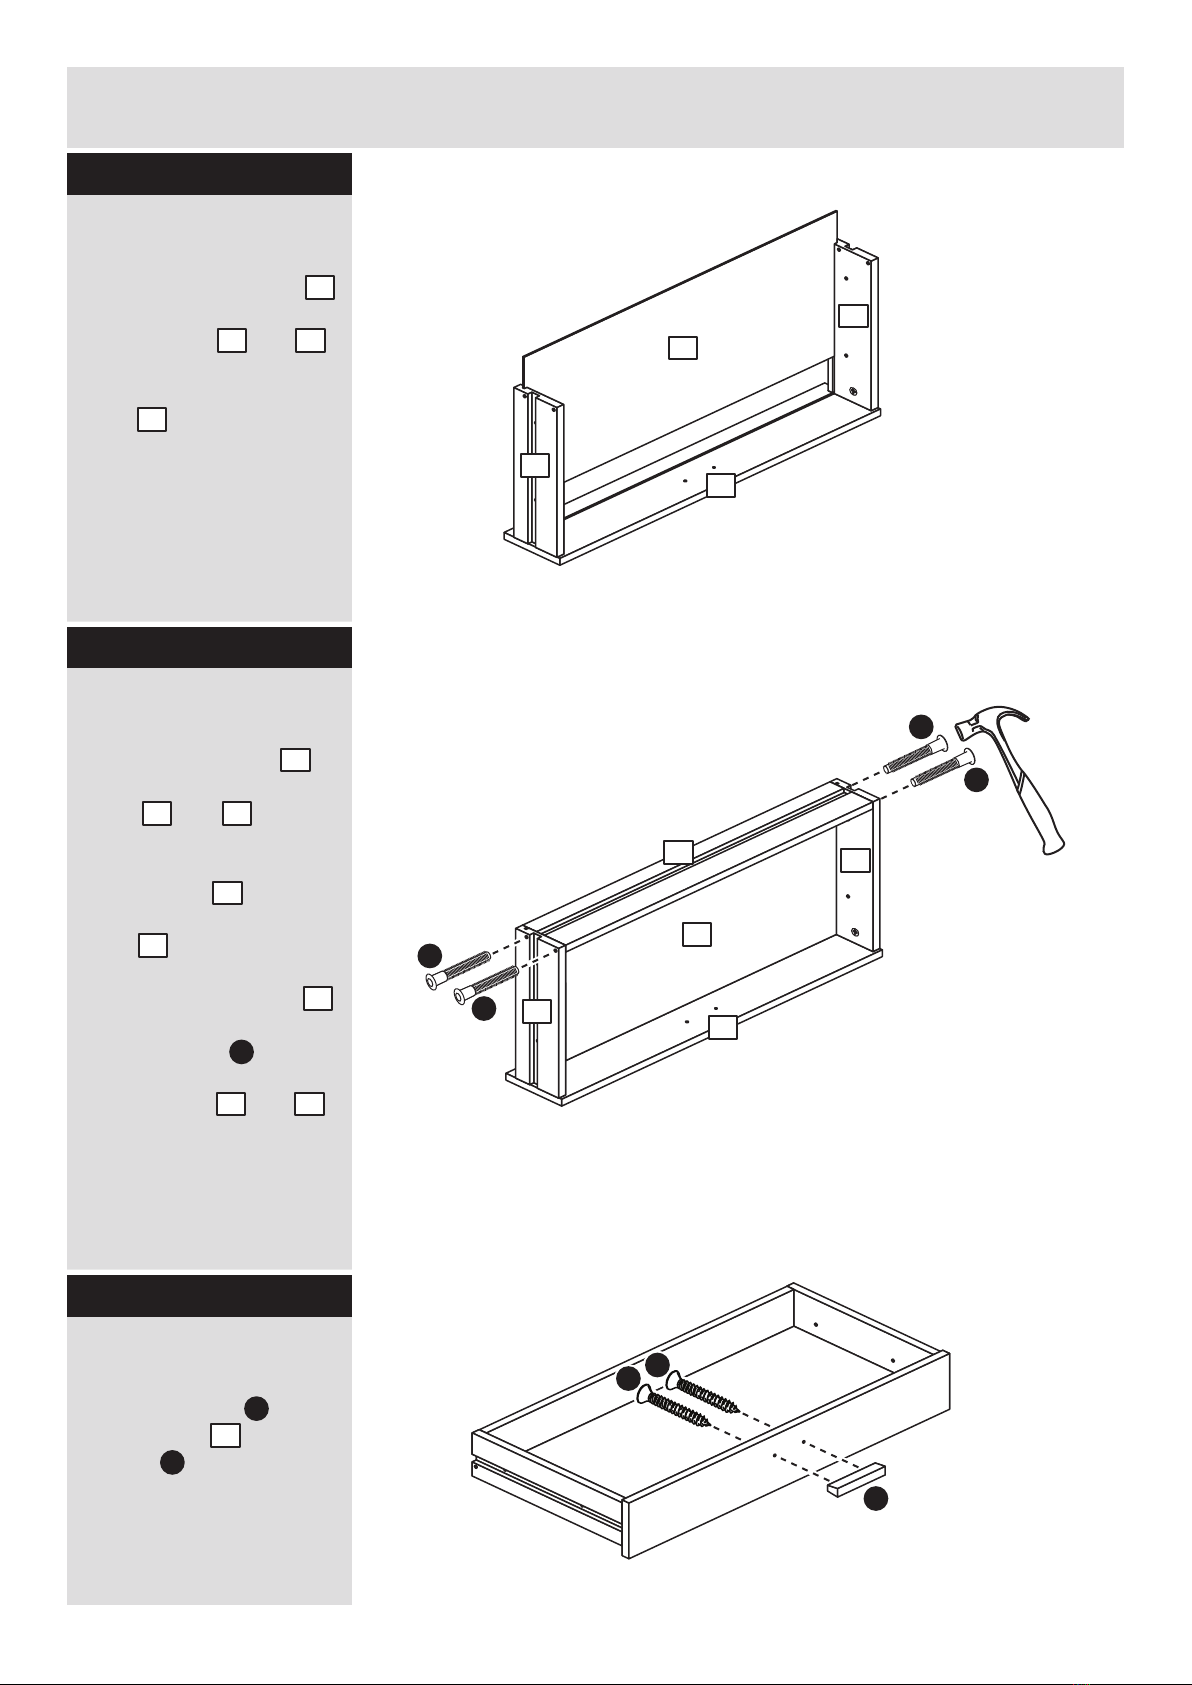
Argos Attalia 617/3742 User manual
Other Argos Indoor Furnishing manuals

Argos
Argos Malibu 630/3165 User manual

Argos
Argos New Sywell 355/9510 User manual

Argos
Argos Atlas 161/5803 User manual

Argos
Argos Gloucester 609/1233 User manual

Argos
Argos Finland 656/1770 User manual

Argos
Argos Java 156/5465 User manual

Argos
Argos Nest of Tables 609/1439 User manual

Argos
Argos Mendoza 228/9953 User manual

Argos
Argos Kids Sywell User manual

Argos
Argos Star 8053011 User manual

Argos
Argos 1838800 User manual

Argos
Argos 1589317 User manual

Argos
Argos Wow Pine Kitchen Trolley 424/6963 User manual

Argos
Argos Star 7607729 User manual

Argos
Argos Linear 276/3503 User manual

Argos
Argos Marlow 417/7654 User manual

Argos
Argos 9011179 User manual

Argos
Argos 617/9447 User manual

Argos
Argos 548/5840 User manual

Argos
Argos AVR 4 Seater Patio Set User manual


Popular Indoor Furnishing manuals by other brands


Coaster
Coaster 4799N Assembly instructions

Stor-It-All
Stor-It-All WS39MP Assembly/installation instructions

Lexicon
Lexicon 194840161868 Assembly instruction

Next
Next AMELIA NEW 462947 Assembly instructions

impekk
impekk Manual II Assembly And Instructions

Elements
Elements Ember Nightstand CEB700NSE Assembly instructions