manuals.online logo
Brands
  1. Home
  2. •
  3. Brands
  4. •
  5. Argos
  6. •
  7. Indoor Furnishing
  8. •
  9. Argos Kids Sywell User manual

Argos Kids Sywell User manual

MADE IN
BRITAIN
Dimensions
Width - 195cm
Depth - 95cm
Height - 53cm
Kids Sywell - Cabin Bed
Assembly Instructions - Please keep for future reference
If you need help or have damaged or missing parts, call the Customer Helpline: 03456 400800
Issue 3 - 23/01/15
Important - Please read these instructions fully before starting assembly
ALR3139
385/1775
379/1316
365/7120
WARNING
NOT SUITABLE FOR CHILDREN
UNDER 4 YEARS OF AGE .
Issue 2 - 15/01/15 - ‘D’ was missing from CHILDREN on the front page warning.
Updated helpline number.
Issue 3 - 23/01/15 - Added codes 376/6853, 385/3845 and 357/6232.
376/6853
385/3845
357/6232
Safety and Care Advice
Important - Please read these instructions fully before starting assembly
• Warning: This unit weighs
approximately 66kgs.
Please lift with care.
• Check you have all the
components and tools listed on
pages 1, 2 and 3.
• Remove all fittings from the
plastic bags and separate them
into their groups.
• Keep children and animals
away from the work area, small
parts could choke if swallowed.
• Parts of the assembly will be
easier with 2 people.
• Make sure you have enough
space to layout the parts before
starting.
• Do not stand or put weight on
the product, this could cause
damage.
• Assemble the item as close to
its final position (in the same
room) as possible.
• Assemble on a soft level
surface to avoid damaging the
unit or your floor (use opened
out unit carton).
• We do not
recommend the
use of power
drill/drivers for
inserting screws,
as this could damage the unit.
Only use hand screwdrivers.
• Safety note: If there is any
chance of this unit being pulled
over by children etc. it is
recommended that the unit is
secured to a wall using suitable
fixings (not supplied).
• Dispose of all packaging
carefully and responsibly.
1
Care and maintenance
• Only clean using a damp cloth
and mild detergent, do no use
bleach or abrasive cleaners.
• This product should not be
discarded with household
waste. Take to your local
authority waste disposal centre.
Note: If required the next page
can be cut out and used as
reference throughout the
assembly. Keep this page with
these instructions for future
reference.
Tools required
Rule Scissors Hammer Eye protection
(when using a
hammer or drill)
Cross-head
screwdriver
IMPORTANT
On a regular basis please
check that the screws and
fittings have not become
loose as this could present
a potential choke hazard.
Components - Panels
Please check you have all the panels listed below
2
12
If you have damaged or missing components, call the
Customer Helpline: 03456 400800 quoting the reference
numbers below
Left Side (DF1658)
(949 x 529mm)
Back Panel (DF1660)
(1920 x 160mm)
Left Quadrant (DF2481)
(543 x 160mm)
Left Door (DF1662)
(312 x 537mm)
Right Side (DF1659)
(949 x 529mm) Right Quadrant (DF1661)
(543 x 160mm)
Left Base (DF1663)
(543 x 287mm)
Cross Rail (DF1668)
(804 x 92mm)
Righ Door (DF2482)
(312 x 537mm)
Right Base (DF2480)
(543 x 287mm)
Left Upright (DF1664)
(353 x 660mm)
Right Upright (DF1665)
(353 x 660mm)
Bed Base (DF1667)
(1920 x 474mm) x 2
End Back (DF1669)
(543 x 353mm) x 2
Support Rail (DF1673)
(1920 x 92mm) x 2
Loose Shelf (DF1672)
(543 x 257mm) x 2
Centre Back (DF1670)
(804 x 353mm)
Fixed Shelf (DF1671)
(804 x 377mm)
Drawer Front (DF1666)
(800 x 162mm)
Drawer Back (W773-124)
(773 x 124mm)
Left Drawer Side (W370-124LH)
(370 x 124mm)
Drawer Base (T784-367)
(784 x 367mm)
Right Drawer Side (W370-124RH)
(370 x 124mm)
7 85 6
3
4
11
10
9
13
14
12
15 16
20
17 18
19 21
22 23
Please check you have all the fittings listed below
Glue Safety - Take care when using glue, please follow the advice below
Skin contact: Remove contami-
nation by washing with soap and
water. This procedure should be
followed prior to aeting and
drinking.
Eye contact: Rinse immediately
with clean water for 15 minutes
and seek medical advice.
If swallowed: Seek medical
advice immediately.
3
• Only clean using a damp cloth
and mild detergent, do no use
bleach or abrasive cleaners.
• This product should not be
discarded with household
waste. Take to your local
authority waste disposal centre.
• From time to time check that
there are no loose screws on
this unit.
Components - Fittings If you have damaged or missing components, call the
Customer Helpline: 03456 400800 quoting the reference
numbers below
Note: The quantities below are the correct amount to complete the assembly. In some cases
more fittings may be supplied than are required.
A
Wooden dowel (F22) x 24
B
Metal dowel (F901) x 6
C
D
Large locking
nut (F900) x 8
E
Small locking
nut (F3) x 2
F
G H I
R
45mm Screw (F65) x 5
P
Wedgefix (F639) x 4
Knock-in Peg (F171GY) x 4
V
Drawer runner (F1004) x 2
N
Q
M
Double metal dowel (F566) x 2
O
Allen Key (F36) x 1
50mm Screw (F49) x 50
J
13mm Screw (F79) x 9
K
U
9mm Screw (F74) x 2
L
W
9mm Screw (F73) x 4
13mm Screw (F52) x 4
Bracket (F945) x 9
Shelf stud (F110) x 8
25mm Screw (F95) x 6
Handle (F315) x 3
13mm Screw (F63) x 8
Plastic Nail (F91) x 12
ST
Hinge plate
(F523) x 4 Hinge (F522) x 4
Ruler - Use this ruler to help correctly identify the screws
mm 10 20 30 40 50 60 70 80 90 100 110 120 130 140 150 160 170
19
Assembly Instructions
4
If you have damaged or missing components, call the
Customer Helpline: 03456 400800 quoting the reference
numbers below
Step 1
B
B
F
F
F
21 22
Step 2
Prepare the drawer
front
Screw 2 metal dowels
into the drawer front .
Note: Tighten the metal
dowels up fully against
the panels.
B
19
Prepare the drawer
sides
Insert a small locking
nut into the hole
shown on the left drawer
side and the right
drawer side .
Note: The arrow on the
locking nut must point
towards the hole in the
edge of the panel.
Step 3
F
21
22
Attach the drawer
sides to the drawer
front
Push the left drawer sides
. and right drawer sides
. onto the back of the
drawer front .
Turn the small locking
nuts on the left
drawer side and right
drawer side .
Note: Turn the locking
nuts clockwise to
secure panels - more
than 1/2 a turn.
21
22
19
F
F
21
22
21
22
B
B
80% x 3
19
F
C
C
Assembly Instructions
5
Step 4
19
Fit the drawer base
Slide the drawer base
down the grooves in the
drawer sides and
and down into the
groove in the drawer
front .
Step 5
Fit the drawer back
Fit the drawer back
between the drawer
sides and .
Make sure that the
drawer base fits into
the groove in the drawer
back .
Hold the drawer back
in position and tap the
knock-in pegs
through the holes in the
drawer sides and .
Step 6
23
21 22
19
20
21 22
23
20
20
C
Attach the handle
Attach a handle to the
drawer front using 2
screws .
Note: Do not
overtighten the screws.
W
I
19
21 22
Step 7
Fit the wedgefixes
Turn the drawer
assembly over and slide
2 wedgefixes into the
front and back grooves,
as shown, and tighten up
the screws.
P
C
C
P
P
P
P
P
23
21
20
21
22
23
22
W
I
I
19
A
A
A
A
Finished
front edge
Assembly Instructions
6
Step 8
Step 9
Finished
front edge
N
V
Prepare the left
upright
a: Tap 2 wooden dowels
. into the left upright .
Place a runner on the
left upright as shown.
Slide back the top of
runner and use the 2nd
hole from the front to fit
the 1st screw .
b: Slide the runner
back the other way and
fit the 2nd screw into
the corresponding hole
in the left upright .
Screw 2 metal dowels
into the left upright .
5
N
N
5
V
V
A5
a:
b:
Finished
front edge
N
V
a:
b:
N
V
5
Finished
front edge
B
B
5
N
V
N
B
5
Prepare the right
upright
a: Tap 2 wooden
dowels into the right
upright .
Place a runner on the
right upright as
shown. Slide back the
top of runner and use the
2nd hole from the front
to fit the 1st screw .
b: Slide the runner
back the other way and
fit the 2nd screw into
the corresponding hole
in the right upright .
Screw 2 metal dowels
into the right upright .
6
N
N
6
V
V
A
6
B
6
Finished
front edge
Finished
front edge
B
B
N
6
6
Finished
front edge Finished
front edge
Assembly Instructions
7
Step 10
Step 11
E
E
Prepare the fixed
shelf
Insert 4 large locking
nuts into the fixed
shelf .
Note: The arrow on the
locking nut must point
towards the hole in the
edge of the panel.
E
E
E
Finished
front edge
E
12
Prepare the cross rail
Tap 2 wooden dowels
into the cross rail .
Insert 2 large locking
nuts into the cross rail
. .
E
10
10
12
Fit the fixed shelf to
the right upright
Push the fixed shelf
onto the right upright .
Use a screwdriver to
tighten the 2 large
locking nuts fitted to
the fixed shelf .
Note: Turn the large
locking nuts as far as
they will go - more than
1/2 a turn.
Step 12
6
12
E
E
12
B
E
6
12
A
A
E
E
Finished
front edge
A
10
Polystyrene
block
Note: To keep the fixed shelf level, place a polystyrene
block from the packaging underneath it.
G
G
O
A
Finished
front edge
Assembly Instructions
8
Step 13
Step 14
U
U
Fit the cross rail
a: Tap a double metal
dowel through the
right upright and into
the cross rail until it
‘’bottoms out’’.
b: Use a screwdriver to
tighten the large locking
nut fitted to the cross
rail .
E
10
U
6
10
a:
b:
6
10
A
Prepare the centre
back
Tap 2 wooden dowels
into the centre back .
Step 15
Fit the centre back
Fit the centre back
onto the right upright
using 2 screws and
the allen key .
14
A14
14
6
Fit the horizontal to
the right upright
Fit the horizontal
onto the right upright
using 2 screws and
the allen key .
3
5
G
O
14
6
G
O
Finished
front edge
Assembly Instructions
9
Step 16
Fit the left upright
Push the left upright
onto the assembly.
Use a screwdriver to
tighten the 2 large
locking nuts fitted to
the fixed shelf .
Secure the left upright
to the centre back
using 2 screws and
the allen key .
Step 17
5
E
12
5
14
G
O
O
G
G
5
12
14
U
Secure the cross rail
a: Tap a double metal
dowel through the left
upright and into the
cross rail until it
‘’bottoms out’’.
b: Use a screwdriver to
tighten the large locking
nut fitted to the cross
rail .
E
10
U
5
10
a:
b:
5
10
5
Step 18
Fit 6 plastic nails
Tap 3 plastic nails
into the bottom edge of
each of the uprights
and . .
R
5
6
R
R
R
R
R
R
Finished
front edge
Finished
front edge
A
A
Assembly Instructions
10
Step 19
Step 20
G
5
6
E
E
Prepare the left and
right base
Tap 2 wooden dowels
into the left base and
the right base .
Insert a large locking
nut into the left base
. and the right base .
E
7
8
7 8
A
A
8
7
Finished
front edge
Finished
front edge
7
8
Fit the left and right
base
Push the left base
and right base onto
the assembly.
Secure the left base
to the left upright
using screw and the
allen key .
Secure the right base
to the right upright
using screw and the
allen key .
Use a screwdriver to
tighten the large locking
nut fitted to the left
base and the right
base .
7
8
E
7
8
7
5
G
O
8
6
G
O
O
G
A
Assembly Instructions
11
Step 21
Step 22
Prepare the 2 end
backs
Tap 2 wooden dowels
into each of the 2 end
backs .
15
A
A
G
O
G
G
G
Fit the 2 end backs
Push both of the end
backs onto the
assembly.
Secure each end back
to the uprights and
using 2 screws and
the allen key .
Step 23
15
15
5 6
G
O
15
15
15
5
6
x 2
x 2
A
Prepare the 2 bed
bases
Tap 2 wooden dowels
into each of the bed
bases .
Finished
front edge
A
9
A
9
Finished
front edge
O
G
G
G
G
Assembly Instructions
12
Step 24
Step 25
O
G
G
G
G
Fit a bed base
Push a bed base
onto the uprights and
. .
Secure the bed base
to each upright and
using 2 screws and
the allen key .
9
5
6
9
5 6
G
O
9
5
6
5
6
Finished
front edge
9
Fit the other bed base
Push the other bed base
. onto the uprights
and . .
Secure the bed base
to each upright and
using 2 screws and
the allen key .
95
6
9
5 6
G
O
Finished
front edge
G
G
G
G
G
G
G
G
O
2
Assembly Instructions
13
Step 26
Fit the right side
Fit the right side onto
the right base and
end back and the 2
bed bases using 8
screws and allen key
. .
2
15
9
8
G
O
15
9
9
8
Finished
front edge
S
Fit 2 hinge plates onto
the left side , making
sure that the slot is
facing towards the
finished front edge.
S
S
S
1
Step 27
Fit 2 hinge plates onto
the right side , making
sure that the slot is
facing towards the
finished front edge.
Step 28
S
2
S
S
S
Finished
front edge
2
1
A
G
Assembly Instructions
14
Step 29
OG
2
Fit a support rail
Fit a support rail onto
the right side using 2
screws and allen key
. .
13
2
G
O
13
Step 30
Prepare the back panel
Tap 2 wooden dowels
into the back panel .
11
A
A
11
Finished
front edge
G
G
G
O
G
Assembly Instructions
15
Step 31
Fit the left side
Fit the left side onto
the assembly using 14
screws and allen
key .
Using at least 2
people, carefully
stand the unit up for
the next step.
Step 32
11
Finished
front edge
2
Fit the back panel and
the other support rail
Fit the back panel
and the support rail
onto the right side
using 4 screws and
allen key .
11
13
2
G
O
G
OG
13
13
Note: Support the back
panel and the support rail
until the left side has been
fitted in the next step.
Note: Secure this
support rail 1st.
O
Gx 16
1
G
O
1
Warning: The
unit is heavy.
Lift with care.
13
Assembly Instructions
16
Step 33
Step 34
Secure the back panel
Fix 5 brackets to the
holes in the bed base
using screws .
Important: Make sure
that you screw down into
the top edge of the
support rail underneath.
Fix the brackets to
the back panel using
screws .
H
H
Q Q
J
Q
Q
Q
Q
Q
Q
9
J
Q
11
9
11
Fit 6 plastic nails
Tap 3 plastic nails
into the bottom edge of
each of the sides
and . .
R
1
2
1
2
R
R
RR
R
R
G
G
Assembly Instructions
17
Step 35
Fit the quadrants
Fit the left quadrant
onto the left side
using 2 screws and
allen key .
Fit the right quadrant
onto the right side
using 2 screws and
allen key .
G
O
G
3
1
O
G
4
2
O
G
Step 36
A
A
Prepare the left and
right quadrants
Tap a wooden dowel
into the left quadrant
and the right quadrant .
3
4
A3
4
3
4
1
2
Assembly Instructions
18
Step 37
Step 38
KJ
Secure the quadrants
For each quadrant, fix 2
brackets to the holes
in the bed base using
screws .
Fix the brackets to
the quadrants and
using screws .
Q
Q
Q
9
3 4
K
J
Q
9
3
4
Fit the drawer
Slide both the runners
forward and locate the
drawer sides and
between them, lining up
the holes in the drawer
sides with the 2nd
'threaded' holes in the
runners .
Working from the inside
of the drawer, insert 2
screws through the
drawer sides and out into
the 2nd threaded hole in
the runner.
Note: Do not
overtighten the
screws.
If they catch on
the runner you
may need to
loosen them
slightly.
2nd threaded
hole
V
M
V
21 22
V
M
M
M
21
22
Assembly Instructions
19
Step 39
Step 40
Prepare the 2 doors
Push fit 2 hinges into
each of the 2 doors
and .
Secure each hinge with
2 screws .
Note: Before securing
with the screws, make
sure that the hinges are
positioned at 90 degrees
with the edge of the
L
T
17
18
90
T
T
L
L
T
L
L
T
L
L
T
L
L
17
18
Dx 4
Fit the loose shelves
For each of the 2 loose
shelves, insert 4 shelf
studs into the holes
shown in the sides and
uprights.
Lower the 2 loose
shelves down onto
the shelf studs .
Dx 4
D
16
16
16
D

This manual suits for next models

6

Other Argos Indoor Furnishing manuals

Argos Solid Wood Storage Box User manual

Argos

Argos Solid Wood Storage Box User manual

Argos Puerto Rico 658/3129 User manual

Argos

Argos Puerto Rico 658/3129 User manual

Argos Capella User manual

Argos

Argos Capella User manual

Argos Barcelona 6545442 User manual

Argos

Argos Barcelona 6545442 User manual

Argos Under Basin Unit 833/2763 User manual

Argos

Argos Under Basin Unit 833/2763 User manual

Argos White Tongue & Groove 2 Drawer Unit User manual

Argos

Argos White Tongue & Groove 2 Drawer Unit User manual

Argos Perth 392/9652 User manual

Argos

Argos Perth 392/9652 User manual

Argos SCHREIBER 6324852 User manual

Argos

Argos SCHREIBER 6324852 User manual

Argos HOME Jenson Gloss 341/1304 User manual

Argos

Argos HOME Jenson Gloss 341/1304 User manual

Argos Atlas User manual

Argos

Argos Atlas User manual

Argos Camden 239/9472 User manual

Argos

Argos Camden 239/9472 User manual

Argos Messina Steel User manual

Argos

Argos Messina Steel User manual

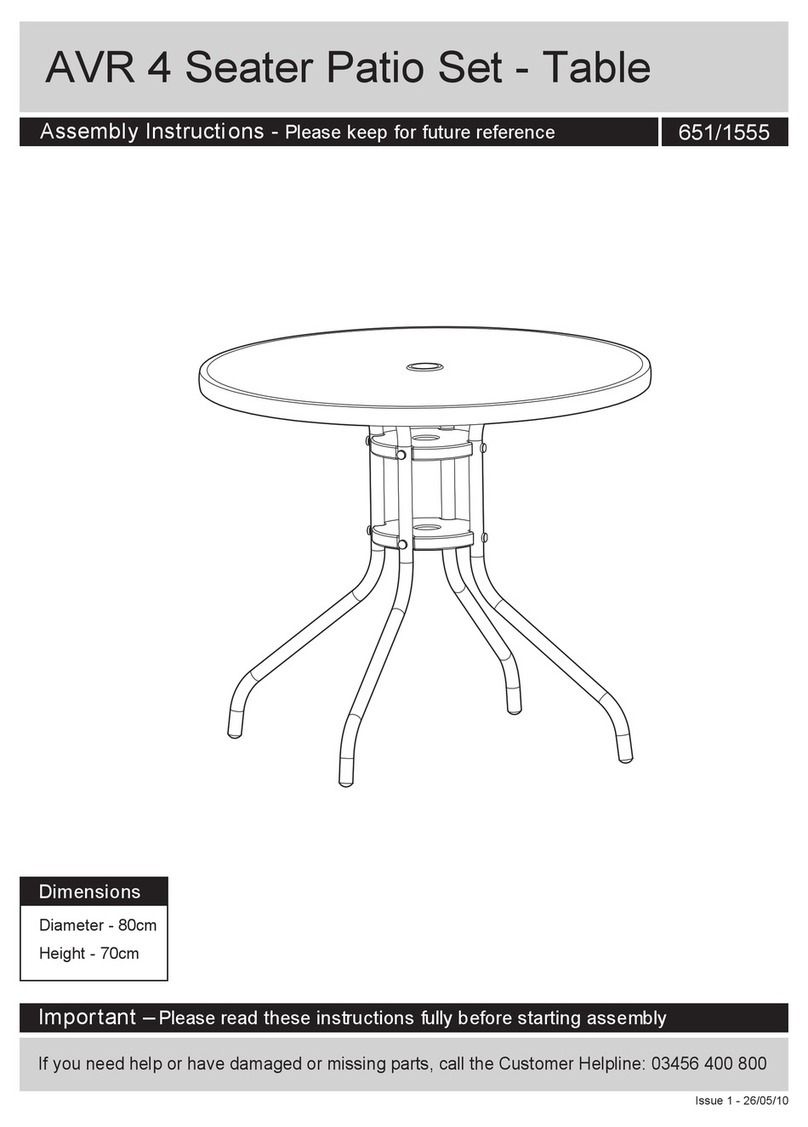
Argos AVR 4 Seater Patio Set User manual
Argos

Argos AVR 4 Seater Patio Set User manual

Argos Capella User manual

Argos

Argos Capella User manual

Argos SWIVEL User manual

Argos

Argos SWIVEL User manual

Argos 184/9198 User manual

Argos

Argos 184/9198 User manual

Argos Ontario 149118 User manual

Argos

Argos Ontario 149118 User manual

Argos WOW BUTTERFLY 6006558 User manual

Argos

Argos WOW BUTTERFLY 6006558 User manual

Argos DALLAS 424/2833 User manual

Argos

Argos DALLAS 424/2833 User manual

Argos HOME 351/3312 User manual

Argos

Argos HOME 351/3312 User manual

Argos Contempo 227/6887 User manual

Argos

Argos Contempo 227/6887 User manual

Argos Adult Malibu 532/9717 User manual

Argos

Argos Adult Malibu 532/9717 User manual

Argos Cucina Light Oak Pair of Chairs User manual

Argos

Argos Cucina Light Oak Pair of Chairs User manual

Argos 603/4135 User manual

Argos

Argos 603/4135 User manual

Popular Indoor Furnishing manuals by other brands

BiGDUG RR1MGK Guide to Assembly & Usage

BiGDUG

BiGDUG RR1MGK Guide to Assembly & Usage

VITRA Dancing Wall Instructions for use

VITRA

VITRA Dancing Wall Instructions for use

Canvas LESLIE 168-0078-8 Assembly instructions

Canvas

Canvas LESLIE 168-0078-8 Assembly instructions

Whittier Wood Furniture 1382AFGACg manual

Whittier Wood Furniture

Whittier Wood Furniture 1382AFGACg manual

American Bedding 4500 quick start guide

American Bedding

American Bedding 4500 quick start guide

Dorel Home Products DA8050-A manual

Dorel Home Products

Dorel Home Products DA8050-A manual

BLACK RED WHITE B169-KOM4D2S Assembly

BLACK RED WHITE

BLACK RED WHITE B169-KOM4D2S Assembly

Winners Only Barnwell DBT52866T Assembly instructions

Winners Only

Winners Only Barnwell DBT52866T Assembly instructions

Triarch 32789 Assembly instructions

Triarch

Triarch 32789 Assembly instructions

Broyhill A208059801 Assembly instructions

Broyhill

Broyhill A208059801 Assembly instructions

Uberhaus VILLA 74805005 Assembly instructions

Uberhaus

Uberhaus VILLA 74805005 Assembly instructions

Next MALVERN DOVE 486526 Assembly instructions

Next

Next MALVERN DOVE 486526 Assembly instructions

2K Furniture Designs BK1750 Assembly instructions

2K Furniture Designs

2K Furniture Designs BK1750 Assembly instructions

Dunelm Wilson Coffee Table manual

Dunelm

Dunelm Wilson Coffee Table manual

FourStar 11224252P Assembly instructions

FourStar

FourStar 11224252P Assembly instructions

Sealy posturematic owner's manual

Sealy

Sealy posturematic owner's manual

Hillsdale Furniture 4492-830S manual

Hillsdale Furniture

Hillsdale Furniture 4492-830S manual

Amerihome HCDTSET36 Assembly

Amerihome

Amerihome HCDTSET36 Assembly

manuals.online logo
manuals.online logoBrands
  • About & Mission
  • Contact us
  • Privacy Policy
  • Terms and Conditions

Copyright 2025 Manuals.Online. All Rights Reserved.