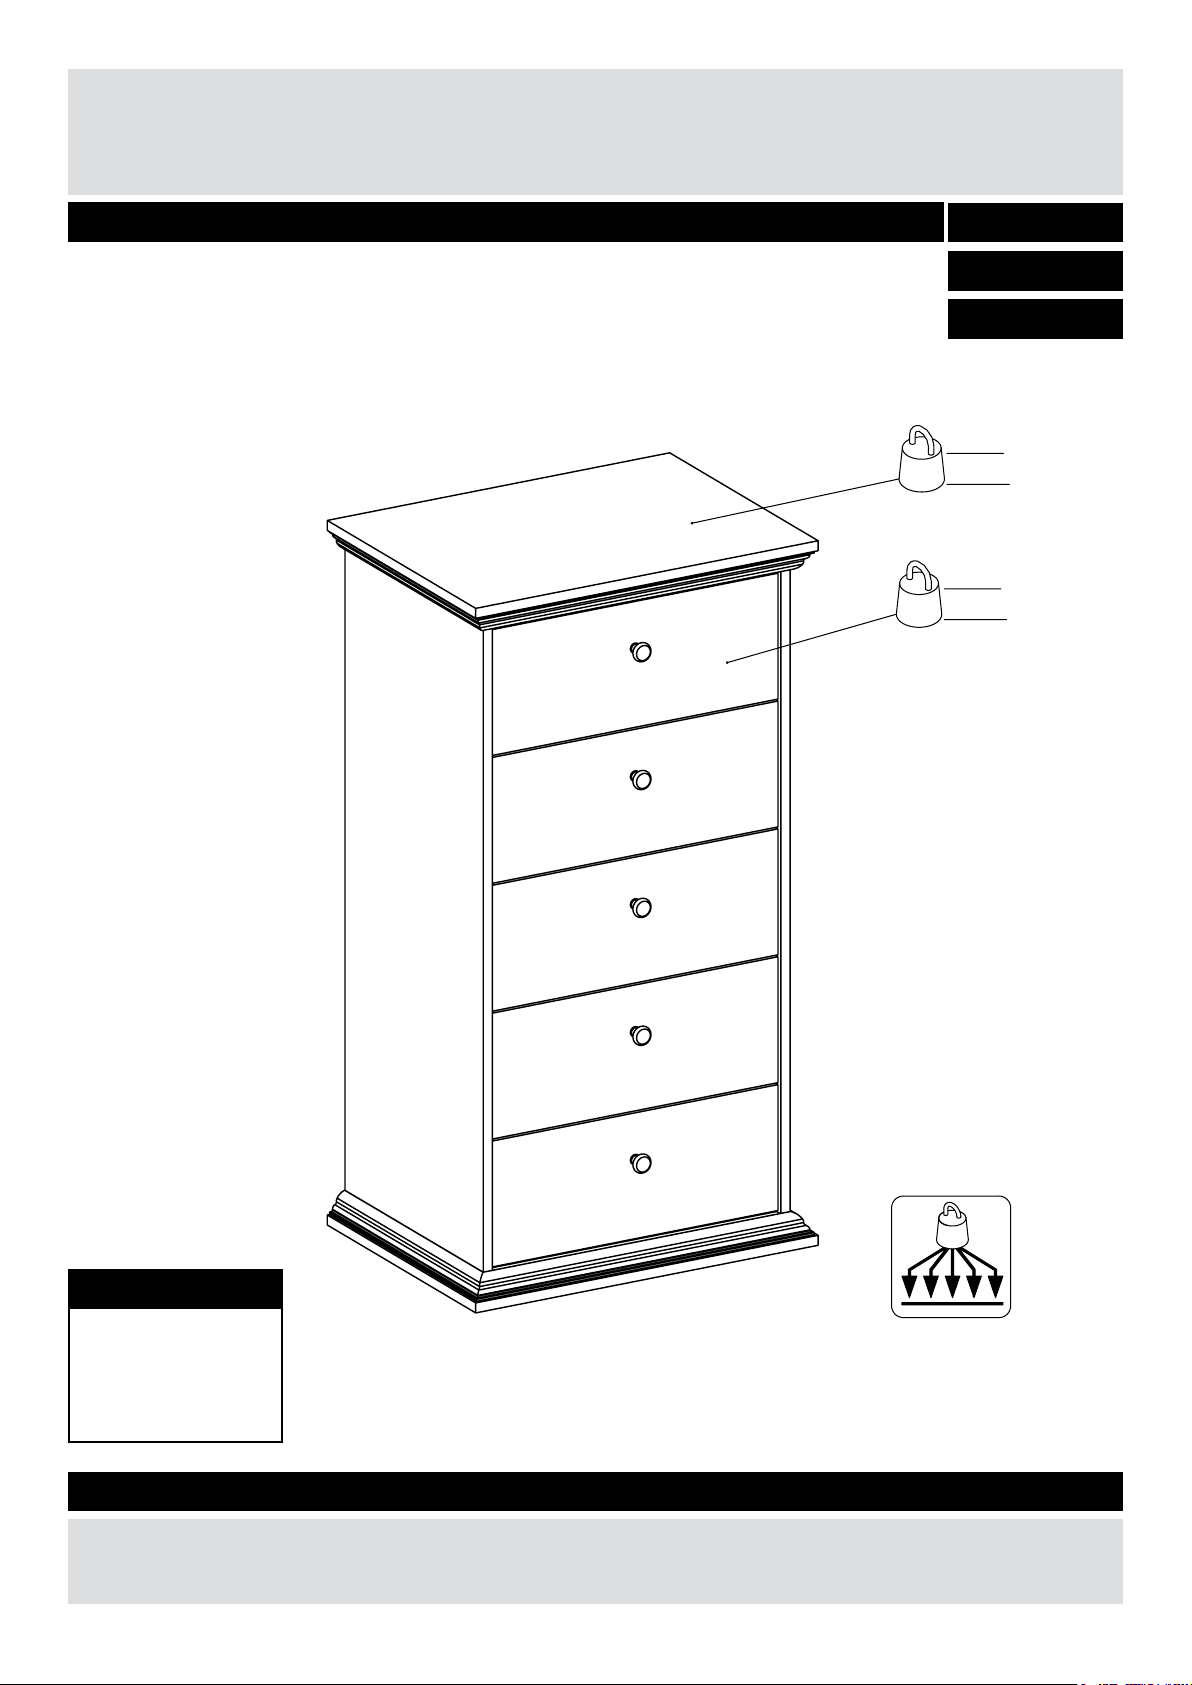
Argos Canterbury 5 DRW CHEST User manual
Other Argos Indoor Furnishing manuals

Argos
Argos Aspley 498/9622 User manual

Argos
Argos 932/6943 User manual

Argos
Argos 465/9732 User manual

Argos
Argos 709/2626 User manual

Argos
Argos 832/8076 User manual

Argos
Argos 609/0117 User manual

Argos
Argos 314/2769 User manual

Argos
Argos Emberton 927/5788 User manual

Argos
Argos 481/3640 User manual

Argos
Argos Malibu 184/8072 User manual

Argos
Argos Mix and Match 709/2523 User manual

Argos
Argos 617/3113 User manual

Argos
Argos avignon 544/2687 User manual

Argos
Argos Alicia 188/8379 User manual

Argos
Argos Malibu Double Cupboard MK2 User manual

Argos
Argos Medium Storage Unit 833/2471 User manual

Argos
Argos Malibu 426/8154 User manual

Argos
Argos 459/4598 User manual

Argos
Argos Perth 423/8029 User manual

Argos
Argos 496/1932 User manual


Popular Indoor Furnishing manuals by other brands


Coaster
Coaster 4799N Assembly instructions

Stor-It-All
Stor-It-All WS39MP Assembly/installation instructions

Lexicon
Lexicon 194840161868 Assembly instruction

Next
Next AMELIA NEW 462947 Assembly instructions

impekk
impekk Manual II Assembly And Instructions

Elements
Elements Ember Nightstand CEB700NSE Assembly instructions